Clinical Procedures for Safer Patient Care

Clinical Procedures for Safer Patient Care

Glynda Rees Doyle and Jodie Anita McCutcheon

BCcampus

Victoria, B.C.

Contents

1

About BCcampus Open Education

Clinical Procedures for Safer Patient Care was created by Glynda Reese Doyle and Jodie Anita McCutcheon and funded by BCcampus Open Education.

BCcampus Open Education began in 2012 as the B.C. Open Textbook Project with the goal of making post-secondary education in British Columbia more accessible by reducing students’ costs through the use of open textbooks and other OER. BCcampus supports the post-secondary institutions of British Columbia as they adapt and evolve their teaching and learning practices to enable powerful learning opportunities for the students of B.C. BCcampus Open Education is funded by the British Columbia Ministry of Advanced Education and Skills Training and the Hewlett Foundation.

Open educational resources (OER) are teaching, learning, and research resources that, through permissions granted by the copyright holder, allow others to use, distribute, keep, or make changes to them. Our open textbooks are openly licensed using a Creative Commons licence and are offered in various eBook formats free of charge, or as printed books that are available at cost.

For more information about open education in British Columbia, please visit the BCcampus Open Education website. If you are an instructor who is using this book for a course, please fill out our Adoption of an Open Textbook form.

2

Introduction

In Canada, there continues to be overwhelming evidence that significant preventable harm and patient care errors continue to occur despite the fact that most health care providers are committed to providing safe patient care and to do no harm (Baker et al., 2004; Butt, 2010). Health care-associated errors or near misses are rarely the result of poor motivation, negligence, or incompetence, but are based on key contributing factors such as poor communications, less than optimal teamwork, memory overload, reliance on memory for complex procedures, and the lack of standardization in policies and procedures in health care (Canadian Patient Safety Institute, 2011). In addition, patient care errors are rarely the result of just one person’s mistake, but, instead, often reflect predictable human failings in the context of poorly designed systems. Despite current research into human factors as direct contributors to patient care errors, many of our complex medical procedures are based on perfect memory, even though we humans are prone to short-term memory loss (Frank, Hughes, & Brian, 2008).

In health care education, students must have the knowledge, skills, attitudes, and experience to be able to anticipate, identify, and manage situations that place patients at risk. To become competent in clinical skills, students practise in the classroom and laboratory, and then apply what they have learned to practise with supervision and support in the clinical setting. However, students today are often faced with less than optimal clinical exposure and assessment to develop the expertise and experience they need to be fully competent by graduation. Furthermore, interprofessional teamwork creates shared patient care environments, where many disciplines will care for patients and their conditions, and patient information and care management moves frequently among health care providers. Successful patient treatment is reliant on many different health care providers and their skill sets, and each discipline teaches clinical skills differently. The lack of consistency in training and in the use of the latest evidence-based research in health care education makes it challenging to ensure safe care.

These issues contribute to unsafe care and preventable medical errors. In the delivery of health care and professional health care practice, it is no longer acceptable that preventable errors continue to take place in modern-day health care. Health care providers need a method to improve patient care, and standardization of processes and approaches, such as is provided by practice guidelines and checklists, will contribute to the development of safer patient care (Canadian Nurses Association, 2004).

In reviewing incidents and preventable errors, significant factors, including human factors, have been identified, and strategies have been introduced to reduce the likelihood of errors and to create a safe standard of care. The creation of guidelines for the execution of processes will not change culture, but can encourage us to find a level of practice that contributes to standardizing safe care and helps us deal with our human failings as we try to always perform perfectly in a complex environment. Change should be focused on creating robust safety systems. Among these, the point-of-care checklist has been proven to be a safe strategy, and is now becoming more common in health care (Frank, Hughes, & Brien, 2008).

Use of Checklists

Checklists are the predominant format used in this resource, following the work of Dr. Atul Gawande, described in his book The Checklist Manifesto: How to Get Things Right (2010). Dr. Gawande believes that although the modern world has given us knowledge and experience, avoidable medical errors continue to occur. Dr. Gawande posits that the reason for this is simple: the volume and complexity of health care today has exceeded our ability as individuals to properly deliver it when caring for people consistently, correctly, and safely. He argues that we can do better by using the simplest of methods: the checklist. The most often-cited example of Dr. Gawande’s work is a simple surgical checklist from the World Health Organization that has been adopted in more than 20 countries as a standard of care and has been heralded as “the biggest clinical invention in thirty years” (The Independent, cited in Gawande, 2010). Just one example of its success comes from the United States: when the State of Michigan began using a checklist for central lines in its intensive care units, the infection rate dropped 66% in three months. In 18 months, the checklist saved an estimated $175 million and 1,500 lives (Shulz, 2010). Checklists allow for complex pathways of care to function with high reliability by giving the users an opportunity to review their actions individually and with others, and to proceed in a logical, safe manner.

This open educational resource (OER) was developed to ensure best practice and quality care based on the latest evidence, and to address inconsistencies in how clinical health care skills are taught and practised in the clinical setting. The checklist approach aims to provide standardized processes for clinical skills and to help nursing schools and clinical practice partners keep procedural practice current.

How to Use This Book

This book should be used in conjunction with existing courses in any health care program. This book is not intended to replace core resources in health care programs that provide comprehensive information concerning diseases and conditions. An understanding of medical terminology, human anatomy, physiology, and pathophysiology is a required asset to use this book effectively. The development of technical skills is based on the knowledge of, practice to achieve proficiency in, and attitudes related to the skill, and an awareness of how our roles affect our patients and other health care professionals. This book contributes to enhancing safer care for patients by outlining evidence-based practices, and looking beyond just the technical skill to understanding the types of expertise and knowledge required to decrease adverse events. In each of the 88 checklists throughout this book (and summarized in Appendix 2), rationale for each step is provided in the form of Additional Information.

Each skill/procedure is covered in a chapter that has learning objectives, a brief overview of the relevant theory, checklists of steps for procedures with the rationale behind each step of the process, and a summary of key takeaways. Photographs and diagrams relevant to the topic are included. The checklists are extendable across all health care professions and are relevant to nursing (RN, NP, LPN, RPN, and CA), allied health, and medical students. They also provide an opportunity for further sharing and collaboration among health care professionals. Students will find this resource valuable at the point of care to reduce the risk of adverse events and to provide a deeper understanding of safety considerations, infection control practice, injury prevention, and the value of consistency in clinical processes. Key terms are set in bold throughout the book and laid out again in the Glossary in Appendix 1.

Our hope is that not only will the checklists in this resource provide clear and concise guidelines for performing clinical skills in the health care setting, but that they will also improve patient safety and quality of care.

Note: For the sake of consistency, we have used the term patient to refer to any person who is being cared for in the health care setting.

Suggested Online Resources

Patient Safety

1. BC Patient Safety and Quality Council. This webstie provides information on the latest initiatives from the BC Ministry of Health to improve clinical issues such as preventing (Deep Venous Thrombosis) DVTs; introducing the 48/6 model of care; improving hand hygiene; creating pathways of care for conditions such as heart failure, stroke, and (transient ischemic attacks) TIAs; reconciling medication; caring for the critically ill; and developing the surgical checklist.

2. Canadian Patient Safety Institute (CPSI). This website provides access to resources, toolkits, events, education, and conferences related to making patient safety happen in health care. It also reviews the latest initiatives.

3. Institute for Healthcare Improvement Open School. Free online courses about health care leadership, patient safety, improving capability, improving patient- and family-centred care, and population health can be found on this resource.

4. Institute for Safe Medication Practices. This is an excellent resource for the latest safety alerts and ways to advance safe administration of medication.

Interprofessional Education (IPE)

1. University of British Columbia Interprofessional Practice Education. This resource provides online modules for students to review strategies to work effectively across disciplines.

2. Institute for Healthcare Improvement (IHI). Free resources and strategies on how to improve health and healthcare around the world are listed on this website. It also offers free online courses to enhance teamwork, communication, and other topics related to safety in health care.

References

Baker, G., Norton, P., Flintoff, V. et al. (2004). The Canadian adverse events study: The incidence of adverse events among hospital patients in Canada. CMAJ 170:1678-1686.

Butt, A. R. (2010). Medical error in Canada: Issues related to reporting of medical error and methods to increase reporting. McMaster University Medical Journal, 7(10), 15-18.

Canadian Nurses Association and University of Toronto Faculty of Nursing. (2004). Nurses and patient safety: A discussion paper. Retrieved on Aug 26, 2015, from http://www.cna-aiic.ca/~/media/cna/files/en/patient_safety_discussion_paper_e.pdf?la=en

Canadian Patient Safety Institute. (2011). Canadian framework for teamwork and communication. Literature review, needs assessment, evaluation of training tools and expert consultations. Retrieved on Aug 26, 2015, from http://www.patientsafetyinstitute.ca/en/toolsResources/teamworkCommunication/pages/default.aspx

Frank, J. R., & Brien, S. (eds.) on behalf of the Safety Competencies Steering Committee. (2008). The safety competencies: Enhancing patient safety across the health professions. Ottawa, ON: Canadian Patient Safety Institute.

Gawande, A. (2010). The checklist manifesto: How to get things right. New York City, NY: Metropolitan Books.

Hughes, R. G. (2008). Nurses at the “sharp end” of patient care. Chapter 2 in Patient safety and quality: An evidence-based handbook for nurses. Retrieved on Aug 26, 2015, from http://www.ncbi.nlm.nih.gov/books/NBK2672/

Shulz, K. (2010). Check, please: Atul Gawande’s The Checklist Manifesto. Retrieved from Huffington Post, Retrieved on Aug 26, 2015, from http://www.huffingtonpost.com/kathryn-schulz/check-please-atul-gawande_b_410507.html

3

Acknowledgments

Special thanks to those without whom this book would not have been possible:

Thank you to Lauri Aesoph and your team at BCcampus for your patience and attention to detail with our writing and formatting of the content in this book. We are grateful for your time, effort, and expertise in the development and writing of the chapters. All your efforts helped us achieve our goal of preparing students for safer clinical practice. Thank you for going above and beyond to ensure a quality and timely production, and thank you for the many helpful comments along our journey.

Thank you to Doug Wiebe (Faculty, BSN program at BCIT) for his photographic expertise and willingness to be photographed. Thank you to Heather Clark (Faculty, BSN program at BCIT) for taking the time to make comments and suggestions, and to critique our chapter on wound care to make it a more useful and relevant tool for our students.​ Thank you to Kathy Rogers (graphic artist at BCIT) for her patience and attention to detail in recreating images to our satisfaction. We are grateful to Cynthia Kent (records and copyright manager at BCIT) for her attention to copyright and licensing. We would also like to thank Sandy del Vecchio (nursing lab technician at BCIT) for her patience in finding and organizing the equipment in our photographs, and her willingness to be the subject of a number of our photographs.

Finally, thank you to our families for their support, encouragement, and patience in our journey through writing this resource, and the unanticipated additional hours and hours of work.

4

Disclaimer

The field of health care is constantly changing and evolving. Procedures and policies in schools and health care agencies will change in accordance with research and practice. This resource will require updates to remain in accordance with these changes, but the authors do not assume responsibility for these updates.

Health care professionals must ensure that they have a strong foundation of knowledge in medical conditions and surgical procedures related to clinical skills and techniques before using this resource to guide their practice. Health care professionals should always put agency policy above the information in this resource and be mindful of their own safety and the safety of others. Any health care professional using this resource should do so in the appropriate environment and under the supervision of other relevant health care professionals, in accordance with their governing professional body and within their scope of practice.

It is the responsibility of any health care professionals using this book to take all appropriate safety precautions and to determine best practice unique to the patient and the context of the situation. The authors do not assume responsibility for any injury or damage to persons or property pertaining to the use of the material and information in this resource.

I

Chapter 1. Infection Control

1

1.1 Introduction

In health care, the use of effective and safe infection prevention and control practices is everyone’s responsibility. Infection prevention and control guidelines are mandated in hospitals to protect patients, health care personnel, and families from the transmission of organisms that cause infections. This chapter will review the principles of infection prevention and control practices, and the use of additional precautions and personal protective equipment to control and prevent the spread of infection in acute health care settings. The chapter also will explore surgical asepsis, the principles of sterile technique, and procedures related to sterile technique in the operating room and during invasive procedures.

Learning Objectives

  • Define infection prevention and control practices, and list the principles and practices of infection control and prevention
  • Explain how to perform hand hygiene using soap and water and alcohol-based hand rubs
  • Describe how and when to use additional precautions and personal protective equipment
  • Explain the difference between the three types of additional precautions: contact, airborne, and droplet
  • Define blood or body fluid exposure and the steps to take if exposed
  • Describe when surgical asepsis and sterile technique are used
  • Explain the principles of sterile technique
  • Describe how to perform various procedures such as surgical hand scrub, applying sterile gloves, and preparing a sterile field

2

1.2 Infection Prevention and Control Practices

Infection prevention and control (IPAC) practices are evidence-based procedures and practices that can prevent and reduce disease transmission, and eliminate sources of potential infections (PIDAC, 2012). When used consistently,  IPAC practices will prevent the transfer of health care associated infections (HAIs) in all health care settings. HAIs, also known as nosocomial infections, are infections that occur in any health care setting as a result of  contact with a pathogen that was not present at the time the person infected was admitted (World Health Organization[WHO], 2009a).

Two types of techniques are used to prevent infection in the hospital setting. The first, medical asepsis, or clean technique, has been used in the past to describe measures for reducing and preventing the spread of organisms (Perry, Potter & Ostendorf, 2014). The second, sterile technique, also known as sterile asepsis, is a strict technique to eliminate all microorganisms from an area (Perry et al., 2014). When a patient is suspected of having or is confirmed to have certain pathogens or clinical presentations, additional precautions are implemented by the health care worker, in addition to routine practices (PIDAC, 2012). These additional precautions are based on how an infection is transmitted, such as by contact, droplet, or air. Additional precautions use personal protective equipment (PPE), such as gowns, eyewear, face shields, and masks, along with environmental controls to prevent transmission of infection.

To reduce, and prevent the spread of, HAIs, routine practices, a system of recommended IPAC practices, are to be used consistently with all patients at all times in all health care settings (Public Health Agency of Canada [PHAC], 2012b). The principles of routine practices are based on the premise that all patients are potentially infectious, even when asymptomatic, and IPAC routine practices should be used to prevent exposure to blood, body fluids, secretions, excretions, mucous membranes, non-intact skin, or soiled items (PIDAC, 2012).

To learn the steps for routine practices, see Checklist 1.

Checklist 1: Routine Practices
Disclaimer: Always review and follow your hospital policy regarding this specific skill.
Safety considerations:
  • Routine practices must be used by all health care professionals, at all times, with all patients/residents/clients in all health care settings. Routine practices will prevent transmission of microorganisms from patient to patient, patient to staff, staff to patient, and staff to staff. 
  • The presence of a pathogen does not predict the onset of an infection. The chain of infection must be present. If the chain of infection is broken, an infection will not occur. Routine practices are used to break or minimize the chain of infection.
  • Be aware of factors that increase a patient’s risk of becoming colonized or infected in the hospital. Increased acuity, advanced age, use of invasive procedures, immunocompromised state of the patient, greater exposure to microorganisms, and an increased use of antimicrobial agents and complex treatments are common risk factors.
  • Reduce patient susceptibility to infection by encouraging immunizations, providing adequate rest and nutrition, and protecting the body’s defences from infection (cover open wounds, keep drainage systems closed and intact, maintain skin integrity). 
  • HAIs can cause symptoms ranging from asymptomatic colonization to septic shock and death, resulting in increased suffering for patients and increased health care costs for Canadians. Ensure additional precautions guidelines are followed for all suspected and confirmed cases of infections and communicable diseases.
  • The most common sites for HAIs are the urinary and respiratory systems, and central line-associated bloodstream infections. Consider practices that will reduce infections related to these systems.
  • The most common types of HAIs in Canada are methicillin-resistant Staphylococcus aureus (MRSA), vancomycin-resistant Enterococci (VRE), and Clostridium difficile (CDI). Ensure all health care providers and visitors follow the additional precautions policies. 

Steps

 Additional Information

1. Complete a risk assessment to determine your need for PPE (gown, clean gloves, mask, face shield, or eyewear). Consider: Will your face, hands, skin, mucous membranes, or clothing be exposed to blood, excretions, or secretions, either by spray, coughing, or sneezing?

Will you have contact with the patient’s environment/surfaces?

Is an infection or communicable disease suspected or confirmed?

2. Perform hand hygiene (hand washing) following hospital policy. Hand hygiene is considered the most important and effective measure to prevent HAIs.

HAIs  are most commonly spread by the hands of health care workers, patients, and visitors.

Health care workers, patients, and visitors spread about 80% of all HAIs.

Always perform hand hygiene after using the washroom, coughing, or sneezing, and before and after eating.

Using an alcohol-based hand rub (ABHR) is the recommended method for hand hygiene if hands are not visibly soiled.

3. Follow proper cleaning or disinfecting procedures of patients and the environment (room etiquette). These environmental controls will control the site or source of microorganism growth.


Dispose of soiled linens and dressings in appropriate receptacle bin.

Avoid contact of soiled item with uniform.

Clean contaminated objects and sterilize or disinfect equipment and patient rooms according to agency policy.

Discard any item that touches the floor.

Control sources of wound drainage and body fluids; change soiled dressings.

Avoid shaking bed linen or clothes; dust with a damp cloth as required. Microorganisms can be expelled through the air and inhaled by patients and health care workers.

Provide all persons with their own linen and personal items.

Place syringes in designated puncture-proof containers.

Keep table surfaces dry and clean.

Empty and dispose of drainage containers as per agency policy.

4. Follow respiratory etiquette. Wear a mask if coughing or sneezing.

Wear a mask if suffering from a respiratory condition, and consider staying home.

Avoid talking, sneezing, or coughing over open wounds and sterile dressings.

Practise coughing or sneezing into your upper arm, not your hands.

Follow hospital policies related to creating healthy workplaces.

Do not come to work ill or with symptoms of a communicable disease (flu or cold) that puts co-workers or patients at risk.

5. Wear clean gloves for appropriate activities based on a risk assessment. Use clean gloves when handling all blood and body fluids. Follow recommendations for assessing each situation and the need for clean gloves.

Improper glove use has been linked to the transmission of microorganisms. Do not wear gloves for activities that do not pose a risk, such as feeding or taking blood pressure.

Clean gloves are task specific and for single use only.

Handle all blood, body fluids, and laboratory specimens as if infectious.

Always perform hand hygiene after taking off clean gloves to reduce the potential of contamination from pathogens on gloves.

6. Use additional precautions guidelines for suspected or known infections or communicable diseases. Use PPEs based on mode of infection transmission (contact, droplet, or airborne). Follow agency guidelines essential to prevent and reduce transmission of infections.

Single rooms, cohorting (placing patients with the same infections in the same room if a private room is not available), restricting visitors, and implementing additional environmental controls may be required.

Provide instruction/signage for appropriate use and disposal of PPE for visitors, patients, and all health care workers.

Remove PPE immediately after single use and perform hand hygiene.

7. Do not eat or drink in the patient/client or resident areas. Eating and drinking increases the risk of transmission of infection between health care providers and patients.
8. Use avoidance procedures/actions to minimize the risk of infection transmission. If a patient has uncontrolled diarrhea, wear a gown when changing linen to prevent contamination of clothing and hands.

If a patient is coughing, sit next to, rather than in front of, the patient when talking to that patient.

Data source: CDC, 2007, 2014; Perry et al., 2014; PIDAC, 2012; PHAC, 2012b, 2013

Critical Thinking Exercises

  1. Name four environmental procedures that can break the chain of infection.
  2. What types of patents are at an increased risk for an HAI?
  3. How can health care providers reduce patient susceptibility to infection?

3

1.3 Hand Hygiene and Non-Sterile Gloves

Hand Hygiene

Hand hygiene is the most important part of practice for health care workers and is the single most effective way to stop the spread of infections; failure to properly perform hand hygiene is the leading cause of HAIs and the spread of multi-drug-resistant organisms (MDROs) (BC Centre for Disease Control, 2014; WHO, 2009a). Hand hygiene is a general term used to describe any action of hand cleaning and refers to the removal or destruction of soil, oil, or organic material, as well as the removal of microbial contamination acquired by contact with patients or the environment. Hand hygiene may be performed using an alcohol-based hand rub (ABHR) or soap and water. A surgical hand scrub is also a method of hand hygiene (WHO, 2009a).

To break the chain of infection, there are five key moments at which to perform hand hygiene when working in health care, as outlined in Checklist 2 and illustrated in Figure 1.1.

Checklist 2: Five Key Moments in Hand Hygiene
Disclaimer: Always review and follow your hospital policy regarding this specific skill.
Safety considerations:
  • If contact dermatitis occurs, use soap and water for hand hygiene.
  • Instruct patients and family on the importance of hand hygiene, proper technique, and ways to incorporate routines into everyday practice.
  • Certain practices can increase the risk of skin irritation and should be avoided. For example, washing hands regularly with soap and water immediately before or after using an alcohol-based product is not only unnecessary but may lead to dermatitis.
  • Always wash hands whenever in doubt.

Key Moments

 Additional Information

1. Before initial contact with patient/client/resident or environment contact Before touching a patient (e.g., feeding, toileting, or personal care)

Before touching the patient’s environment

Before adjusting an IV rate

Before taking a pulse or blood pressure

2. Before any clean (routine) or aseptic (sterile) procedure Before applying clean or sterile gloves

Before performing a sterile dressing change

Before feeding a patient

Before performing oral/dental care

Before inserting eye drops

Before inserting Foley catheter

Before preparing medication

3. After blood or body fluid risk/exposure After contact with body secretions, mucous membranes, or non-intact skin

After glove removal (clean or sterile gloves)

After handling waste (urine, drainage, wound care)

After wound care or a sterile procedure

When moving from a contaminated area on the body to a non-contaminated area

4. After contact/touching the patient/client/resident After taking a blood pressure or pulse, touching a urinary catheter, or feeding or dressing a patient
5. After contact with the patient’s/client’s/resident’s environment After touching a bed table or  bathroom light

After touching personal toiletries

After touching walkers or wheelchairs

After touching electronic IV devices

After taking blood pressure or pulse

After changing bed linen

Data source: Kampf & Loffler, 2003; WHO, 2009a, 2009b
5 moments in hand hygiene
Figure 1.1 Five moments in hand hygiene

Safety Alert: Factors that Reduce Hand Hygiene Effectiveness

How to Wash Hands: Types of Hand Hygiene

Two types of hand hygiene are commonly used in the health care setting: hand hygiene with an alcohol-based hand rub (see Figure 1.2) and hand hygiene with soap and water.

Figure 1.2 Alcohol-based hand rub

Alcohol-based hand rub (ABHR) is a product containing 60% to 90% alcohol concentration and is recommended for hand hygiene in health care settings (CDC, 2012). ABHR is the preferred method of hand hygiene and is  more effective than washing hands with soap and water (WHO, 2009a). ABHRs:

See Checklist 3 for the steps to take when washing hands with ABHR.

Checklist 3: Hand Hygiene with ABHR
Disclaimer: Always review and follow your hospital policy regarding this specific skill.
Safety considerations:
  • Do not use in combination with soap and water. This practice may increase skin irritation.
  • Use ABHR that contains emollients (oils) to help reduce skin irritation and overdrying.
  • Allow hands to dry completely before initiating tasks or applying clean or sterile gloves.
  • ABHR may be used for all five moments in hand hygiene (see Checklist 2) as long as hands are not contaminated or visibly soiled.
  • DO NOT use ABHR if patient is suspected to have or confirmed with Clostridium difficile, norovirus, or Bacillus anthracis. ABHR will not kill spore-forming pathogens. 

Steps

 Additional Information

1. Remove all jewellery on hands. Apply 1 to 2 pumps of product into palm of dry hands.
Remove Jewellery
Remove jewellery

Product should not be applied to wet hands, as this will dilute the product.

Enough product should be applied to thoroughly wet hands and fingers for the entire procedure of 20 to 30 seconds.

Apply ABHR onto hands

Always follow the manufacturer’s guidelines.

2. Rub hands together, palm to palm. Rubbing hands together ensures palm surfaces are covered by the product.
DSC_1584
Rub alcohol over entire surface of palms
3. Rub the back of the hands. Rubbing the back of the hands allows all surfaces of the fingers to be exposed to the product.
Rub back of hands
Rub back of hands
4. Rub the alcohol between all the fingers to cover all the fingers. Rubbing between the fingers allows all surfaces of the hands to be exposed to the product.
DSC_1588
Rub between the fingers
5. Press fingertips into the palm of opposing hand and rub back and forth. Pressing fingertips into opposing palms and rubbing ensures fingertips and nails are exposed to the cleaning product. Nails harbour more bacteria than do hands.
DSC_1591
Clean with ABHR under the fingernails
6. Rub each thumb in a circle in the palm of the opposite hand. Rubbing each thumb provides complete coverage of the product on the thumb.
DSC_1598
Clean the surface of thumb
7. Rub hands together until they are dry. Do not use a paper towel to dry hands. Rubbing hands together provides adequate time for the alcohol to dry. The minimum time required for proper rubbing technique when using ABHR is 20 to 30 seconds.
DSC_1584
Rub hands until dry
8. Hands are now safe to use.
DSC_1595
Clean hands
Data source: CDC, 2012; PIDAC, 2012; PHAC, 2012b; WHO, 2009a, 2009b

Hand Hygiene with Soap and Water

Hand hygiene with water requires soap to dissolve fatty materials and facilitate their subsequent flushing with water. Soap must be rubbed on all surfaces of both hands followed by thorough rinsing and drying, Water alone is not suitable for cleaning soiled hands (WHO, 2009a). The entire procedure should last 40 to 60 seconds and should use soap approved by the health agency. See the steps in Checklist 4.

Checklist 4: Hand Hygiene with Soap and Water
Disclaimer: Always review and follow your hospital policy regarding this specific skill.
Safety considerations:
  • Always wash hands with soap and water if hands are visibly dirty or soiled.
  • When working with patients where Clostridium difficile (CDI), norovirus, or Bacillus anthracis is suspected or confirmed, soap and water must be used. CDI can remain dormant on surfaces for long periods of time. 
  • Always use soap and water if hands are exposed to blood or body fluids.
  • Multi-step rubbing techniques using soap and water are required to promote coverage of all surfaces on hands. Friction and rubbing are required to remove oil and debris from hands.

Steps

 Additional Information

1. Remove all jewellery. Wet hands with warm water.
Remove jewelry
Remove jewellery

A comfortable temperature of water should be used. Hot water may damage skin.

Regulating water temperature
Regulate water temperature
2. Apply 1 to 2 pumps of soap. Enough soap should be used to lather the palms, back of hands, fingers, and thumbs.
Dispense soap
Dispense soap
3. Lather soap and rub palms together. Ensure all surfaces of the palms are covered with soap, using friction to remove debris and oil.
Lather hands with soap and water
4. Rub in between fingers and around fingers. Ensure all surfaces of the fingers are covered with soap, using friction to remove debris and oil.
Rub hands to remove debris and oil
5. Rub the back of each hand with the palm of the opposite hand. Ensure all surfaces on the back of the hands are covered with soap, using friction to remove debris and oil.
Rub the back of the hands
6. Press and rub fingernails and fingertips into the palm of the opposite hand. Ensure all surfaces around the fingertips are covered with soap, using friction to remove debris and oil.
Clean tips of fingers and underneath nailbeds
7. Rub each thumb in a circle with the palm of the opposite hand. Ensure all surfaces around the thumbs are covered with soap, using friction to remove debris and oil.
Clean around the thumb up to the wrist on both hands
8. Rinse hands under water by keeping fingers pointing downward toward the drain. Rinsing in this way allows the oil and debris to be washed off the hands and down the drain.
Rinse soap and water off hands
9. Pat hands dry using clean paper towel. Use a gentle action to prevent skin irritation.
Dry hands
Dry hands
10. Using a clean paper towel, turn off faucet. Using a paper towel prevents re-contamination of hands by touching dirty faucet handles.
Turn off facet with dry paper towel
Turn off faucet with dry paper towel
11. Hands are now safe to use.
Clean hands
Clean hands
Data source: Accreditation Canada, 2013; CDC, 2014; PHAC, 2012a; WHO, 2009a

Non-sterile (Clean) Gloves

Both hand hygiene and clean glove use are strategies to prevent transmission of infections through hand contact. In the context of patient care, it makes sense to think of glove use and hand hygiene as complementary strategies to prevent transmission of pathogens. Gloves are critical to prevent the transmission of organisms when hand hygiene alone is not enough in an outbreak such as Clostridium difficile or the norovirus, or when a patient has a suspected or known pathogen. Studies have shown that gloves reduce transmission of microbes from the hands of health care workers (PIDAC, 2012).

Non-sterile gloves are single use and should be applied:

Non-sterile gloves should be removed:

See Checklist 5 for steps on how to apply non-sterile gloves.

Checklist 5: Applying Non-Sterile Gloves
Disclaimer: Always review and follow your hospital policy regarding this specific skill.
Safety considerations:
  • Hands must be clean and dry before putting on gloves. Gloves do not replace the need for hand hygiene.
  • Hand hygiene must be performed every time gloves are removed. Gloves are not completely free of leaks or 100% tear-proof, and hands may become contaminated when gloves are removed. 
  • Gloves are for single patient use and must be removed after caring for one patient. Reuse of gloves has been associated with transmission of antibiotic-resistant organisms.
  • Change or remove gloves if moving from a contaminated site to a non-contaminated site on the same person or if touching the environment.
  • Wear gloves that fit properly. Different sizes are available.
  • Gloves must be removed immediately and discarded in a waste bin after the activity for which they were used and before exiting a patient’s environment.
  • Gloves are not required for health care activities where contact is limited to intact skin, such as taking blood pressure.
  • Indiscriminate or improper glove use (e.g., wearing gloves all the time) has been linked to transmission of pathogens.
  • Gloves should fit snugly around wrists and hands for use with a gown to provide a better skin barrier.

Steps

 Additional Information

1. Perform hand hygiene.
Hand hygiene with ABHR
2. Select the appropriate size of non-sterile gloves. Remove gloves one at a time out of the box, touching only the top of the cuff.
Remove gloves from box
3. Put hand through opening and pull up to the wrist.
Apply first glove
Apply first glove
4. Repeat procedure with the second hand.
Apply second glove
Apply second glove
5. Adjust gloves to cover wrists or gown as required.  Prevents the contamination of the wrists.
6. Complete care as required.
Non-sterile gloved hands

How to Remove Gloves

1. Grasp glove on the outside about 1/2 inch below the cuff (edge of the glove opening). Do not touch the wrist with the other hand.
Grasp glove on the outside 1/2 inch below the cuff
2. Pull down glove, turning it inside out. Hold the inside-out glove in the gloved hand.
Pull glove off inside out
Pull glove off …
... inside out
… inside out
3. Gather the inside-out glove in the gloved hand.
Gather inside out glove in remaining gloved hand
Gather inside-out glove in remaining gloved hand
4. Insert finger of the bare hand under the cuff of the gloved hand.
Insert finger under cuff of gloved hand
5. Pull down the glove until it is inside out, drawing it over the first glove.
Remove second glove
Remove second glove
6. Discard gloves in a garbage container. This step reduces the spread of microorganisms.
Discard used non-sterile gloves
7. Perform hand hygiene. This step reduces the spread of microorganisms.
Hand hygiene with ABHR
Data source: Braswell & Spruce, 2012; PIDAC, 2012; Poutanen, Vearncombe, McGeer, Gardam, Large, & Simor, 2005; PHAC, 2012a; WHO, 2009a

Latex Allergies and Non-sterile (Clean) Glove Use

A latex allergy is a reaction to the proteins in natural rubber latex (American Academy of Allergy, Asthma and Immunology, 2014). When people come in contact with latex, an allergic reaction may occur. Most reactions are mild (asthma-like symptoms or contact dermatitis), but there are some rare severe cases (reactions). Many hospitals have moved away from using latex gloves, but latex is commonly used in many health care products such as IV tubing, urinary catheters, syringes, dressings,  and bandages. People at risk for developing a latex allergy are:

Note that powdered latex gloves have also been associated with latex allergies. If an allergy to latex exists, the best treatment is to avoid latex and use a medical alert bracelet to inform others of the allergy (PIDAC, 2012).

Critical Thinking Exercises

  1. Name four factors that decrease the effectiveness of hand hygiene.
  2. What are two ways to reduce or prevent skin irritation with hand hygiene or non-sterile (clean) glove use?

4

1.4 Additional Precautions and Personal Protective Equipment (PPE)

Certain pathogens and communicable diseases are easily transmitted and require additional precautions to interrupt the spread of suspected or identified agents to health care providers, other patients, and visitors (PIDAC, 2012). Additional precautions are used in addition to routine precautions and are defined by how a microorganism is transmitted (Perry et al., 2014).

Types of Additional Precautions

There are three categories of additional precautions: contact precautions, droplet precautions, and airborne precautions.

Contact precautions are are the most common type of additional precautions. They are used in addition to routine practice for patients who are known or suspected to be infected with microorganisms that can be transferred by direct (touching) or indirect (shared equipment) contact.  Types of organisms in this category are antibiotic-resistant organisms (AROs) such as methicillin-resistant Staphylococcus aureus (MRSA), vancomycin-resistant Enterococci (VRE), extended spectrum beta-lactamase (ESBL), Clostridium difficile (CDI), carbapenemase-producing organisms (CPO), diarrhea, and scabies. AROs are also known as multi-drug-resistant organisms (MDROs).

Droplet precautions are used in addition to routine practices for patients who are known or suspected to be infected with microorganisms that are spread through the air by large droplets. Types of organisms and unconfirmed conditions in this category include mumps, influenza, vomiting of unknown cause, norovirus, and unconfirmed cough.

Airborne precautions are used in addition to routine practices for patients who are known to have or are suspected of having an illness that is transmitted by small droplet nuclei that may stay suspended in the air and be inhaled by others. These particles can remain infectious for a long period of time when spread through the air. Types of organisms in this category include tuberculosis (TB), measles, chicken pox (varicella), disseminated zoster, and severe acute respiratory syndrome (SARS).

Special considerations:

Tables 1.1, 1.2, and 1.3. summarize the three categories of additional precautions.

Table 1.1 Contact Precaution Guidelines
PPE Private Room Visitors Patient Transport Cleaning
Gown, gloves Private room preferred or cohort patients.

Must have own dedicated equipment.

Gown and gloves must be worn if providing direct care.

Must perform hand hygiene before and after care.

Must not go into other patient rooms.

Patient: none required

Staff: gown and gloves

Additional daily room cleaning may be required.


Data source: PIDAC, 2012; PHAC, 2013; Siegal, Rhinehart, Jackson, & HICPAC, 2007
Table 1.2 Droplet Precautions
PPE Private Room Visitors Patient Transport Cleaning
Gloves, gown, and a surgical mask if within two metres of the patient Private room preferred or cohort.

Must have own dedicated equipment.


Gown, gloves, surgical masks, and eye protection are worn for all activities within two metres of the patient.

The patient must wear a surgical mask when leaving the room.

The door may remain open.

Strict adherence to hand hygiene must be observed.

Gloves, gown, and surgical mask must be worn  if providing direct care. Must perform hand hygiene before and after care.

Visitors may not go into other patient rooms.

Patient: gown, surgical mask Additional daily room cleaning may be required.
Data source: PIDAC, 2012; PHAC, 2013; Siegal et al., 2007
Table 1.3 Airborne Precautions
PPE Private Room Visitors Patient Transport Cleaning
Must wear N95 respirator prior to entering room.

Strict adherence to hand hygiene.

Must remove N95 respirator after exiting the room.

No immune-compromised persons to enter room. Care providers should have current vaccines.

Yes.

Must have a negative pressure room.

Must have own dedicated equipment.

Keep the door closed whether or not the patient is in the room.

The room should have bathroom facilities.

The room must be a single room, preferably one that is under negative pressure. When a negative pressure room is unavailable, refer to your health authority policy to determine whether a transfer to another facility is mandated.

Gloves, gown, and surgical mask required if providing direct care.Must perform hand hygiene before and after care.

Must not go into other patient rooms.

Patient: must wear surgical mask

Staff: N95 mask

Additional daily room cleaning may be required.
Data source: PIDAC, 2012; PHAC, 2013; Siegal et al., 2007

Personal Protective Equipment (PPE)

Additional precautions require the use of personal protective equipment (PPE), which is equipment or clothing worn by staff to prevent the transmission of infection from patient to staff or to family member (PIDAC, 2012). All PPE must be applied and removed in a specific order to ensure the skin, nose, mouth, and eyes are covered to prevent transmission of infection to health care providers. Depending on the type of additional precaution or risk assessment, a gown, goggles, face shield, and mask (surgical or N95) may be used during patient care. Refer to Checklist 6  for steps to take when donning (putting on) PPE.

  Checklist 6: Donning PPE
Disclaimer: Always review and follow your hospital policy regarding this specific skill.
Safety considerations:
  • The selection of PPE is based on the nature of the interaction with the patient and the likelihood of transmission of infectious agents.
  • PPE should be put on just prior to the interaction with the patient and should be removed immediately after the interaction, followed by hand hygiene.
  • Patients may feel depressed or lonely when isolated in a room or experiencing decreased contact with health care providers. Support for individuals on isolation must be provided. Conversely, some patients may appreciate the privacy of an individual room.

Steps

 Additional Information

1. Remove rings, bracelets, and watches. Perform hand hygiene. This prepares hands for direct patient care.
Perform hand hygiene
2. Apply waterproof long-sleeved gown. Tie the neck and waist strings. Waterproof gown prevents any potential cross-contamination from blood or body fluids onto forearms and body.
Apply water proof gown
Apply waterproof gown
3. Apply surgical or N95 mask. Ensure the fit is secure with no air leaks. Secure the metal band around the nose and pull mask over chin as required. Wearing a poor-fitting mask is the number one reason for exposure to pathogens for health care providers.

Masks should be worn if provider is within two metres of a coughing or sneezing patient or if there is a potential for spray of secretions or excretions.

Surgical mask (L) and N95 mask (R)
Surgical mask (left) and N95 mask (right)

Replace mask if it becomes wet or soiled.

Apply mask
Apply mask
4. Apply goggles or face shield. Goggles or a face shield prevents accidental exposure to eyes, nose, and mouth. Goggles can be placed on top of eyeglasses.

Prescription glasses are not an alternative to goggles as they do not protect the entire eye.

Applying goggles
Apply goggles
5. Apply non-sterile gloves over top of the cuff of the gown. Non-sterile gloves ensure complete coverage of skin on arms for direct patient care.
apply non-sterile gloves over top of sleeves
Apply non-sterile gloves over top of sleeves
Data source: Barratt, Shaban, & Moyle, 2011; PIDAC, 2012; PHAC, 2012b

See Checklist 7 for steps on how to doff or remove PPE.

    Checklist 7: Doffing PPE
Disclaimer: Always review and follow your hospital policy regarding this specific skill.

Steps

 Additional Information

1. Remove gloves. Grasp outer edge of glove by wrist and peel away from hand, rolling the glove inside out. Roll it into a ball in gloved hand.

With the bare hand, reach under the second glove and gently peel down off the fingers.

Place bare finger under gloved hand to avoid contamination from glove
Place bare finger under glove to avoid contamination from glove

Drop glove into garbage bin.

Always perform hand hygiene after removing gloves. Gloves are not tear- or leak-proof. Hands may have been contaminated upon removal of the gloves.

2. Perform hand hygiene. Clean hands if they feel or look dirty.
Perform hand hygiene
3. Remove gown. Remove gown in a manner that does not contaminate clothing. Starting at the neck ties, pull the outer (contaminated) part forward and, turned inward, roll into a ball. Discard in appropriate receptacle bin.
Remove gown
Remove gown
4. Perform hand hygiene. Always perform hand hygiene after removing gown. Hands may have been contaminated upon removal of the gown.
Perform hand hygiene
5. Remove eye protection or face shield. Arms of goggles and the headband on the face shield are considered clean. Handle these only by the sides. The front of the face shield or goggles is considered contaminated. Dispose them according to agency policy.
Remove goggles
Remove goggles
6. Remove mask/N95 respirator. Ties, earlobe loops, or straps are considered clean and may be touched. If tied, remove bottom tie first, then top tie. Remove ear loops or straps by leaning forward to allow the mask to slip off your face.

Dispose of the mask in the garbage bin.

Remove mask
Remove mask
7.  Perform hand hygiene. This step reduces the transmission of microorganisms.
Perform hand hygiene
Data source: Barratt et al., 2011; Perry et al., 2014; PHAC, 2012b; Siegal et al., 2007

Video 1.1

Watch the video Donning and Doffing PPE by Renée Anderson & Wendy McKenzie, Thompson Rivers University.

Blood or Body Fluid (BBF) Exposure

A blood and body fluid (BBF) exposure is defined as an exposure to potentially infectious body fluids or blood through the following methods: a puncture wound by a sharp object or needle (percutaneous exposure), from a body fluid/blood splash onto your mucous membranes (permucosal exposure) or exposure through eczema, an open wound/skin or scratch (non-intact skin exposure) (BCCDC, 2015).

Post-exposure management is only required when (1) percutaneous, permucosal, or non-intact skin is exposed to a BBF; (2) the exposure is to blood or potentially infectious body tissue or fluid; (3) the source is considered potentially infectious (e.g., patient is part of a high-risk group, exposure occurred in a high-risk setting, or patient has a positive test); and (4) the exposed person is considered susceptible to HIV, hepatitis B, or hepatitis C. Checklist 8 explains what to do if exposed.

  Checklist 8: BBF Exposure
Disclaimer: Always review and follow your hospital policy regarding this specific skill.
Safety considerations:
  • Evidence shows that antiretroviral therapy can reduce the transmission of HIV by 86%.
  • The risks and benefits of the post-exposure immunoprophylaxis should be discussed and appropriate recommendations made by the physician to the exposed person.
  • Despite the relatively low risk of infection from an exposure, the event is associated with stress and anxiety for the exposed person.
  • Seek advice from a physician at a hospital, walk-in clinic, or community clinic within two hours of any BBF exposure.
  • Not all body fluids are implicated in transmission of viruses. Review the CDC guidelines to understand which body fluids are implicated in transmitting HIV and hepatitis B and C.

Steps

 Additional Information

1. Wash the exposed skin, mucous membrane, or eye.

Skin: Wash the area thoroughly with soap and water.

Mucous membranes or eye: Rinse area with water or normal saline.

Allow injury/wound site to bleed freely and then cover lightly.

Do not promote bleeding of percutaneous injuries by cutting, scratching, or squeezing or puncturing the skin. This may damage the skin and increase uptake of any pathogens.

Do not apply bleach or soak wound/injury in bleach.

2. Contact first aid for assistance and obtain proper forms. These forms are also available in emergency departments.

If unable to contact first aid, proceed to the emergency room.

3. Advise your supervisor or charge nurse of the incident. Ask them to complete the required form and return it to you.

This step allows for follow-up by the manager, in relation to a BBF exposure.

4. A risk assessment should be completed within two hours. Go to the emergency room or urgent care centre and be assessed by a physician/NP.

Inform the department personnel that an occupational BBF exposure has occurred. You will be assessed and blood work will be drawn.

Emergency rooms or other health agencies are supplied with antiretroviral kits from the BC Centre for Excellence in HIV/AIDS.

Physicians will assess your risk of exposure and the risk of transmission from source.

5. Following treatment, return to your department and report the incident according to agency policy.

This ensures that the proper procedure is followed and the incident form is filled out to prevent or minimize further exposure.

Data source: BCCDC, 2015

Critical Thinking Exercises

  1. A family member has come into the health care setting to visit his mother, who has been admitted with chicken pox. List four infection preventive measures to discuss with the family member.
  2. How is PPE selected for patient care?

5

1.5 Surgical Asepsis and the Principles of Sterile Technique

Surgical Asepsis

Asepsis refers to the absence of infectious material or infection. Surgical asepsis is the absence of all microorganisms within any type of invasive procedure. Sterile technique is a set of specific practices and procedures performed to make equipment and areas free from all microorganisms and to maintain that sterility (BC Centre for Disease Control, 2010). In the literature, surgical asepsis and sterile technique are commonly used interchangeably, but they mean different things (Kennedy, 2013). Principles of sterile technique help control and prevent infection, prevent the transmission of all microorganisms in a given area, and include all techniques that are practised to maintain sterility.

Sterile technique is most commonly practised in operating rooms, labour and delivery rooms, and special procedures or diagnostic areas. It is also used when performing a sterile procedure at the bedside, such as inserting devices into sterile areas of the body or cavities (e.g., insertion of chest tube, central venous line, or indwelling urinary catheter). In health care, sterile technique is always used when the integrity of the skin is accessed, impaired, or broken (e.g., burns or surgical incisions). Sterile technique may include the use of sterile equipment, sterile gowns, and gloves (Perry et al., 2014).

Sterile technique is essential to help prevent surgical site infections (SSI), an unintended and oftentimes preventable complication arising from surgery. SSI is defined as an “infection that occurs after surgery in the area of surgery” (CDC, 2010, p. 2). Preventing and reducing SSI are the most important reasons for using sterile technique during invasive procedures and surgeries.

Principles of Surgical Asepsis

All personnel involved in an aseptic procedure are required to follow the principles and practice set forth by the Association of periOperative Registered Nurses (AORN). These principles must be strictly applied when performing any aseptic procedures, when assisting with aseptic procedures, and when intervening when the principles of surgical asepsis are breached. It is the responsibility of all health care workers to speak up and protect all patients from infection. See Checklist 9 for the principles of sterile technique.

Checklist 9: Principles of Sterile Technique
Disclaimer: Always review and follow your hospital policy regarding this specific skill.
Safety considerations:
  • Hand hygiene is a priority before any aseptic procedure.
  • When performing a procedure, ensure the patient understands how to prevent contamination of equipment and knows to refrain from sudden movements or touching, laughing, sneezing, or talking over the sterile field.
  • Choose appropriate PPE to decrease the transmission of microorganisms from patients to health care worker.
  • Review hospital procedures and requirements for sterile technique prior to initiating any invasive procedure.
  • Health care providers who are ill should avoid invasive procedures or, if they can’t avoid them, should double mask.

Steps

 Additional Information

1. All objects used in a sterile field must be sterile. Commercially packaged sterile supplies are marked as sterile; other packaging will be identified as sterile according to agency policy.

Check packages for sterility by assessing intactness, dryness, and expiry date prior to use.

Any torn, previously opened, or wet packaging, or packaging that has been dropped on the floor, is considered non-sterile and may not be used in the sterile field.

2. A sterile object becomes non-sterile when touched by a non-sterile object. Sterile objects must only be touched by sterile equipment or sterile gloves.

Whenever the sterility of an object is questionable, consider it non-sterile.

Fluid flows in the direction of gravity. Keep the tips of forceps down during a sterile procedure to prevent fluid travelling over entire forceps and potentially contaminating the sterile field.

3. Sterile items that are below the waist level, or items held below waist level, are considered to be non-sterile. Keep all sterile equipment and sterile gloves above waist level.

Table drapes are only sterile at waist level.

4. Sterile fields must always be kept in sight to be considered sterile. Sterile fields must always be kept in sight throughout entire sterile procedure.

Never turn your back on the sterile field as sterility cannot be guaranteed.

5. When opening sterile equipment and adding supplies to a sterile field, take care to avoid contamination.


Set up sterile trays as close to the time of use as possible.

Stay organized and complete procedures as soon as possible.

Place large items on the sterile field using sterile gloves or sterile transfer forceps.

Sterile objects can become non-sterile by prolonged exposure to airborne microorganisms.

6. Any puncture, moisture, or tear that passes through a sterile barrier must be considered contaminated. Keep sterile surface dry and replace if wet or torn.
7. Once a sterile field is set up, the border of one inch at the edge of the sterile drape is considered non-sterile. Place all objects inside the sterile field and away from the one-inch border.
8. If there is any doubt about the sterility of an object, it is considered non-sterile. Known sterility must be maintained throughout any procedure.
9. Sterile persons or sterile objects may only contact sterile areas; non-sterile persons or items contact only non-sterile areas. The front of the sterile gown is sterile between the shoulders and the waist, and from the sleeves to two inches below the elbow.

Non-sterile items should not cross over the sterile field. For example, a non-sterile person should not reach over a sterile field.

When opening sterile equipment, follow best practice for adding supplies to a sterile field to avoid contamination.

Do not place non-sterile items in the sterile field.

10. Movement around and in the sterile field must not compromise or contaminate the sterile field. Do not sneeze, cough, laugh, or talk over the sterile field.

Maintain a safe space or margin of safety between sterile and non-sterile objects and areas.

Refrain from reaching over the sterile field.

Keep operating room (OR) traffic to a minimum, and keep doors closed.

Keep hair tied back.

When pouring sterile solutions, only the lip and inner cap of the pouring container is considered sterile. The pouring container must not touch any part of the sterile field. Avoid splashes.

Data source: Kennedy, 2013; Infection Control Today, 2000; ORNAC, 2011; Perry et al., 2014; Rothrock, 2014

Video 1.2

Watch the video Principles of Asepsis by Renée Anderson & Wendy McKenzie, Thompson Rivers University.

Critical Thinking Exercises

  1. When should a sterile field be opened (under normal circumstances)?
  2. What part of the sterile field is considered non-sterile?

6

1.6 The Operating Room Environment

The operating room (OR) is a sterile, organized environment. As a health care provider, you may be required to enter the OR during a surgical procedure or to set up before a surgical procedure. It is important to understand how to enter an OR area and how the OR area functions to maintain an sterile environment.

Members of the surgical team work hard to coordinate their efforts to ensure the safety and care of their patients. The surgical team is in charge of the OR and makes decisions regarding patient care procedures. The OR environment has sterile and non-sterile areas, as well as sterile and non-sterile personnel. It is important to know who is sterile and who not, and which areas in the OR are sterile or non-sterile.

Sterile OR Personnel

Non-sterile OR Personnel

There are specific requirements for all health care professionals entering the OR to minimize the spread of microorganisms and maintain sterility of the OR environment. Prior to entering the OR, show your hospital-issued ID and inform the person in charge of the purpose of your visit. Refer to Checklist 10 for the specific steps to take before entering an OR.

Checklist 10: Entering the OR
Disclaimer: Always review and follow your hospital policy regarding this specific skill.

Steps

 Additional Information

1. Bring all required supplies to the OR. Sterilize or disinfect them as required. This step prevents the need to unnecessarily leave the restricted area.

Movement in the OR should be kept to a minimum to avoid contamination of sterile items or persons.

2. State the purpose of your visit to OR personnel and show your ID. This step allows for clear communication with the health care team.
3. Artificial nails should not be worn, and nail polish should be fresh (not more than four days old) and not chipped. Artificial nails, extenders, and chipped nail polish harbour more microorganisms than hands and can potentially contaminate the sterile area.
4. Remove all jewellery. Wedding bands may be permitted under agency policy. Jewellery harbours additional microorganisms and must be removed prior to a surgical hand scrub.
5. Don surgical attire (top and bottom). Surgical attire must be worn only in the surgical area. Tuck top into pants. Surgical attire must be worn only in the surgical area to avoid contamination outside the surgical area.
6. Cover shoes according to agency policy. Shoe covers will protect work shoes from accidental blood or body fluid spills in the OR. Shoe covers must not be worn outside the OR area.
7. Perform a surgical hand scrub according to agency policy. Surgical hand scrubs reduce the bacterial count on hands prior to applying sterile gloves. Hands are kept above waist at all times.
8. Prior to entering the restricted or semi-restricted area:
  1. Apply mask.
  2. Apply head covering to cover earrings, beard, and sideburns.
  3. Once in the OR, introduce yourself to the surgical staff and inquire about the sterile area and non-sterile areas.
Mask must cover nose, mouth, and chin for a proper seal. Mask should be changed if it becomes wet or soiled.

A surgical mask or N95 mask may be required, depending on whether the patient is on additional precautions.

Knowing what area is sterile/non-sterile will prevent accidental contamination of sterile fields and delays in surgery.

Sterile persons/area

The sterile field should be created as close as possible to the time of use. Covering sterile fields is not recommended.

Sterile areas should be continuously kept in view. An unguarded sterile field is considered contaminated.

Sterile persons should keep well within the sterile area. Sterile persons should pass each other back to back or front to front. A sterile person should face a sterile area to pass it and stay within the sterile field.

Non-sterile person/area

A non-sterile person should stay at least one foot away from the sterile field, and face the sterile field when passing it.

A non-sterile person should not walk between two sterile fields or reach over the sterile field.

Data source: Kennedy, 2013; ORNAC, 2011; Perry et al., 2014; Rothrock, 2014

Critical Thinking Exercises

  1. Why should the sterile field always be kept in sight by the scrub nurse or circulating nurse?
  2. Name three health care providers who are considered sterile in the OR area.

7

1.7 Sterile Procedures and Sterile Attire

Sterile procedures are required before and during specific patient care activities to maintain an area free from microorganisms and to prevent infection. Performing a surgical hand scrub, applying sterile gloves, and preparing a sterile field are ways to prevent and minimize infection during surgeries or invasive procedures.

Surgical Hand Scrub

Skin is a major source of microorganisms and a major source of contamination in the OR setting (CDC, 2010). Since skin cannot be sterilized, members of the surgical team must wear sterile gloves. The purpose of the surgical hand scrub is to significantly reduce the number of skin bacteria found on the hands and arms of the OR staff (Kennedy, 2013). A surgical hand scrub is an antiseptic surgical scrub or antiseptic hand rub that is performed prior to donning surgical attire (Perry et al., 2014) and lasts two to five minutes, depending on the product used and hospital policy. Studies have shown that skin bacteria rapidly multiply under surgical gloves if hands are not washed with an antimicrobial soap, whereas a surgical hand scrub will inhibit growth of bacteria under gloved hands (Kennedy, 2013).

Types of surgical hand scrubs

Surgical hand scrub techniques and supplies to clean hands will vary among health care agencies. Most protocols will require a microbial soap-and-water, three- to five-minute hand scrub procedure. Some agencies may use an approved waterless hand scrub product. See Checklist 11 for the steps to follow when scrubbing with medicated soap.

Checklist 11: Surgical Hand Scrub with Medicated Soap
Disclaimer: Always review and follow your hospital policy regarding this specific skill.
Safety considerations:
  • All personnel entering the operating room (OR) or a specific sterile procedure must perform a surgical hand scrub.
  • Hands must be free from rings, watches, and bracelets. Nails should be free from any nail enhancements, artificial extenders, acrylics, wraps, and tips. Nail polish must be free from chips or cracks. Research shows that the amount of bacteria is nine times higher on rings and on the skin beneath the fingernails.
  • All skin on the forearm and hands (including cuticles) should be free from open lesions and breaks in skin integrity. Any allergies to the cleansing products should be reported to the manager.
  • If hands touch anything during cleaning, the entire procedure must be started from the beginning.

 Steps

 Additional Information

1. Remove all jewellery. Jewellery harbours microorganisms.
Remove Jewelry
Remove jewellery
2. No artificial nails, extenders, or chipped nail polish should be worn in the OR. Artificial nails, extenders, and chipped nail polish can harbour microorganisms.
3. Inspect hands for sores or abrasions; cover or report to supervisor as required. Open sores can harbour microorganisms.
4. Ensure sleeves are at least two to three inches above the elbows. This step prevents sleeves from becoming moist.
5. Clean hands with ABHR or soap and water to remove visible debris. Hand hygiene is recommended by the Association of periOperative Registered Nurses (AORN).
Hand hygiene with ABHR
6. Turn on water. Regulate the temperature of the water. Warm water is recommended to prevent drying out of hands.
Wet hands
Wet hands
7. Apply the required amount of microbial soap to hands. A good amount of soap is required to create lather for a three- to five-minute scrub.
8. Keeping hands above elbows, start timing; scrub each side of each finger, between fingers, under each nail with a nail file, and the back and front of hands for the recommended time, according to agency policy. Nail files work more effectively than a nail brush. Clean the subungal area (under the fingernails) with a nail file. Nail brushes are not recommended as they may damage the skin around the nail.
9. Scrub the arms, using an up-and-down motion, keeping hands above the elbows at all times. Wash each side of the arm from wrist to elbow for one minute. Keeping hands above the wrist allows for the microorganisms to slide off the hands into the sink.
10. Repeat the entire process with the other hand and forearm. Use an equal amount of time to wash each hand.
11. With hands raised, rinse hands and arms by passing them through running water, letting the water drip down from the fingertips to the elbow. This step allows for all the soap to be rinsed off from cleanest to dirtiest area.
12. Proceed into the operating room (keep hands above the waist), and dry arms using a sterile towel, starting at the fingertips and working down toward the forearms using a dabbing motion. This step prevents contamination of the hands and adheres to the principles of sterile technique.
Data source: ATI, 2015a; Bartlett, Pollard, Bowker, & Bannister, 2002; Kennedy, 2013; WHO, 2009a

Applying Sterile Gloves

Sterile gloves are gloves that are free from all microorganisms. They are required for any invasive procedure and when contact with any sterile site, tissue, or body cavity is expected (PIDAC, 2012). Sterile gloves help prevent surgical site infections and reduce the risk of exposure to blood and body fluid pathogens for the health care worker. Studies have shown that 18% to 35% of all sterile gloves have tiny holes after surgery, and up to 80% of the tiny puncture sites go unnoticed by the surgeon (Kennedy, 2013). Double gloving is known to reduce the risk of exposure and has become common practice, but does not reduce the risk of cross-contamination after surgery (Kennedy, 2013).

To apply sterile gloves, follow the steps in Checklist 12.

Checklist 12: Donning Sterile Gloves
Disclaimer: Always review and follow your hospital policy regarding this specific skill.
Safety considerations:
  • Choose the right size of gloves. Gloves come in multiple sizes. Make sure the gloves are tight enough so that objects are easy to pick up.
  • Sterile gloving does not replace hand washing. Hands must be washed before and after any procedure.
  • Gather all supplies and prepare your patient for the procedure prior to applying gloves.
  • Ensure the patient does not have a latex allergy prior to applying sterile gloves.

 Steps

 Additional Information

1. Remove all jewellery. Jewellery harbours more microorganisms than do hands.
Remove Jewelry
Remove jewellery
2. No artificial nails, extenders, or chipped nail polish should be worn. Artificial nails, extenders, and chipped nail polish can harbour additional microorganisms.
3. Inspect hands for sores and abrasions. Cover or report to supervisor as required. Open sores can harbour microorganisms.
4. Ensure sleeves are at least two to three inches above the elbows. This step prevents sleeves from becoming moist, and prevents the transfer of microorganisms from the sleeves.
5. Clean hands with ABHR or soap and water. This step decreases the bacterial count on hands and prevents contamination of sterile equipment.
Hand hygiene with ABHR
6. Clean surface to open sterile field and raise its height to waist level. All sterile items must be kept above waist level.
7. Inspect packaging for sterility. All sterile items must be checked for sterility prior to use. Always examine sterile glove packaging for expiry date, intactness, and tears. The package should be dry. Sterile gloves have outer packaging that must be removed prior to starting the procedure of applying sterile gloves.
Inspect outer packaging
8. Open sterile packaging by peeling open the top seam and pulling down. Open sterile packaging without contaminating inner package.
open sterile glove packaging
Open sterile glove packaging
9. Place inner package on working surface and open up to see right and left gloves. Start with dominant hand first. Open packaging. This step prepares sterile surface to perform sterile application of gloves.
Place inner packaging on clean surface
Open packaging
Start with dominant hand
Open packaging
Open packaging
10. Pick up glove for dominant hand by touching the inside cuff of the glove. Do not touch the outside of the glove. Pull glove completely over dominant hand.  This step allows ease of application.
Book pictures 2015 219
Grasp the glove of the dominant hand
Insert hand into opening
Pull glove on up to wrist
11. Insert gloved hand into the cuff of the remaining glove. Pull remaining glove on non-dominant hand and insert fingers. Adjust gloves if necessary. This ensures proper fit of gloves.
Book pictures 2015 225
Place gloved hand under the cuff
Book pictures 2015 226
Insert fingers
Pull glove up to wrist
12. Once gloves are on, interlock gloved hands and keep at least six inches away from clothing, keeping hands above waist level and below the shoulders. This step prevents the accidental touching of non-sterile objects or the front of the gown.
Keep hands above waist level and away from clothing
13. To remove gloves, grasp the outside of the cuff or palm of glove and gently pull the glove off, turning it inside out and placing it into gloved hand. Doing this, prevents the contamination of the hand when removing glove.
Grasp the outside of the glove 1/2 inch below the cuff
Book pictures 2015 235
Turn glove inside out
Book pictures 2015 236
Place inside-out glove in gloved hand
14. Take ungloved hand, place fingers inside the other glove, and pull glove off inside out. This step prevents the contamination of gloved hand touching ungloved hand.
Insert finger under the cuff
Book pictures 2015 239
Remove second glove inside out
15. Perform hand hygiene. This removes powder from the gloves, which can irritate the skin; it also prevents contamination from potential pinholes in the gloves.
Hand hygiene with ABHR
Data source: ATI, 2015b; Berman & Snyder, 2016; Kennedy, 2013; Perry et al., 2014; Rothrock, 2014

Video 1.3

Watch the video Applying Sterile Gloves by Renée Anderson & Wendy McKenzie, Thompson Rivers University.

Watch this Donning Sterile Gloves video for a demonstration on donning sterile gloves.

Setting up a Sterile Field

Aseptic procedures require a sterile area in which to work with sterile objects. A sterile field is a sterile surface on which to place sterile equipment that is considered free from microorganisms (Perry et al., 2014). A sterile field is required for all invasive procedures to prevent the transfer of microorganisms and reduce the potential for surgical site infections. Sterile fields can be created in the OR using drapes, or at the bedside using a prepackaged set of supplies for a sterile procedure or wound care. Many sterile kits contain a waterproof inner drape that can be set up as part of the sterile field. Sterile items can be linen wrapped or paper wrapped, depending on whether they are single- or multi-use. Always check hospital policy and doctor orders if a sterile field is required for a procedure. See Checklist 13 for the steps for preparing a sterile field.

Checklist 13: Preparing a Sterile Field
Disclaimer: Always review and follow your hospital policy regarding this specific skill.
Safety considerations:
  • Check physician orders and hospital policy regarding procedure.
  • Instruct patient how to assist throughout the procedure (e.g., lying still, not talking over the sterile field or touching sterile objects).
  • If required, check dressing on wound to assess for required supplies needed for the procedure.
  • Offer analgesic and/or bathroom to ensure patient comfort throughout the procedure.
  • Explain procedure to the patient and give an approximate time frame for completing the procedure.

Steps

 Additional Information

1. Perform hand hygiene, gather supplies, check equipment for sterility, and gather additional supplies (gauze, sterile cleaning solution, sterile gloves, etc.). Gathering additional supplies at the same time will help avoid leaving the sterile field unattended. Prepackaged sterile kits may not have all the supplies required for each procedure.
Hand hygiene with ABHR
2. Place package on clean, dry, waist-level table. A clean, dry surface is required to set up a sterile field.

Items below waist level are considered contaminated.

Prepare sterile field as close to the time of procedure as possible.

Waist high, dry clean surface
Place package on waist-high, dry, clean surface
3. Remove the outside sterile packaging and discard. This allows more space to set up a sterile field.
4. Grab the outer surface’s outermost tip (corner of folded drape) and open the flap away from you. The one-inch border on the sterile field is considered non-sterile. Make sure your arm is not over the sterile field.

The inside of the sterile packaging is your sterile drape.

Stand away from your sterile field when opening sterile packaging.

Opening first flap
Open first flap
5. Grab the side flaps and open outwards, and let it lie flat on the table. Touch only the one-inch border on the sterile field. Do not reach over the sterile field.
Second flap
Second flap
Third flap
Third flap
6. Grasping the outermost corner, pull the last flap toward you, and lay it flat on the table. This step creates an open sterile field.
Remove forceps prior to opening last flap
Open last flap towards you
7. Using sterile forceps, rearrange sterile equipment on the sterile field in order of usage. This step saves time for completing sterile procedure; it also limits the amount of time the sterile field is exposed to air.
Book pictures 2015 713
Arrange sterile items on field
Sterile field
Sterile field

Adding Sterile Items to a Sterile Field

8. Supplies can be opened (following packaging directions), then gently dropped onto the sterile field.


Gently drop items onto the sterile field or use sterile forceps to place sterile items onto the field.

If using equipment wrapped in linen, ensure sterility by checking the tape for date and to view chemical indicator (stripes on the tape ensure sterility has been achieved).

When using paper-wrapped items, they should be dry and free from tears. Confirm expiry date.

Do not flip or toss objects onto the sterile field.

Adding sterile items to sterile field
Add sterile items to sterile field
Adding sterile supplies
Add sterile supplies
9. Add solution to the sterile tray by pouring the solution carefully into the receptacle:
  • Verify solution and expiry date.
  • Open cap and place face up on non-sterile surface.
  • Hold bottle two inches above receptacle and pour the required amount slowly and without splashing.
  • If bottle is multi-use, recap and label it with the date and time of opening. Most sterile solutions are good for 24 hours.
Do not touch the edge of the solution receptacle. Place the receptacle near the edge of the sterile field.
Sterile solution
Sterile solution
Adding sterile solution to the sterile field
Add sterile solution to the sterile field

This ensures the sterility of the solution and the use of the correct solution.

It also ensures the bottle of solution does not come in contact with the sterile field.

Lastly, it verifies the type of solution required for the procedure.

Be careful not to drip solution onto the sterile field, causing contamination. (When liquid permeates a sterile field it is called strike through.)

Data source: ATI, 2015c; Berman & Snyder, 2016; Kennedy, 2013; Perry et al., 2014; Rothrock, 2014
Read this Surgical Aseptic Technique and Sterile Field PDF for information about surgical asepsis and setting up a sterile field at the bedside.

Sterile Attire in the OR

Wearing sterile surgical attire (sterile gowns, closed gloving, and masks) and PPE is essential to keep the restricted and semi-restricted areas clean and to minimize sources of microbial transmission and contamination. It is important to minimize the patient’s exposure to the surgical team’s skin, mucous membranes, and hair by the proper application of surgical attire. An extensive list of recommendations for surgical attire can be located on the Association of periOperative Registered Nurses (AORN) website at Recommendations for surgical attire (Braswell & Spruce, 2012).

Critical Thinking Exercises

  1. Name four differences between a medical hand wash with soap and water and a surgical hand scrub.
  2. When preparing a sterile field, is the first flap open toward the health care provider or away from the health care provider?
  3. Name two reasons for performing hand hygiene before and after applying sterile gloves.

8

1.8 Summary

Infection control and prevention practices are a critical component of patient safety in the health care environment. In order to protect the public and cut health care costs, all health care professionals must take part in preventing infections before they occur. The use of routine practices, effective hand hygiene techniques, additional precautions, and sterile procedures contribute to enhancing patient safety and eliminating significant health care risks such as health care-associated infections. If effectively applied, infection control and prevention practices will prevent and minimize transmission of infections in health care settings.

Key Takeaways

  • Hand hygiene is the single most important part of infection prevention and control practices in the health care setting.
  • Plan your care: each health care worker is responsible to perform a risk assessment before every contact with a patient and/or patient’s environment to ensure the proper control measures are in place to prevent transmission of infections.
  • The most common sites for HAIs are the urinary tract and the respiratory tract. It is vital to implement preventive measures at all times during patient care or during procedures related to these areas.
  • Be aware of potential risk factors of patients that make them more susceptible to infections. Susceptible patients include very young children; patients who are elderly, nutritionally deficient, or chronically ill; patients undergoing medical treatments such as chemotherapy or taking medications such as high doses of steroids; and individuals who are already ill or have open wounds (Perry et al., 2014).
  • Be aware how the chain of infection works and implement ways to break the chain of infection in practice.
  • Practise strict adherence to the principles of sterile technique to prevent and minimize infections during sterile and invasive procedures.

Suggested Online Resources

  1. BC Centre for Disease Control: Blood and body fluid exposure management. This resource outlines risk assessment and guidelines for potential exposures of percutaneous, permucosal, and non-intact skin to HIV, hepatitis B, and hepatitis C.
  2. British Columbia: Home and community care – Policy manual. This manual offers guidelines for working in the community and residential care.
  3. Centers for Disease Control and Prevention: Antibiotic/antimicrobial resistance. This resource covers common viruses/bacteria found in the health care setting, such as:
    • Clostridium difficile infection (CDI)
    • Carbapenemase-producing organisms (CPO)
    • Multi-drug-resistant organisms (MDRO) or antibiotic-resistant organisms (ARO): MRSA/VRE
    • Severe acute respiratory syndrome (SARS)
    • Middle East respiratory syndrome (MERS)
    • Ebola virus disease (EVD)
  4. Centers for Disease Control and Prevention: Guidelines for disinfection and sterilization in healthcare facilities. The goal of this document is to reduce the rates of health care associated infections. Each recommendation listed is categorized according to scientific evidence, theoretical rationale, and applicability.
  5. Infection and Prevention Control Canada. (IPAC): Evidence-based guidelines. This website offers the latest reports, guidelines, standards, and policies related to infection control issues. U.S. and international resources are also provided. These documents may be used to support your own documentation practice and best practices.
  6. Ontario Agency for Health Protection and Promotion: Routine practices and additional precautions. This excellent  resource provides routine practice and additional precautions in all health care settings. These were developed by the Ontario Provincial Infectious Disease Advisory Committee (PIDAC) on Infection Prevention and Control (IPC).
  7. Provincial Infection Control Network of British Columbia (PICNet): BC infection control and hand hygiene module. This course teaches the basic principles of infection control in the health care system, sharps management, hand hygiene, blood and body fluid exposure and cleanup, the proper use of personal protective equipment, and isolation precautions.
  8. Provincial Infection Control Network of British Columbia (PICNet): Infection control guidelines.Providing health care to the client living in the community.
    PICNet Educational Links.This document is intended to provide guidance in the writing of policies pertaining to infection prevention and control within community health care, and home care programs and settings.
  9. Public Health Agency of Canada: Hand hygiene practices in healthcare settings. This excellent Canadian resource covers infectious disease prevention and control policies.
  10. World Health Organization: Clean care is safer care. This website provides links to the five moments in hand hygiene, diagrams on hand washing and hand rubs, and leaflets for teaching.

References

Accreditation Canada. (2013). Infection prevention and control. Mentum Quarterly, 5(4). Retrieved on Feb 28, 2015, from: http://www.accreditation.ca/sites/default/files/qq-spring-2013.pdf

American Academy of Allergy, Asthma and Immunology. (2015). Latex allergies: Tips to remember. Retrieved on Feb 28, 2015, from: http://www.aaaai.org/conditions-and-treatments/Library/At-a-Glance/Latex-Allergy.aspx

ATI. (2015a). Traditional hand scrub method. Retrieved from ATI Nursing Education. Surgical Asepsis. Retrieved on Oct 10, 2015, from http://atitesting.com/ati_next_gen/skillsmodules/content/surgical-asepsis/viewing/attire-tradscrub.html

ATI. (2015b). Open-gloving technique. Retrieved from ATI Nursing Education. Surgical Asepsis. Retrieved on Oct 10, 2015, from http://atitesting.com/ati_next_gen/skillsmodules/content/surgical-asepsis/viewing/glove-open.html

ATI. (2015c). Setting up a sterile field. Retrieved from ATI Nursing Education. Surgical Asepsis. Retrieved on Oct 10, 2015, from http://atitesting.com/ati_next_gen/skillsmodules/content/surgical-asepsis/equipment/field.html

Barratt, R. L., Shaban, R., & Moyle, W. (2011). Patient experience from source isolation: Lessons from clinical practice. Contemporary Nurse, 39(2), 180-193. doi: 10.5172/conu.2011.180

Bartlett, G. E., Pollard, T. C., Bowker, K. E., & Bannister, G. C. (2002). Effect of jewellery on surface bacterial counts of operating theatres. The Journal of Hospital Infection, 52(1), 68-70.

BC Centre for Disease Control (BCCDC). (2014). Hand hygiene. Retrieved on Feb 21, 2015, from: http://www.bccdc.ca/prevention/HandHygiene/default.htm

BC Centre for Disease Control (BCCDC). (2015). Communicable Disease Control. Blood and body fluid exposure management. Retrieved on Nov 6, 2015 from
http://www.bccdc.ca/NR/rdonlyres/E6AF842F-A899-477F-BC90-5BFF6A4280F6/0/CPS_CDManual_BBFExpMangt_20150715.pdf

Berman, A., & Snyder S. J. (2016). Skills in clinical nursing (8th ed.). Upper Saddle River, New Jersey: Pearson.

Bissett, L. (2007). Skin care: An essential component of hand hygiene and infection control. British Journal of Nursing, 16(16), 976-981.

Braswell, M. L., & Spruce, L. (2012). Implementing AORN recommended practices for surgical attire. AORN Journal, 95(1), 122-140. doi: 10.1016/j.aorn.2011.10.017

Centers for Disease Control and Prevention (CDC). (2007). Part III: Precautions to prevent the transmission of infectious agents. Retrieved on Oct 10, 2015, from http://www.cdc.gov/hicpac/2007IP/2007ip_part3.html

Centers for Disease Control (CDC). (2012). Frequently asked questions about Clostridium difficile for healthcare providers. Retrieved on Feb 27, 2015, from http://www.cdc.gov/HAI/organisms/cdiff/Cdiff_faqs_HCP.html

Centers for Disease Control (CDC). (2014). Types of healthcare-associated infections. Retrieved on Feb 27, 2015, from http://www.cdc.gov/HAI/infectionTypes.html

Infection Control Today. (2000). Asepsis and aseptic practices in the operating room. Retrieved on Oct 10, 2015, from http://www.infectioncontroltoday.com/articles/2000/07/asepsis-and-aseptic-practices-in-the-operating-ro.aspx

Kampf, G., & Loffler, H. (2003). Dermatological aspects of a successful introduction and continuation of alcohol based hand rubs for hygienic hand disinfection. The Journal of Hospital Infection, 55(1), 1-7.

Kennedy, L. (2013). Implementing AORN recommended practices for sterile technique. AORN Journal, 98(1), 14-26.

Longtin, Y., Sax, H., Allegranzi, B., Schneider, F., & Pittet, D. (2011). Hand hygiene. New England Journal of Medicine, 34(13) 24-28. Retreived on Feb 27, 2015, from http://www.nejm.org/doi/pdf/10.1056/NEJMvcm0903599

Operating Room Nurses Association of Canada (ORNAC). (2011). Standards, guidelines and position statements for perioperative registered nursing practice. Retrieved on Oct 10, 2015, from http://flex5114.weebly.com/uploads/1/4/5/1/14518934/ornac_standards.pdf

Patrick, M., & Van Wicklin, S. A. (2012). AORN recommended practice for hand hygiene. AORN Journal, 9(4), 492-507. doi; 10.1016/j.aorn.2012.01.019 492

Perry, A. G., Potter, P. A., & Ostendorf, W. R. (2014). Clinical skills and nursing techniques (8th ed.). St Louis, MO: Elsevier-Mosby.

Provincial Infectious Diseases Advisory Committee (PIDAC) (Ontario Agency for Health Provincial Infectious Disease Advisory Committee). (2012). Routine practices and additional precautions in all health care settings (3rd ed.). Toronto, ON: Queen’s Printer for Ontario. Retrieved on Feb 20, 2015, from http://www.publichealthontario.ca/en/eRepository/RPAP_All_HealthCare_Settings_Eng2012.pdf

Poutanen, S. M., Vearncombe, M., McGeer, A. J., Gardam, M., Large, G., & Simor, A. E. (2005). Nonsocomial acquisition of methicillin-resistant Staphylococcus aureus during an outbreak of severe acute respiratory syndrome. Infection Control Hospital Epidemiology, 26(2) 134-137.

Public Health Agency of Canada (PHAC). (2012a). Hand hygiene practices in healthcare settings. Retrieved on Feb 26, 2015, from http://publications.gc.ca/site/eng/430135/publication.html

Public Health Agency of Canada (PHAC). (2012b). Routine practices and additional precautions for preventing the transmission of infection in healthcare settings. Retrieved on Feb 26, 2015, from http://www.phac-aspc.gc.ca/nois-sinp/guide/ summary-sommaire/tihs-tims-eng.php

Public Health Agency of Canada (PHAC). (2013). The Chief Public Health Officer’s report on the state of public health in Canada: Infectious disease, the never ending threat. Retrieved on Feb 26, 2105, from http://www.phac-aspc.gc.ca/cphorsphc-respcacsp/2013/infections-eng.php#a8

Rothrock, J. C. (2014). Care of the patient in surgery. St. Louis, MO: Mosby Elsevier.

Siegel, J. D., Rhinehart, E., Jackson, M., & the Healthcare Infection Control Practices Advisory Committee (HICPAC). (2007). Guidelines for isolation precautions: Preventing transmission of infectious agents in healthcare settings. Centers for Disease Control. Retrieved on Feb 17, 2015, from: http://www.cdc.gov/hicpac/pdf/isolation/Isolation2007.pdf

World Health Organization (WHO). (2009a). WHO guidelines for hand hygiene in health care: First global patient safety challenge. Retrieved on Feb 6, 2015, from http://whqlibdoc.who.int/publications/2009/9789241597906_eng.pdf?ua=1

World Health Organization (WHO). (2009b). Five moments for hand hygiene. Retrieved on March 1, 2015, from: http://www.who.int/gpsc/tools/Five_moments/en/

II

Chapter 2. Patient Assessment

9

2.1 Introduction

Systematic health assessments are performed regularly in nearly every health care setting. For example:

A routine physical assessment reveals information to supplement a patient’s database. The assessment is documented according to agency policy, and unusual findings are reported to appropriate members of the health care team. Ongoing, objective, and comprehensive assessments promote continuity in health care.

The ability to think critically and interpret patient behaviours and physiologic changes is essential. The skills of physical assessment are powerful tools for detecting both subtle and obvious changes in a patient’s health. The assessment skills outlined in this chapter are meant to provide a framework to develop assessment competencies applicable and salient to everyday practice as recommended by Anderson, Nix, Norman, and McPike (2014).

Learning Objectives

Physical assessment objectives include being able to:
  • Describe the purposes of physical assessment
  • Describe the different types of assessment and when they should be used to inform care
  • Discuss techniques to promote a patient’s physical and psychological comfort during an examination
  • Make environmental preparations before an assessment
  • Identify data to collect from the nursing history before an examination
  • Incorporate health promotion and health teaching into an assessment
  • Use physical assessment techniques and skills during routine nursing care
  • Document assessment findings according to agency policy
  • Communicate abnormal findings to appropriate members of the health care team

10

2.2 Pain Assessment

“Pain is whatever the experiencing person says it is, existing whenever the experiencing person says it does” (McCaffery, 1968, cited in Rosdahl & Kowalski, 2007, p. 704). Pain is a subjective experience, and self-report of pain is the most reliable indicator of a patient’s experience. Determining pain is an important component of a physical assessment, and pain is sometimes referred to as the “fifth vital sign.”

Example of a pain scale https://commons.wikimedia.org/wiki/File:Children%27s_pain_scale.JPG
Figure 2.1 Example of a pain scale

Pain assessment is an ongoing process rather than a single event (see Figure 2.1). A more comprehensive and focused assessment should be performed when someone’s pain changes notably from previous findings, because sudden changes may indicate an underlying pathological process (Jarvis, Browne, MacDonald-Jenkins, & Luctkar-Flude, 2014).

Always assess pain at the beginning of a physical health assessment to determine the patient’s comfort level and potential need for pain comfort measures. At any other time you think your patient is in pain, you can use the mnemonic LOTTAARP (location, onset, timing, type, associated symptoms, alleviating factors, radiation, precipitating event) to help you remember what questions to ask your patient. See Checklist 14 for the questions to ask and steps to take to assess pain.

Checklist 14: Pain Assessment
Disclaimer: Always review and follow your hospital policy regarding this specific skill.

Steps

 Additional Information

1. Start your assessments by asking patients to rate their pain on a scale from 0 to 10, with 10 being the worst possible pain and 0 being no pain.
L: Location Where are you feeling pain?
O: Onset When did the pain start?

How long have you been in pain?

T: Timing Is the pain constant or intermittent?
Has the intensity changed over time?
T: Type What does the pain feel like?
A: Associated symptoms Do you have any associated symptoms such as nausea, vomiting, fever, etc.?
A: Alleviating factors What makes the pain feel better?
Do you take any medications for this pain? If so, are they effective?
R: Radiation Does the pain move anywhere else?
P: Precipitating event What was happening when the pain started? What has caused the pain to occur?

Has this happened before?

2. Provide analgesia as prescribed and other comfort measures, such as distraction, massage, and the application of warmth or cold, as appropriate.
3. Report and document assessment findings and related health problems according to agency policy.
Data source: Assessment Skill Checklists, 2014
Read this section on vital signs to learn how to take a full set of vital signs.

Critical Thinking Exercises

  1. You are caring for a patient who has just returned from a surgical procedure. The patient has a history of chronic pain. Would the patient’s assessment provide the same data as an assessment of a person who does not have a history of chronic pain?
  2. What is more important: the subjective or the objective data in a pain assessment?

Attribution

Figure 2.1 
Children’s pain scale by Robert Weis is used under a CC BY SA 4.0 licence.

11

2.3 Vital Signs

Temperature, pulse, respiration, blood pressure (BP), and oxygen saturation, are measurements that indicate a person’s hemodynamic status. These are the five vital signs most frequently obtained by health care practitioners (Perry, Potter, & Ostendorf, 2014). Vital signs will potentially reveal sudden changes in a patient’s condition and will also measure changes that occur progressively over time. A difference between patients’ normal baseline vital signs and their present vital signs may indicate the need for intervention (Perry et al., 2014). Checklist 15 outlines the steps to take when checking vital signs.

Checklist 15: Vital Signs
Disclaimer: Always review and follow your hospital policy regarding this specific skill.

Steps

 Additional Information

1. Temperature:

DSC_2218

Normal (oral) = 35.8ºC to 37.3ºC

Oral temperature: Place the thermometer in the mouth under the tongue and instruct patient to keep mouth closed. Leave the thermometer in place for as long as is indicated by the device manufacturer.

Axillary temperature: Usually 1ºC lower than oral temperature. Place the thermometer in patient’s armpit and leave it in place for as long as is indicated by the device manufacturer.

Tympanic membrane (ear) temperature: Usually 0.3°C to 0.6°C higher than an oral temperature. The tympanic membrane shares the same vascular artery that perfuses the hypothalamus. Do not force the thermometer into the ear and do not occlude the ear canal.

Rectal temperature: Usually 1ºC higher than oral temperature. Use only when other routes are not available.

2. Pulse:

Normal resting heart rate = 60 to 100 beats per minute

Radial pulse
Radial pulse
Apical pulse
Apical pulse
Radial pulse: Use the pads of your first three fingers to gently palpate the radial pulse at the inner lateral wrist.

Apical pulse: Taken as part of a focused cardiovascular assessment and when the pulse rate is irregular. Apical heart rate should be used as the parameter indicated in certain cardiac medications (e.g., digoxin). Apical pulse rate should be taken for a full minute for accuracy, and is located at the fifth intercostal space in line with the middle of the clavicle in adults.

Carotid pulse: May be taken when radial pulse is not present or is difficult to palpate.

3. Respiration rate:

Normal resting respiratory rate = 10 to 20 breaths per minute

DSC_2220
Respiratory rate
Count respiratory rate unobtrusively while you are taking the pulse rate so that the patient is not aware that you are taking the respiration rate. Count for 30 seconds or for a full minute if irregular.
4. Blood pressure (BP):
DSC_2215
Blood pressure cuff

The average BP for an adult is 120/80 mmHg, but variations are normal for various reasons.

The systolic pressure is the maximum pressure on the arteries during left ventricular contraction.

The diastolic pressure is the resting pressure on the arteries between each cardiac contraction.

The patient may be sitting or lying down with the bare arm at heart level. Palpate the brachial artery just above the antecubital fossa medially. Wrap the BP cuff around the upper arm about 2.5 cm above the brachial artery.

Palpate the radial or brachial artery, and inflate the BP cuff until the pulse rate is no longer felt. Then inflate 20 to 30 mmHg more.

Place the bell of the stethoscope over the brachial artery, and deflate the cuff slowly and evenly, noting the points at which you hear the first appearance of sound (systolic BP), and the disappearance of sound (diastolic BP).

5. Oxygen saturation (SpO2):

A healthy patient will have an SpOof ≥ 97%.

DSC_2214
Pulse oximeter sensor
A pulse oximeter sensor attached to the patient’s finger or earlobe measures light absorption of hemoglobin and represents arterial SpO2.
Data source: Jarvis et al., 2014; Stephen, Skillen, Day, & Jensen, 2012

Critical Thinking Exercises

  1. Which type of thermometer is the best example of a non-invasive, safe, and efficient tool for measuring temperature?
  2. A 40-year-old male patient has a blood pressure of 140/100 mmHg. Is this normal for this patient? What additional data would you need to collect before making a decision about care for this patient?

12

2.4 Health History

The purpose of obtaining a health history is to gather subjective data from the patient and/or the patient’s family so that the health care team and the patient can collaboratively create a plan that will promote health, address acute health problems, and minimize chronic health conditions. The health history is typically done on admission to hospital, but a health history may be taken whenever additional subjective information from the patient may be helpful to inform care (Wilson & Giddens, 2013).

Data gathered may be subjective or objective in nature. Subjective data is information reported by the patient and may include signs and symptoms described by the patient but not noticeable to others. Subjective data also includes demographic information, patient and family information about past and current medical conditions, and patient information about surgical procedures and social history. Objective data is information that the health care professional gathers during a physical examination and consists of information that can be seen, felt, smelled, or heard by the health care professional. Taken together, the data collected provides a health history that gives the health care professional an opportunity to assess health promotion practices and offer patient education (Stephen et al., 2012).

The hospital will have a form with assessment questions similar to the ones listed in Checklist 16.

Checklist 16: Health History Checklist
Disclaimer: Always review and follow your hospital policy regarding this specific skill.

Steps

Additional Information

Determine the following:

1. Biographical data

  • Source of history
  • Name
  • Age
  • Occupation (past or present)
  • Marital status/living arrangement
2. Reason for seeking care and history of present health concern
  • Chief complaint
  • Onset of present health concern
  • Duration
  • Course of the health concern
  • Signs, symptoms, and related problems
  • Medications or treatments used (ask how effective they were)
  • What aggravates this health concern
  • What alleviates the symptoms
  • What caused the health concern to occur
  • Related health concerns
  • How the concern has affected life and daily activities
  • Previous history and episodes of this condition
3. Past health history
  • Allergies (reaction)
  • Serious or chronic illness
  • Recent hospitalizations
  • Recent surgical procedures
  • Emotional or psychiatric problems (if pertinent)
  • Current medications: prescriptions, over­-the­-counter, herbal remedies
  • Drug/alcohol consumption
4. Family history
  • Pertinent health status of family members
  • Pertinent family history of heart disease, lung disease, cancer, hypertension, diabetes, tuberculosis, arthritis, neurological disease, obesity, mental illness, genetic disorders
5. Functional assessment (including activities of daily living)
  • Activity/exercise, leisure and recreational activities (assess for falls risk)
  • Sleep/rest
  • Nutrition/elimination
  • Interpersonal relationships/resources
  • Coping and stress management
  • Occupational/environmental hazards
6. Developmental tasks
  • Current significant physical and psychosocial changes/issues
7. Cultural assessment
  • Cultural/health-related beliefs and practices
  • Nutritional considerations related to culture
  • Social and community considerations
  • Religious affiliation/spiritual beliefs and/or practices
  • Language/communication
Data source: Assessment Skill Checklists, 2014

Critical Thinking Exercises

  1. You are taking a health history. Why is it important for you to obtain a complete description of the patient’s present illness?
  2. You are taking a health history. What is one reason it is important for you to obtain a complete description of the patient’s lifestyle and exercise habits?

13

2.5 Head-to-Toe Assessment

A comprehensive head-to-toe assessment is done on patient admission, at the beginning of each shift, and when it is determined to be necessary by the patient’s hemodynamic status and the context. The head-to-toe assessment includes all the body systems, and the findings will inform the health care professional on the patient’s overall condition. Any unusual findings should be followed up with a focused assessment specific to the affected body system.

A physical examination involves collecting objective data using the techniques of inspection, palpation, percussion, and auscultation as appropriate (Wilson & Giddens, 2013). Checklist 17 outlines the steps to take.

Checklist 17: Head-to-Toe Assessment
Disclaimer: Always review and follow your hospital policy regarding this specific skill.
Safety considerations:
  • Perform hand hygiene.
  • Check room for contact precautions.
  • Introduce yourself to patient.
  • Confirm patient ID using two patient identifiers (e.g., name and date of birth).
  • Explain process to patient.
  • Be organized and systematic in your assessment.
  • Use appropriate listening and questioning skills.
  • Listen and attend to patient cues.
  • Ensure patient’s privacy and dignity.
  • Assess ABCCS (airway, breathing, circulation, consciousness, safety)/suction/oxygen/safety.
  • Apply principles of asepsis and safety.
  • Check vital signs.
  • Complete necessary focused assessments.

Steps

Additional Information

1. General appearance:
  • Affect/behaviour/anxiety
  • Level of hygiene
  • Body position
  • Patient mobility
  • Speech pattern and articulation
Alterations may reflect neurologic impairment, oral injury or impairment, improperly fitting dentures, differences in dialect or language, or potential mental illness. Unusual findings should be followed up with a focused neurological system assessment.
DSC_2293
Assess general appearance
This is not a specific step. Evaluating the skin, hair, and nails is an ongoing element of a full  body assessment as you work through steps 3-9.

2. Skin, hair, and nails:

  • Inspect for lesions, bruising, and rashes.
  • Palpate skin for temperature, moisture, and texture.
  • Inspect for pressure areas.
  • Inspect skin for edema.
  • Inspect scalp for lesions and hair and scalp for presence of lice and/or nits.
  • Inspect nails for consistency, colour, and capillary refill.
Check for and follow up on the presence of lesions, bruising, and rashes.Variations in skin temperature, texture, and perspiration or dehydration may indicate underlying conditions.

Redness of the skin at pressure areas such as heels, elbows, buttocks, and hips indicates the need to reassess patient’s need for position changes.

Unilateral edema may indicate a local or peripheral cause, whereas bilateral-pitting edema usually indicates cardiac or kidney failure.

Check hair for the presence of lice and/or nits (eggs), which are oval in shape and adhere to the hair shaft.

3. Head and neck:
  • Inspect eyes for drainage.
  • Inspect eyes for pupillary reaction to light.
  • Inspect mouth, tongue, and teeth for moisture, colour, dentures.
  • Inspect for facial symmetry.
Check eyes for drainage, pupil size, and reaction to light. Drainage may indicate infection, allergy, or injury.

Slow pupillary reaction to light or unequal reactions bilaterally may indicate neurological impairment.

Check pupillary reaction to light

Dry mucous membranes indicate decreased hydration.

Facial asymmetry may indicate neurological impairment or injury. Unusual findings should be followed up with a focused neurological system assessment.

4. Chest:
  • Inspect:
    • Expansion/retraction of chest wall/work of breathing and/or accessory muscle use
    • Jugular distension
  • Auscultate:
    • For breath sounds anteriorly and posteriorly
    • Apices and bases for any adventitious sounds
    • Apical heart rate
  • Palpate:
    • For symmetrical lung expansion
Chest expansion may be asymmetrical with conditions such as atelectasis, pneumonia, fractured ribs, or pneumothorax.

Use of accessory muscles may indicate acute airway obstruction or massive atelectasis.

Jugular distension of more than 3 cm above the sternal angle while the patient is at 45º may indicate cardiac failure.

The presence of crackles or wheezing must be further assessed, documented, and reported. Unusual findings should be followed up with a focused respiratory assessment.

Auscultate anterior chest. Blue dots indicate stethoscope placement for auscultation
Auscultate anterior chest; blue dots indicate stethoscope placement for auscultation
Auscultate posterior chest. Blue dots indicate stethoscope placement for auscultation
Auscultate posterior chest; blue dots indicate stethoscope placement for auscultation
Auscultate apical pulse at the fifth intercostal space and midclavicular line

Note the heart rate and rhythm, identify S1 and S2, and follow up on any unusual findings with a focused cardiovascular assessment.

5. Abdomen:
  • Inspect:
    • Abdomen for distension, asymmetry
  • Auscultate:
    • Bowel sounds (RLQ)
  • Palpate:
    • Four quadrants for pain and bladder/bowel distension (light palpation only)
  • Check urine output for frequency, colour, odour.
  • Determine frequency and type of bowel movements.
Abdominal distension may indicate ascites associated with conditions such as heart failure, cirrhosis, and pancreatitis. Markedly visible peristalsis with abdominal distension may indicate intestinal obstruction.

Hyperactive bowel sounds may indicate bowel obstruction, gastroenteritis, or subsiding paralytic ileum.

Hypoactive or absent bowel sounds may be present after abdominal surgery, or with peritonitis or paralytic ileus.

Pain and tenderness may indicate underlying inflammatory conditions such as peritonitis.

Unusual findings in urine output may indicate compromised urinary function. Follow up with a focused gastrointestinal and genitourinary assessment.

Unusual findings with bowel movements should be followed up with a focused gastrointestinal and genitourinary assessment.

Auscultate abdomen
Auscultate abdomen

Palpate abdomen

6. Extremities:
  • Inspect:
    • Arms and legs for pain, deformity, edema, pressure areas, bruises
    • Compare bilaterally
  • Palpate:
    • Radial pulses
    • Pedal pulses: dorsalis pedis and posterior tibial
    • CWMS and capillary refill (hands and feet)
  • Assess handgrip strength and equality.
  • Assess dorsiflex and plantarflex feet against resistance (note strength and equality).
  • Check skin integrity and pressure areas.
Limitation in range of movement may indicate articular disease or injury.

Palpate pulses for symmetry in rate and rhythm. Asymmetry may indicate cardiovascular conditions or post-surgical complications.

Unequal handgrip and/or foot strength may indicate underlying conditions, injury, or post-surgical complications.

CWMS: colour, warmth, movement, and sensation of the hands and feet should be checked and compared to determine adequacy of perfusion.

Check skin integrity and pressure areas, and ensure follow-up and in-depth assessment of patient mobility and need for regular changes in position.

A person puts their hands on the top sides of a mannequin's feet.
Assess dorsiflexion
A person puts their hands on the bottom sides of a mannequin's feet.
Assess plantarflexion
Assess CWMS - colour, warmth, movement, and sensation
Assess CWMS – colour, warmth, movement, and sensation
Assess bilateral hand strength

Palpate and inspect capillary refill and report if more than 3 seconds.

Assess pedal pulses
Assess pedal pulses
Check capillary refill

To check capillary refill, depress the nail edge to cause blanching and then release. Colour should return to the nail instantly or in less than 3 seconds. If it takes longer, this suggests decreased peripheral perfusion and may indicate cardiovascular or respiratory dysfunction. Unusual findings should be followed up with a focused cardiovascular assessment.

Clubbing of nails, in which the nails present as straightened out to 180 degrees, with the nail base feeling spongy, occurs with heart disease, emphysema, and chronic bronchitis.

7. Back area (turn patient to side or ask to sit up or lean forward):
  • Inspect back and spine.
  • Inspect coccyx/buttocks.
Check for curvature or abnormalities in the spine.

Check skin integrity and pressure areas, and ensure follow-up and in-depth assessment of patient mobility and need for regular changes in position.

8. Tubes, drains, dressings, and IVs:
  • Inspect for drainage, position, and function.
  • Assess wounds for unusual drainage.
Note amount, colour, and consistency of drainage (e.g., Foley catheter), or if infusing as prescribed (e.g., intravenous).
Urinary catheter bag

Assess wounds for large amounts of drainage or for purulent drainage, and provide wound care as indicated.

9. Mobility: 
  • Check if full or partial weight-bearing.
  • Determine gait/balance.
  • Determine need for and use of assistive devices.
Assess patient’s risk for falls. Document and follow up any indication of falls risk. Note use of mobility aids and ensure they are available to the patient on ambulation.
Patient position prior to standing
10. Report and document assessment findings and related health problems according to agency policy. Accurate and timely documentation and reporting promote patient safety.
Data source: Assessment Skill Checklists, 2014; Jarvis et al., 2014; Stephen et al., 2012

Critical Thinking Exercises

  1. You are assessing a patient at the beginning of your shift. Which assessment would be the most appropriate?
  2. You come back from a break to find your patient complaining that she feels short of breath. Which assessment would be the most appropriate?

14

2.6 Initial and Emergency Assessment

The ABCCS assessment (airway, breathing, circulation, consciousness, safety) is the first assessment you will do when you meet your patient. This assessment is repeated whenever you suspect or recognize that your patient’s status has become, or is becoming, unstable.

For example, if you assess that your patient is short of breath (dyspneic) with an increased respiration rate (tachypneic), then you should proceed with an ABCCS assessment and a focused respiratory assessment with appropriate interventions.

The ABCCS assessment includes the steps in Checklist 18.

Checklist 18: Initial and Emergency Assessment
Disclaimer: Always review and follow your hospital policy regarding this specific skill.

Steps

 Additional Information

A – Airway
  • Is the patient’s airway compromised?
Does the patient’s position need to be changed?

If patient is choking on thick secretions, consider oral suctioning (check suction equipment).

B – Breathing
  • Assess rate and ease of breathing.
  • Assess the effectiveness of the oxygen delivery.
Is the oxygen flow connection intact? Is the rate, flow, and percentage as ordered?

Based on your assessment, consider the need for potential oxygen supplementation.

C – Circulation
  • Assess for the presence of a radial pulse.
  • Assess skin colour, moisture, and temperature for signs of decreased tissue perfusion (pale, dusky, cool, or clammy skin).
Note whether the pulse is too fast, too slow, or absent.

If a radial pulse is not detectable, check for a carotid pulse.

If no pulse is present, call for help and start CPR.

C – Consciousness
  • Check the patient’s level of consciousness (LOC).
Is the patient alert, drowsy, disoriented, restless, agitated, unconscious?

Note if there is a change from the patient’s normal or previously noted LOC.

S – Safety
  • Ensure the patient is safe and free from risk of harm or injury at all times.
Check for name band and allergy band.

Check oxygen saturation level.

Check that suction is working.

Check brakes on the bed, bedrail position (up, if required), bed is at the appropriate level, and call bell is within reach.

Are there any fall risk indicators?

Are there any dysphagia (difficulty swallowing) guidelines, or should there be some requested?

Report and document assessment findings and related health problems according to agency policy.
Data source: Assessment Skill Checklists, 2014

Critical Thinking Exercises

  1. Initial assessment of your patient reveals that the patient is having trouble speaking. What would be your next steps?
  2. What is included in the safety check on your unit? Is there anything that is not listed here?

15

2.7 Focused Assessments

Health care professionals do focused assessments in response to a specific patient health problem recognized by the assessor as needing further assessment of a body system or systems.

Focused Respiratory System Assessment

Respiratory System https://en.wikipedia.org/wiki/File:Respiratory_system_complete_en.svg
Figure 2.2 Respiratory system

A focused respiratory system assessment includes collecting subjective data about the patient’s history of smoking, collecting the patient’s and patient’s family’s history of pulmonary disease, and asking the patient about any signs and symptoms of pulmonary disease, such as cough and shortness of breath. Objective data is also assessed.

The focused respiratory system assessment in Checklist 19 outlines the process for gathering objective data.

Checklist 19: Focused Respiratory System Assessment
Disclaimer: Always review and follow your hospital policy regarding this specific skill.
Safety considerations:

Steps

Additional Information

1. Conduct a focused interview related to history of respiratory disease, smoking, and environmental exposures. Ask relevant questions related to dyspnea, cough/sputum, fever, chills, chest pain with breathing, previous history, treatment, medications, etc.
2. Inspect:
  • For use of accessory muscles and work of breathing
  • Configuration and symmetry of the chest
  • Respirations for rate (1 minute), depth, rhythm pattern
  • Skin colour of lips, face, hands, feet
  • O2 saturation with a pulse oximeter
Patients in respiratory distress may have an anxious expression, pursed lips, and/or nasal flaring.

Asymmetrical chest expansion may indicate conditions such as pneumothorax, rib fracture, severe pneumonia, or atelectasis.

assess respiration rate
Assess respiration rate

With hypoxemia, cyanosis of the extremities or around the mouth may be noted.

3. Auscultate (anterior and posterior) lungs for breath sounds and adventitious sounds.


Fine crackles (rales) may indicate asthma and chronic obstructive pulmonary disease (COPD).

Coarse crackles may indicate pulmonary edema.

Wheezing may indicate asthma, bronchitis, or emphysema.

Low-pitched wheezing (rhonchi) may indicate pneumonia.

Pleural friction rub (creaking) may indicate pleurisy.

Auscultate anterior chest. Blue dots indicate stethoscope placement for auscultation
Auscultate anterior chest; blue dots indicate stethoscope placement for auscultation
Auscultate posterior chest. Blue dots indicate stethoscope placement for auscultation
Auscultate posterior chest; blue dots indicate stethoscope placement for auscultation
4. Report and document assessment findings and related health problems according to agency policy. Accurate and timely documentation and reporting promote patient safety.
Data source: Assessment Skill Checklists, 2014; Jarvis et al., 2014; Perry et al., 2014; Stephen et al., 2012; Wilson & Giddens, 2013

Focused Cardiovascular and Peripheral Vascular System Assessment

Figure 2.3 Anatomy of the heart

The cardiovascular and peripheral vascular system affects the entire body. A cardiovascular and peripheral vascular system assessment includes collecting subjective data about the patient’s diet, nutrition, exercise, and stress levels; collecting the patient’s and the patient’s family’s history of cardiovascular disease; and asking the patient about any signs and symptoms of cardiovascular and peripheral vascular disease, such as peripheral edema, shortness of breath (dyspnea), and irregular pulse rate. Objective data is also assessed.

The focused cardiovascular and peripheral vascular system assessment in Checklist 20 outlines the process for gathering objective data.

Checklist 20: Focused Cardiovascular/Peripheral Vascular System Assessment
Disclaimer: Always review and follow your hospital policy regarding this specific skill.
Safety considerations: 

Steps

 Additional Information

1. Conduct a focused interview related to cardiovascular and peripheral vascular disease. Ask relevant questions related to chest pain/shortness of breath (dyspnea), edema, cough, fatigue, cardiac risk factors, leg pain, skin changes, swelling in limbs, history of past illnesses, history of diabetes, injury.
2. Inspect:
  • Face, lips, and ears for cyanosis
  • Chest for deformities, scars
  • Bilateral arms/hands, noting CWMS, edema, colour of nail beds, and capillary refill
  • Bilateral legs, noting CWMS, edema to lower legs and feet, presence of superficial distended veins, colour of nail beds, and capillary refill
  • calf size/pain for signs of DVT
Cyanosis is an indication of decreased perfusion and oxygenation.
Assess capillary refill
Assess bilateral lower legs

Alterations and bilateral inconsistencies in colour, warmth, movement, and sensation (CWMS) may indicate underlying conditions or injury.

Sudden onset of intense, sharp muscle pain that increases with dorsiflexion of foot is an indication of deep venous thrombosis (DVT), as is increased warmth, redness, tenderness, and swelling in the calf.

Note: DVT requires emergency referral because of the risk of developing a pulmonary embolism.

3. Auscultate apical pulse for one minute. Note the rate and rhythm. Note the heart rate and rhythm. Identify S1 and S2 and follow up on any unusual findings.
Auscultate apical pulse at the fifth intercostal space and midclavicular line
4. Palpate the radial, brachial, dorsalis pedis, and posterior tibialis pulses. Absence of pulse may indicate vessel constriction, possibly due to surgical procedures, injury, or obstruction.
Assess tibial pulses
Assess pedal pulses
Assess pedal pulses
5. Report and document assessment findings and related health problems according to agency policy. Accurate and timely documentation and reporting promote patient safety.
Data source: Assessment Skill Checklists, 2014; Jarvis et al., 2014; Perry et al., 2014; Stephen et al., 2012; Wilson & Giddens, 2013

Focused Gastrointestinal and Genitourinary Assessment

Figure 2.4 Gastrointestinal system
Figure 2.5 Components of the urinary system

The gastrointestinal and genitourinary system is responsible for the ingestion of food, the absorption of nutrients, and the elimination of waste products. A focused gastrointestinal and genitourinary assessment includes collecting subjective data about the patient’s diet and exercise levels, collecting the patient’s and the patient’s family’s history of gastrointestinal and genitourinary disease, and asking the patient about any signs and symptoms of gastrointestinal and genitourinary disease, such as abdominal pain, nausea, vomiting, bloating, constipation, diarrhea, and characteristics of urine and faeces. Objective data is also assessed.

The focused gastrointestinal and genitourinary assessment in Checklist 21 outlines the process for gathering objective data.

Checklist 21: Focused Gastrointestinal and Genitourinary Assessment
Disclaimer: Always review and follow your hospital policy regarding this specific skill.
Safety considerations: 

 Position patient supine if tolerated

Steps

 Additional Information

1. Conduct a focused interview related to gastrointestinal and genitourinary systems. Ask relevant questions related to the abdomen, urine output, last bowel movement, flatus, any changes, diet, nausea, vomiting, diarrhea.
2. Inspect:
  • Abdomen for distension, striae, scars, contour, and symmetry
  • Observe any abdominal movements associated with respiration, or any pulsations or peristaltic waves
Abdominal distension may indicate ascites associated with conditions such as heart failure, cirrhosis, and pancreatitis. Markedly visible peristalsis with abdominal distension may indicate intestinal obstruction.


3. Auscultate abdomen for bowel sounds in all four quadrants before palpation. Hyperactive bowel sounds may indicate bowel obstruction, gastroenteritis, or subsiding paralytic ileus.

Hypoactive or absent bowel sounds may be present after abdominal surgery, or with peritonitis or paralytic ileus.

Auscultate abdomen for bowel sounds in all four quadrants
4. Palpate abdomen lightly in all four quadrants. Palpate to detect presence of masses and distension of bowel and bladder.
Palpate abdomen lightly in all four quadrants

Pain and tenderness may indicate underlying inflammatory conditions such as peritonitis.

Note: If patient is wearing a brief, ensure it is clean and dry. Inspect skin underneath for signs of redness/rash/breakdown.
Note: If patient has a Foley catheter, inspect bag for urine amount, colour, and clarity. Inspect skin at insertion site for redness/breakdown.
5. Report and document assessment findings and related health problems according to agency policy.
Accurate and timely documentation and reporting promote patient safety.
Data source: Assessment Skill Checklists, 2014; Jarvis et al., 2014; Perry et al., 2014; Stephen et al., 2012; Wilson & Giddens, 2013

Focused Musculoskeletal System Assessment

Figure 2.6a Anterior view of muscles
Figure 2.6b Posterior view of muscles

A focused musculoskeletal assessment includes collecting subjective data about the patient’s mobility and exercise level, collecting the patient’s and the patient’s family’s history of musculoskeletal conditions, and asking the patient about any signs and symptoms of musculoskeletal injury or conditions. Objective data is also assessed.

The focused musculoskeletal assessment in Checklist 22 outlines the process for gathering objective data.

Checklist 22: Focused Musculoskeletal System Assessment
Disclaimer: Always review and follow your hospital policy regarding this specific skill.
Safety considerations: 

Steps

 Additional Information

1. Check patient information prior to assessment:
  • Activity order
  • Mobility status
  • Falls risk
  • Need for assistive devices
Determine patient’s activity as tolerated (AAT)/bed rest requirements.
Patient position prior to standing

Determine if patient has non-weight-bearing, partial, or full weight-bearing status.

Determine if patient ambulates independently, with one-person assist (PA), two-person assist (2PA), standby, or lift transfer.

Check alertness, medications, pain.

Ask if patient uses walker/cane/wheelchair/crutches.

Consider non-slip socks/hip protectors/bed-chair alarm.

2. Conduct a focused interview related to mobility and musculoskeletal system. Ask relevant questions related to the musculoskeletal system, including pain, function, mobility, and activity level (e.g., arthritis, joint problems, medications, etc.).
3. Inspect, palpate, and test muscle strength and range of motion:
  • Bilateral handgrip strength
  • Range of motion (ROM) of knees
  • Dorsi/plantar flexion

Evaluate client’s ability to sit up before standing, and to stand before walking, and then assess walking ability.

Note strength of handgrip and foot strength for equality bilaterally.
Assess strength on plantarflexion
Assess strength on plantar flexion
Assess strength on dorsiflexion
Assess grip strength

Note patient’s gait, balance, and presence of pain.

4. Report and document assessment findings and related health problems according to agency policy. Accurate and timely documentation and reporting promote patient safety.
Data source: Assessment Skill Checklists, 2014; Jarvis et al., 2014; Perry et al., 2014; Stephen et al., 2012; Wilson & Giddens, 2013

Video 2.1

Watch the video Assessing Range of Motion and Strength by Renée Anderson & Wendy McKenzie, Thompson Rivers University.

Focused Neurological System Assessment

Figure 2.7 Nervous system

The neurological system is responsible for all human function. It exerts unconscious control over basic body functions, and it also enables complex interactions with others and the environment (Stephen et al., 2012). A focused neurological assessment includes collecting subjective data about the patient’s history of head injury or dysfunction, collecting the patient’s and the patient’s family’s history of neurological disease, and asking the patient about signs and symptoms of neurological conditions, such as seizures, memory loss (amnesia), and visual disturbances. Objective data is also assessed.

The focused neurological assessment in Checklist 23 outlines the process for gathering objective data.

Checklist 23: Focused Neurological System Assessment
Disclaimer: Always review and follow your hospital policy regarding this specific skill.
Safety considerations: 

Steps

 Additional Information

1. Conduct a focused interview related to the neurological system. Ask relevant questions related to past or recent history of head injury, neurological illness, or symptoms, confusion, headache, vertigo, seizures, recent injury or fall, weakness, numbness, tingling, difficulty swallowing (dysphagia) or speaking (dysphasia), and lack of coordination of body movements.
Focused interview
Focused interview
2. Assess mental health status. Assess mental status by observing the patient’s appearance, attitude, activity (behaviour), mood and affect, and asking questions similar to those outlined in this example of a mini-mental state examination (MMSE).
3. Assess neurological function using the Glasgow Coma Scale (GCS):
  • Assess best eye-opening response.
  • Assess best motor response.
  • Assess best verbal response.
Best eye-opening response

Record “C” if eyes closed due to swelling.

Spontaneously 4
To speech 3
To pain 2
No response 1
Best motor response (to painful stimuli)
Press at fingernail bed and record best upper-limb response.
Obeys verbal command 6
Localizes pain 5
Flexion – withdrawal 4
Flexion – abnormal 3
Extension – abnormal 2
No response 1
Best verbal response
Record “E” if endotracheal tube is in place, and “T” if tracheostomy is in place.
Oriented x 3 (to person, time, and place) 5
Conversation – confused 4
Speech – inappropriate 3
Sounds – incomprehensible 2
No response 1
Glasgow Coma Scale adapted from Jarvis et al., 2014, p. 699.
4. Note patient’s LOC (level of consciousness, oriented x 3), general appearance, and behaviour. Note hygiene, grooming, speech patterns, facial expressions.
5. Assess pupils for size, equality, reaction to light (PERL), and consensual reaction to light. Unequal pupils may indicate underlying neurological disease or injury.
Assess pupillary reaction to light
6. Assess motor strength and sensation.
  • Arms and legs for strength (compare bilaterally)
  • Handgrips, drift
  • Extremities for sensation, numbness, tingling
Unequal motor strength and unusual sensation may indicate underlying neurological disease or injury, such as stroke or head injury.
Assess motor strength and sensation of extremities
7. Report and document assessment findings and related health problems according to agency policy. Accurate and timely documentation and reporting promote patient safety.
Data source: Assessment Skill Checklists, 2014; Jarvis et al., 2014; Perry et al., 2014; Stephen et al., 2012; Wilson & Giddens, 2013

Video 2.2

Watch the video Neurological Assessment (Basic) by Renée Anderson & Wendy McKenzie, Thompson Rivers University.

Critical Thinking Exercises

  1. Your patient complains of stomach pain during your head-to-toe assessment. What would be your next steps?
  2. You notice that your patient seems lethargic during your head-to-toe assessment. What would be your next steps?

Attributions

Figure 2.2
The respiratory system by LadyofHats is in the public domain.

Figure 2.3
Sectional anatomy of the heart by Blausen Medical Communications, Inc. is used under a CC BY 3.0 licence.

Figure 2.4
Digestive system diagram by Mariana Ruiz Villarreal is in the public domain.

Figure 2.5
Urinary system is in the public domain.

Figure 2.6
Anterior and posterior views of muscles by OpenStax College is used under a CC BY 3.0 licence.

Figure 2.7
Nervous system diagram by William Crochot is used under a CC BY SA 4.0 licence.

16

2.8 Summary

This chapter has outlined the different components of health assessment. Different assessments are done in different contexts and are dependent on the type of patient, health care professional, and environment.

The health assessment is an opportunity to develop a therapeutic relationship with the patient, optimize communication, promote health, and provide patient education as necessary. Throughout the assessment, be aware of ensuring patient safety, privacy, and dignity.

The assessment must always be documented according to the agency policy, and any unusual findings must be reported comprehensively, in conjunction with other pertinent findings, to appropriate members of the health care team.

Key Takeaways

  • Health assessment refers to a systematic method of collecting and analyzing data for the purpose of planning patient-centred care.
  • A pain assessment should be measured at the beginning of the physical assessment, and comfort measures taken as necessary.
  • Safety considerations should be followed throughout any physical assessment.
  • Components of health assessment include conducting a health history, performing a physical examination, and communicating and documenting the findings according to agency policy.
  • The amount of information gained during a health assessment depends on several factors, including the context of care, patient needs, and the health care professional.
  • The types of health assessments are head-to-toe, focused, initial, and emergency assessment.
  • The data collected during the health assessment is organized and interpreted to initiate or continue a plan of care.

Suggested Online Resources

  1. Auscultation Assistant, The. This website provides audio clips of heart murmurs and lung sounds.
  2. BC Patient Safety & Quality Council: 48/6 Model of care. This resource offers a model of care for hospitalized seniors (aged 70 and older) in British Columbia. It is an integrated care initiative that addresses six care areas of functioning through patient screening and assessment (assessments are completed only where screening shows areas of concern) within the first 48 hours of hospital admission.
  3. Canadian Patient Safety Institute (CPSI): The Canadian framework for teamwork and communication. This framework provides health care providers with techniques to improve teamwork and collaboration.
  4. Canadian Patient Safety Institute (CPSI): The safety competencies. Developed by the Safety Competencies Steering Committee of CPSI, this interprofessional patient safety framework identifies the knowledge, skills, and attitudes required by all health care professionals to practise safely.

References

Anderson, B., Nix, N., Norman, B., & McPike, H. D. (2014). An evidence based approach to undergraduate physical assessment practicum course development. Nurse Education in Practice, 14(3), 242-246.

Assessment Skill Checklists. (2014). Checklists from Nursing 1019: Clinical Techniques (BCIT BSN program course).

Jarvis, C., Browne, A. J., MacDonald-Jenkins, J., & Luctkar-Flude, M. (2014). Physical examination and health assessment. Toronto, ON: Elsevier-Saunders.

Perry, A., Potter, P., & Ostendorf, W. (2014). Clinical skills and nursing techniques (8th ed.). St Louis, MO: Elsevier-Mosby.

Rosdahl, C. B., & Kowalski, M. T. (2007). Textbook of basic nursing. Philadelphia, PA: Lippincott Williams & Wilkins.

Stephen, T. C., Skillen, D. L., Day, R. A., & Jensen, S. (2012). Canadian Jensen’s nursing health assessment: A best practice approach. Philadelphia, PA: Wolters Kluwer-Lippincott.

Wilson, S. F., & Giddens, J. F. (2013) Health assessment for nursing practice (5th ed.) St Louis, MO: Mosby.

III

Chapter 3. Safe Patient Handling, Positioning, and Transfers

17

3.1 Introduction

In health care, all patient-handling activities, such as positioning, transfers, and ambulation, are considered high risk for injury to patients and health care providers. This chapter reviews the essential guidelines for proper body mechanics and safe transfer techniques to minimize and eliminate injury in health care.

Learning Objectives

  • Describe body mechanics and principles of body mechanics
  • Define musculoskeletal injury (MSI), factors that contribute to an MSI, and ways to prevent an MSI
  • Describe how to complete a mobility assessment prior to positioning, transferring, or ambulating a patient
  • Describe various techniques for positioning a patient in bed and types of positions
  • Describe how to transfer a patient using assistive devices
  • Describe how to transfer a patient from a stretcher to a bed and from a wheelchair to a bed
  • Discuss how to prevent accidental falls in the acute and community setting

18

3.2 Body Mechanics

Body mechanics involves the coordinated effort of muscles, bones, and the nervous system to maintain balance, posture, and alignment during moving, transferring, and positioning patients. Proper body mechanics allows individuals to carry out activities without excessive use of energy, and helps prevent injuries for patients and health care providers (Perry, Potter, & Ostendorf, 2014).

Musculoskeletal Injuries

A musculoskeletal injury (MSI) is an injury or disorder of the muscles, tendons, ligaments, joints or nerves, blood vessels, or related soft tissue including a sprain, strain, or inflammation related to a work injury. MSIs are the most common health hazard for health care providers (WorkSafeBC, 2013). Table 3.1 lists risk factors that contribute to an MSI.

Table 3.1 Factors That Contribute to an MSI

Factor

Special Information

Ergonomic risk factors Repetitive or sustained awkward postures, repetition, or forceful exertion
Individual risk factors Poor work practice; poor overall health (smoking, drinking alcohol, and obesity); poor rest and recovery; poor fitness, hydration, and nutrition
Data source: Perry et al., 2014; Workers Compensation Board, 2001; WorkSafeBC, 2013

When health care providers are exposed to ergonomic risk factors, they become fatigued and risk musculoskeletal imbalance. Additional exposure related to individual risk factors puts health care providers at increased risk for an MSI (WorkSafeBC, 2013). Preventing an MSI is achieved by understanding the elements of body mechanics, applying the principles of body mechanics to all work-related activities, understanding how to assess a patient’s ability to position or transfer, and learning safe handling transfers and positioning techniques.

Elements of Body Mechanics

Body movement requires coordinated muscle activity and neurological integration. It involves the basic elements of body alignment (posture), balance, and coordinated movement. Body alignment and posture bring body parts into position to promote optimal balance and body function. When the body is well aligned, whether standing, sitting, or lying, the strain on the joints, muscles, tendons, and ligaments is minimized (WorkSafeBC, 2013).

Body alignment is achieved by placing one body part in line with another body part in a vertical or horizontal line. Correct alignment contributes to body balance and decreases strain on muscle-skeletal structures. Without this balance, the risk of falls and injuries increase. In the language of body mechanics, the centre of gravity is the centre of the weight of an object or person. A lower centre of gravity increases stability. This can be achieved by bending the knees and bringing the centre of gravity closer to the base of support, keeping the back straight. A wide base of support is the foundation for stability. A wide base of support is achieved by placing feet a comfortable, shoulder width distance apart. When a vertical line falls from the centre of gravity through the wide base of support, body balance is achieved. If the vertical line moves outside the base of support, the body will lose balance.

The diagram in Figure 3.1 demonstrates (A) a well-aligned person whose balance is maintained and whose line of gravity falls within the base of support. Diagram (B) demonstrates how balance is not maintained when the line of gravity falls outside the base of support, and diagram (C) shows how balance is regained when the line of gravity falls within the base of support.

Figure 3.1 Centre of gravity

Principles of Body Mechanics

Table 3.2 describes the principles of body mechanics that should be applied during all patient-handling activities.

Table 3.2 Principles of Body Mechanics
Action  Principle
Assess the environment. Assess the weight of the load before lifting and determine if assistance is required.
Plan the move. Plan the move; gather all supplies and clear the area of obstacles.
Avoid stretching and twisting. Avoid stretching, reaching, and twisting, which may place the line of gravity outside the base of support.
Ensure proper body stance. Keep stance (feet) shoulder-width apart.

Tighten abdominal, gluteal, and leg muscles in anticipation of the move.

Stand up straight to protect the back and provide balance.

Stand close to the object being moved. Place the weight of the object being moved close to your centre of gravity for balance.

Equilibrium is maintained as long as the line of gravity passes through its base of support.

Hold objects close to your centre of gravity
Face direction of the movement. Facing the direction prevents abnormal twisting of the spine.
Avoid lifting. Turning, rolling, pivoting, and leverage requires less work than lifting.

Do not lift if possible; use mechanical lifts as required.

Encourage the patient to help as much as possible.

Work at waist level. Keep all work at waist level to avoid stooping.

Raise the height of the bed or object if possible.

Do not bend at the waist.

Reduce friction between surfaces. Reduce friction between surfaces so that less force is required to move the patient.
Bend the knees. Bending the knees maintains your centre of gravity and lets the strong muscles of your legs do the lifting.
Push the object rather than pull it, and maintain continuous movement. It is easier to push an object than to pull it.

Less energy is required to keep an object moving than it is to stop and start it.

Use assistive devices. Use assistive devices (gait belt, slider boards, mechanical lifts) as required to position patients and transfer them from one surface to another.
Work with others. The person with the heaviest load should coordinate all the effort of the others involved in the handling technique.
Data source: Berman & Snyder, 2016; Perry et al., 2014; WorkSafeBC, 2013

Assistive Devices

An assistive device is an object or piece of equipment designed to help a patient with activities of daily living, such as a walker, cane, gait belt, or mechanical lift (WorkSafeBC, 2006). Table 3.3 lists some assistive devices found in the hospital and community setting.

Table 3.3 Assistive Devices
Type Definition
Gait belt or transfer belt Used to ensure a good grip on unstable patients. The device provides more stability when transferring patients. It is a 2-inch-wide (5 mm) belt, with or without handles, that is placed around a patient’s waist and fastened with Velcro. The gait belt must always be applied on top of clothing or gown to protect the patient’s skin. A gait belt can be used with patients in both one-person or two-person pivot transfer, or in transfer with a slider board.
Gait Belt
Gait belt
Slider board or transfer board
Slider board (red) on a stretcher
SliderBoard2 (1)
Placing a slider board (transfer board) under a patient

A slider board is used to transfer immobile patients from one surface to another while the patient is lying supine. The board allows health care providers to safely move immobile, bariatric, or complex patients.

Mechanical lift A mechanical lift is a hydraulic lift, usually attached to a ceiling, used to move patients who cannot bear weight, who are unpredictable or unreliable, or who have a medical condition that does not allow them to stand or assist with moving.
Mechanical lift
Mechanical lift
Data source: Perry et al., 2014; WorkSafeBC, 2006

Video 3.1

Watch the video How to use a Ceiling Lift by Renée Anderson & Wendy McKenzie, Thompson Rivers University.
Special considerations:

Critical Thinking Exercises

  1. How do body alignment and body balance contribute to proper body mechanics?
  2. John is asked to lift a heavy box from a table onto a trolley. Name five principles of body mechanics John can implement to prevent an MSI.

19

3.3 Patient Risk Assessment

To prevent and minimize MSI injuries related to patient handling activities, a risk assessment must be done to determine a patient’s ability to move, the need for assistance, and the most appropriate means of assistance (Provincial Health Services Authority [PHSA], 2010). There are four important areas to assess:

Checklist 24 outlines what to assess and how to assess a patient prior to positioning, ambulation, and transfers.

Checklist 24: Risk Assessment
Disclaimer: Always review and follow your hospital policy regarding this specific skill.
Safety considerations:
  • The assessment process should not override clinical judgment and patient-specific needs as determined by the health care team.
  • An assessment should be performed before each handling procedure.
  • Seek additional help if a procedure requires two or more persons.
  • Use assistive devices (gait belts, slider boards, pillows, etc.) to perform the procedure safely.
  • Assess the patient’s ability to tolerate the movement. Acute pain, shortness of breath, and inability to follow direction will place the health care provider and patient at risk for an injury.
  • Always consider the principles of proper body mechanics prior to any procedure, such as raising the head of bed and tucking elbows in to help prevent injuries.
  • Avoid lifting shoulders when positioning a patient.
  • Never lift a patient; always use a weight shift to perform the procedure.
  • When positioning a patient using a sheet, place palms of hands up. A palms-down technique increases risk for injury.
  • Vision and hearing loss and language barriers may increase risk for injury.

Steps

Additional Considerations

1. Assess your patient. There are three areas to assess:

1. Is the patient cooperative and able to follow directions?

Ask patient to squeeze your hands. Is the behaviour predictable (non-aggressive, fearful, or fatigued)? Is the patient able to follow directions with cues?

If yes, proceed to next question.

If no, use a mechanical lift for transfers and/or assistive devices for repositioning in bed if patient has some abilities.

2. Can the patient bear weight?

Ask patient to lift buttocks off the bed (also known as “bridging”) and hold the position for 5 seconds. The health care provider may give cues on how to lift buttocks off the bed.

Bridging hips strength test

After bridging, ask the patient to perform a straight leg raise by lifting one leg up off the bed and holding it for 5 seconds while the other leg is kept bent. Repeat with the opposite leg.

Leg lift strength test

If yes, proceed to next question.

If no, use an appropriate moving technique, such as a mechanical lift and/or assistive device, to transfer a non-weight-bearing patient.

3. Can the patient sit up on the side of the bed without support? Can the patient sit forward on a chair or the edge of the bed without support?

Sit unassisted on the bed

If yes, decide on the amount of assist required (minimum, moderate, or maximum) according to your agency policy.

If no, use a mechanical lift for transfers and/or an assistive device for repositioning if patient has some movement abilities.

2. Assess your environment. Is there adequate space?

Is available equipment in proper working order?

Have all hazards been removed?

3. Assess yourself and readiness to perform procedures. Complete all required training according to health agency regulations.

Wear non-slip footwear.

Maintain a neutral spine; do not twist or side bend, and use proper body mechanics when moving or positioning patients.

Designate a leader if working in a team to mobilize or position a patient.

Always use proper weight-shift techniques (side to side, front to back, and up and down).

4. Assess your work organization. Ensure adequate number of caregivers.

Ensure there is enough time to perform the procedure.

Take rest breaks and vary activities to promote optimal back health.

If patient is complex or bariatric, consult additional resources, seek assistance, and use assistive devices.

Data source: Interior Health, 2012; National Institute of Occupational Safety and Health, 2010; PHSA, 2010; WorkSafeBC, 2010

To help you assess and make decisions about moving a patient, refer to these two useful tools.

Read the Mobility Decision Support Tool PDF, which was provincially developed, to guide decision making about transfers and ambulation.
Watch the Assess Every Time video, which was developed by WorkSafeBC, to review the quick assessment as described in Checklist 24.

Critical Thinking Exercises

  1. A patient requires repositioning in bed. After your assessment, you determine the patient is cooperative and predictable, able to weight bear, but unable to sit up unassisted. What are your two options to reposition the patient?
  2. When assessing your abilities to perform a patient-handling procedure, what five things must you consider?
  3. Vision and hearing impairments, along with language barriers, are risk factors when performing patient-handling procedures. What additional risk factors should be considered?

20

3.4 Immobility and Assisting Patients

When patients are recovering from illness, they may require assistance to move around in bed, to transfer from bed to wheelchair, or to ambulate. Changing patient positions in bed and mobilization are also vital to prevent contractures from immobility, maintain muscle strength, prevent pressure ulcers, and help body systems function properly for optimal health and healing (Perry et al., 2014). The amount of assistance each patient will require depends on the patient’s previous health status, age, type of illness, and length of stay (Perry et al., 2014).

Types of Assistance

At times, patients are assessed and given a “level of assistance” required for transferring. This is most common in residential care settings. The level of assistance is based on the patient’s ability to transfer and stand. The terms describing different levels of assistance are used by health care providers to communicate with each other so everyone understands what type of assistance is required. The assistance needed is usually charted on the patient’s Kardex, above the head of the bed, and/or on the patient’s chart. Table 3.4 describes different types of assistance in the hospital and community setting.

Table 3.4 Level of Assistance
Level of Assistance Description
 Independent The patient is able to transfer independently and safely.
Standby supervision The patient requires no physical assistance but may require verbal reminder.

This type of patient may also be learning to transfer independently using a wheelchair, walker, or cane.

Minimal assist The patient is cooperative but needs minimal physical assistance with the transfer.
One-person standing pivot The patient can bear weight on one or both legs and is cooperative and predictable.

The patient also can sit with minimal support on the side of the bed.

Two-person standing pivot The patient can assist with weight bearing, but may be inconsistent.

The patient is cooperative and predictable.

One-person assist with transfer board The patient is cooperative, follows directions, and has good trunk control.

The patient can use their arms, but cannot bear weight on both legs.

Two-person assist with transfer board The patient is cooperative and can follow directions.

The patient can use their arms, but cannot bear weight on both legs. The patient does not have good trunk control.

The patient’s wheelchair has removable arms.

Mechanical stand The patient may have some ability to stand, but is unreliable.

The patient may be unpredictable (due to cognitive changes, medications).

The patient is a heavy two-person transfer and requires toileting or pericare.

The patient does not have severe limb contractures or injuries where movement is medically contraindicated (e.g., spinal injury).

Use of a mechanical lift.

Data source: Winnipeg Regional Health Authority (WRHA), 2008
Special considerations:

If the patient is cooperative, able to bear weight, and has some balance to sit (see Checklist 24: Risk Assessment), the health care provider must decide how much assistance the patient needs. Table 3.5 provides guidelines to consider.

Table 3.5 Assistance Required for Transfer

Assess

Description

Minimal

One-person transfer with gait belt

The patient is able to perform 75% of the required activity on their own.

Moderate

Two-person transfer with a gait belt, a stander, or a two-person transfer with a slide board and a gait belt

The patient is able to perform 50% of the required activity on their own.

Maximum

Stander or a two-person transfer with a slide board and gait belt

The patient is able to perform 25% of the required activity on their own.

 Data source: WRHA, 2008
Special considerations:

Critical Thinking Exercises

  1. A patient requires no assistance from the health care provider except for the occasional reminder to lift feet while walking. Is the patient’s level of assistance considered independent or a minimal assist?
  2. A patient is assessed as a one-person pivot. As the health care provider begins the transfer, the patient suddenly becomes uncooperative. What should the health care provider do next?

21

3.5 Positioning Patients in Bed

Positioning a patient in bed is important for maintaining alignment and for preventing bed sores (pressure ulcers), foot drop, and contractures (Perry et al., 2014). Proper positioning is also vital for providing comfort for patients who are bedridden or have decreased mobility related to a medical condition or treatment. When positioning a patient in bed, supportive devices such as pillows, rolls, and blankets, along with repositioning, can aid in providing comfort and safety (Perry et al., 2014).

Patient Positions in Bed

Positioning a patient in bed is a common procedure in the hospital. There are various positions possible for patients in bed, which may be determined by their condition, preference, or treatment related to an illness. Table 3.6 lists patient positions in bed.

Table 3.6 Patient Positions in Bed

Position

Description

Supine position Patient lies flat on back. Additional supportive devices may be added for comfort.
Supine
Supine position
Prone position Patient lies on stomach with head turned to the side.
Prone
Prone position
Lateral position Patient lies on the side of the body with the top leg over the bottom leg. This position helps relieve pressure on the coccyx.
Lateral
Lateral position
Sims position Patient lies between supine and prone with legs flexed in front of the patient. Arms should be comfortably placed beside the patient, not underneath.
Sims
Sims position
Fowler’s position Patient’s head of bed is placed at a 45-degree angle. Hips may or may not be flexed. This is a common position to provide patient comfort and care.
High fowlers
Fowler’s position
Semi-Fowler’s position Patient’s head of bed is placed at a 30-degree angle. This position is used for patients who have cardiac or respiratory conditions, and for patients with a nasogastric tube.
Semi- fowlers
Semi-Fowler’s position
Orthopneic or tripod position Patient sits at the side of the bed with head resting on an over-bed table on top of several pillows. This position is used for patients with breathing difficulties.
Trendelenburg position Place the head of the bed lower than the feet. This position is used in situations such as hypotension and medical emergencies. It helps promote venous return to major organs such as the head and heart.
Trendelenberg position
Trendelenburg position
Data source: ATI, 2015a; Perry et al., 2014; Potter et al., 2011

Moving a Patient up in Bed

When moving a patient in bed, perform a patient risk assessment prior to the procedure to determine the level of assistance needed for optimal patient care. If a patient is unable to assist with repositioning in bed, follow agency policy regarding “no patient lifts” and the use of mechanical lifts for complex and bariatric patients. See Checklist 25 for the steps to move a patient up in bed.

Checklist 25: Moving a Patient Up in Bed
Disclaimer: Always review and follow your hospital policy regarding this specific skill.
Safety considerations: 
  • Perform hand hygiene.
  • Check room for contact precautions.
  • Introduce yourself to patient.
  • Confirm patient ID using two patient identifiers (e.g., name and date of birth).
  • Listen and attend to patient cues.
  • Ensure patient’s privacy and dignity.
  • Assess ABCCS/suction/oxygen/safety.
  • Ensure tubes and attachments are properly placed prior to the procedure to prevent accidental removal.
  • Ensure patient has a draw sheet or a friction-reducing sheet on the bed prior to repositioning.

Steps

 Additional Information

1. Make sure an additional health care provider is available to help with the move.

This procedure requires two health care providers.

2. Explain to the patient what will happen and how the patient can help.

Doing this provides the patient with an opportunity to ask questions and help with the positioning.

3. Complete risk assessment (Checklist 24) of patient’s ability to help with the positioning.

This step prevents injury to patient and health care provider.

4. Raise bed to safe working height and ensure that brakes are applied. Health care providers stand on each side of the bed.

Principles of proper body mechanics help prevent MSI.

Safe working height is at waist level for the shortest health care provider.

Bed at waist level
Bed at waist level

5. Lay patient supine; place pillow at the head of the bed and against the headboard.

This step protects the head from accidentally hitting the headboard during repositioning.

6. Stand between shoulders and hips of patient, feet shoulder width apart. Weight will be shifted from back foot to front foot.

This keeps the heaviest part of the patient closest to the centre of gravity of the health care providers.
Feet shoulder width apart

7. Fan-fold the draw sheet toward the patient with palms facing up.

This provides a strong grip to move the patient up using the draw sheet.
Fold sheet with fingers upwards
Fold sheet with fingers facing upward

8. Ask patient to tilt head toward chest, fold arms across chest, and bend knees to assist with the movement. Let the patient know when the move will happen.

This step prevents injury from patient and prepares patient for the move.
Chin tucked in and arms across chest

9. Tighten your gluteal and abdominal muscles, bend your knees, and keep back straight and neutral.

The principles of proper body mechanics help prevent injury.

10. On the count of three by the lead person, gently slide (not lift) the patient up the bed, shifting your weight from the back foot to the front, keeping back straight with knees slightly bent.

The principles of proper body mechanics help prevent injury.

Facing direction of movement

11. Replace pillow under head, position patient in bed, and cover with sheets.

This step promotes comfort and prevents harm to patient.

12. Lower bed, raise side rails as required, and ensure call bell is within reach. Perform hand hygiene.

Placing bed and side rails in safe positions reduces the likelihood of injury to patient. Proper placement of call bell facilitates patient’s ability to ask for assistance.
Bed in lowest position, side rail up, call bell within reach

Hand hygiene reduces the spread of microorganisms.

Data source: Perry et al., 2014; PHSA, 2010

Watch these three videos for more information about how to move a patient up in bed.

Take this Repositioning a Patient in Bed, Caregivers at Head course to learn how to move a patient up in bed, with caregivers at the head of the bed.
Take this Repositioning a Patient in Bed, Caregivers Facing Each Other course to learn how to move a patient up in bed, with the caregivers facing each other.
Take this Repositioning a Patient in Bed, Diagonal Technique course to learn how to move a patient up in bed, with the caregivers standing positioned diagonally.

Positioning a Patient to the Side of the Bed

Prior to ambulating, repositioning, or transferring a patient from one surface to another (e.g., a stretcher to a bed), it may be necessary to move the patient to the side of the bed to avoid straining or excessive reaching by the health care provider. Positioning the patient to the side of the bed also allows the health care provider to have the patient as close as possible to the health care provider’s centre of gravity for optimal balance during patient handling. Checklist 26 describes how to safely move a patient to the side of the bed.

Checklist 26: Positioning a Patient to the Side of the Bed
Disclaimer: Always review and follow your hospital policy regarding this specific skill.
Safety considerations: 
  • Perform hand hygiene.
  • Check room for contact precautions.
  • Introduce yourself to patient.
  • Confirm patient ID using two patient identifiers (e.g., name and date of birth).
  • Listen and attend to patient cues.
  • Ensure patient’s privacy and dignity.
  • Assess ABCCS/suction/oxygen/safety.
  • Ensure tubes and attachments are properly placed prior to the procedure to prevent accidental removal.
  • Ensure patient has a draw sheet or a friction-reducing sheet on the bed prior to repositioning.

Steps

 Additional Information

1. Make sure you have as many additional health care providers as needed to help with the move.

The procedure works best with two or more health care providers, depending on the size of the patient and the size of the health care professional.

2. Explain to the patient what will happen and how the patient can help.

This provides the patient with an opportunity to ask questions and help with the positioning.

3. Raise bed to safe working height and ensure that brakes are applied. Lay patient supine.

Principles of proper body mechanics help prevent MSI.

Safe working height is at waist level for the shortest health care provider.

4. Stand on the side of the bed the patient is moving toward.

One person stands at the shoulder area and the other person stands near the hip area, with feet shoulder width apart.

This step keeps the heaviest part of the patient closest to the centre of gravity of the health care providers.
Keep heaviest part of the patient closest to your center of gravity

5. Fan-fold the draw sheet toward the patient with palms facing up.

Fold sheet with fingers upwards
Fold sheet with fingers facing upward

6. Have the health care provider at the head of the bed grasp the pillow with one hand and the draw sheet with the other hand.

This prevents injury to patient.
Oct 2, 2015 035
Grasp the pillow with one hand and the draw sheet with the other

7. Have patient place arms across chest.

This step prevents injury to patient.
Chin tucked in and arms across chest

8. Tighten your gluteal and abdominal muscles, bend your knees, and keep back straight and neutral. Place one foot in front of the other. The weight will shift from the front foot to the back during the move.

Use of proper body mechanics helps prevent injury when handling patients.


9. On the count of three by the lead person, with arms tight and shoulders down, shift your weight from the front foot to the back foot. Use your large leg muscles to move the patient. Do not lift, but gently slide the patient.

Weight on front leg
Start move with weight on front foot
Shift weight to back foot

If the patient is bariatric, the move should be repeated to correctly position the patient, or use a mechanical lift.

10. Once patient is positioned toward the side of the bed, ensure pillow is comfortable under the head, and straighten sheets. Complete all other procedures related to safe patient handling.

This step promotes comfort and prevents harm to patient.
Raise side rails
Raise side rails

11. Lower bed, raise side rails as required, and ensure call bell is within reach. Perform hand hygiene.

Placing bed and side rails in safe positions reduces the likelihood of injury to patient. Proper placement of call bell facilitates patient’s ability to ask for assistance.
Bed in lowest position, side rail up, call bell within reach

Hand hygiene reduces the spread of microorganisms.

Data source: Perry et al., 2014; PHSA, 2010
Take this Repositioning a Patient to One Side of the Bed course to learn how to position a patient to one side of the bed.

Critical Thinking Exercises

  1. Name five body mechanic principles that should be used when moving a patient up in bed.
  2. A health care provider completes a risk assessment for a patient and determines the patient is unable to assist with repositioning. What should the health care provider do next?
  3. Your patient is experiencing shortness of breath related to heart failure. Which position in bed is best for this condition?

22

3.6 Assisting a Patient to a Sitting Position and Ambulation

Immobility in hospitalized patients is known to cause functional decline and complications affecting the respiratory, cardiovascular, gastrointestinal, integumentary, musculoskeletal, and renal systems (Kalisch, Lee, & Dabney, 2013). For surgical patients, early ambulation is the most significant factor in preventing complications (Sanguinetti, Wild, & Fain, 2014). Lack of mobility and ambulation can be especially devastating to the older adult when the aging process causes a more rapid decline in function (Graf, 2006). Ambulation provides not only improved physical function, but also improved emotional and social well-being (Kalisch et al., 2013).

Prior to assisting a patient to ambulate, it is important to perform a patient risk assessment to determine how much assistance will be required. An assessment can evaluate a patient’s muscle strength, activity tolerance, and ability to move, as well as the need to use assistive devices or find additional help. The amount of assistance will depend on the patient’s condition, length of stay and procedure, and any previous mobility restrictions.

Assisting Patient to the Sitting Position

Patients who have been immobile for a long period of time may experience vertigo, a sensation of dizziness, and orthostatic hypotension, a form of low blood pressure that occurs when changing position from lying down to sitting, making the patient feel dizzy, faint, or lightheaded (Potter, Perry, Ross-Kerr, & Wood, 2010). For this reason, always begin the ambulation process by sitting the patient on the side of the bed for a few minutes with legs dangling. Checklist 27 outlines the steps to positioning the patient on the side of a bed prior to ambulation (Perry, et al., 2014).

Checklist 27: Assisting a Patient to a Sitting Position
Disclaimer: Always review and follow your hospital policy regarding this specific skill.
Safety considerations: 
  • Perform hand hygiene.
  • Check room for additional precautions.
  • Introduce yourself to patient.
  • Confirm patient ID using two patient identifiers (e.g., name and date of birth).
  • Listen and attend to patient cues.
  • Ensure patient’s privacy and dignity.
  • Assess ABCCS/suction/oxygen/safety.
  • Ensure tubes and attachments are properly placed prior to the procedure to prevent accidental removal.
  • Follow the principles of proper body mechanics with all patient-handling procedures

Steps

Additional Information

1. Check physician’s order to ambulate and supplies for ambulation if required, and perform an assessment of patient’s strength and abilities.

Check physician orders for any restrictions related to ambulation due to medical treatment or surgical procedure.

Supplies (proper footwear, gait belt, or assistive devices) must be gathered prior to ambulation. Do not leave patient sitting on the side of the bed unsupervised as this poses a safety risk.
2. Explain what will happen and let the patient know how they can help. This step provides the patient with an opportunity to ask questions and help with the positioning.
3. Lower bed and ensure brakes are applied. This prepares the work environment.
4. Stand facing the head of the bed at a 45-degree angle with your feet apart, with one foot in front of the other. Stand next to the waist of the patient. Proper positioning helps prevent back injuries and provides support and balance.
5. Have patient turn onto side, facing toward the caregiver. Assist patient to move close to the edge of the bed. This step prepares the patient to be moved.
Positioning patient on the side of the bed
6. Place one hand behind patient’s shoulders, supporting the neck and vertebrae. This provides support for the patient.
7. On the count of three, instruct the patient to use their elbows to push up on the bed and then grasp the side rails, as you support the shoulders as the patient sits up. Shift weight from the front foot to the back foot. Do not allow the patient to place their arms around your shoulders. This action can lead to serious back injuries.
8. At the same time as you’re shifting your weight, gently grasp the patient’s outer thighs with your other hand and help the patient slide their feet off the bed to dangle or touch the floor. This step helps the patient sit up and move legs off the bed at the same time.
Assisting patient into a sitting position

9. Bend your knees and keep back straight and neutral.

Use of proper body mechanics helps prevent injury when handling patients.

10. On the count of three, gently raise the patient to sitting position. Ask patient to push against bed with the arm closest to the bed, at the same time as you shift your weight from the front foot to the back foot.

This allows the patient to help with the process and prevents injury to the health care provider.
Assist into a sitting position

11. Assess patient for orthostatic hypotension or vertigo.

If patient is not dizzy or lightheaded, the patient is safe to ambulate.

If patient becomes dizzy or faint, lay patient back down on bed.

12. Continue with mobilization procedures as required.

Mobilization helps prevent complications and improves physical function in hospitalized patients.
Data source: ATI, 2015b; Interior Health, 2013; Perry et al., 2014; PHSA, 2010

Video 3.2

Watch the video Sit to Stand Mechanical Assist by Renée Anderson & Wendy McKenzie, Thompson Rivers University.

Ambulating a Patient

Ambulation is defined as moving a patient from one place to another (Potter et al., 2010). Once a patient is assessed as safe to ambulate, determine if assistance from additional health care providers or assistive devices is required. Checklist 28 reviews the steps to ambulating a patient with and without a gait belt.

Checklist 28: Ambulating a Patient
Disclaimer: Always review and follow your hospital policy regarding this specific skill.
Safety considerations: 
  • Perform hand hygiene.
  • Check room for additional precautions.
  • Introduce yourself to patient.
  • Confirm patient ID using two patient identifiers (e.g., name and date of birth).
  • Listen and attend to patient cues.
  • Ensure patient’s privacy and dignity.
  • Assess ABCCS/suction/oxygen/safety.
  • Ensure tubes and attachments are properly placed prior to the procedure to prevent accidental removal.
  • Bring in required assistive devices and proper footwear.

Steps

Additional Information

1. Ensure patient does not feel dizzy or lightheaded and is tolerating the upright position.

Instruct the patient to sit on the side of the bed first, prior to ambulation.

Ensure proper footwear is on patient, and let patient know how far you will be ambulating. Proper footwear is non-slip or slip resistant footwear. Socks are not considered proper footwear.

Check physician’s orders for any activity restrictions related to treatment or surgical procedures.

Proper footwear is essential to prevent accidental falls.
Footwear
Footwear
2. Apply gait belt snugly around the patient’s waist if required.
Assessment and instructions prior to ambulation

Gait belts are applied over clothing.

Apply gait belt over clothing
Sept 22, 2015 121-001
Gait belt should be snug, not tight
3. Assist patient by standing in front of the patient, grasping each side of the gait belt, keeping back straight and knees bent. The patient should be cooperative and predictable, able to bear weight on own legs and to have good trunk control. Apply gait belt if required for additional support.
4. While holding the belt, gently rock back and forth three times. On the third time, pull patient into a standing position. This action provides momentum to help patient into a standing position.
Rock back and forth to provide momentum
Pulled to a standing position
5. Once patient is standing and feels stable, move to the unaffected side and grasp the gait belt in the middle of the back. With the other hand, hold the patient’s hand closest to you.

If the patient does not require a gait belt, place hand closest to the patient around the upper arm and hold the patient’s hand with your other hand.

Standing to the side of the patient provides assistance without blocking the patient.
Assisting ambulation with a gait belt
6. Before stepping away from the bed, ask the patient if they feel dizzy or lightheaded. If they do, sit patient back down on the bed.

If patient feels stable, begin walking, matching your steps to the patient’s. Instruct patient to look ahead and lift each foot off the ground.

Always perform a risk assessment prior to ambulation.

Walk only as far as the patient can tolerate without feeling dizzy or weak.

Ask patient how they feel during ambulation.

7. To help a patient back to bed, have patient stand with back of knees touching the bed. Grasp the gait belt and help patient into a sitting position, keeping your back straight and knees bent. Allowing a patient to rest after ambulation helps prevent fatigue.
8. When patient is finished ambulating, remove gait belt and settle patient into bed or a chair. This provides a safe place for the patient to rest.
Apply gait belt over clothing
Remove gait belt
9. When patient returns to bed, place the bed in lowest position, raise side rails as required, and ensure call bell is within reach. Perform hand hygiene. Placing bed and side rails in a safe position reduces the likelihood of injury to patient. Proper placement of call bell facilitates patient’s ability to ask for assistance.
Bed in the lowest position, call bell in reach, and side rail up

Hand hygiene reduces the spread of microorganisms.

10. Document patient’s ability to tolerate ambulation and type of assistance required. This provides a baseline of patient’s abilities and promotes clear communication between health care providers.
Data source: ATI, 2015b; Interior Health, 2013; Perry et al., 2014; PHSA, 2010

Video 3.3

Watch the video How to Ambulate With or Without a Gait Belt or Transfer Belt by Kim Morris, Thompson Rivers University.

Video 3.4

Watch the video How to Ambulate with a Cane by Kim Morris of Thompson Rivers University.

Video 3.5

Watch a video How to Ambulate With Crutches by Kim Morris, Thompson Rivers University.

Critical Thinking Exercises

  1. A 90-year-old male patient is required to ambulate. He had a total hip arthroplasty and is post-operative day 3 (POD 3). What risk factors should be considered prior to ambulating an elderly patient who has been immobile after hip surgery?
  2. Does ambulation require a physician’s order?
  3. What should you do if a patient feels dizzy or lightheaded before ambulation?

23

3.7 Patient Transfers

Transfers are defined as moving a patient from one flat surface to another, such as from a bed to a stretcher (Perry et al., 2014). Types of hospital transfers include bed to stretcher, bed to wheelchair, wheelchair to chair, and wheelchair to toilet, and vice versa.

Patient Transfer from Bed to Stretcher

A bed to stretcher transfer requires a minimum of three to four people, depending on the size of the patient and the size and strength of the health care providers. Patients who require this type of transfer are generally immobile or acutely ill and may be unable to assist with the transfer. Checklist 29 shows the steps for moving patients laterally from one surface to another.

Checklist 29: Moving a Patient from Bed to Stretcher
Disclaimer: Always review and follow your hospital policy regarding this specific skill.
Safety considerations: 
  • Perform hand hygiene.
  • Check room for additional precautions.
  • Introduce yourself to patient.
  • Confirm patient ID using two patient identifiers (e.g., name and date of birth).
  • Listen and attend to patient cues.
  • Ensure patient’s privacy and dignity.
  • Assess ABCCS/suction/oxygen/safety.
  • Ensure tubes and attachments are properly placed prior to the procedure to prevent accidental removal.
  • A slider board and full-size sheet or friction-reducing sheet is required for the transfer.

Steps

 Additional Information

1. Always predetermine the number of staff required to safely transfer a patient horizontally.

Three to four health care providers are required for the transfer.

2. Explain what will happen and how the patient can help (tuck chin in, keep hands on chest).

Collect supplies.

This step provides the patient with an opportunity to ask questions and help with the transfer.

Slider board (red) on a stretcher
Stretcher and slider board
Chin tucked in and arms across chest

3. Raise bed to safe working height. Lower head of bed and side rails.

Position the patient closest to the side of the bed where the stretcher will be placed.

Safe working height is at waist level for the shortest health care provider.

The patient must be positioned correctly prior to the transfer to avoid straining and reaching.

May need additional health care providers to move patient to the side of the bed.

4. Roll patient over and place slider board halfway under the patient, forming a bridge between the bed and the stretcher.

Place sheet on top of the slider board. The sheet is used to slide patient over to the stretcher.

The patient is returned to the supine position.

Patient’s feet are positioned on the slider board.

The slider board must be positioned as a bridge between both surfaces.

The sheet must be between the patient and the slider board to decrease friction between patient and board.

Placing slider board
Place slider board

Ensure all tubes and attachments are out of the way.

5. Position stretcher beside the bed on the side closest to the patient, with stretcher slightly lower. Apply brakes.

Two health care providers climb onto the stretcher and grasp the sheet. The lead person is at the head of the bed and will grasp the pillow and sheet. The other health care provider is positioned on the far side of the bed, between the chest and hips of the patient, and will grasp the sheet with palms facing up.

The two caregivers on the stretcher grasp the draw sheet using a palms up technique, sitting up tall, and keeping their elbows close to their body and backs straight.

The position of the health care providers keeps the heaviest part of the patient near the health care providers’ centre of gravity for stability.
Caregiver at the head of the bed

6. The caregiver on the other side of the bed places his or her hands under the patient’s hip and shoulder area with forearms resting on bed.


7. The designated leader will count 1, 2, 3, and start the move.

The person on the far side of the bed will push patient just to arm’s length using a back-to-front weight shift.

At the same time, the two caregivers on the stretcher will move from a sitting-up-tall position to sitting on their heels, shifting their weight from the front leg to the back, bringing the patient with them using the sheet.

Coordinating the move between health care providers prevents injury while transferring patients.

Using a weight shift from front to back uses the legs to minimize effort when moving a patient.

8. The two caregivers will climb off the stretcher and stand at the side and grasp the sheet, keeping elbows tucked in.

One of the two caregivers should be in line with the patient’s shoulders and the other should be at the hip area.

On the count of three, with back straight and knees bent, the two caregivers use a front-to-back weight shift and slide the patient into the middle of the bed.

The step allows the patient to be properly positioned in the bed and prevents back injury to health care providers.

Caregiver at the head of the bed
Weight on front leg
Weight on front leg
Shift weight to back foot

9. At the same time, the caregiver on the other side slides the slider board out from under the patient.

This step allows the patient to lie flat on the bed.

10. Replace pillow under head, ensure patient is comfortable, and cover the patient with sheets.

This promotes comfort and prevents harm to patient.

11. Lower bed and lock brakes, raise side rails as required, and ensure call bell is within reach.

Perform hand hygiene.

Placing bed and side rails in a safe position reduces the likelihood of injury to patient. Proper placement of call bell facilitates patient’s ability to ask for assistance.
Bed in lowest position, side rail up, call bell within reach

Hand hygiene reduces the spread of microorganisms.

Hand hygiene with ABHR
Data source: ATI, 2015c; Perry et al., 2014; PHSA, 2010
Take this Lateral Transfer Sliding Board course for more information on sliding board transfer.

Transfer from Bed to Wheelchair

Patients often need assistance when moving from a bed to a wheelchair. A patient must be cooperative and predictable, able to bear weight on both legs and take small steps. If any of these criteria are not met, a two-person transfer or mechanical lift is recommended. Always complete a patient risk assessment prior to all patient-handling activities. See Checklist 30 for the steps to transfer a patient from the bed to the wheelchair (PHSA, 2010).

Checklist 30: Bed to Wheelchair Transfer
Disclaimer: Always review and follow your hospital policy regarding this specific skill.
Safety considerations: 
  • Check room for additional precautions.
  • Introduce yourself to patient.
  • Confirm patient ID using two patient identifiers (e.g., name and date of birth).
  • Listen and attend to patient cues.
  • Ensure patient’s privacy and dignity.
  • Assess ABCCS/suction/oxygen/safety.
  • Ensure tubes and attachments are properly placed prior to the procedure to prevent accidental removal.
  • A gait belt and wheelchair are required.

Steps

 Additional Information

1. One health care provider is required.

The patient should be assessed as a 1-person assist.

2. Perform hand hygiene. Explain what will happen during the transfer and how the patient can help.

Apply proper footwear prior to ambulation

This step provides the patient with an opportunity to ask questions and help with the positioning.

Explain procedure to patient
Proper Footwear
Proper footwear

3. Lower the bed and ensure that brakes are applied.

Place the wheelchair next to the bed at a 45-degree angle and apply brakes. If a patient has weakness on one side, place the wheelchair on the strong side.

Ensure brakes are applied on the wheelchair.
Wheelchair with one leg rest removed

4. Sit patient on the side of the bed with his or her feet on the floor. Apply the gait belt snugly around the waist (if required).

Place hands on waist to assist into a standing position

The patient’s feet should be in between the health care provider’s feet.

Patient position prior to standing

5. As the patient leans forward, grasp the gait belt (if required) on the side the patient, with your arms outside the patient’s arms. Position your legs on the outside of the patient’s legs. The patient’s feet should be flat on the floor.

Rock back and forth to provide momentum
Assist to a standing position using a gait belt

6. Count to three and, using a rocking motion, help the patient stand by shifting weight from the front foot to the back foot, keeping elbows in and back straight.

Assist to standing position
Weight shift to back leg by health care provider

7. Once standing, have the patient take a few steps back until they can feel the wheelchair on the back of their legs. Have patient grasp the arm of the wheelchair and lean forward slightly.

Ensure the patient can feel the wheelchair on the back of the legs prior to sitting down.
Assist into the wheelchair

8. As the patient sits down, shift your weight from back to front with bent knees, with trunk straight and elbows slightly bent. Allow patient to sit in wheelchair slowly, using armrests for support.

This allows the patient to be properly positioned in the chair and prevents back injury to health care providers.

Transferred to wheelchair
Transfer to wheelchair
 Data source: ATI, 2015b; Perry et al., 2014; PHSA, 2010
Special considerations:

Video 3.6

Watch the video Assisting from Bed to Chair with a Gait Belt or Transfer Belt by Kim Morris, Thompson Rivers University.
Take this Standing Step Around Transfer course to learn the method for a bed to wheelchair transfer.

Critical Thinking Exercises

  1. Prior to moving the patient, where should the patient’s feet be placed?
  2. As you start to stand your patient, the patient gently places his arms around your neck. How do you proceed?

24

3.8 Fall Prevention

Patient falls are the most reported patient safety events in British Columbia and account for 40% of all adverse events (BCPSLS, 2015). Falls are a major priority in health care, and health care providers are responsible for identifying, managing, and eliminating potential hazards to patients. All patient-handling activities (positioning, transfers, and ambulation) pose a risk to patients and health care providers. Older adults may be at increased risk for falls due to impaired mental status, decreased strength, impaired balance and mobility, and decreased sensory perception (Titler, Shever, Kanak, Picone, & Qin, 2011). Other patients may be at risk due to gait problems, cognitive ability, visual problems, urinary frequency, generalized weakness, and cognitive dysfunction. Specific treatments and medications may cause hypotension or drowsiness, which increase a patient’s risk for falls (Hook & Winchel, 2006).

Fall Prevention Strategies

All clients should be assessed for risk factors, and necessary prevention measures should be implemented as per agency policy. Table 3.7 lists factors that affect patient safety and general measures to prevent falls in health care.

Table 3.7 Fall Prevention Strategies
Prior to ambulation consider the following risk factors:
  • Age (elderly)
  • Sensory-perception alteration
  • Cognitive impairment (decreased LOC, confusion)
  • Poly-pharmacology
  • Urinary incontinence
  • Ability to communicate (language barriers)
  • Lack of safety awareness (height of bed, attachments and tubes)
  • Environmental factors (dim light, tripping hazards, uneven floors)

Prevention Strategies

Safety Measures

Look for fall risk factors in all patients. Identifying specific factors helps you implement specific preventive measures. Risk factors include age, weakness on one side, the use of a cane or walker, history of dizziness or lightheadedness, low blood pressure, and weakness.
Follow hospital guidelines for transfers. Transfer guidelines provide a good baseline for further patient risk assessments.
Orient patient to surroundings. Orient patients to bed, surroundings, location of bathroom and call bell, and tripping hazards in the surrounding environment.
Answer call bells promptly. Long wait times may encourage unstable patients to ambulate independently.
Ensure basic elimination and personal needs are met. Provide opportunities for patients to use the bathroom and to ask for water, pain medication, or a blanket.
Ensure patient has proper footwear and mobility aids. Proper footwear prevents slips.
Proper Footwear
Proper Footwear
Communicate with your patients. Let patients know when you will be back, and how you will help them ambulate
Keep bed in the lowest position for sedated, unconscious, or compromised patients. This step prevents injury to patients.
Avoid using side rails when a patient is confused. Side rails may create a barrier that can be easily climbed and create a fall risk situation for confused patients.
Keep assistive devices and other commonly used items close by. Allow patients to access assistive devices quickly and safely. Items such as the call bell, water, and Kleenex should be kept close by, to avoid any excessive reaching.
Data source: Accreditation Canada, 2014; Canadian Patient Safety Institute, 2015; Perry et al., 2014; Titler et al., 2011

Lowering a Patient to the Floor

A patient may fall while ambulating or being transferred from one surface to another. If a patient begins to fall from a standing position, do not attempt to stop the fall or catch the patient. Instead, control the fall by lowering the patient to the floor. Checklist 31 lists the steps to assisting a patient to the floor to minimize injury to patient and health care provider (PHSA, 2010).

Checklist 31: Lowering a Patient to the Floor
Disclaimer: Always review and follow your hospital policy regarding this specific skill.
Safety considerations: 
  • There is always a potential fall risk during transfers and ambulation. Prevention is key.
  • If a patient begins to feel dizzy, have them sit on a chair or the floor to avoid a fall.
  • The head is the most important part of the body; always protect it as much as possible.
  • In the event of a fall, stay with the patient until help arrives.
  • After a fall, always assess a patient for injuries prior to moving them. If the patient remains weak or dizzy, do not attempt to ambulate them. Seek help.

Steps

 Additional Information

1. If a patient starts to fall and you are close by, move behind the patient and take one step back. Look and be attentive to cues if a patient is feeling dizzy or weak.
Stand behind patient
2. Support the patient around the waist or hip area, or grab the gait belt. Bend your leg and place it in between the patient’s legs. Hand placement allows for a solid grip on the patient to guide the fall.
Support patient by grabbing the hips area or gait belt
Support patient by grabbing the hip area or gait belt
3. Slowly slide the patient down your leg, lowering yourself at the same time. Always protect the head first. Lowering yourself with the patient prevents back injury and allows you to protect the patient’s head from hitting the floor or hard objects.
Lower patient to the floor
4. Once the patient is on the floor, assess the patient for injuries prior to moving. Assesses patient’s ability, or need for additional help, to get off the floor.
Support the patient's hip area or grab hold of the gait belt
Assess patient prior to moving
5. Provide reassurance and seek assistance if required. If required, stay with the patient and call out for help.
6. If patient is unable to get up off the floor, use a mechanical lift. If patient still feels dizzy or weak, using a mechanical lift will prevent injury.
7. Complete an incident report according to agency policy. An incident report helps identify and manage risks related to patient falls.
Data source: Perry et al., 2014; PHSA, 2010; Titler et al., 2011
Special considerations:
Take this Lowering a Patient to the Floor course for more information on lowering a falling patient to the floor.

Video 3.7

Watch the video Assisted Fall by Kim Morris, Thompson Rivers University.

Critical Thinking Exercises

  1.  Name four fall prevention strategies that will help keep a patient safe when ambulating in the hospital.
  2. A patient is ambulating for the first time after surgery. Is it safe to encourage the patient to ambulate independently?
  3. Many physiological risk factors can be identified from a routine assessment. Name three risk factors and three prevention strategies to manage these risks. For example, if a patient has frequent toileting needs, a preventive action is to offer assistance to the toilet every hour, and to ensure the call bell is within reach at all times.

Additional Videos

Video 3.8

Watch the video How to Use a Hammock Sling by Kim Morris, Thompson Rivers University.

Video 3.9

Watch the video How to Use a Hygiene Sling by Kim Morris, Thompson Rivers University.

25

3.9 Summary

To use the principles of body mechanics effectively and safely, health care providers must have the required training to perform a risk assessment, knowledge about transfer assistive devices, and an understanding of the procedures for safe patient handling. In addition, knowing risk factors for positioning, transferring, and ambulation, along with understanding falls prevention, will help prevent injuries to staff and patients. The goal of this chapter has been to help reduce the incidence and severity of injuries related to patient-handling procedures.

Key Takeaways

  • Patients’ conditions and their ability to move will change over the course of their hospital stay. A patient risk assessment must be done prior to all patient-handling procedures.
  • MSI can result from any type of handling procedure. The principles of proper body mechanics can be applied to all procedures related to positioning, transferring, and ambulation. Correct posture and keeping the patient close to your centre of gravity is essential to maintain balance during transfers, positioning, and ambulation.
  • Educate yourself on standard procedures to protect yourself from injury. Retrain and keep current with new procedures and assistive devices.
  • The use of assistive devices can help a patient transfer safely and effectively.
  • Always seek additional assistance and help as required.
  • Keep yourself healthy with exercise and a proper diet, along with suitable footwear to help prevent injury. If an MSI is suspected, seek help immediately and report the incident.
  • Avoid trying to catch a falling patient. If possible, follow the guidelines to lower a falling patient to the floor.
  • Be proactive to implement safe strategies and prevent hazards in the workplace related to patient handling.

Suggested Online Resources

  1. Agency for Healthcare Research and Quality: Which fall prevention practices do you want to use?  These universal fall risk precautions review physiological anticipated, unanticipated, and environmental hazards with a focus on identifying risk factors and prevention strategies.
  2. BC Interior Health: Safe patient handling. This website lists excellent resources including brochures and videos about topics related to body mechanics, transfers, positions, and performing risk assessments.
  3. BC Patient Safety & Quality Council: 48/6 Model of care. This resource offers a model of care for hospitalized seniors (aged 70 and older) in British Columbia. It is an integrated care initiative that addresses six care areas of functioning through patient screening and assessment (assessments are completed only where screening shows areas of concern) within the first 48 hours of hospital admission.
  4. Canadian Fall Prevention Education Collaborative: Canadian falls prevention curriculum. This website provides information and tool kits for preventing falls in the community and acute care settings.
  5. Centers for Disease Control and Prevention: Safe patient handling training for schools of nursing. This resource was developed by the World Health Organization to create global awareness. It provides up-to-date algorithms for patient transfers.
  6. Provincial Health Services Authority: Patient handling guidelines. These instructional video courses cover numerous topics including mechanical (ceiling) lifts, additional repositioning techniques, transfers, and assisting a patient off the floor.
  7. WorkSafeBC: High-risk manual handling of patients in health care. This document provides guidelines for moving patients when health care providers are at high risk of injury.
  8. WorkSafeBC: Resources – by industry – health care. This website addresses body mechanics, MSI prevention, and the use of transfer assistive devices in health care.

References

Accreditation Canada. (2014). From evidence to improvement in Canadian healthcare. Retrieved on Oct 10, 2015, from https://www.accreditation.ca/sites/default/files/falls-joint-report-2014-en.pdf

ATI. (2015a). Positioning. In ATI Nursing Education. Ambulation, transferring and range of motion. Retrieved on Oct 10, 2015, from http://www.atitesting.com/ati_next_gen/skillsmodules/content/ambulation/equipment/positioning.html

ATI. (2015b) Transferring – lying to sitting to standing. In ATI Nursing Education. Ambulation, transferring and range of motion. Retrieved on Oct 10, 2015, from http://www.atitesting.com/ati_next_gen/skillsmodules/content/ambulation/viewing/Transfering-lying-sit.html

ATI. (2015c). Transfer – bed to gurney. Retrieved from ATI Nursing Education. Ambulation, transferring and range of motion. Retrieved on Oct 10, 2015, from http://www.atitesting.com/ati_next_gen/skillsmodules/content/ambulation/viewing/Transfering-bed-gurney.html

Berman, A., & Snyder, S. J. (2016). Skills in clinical nursing (8th ed.). Upper Saddle River, New Jersey: Pearson.

British Columbia Patient Safety Learning System. (2015). Retrieved on April 25, 2015, from http://bcpslscentral.ca/

Canadian Patient Safety Institute. (2015). Reducing falls and injury from falls: Starter kit. Retrieved on Oct 10, 2015, from http://www.patientsafetyinstitute.ca/en/toolsResources/Documents/Interventions/Reducing%20Falls%20and%20Injury%20from%20Falls/Falls%20Getting%20Started%20Kit.pdf

Graf, C. (2006). Functional decline in hospitalized older adults. It’s often a consequence of hospitalization, but it doesn’t have to be. American Journal of Nursing, 101(1), 58-67. Retrieved on April 2, 2015, from http://www.researchgate.net/publication/232182376_Functional_Decline_in_Hospitalized_Older_Adults_Its_often_a_consequence_of_hospitalization_but_it_doesnt_have_to_be

Hook, M. L., & Winchel, S. (2006). Fall related injuries in acute care: Reducing the risk of harm. Clinical Practice, 15(6), 370-377.

Interior Health. (2012). Point of care risk assessment (Developed provincially). Retrieved on Oct 10, 2015, from https://www.interiorhealth.ca/sites/Partners/WHSresources/Documents/Point%20of%20Care%20Risk%20Assessment%20Tool.pdf

Interior Health. (2013). Manual transfer: One person assist with help. Retrieved on Oct 10, 2015, from https://www.interiorhealth.ca/sites/Partners/WHSresources/Documents/Manual%20Transfers%20-%20One%20Person%20Assist%20with%20Help%20SWP.pdf

Kalisch, B. J., Lee, S., & Dabney, B. W. (2013). Outcomes of inpatient mobilization: A literature review. Journal of Clinical Nursing. doi: 10.1111/jocn.12315

National Institute for Occupational Safety and Health (NIOSH). (2010). Safe patient handling training for schools of nursing. Retrieved on Oct 10, 2015, from http://www.cdc.gov/niosh/docs/2009-127/pdfs/2009-127.pdf

Perry, A. G., Potter, P. A., & Ostendorf, W. R. (2014). Clinical nursing skills and techniques. St Louis, MO: Mosby Elsevier.

Potter, P. A., Perry, A. G., Ross-Kerr, J. C., & Wood, M. J. (2010). Canadian fundamentals of nursing (4th ed.). St Louis, MO: Mosby Elsevier.

Potter, P. A., Perry, A. G., Stockert, P. A., & Hall, A. (2011). Basic nursing (7th Ed.). St Louis, MO: Mosby Elsevier.

Provincial Health Services Authority. (2010). Employee wellness elearning courses: Safe patient handling. Retrieved on April 2, 2015, from http://learn.phsa.ca/phsa/patienthandling/

Sanguineti, V. A., Wild, J. R., & Fain, M. J. (2014). Management of postoperative complications: A general approach. Clinics in Geriatric Medicine, 30(2), 261-270.

Titler, M. G., Shever, L. L., Kanak, M. F., Picone, D. M., & Qin, R. (2011). Factors associated with falls during hospitalization in an older adult population. Research and Theory for Nursing Practice: An International Journal, 25(2), 127-152. doi: 10.1891/1541-6577.25.2.127

Winnipeg Regional Health Authority. (2008). Safe patient handling and movement guidelines. Retrieved on April 2, 2015, from http://www.wrha.mb.ca/professionals/safety/files/Manual.pdf

Workers Compensation Board (WCB). (2001).Understanding the risks of musculoskeletal injury (MSI). An educational guide for workers on sprains, strains and other MSIs. Retrieved on Oct 10, 2015, from http://www.worksafebc.com/publications/Health_and_Safety/by_topic/assets/pdf/msi_workers.pdf

WorkSafeBC. (2006). Transfer assist devices for safer handling of patients. Retrieved on April 2, 2015, from http://www.worksafebc.com/publications/high_resolution_publications/assets/pdf/BK103.pdf

WorkSafeBC. (2010). Patient handling. Retrieved on Oct 10, 2015, from https://www2.worksafebc.com/PDFs/healthcare/patient_handling_bulletins_ALL.pdf

WorkSafeBC. (2013). Preventing musculoskeletal injury (MSI). Retrieved on April 2, 2015, from http://www.worksafebc.com/publications/health_and_safety/by_topic/assets/pdf/msi_employers.pdf

IV

Chapter 4. Wound Care

26

4.1 Introduction

Wound healing is a complex physiological process. It occurs after an injury in the cells and tissues of our bodies to restore function of the tissue. The healing process is affected by the severity of the wound, location, extent of injury, and other external and internal factors that will either inhibit or promote wound healing. A health care provider must understand how to assess a wound, assess external and internal factors, and determine treatment to optimize the healing process.

Learning Objectives

  • Identify factors that affect wound healing
  • Describe the stages of wound healing
  • Perform a comprehensive wound assessment
  • Describe how to complete a simple dressing change and a wet to dry dressing change
  • Review how to irrigate a wound and remove sutures and staples
  • Describe care for a wound-drainage system
  • Outline steps for removing a wound drain

27

4.2 Wound Healing and Assessment

Wound healing is a dynamic process of restoring the anatomic function of living tissue. Since damage to the body’s tissue is common, the body is well adapted to utilizing mechanisms of repair and defence to elicit the healing process. Normal wound healing is profoundly influenced by the type of injury and by factors about the wound (intrinsic) and within the patient (extrinsic) (Perry, Potter, & Ostendorf, 2014).

Phases of Wound Healing

There are four distinct phases of wound healing. These four phases must occur in correct sequence and in a correct time frame to allow the layers of the skin to heal (see Figure 4.1). Table 4.1 describes how a wound heals.

Table 4.1 Phases of Wound Healing for Full Thickness Wounds

Phase

 Additional Information

Hemostasis phase Blood vessels constrict and clotting factors are activated. Clot formation blocks the bleeding and acts as a barrier to prevent bacterial contamination. Platelets release growth factors, which alert various cells to start the repair process at the wound location.
Inflammatory phase Vasodilation occurs, allowing plasma and leukocytes (white blood cells) into the wound to start cleaning the wound bed. This process is seen as edema, erythema, and exudate. Macrophages (another type of white blood cell) work to regulate the cleanup.
Proliferative phase Four important processes occur in this phase:
  1. Epithelialization: new epidermis and granulation tissue are developed
  2. New capillaries: angiogenesis occurs to bring oxygen and nutrients to the wound
  3. Collagen formation: this provides strength and integrity to the wound
  4. Contraction: the wound begins to reduce in size
Maturation (remodelling) phase Collagen continues to strengthen the wound, and the wound becomes a scar.
Data source: British Columbia Provincial Nursing Skin and Wound Committee, 2011; Perry et al., 2014
Phases of wound healing https://upload.wikimedia.org/wikipedia/commons/a/a6/Wound_healing_phases.svg
Figure 4.1 Phases of wound healing

Types of Wounds

To determine how to treat a wound, consider the etiology, amount of exudate, and available products to plan appropriate treatment. Wounds are classified as acute (healing occurs in a short time frame without complications) or chronic (healing occurs over weeks to years, and treatment is usually complex). Examples of acute wounds include a surgical incision or a traumatic wound (e.g., a gunshot wound). Examples of chronic wounds include venous and arterial ulcers, diabetic ulcers, and pressure ulcers. Table 4.2 lists the six main types of wounds.

Table 4.2 Types of Wounds

Type

 Additional Information

Surgical Healing occurs by primary, secondary, or tertiary intention.

Primary intention is where the edges are sutured or stapled closed, and the wound heals quickly with minimal tissue loss. The healing time for a surgical wound is usually short, depending on the surgery.

A surgical wound left open to heal by scar formation is a wound healed by secondary intention. In this type of wound, there is a loss of skin, and granulation tissue fills the area left open. Healing is slow, which places the patient at risk for infection. Examples of wounds healing by secondary intention include severe lacerations or massive surgical interventions.

Healing by tertiary intention is the intentional delay in closing a wound. On occasion, wounds are left open (covered by a sterile dressing) to allow an infection or inflammation to subside. Once the wound is closed with staples or sutures, the scarring in minimal.

Traumatic Examples are gunshot wounds, stab wounds, or abrasions. These wounds may be acute or chronic.
Diabetic/neuropathic ulcer This is a nerve disorder that results in the loss or impaired function of the tissues affecting nerve fibres. These wounds generally occur as a result of damage to the autonomic, sensory, or motor nerves and have an arterial perfusion deficit. They are usually located in the lower extremity on the foot. Diabetic/neuropathic ulcers are often small with a calloused edge. Pain may be absent or severe depending on the neuropathy.
Arterial ulcer Arterial ulcers occur when tissue ischemia occurs due to arterial insufficiency from the narrowing of an artery by an obstruction (atherosclerosis). They are located on the distal aspects of the arterial circulation, and can be anywhere on the legs, including feet or toes. Wound margins are well defined with a pale wound bed with little or no granulation. Necrotic tissue is often present. There is minimal to no exudate present. Pedal pulses are usually absent or diminished. Pain occurs in limb at rest, at night, or when limb is elevated.

Arterial ulcers account for 5% to 20% of all leg ulcers. Perfusion must be assessed prior to initiating treatment.

Venous ulcer A venous ulcer is a lower extremity wound. Tissue ischemia occurs due to the failure of the venous valve function to return blood from the lower extremities to the heart. It is usually located in the ankle to mid-calf region, usually medial or lateral, and can be circumferential. Drainage can be moderate to heavy. A venous ulcer can be irregularly shaped, large, and shallow with generalized edema to lower limbs. Pulse may be difficult to palpate.

Venous ulcers account for 70% to 90% of all leg ulcers. Perfusion must be assessed prior to initiating treatment.

Pressure ulcer Also known as a pressure sore or decubiti wound, the pressure ulcer is a localized area of tissue damage that results from compression of soft tissue between a hard surface and a bony prominence (coccyx, ankle, shoulder blade, or hip). As blood supply decreases to the area of compression, tissue anoxia occurs, which can lead to eventual tissue death. Wounds are usually circular and may have viable or necrotic tissue, and exudate can vary from none to heavy. Pressure ulcers are classified depending on the level of tissue damage (stages 1 to 4). Treatment is based on stage, exudate, type of available dressing, and frequency of dressing changes.
Data source: British Columbia Provincial Nursing Skin and Wound Committee, 2011, 2014; Perry et al., 2014

Wound Healing

Wounds require different treatment throughout the phases of healing. There are multiple factors that affect how a wound heals as it moves through the phases of healing. It is important to look at the “whole patient” rather than the “hole in the patient” to identify the correct treatment and work efficiently and effectively from the beginning of the healing process.

Table 4.3 lists a number of factors that inhibit the ability of tissues and cells to regenerate, which can delay healing and contribute to wound infections.

Table 4.3: Patient Considerations for Wound Healing

Influencing Factors

 Additional Information

Patient’s age Vascular changes occur with increasing age, skin is less pliable, and scar tissue is tighter.

For example, an older adult’s skin tears more easily from mechanical trauma such as tape removal.

Patient’s nutritional status Tissue repair and infection resistance are directly related to adequate nutrition.

Patients who are malnourished are at increased risk for wound infections and wound infection-related sepsis.

Patient’s size Inadequate vascularization due to obesity will decrease the delivery of nutrients and cellular elements required for healing.

An obese person is at greater risk for wound infection and dehiscence or evisceration.

Oxygenation Factors such as decreased hemoglobin level, smoking, and underlying cardiopulmonary conditions will decrease oxygenation.

Adequate oxygenation at the tissue level is essential for adequate tissue repair.

Hemoglobin level and oxygen release to tissues is reduced in smokers.

Patient’s medications Steroids reduce the inflammatory response and slow collagen synthesis.

Cortisone depresses fibroblast activity and capillary growth.

Chemotherapy depresses bone marrow production of white blood cells and impairs immune function.

Chronic diseases or trauma Chronic diseases and traumas such as diabetes mellitus or radiation decrease tissue perfusion and oxygen release to tissues.
Data source: Gallagher-Camden, 2012; Perry et al., 2014; Stotts, 2012
Watch this 30-minute video about how wounds heal from Connecting Learners with Knowledge (CLWK), a provincial resource.

Wound Assessment

Frequent wound assessment based on the type, cause, and characteristics of the wound is necessary to help determine the type of treatment required to manage the wound effectively and to promote maximal healing. The health care professional should always compare the wound to the previous assessment to determine progress toward healing. If there has been no improvement in the healing of the wound, alternative options or consulting a wound care specialist should be considered.

Checklist 32 outlines the steps to take when assessing a wound.

Checklist 32: Wound Assessment
Disclaimer: Always review and follow your hospital policy regarding this specific skill.

Steps

 Additional Information

1. Location Note the anatomic position of the wound on the body.
2. Type of wound Note the etiology (cause) of the wound (i.e., surgical, pressure, trauma).

Common types are pressure, venous, arterial, or neuropathic/diabetic foot ulcers, or surgical or trauma wounds.

3. Extent of tissue involvement A full-thickness wound involves both the dermis and epidermis.

A partial-thickness wound involves only the epidermal layer.

If the wound is a pressure ulcer, use the Braden Scale Interventions Algorithm.

4. Type and percentage of tissue in wound base Describe the type of tissue (i.e., granulation, slough, eschar) and the approximate amount.
5. Wound size Follow agency policy to measure wound dimensions, including width, depth, and length.

Assess for a sinus tract, tunnelling, or induration.

6. Wound exudate Describe the amount, colour, and consistency:
  • Serous drainage (plasma): clear or light yellowish
  • Sanguineous drainage (fresh bleeding): bright red
  • Serosanguineous drainage (a mix of blood and serous fluid): pink
  • Purulent drainage (infected): thick and yellow, pale green, or white
7. Presence of odour Note the presence or absence of odour. The presence of odour may indicate infection.
8. Peri-wound area Assess the temperature, colour, and integrity of the skin surrounding the wound.
9. Pain Assess pain using LOTTAARP.
Data source: British Columbia Provincial Nursing Skin and Wound Committee, 2014; Perry et al., 2014
Watch this 30-minute Wound Assessment video, a provincial resource from CLWK, to learn how to improve wound-assessment skills.

Critical Thinking Exercises

  1. Your patient is 75 years old, smokes cigarettes, has renal disease, and is overweight. What additional factors should you consider prior to assessing the patient’s wound?
  2. What phase of wound healing is indicated by the presence of epithelialization and wound contraction?

Attribution

Figure 4.1
Phases of wound healing by Mikael Häggström is in the public domain.

28

4.3 Simple Dressing Change

The health care provider chooses the appropriate sterile technique and necessary supplies based on the clinical condition of the patient, the cause of the wound, the type of dressing procedure, the goal of care, and agency policy.

Agency policy will determine the type of wound cleansing solution, but sterile normal saline and sterile water are the solutions of choice for cleansing wounds and should be at room temperature to support wound healing.

For more complex wounds with delayed healing, antiseptic solutions such as povidone iodine or chlorhexidene may be used for cleansing based on agency policy and the recommendation of a wound clinician or physician.

Checklist 33 outlines the steps for performing a simple dressing change.

Checklist 33: Simple Dressing Change
Disclaimer: Always review and follow your hospital policy regarding this specific skill.
Safety considerations: 
  • Perform hand hygiene.
  • Check room for additional precautions.
  • Introduce yourself to patient.
  • Confirm patient ID using two patient identifiers (e.g., name and date of birth).
  • Explain process to patient; offer analgesia, bathroom, etc.
  • Listen and attend to patient cues.
  • Ensure patient’s privacy and dignity.
  • Assess ABCCS/suction/oxygen/safety.

Steps

 Additional Information

1. Check present dressing with non-sterile gloves. Use non-sterile gloves to protect yourself from contamination.
Apply non-sterile gloves
2. Perform hand hygiene. Hand hygiene prevents spread of microorganisms.
Perform hand hygiene
3. Gather necessary equipment. Dressing supplies must be for single patient use only.

Use the smallest size of dressing for the wound.

Gather supplies
Gather supplies

Take only the dressing supplies needed for the dressing change to the bedside.

4. Prepare environment, position patient, adjust height of bed, turn on lights. Ensure patient’s comfort prior to and during the procedure.

Proper lighting allows for good visibility to assess wound.

5. Perform hand hygiene. Hand hygiene prevents spread of microorganisms.
Hand hygiene with ABHR
6. Prepare sterile field.
Prepare sterile field
7. Add necessary sterile supplies.
Add necessary supplies
8. Pour cleansing solution.
Pour sterile cleansing solution into sterile tray

Normal saline or sterile water containers must be used for only one client and must be dated and discarded within at least 24 hours of being opened.

9. Prepare patient and expose dressed wound.
Prepare patient and expose wound
10. Apply non-sterile gloves. Use non-sterile gloves to protect yourself from contamination.
Apply non-sterile gloves
11. Remove outer dressing with non-sterile gloves and discard as per agency policy.
Removing outer dressing with non-sterile gloves
Remove outer dressing with non-sterile gloves
12. Remove inner dressing with transfer forceps, if necessary.
DSC_0328
Remove inner dressing with transfer forceps
13. Discard transfer forceps and non-sterile gloves according to agency policy.
Discard transfer forceps as per agency policy
Discard gloves
Discard gloves
14. Assess wound.
Assess wound
Assess wound
15. Drape patient with water-resistant underpad (optional). Water-resistant underpad protects patient’s clothing and linen.
Drape patient with water resistant underpad
Drape patient with water-resistant underpad
16. Apply non-sterile gloves (optional). Use non-sterile gloves to protect yourself from contamination.
Apply non-sterile gloves
17. Cleanse wound using one 2 x 2 gauze per stroke. Strokes should be:
  • From clean to dirty (incision, then outer edges)
  • From top to bottom
The suture line is considered the “least contaminated” area and is cleansed first.
Using a sterile swab or gauze, clean the suture line by starting at the centre and working toward one end.
1. Using a sterile swab or gauze, clean the suture line by starting at the centre and working toward one end.
With another sterile swab or gauze, start at the centre of the incision and work toward the other end.
2. With another sterile swab or gauze, start at the centre of the incision and work toward the other end.
All other cleansing involves moving from one end to the other on each side of the incision.
3. All other cleansing involves moving from one end to the other on each side of the incision.
Work in straight lines, moving away from the suture line with each successive stroke.
4. Work in straight lines, moving away from the suture line with each successive stroke.
18. Cleanse around drain (if present). If a drain is present, clean the drain site using a circular stroke, starting with the area immediately next to the drain.

Using a new swab, cleanse immediately next to the drain and attempt to clean a little further out from the drain. Continue this process with subsequent swabs until the skin surrounding the drain is cleaned.

DSC_0350
Cleanse around drain
19. Apply inner dressing (4 x 4 gauze) with forceps to incision, then drain site (drain sponges/cut gauze).
DSC_0366
1. Cover incision
DSC_0371
2. Cover drain site
DSC_0372
3. Tape drain tubing to skin
20. Discard non-sterile gloves if they were used. This step prevents the spread of microorganisms.
Discard gloves
Discard gloves
21. Apply outer dressing, keeping the inside of the sterile dressing touching the wound. This step protects wound from contamination.
DSC_0384
Apply outer dressing if required
22. To complete dressing change:
  • Assist patient to comfortable position.
  • Lower patient’s bed.
  • Discard used equipment appropriately.
  • Perform hand hygiene.
Taking these step ensures the patient’s continued safety.
Hand hygiene with ABHR
23. Document procedure and findings according to agency policy. Record dressing change as per hospital policy.

Document the wound appearance, if the staples are intact, if the incision is well-approximated.

Chart the time, place of wound, size, drainage and amount, type of cleaning solution, and dressing applied.

State how the patient tolerated the procedure.

Report any unusual findings or concerns to the appropriate health care professional.

24. Compare wound to previous wound assessment and determine healing progress, if any. If there is no movement toward healing, or if there is deterioration, notify the physician or wound care nurse according to agency policy.
Data source: BCIT, 2010a; Perry et al., 2014

Video 4.1

Watch the video Simple Sterile Dressing Change by Renée Anderson and Wendy McKenzie, Thompson Rivers University.

Critical Thinking Exercises

  1. Your patient has a post-operative hip incision. You notice that the wound is slightly inflamed and not approximated, with some yellowish exudate present. What would be your next steps?
  2. As you select your supplies, you notice that the sterile saline container was opened exactly 24 hours ago. What would be your next steps?

29

4.4 Suture Removal

Sutures are tiny threads, wire, or other material used to sew body tissue and skin together. They may be placed deep in the tissue and/or superficially to close a wound. A variety of suture techniques are used to close a wound, and deciding on a specific technique depends on the location of the wound, thickness of the skin, degree of tensions, and desired cosmetic effect (Perry et al., 2014).

There are three types of sutures techniques: intermittent, blanket, and continuous (see Figure 4.2). The most commonly seen suture is the intermittent suture.

types of sutures
Figure 4.2 Types of sutures

Sutures may be absorbent (dissolvable) or non-absorbent (must be removed). Non-absorbent sutures are usually removed within 7 to 14 days. Suture removal is determined by how well the wound has healed and the extent of the surgery. Sutures must be left in place long enough to establish wound closure with enough strength to support internal tissues and organs.

The health care provider must assess the wound to determine whether or not to remove the sutures. The wound line must also be observed for separations during the process of suture removal. Removal of sutures must be ordered by the primary health care provider (physician or nurse practitioner). An order to remove sutures must be obtained prior to the procedure, and a comprehensive assessment of the wound site must be performed prior to the removal of the sutures by the health care provider.

Alternate sutures (every second suture) are typically removed first, and the remaining sutures are removed once adequate approximation of the skin tissue is determined. If the wound is well healed, all the sutures would be removed at the same time. Alternately, the removal of the remaining sutures may be days or weeks later (Perry et al., 2014). Checklist 34 provides the steps for intermittent suture removal.

Checklist 34: Intermittent Suture Removal
Disclaimer: Always review and follow your hospital policy regarding this specific skill.
Safety considerations: 
  • Perform hand hygiene.
  • Check room for additional precautions.
  • Introduce yourself to patient.
  • Confirm patient ID using two patient identifiers (e.g., name and date of birth).
  • Explain process to patient and offer analgesia, bathroom etc.
  • Listen and attend to patient cues.
  • Ensure patient’s privacy and dignity.
  • Assess ABCCS/suction/oxygen/safety.

Steps

 Additional Information

1. Confirm physician/nurse practitioner (NP) orders, and explain procedure to patient. Explaining the procedure will help prevent anxiety and increase compliance with the procedure.

Inform patient that the procedure is not painful but the patent may feel some pulling of the skin during suture removal.

2. Gather appropriate supplies. You will need sterile suture scissors or suture blade, sterile dressing tray (to clean incision site prior to suture removal), non-sterile gloves, normal saline, Steri-Strips, and sterile outer dressing.
3. Position patient appropriately and create privacy for procedure. Ensure proper body mechanics for yourself and create a comfortable position for the patient.
4. Perform hand hygiene. Hand hygiene reduces the risk of infection.
Perform hand hygiene
5. Prepare the sterile field and add necessary supplies in an organized manner. This allows easy access to required supplies for the procedure.
Preparing sterile field
Prepare sterile field
6. Remove dressing and inspect the wound using non-sterile gloves. Visually assess the wound for uniform closure of the wound edges, absence of drainage, redness, and swelling.

Pain should be minimal.

After assessing the wound, decide if the wound is sufficiently healed to have the sutures removed. If there are concerns, question the order and seek advice from the appropriate health care provider.

Assess wound
Assess wound
7. Remove non-sterile gloves and perform hand hygiene. This prevents the transmission of microorganisms.
Hand hygiene with ABHR
8. Apply clean non-sterile gloves. This prevents the transmission of microorganisms.
Apply non-sterile gloves
9. Clean incision site according to agency policy. This step reduces risk of infection from microorganisms on the wound site or surrounding skin.
Clean incision
Clean incision

Cleaning also loosens and removes any dried blood or crusted exudate from the sutures and wound bed.

10. To remove intermittent sutures, hold scissors in dominant hand and forceps in non-dominant hand. This allows for dexterity with suture removal.
holHold scissors in dominant hand and forceps in non-dominant hand
Hold scissors in dominant hand and forceps in non-dominant hand
11. Place a sterile 2 x 2 gauze close to the incision site. The sterile 2 x 2 gauze is a place to collect the removed suture pieces.
PLace sterile 2x2 gauze close by
Place sterile 2 x 2 gauze close by
12. Grasp knot of suture with forceps and gently pull up knot while slipping the tip of the scissors under suture near the skin. Examine the knot.
DSC_0257
The knot should have three ends
13. Cut under the knot as close as possible to the skin at the distal end of the knot.


Cut under the knot

Never snip both ends of the knot as there will be no way to remove the suture from below the surface.

Do not pull the contaminated suture (suture on top of the skin) through tissue.

If using a blade to cut the suture, point the blade away from you and your patient.

14. Grasp knotted end with forceps, and in one continuous action pull suture out of the tissue and place cut knot on sterile 2 x 2 gauze.
Grasp knotted end with forceps
15. Remove every second suture until the end of the incision line. Assess wound healing after removal of each suture to determine if each remaining suture will be removed.
If wound edges open, stop removing sutures, apply Steri-Strips (using tensions to pull wound edges together), and notify appropriate health care providers. 
16. Using the principles of sterile technique, place Steri-Strips on location of every removed suture along incision line.
Apply Steri-strips
Apply Steri-Strips
17. Cut Steri-Strips so that they extend 1.5 to 2 inches on each side of incision. Steri-Strips support wound tension across wound and help to eliminate scarring.
Steri-strips
Steri-Strips
18. Remove remaining sutures on incision line if indicated.


Only remove remaining sutures if wound is well approximated.
Remove remaining sutures
19. Place Steri-Strips on remaining areas of each removed suture along incision line. The Steri-Strips will help keep the skin edges together.
Apply Steri-strips
Apply Steri-Strips
 Data source: BCIT, 2010c; Perry et al., 2014

Video 4.2

Watch the video Intermittent Suture Removal by Renée Anderson and Wendy McKenzie, Thompson Rivers University.

Checklist 35 outlines the steps to remove continuous and blanket stitch sutures.

Checklist 35: Continuous and Blanket Stitch Suture Removal
Disclaimer: Always review and follow your hospital policy regarding this specific skill.
Safety considerations: 
  • Perform hand hygiene.
  • Check room for additional precautions.
  • Introduce yourself to patient.
  • Confirm patient ID using two patient identifiers (e.g., name and date of birth).
  • Explain process to patient and offer analgesia, bathroom etc.
  • Listen and attend to patient cues.
  • Ensure patient’s privacy and dignity.
  • Assess ABCCS/suction/oxygen/safety.

Steps

 Additional Information

1. Confirm physician/NP orders, and explain procedure to patient. Explaining the procedure will help prevent anxiety and increase compliance with the procedure.

Inform patient that the procedure is not painful but the patent may feel some pulling of the skin during suture removal.

2. Gather appropriate supplies. You will need sterile suture scissors or suture blade, sterile dressing tray (to clean incision site prior to suture removal), non-sterile gloves, normal saline, Steri-Strips, and sterile outer dressing.
3. Position patient appropriately and create privacy for procedure. Ensure proper body mechanics for yourself and create a comfortable position for the patient.
4. Perform hand hygiene. Hand hygiene reduces the risk of infection.
Perform hand hygiene
5. Prepare the sterile field and add necessary supplies in an organized manner. This step allows for easy access to required supplies for the procedure.
Preparing sterile field
Prepare sterile field
6. Remove dressing and inspect the wound using non-sterile gloves. Visually assess the wound for uniform closure of the wound edges, absence of drainage, redness, and swelling.

Pain should be minimal.

Assess wound
Assess wound

After assessing the wound, decide if the wound is sufficiently healed to have the sutures removed. If there are concerns, question the order and seek advice from the appropriate health care provider.

7. Remove non-sterile gloves and perform hand hygiene. This step prevents the transmission of microorganisms.
Remove non-sterile gloves
8. Apply clean non-sterile gloves. This prevents the transmission of microorganisms.
Apply non-sterile gloves
9. Clean incision site according to agency policy. This step reduces the risk of infection from microorganisms on the wound site or surrounding skin.

Cleaning also loosens and removes any dried blood or crusted exudate from the sutures and wound bed.

Clean incision site
Clean incision site
10. Place sterile gauze close to suture line; grasp scissors in dominant hand and forceps in non-dominant hand. This allows for dexterity with suture removal.
11. Snip first suture close to the skin surface, distal to the knot.
Snip suture distal to the knot


continuous-suture-removal
Continuous suture removal guide
12. Snip second suture on the same side. This action prevents the suture from being left under the skin.
13. Grasp knotted end and gently pull out suture; place suture on sterile gauze.
Oct 1st, 2015 026
Never pull contaminated suture underneath the tissue
14. Continue cutting in the same manner until the entire suture is removed, inspecting the incision line during the procedure. Inspection of incision line reduces the risk of separation of incision during procedure.
If separation occurs, stop procedure, apply Steri-Strips, and notify physician.
15. Apply Steri-Strips to suture line, then apply sterile dressing or leave open to air. This step reduces the risk of infection.
DSC_1658
Apply Steri-Strips
16. Position patient and lower bed to safe height; ensure patient is comfortable and free from pain. This ensures patient safety.
17. Complete patient teaching regarding Steri-Strips and bathing, wound inspection for separation of wound edges, and ways to enhance wound healing. Instruct patient to take showers rather than bathe.

Instruct patient to pat dry, and to not scrub or rub the incision.

Instruct patient not to pull off Steri-Strips. Allow the Steri-Strips to fall off naturally and gradually (usually  takes one to three weeks).

Instruct patient about the importance of not straining during defecation, and the importance of adequate rest, fluids, nutrition, and ambulation for optional wound healing.

18. Discard supplies according to agency policies for sharp disposal and biohazard waste. Scissors and forceps may be disposed of or sent for sterilization.
19. Perform hand hygiene. Hand hygiene reduces risk of infection.
Hand hygiene with ABHR
20. Document procedures and findings according to agency policy. Report any unusual findings or concerns to the appropriate health care professional.
 Data source: BCIT, 2010c; Perry et al., 2014

Video 4.3

Complications related to suture removal, including wound dehiscence, may occur if wound is not well healed, if the sutures are removed too early, or if excessive force (pressure) is applied to the wound. In addition, if the sutures are left in for an extended period of time, the wound may heal around the sutures, making extraction of the sutures difficult and painful. Table 4.4. lists additional complications related to wounds closed with sutures.

Table 4.4 Complications of Suture Removal

Complication

 Solution

Unable to remove suture from tissue Contact physician for further instructions.
Wound dehiscence: Incision edges separate during suture removal; wound opens up Stop removing sutures.

Apply Steri-Strips across open area.

Notify physician.

Patient experiences pain when sutures are removed Allow small breaks during removal of sutures.

Provide opportunity for the patient to deep breathe and relax during the procedure.

Wound becomes red, painful, with increasing pain, fever, drainage from wound These changes may indicate the wound is infected. Report findings to the primary health care provider for additional treatment and assessments.
Scarring related to sutures All wounds form a scar and will take months to one year to completely heal. Scarring may be more prominent if sutures are left in too long.
Keloid formation A keloid formation is a firm scar-like mass of tissue that occurs at the wound site. The scarring tends to extend past the wound and is darker in appearance.
Hypertrophic scars Hypertrophic scars are scars that are bulky but remain within the boundaries of the wound. These scars can be minimized by applying firm pressure to the wound during the healing process using sterile Steri-Strips or a dry sterile bandage.
Data source: BCIT, 2010c; Perry et al., 2014

Critical Thinking Exercises

  1. What is the purpose of applying Steri-Strips to the incision after removing sutures?
  2. Which health care provider is responsible for assessing the wound prior to removing sutures?

30

4.5 Staple Removal

Staples are made of stainless steel wire and provide strength for wound closure. The wound location sometimes restricts their use because the staples must be far enough away from organs and structures. The aesthetic outcome may not be as desirable as a suture line, but staples are strong, quick to insert, and simple to remove.

Removal of staples requires sterile technique and a staple extractor. An order to remove the staples, and any specific directions for removal, must be obtained prior to the procedure. The health care professional performing the removal must also inspect the wound prior to the procedure to ensure the wound is adequately healed to have the staples removed. Usually every second staple is removed initially; then the remainder are removed at a later time (Perry et al., 2014). In general, staples are removed within 7 to 14 days.

Checklist 36 outlines the steps for removing staples from a wound.

Checklist 36: Staple Removal
Disclaimer: Always review and follow your hospital policy regarding this specific skill.
Safety considerations: 
  • Perform hand hygiene.
  • Check room for additional precautions.
  • Introduce yourself to patient.
  • Confirm patient ID using two patient identifiers (e.g., name and date of birth).
  • Explain process to patient and offer analgesia, bathroom, etc.
  • Listen and attend to patient cues.
  • Ensure patient’s privacy and dignity.
  • Assess ABCCS/suction/oxygen/safety.

Steps

 Additional Information

1. Confirm physician orders, and explain procedure to patient. Explanation helps prevent anxiety and increases compliance with the procedure. Inform patient the procedure is not painful but the patent may feel some pulling or pinching of the skin during staple removal.
2. Gather appropriate supplies. Gather sterile staple extractors, sterile dressing tray, non-sterile gloves, normal saline, Steri-Strips, and sterile outer dressing.
3. Position patient appropriately and create privacy for procedure. Ensure proper body mechanics for yourself and create a comfortable position for the patient.
4. Perform hand hygiene. This reduces the risk of infection.
Perform hand hygiene
5. Prepare the sterile field and add necessary supplies (staple extractor). This step allows easy access to required supplies for the procedure.
Add sterile items to sterile field
6. Remove dressing and inspect the wound. Visually assess the wound for uniform closure of the edges, absence of drainage, redness, and inflammation.
Remove dressing and inspect the wound

After assessing the wound, determine if the wound is sufficiently healed to have the staples removed. If concerns are present, question the order and seek advice from the appropriate health care provider.

7. Apply non-sterile gloves. This reduces the risk of contamination.
Apply non-sterile gloves
8. Clean incision site according to agency policy. This reduces the risk of infection from microorganisms on the wound site or surrounding skin.
Clean incision site
Clean incision site

Cleaning also loosens and removes any dried blood or crusted exudate from the staples and wound bed.

 To Remove Staples (start with every second staple).
9. Place lower tip of staple extractor beneath the staple. Do not pull up while depressing handle on staple remover or change the angle of your wrist or hand. Close the handle, then gently move the staple side to side to remove. The closed handle depresses the middle of the staple causing the two ends to bend outward and out of the top layer of skin.
Close the handle, then gently move the staple from side to side to remove
10. When both ends of the staple are visible, move the staple extractor away from the skin and place the staple on a sterile piece of gauze by releasing the handles on the staple extractor. This avoids pulling the staple out prematurely and avoids putting pressure on the wound. It also prevents scratching the skin with the sharp staple.
Keep the handle closed and move the staple extractor away from the skin
11. Continue to remove every second staple to the end of the incision line. Alternating removal of staples provides strength to incision line while removing staples and prevents accidental separation of incision line.
Continue to remove every second staple to the end of the incision line
12. Using the principles of sterile technique, place Steri-Strips on location of every removed staple along incision line. Cut Steri-Strips to allow them to extend 1.5 to 2 cm on each side of incision.

Remove sterile backing to apply Steri-Strips.

Cut Steri-strips
Cut Steri-Strips

Steri-Strips support wound tension across wound and eliminate scarring. 

This allows wound to heal by primary intention.

Cut Steri-Strips to allow them to extend 1.5 to 2 cm on each side of incision
13. Remove remaining staples, followed by applying Steri-Strips along the incision line. Steri-Strips support wound tension across wound and eliminate scarring.
14. Apply dry, sterile dressing on incision site or leave exposed to air if wound is not irritated by clothing, or according to physician orders. This reduces risk of infection.
Apply dry sterile dressing if required
Apply dry, sterile dressing if required
15. Position patient, lower bed to safe height, and ensure patient is comfortable and free from pain. This provides patient with a safe, comfortable place, and attends to pain needs as required.
16. Complete patient teaching regarding Steri-Strips and bathing, wound inspection for separation of wound edges, and ways to enhance wound healing. Instruct patient to take showers rather than bathe.

Instruct patient not to pull off Steri-Strips and to allow them to fall off naturally and gradually (usually takes one to three weeks).

Instruct on the importance of not straining during defecation, and of adequate rest, fluids, nutrition, and ambulation for optional wound healing.

17. Discard supplies according to agency policies for sharp disposal and biohazard waste. Staple extractor may be disposed of or sent for sterilization.
18. Perform hand hygiene and document procedure and findings according to agency policy. Report any unusual findings or concerns to the appropriate health care professional. Hand hygiene reduces the risk of infection.
Hand hygiene with ABHR
Data source: BCIT, 2010c; Perry et al., 2014

Video 4.4

Watch the video Staple Removal by Renée Anderson and Wendy McKenzie, Thompson Rivers University.
Special Considerations:

Staple removal may lead to complications for the patient. When removing staples, consider the length of time the staples have been in situ. Wound dehiscence, a mechanical failure of wound healing, remains a problem and can be affected by multiple factors (Spiliotis et al., 2009). Obese patients (greater than 30 kg/m2) have a higher risk of dehiscence than patients with a normal BMI. Additional risk factors for dehiscence include age over 75 years, COPD, diagnosis of cancer, use of steroids, malnutrition, anemia, sepsis, obesity, diabetes, tobacco use, and previous administration of chemotherapy or radiotherapy (Spiliotis et al., 2009). Table 4.5 lists other complications of removing staples.

Table 4.5 Complications of Staple Removal

Complication

 Solution

Unable to remove staple from tissue Contact physician for further instructions.
Dehiscence: Incision edges separate during staple removal Stop removing staples.

Apply Steri-Strips across open area.

Notify physician.

Patient experiences pain when staples are removed Allow small breaks during removal of staples.

Provide opportunity for the patient to deep breathe and relax during the procedure.

Data source: BCIT, 2010c; Perry et al., 2014

Critical Thinking Exercises

  1. You are about to remove your patient’s abdominal incision staples according to the physician’s orders. As you start to remove the staples, you notice that the skin edges of the incision line are separating. What would be your next steps?
  2. Your patient informs you that he is feeling significant pain as you begin to remove his staples. What would you do next?

31

4.6 Moist to Dry Dressing, and Wound Irrigation and Packing

Moist to Dry Dressing

A moist to dry dressing is a primary dressing that directly touches the wound bed, with a secondary dressing that covers the primary dressing. The type of wound dressing used depends not only on the characteristics of the wound but also on the goal of the wound treatment.

Important: Ensure pain is well managed prior to a dressing change to maximize patient comfort.

Checklist 37 outlines the steps for performing a moist to dry dressing change.

Checklist 37: Moist to Dry Dressing Change
Disclaimer: Always review and follow your hospital policy regarding this specific skill.
Safety considerations:
  • Check room for additional precautions.
  • Introduce yourself to patient.
  • Confirm patient ID using two patient identifiers (e.g., name and date of birth).
  • Explain process to patient and offer analgesia, bathroom, etc.
  • Listen and attend to patient cues.
  • Ensure patient’s privacy and dignity.
  • Assess ABCCS/suction/oxygen/safety.

Steps

 Additional Information

1. Check present dressing using non-sterile gloves. This provides an opportunity to collect required supplies for the procedure.
2. Perform hand hygiene. Hand hygiene reduces the risk of infection.
Perform hand hygiene
3. Gather necessary equipment and supplies. Being organized will help with efficiency and expedite the procedure, minimizing the length of time the patient experiences discomfort.
4. Prepare environment, position patient, adjust height of bed, turn on lights. This helps prepare patient and bedside for procedure.
5. Perform hand hygiene. Hand hygiene reduces the risk of infection.
Hand hygiene with ABHR
6. Prepare sterile field.
Sterile field
Sterile field
7. Add necessary sterile supplies.
Adding supplies
Add supplies
8. Pour cleansing solution.
Pouring cleaning solution
Pour cleansing solution
9. Expose dressed wound. Inspect wound for the amount of drainage, odours, and type of drainage.
Inspect the wound
Inspect the wound
10. Apply non-sterile gloves. This reduces the risk of contaminating your hands with the patient’s blood and other body fluids.

It also reduces the risk of germ dissemination to the environment and of germ transmission from you to the patient and vice versa, as well as from one patient to another.

Apply non-sterile gloves
11. Remove outer dressing with non-sterile gloves.
Removing outer dressing with non-sterile gloves
Remove outer dressing with non-sterile gloves
12. Remove inner dressing with transfer forceps.
Remove inner dressing with forceps
13. Discard transfer forceps and non-sterile gloves.
Discard transfer forceps
14. Drape patient with underpad (optional).
Drape patient with underpad
15. Apply non-sterile gloves (optional). This reduces the risk of infection.
16. Place sterile or non-woven gauze in container of prescribed solution, and wring out excess solution. Use enough prescribed solution to saturate gauze. Excess solution has the potential to contaminate surrounding areas.
Saturate gauze
Saturate gauze
17. Apply moist gauze as a single layer onto wound surface, pack gauze into wound if necessary, and ensure gauze does not touch skin around the wound. Apply skin preparation as per agency protocol, if required.
Apply moist gauze
Apply moist gauze
18. Cleanse around drain (if present). Drain is cleansed using circular strokes starting near the drain and moving outward and away from the insertion site.
19. Apply dry layer of sterile gauze over moist gauze using sterile technique. This covers moist gauze and preserves moistness.
20. Apply drain sponges/cut gauze to drain site if present.
Apply drain sponges/cut gauze to drain site if present
21. Cover with ABD (abdominal) pad or gauze, and fasten with tape.
22. Discard non-sterile gloves according to agency policy and perform hand hygiene. Hand hygiene reduces the risk of infection.
Book pictures 2015 196
Discard gloves
23. Next:
  • Assist patient to comfortable position
  • Lower patient’s bed
  • Discard used equipment appropriately
These steps ensure the patient’s continued safety.
24. Document procedure and findings according to agency policy.

Report any unusual findings or concerns to the appropriate health care professional.

Record dressing change: time, place of wound, wound characteristics, presence of staples or sutures, size, drainage type and amount, type of cleansing solution and dressing applied.
Data source: Perry et al., 2014; WHO, 2009

Wound Irrigation and Packing

Wound irrigation and packing refer to the application of fluid to a wound to remove exudate, slough, necrotic debris, bacterial contaminants, and dressing residue without adversely impacting cellular activity vital to the wound healing process (British Columbia Provincial Nursing Skin and Wound Committee, 2014).

Any wound that has a cavity, undermining, sinus, or a tract will require irrigation and packing. Open wounds require a specific environment for optimal healing from secondary intention. The purpose of irrigating and packing a wound is to remove debris and exudate from the wound and encourage the growth of granulation tissue to prevent premature closure and abscess formation (Saskatoon Health Region, 2013). Depending on the severity of the wound, it can take weeks to months or years to complete the healing process. Packing should only be done by a trained health care professional and according to agency guidelines.

Contraindications to packing a wound include a fistula tract, a wound with an unknown endpoint to tunnelling, a wound sinus tract or tunnel where irrigation solution cannot be retrieved, or a non-healing wound that requires a dry environment (Saskatoon Health Region, 2013).

The type of packing for the wound is based on a wound assessment, goal for the wound, and wound care management objectives. The packing material should fill the dead space and conform to the cavity to the base and sides. It is important to not over-pack or under-pack the wound. If the wound is over-packed, there may be excessive pressure placed on the tissue causing pain, impaired blood flow, and, potentially, tissue damage. If the wound is under-packed and the packing material is not touching the base and the sides of the cavity, undermining, sinus tract, or tunnel, there is a risk of the edges rolling and abscess formation (British Columbia Provincial Nursing Skin and Wound Committee, 2014).

The types of gauze used to pack a wound may be soaked with normal saline, ointment, or hydrogel, depending on the needs of the wound. Other types of packing material include impregnated gauze, ribbon dressing, hydro-fiber dressing, alginate antimicrobial dressing, and a negative pressure foam or gauze dressing. If using ribbon gauze from a multi-use container, ensure each patient has their own container to avoid cross-contamination (British Columbia Provincial Nursing Skin and Wound Committee, 2014). Additional guidelines to irrigating and packing a wound are listed in Table 4.6.

Table 4.6: General Guidelines for Irrigating and Packing a Wound

Guideline

 Additional Information

Aseptic technique Sterile technique or no-touch technique may be used for irrigating and packing a wound. The use of a specific technique is based on agency policy, condition of the client, healability of the wound, invasiveness, and goal of the wound care. Sterile technique or no-touch technique must be used in all acute care settings. Clean technique may be used for chronic wounds in long-term-care settings.
Type of solution for irrigation The most common solution used is normal saline at room temperature, unless otherwise ordered. Check physician orders.
Wound irrigation The wound is irrigated each time the dressing is changed.
Irrigation pressure The pressure of irrigating must be strong enough to remove debris but not damage the new tissue. Generally, a 35 ml syringe with a 19 gauge blunt tip is sufficient for irrigation.
Wound assessment Wound assessment must be done with each dressing change to ensure the product is adequately meeting the needs of the wound.
Swabbing the wound Swab for culture, if required. always swab a wound after irrigation.
Packing material Packing material must be removed with each dressing change. Only one piece of gauze or dressing material should be used in wounds with sinus tracts or tunnelling to avoid the risk of retaining dressing/packing material. If there is a concern that packing is retained in the wound, contact the wound specialist or physician for follow-up.

Always leave a “tail” of the packing strip outside the wound. If more than one piece of packing is used, leave the tails outside the wound by securing the tails to the skin with a piece of Steri-Strip.

Documentation Wound assessment and dressing change must be documented each time. Each wound requires a separate wound care sheet. Type and quantity of packing material (length or pieces), along with the number of inner and outer dressings should be recorded as per agency policy. For any cavity, undermining, sinus tract, or tunnel with a depth greater than 1cm (>1cm), count and document the number of packing pieces removed from the wound, and the number of packing pieces inserted into the wound.
Communication A copy of the most recent wound care assessment and dressing change should be sent with patient upon transfer to another health care facility.
Use of sterile gloves for packing Sterile gloves may be used if packing a large or complex wound.
Data source: British Columbia Provincial Nursing Skin and Wound Committee, 2014; Saskatoon Health Region, 2013

The health care professional chooses the method of cleansing (a squeezable sterile normal saline container or a 30 to 35 cc syringe with a wound irrigation tip catheter) and the type of wound cleansing solution to be used based on the presence of undermining, sinus tracts or tunnels, necrotic slough, and local wound infection.

Agency policy will determine the wound cleansing solution, but sterile normal saline and sterile water are the solutions of choice for cleansing wounds and should be warmed to support wound healing.

Undermining, sinuses, and tunnels can only be irrigated when there is a known endpoint. Do not irrigate undermining, sinuses, or tunnels that extend beyond 15 cm unless directed by a physician or nurse practitioner (NP). If fluid is instilled into a sinus, tunnel, or undermined area and cannot be removed from the area, stop irrigating and refer to a wound specialist or physician or NP.

Checklist 38 outlines the steps for irrigating and packing a wound.

Checklist 38: Wound Irrigation and Packing
Disclaimer: Always review and follow your hospital policy regarding this specific skill.
Safety considerations:
  • Perform hand hygiene.
  • Check room for additional precautions.
  • Introduce yourself to patient.
  • Confirm patient ID using two patient identifiers (e.g., name and date of birth).
  • Explain process to patient and offer analgesia, bathroom, etc.
  • Listen and attend to patient cues.
  • Ensure patient’s privacy and dignity.
  • Assess ABCCS/suction/oxygen/safety.
  • Containers with cleansing solution must be patient specific and must be discarded after 24 hours if solution is left over.

Steps

 Additional Information

1. Review order for wound irrigation and packing. Confirm that physician’s orders are appropriate to wound assessment.
2. Perform hand hygiene. Hand hygiene reduces the risk of infection.
Hand hygiene with ABHR
3. Gather necessary equipment and supplies:
  • Syringe
  • Cannula with needleless adaptor
  • Irrigation fluid
  • Basin
  • Waterproof pad
  • Dressing tray with sterile forceps
  • Steri-Strips
  • Scissors
  • Skin barrier/protectant
  • Cotton tip applicators
  • Measuring guide
  • Outer sterile dressing
  • Packing gauze or packing as per physician’s orders

Some agencies provide a prepackaged sterile irrigation tray.

Being organized will help with efficiency and expedite the procedure, minimizing the length of time the patient experiences discomfort.
Gather supplies and set up sterile tray
4. Position patient to allow solution to flow off patient.

Position patient so wound is vertical to the collection basin.

Position patient on side
5. Place waterproof pad under patient.

Apply clean gloves.

Set up sterile field and supplies.

Protect patient’s clothing and bedding from irrigation fluid.
6. Remove outer dressing.
  • Using sterile forceps, remove inner dressing (packing) from the wound.
  • If the packing sticks, gently soak the packing with normal saline or sterile water and gently lift off the packing.
  • Confirm the quantity and type of packing is the same as recorded on previous dressing change.
Remove outer dressing

Removing packing that adheres to the wound bed without soaking can cause trauma to the wound bed tissue.

If packing material cannot be removed, contact the physician / NP or wound clinician.

If packing adheres to the wound, reassess the amount of wound exudate and consider a different packing material.

Remove inner dressing

All packing must be removed with each dressing change.

7. Assess the wound.
  • Take measurements, including length, width, and depth.
  • For undermining or tunnelling, note location and size.
  • Look for evidence of bone or tendon exposure.
  • Assess appearance of wound bed, noting percentage of tissue types.
  • Note presence of odour after cleansing.
  • Assess appearance of wound edge and peri-wound skin.
Assess the wound
Assess the wound

Wound assessment helps identify if the wound care is effective.

Always compare the current wound assessment with the previous assessment to determine if the wound is healing, delayed, worsening, or showing signs of infection.

8. Apply non-sterile gloves, gown, and goggles or face shield according to agency policy. The use of personal protective equipment (PPE) reduces the risk of contamination.
Apply non-sterile gloves
9. Fill 35 to 60 ml syringe with sterile water/irrigating solution and attach a needleless cannula to end of syringe.
Fill syringe with irrigating solution
10. Hold syringe about 1 inch above wound and flush wound using gently continuous pressure until returns run clear into the basin.

If irrigating a deep wound with a very small opening, attach a small needleless catheter to prefilled irrigation syringe and insert about 1/2 inch.

Use slow continuous pressure to flush wound.

Repeat flushing procedure until returns run clear into the basin.

Irrigate wound
Irrigate wound

Irrigation should be drained into basin. Retained irrigation fluid is a medium for bacterial growth and subsequent infection.

Irrigation should not increase patient discomfort.

The irrigation tip controls the pressure of the fluid, not the force of the plunger.

11. Dry wound edges with sterile gauze using sterile forceps.
Dry wound edges with sterile gauze

This step prevents maceration of surrounding tissue from excess moisture.

12. Remove goggles or face shield. PPE is no longer required after irrigating a wound.
13. Perform hand hygiene and apply sterile gloves (if not using sterile forceps) or non-sterile gloves. Hand hygiene reduces the risk of infection.
Hand hygiene with ABHR
14. Apply a skin barrier / protectant on the peri-wound skin as needed. Saturated packing materials and/or wound exudate may macerate or irritate unprotected peri-wound skin.
15. For normal saline gauze packing:
  • Moisten the gauze with sterile normal saline and wring it out so it is damp but not wet.
  • Enclose any non-woven edges in the centre of the packing material to reduce the risk of loose threads in the wound.
  • For other packing materials, see the specific product information.
The wound must be moist, not wet, for optimal healing. Gauze packing that is too wet can cause tissue maceration and reduces the absorbency of the gauze.
Moisten gauze
Moisten gauze

Normal saline gauze packing needs to be changed at least once daily.

If it is necessary to use more than one ribbon packing piece, the pieces must be tied together using sterile gloves; ensure the knot(s) is secure.

Ensure the wound is not over-packed or under-packed as this may diminish the healing process.

Apply packing to wound

This prepares the wound bed for optimal healing with a moist to dry dressing.

16. Open gauze and gently pack it into wound using either forceps or the tip of a cotton swab stick. Continue until all wound surfaces are in contact with gauze.
Apply packing to wound

Do not pack too tightly.

Do not overlap wound edges with wet packing.

17. Always leave a “tail” of packing materials either clearly visible in the wound cavity or on the peri-wound skin.

Use a Steri-Strip to secure the packing tail to the peri-wound skin.

If two or more packing pieces have been knotted together, ensure that the knots are placed in the wound cavity, not in the undermining, sinus tract, or tunnel.

leave a “tail” of packing materials
Leave a “tail” of packing materials

If the knot is visible in the wound, it is less likely that a packing piece will be lost if the knot comes undone.

A knot exerting pressure on the wound surface may impair blood flow and potentially cause necrosis in the wound.

18. Apply an appropriate outer dry dressing, depending on the frequency of the dressing changes and the amount of exudate from the wound. The dressing on the wound must remain dry on the outside until the next dressing change to avoid cross-contamination of the wound.
Apply outer dressing
19. Discard supplies and perform hand hygiene. This prevents the transfer of microorganisms.
Perform hand hygiene
20. Help patient back into a comfortable position, and lower the bed. This step optimizes patient safety.
21. Document wound assessment, irrigation solution, and patient response to the irrigation and dressing change.

Documentation should include date and time of procedure.

Report any unusual findings or concerns to the appropriate health care professional.

This allows for effective communication between health care providers.

Notify required health care providers if wound appears infected or is not healing as expected.

Data source: BCIT, 2010b; Perry et al., 2014

Video 4.5

Watch the video Wound Irrigation and Packing by Renée Anderson and Wendy McKenzie, Thompson Rivers University.

The following links provide additional information about wound packing and wound measuring.

Read this Procedure: Wound Packing PDF to learn more about wound packing procedure.
Take this Wound Assessment course to learn more about wound measuring and assessment.

Critical Thinking Exercises

  1. What information is documented when a wet to dry dressing change is performed?
  2. What temperature should the wound cleansing solution be?

32

4.7 Drain Management and Removal

Drain Management

Drains systems are a common feature of post-operative surgical management and are used to remove drainage from a wound bed to prevent infection and the delay of wound healing. A drain may be superficial to the skin or deep in an organ, duct, or a cavity such as a hematoma. The number of drains depends on the extent and type of surgery. A closed system uses a vacuum system to withdraw fluids and collects the drainage into a reservoir. Closed systems must be emptied and measured at least once every shift and cleaned using sterile technique according to agency protocol.

Drainage tubes consist of silastic tubes with perforations to allow fluid to drain from the surgical wound site, or separate puncture holes close to the surgical area. The drainage is collected in a closed sterile collection system/reservoir (Hemovac or Jackson-Pratt) or an open system that deposits the drainage on a sterile dressing. Drainage may vary depending on location and type of surgery. A Hemovac drain (see Figure 4.3) can hold up to 500 ml of drainage. A Jackson-Pratt (JP) drain (see Figure 4.4) is usually used for smaller amounts of drainage (25 to 50 ml). Drains are usually sutured to the skin to prevent accidental removal. The drainage site is covered with a sterile dressing and should be checked periodically to ensure the drain is functioning effectively and that no leaking is occurring.

Figure 4.7.1 Hemovac drain
Figure 4.3 Hemovac drain
Figure 4.7.2 Jackson Pratt drain
Figure 4.4 Jackson-Pratt drain

Checklist 39 outlines the steps to take when emptying a closed wound drainage system.

Checklist 39: Emptying a Closed Wound Drainage System

 Disclaimer: Always review and follow your hospital policy regarding this specific skill.

Safety considerations: 
  • Perform hand hygiene.
  • Check room for additional precautions.
  • Introduce yourself to patient.
  • Confirm patient ID using two patient identifiers (e.g., name and date of birth).
  • Explain process to patient and offer analgesia, bathroom etc.
  • Listen and attend to patient cues.
  • Ensure patient’s privacy and dignity.

Steps

 Additional Information

1. Perform hand hygiene. Hand hygiene reduces the risk of infection.
Perform hand hygiene
2. Collect the necessary supplies. For example: drainage measurement container, non-sterile gloves, waterproof pad, and alcohol swab
3. Apply non-sterile gloves and goggles or face shield according to agency protocols. Personal protective equipment reduces the transmission of microorganisms and protects against an accidental body fluid exposure.
Apply non-sterile gloves
4. Maintaining sterile technique, remove plug from pouring spout as indicated on drain. Open plug pointing away from your face to avoid an accidental splash of contaminated fluid.

Maintain the plug’s sterility.

The vacuum will be broken and the reservoir (drainage collection system) will expand.

DSC_0277
Open drain with opening facing away from you
5. Gently tilt the opening of the reservoir toward the measuring container and pour out the drainage. Pour away from yourself to prevent exposure to body fluids.
6. Place drainage container on bed or hard surface, tilt away from your face, and compress the drain to flatten it with one hand.

With the other hand, swab the surface of the port, then insert the plug to close the drainage system.

Gently squeezing the drain to flatten and remove all the air prior to closing the spout will establish the vacuum system.
DSC_0289
Expel air from JP drain and flatten it before closing
DSC_0297
Expel air from Hemovac drain and flatten it before closing
7. Place the plug back into the pour spout of the drainage system, maintaining sterility. This establishes vacuum suction for drainage system.
DSC_0293
Place the plug back into the pour spout of the JP drain, maintaining sterility
DSC_0300
Place the plug back into the pour spout of the Hemovac drain, maintaining sterility
8. Secure device onto patient’s gown using a safety pin; check patency and placement of tube.

Ensure that enough slack is present in tubing, and that reservoir hangs lower than the wound.

Proper placement of the reservoir allows gravity to facilitate wound drainage. Providing enough slack to accommodate patient movement prevents tension of the drainage system and pulling on the tubing and insertion site.
9. Note character of drainage: colour, consistency, odour, amount.

Discard drainage according to agency policy.

Drainage counts as patient fluid output and must be documented on patient chart as per hospital protocol.

Monitor drains frequently in the post-operative period to reduce the weight of the reservoir and to monitor drainage.

10. Remove gloves and perform hand hygiene. Hand hygiene must be performed after removing gloves. Gloves are not puncture-proof or leak-proof, and hands may become contaminated when gloves are removed.
Remove gloves
Remove gloves
Hand hygiene with ABHR
 

11. Document procedure and findings according to agency policy.

Report any unusual findings or concerns to the appropriate health care professional.

This allows for an accurate recording of drainage.

Record the number the drains if there is more than one, and record each one separately.

If the amount of drainage increases or changes, notify the appropriate health care provider according to agency policy.

If amount of drainage significantly decreases, the drain may be ready to be assessed and removed.

Data source: BCIT, 2010b; Perry et al., 2014

Drain Removal

Removal of a drain must be ordered by the physician or NP. A drain is usually in place for 24 to 48 hours, and removal depends on the amount of drainage over the last 24 hours.

Checklist 40 outlines the steps for removing a wound drainage system.

Checklist 40: Drain Removal

Disclaimer: Always review and follow your hospital policy regarding this specific skill.
Safety considerations:
  • Perform hand hygiene.
  • Check room for additional precautions.
  • Introduce yourself to patient.
  • Confirm patient ID using two patient identifiers (e.g., name and date of birth).
  • Explain process to patient and offer analgesia, bathroom, etc.
  • Listen and attend to patient cues.
  • Ensure patient’s privacy and dignity.
  • Assess ABCCS/suction/oxygen/safety.

Steps

 Additional Information

1. Confirm that the physician order correlates with amount of drainage in the past 24 hours. Physicians should specify an amount for acceptable drainage for the drain to be removed.
2. Explain procedure to patient; offer analgesia and bathroom as required. Taking this step decrease the patient’s anxiety about the procedure. Explain to the patient that a pulling sensation may be felt but will stop after the procedure is complete.

Analgesia provides comfort and achieves the goal of an acceptable pain level for the procedure.

3. Assemble supplies at patient’s bedside: dressing tray, sterile suture scissors or a sterile blade, cleansing solution, extra gauze, tape, garbage bag. Organizing supplies helps the procedure occur as efficiently as possible for the patient.
4. Apply a waterproof drape/pad for depositing the drain once it has been removed. This provides a place to put the drain once it is removed.
5. Perform hand hygiene. Hand hygiene reduces the risk of infection.
Hand hygiene with ABHR
6. Apply non-sterile gloves and face shield according to agency policy. Personal protective equipment reduces the potential for accidental exposure to blood or body fluids.
Apply non-sterile gloves
7. Release suction on reservoir and empty; measure and record drainage if >10 ml. Releasing suction reduces potential for tissue damage as drain is removed.
Release suction cap
Release suction cap
8. Remove tape and dressing from drain insertion site. Remove tape to allow for ease of drain removal.
9. Cleanse site according to simple dressing change procedure. This step prevents infection of the site and allows the suture to be easily seen for removal.
Cleanse drain site
Cleanse drain site
10. Carefully cut and remove suture anchoring drain with sterile suture scissors or a sterile blade.
DSC_0284
Wound drain may be attached to the skin with one suture to keep it in place
Snip beneath the suture knot

Snip beneath the suture knot to ensure contaminated suture is not brought into the tissue. Pull suture out. Snip or cut knot away from yourself.

11. Stabilize skin with non-dominant hand. Applying counterpressure to skin near the drain decreases discomfort to patient.
12. Ask patient to take a deep breath and exhale slowly; remove the drain as the patient exhales. This step helps the patient prepare for removal of the drain.
13. Firmly grasp drainage tube close to skin with dominant hand, and with a swift and steady motion withdraw the drain and place it on the waterproof drape/pad (other hand should stabilize skin with 4 x 4 sterile gauze around drain site). Slight resistance may be felt.

If there is strong resistance, stop, cover site, and call physician.

Ensure the drainage tip is intact. The end of the drainage tip should be smooth. Some agencies require that the tip be sent for lab analysis for microorganisms.

When pulling out drain, gather up the drain tubing in your hand as it’s being removed.

gather drain tubing in your hand as it's being removed
Gather drain tubing in your hand as it’s being removed
14. Place drain and tube on waterproof pad or in garbage bag to be disposed of after procedure is complete. This step prevents the drain and tube from contaminating bed or floor.
15. Remove gloves and apply new non-sterile gloves. This prevents contamination of the drain site.
Remove gloves
Remove gloves
Apply new non-sterile gloves
16. Cleanse old drain site using aseptic technique according to simple dressing change procedure. This step prevents contamination of the drain site.
17. Cover drain site with sterile dressing.
Cover drain site with sterile dressing
18 Assist patient back to comfortable position and lower bed. This ensures patient safety and comfort after the procedure.
19. Discard drain in biohazard waste as per hospital policy. This prevents the spread of microorganisms.
20. Perform hand hygiene. Hand hygiene prevents the spread of infection.
Perform hand hygiene
21. Document output and drain removal. Record drainage according to agency policy.
22. Assess dressing 30 minutes after drain removal. Monitor for excessive drainage from the drainage site.
Assess dressing 30 minutes post-drain removal
Assess dressing 30 minutes after drain removal
23. Document procedure and findings according to agency policy.

Report any unusual findings or concerns to the appropriate health care professional.

Accurate and timely documentation and reporting promote patient safety.
Data source: BCIT, 2010b; Perry et al., 2014; Saskatoon Health Region, 2012

Video 4.6

Watch the video JP Drain Removal by Renée Anderson & Wendy McKenzie, Thompson Rivers University.

Critical Thinking Exercises

  1. When you start to remove your patient’s Jackson-Pratt drain, you notice there is 100 ml of fresh blood in the drainage bulb. What would be your next steps?
  2. Describe ways in which you can help relieve the discomfort felt by a patient while removing a wound drain.

33

4.8 Summary

Wound healing is a complex process. To ensure optimal wound healing, it is essential to identify and control underlying issues that may prevent a wound from healing. Controlling blood sugar levels, limiting smoking, and observing proper nutrition all have a significant impact on the healing process. It is important to educate patients on these modifiable risk factors to promote wound healing. Understanding the process of wound healing, the use of a comprehensive assessment, and the appropriate selection of wound care products can maximize the wound healing process.

Key Takeaways

  • Wound care requires a complete assessment prior to initiating wound treatment. Always compare assessments with previous findings to assess whether wound is healing and if wound treatment is effective.
  • Treat the patient (modifiable external and internal factors) and the wound to optimize the healing process.
  • Select the appropriate wound treatment based on the wound characteristics, type of wound, and purpose of the dressing.
  • Understand the differences between types of wounds and causes, and follow procedures for best practice in the acute and clinical setting.

Suggested Online Resources

  1. BC Patient Safety and Quality Council: Surgical site infections resources. This website provides links to a variety of online resources related to surgical site infections.
  2. Canadian Association of Wound Care (CAWC): Education. This website offers an education section for health care professionals using various methods to provide flexible, interprofessional education that supports the learning needs and professional career growth in the areas of skin health, wound prevention, and management.
  3. Connecting Learners with Knowledge (CLWK). This website, started as a pilot project in 2010, was created by nurses to explore innovative ways to meet their education needs. Membership grew considerably and it soon became a permanent, living resource. In February 2014 it merged with QExchange.ca, which was home to communities for British Columbia health care providers. CLWK is now a growing group of communities that support health care providers as they network and improve care.
  4. Connecting Learners with Knowledge (CLWK): Skin & wound care. These interactive e-learning modules cover skin and wound care and each take about 25 to 30 minutes to complete.
  5. Provincial Infection Control Network of British Columbia (PICNET). This is the website for PICNET, a program of the Provincial Health Services Authority. Its mission is to reduce health care-associated infections by improving infection prevention control practices.
  6. Vancouver Coastal Health: How wounds heal. This 30-minute video is designed for health care professionals who wish to improve their understanding of wound and skin care. Information includes the definition of a wound, the three classifications of wound healing or closure, the trajectory of wound healing, and reasons for delayed wound healing.
  7. Vancouver Coastal Health: Wound assessment. This 30-minute video is designed for health care professionals who wish to improve their understanding of wound and skin care. Information includes basic wound etiology, wound location, and wound assessment parameters.

References

British Columbia Institute of Technology (BCIT). (2010a). Simple dressing change. Skills checklists.

British Columbia Institute of Technology (BCIT). (2010b). Drain removal. Skills checklists.

British Columbia Institute of Technology (BCIT). (2010c).Removal of sutures and staples. Skills checklists.

British Columbia Provincial Nursing Skin and Wound Committee. (2011). Guidelines: Assessment and treatment of surgical wounds healing by primary and secondary intention in adults and children. Retrieved on April 25, 2015, from https://www.clwk.ca/buddydrive/file/guideline-surgical-wounds-primary-secondary-intention/?download=102%25253Aguideline-surgical-wounds-primary-secondary-intention

British Columbia Provincial Nursing Skin and Wound Committee. (2014). Guidelines: Braden scale for predicting pressure ulcer risks in adults and children/infants. Retrieved on April 25, 2015, from https://www.clwk.ca/buddydrive/file/guideline-braden-risk-assessment/

Gallagher-Camden, S. (2012). Skin care needs of the obese patient. In Bryant, R. A., & Nix, D. P. (Eds.). Acute and chronic wounds: Current management concepts (4th ed.). St Louis, MO: Mosby.

Perry, A., Potter, P., & Ostendorf, W. (2014). Clinical skills and nursing techniques (8th ed.). St Louis, MO: Elsevier-Mosby.

Saskatoon Health Region. (2013). Drains: Emptying, shortening and removal. Policies and procedures. Retrieved on May, 2012, from https://www.saskatoonhealthregion.ca/about/NursingManual/1100.pdf

Spiliotis, J., Tsiveriotis, K., Datsis, A. D., Vaxevanidou, A., Zacharis, G., Giafis, K., Kekelos, S., & Rogdakis, A. (2009). Wound dehiscence: Is still a problem in the 21st century: A retrospective study. Retrieved on June 23, 2015, from http://www.wjes.org/content/4/1/12

Stotts, N. A. (2012). Nutritional assessment and support. In Bryant, R. A., & Nix, D.P. (Eds.). Acute and chronic wounds: Current management concepts (4th ed.). St Louis, MO: Mosby

World Health Organization. (2009). Glove use information leaflet. Retrieved from WHO: Patient Safety. Retrieved on June 23, 2015, from http://www.who.int/gpsc/5may/Glove_Use_Information_Leaflet.pdf

V

Chapter 5. Oxygen Therapy

34

5.1 Introduction

Oxygen is essential for sustaining life. The cardiovascular and the respiratory systems are responsible for supplying the body’s oxygen demands. Blood is oxygenated through the mechanisms of ventilation, perfusion, and the transport of respiratory gases (Potter, Perry, Ross-Kerr, & Wood, 2010).

Respiration is optimal when sufficient oxygenation occurs at the cellular level and when cellular waste and carbon dioxide are adequately removed via the bloodstream and lungs. If this system is interrupted — for example by lung tissue damage, inflammation or excess mucus in the airways, or impairment of ventilation — intervention is required to support the client and prevent the condition from worsening or, potentially, to prevent death from occurring (Perry, Potter, & Ostendorf, 2014).

Oxygen is the most frequently used medication in emergency medicine, and when used appropriately in the treatment of hypoxemia (an inadequate supply of oxygen in the arterial blood), it potentially saves lives (Kane, Decalmer, & O’Driscoll, 2013). This chapter describes the principles of oxygen therapy, the causes and management of hypoxia (the reduction of oxygen supply at the tissue level), and the optimal use of oxygen therapy and treatment modalities.

Learning Objectives

  • Describe the principles of oxygenation
  • Understand the functions and limitations of pulse oximetry
  • Describe the causes of hypoxia
  • Identify when oxygen therapy is needed
  • Describe the management of hypoxia
  • List hazards, precautions, and complications of oxygen therapy
  • Describe how to perform oral suctioning

35

5.2 Principles

The air we breathe is made up of various gases, 21% of which is oxygen. Therefore, a patient who is receiving no supplemental oxygen therapy is still receiving oxygen from the air. This amount of oxygen is adequate provided that the patient’s airway is not compromised and there is sufficient hemoglobin in the blood. The cardiovascular system must also be intact and able to circulate blood to all body tissues. If any of these systems fail, the patient will require supplemental oxygen to increase the likelihood that adequate levels of oxygen will reach all vital body tissues necessary to sustain life.

Oxygen in the Blood

Hemoglobin (Hgb) holds oxygen in reserve until the metabolic demands of the body require more oxygen. The Hgb then moves the oxygen to the plasma for transport to the tissues. The body’s demand for oxygen is affected by activity, metabolic status, temperature, and level of anxiety. The ability of Hgb to move the oxygen to the tissues depends on a number of factors, such as oxygen supply, ventilatory effectiveness, nutrition, cardiac output, hemoglobin level, smoking, drug use, and underlying disease. Any one of these factors can potentially impede the supply and transport of oxygen to the tissues.

Measurement of Oxygen in the Blood

The vast majority of oxygen carried in the blood is attached to hemoglobin and can be assessed by monitoring the oxygen saturation through pulse oximetry (SpO2).The target range for oxygen saturation as measured by blood analysis (SaO2), such as arterial blood gas, is 92% to 98% for a normal adult. Arterial blood gas (ABG) is the analysis of an arterial blood sample to evaluate the adequacy of ventilation, oxygen delivery to the tissues, and acid-base balance status (Simpson, 2004). For patients with COPD, the target SaO2 range is 88% to 92% (Alberta Health Services, 2015; British Thoracic Society, 2008; Kane et al., 2013). Only about 3% of the oxygen carried in the blood is dissolved in the plasma, which can be assessed by looking at the partial pressure of oxygen in the blood through blood gas analysis (PaO2). The normal PaO2 of a healthy adult is 80 to 100 mmHg. The SpOis more clinically significant than the PaOin determining the oxygen content of the blood.

Oxygen is considered a medication and therefore requires continuous monitoring of the dose, concentration, and side effects to ensure its safe and effective use (Alberta Health Services, 2015). Oxygen therapy may be indicated for hypoxemia and hypoxia.

Understanding Hypoxemia and Hypoxia

Although the terms hypoxemia and hypoxia are often used interchangeably, they do not mean the same thing. Hypoxemia is a condition where arterial oxygen tension or partial pressure of oxygen (PaO2) is below normal (<80 mmHg). Hypoxemia is the inadequate supply of oxygen in the arterial blood. Hypoxia is the reduction of oxygen supply at the tissue level, which is not measured directly by a laboratory value (Metrovic, 2014), but by pulse oximetry and SpO2 (British Thoracic Society, 2008).

Generally, the presence of hypoxemia suggests that hypoxia exists. However, hypoxia may not be present in a patient with hypoxemia if the patient is able to compensate for a low PaO2 by increasing oxygen supply. This is usually achieved by increasing cardiac output (by raising the heart rate) or by decreasing tissue oxygen consumption. Conversely, patients who do not show signs of hypoxemia may be hypoxic if oxygen delivery to the tissues is diminished or if the tissues are unable to adequately use the oxygen.

Hypoxemia is the most common cause of tissue hypoxia, and if the correct diagnosis is made, it is readily treatable.

The Vancouver Coastal Health Authority (2015) lists three causes of hypoxemia: deadspace and shunts, low inspired oxygen tension, and alveolar hypoventilation.

Deadspace and Shunts

Ventilation and perfusion are not always equal between the alveoli and pulmonary capillaries. There is sometimes too much perfusion and not enough ventilation in some areas of the lungs, causing a shunt where the blood is unable to pick up oxygen and unload carbon dioxide. In other areas of the lungs, there may be too much ventilation and not enough perfusion, causing deadspace where oxygen is unable to diffuse into the blood.

Low Inspired Oxygen Tension

Hypoxemia can be caused by breathing air at pressures less than atmospheric pressure, such as at high altitudes or in an enclosed space with inadequate ventilation. The enclosed space may be especially hazardous if there is a low concentration of oxygen or if it contains toxic gases.

Alveolar Hypoventilation

If a patient hypoventilates, the level of oxygen in the alveoli will fall, and the level of carbon dioxide will increase. Hypoxemia occurs because less oxygen is moved into the pulmonary blood flow.

Examples of medical conditions that cause hypoxemia include:

With hypoxia, there is inadequate transport of oxygen to the cells or tissues, either because of obstruction, secretions, or tumours in the lungs; hypoventilation due to disease, injury to the respiratory system, or medications; or poor blood flow due to a compromised circulatory system (British Thoracic Society, 2008). Hypoxia related to anemia or circulatory system compromise, such as decreased cardiac output, will respond poorly to oxygen therapy, and other appropriate interventions should be considered.

Hypoxia is a medical emergency (Alberta Health Services, 2015). Oxygen therapy will:

Critical Thinking Exercises

  1. How do you know if your patient is hypoxic or hypoxemic? Please explain.
  2. Why would the post-surgical patient require supplemental oxygen?

36

5.3 Pulse Oximetry

Oxygen saturation, sometimes referred to as ‘‘the fifth vital sign,” should be checked by pulse oximetry in all breathless and acutely ill patients (British Thoracic Society, 2008). SpO2 and the inspired oxygen concentration should be recorded on the observation chart together with the oximetry result. The other vital signs of pulse, blood pressure, temperature, and respiratory rate should also be recorded in situations where supplemental oxygen is required.

Pulse oximetry is a painless, non-invasive method to monitor SpO2 intermittently and continuously. The use of a pulse oximeter (see Figure 5.1) is indicated in patients who have, or are at risk for, impaired gaseous exchange or an unstable oxygen status.

pulse oximeter
Figure 5.1 Pulse oximeter

The pulse oximeter is a probe with a light-emitting diode (LED) that is attached to the patient’s finger, forehead, or ear. Beams of red and infrared light are emitted from the LED, and the light wavelengths are absorbed differently by the oxygenated and the deoxygenated hemoglobin (HgB) molecules. The receiving sensor measures the amount of light absorbed by the oxygenated and deoxygenated Hgb in the arterial (pulsatile) blood. The more HgB that is saturated with oxygen, the higher the SpO2, which should normally measure above 95%.

Pulse oximeters have an indicator of signal strength (such as a bar graph, audible tone, waveform, or flashing light) to show how strong the receiving signal is. Measurements should be considered inaccurate if the signal strength is poor.

Pulse oximeters will also indicate heart rate by counting the number of pulsatile signals. To ensure accuracy, count the patient’s pulse rate by taking the pulse and comparing it to the pulse rate shown on the pulse oximeter.

Limitations

The most common cause of inaccuracy with pulse oximeters is motion artifact. Patient movement can cause pulsatile venous flow to be incorrectly measured as arterial pulsations, thus producing an inaccurate oximetry and pulse-rate reading.

Another common cause of inaccuracy is poor peripheral perfusion. Poor peripheral perfusion can be caused by conditions such as hypothermia, peripheral vascular disease, vasoconstriction, hypotension, or peripheral edema (Perry, Potter, & Ostendorf, 2014). A forehead probe can be used for patients with decreased peripheral perfusion.

Conditions such as jaundice, as well as intravascular dyes and carbon monoxide in the blood, can also influence oximetry readings. Anemic patients with low Hgb may have a normal SpO2 reading, even though the available oxygen is not enough to meet the metabolic demands of the body. Patients with elevated bilirubin concentrations may also have falsely low SpO2 readings (Howell, 2002).

Application of Pulse Oximetry

If measuring SpO2 by attaching the probe to a finger or toe, check the radial or pedal pulse and capillary refill of the finger or toe you plan to use. If the patient’s extremities are cold, you could try to warm his or her hands in yours, or apply warm towels to improve perfusion.

The patient’s finger or toe should be clean and dry. Check that the patient does not have artificial nails or nail polish, as both will influence the light transmission and should, therefore, be removed before applying pulse oximetry.

Check that the probe is positioned properly so that optical shunting (when light from the transmitter passes directly into the receiver without going through the finger) does not occur.

Bright ambient light may also affect the accuracy of pulse oximetry readings.

Hazards of Pulse Oximetry

Pulse oximetry is generally considered to be a safe procedure. However, tissue injury may occur at the measuring site as a result of probe misuse. Pressure sores or burns are possible effects of prolonged application (>2 hours).

Critical Thinking Exercises

  1. You are checking your patient’s SpO2 but the signal strength on the pulse oximeter is poor. What would be your next steps?
  2. Your patient has been admitted with a diagnosis of carbon monoxide poisoning with an SpOof 98%. What does this reading tell you?

37

5.4 Signs and Symptoms of Hypoxia

Assessment for hypoxia can be done by completing a medical history, determining current medical condition, and performing a respiratory assessment. If a patient is experiencing any of the signs and symptoms listed in Table 5.1, hypoxia may be present.

Hypoxia must be treated immediately by the health care provider, as a lack of oxygen to tissues and organs can create serious complications (Alberta Health Services, 2015).

Table 5.1 Signs and Symptoms of Hypoxia
Safety considerations:
  • Presence of symptoms depends on the patient’s age, presence of disease process, level of health, and presence of chronic illness.
  • Consider any underlying causes of hypoxia, such as COPD, heart failure, anemia, and pneumonia, which need to be corrected to prevent and manage hypoxia (Perry et al., 2007).
  • Early signs of hypoxia are anxiety, confusion, and restlessness; if hypoxia is not corrected, hypotension will develop.
  • As hypoxia worsens, the patient’s vital signs, activity tolerance, and level of consciousness will decrease.
  • Late signs of hypoxia include bluish discoloration of the skin and mucous membranes, where vasoconstriction of the peripheral blood vessels or decreased hemoglobin causes cyanosis. Cyanosis is most easily seen around the lips and in the oral mucosa. Never assume the absence of cyanosis means adequate oxygenation.

Signs and Symptoms

Indications

 Tachypnea Increased respiration rate is an indication of respiratory distress.
 Dyspnea Shortness of breath (SOB) is an indication of respiratory distress.
Use of accessory muscles Use of neck or intercostal muscles when breathing is an indication of respiratory distress.
Noisy breathing Audible noises with breathing, or wheezes and crackles, are an indication of respiratory conditions. Assess lung sounds for adventitious sounds such as wheezing or crackles. Secretions can plug the airway, thereby decreasing the amount of oxygen available for gas exchange in the lung.
Decreased oxygen saturation levels Oxygen saturation levels should be between 92% and 98% for an adult without an underlying respiratory condition. Lower than 92% is considered hypoxic. For patients with COPD, oxygen saturation levels may range from 88% to 92%. Lower than 88% is considered hypoxic.
Flaring of nostrils or pursed lips Patients who are hypoxic may breathe differently, which may signal the need for supplemental oxygen.
Skin colour of patient Changes in skin colour to bluish or gray are a late sign of hypoxia.
Position of patient Patients in respiratory distress may voluntarily sit up or lean over by resting arms on their legs to enhance lung expansion. Patients who are hypoxic may not be able to lie flat in bed.
Ability of patient to speak in full sentences Patients in respiratory distress may be unable to speak in full sentences, or may need to catch their breath between sentences.
Change in mental status or loss of consciousness (LOC) This is a worsening and a late sign of hypoxia.
Restlessness or anxiety This is an early sign of hypoxia.
Data source: British Thoracic Society, 2008; Perry et al., 2014

Critical Thinking Exercises

  1. Your patient is tachypneic and dyspneic. What is the first step you should take to ensure maximal lung expansion?
  2. Your patient is sitting up at 90 degrees, but is still showing signs of hypoxia. What would be your best steps?

38

5.5 Oxygen Therapy Systems

Tissue oxygenation is dependent on optimal or adequate delivery of oxygen to the tissues. Increasing the concentration of inhaled oxygen is an effective method of increasing the partial pressure of oxygen in the blood and correcting hypoxemia. Simply stated, oxygen therapy is a means to provide oxygen according to target saturation rates (as per physician orders or hospital protocol) to achieve normal or near normal oxygen saturation levels for acute and chronically ill patients (British Thoracic Society, 2008). Those administering oxygen must monitor the patient to keep the saturation levels within the required target range. Oxygen should be reduced or discontinued in stable patients with satisfactory oxygen saturation levels (Perry et al., 2014).

Hypoxemia or hypoxia is a medical emergency and should be treated promptly. Failure to initiate oxygen therapy can result in serious harm to the patient. The essence of oxygen therapy is to provide oxygen according to target saturation rates, and to monitor the saturation rate to keep it within target range. The target range (SaO2) for a normal adult is 92% to 98%. For patients with COPD, the target SaO2 range is 88% to 92% (Alberta Health Services, 2015; British Thoracic Society, 2008; Kane, et al., 2013).

Although all medications given in the hospital require a prescription, oxygen therapy may be initiated without a physician order in emergency situations. Most hospitals will have a protocol in place to allow health care providers to apply oxygen in emergency situations. The health care provider administering oxygen is responsible for monitoring the patient response and keeping the oxygen saturation levels within the target range.

The most common reasons for initiating oxygen therapy include acute hypoxemia related to pneumonia, shock, asthma, heart failure, pulmonary embolus, myocardial infarction resulting in hypoxemia, post-operative states, pneumonthorax, and abnormalities in the quality and quantity of hemoglobin. There are no contraindications to oxygen therapy if indications for therapy are present (Kane et al., 2013).

Oxygen Delivery Systems

There is a wide variety of devices available to provide oxygen support. Delivery systems are classified as low-flow or high-flow equipment, which provide an uncontrolled or controlled amount of supplemental oxygen to the patient (British Thoracic Society, 2008). Selection should be based on preventing and treating hypoxemia and preventing complications of hyper-oxygenation. Factors such as how much oxygen is required, the presence of underlying respiratory disease, age, the environment (at home or in the hospital), the presence of an artificial airway, the need for humidity, a tolerance or a compliance problem, or a need for consistent and accurate oxygen must be considered to select the correct oxygen delivery device (British Thoracic Society, 2008). Table 5.2 lists the types of oxygen equipment.

Table 5.2 Types of Oxygen Equipment

Types of Oxygen Equipment

 Additional Information

Nasal-cannula (low-flow system) Nasal cannula consists of a small bore tube connected to two short prongs that are inserted into the nares to supply oxygen directly from a flow meter or through humidified air to the patient. It is used for short- or long-term therapy (i.e., COPD patients), and is best used with stable patients who require low amounts of oxygen.

Advantages: Can provide 24% to 40% O2 (oxygen) concentration. Most common type of oxygen equipment. Can deliver O2 at 1 to 6 litres per minute (L/min). It is convenient as patient can talk and eat while receiving oxygen. May be drying to nares if level is above 4 L/min. Easy to use, low cost, and disposable.

Limitations: Easily dislodged, not as effective is a patient is a mouth breather or has blocked nostrils or a deviated septum or polyps.

Applying nasal prongs
Applying a nasal cannula
Nasal cannula
Nasal cannula
Simple face mask (low-flow system) A mask fits over the mouth and nose of the patient and consists of exhalation ports (holes on the side of the mask) through which the patient exhales CO2 (carbon dioxide). These holes should always remain open. The mask is held in place by an elastic around the back of the head, and it has a metal piece to shape over the nose to allow for a better mask fit for the patient. Humidified air may be attached if concentrations are drying for the patient.

Advantages: Can provide 40% to 60% O2 concentration. Flow meter should be set to deliver O2 at 6 to 10 L/min. Used to provide moderate oxygen concentrations. Efficiency depends on how well mask fits and the patient’s respiratory demands. Readily available on most hospital units. Provides higher oxygen for patients.

Disadvantages: Difficult to eat with mask on. Mask may be confining for some patients, who may feel claustrophobic with the mask on.

Simple Face Mask
Simple face mask
Non re-breather mask (high-flow system) Consists of a simple mask and a small reservoir bag attached to the oxygen tubing connecting to the flow meter. With a re-breather mask, there is no re-breathing of exhaled air. It has a series of one-way valves between the mask and the bag and the covers on the exhalation ports. On inspiration, the patient only breathes in from the reservoir bag; on exhalation, gases are prevented from flowing into the reservoir bag and are directed out through the exhalation ports.

Advantages: With a good fit, the mask can deliver between 60% and 80% FiO2 (fraction of inspired oxygen). The flow meter should be set to deliver O2 at 10 to 15 L/min. Flow rate must be high enough to ensure that the reservoir bag remains partially inflated during inspiration.

Disadvantages: These masks have a risk of suffocation if the gas flow is interrupted. The bag should never totally deflate. The patient should never be left alone unless the one-way valves on the exhalation ports are removed. This equipment is used by respiratory therapists for specific short-term, high oxygen requirements such as pre-intubation and patient transport. They are not available on general wards due to: 1. the risk of suffocation, 2. the chance of hyper-oxygenation, and 3. their possible lack of humidity. The mask also requires a tight seal and may be hot and confining for the patient. The mask will interfere with talking and eating.

Non-rebreather mask
Non re-breather mask
Partial re-breather mask (high-flow system) The bag should always remain partially inflated. The flow rate should be high enough to keep the bag partially inflated.

Advantages: Can deliver 10 to 12 L/min for an O2 concentration of 80% to 90%. Used short term for patients who require high levels of oxygen.

Disadvantages: The partial re-breather bag has no one-way valves, so the expired air mixes with the inhaled air. The mask may be hot and confining for the patient and will interfere with eating and talking.

Partial re-breather mask
Face tent (low-flow system) The mask covers the nose and mouth and does not create a seal around the nose.

Advantages: Can provide 28% to 100% O2 Flow meter should be set to deliver O2 at a minimum of 15 L/min. Face tents are used to provide a controlled concentration of oxygen and increase moisture for patients who have facial burn or a broken nose, or who are are claustrophobic.

Disadvantages: It is difficult to achieve high levels of oxygenation with this mask.

Face Tent
Face tent
Venturi mask (high-flow system) High-flow system consisting of a bottle of sterile water, corrugated tubing, a drainage bag, air/oxygen ratio nebulizer system, and a mask that works with the corrugated tubing. The mask may be an aerosol face mask, tracheostomy mask, a T-piece, or a face tent. The key is that the flow of oxygen exceeds the peak inspiratory flow rate of the patient, and there is little possibility for the patient to breathe in air from the room

Advantages: The system can provide 24% to 60% O2 at 4 to 12 L/min. Delivers a more precise level of oxygen by controlling the specific amounts of oxygen delivered. The port on the corrugated tubing (base of the mask) sets the oxygen concentration. Delivers humidified oxygen for patient comfort. It does not dry mucous membranes.

Disadvantages: The mask may be hot and confining for some patients, and it interferes with talking and eating. Need a properly fitting mask. Nurses may be asked to set up a high-flow system. In other instances, respiratory therapists may be responsible for regulating and monitoring the high-flow systems.

Venturi mask
Venturi mask
Data source: Perry et al., 2014; Vancouver Coastal Health Authority, 2015
Special considerations:

Increasing Oxygen in the Lungs

The use of oxygen delivery systems is only one component to increasing oxygen to the alveolar capillary bed to allow for optimal oxygenation to the tissues. Additional methods to increase oxygen saturation levels in the body include (Perry et al., 2014):

Critical Thinking Exercises

  1. Explain the difference between low- and high-flow oxygen systems.
  2. The reservoir bag on a non re-breather mask and a partial re-breather mask must always be kept partially inflated. Why?

39

5.6 Management of Hypoxia

Hypoxemia or hypoxia is a medical emergency and should be treated promptly. Failure to initiate oxygen therapy can result in serious harm to the patient. The essence of oxygen therapy is to provide oxygen according to target saturation rate, and to monitor the saturation rate to keep it within target range. The target range (SaO2) for a normal adult is 92 – 98%. For patients with COPD, the target SaO2 range is 88 – 92% (Alberta Health Services, 2015; Kane, et al., 2013; Perry et al., 2014).

Although all medications require a prescription, oxygen therapy may be initiated without a physician’s order in emergency situations. Hypoxia is considered an emergency situation. Most hospitals have a protocol in place allowing health care providers to apply oxygen in emergency situations. The health care provider administering oxygen is responsible for monitoring the patient response and keeping the oxygen saturation levels within the target range. The most common reasons for initiating oxygen therapy include acute hypoxemia related to pneumonia, shock, asthma, heart failure, pulmonary embolus, myocardial infarction resulting in hypoxemia, post operative states, pneumonthorax, and abnormalities in the quality and quantity of hemoglobin. There are no contradictions to oxygen therapy if indications for therapy are present (Kane et al., 2013).

Hypoxic patients must be assessed for the causes and underlying reasons for their hypoxia. Hypoxia must be managed not only with supplemental oxygen but in conjunction with the interventions outlined in Table 5.3.

Table 5.3 Interventions to Treat and Prevent Hypoxia
Interventions

Additional Information

Raise the head of the bed Raising the head of the bed promotes effective breathing and diaphragmatic descent, maximizes inhalation, and decreases the work of breathing. Positioning enhances airway patency in all patients. A Fowler’s or semi-Fowler’s position promotes a patient’s chest expansion with the least amount of effort. Patients with COPD who are short of breath may gain relief by sitting with their back against a chair and rolling their head and shoulders forward or leaning over a bedside table while in bed.
High fowlers
High Fowler’s position
Deep breathing and coughing techniques Deep breathing and coughing techniques help patients effectively clear their airway while maintaining their oxygen levels. Teach patients “controlled coughing” by having them take a deep breath in and cough deeply with the mouth slightly open. If they have difficulty coughing, teach the huffing technique. This involves taking a medium breath and then making a sound like “ha” to push the air out fast with the mouth slightly open. This is done three or four times, and then they are instructed to cough. If secretions are thick and tenacious, the patient may be dehydrated and require additional fluids (if medical condition does not contraindicate additional fluids).
Oxygen therapy and equipment If patient is already on supplemental oxygen, ensure equipment is turned on and set at the required flow rate and is connected to an oxygen supply source. If a portable tank is being used, check the oxygen level in the tank. Ensure the connecting oxygen tubing is not kinked, which could obstruct the flow of oxygen. Feel for the flow of oxygen from the exit ports on the oxygen equipment. In hospitals where medical air and oxygen are used, ensure patient is connected to the oxygen flow port.
Applying nasal prongs
Assess need for bronchodilators Pharmacological management is essential for patients with respiratory disease. Medications such as bronchodilators effectively relax smooth muscles and open airways in certain disease processes such as COPD. Glucocorticoids relieve inflammation and also assist in opening air passages. Mucolytics and adequate hydration decrease the thickness of pulmonary secretions so that they can be expectorated more easily.
Assess need for bronchodilation
Oral suctioning Some patients may have a weakened cough that inhibits their ability to clear secretions from the mouth and throat. Patients with muscle disorders or who have experienced a cerebral vascular accident (CVA) are at risk for aspiration related to ineffective cough reflex, which could lead to hypoxia. Provide oral suction if patient is unable to clear secretions, foreign debris, or mucous from the mouth and pharynx. See Checklist 42 for further directions.
Oral suctioning may be necessary
Pain relief Provide adequate pain relief. Pain is known to increase the metabolic demands on the body, which in turn increases the need for more oxygen supply.
Devices to enhance secretion clearance Many devices assist with secretion clearance, such as vests that inflate with large volumes of air and vibrate the chest wall, and handheld devices that help provide positive expiratory pressure to prevent airway collapse in exhalation. Usefulness of these therapies is decided based on the individual patient’s situation and the preference of both the patient and care provider.
Frequent rests in between activities Patients experiencing hypoxia often feel short of breath (SOB) and fatigue easily. Allow patient to rest frequently, and space out interventions to decrease oxygen demand in patients whose reserves are likely limited. Has the patient just returned from a walk down the hall or to the bathroom?

Assess for underlying causes of the hypoxia. Is the potential problem respiratory or cardiovascular? What underlying respiratory or cardiovascular conditions exist? Complete respiratory and cardiovascular assessments may reveal potential abnormalities in these systems.

Obstructive sleep apnea Patients with obstructive sleep apnea (OSA) may be unable to maintain a patent airway. In OSA, nasopharyngeal abnormalities that cause narrowing of the upper airway produce repetitive airway obstruction during sleep, with the potential for periods of apnea and hypoxemia. Pressure can be delivered during the inspiratory and expiratory phases of the respiratory cycle by using a mask to maintain airway patency during sleep. The process requires consideration of each individual’s needs in order to to obtain compliance.
Anxiety and depression The most common co-morbidities of COPD are anxiety and depression. Anxiety is related to chronic shortness of breath and an inability to breathe effectively. Anxiety and depression are chronically undertreated and may be relieved with breathing retraining, counselling, relaxation techniques, or anti-anxiety medications if appropriate.
Data source: Cigna & Turner-Cigna, 2005; Kane et al., 2013; Maurer et al., 2008; Perry et al., 2007; Perry et al., 2014; Shackell & Gillespie, 2009

Applying and Titrating Oxygen Therapy

When providing oxygen therapy, remember the following (Kane et al., 2013):

Oxygen is available in hospitals through bulk liquid oxygen systems that dispense oxygen as a gas through outlets in rooms. It can also be provided in cylinders (large or small) for easy transport for patient use while mobile or when moving around the hospital. An oxygen flow meter regulates the flow in litres per minute. Oxygen therapy may be short- or long-term depending on the SaO2 requirements of the patients and underlying diseases processes (Perry et al., 2014).

Checklist 41 reviews the steps for applying and titrating oxygen therapy (see Figure 5.2).

Checklist 41: Applying and Titrating Oxygen Therapy
Disclaimer: Always review and follow your hospital policy regarding this specific skill.
Safety considerations: 
  • Perform hand hygiene.
  • Check room for additional precautions.
  • Introduce yourself to patient.
  • Check patient’s name band to confirm identification.
  • Explain process to patient.
  • Use appropriate listening and questioning skills.
  • Listen and attend to patient cues.
  • Ensure patient’s privacy and dignity.
  • Apply principles of asepsis and safety.

Steps

 Additional Information

1. Complete respiratory assessment for hypoxia. SaO2 should be greater than 92% unless otherwise stated by the physician. The goal is to use the least amount of oxygen to maintain levels between 92% and 98%. Assess need for O2: check SaO2 level with a pulse oximetry device.

Assess for underlying medical conditions or alternate causes of hypoxia (cardiovascular).

2. If a patient requires oxygen therapy, choose an oxygen delivery system based on your patient’s requirements. Oxygen is initially started at a low concentration (2 L/min) using nasal prongs. Then the flow is titrated up to maintain oxygen saturation of 92% or greater.

Selection of delivery system is based on the level of oxygen support required (controlled or non-controlled), the severity of hypoxia, and the disease process. Other factors include age, presence of underlying disease (COPD), level of health, presence of an artificial airway, and environment (home or hospital).

Significant decreases to O2 saturation levels or large increases to maintain O2 saturation should be reported promptly to responsible health care provider.

3. Once oxygen is applied, reassess your patient in 5 minutes to determine the effects on the body. Hypoxia should be reduced or prevented. O2 levels should be between 92% and 98%.

Assess vital signs, respiratory and cardiovascular systems, and level of consciousness. Assess and implement additional treatments for hypoxia if appropriate.

Reassess your patient if signs and symptoms of hypoxia return.

4. If required, adjust O2 levels. Changes in O2 percentages should be in 5% to 10% increments.

Patients should be reassessed (respiratory assessment including O2 saturations) after 5 minutes following any changes to oxygenation levels.

Changes in litre flow should be in 1 to 2 L increments.

Consider changing O2 delivery device if O2 saturation levels are not maintained in target range.

Slow, laboured breathing is a sign of respiratory failure.

5. If hypoxia continues, contact respiratory therapist or physician for further orders according to agency protocol. Patient may require further interventions from the respiratory therapist or most responsible health care provider.

Signs and symptoms of respiratory deterioration include increased respiratory rate, increased requirement of supplemental oxygen, inability to maintain target saturation level, drowsiness, decrease in level of consciousness, headache, or tremors.

Data source: British Thoracic Society, 2008; Perry et al., 2014
 Special considerations:
Figure 5.2 Oxygen therapy protocol (adapted from Providence Health Care, 2008)

Critical Thinking Exercises

  1. A patient is admitted with COPD and pneumonia and has an oxygen saturation of 88% on 1 L/min of oxygen. Is this an appropriate oxygenation level for a patient with COPD? Why?
  2. A patient with no underlying respiratory disease is hypoxic with an oxygen saturation level of 91% on room air. What are four additional interventions that may help improve oxygen saturation levels without applying oxygen therapy?

40

5.7 Cautions with Oxygen Therapy

Oxygen therapy supports life and supports combustion. While there are many benefits to inhaled oxygen, there are also hazards and side effects. Anyone involved in the administration of oxygen should be aware of potential hazards and side effects of this medication. Oxygen should be administered cautiously and according to the safety guidelines listed in Table 5.4.

Table 5.4 Oxygen Safety Guidelines for Home and Hospital
Guideline Additional Information
Oxygen is a medication. Remind patient that oxygen is a medication and should not be adjusted without consultation with a physician or respiratory therapist.
Storage of oxygen cylinders When using oxygen cylinders, store them upright, chained, or in appropriate holders so that they will not fall over.
No smoking Oxygen supports combustion. No smoking is permitted around any oxygen delivery devices in the hospital or home environment.
Keep oxygen cylinders away from heat sources. Keep oxygen delivery systems at least 1.5 metres from any heat source.
Check for electrical hazards in the home or hospital prior to use. Determine that electrical equipment in the room or home is in safe working condition. A small electrical spark in the presence of oxygen will result in a serious fire. The use of a gas stove, kerosene space heater, or smoker is unsafe in the presence of oxygen. Avoid items that may create a spark (e.g., electrical razor, hair dryer, synthetic fabrics that cause static electricity, or mechanical toys) with nasal cannula in use.
Check levels of oxygen in portable tanks. Check oxygen levels of portable tanks before transporting a patient to ensure that there is enough oxygen in the tank.
ABGs should be ordered for all critically ill patients on oxygen therapy. High concentrations of oxygen therapy should be closely monitored with formal assessments (pulse oximetry and ABGs).
Data source: British Thoracic Society, 2008; Perry et al., 2014

Precautions and Complications of Oxygen Therapy

Oxygen is essential to life, but as a drug it has both a maximum positive benefit and an accompanying toxicity effect. The toxic effects from oxygen therapy can occur based on the condition of the patient and the duration and intensity of the oxygen therapy. For example, with normal lung function, a stimulation to take another breath occurs when a patient has a slight rise in PaCO2. The slight rise in PaCO2 stimulates the respiratory centre in the brain, creating the impulse to take another breath. In some patients with a chronically high level of PaCO2, such as those with chronic obstructive pulmonary disease (COPD), the stimulus and drive to breathe is caused by a decrease in PaO2. This is called a hypoxic drive. When administering oxygen to patients with known CO2 retention, watch for signs of hypoventilation, a decreased level of consciousness, and apnea.

Oxygen therapy can have harmful effects, which are dependent on the duration and intensity of the oxygen therapy. See Table 5.5 for precautions and complications of oxygen therapy.

Table 5.5 Precautions and Complications of Oxygen Therapy
Complications Precautions
Oxygen-induced hypoventilation/ hypoxic drive If patients with a hypoxic drive are given a high concentration of oxygen, their primary urge to breathe is removed and hypoventilation or apnea may occur. It is important to note that not all COPD patients have chronic retention of CO2, and not all patients with CO2 retention have a hypoxic drive. It is not commonly seen in clinical practice.

Never deprive any patient of oxygen if it is clinically indicated. It is usually acceptable to administer whatever concentration of oxygen is needed to maintain the SpO2 between 88% and 92% in patients with known chronic CO2 retention verified by an ABG.

Absorption actelectasis About 80% of the gas in the alveoli is nitrogen. If high concentrations of oxygen are provided, the nitrogen is displaced. When the oxygen diffuses across the alveolar-capillary membrane into the bloodstream, the nitrogen is no longer present to distend the alveoli (called a nitrogen washout).

This reduction in alveolar volume results in a form of collapse called absorption atelectasis. This situation also causes an increase in the physiologic shunt and resulting hypoxemia.

Oxygen toxicity Oxygen toxicity, caused by excessive or inappropriate supplemental oxygen, can cause severe damage to the lungs and other organ systems. High concentrations of oxygen, over a long period of time, can increase free radical formation, leading to damaged membranes, proteins, and cell structures in the lungs. It can cause a spectrum of lung injuries ranging from mild tracheobronchitis to diffuse alveolar damage.

For this reason, oxygen should be administered so that appropriate target saturation levels are maintained.

Supplemental oxygen should be administered cautiously to patients with herbicide poisoning and to patients receiving bleomycin. These agents have the ability to increase the rate of development of oxygen toxicity.

Data source: British Thoracic Society, 2008; Perry et al., 2014.

Critical Thinking Exercises

  1. A patient is being discharged with low oxygen levels and will receive home oxygen. Name four vital safety components to review with the patient prior to discharge.
  2. COPD patients are at risk for developing a complication called oxygen-induced hypoventilation. What is the cause of this complication and how can it be prevented?

41

5.8 Oral Suctioning

The purpose of oral suctioning is to maintain a patent airway and improve oxygenation by removing mucous secretions and foreign material (vomit or gastric secretions) from the mouth and throat (oropharynx). Oral suction is the use of a rigid plastic suction catheter, known as a yankauer (see Figure 5.3), to remove pharyngeal secretions through the mouth (Perry et al., 2014). The suction catheter has a large hole for the thumb to cover to initiate suction, along with smaller holes along the end, which mucous enters when suction is applied. The oral suctioning catheter is not used for tracheotomies due to its large size. Oral suctioning is useful to clear secretions from the mouth in the event a patient is unable to remove secretions or foreign matter by effective coughing. Patients who benefit the most include those with CVAs, drooling, impaired cough reflex related to age or condition, or impaired swallowing (Perry et al., 2014). The procedure for oral suctioning can be found in Checklist 42.

DSC_0192
Figure 5.3 Suctioning with a yankauer
Checklist 42: Oral Suctioning
Disclaimer: Always review and follow your hospital policy regarding this specific skill.
Safety considerations: 
  • Avoid oral suctioning on patients with recent head and neck surgeries.
  • Use clean technique for oral suctioning.
  • Know which patients are at risk for aspiration and are unable to clear secretions because of an impaired cough reflex. Keep supplies readily available at the bedside and ensure suction is functioning in the event oral suctioning is required immediately.
  • Know appropriate suctioning limits and the risks of applying excessive pressure or inadequate pressure.
  • Avoid mouth sutures, sensitive tissues, and any tubes located in the mouth or nares.
  • Avoid stimulating the gag reflex.
  • Always perform a pre- and post-respiratory assessment to monitor patient for improvement.
  • Consider other possible causes of respiratory distress, such as pneumothorax, pulmonary edema, or equipment malfunction.
  • If an abnormal side effect occurs (e.g., increased difficulty in breathing, hypoxia, discomfort, worsening vital signs, or bloody sputum), notify appropriate health care provider.

Steps

 Additional Information

1. Assess patient need for suctioning (respiratory assessment for signs of hypoxia), risk for aspiration, and inability to protect own airway or clear secretions adequately, which may lead to upper airway obstruction. Baseline respiratory assessment, including an O2 saturation level, can alert the health care provider to worsening condition.

Signs and symptoms include obvious excessive secretions; weak, ineffective cough; drooling; gastric secretions or vomit in the mouth; or gurgling sounds with inspiration and expiration. Pooling of secretions may lead to obstruction of airway. Suctioning is required with alterations in oxygen levels and with increased secretions.

2. Explain to patient how the procedure will help clear out secretions and will only last a few seconds. If appropriate, encourage patient to cough. This allows patient time to ask questions and increase compliance with the procedure. Minimizes fear and anxiety.

Encourage the patient to cough to bring secretions from the lower airways to the upper airways.

3. Position patient in semi-Fowler’s position with head turned to the side. This facilitates ease of suctioning. Unconscious patients should be in the lateral position.
4. Perform hand hygiene, gather supplies, and apply non-sterile gloves. Apply mask if a body fluid splash is likely to occur.
Wash hands
Wash hands
Apply non-sterile gloves

This prevents the transmission of microorganisms.

Supplies include a suction machine or suction connection, connection tubing, non-sterile gloves, yankauer, water and a sterile basin, mask, and clean towel.

Suctioning may cause splashing of body fluids.

5. Fill basin with water. Water is used to clear connection tubing in between suctions. Fill basin with enough water to clear the connection tubing at least three times.
Fill sterile container with sterile water
6. Attach one end of connection tubing to the suction machine and the other end to the yankauer. This prepares equipment to function effectively.
Suction container
Suction container
7. Turn on suction to the required level. Test function by covering hole on the yankaeur with your thumb and suctioning up a small amount of water. Suction levels for adults are 100-150 mmHg on wall suction and 10-15 mmHg on portable suction units. Always refer to hospital policy for suction levels.
8. Remove patient’s oxygen mask if present. Nasal prongs may be left in place. Place towel on patient’s chest. Always be prepared to replace the oxygen if patient becomes short of breath or has decreased O2 saturation levels.

The towel prevents patient from coming in contact with secretions.

9. Insert yankauer catheter and apply suction by covering the thumb hole. Run catheter along gum line to the pharynx in a circular motion, keeping yankauer moving.

Encourage patient to cough.

Movement prevents the catheter from suctioning to the oral mucosa and causing trauma to the tissues.
nsert Yankauer and apply suction by covering the thumb hole
Insert yankauer and apply suction by covering the thumb hole

Coughing helps move secretions from the lower airways to the upper airways.

Apply suction for a maximum of 10 to 15 seconds. Allow patient to rest in between suction for 30 seconds to 1 minute.

10. If required, replace oxygen on patient and clear out suction catheter by placing yankauer in the basin of water. Replace oxygen to prevent or minimize hypoxia.
Clear suction tubing with water

Clearing out the catheter prevents the connection tubing from plugging.

11. Reassess and repeat oral suctioning if required. Compare pre- and post-suction assessments to determine if intervention was effective.
12. Reassess respiratory status and O2 saturation for improvements. Call for help if any abnormal signs and symptoms appear. This identifies positive response to suctioning procedure and provides objective measure of effectiveness.
13. Ensure patient is in a comfortable position and call bell is within reach. Provide oral hygiene if required. This promotes patient comfort.
14. Clean up supplies, remove gloves, and wash hands. Document procedure according to hospital policy. Cleanup prevents the transmission of microorganisms. Documentation provides accurate details of response to suctioning and clear communication among the health care team.
Data source: Perry et al., 2014; Potter et al., 2010

Video 5.1

Watch the Oral Suctioning video by Renée Anderson and Wendy McKenzie, Thompson Rivers University.

Critical Thinking Exercises

  1. What is the purpose of oral suctioning? Name three types of patients at risk for airway obstruction or ineffective cough.
  2. What is the rationale for encouraging the patient to cough before suctioning?

42

5.9 Summary

Oxygen is essential to life. The main goal of oxygen therapy is to prevent hypoxemia, thereby preventing hypoxia that could result in tissue damage and cell death. Hypoxia, if caused by certain medical conditions, can be managed and prevented by oxygen therapy. In other instances, such as with anemia and decreased cardiac output, the effects of oxygen therapy will be limited.

Always follow the guiding principles of the oxygen therapy protocols of your local health authority to administer oxygen safely to manage hypoxia and prevent the side effects and hazards of oxygen therapy.

Key Takeaways

  • Understand the pathophysiological factors affecting the gas exchange of oxygen. Understanding how the respiratory system works is key to knowing how to prevent and manage hypoxia.
  • Hypoxia is a medical emergency. Be aware of the signs and symptoms of hypoxia, and of patients who are at risk for hypoxia.
  • Oxygen therapy is a medical intervention. Ensure correct patient, correct flow rate, and correct connection to oxygen source. Oxygen may be initiated in emergency situations without a physician’s order.
  • Care should be taken to avoid interruption of oxygen therapy in situations including ambulation or transport for procedures. If using a portable tank during transport or ambulation, ensure there is a sufficient reserve of oxygen.
  • Oxygen is a medication and should be prescribed with a target saturation range.
  • For adults, the recommended target range for oxygen saturation is 92% to 98%. Oxygen levels decrease slightly with age, especially in patients over 70 years. A saturation of 94% may be considered normal in a patient with heart failure or underlying lung disease.
  • For most patients with COPD, the target oxygen saturation range is 88% to 92%.
  • Be aware of the causes of hypoxemia and treatments related to managing and preventing hypoxia.
  • Oxygen therapy has benefits and hazards. Be aware of how to handle the administration of oxygen safely and monitor for side effects.
  • Contact the respiratory therapist in the health care agency with questions or concerns related to oxygen therapy.

Additional Videos

Video 5.2

Watch the Oropharyngeal Suctioning video by Renée Anderson and Wendy McKenzie, Thompson Rivers University.

Suggested Online Resources

  1. British Columbia Institute of  Technology (BCIT) / Canadian Association of Critical Care Nurses (CACCN): The oxygen supply and demand framework: A tool to support integrative learning. This article discusses oxygenation and perfusion in the body.
  2. Canadian Centre for Occupational Health and Safety. This website provides standards for the safe use of oxygen in the hospital and home.
  3. Canadian Thoracic Society: Canadian respiratory guidelines. This website provides Canadian guidelines related to respiratory conditions such as chronic obstructive pulmonary disease (COPD), asthma, bronchitis, infectious respiratory diseases, and sleep apnea, as well as home ventilation.
  4. College of Respiratory Therapists of Ontario: Oxygen therapy. Clinical best practice guidelines. This document reviews Canadian standards for the management of oxygen therapy. This resource provides information on oxygen equipment, describes how oxygen works in the body, lists oxygen guidelines according to Canadian law, and gives a review of hyperbaric oxygen therapy.
  5. Thorax: Guideline for emergency oxygen use in adult patients. This British journal article provides the most current evidence-based material related to oxygen therapy.
  6. Vancouver Coastal Health: Course catalogue registration system (CCRS). This system offers over 600 online and classroom health-related courses from Vancouver Coastal Health, Providence Health Care, Fraser Health Authority, and Island Health. You must create an account to access this system of free courses (select the “New User” button).

References

Alberta Health Services. (2015). Oxygen therapy for acute adult inpatients. Learning module for allied health staff (level 1 and 2). Retrieved on May 1, 2015, from http://www.albertahealthservices.ca/assets/info/hp/edu/if-hp-edu-ahc-oxygen-therapy-learning-module-cat-1and2.pdf

British Thoracic Society. (2008). Guideline for emergency oxygen use in adult patients. Thorax, 63(suppl.VI). Retreived on May 1, 2015, from https://www.brit-thoracic.org.uk/document-library/clinical-information/oxygen/emergency-oxygen-use-in-adult-patients-guideline/emergency-oxygen-use-in-adult-patients-guideline/

Cigna, J. A., & Turner-Cigna, L. M. (2005). Rehabilitation for the home care patient with COPD. Home Healthcare Nurse 23(9), 578-584.

Howell, M. (2002, March). The correct use of pulse oximetry in measuring oxygen status. Retrieved on November 12, 2015, from http://www.nursingtimes.net/the-correct-use-of-pulse-oximetry-in-measuring-oxygen-status/199984.article

Jardins, T., & Burton, G. G. (2011). Clinical manifestations and assessment of respiratory diseases (6th ed.). St Louis; MO: Elsevier-Mosby.

Kane, B., Decalmer, S., & O’Driscoll, B. R. (2013). Emergency oxygen therapy: From guideline to implementation. Breathe, 9(4) 246-253. doi: 10.1183/20734735.025212l

Maurer, J., Rebbapragada, V., Borson, S., Goldstein, R., Kunik, M., Yohannes, A., & Hanania, N. (2008). Understanding depression and COPD. Current understanding, unanswered questions and research needs. Chest134(4), 43s-56s. doi: 10.1378/chest.08-0342

Metrovic, T. (2014). What is Hypoxemia? Retrieved on May 3, 2015, from http://www.news-medical.net/health/What-is-Hypoxemia.aspx

Perry, A. G., Potter, P. A., & Elkin, M. K. (2007). Nursing interventions and clinical skills (5th ed.). St Louis, MO: Elsevier-Mosby.

Perry, A. G., Potter, P. A., & Ostendorf, W. R. (2014). Clinical skills and nursing techniques. (8th ed.). St Louis, MO: Elsevier-Mosby.

Potter, P. A., Perry, A. G., Ross-Kerr, J. C., & Wood, M. J. (Eds.). (2010). Canadian fundamentals of nursing (4th ed.). Toronto: Elsevier Canada.

Providence Health Care. (2008). Nursing care standards: Oxygen therapy protocol. Vancouver, BC: Providence Health Care.

Shackell, E., & Gillespie, M. (2009). The oxygen supply and demand framework: A tool to support integrative learning. Canadian association of critical care nurses, 20(4), 15-19. Retrieved on April 1, 2015, from http://www.bcit.ca/files/health/bsnpreceptors/oxygen_supply_and_demand_framework_tool_support_integrative_learning.pdf

Simpson, H. (2004). Interpretation of arterial blood gases: A clinical guide for nurses. British journal of nursing, 13(9), 522-528.

VI

Chapter 6. Non-Parenteral Medication Administration

43

6.1 Introduction

The nurse is the health care professional who will administer medication. This chapter describes responsibilities related to nurses in the administration of all medications except parenteral (see Chapter 7). Medications can be administered by a variety of routes or methods, each determined by the different preparations of drugs that influence the absorption, distribution, metabolism, and excretion (pharmacokinetics) in the body. It is imperative that the appropriate form of a drug be administered.

Every medication has the potential to harm a patient. Nurses must be aware that:

The nurse administering medication is responsible for ensuring full understanding of medication administration and its implications for patient safety.

Learning Objectives

  • Discuss steps for ensuring safe medication administration
  • Discuss factors that contribute to medication errors
  • List and discuss the seven rights of medication administration
  • Outline procedures for administering medication safely via the following routes:
    • Mouth and gastric tube
    • Rectally and vaginally
    • Eyes, ears, and nose
    • Inhalation and topically
  • Outline steps for teaching patient self-administration of medication

44

6.2 Safe Medication Administration

In the Institute of Medicine’s often-cited book To Err Is Human: Building a Safer Health System (Kohn, Corrigan, & Donaldson, 2000), it is estimated that approximately 1.5-million preventable adverse drug events (ADEs) occur annually. The Joint Commission (TJC) defines medication errors as any preventable event that may cause inappropriate medication use or jeopardize patient safety (TJC, 2012).

Medication errors are the number-one error in health care (Centers for Disease Control [CDC], 2013). Safe and accurate medication administration is an important and potentially challenging nursing responsibility. Medication administration requires good decision-making skills and clinical judgment, and the nurse is responsible for ensuring full understanding of medication administration and its implications for patient safety.

Medication errors have a substantial impact on health care in Canada (Butt, 2010). When preparing and administering medication, and assessing patients after receiving medication, always follow agency policy to ensure safe practice. Review Table 6.1 for guidelines for safe medication administration.

Table 6.1 Guidelines for Safe Medication Administration
Safety Considerations:
  • Agency policy on medication administration and medication administration record (MAR) may vary. Always receive the required training on the use of the medication system for each agency to avoid preventable errors.

Principle

 Additional Information

Be vigilant when preparing medications. Avoid distractions. Some agencies have a no-interruption zone (NIZ), where health care providers can prepare medications without interruptions.
Check for allergies. Always ask patient about allergies, types of reactions, and severity of reactions.
Use two patient identifiers at all times. Always follow agency policy for patient identification. Use at least two patient identifiers before administration and compare against the MAR.
Assessment comes before medication administration. All medications require an assessment (review of lab values, pain, respiratory assessment, cardiac assessment, etc.) prior to medication administration to ensure the patient is receiving the correct medication for the correct reason.
Be diligent in all medication calculations. Errors in medication calculations have contributed to dosage errors, especially when adjusting or titrating dosages.
Avoid reliance on memory; use checklists and memory aids. Slips in memory are caused by lack of attention, fatigue, distractions. Mistakes are often referred to as attentional behaviours where lack of training or knowledge is the cause of the error. Slips account for most errors in heath care. If possible, follow a standard list of steps for every patient.
Communicate with your patient before and after administration. Provide information to patient about the medication before administering it. Answer questions regarding usage, dose, and special considerations. Give the patient an opportunity to ask questions. Include family members if appropriate.
Avoid workarounds. workaround is a process that bypasses a procedure, policy, or problem in a system. For example, a nurse may “borrow” a medication from another patient while waiting for an order to be filled by the pharmacy. These workarounds fail to follow agency policy to ensure safe medication practices.
Ensure medication has not expired. Medication may be inactive if expired.
Always clarify an order or procedure that is unclear. Always ask for help whenever you are uncertain or unclear about an order. Consult with the pharmacist, charge nurse, or other health care providers and be sure to resolve all questions before proceeding with medication administration.
Use available technology to administer medications. Bar-code scanning (eMAR) has decreased errors in administration by 51%, and computerized physician orders have decreased errors by 81%. Technology has the potential to help decrease errors. Use technology when administering medications but be aware of technology-induced errors.
Report all near misses, errors, and adverse reactions. Reporting allows for analysis and identification of potential errors, which can lead to improvements and sharing of information for safer patient care.
Be alert to error-prone situations and high-alert medications. High-alert medications are those that are most likely to cause significant harm, even when used as intended. The most common high-alert medications are anticoagulants, narcotics and opiates, insulins, and sedatives. The types of harm most commonly associated with these medications include hypotension, delirium, bleeding, hypoglycemia, bradycardia, and lethargy.
If a patient questions or expresses concern about a medication, stop and do not administer it. If a patient questions a medication, stop and explore the patient’s concerns, review the physician’s order, and, if necessary, notify the practitioner in charge of the patient.
Data source: Agency for Healthcare Research and Quality, 2014; Canadian Patient Safety Institute, 2012; Debono et al., 2013; Institute for Healthcare Improvement, 2015; National Patient Safety Agency, 2009; National Priority Partnership, 2010; Prakash et al., 2014

Technological Advances That Help Mitigate Medication Errors

Computerized physician order entry (CPOE) is a system that allows prescribers to electronically enter orders for medications, thus eliminating the need for written orders. CPOE increases the accuracy and legibility of medication orders; the potential for the integration of clinical decision support; and the optimization of prescriber, nurse, and pharmacist time (Agrawal, 2009). Decision support software integrated into a CPOE system can allow for the automatic checking of drug allergies, dosage indications, baseline laboratory results, and potential drug interactions. When a prescriber enters an order through CPOE, the information about the order will then transmit to the pharmacy and ultimately to the MAR.

The use of electronic bar codes on medication labels and packaging has the potential to improve patient safety in a number of ways. A patient’s MAR is entered into the hospital’s information system and encoded into the patient’s wristband, which is accessible to the nurse through a handheld device. When administering a medication, the nurse scans the patient’s medical record number on the wristband, and the bar code on the drug. The computer processes the scanned information, charts it, and updates the patient’s MAR record appropriately (Poon et al., 2010).

Automated medication dispensing systems (AMDS) provide electronic automated control of all medications, including narcotics. Each nurse accessing the system has a unique access code. The nurse will enter the patient’s name, the medication, the dosage, and the route of administration. The system will then open either the patient’s individual drawer or the narcotic drawer to dispense the specific medication. If the patient’s electronic health record is linked to the AMDS, the medication and the nurse who accessed the system will be linked to the patient’s electronic record.

Read the Top Ten Tips PDF to review the importance of medication reconciliation.

Checklist 43 outlines the steps for safe medication administration.

Checklist 43: Safe Medication Administration
Disclaimer: Always review and follow your hospital policy regarding this specific skill.
Safety considerations:
  • Plan medication administration to avoid disruption:
    • Dispense medication in a quiet area.
    • Avoid conversation with others.
    • Follow agency’s no-interruption zone policy.
  • Prepare medications for ONE patient at a time.
  • Follow the SEVEN RIGHTS of medication preparation (see below).
  • Check that the medication has not expired.
  • Perform hand hygiene.
  • Check room for additional precautions.
  • Introduce yourself to patient.
  • Confirm patient ID using two patient identifiers (e.g., name and date of birth) AND check against MAR.
  • Check allergy band for any allergies, and ask patient about type and severity of reaction.
  • Complete necessary focused assessments, lab values, and/or vital signs, and document on MAR.
  • Provide patient education as necessary.
  • If a patient questions or expresses concern regarding a medication, stop and do not administer.

Steps

 Additional Information

1. Check MAR against doctor’s orders. Check that MAR and doctor’s orders are consistent.
Comparing physician orders and MAR
Compare physician orders and MAR

Compare MAR with patient wristband.

Night staff usually complete and verify this check as well.

2. Perform the SEVEN RIGHTS x 3 (this must be done with each individual medication):
  • The right patient
  • The right medication (drug)
  • The right dose
  • The right route
  • The right time
  • The right reason
  • The right documentation

Medication calculation: D/H x S = A

(D or desired dosage/H or have available x S or stock = A or amount prepared)

The right patient: check that you have the correct patient using two patient identifiers (e.g., name and date of birth).
Compare MAR with patient name band
Compare MAR with patient wristband

The right medication (drug): check that you have the correct medication and that it is appropriate for the patient in the current context.

The right dose: check that the dose makes sense for the age, size, and condition of the patient. Different dosages may be indicated for different conditions.

The right route: check that the route is appropriate for the patient’s current condition.

The right time: adhere to the prescribed dose and schedule.

Check the right patient, medication, dose, route, time, reason, documentation

The right reason: check that the patient is receiving the medication for the appropriate reason.

The right documentation: always verify any unclear or inaccurate documentation prior to administering medications.

NEVER document that you have given a medication until you have actually administered it.

3. The label on the medication must be checked for name, dose, and route, and compared with the MAR at three different times:
  1. When the medication is taken out of the drawer
  2. When the medication is being poured
  3. When the medication is being put away/or at bedside
Perform 7 checks 3 times before administering medication
Perform seven checks three times before administering medication

These checks are done before administering the medication to your patient.

If taking the drug to the bedside (e.g., eye drops), do a third check at the bedside.

4. Circle medication when poured. Pour medication. Circle MAR to show that medication has been poured.
Circle medication once it has been poured
5. Positioning:
  • Position patient appropriately for medication administration.
  • Ensure proper body mechanics for health care provider.
  • Position patient safely and appropriately once medication is administered.
This ensures patient safety and comfort.
Position patient appropriately for medication administration
6. Post-medication safety check:
  • Complete post assessment and/or vital signs (if applicable).
  • Sign MAR; place in the appropriate chart.
  • Perform hand hygiene.
This ensures patient safety.

This step prevents the transfer of microorganisms.

Hand hygiene with ABHR
Data source: Lilley, Harrington, Snyder, & Swart, 2011; Lynn, 2011; Perry et al., 2014

Critical Thinking Exercises

  1. Discuss why you think medication reconciliation is important for patient safety.
  2. List five steps you can take to ensure safe medication administration practice.

45

6.3 Administering Medications by Mouth and Gastric Tube

Medication by Mouth

Medication is usually given orally, which is generally the most comfortable and convenient route for the patient. Medication given orally has a slower onset and a more prolonged, but less potent, effect than medication administered by other routes (Lynn, 2011).

Prior to oral administration of medications, ensure that the patient has no contraindications to receiving oral medication, is able to swallow, and is not on gastric suction. If the patient is having difficulty swallowing (dysphagia), some tablets may be crushed using a clean mortar and pestle for easier administration. Verify that a tablet may be crushed by consulting a drug reference or a pharmacist. Medications such as enteric-coated tablets, capsules, and sustained-release or long-acting drugs should never be crushed because doing so will affect the intended action of the medication. Tablets should be crushed one at a time and not mixed, so that it is possible to tell drugs apart if there is a spill. You may mix the medication in a small amount of soft food, such as applesauce or pudding.

Position the patient in a side-lying or upright position to decrease the risk of aspiration. Offer a glass of water or other oral fluid (that is not contraindicated with the medication) to ease swallowing and improve absorption and dissolution of the medication, taking any fluid restrictions into account.

Remain with the patient until all medication has been swallowed before signing that you administered the medication.

Checklist 44 outlines the steps for administering medication by mouth.

Checklist 44: Administering Medication by Mouth
Disclaimer: Always review and follow your hospital policy regarding this specific skill.
Safety considerations:
  • Perform hand hygiene.
  • Check room for additional precautions.
  • Introduce yourself to patient.
  • Confirm patient ID using two patient identifiers (e.g., name and date of birth).
  • Check allergy band for any allergies.
  • Complete necessary focused assessments and/or vital signs, and document on MAR.
  • Provide patient education as necessary.
  • Plan medication administration to avoid disruption:
    • Dispense medication in a quiet area.
    • Avoid conversation with others.
    • Follow agency’s no-interruption zone policy.
    • Prepare medications for ONE patient at a time.
    • Follow the SEVEN RIGHTS of medication administration.

Steps

 Additional Information

1. Check MAR against doctor’s orders.

Check that MAR and doctor’s orders are consistent.

Comparing physician orders and MAR
Compare physician orders and MAR

Night staff usually complete and verify this check as well.

2. Perform the SEVEN RIGHTS x 3 (must be done with each individual medication):
  • The right patient
  • The right medication (drug)
  • The right dose
  • The right route
  • The right time
  • The right reason
  • The right documentation

Medication calculation: D/H x S = A

(D or desired dosage/H or have available x S or stock = A or amount prepared)

The right patient: check that you have the correct patient using two patient identifiers (e.g., name and date of birth).

Compare MAR with patient name band
Compare MAR with patient wristband

The right medication (drug): check that you have the correct medication and that it is appropriate for the patient in the current context.

The right dose: check that the dose makes sense for the age, size, and condition of the patient. Different dosages may be indicated for different conditions.

The right route: check that the route is appropriate for the patient’s current condition.

The right time: adhere to the prescribed dose and schedule.

The right reason: check that the patient is receiving the medication for the appropriate reason.

The right documentation: always verify any unclear or inaccurate documentation prior to administering medications.

Check the right patient, medication, dose, route, time, reason, documentation

NEVER document that you have given a medication until you have actually administered it.

3. The label on the medication must be checked for name, dose, and route, and compared with the MAR at three different times:
  1. When the medication is taken out of the drawer
  2. When the medication is being poured
  3. When the medication is being put away/or at bedside
Perform 7 checks 3 times before administering medication
Perform seven checks three times before administering medication

These checks are done before administering the medication to your patient.

If taking drug to bedside (e.g., eye drops), do third check at bedside.

4. Place all medications that patient will receive in one cup, except medications that require pre-assessment (e.g., blood pressure or pulse rate). Place these in a separate cup and keep wrapper intact. Keeping medications that require pre-assessment separately acts as a reminder and makes it easier to withhold medications if necessary.
5. Do not touch medication with ungloved hands. Use clean gloved hands if it is necessary to touch the medication. Using gloves reduces contamination of the medication.
6. Circle medication when poured. Pour medication. Circle MAR to show that medication has been poured.
Circle medication once it has been poured
7. Patient education
  • Discuss purpose of each medication, action, and possible adverse effects.
  • Ask patient if they have any allergies.
The patient has the right to be informed and provided with reasons for medication, action, and potential adverse effects. Giving this information will likely improve adherence to medication therapy and patient reporting of adverse effects.

Confirms patient’s allergy history.

IMPORTANT: If patient expresses concerns over medications, do not give medication. Verify doctor’s order and explore patient concerns before administering medication.
8. Positioning
  • Help patient to sitting position. If patient is unable to sit, use the side-lying position.
  • Have patient stay in this position for 30 minutes after administering medication.
  • Offer patient water or desired oral fluid.
  • Ensure proper body mechanics for health care provider.
Position patient appropriately for medication administration

Correct positioning reduces risk of aspiration during swallowing.

Water or other oral fluids will help with swallowing of medication.

Proper body mechanics reduces risk of injury to health care provider.

9. Administer medication orally as prescribed.
  • Tablets: place in mouth and swallow using water or other oral fluids.
  • Orally disintegrating medications: Remove carefully from packaging. Place medication on top of patient’s tongue, and have patient avoid chewing the medication. Water is not needed.
  • Sublingually: Place medication under patient’s tongue and allow to dissolve completely. Ensure patient avoids swallowing the medication.
  • Buccal: place medication in mouth and against inner cheek and gums and allow to dissolve completely.
  • Powdered medication: mix at bedside with water to avoid thickening of medication that may occur with time.
Follow any specific descriptions for administration of the medication.

Wear gloves if placing the medication inside the patient’s mouth.


10. Post-medication safety check
  • Stay with patient until all medications are swallowed or dissolved.
  • Perform post assessments and/or vital signs if applicable.
  • Sign MAR and place in appropriate chart.
  • Perform hand hygiene.
  • Document any additional information, such as patient education, reasons why medication not administered, and adverse effects, as per agency policy.
Do not sign for any medications if you are not sure the patient has taken them.

Post assessments determine effects and potential adverse effects of medications.

11. Return within appropriate time to evaluate patient’s response to the medications and to check for possible adverse effects.

If patient presents with any adverse effects:

  • Withhold further doses.
  • Assess vital signs.
  • Notify prescriber.
  • Notify pharmacy.
  • Document as per agency policy.
Most sublingual medications act in 15 minutes, and most oral medications act in 30 minutes.


Data source: BCIT, 2015; Lilley et al., 2011; Perry et al., 2014

Medication via a Gastric Tube

Patients with a gastric tube (nasogastric, nasointestinal, percutaneous endoscopic gastrostomy [PEG], or jejenostomy [J] tube) will often receive medication through this tube (Lynn, 2011). Liquid medications should always be used when possible because absorption is better and less likely to cause blockage of the tube. Certain solid forms of medication can be crushed and mixed with water prior to administration.

Checklist 45 outlines the steps for administering medication via a gastric tube.

Checklist 45: Administering Medication via a Gastric Tube
Disclaimer: Always review and follow your hospital policy regarding this specific skill.
Safety considerations:
  • Perform hand hygiene.
  • Check room for additional precautions.
  • Introduce yourself to patient.
  • Confirm patient ID using two patient identifiers (e.g., name and date of birth).
  • Check allergy band for any allergies.
  • Complete necessary focused assessments and/or vital signs, and document on MAR.
  • Provide patient education as necessary.
  • Plan medication administration to avoid disruption:
    • Dispense medication in a quiet area.
    • Avoid conversation with others.
    • Follow agency’s no-interruption zone policy.
    • Prepare medications for ONE patient at a time.
    • Follow the SEVEN RIGHTS of medication administration.

Steps

Additional Information

1. Check MAR against doctor’s orders. Check that MAR and doctor’s orders are consistent.
Comparing physician orders and MAR
Compare physician orders and MAR

Night staff usually complete and verify this check as well.

2. Perform the SEVEN RIGHTS x 3 (must be done with each individual medication):
  • The right patient
  • The right medication (drug)
  • The right dose
  • The right route
  • The right time
  • The right reason
  • The right documentation

Medication calculation: D/H x S = A

(D or desired dosage/H or have available x S or stock = A or amount prepared)

The right patient: check that you have the correct patient using two patient identifiers (e.g., name and date of birth).
Compare MAR with patient name band
Compare MAR with patient wristband

The right medication (drug): check that you have the correct medication and that it is appropriate for the patient in the current context.

The right dose: check that the dose makes sense for the age, size, and condition of the patient. Different dosages may be indicated for different conditions.

The right route: check that the route is appropriate for the patient’s current condition.

The right time: adhere to the prescribed dose and schedule.

Check the right patient, medication, dose, route, time, reason, documentation

The right reason: check that the patient is receiving the medication for the appropriate reason.

The right documentation: always verify any unclear or inaccurate documentation prior to administering medications.

NEVER document that you have given a medication until you have actually administered it.

3. The label on the medication must be checked for name, dose, and route, and compared with the MAR at three different times:
  1. When the medication is taken out of the drawer
  2. When the medication is being poured
  3. When the medication is being put away/or at bedside
Perform 7 checks 3 times before administering medication
Perform seven checks three times before administering medication

These checks are done before administering the medication to your patient.

If taking drug to bedside (e.g., eye drops), do third check at bedside.

4. Place all medications that patient will receive in one cup, except medications that require pre-assessment (e.g., blood pressure or pulse rate). Place these in a separate cup and keep wrapper intact. Keeping medications that require pre-assessment separately acts as a reminder and makes it easier to withhold medications if necessary.
5. Do not touch medication with ungloved hands. Use clean gloved hands if it is necessary to touch the medication. Use gloves to reduce contamination of medication.
6. Circle medication when poured. Pour medication. Circle MAR to show that medication has been poured.
Circle medication once it has been poured
7. Patient education:
  • Discuss purpose of each medication, action, and possible adverse effects.
  • Ask patient if he or she has any allergies.
The patient has the right to be informed, and providing reasons for medication, actions, and potential adverse effects will likely improve adherence to medication therapy and patient reporting of adverse effects.

Confirm patient’s allergy history.

IMPORTANT: If patient expresses concern about medications, do not give medication. Verify doctor’s order and explore patient concerns before administering medication.
8. Help patient to a high sitting position unless contraindicated. This position reduces risk of aspiration during swallowing.
9. Determine if medication should be given with or without food. If the medication is to be given on an empty stomach, the enteral feeding may need to be stopped from 30 minutes before until 30 minutes after the medication is given. Follow specific medication guidelines to ensure adequate absorption and distribution of the medication.
10. Apply clean non-sterile gloves. Using gloves prevents spread of microorganisms.
11. Check gastric tube for correct placement as described in Chapter 10. Ensure that tube is properly placed prior to administering medication to prevent aspiration.
12. Dilute medication in 15 to 30 ml of water. Dilution keeps the tube from blocking.
13. Remove plunger from a 60 ml gastric tube syringe and attach syringe to the end of the gastric tube while pinching the gastric tube. Make sure the tip of the syringe fits the end of the gastric tube.
14. Pour medication and water solution into the 60 ml syringe, release pinch, and allow fluid to drain slowly by gravity into the gastric tube. If fluid does not drain by gravity, gentle pressure may be applied using the plunger of the syringe, but do not force the medication through the tube.
Administer diluted medication via gastric tube
15. Flush 10 ml of water between medications. This step prevents interactions between medications.
16. After the last medication has been given, flush the tube with 30 ml of water. Flushing prevents blocking of the tube.
17. Keep the patient in a high sitting position to prevent aspiration. This position prevents aspiration and encourages absorption of medication.
18. Post-medication safety check:
  • Stay with patient until all medications are instilled.
  • Perform post assessments and/or vital signs if applicable.
  • Sign MAR and place in appropriate chart.
  • Perform hand hygiene.
  • Document any additional information, such as patient education, reasons why medication not administered, adverse effects, as per agency policy.
 

Post assessments determine effects and potential adverse effects of medications.

19. Return within appropriate time frame to evaluate patient’s response to the medications and to check for possible adverse effects.

If patient presents with any adverse effects:

  • Withhold further doses.
  • Assess vital signs.
  • Notify prescriber.
  • Notify pharmacy.
  • Document as per agency policy.
Evaluate patient for intended and adverse effects.
Data source: BCIT, 2015; Lilley et al., 2011; Perry et al., 2014

Critical Thinking Exercises

  1. Your patient is dysphagic. Discuss the steps you should take and the considerations you should be cognizant of to administer oral medication safely.
  2. Your patient is receiving medication and nutritional sustenance via an enteral gastric tube. The drug reference guide recommends that the medication you should administer be given without food. Discuss how you would approach this situation to ensure the safe administration of the medication.

46

6.4 Administering Medications Rectally and Vaginally

Medication Administered Rectally

Administering medication rectally
Figure 6.1 Administering medication rectally

Drugs administered PR have a faster action than via the oral route and a higher bio-availability – that is, the amount of effective drug that is available is greater as it has not been influenced by upper gastrointestinal tract digestive processes. Rectal absorption results in more of the drug reaching the systemic circulation with less alteration on route. As well as being a more effective route for delivering medication, rectal administration also reduces side-effects of some drugs, such as gastric irritation, nausea and vomiting (Lowry, 2016, para 2). Rectal medications are given for their local effects in the gastrointestinal system (e.g., laxatives) or their systemic effects (e.g., analgesics when oral route is contraindicated). Rectal medications are contraindicated after rectal or bowel surgery, with rectal bleeding or prolapse, and with low platelet counts. Checklist 46 outlines the procedure for administering rectal suppositories or enemas.

Checklist 46: Medication Administered Rectally
Disclaimer: Always review and follow your hospital policy regarding this specific skill.
Safety considerations:
  • Perform hand hygiene.
  • Check room for additional precautions.
  • Introduce yourself to patient.
  • Confirm patient ID using two patient identifiers (e.g., name and date of birth).
  • Check allergy band for any allergies.
  • Complete necessary focused assessments and/or vital signs, and document on MAR.
  • Provide patient education as necessary.
  • Plan medication administration to avoid disruption:
    • Dispense medication in a quiet area.
    • Avoid conversation with others.
    • Follow agency’s no-interruption zone policy.
    • Prepare medications for ONE patient at a time.
    • Follow the SEVEN RIGHTS of medication administration.

Steps

 Additional Information

1. Check MAR against doctor’s orders.

Check that MAR and doctor’s orders are consistent.

Compare physician orders and MAR

Night staff usually complete and verify this check as well.

2. Perform the SEVEN RIGHTS x 3 (must be done with each individual medication):
  • The right patient
  • The right medication (drug)
  • The right dose
  • The right route
  • The right time
  • The right reason
  • The right documentation

Medication calculation: D/H x S = A

(D or desired dosage/H or have available x S or stock = A or amount prepared)

The right patient: check that you have the correct patient using two patient identifiers (e.g., name and date of birth).
Compare MAR with patient name band
Compare MAR with patient wristband

The right medication (drug): check that you have the correct medication and that it is appropriate for the patient in the current context.

The right dose: check that the dose makes sense for the age, size, and condition of the patient. Different dosages may be indicated for different conditions.

The right route: check that the route is appropriate for the patient’s current condition.

The right time: adhere to the prescribed dose and schedule.

The right reason: check that the patient is receiving the medication for the appropriate reason.

The right documentation: always verify any unclear or inaccurate documentation prior to administering medications.

Check the right patient, medication, dose, route, time, reason, documentation

NEVER document that you have given a medication until you have actually administered it.

3. The label on the medication must be checked for name, dose, and route, and compared with the MAR at three different times:
  1. When the medication is taken out of the drawer
  2. When the medication is being poured
  3. When the medication is being put away/or at bedside
Perform 7 checks 3 times before administering medication
Perform seven checks three times before administering medication

These checks are done before administering the medication to your patient.

If taking drug to bedside (e.g., eye drops), do third check at bedside.

4. If possible, have patient defecate prior to rectal medication administration. Medication should not be inserted into feces.
5. Ensure that you have water-soluble lubricant available for medication administration. Lubricant reduces friction as suppository enters rectal canal.
6. Explain the procedure to the patient. If patient prefers to self-administer the suppository/enema, give specific instructions to patient on correct procedure. Patient may feel more comfortable self-administering suppository.
NOTE: Unintended vagal stimulation may occur, resulting in bradycardia in some patients. Be aware that the rectal route may not be suitable for certain cardiac conditions. Notify physician.
7. Raise bed to working height.
  • Position patient on left side with upper leg flexed over lower leg toward the waist (Sims position).
  • Provide privacy and drape the patient with only the buttocks and anal area exposed.
  • Place a drape underneath the patient’s buttocks.
Positioning helps prevent injury to nurse administering medication. This protects patient’s privacy and facilitates relaxation.

Drape protects linens from potential fecal drainage.

8. Apply clean non-sterile gloves. Gloves protect the nurse from contact with mucous membranes and body fluids.
DSC_1511
Apply non-sterile gloves
9. Assess patient for diarrhea or active rectal bleeding. Rectal medications are contraindicated in these situations.
10. Apply clean non-sterile gloves if previous gloves were soiled. Gloves protect the nurse from contact with mucous membranes and body fluids.
Apply non-sterile gloves
11. Remove wrapper from suppository/tip of enema and lubricate rounded tip of suppository and index finger of dominant hand with lubricant.

If enema, lubricate only tip of enema.

Lubricant reduces friction as suppository/enema enters rectal canal.
Lubricate rounded tip of suppository
12. Separate buttocks with non-dominant hand and, using gloved index finger of dominant hand, insert suppository (rounded tip toward patient) into rectum toward umbilicus while having patient take a deep breath, exhale through the mouth, and relax anal sphincter.

If enema: Expel air from enema and then insert tip of enema into rectum toward umbilicus while having patient take a deep breath, exhale through the mouth, and relax anal sphincter.

You should feel the anal sphincter close around your finger after insertion. Forcing the suppository/enema through a clenched sphincter will cause pain and, potentially, rectal damage.
13. With your gloved finger, insert suppository along wall of rectum about 5 cm beyond anal sphincter. Do not insert the suppository into feces.

If enema: roll plastic bottle from bottom to tip until all solution has entered rectum and colon.

Suppository should be against rectal mucosa for absorption and therapeutic action. Inserting suppository into feces will decrease its effectiveness.
14. Option: A suppository may be given through a colostomy (not ileostomy) if prescribed. The patient should lie supine and a small amount of lubricant should be used.
15. Remove finger and wipe patient’s anal area. Wiping removes excess lubricant and provides comfort to the patient.
16. Ask patient to remain on side for 5 to 10 minutes. This position helps prevent the expulsion of suppository.
17. Discard gloves by turning them inside out and disposing of them and any used supplies as per agency policy. Perform hand hygiene. Using gloves reduces transfer of microorganisms.
Dispose of gloves
Dispose of gloves
Hand hygiene with ABHR
18. Ensure call bell is nearby and bedpan/commode is available and close by. If suppository is a laxative or stool softener, patient will require a bedpan/commode or close proximity to toilet.
Ensure call bell is available to patient
19. Document procedure as per agency policy and include patient’s tolerance of administration. Timely and accurate documentation promotes patient safety.
Data source: BCIT, 2015; Lilley et al., 2011; Perry et al., 2014

Medication Administered Vaginally

Administering medication vaginally using an applicator
Figure 6.2 Administering medication vaginally using an applicator
Administering medication vaginally without an applicator
Figure 6.3 Administering medication vaginally without an applicator

Female patients may require vaginal suppositories to treat vaginal infections. Vaginal suppositories are larger and more oval than rectal suppositories, and are inserted with an applicator (see Figure 6.2) or by hand (see Figure 6.3). Checklist 47 outlines the procedure for administering vaginal suppositories or medications.

Checklist 47: Medication Administered Vaginally
Disclaimer: Always review and follow your hospital policy regarding this specific skill.
Safety considerations:
  • Perform hand hygiene.
  • Check room for additional precautions.
  • Introduce yourself to patient.
  • Confirm patient ID using two patient identifiers (e.g., name and date of birth).
  • Check allergy band for any allergies.
  • Complete necessary focused assessments and/or vital signs, and document on MAR.
  • Provide patient education as necessary.
  • Plan medication administration to avoid disruption:
    • Dispense medication in a quiet area.
    • Avoid conversation with others.
    • Follow agency’s no-interruption zone policy.
    • Prepare medications for ONE patient at a time.
    • Follow the SEVEN RIGHTS of medication administration.

Steps

Additional Information

1. Check MAR against doctor’s orders. Students must check that MAR and doctor’s orders are consistent.
Compare physician orders and MAR

Night staff usually complete and verify this check as well.

2. Perform the SEVEN RIGHTS x 3 (must be done with each individual medication):
  • The right patient
  • The right medication (drug)
  • The right dose
  • The right route
  • The right time
  • The right reason
  • The right documentation

Medication calculation: D/H x S = A

(D or desired dosage/H or have available x S or stock = A or amount prepared)

The right patient: check that you have the correct patient using two patient identifiers (e.g., name and date of birth).
Compare MAR with patient name band
Compare MAR with patient wristband

The right medication (drug): check that you have the correct medication and that it is appropriate for the patient in the current context.

The right dose: check that the dose makes sense for the age, size, and condition of the patient. Different dosages may be indicated for different conditions.

The right route: check that the route is appropriate for the patient’s current condition.

The right time: adhere to the prescribed dose and schedule.

The right reason: check that the patient is receiving the medication for the appropriate reason.

The right documentation: always verify any unclear or inaccurate documentation prior to administering medications.

Check the right patient, medication, dose, route, time, reason, documentation

NEVER document that you have given a medication until you have actually administered it.

3. The label on the medication must be checked for name, dose, and route, and compared with the MAR at three different times:
  1. When the medication is taken out of the drawer
  2. When the medication is being poured
  3. When the medication is being put away/or at bedside
Perform 7 checks 3 times before administering medication
Perform seven checks three times before administering medication

These checks are done before administering the medication to your patient. If taking drug to bedside (e.g., eye drops), do third check at bedside.

4. Before inserting the medication vaginally, explain the procedure to the patient. If patient prefers to self-administer the vaginal medication, give specific instructions to patient on correct procedure. Patient may feel more comfortable self-administering vaginal medication.
5. Ensure that you have water-soluble lubricant available for medication administration. Lubricant reduces friction against vaginal mucosa as medication is inserted.
6. Have patient void prior to procedure. Voiding prevents passing of urine during procedure.
7. Raise bed to working height.
  • Position patient on back with legs slightly bent and feet flat on the bed.
  • Provide privacy, and drape patient so that vaginal area is exposed.
Position helps prevent injury to nurse administering medication.

Draping protects patient’s privacy and facilitates relaxation.

8. Apply clean non-sterile gloves. Gloves protect the nurse from contact with mucous membranes and body fluids.
Apply non-sterile gloves
9. Remove suppository from wrapper and apply a liberal amount of water-soluble lubricant to suppository and index finger of dominant hand. Suppository should be at room temperature. Lubricant reduces friction against vaginal mucosa as medication is inserted.
Lubricate suppository
10. With non-dominant hand, gently separate labial folds. With gloved index finger of dominant hand, insert lubricated suppository about 8 to 10 cm along posterior vagina wall. Exposes vaginal orifice and helps to ensure equal distribution of medication.
11. Withdraw finger and wipe away excess lubricant. Wiping maintains patient comfort.
NOTE: An applicator may be used to insert vaginal medication. Follow procedure above and specific manufacturer directions.
12. Discard gloves by turning them inside out and disposing of them and any used supplies as per agency policy. Perform hand hygiene. Using gloves reduces transfer of microorganisms.
Dispose of gloves
Dispose of gloves
Hand hygiene with ABHR
13. Document procedure as per agency policy, and include patient’s tolerance of administration. Timely and accurate documentation promotes patient safety.
Data source: Lilley et al., 2011; Perry et al., 2014

Critical Thinking Exercises

  1. Your patient has a colostomy, and a laxative has been prescribed. Discuss the procedure for administering a laxative in this situation.
  2. Your patient prefers to self-administer her vaginal suppository. Outline the steps you would explain for safe and appropriate administration of a vaginal medication.

47

6.5 Instilling Eye, Ear, and Nose Medications

Instilling Eye Medications

The eye is the most sensitive organ to which medication may be applied (Perry et al., 2014). The cornea is especially sensitive, making the conjunctival sac the appropriate site for instilling eye (ophthalmic) medications.

Checklist 48 outlines the steps for instilling eye medications.

Checklist 48: Instilling Eye (Ophthalmic) Medications
Disclaimer: Always review and follow your hospital policy regarding this specific skill.
Safety considerations:
  • Perform hand hygiene.
  • Check room for additional precautions.
  • Introduce yourself to patient.
  • Confirm patient ID using two patient identifiers (e.g., name and date of birth).
  • Check allergy band for any allergies.
  • Complete necessary focused assessments and/or vital signs, and document on MAR.
  • Provide patient education as necessary.
  • Plan medication administration to avoid disruption:
    • Dispense medication in a quiet area.
    • Avoid conversation with others.
    • Follow agency’s no-interruption zone policy.
    • Prepare medications for ONE patient at a time.
    • Follow the SEVEN RIGHTS of medication administration.

Steps

 Additional Information

1. Check MAR against doctor’s orders.

Check that MAR and doctor’s orders are consistent.

Comparing physician orders and MAR
Compare physician orders and MAR

Night staff usually complete and verify this check as well.

2. Perform the SEVEN RIGHTS × 3 (must be done with each individual medication):

  • The right patient
  • The right medication (drug)
  • The right dose
  • The right route
  • The right time
  • The right reason
  • The right documentation

Medication calculation: D/H × S = A

(D or desired dosage/H or have available × S or stock = A or amount prepared)

The right patient: check that you have the correct patient using two patient identifiers (e.g., name and date of birth).

Compare MAR with patient name band
Compare MAR with patient wristband

The right medication (drug): check that you have the correct medication and that it is appropriate for the patient in the current context.

The right dose: check that the dose makes sense for the age, size, and condition of the patient. Different dosages may be indicated for different conditions.

The right route: check that the route is appropriate for the patient’s current condition.

The right time: adhere to the prescribed dose and schedule.

The right reason: check that the patient is receiving the medication for the appropriate reason.

The right documentation: always verify any unclear or inaccurate documentation prior to administering medications.

Check the right patient, medication, dose, route, time, reason, documentation

NEVER document that you have given a medication until you have actually administered it.

3. The label on the medication must be checked for name, dose, and route, and compared with the MAR at three different times:
  1. When the medication is taken out of the drawer
  2. When the medication is being poured
  3. When the medication is being put away/or at bedside
Perform 7 checks 3 times before administering medication
Perform seven checks three times before administering medication

These checks are done before administering the medication to your patient.

If taking drug to bedside (e.g., eye drops), do third check at bedside.

4. Before instilling eye medication, offer a tissue to the patient. Drops may spill from the eye with administration.
5. Wear clean non-sterile gloves. Using gloves protects the nurse from potential contact with patient body fluids and medications.
Apply non-sterile gloves
6. Cleanse the eyelashes and eyelids of any drainage or crusting with a warm washcloth or gauze. Use each area of cleaning surface only once and move from inner to outer eye area. Cleansing removes debris from eye area.
7. Tilt patient’s head back slightly if patient is sitting up, or place patient’s head over a pillow (under the neck) if they are lying down. Tilting the head back makes it easier to reach the conjunctival sac for instilling drops.

Do not tilt head back if patient has a cervical spine injury.

8. Invert the eye-drop container and have patient look up and focus on something on the ceiling. Keeping the eye focused will help keep it still.
9. Gently pull patient’s lower lid down, using thumb or two fingers to expose conjunctival sac. Place eye drop in conjunctival sac, not directly on eyeball (cornea).
10. Eye drops: Hold eye-drop container above eye, taking care not to touch the eye, eyelids, or eyelashes. Instill one drop or more, if prescribed, into conjunctival sac.

Eye ointment: Apply about 1.5 cm of ointment along conjunctival sac, moving from inner to outer canthus. Twist tube to break off ribbon of ointment.

Touching the tip of the container to anything can contaminate the medication.
DSC_0825
Instill eye drops in left eye
11. Release lower lid after instillation and ask patient to close eyes gently. Ask patient to move the eyeball while eyes are closed. This step allows the medication to be distributed across the eye.
DSC_0826
Have patient close eyes after drop is instilled
12. Eye drops only: apply gentle pressure over inner canthus for 30 to 60 seconds to prevent medication from entering the lacrimal duct. This minimizes the systemic effects of the medication.
13. Instruct patient not to rub eye. This is to prevent irritation and injury to the eye.
14. Remove gloves and assist patient to a comfortable and safe position. This ensures patient safety and comfort.
Dispose of gloves
Dispose of gloves
15. Perform hand hygiene. Hand hygiene prevents the spread of microorganisms.
Hand hygiene with ABHR
16. Document as per agency policy. Include date, time, dose, route; which eye the medication was instilled into; and patient’s response to procedure. Timely and accurate documentation helps to ensure patient safety.
Data source: BCIT, 2015; Lilley et al., 2011; Perry et al., 2014

Instilling Ear Medications

Internal ear structures are particularly sensitive to temperature extremes. Therefore, ear (otic) medications should always be administered at room temperature. Always use sterile ear drops in case the ear drum is ruptured.

Checklist 49 outlines the steps for instilling ear medications.

Checklist 49: Instilling Ear (Octic) Medications
Disclaimer: Always review and follow your hospital policy regarding this specific skill.
Safety considerations:
  • Perform hand hygiene.
  • Check room for additional precautions.
  • Introduce yourself to patient.
  • Confirm patient ID using two patient identifiers (e.g., name and date of birth).
  • Check allergy band for any allergies.
  • Complete necessary focused assessments and/or vital signs, and document on MAR.
  • Provide patient education as necessary.
  • Plan medication administration to avoid disruption:
    • Dispense medication in a quiet area.
    • Avoid conversation with others.
    • Follow agency’s no-interruption zone policy.
    • Prepare medications for ONE patient at a time.
    • Follow the SEVEN RIGHTS of medication administration.

Steps

Additional Information

1. Check MAR against doctor’s orders.

Check that MAR and doctor’s orders are consistent.

Comparing physician orders and MAR
Compare physician orders and MAR

Night staff usually complete and verify this check as well.

2. Perform the SEVEN RIGHTS x 3 (must be done with each individual medication):
  • The right patient
  • The right medication (drug)
  • The right dose
  • The right route
  • The right time
  • The right reason
  • The right documentation

Medication calculation: D/H x S = A

(D or desired dosage/H or have available x S or stock = A or amount prepared)

The right patient: check that you have the correct patient using two patient identifiers (e.g., name and date of birth).

Compare MAR with patient name band
Compare MAR with patient wristband

The right medication (drug): check that you have the correct medication and that it is appropriate for the patient in the current context.

The right dose: check that the dose makes sense for the age, size, and condition of the patient. Different dosages may be indicated for different conditions.

The right route: check that the route is appropriate for the patient’s current condition.

The right time: adhere to the prescribed dose and schedule.

The right reason: check that the patient is receiving the medication for the appropriate reason.

The right documentation: always verify any unclear or inaccurate documentation prior to administering medications.

Check the right patient, medication, dose, route, time, reason, documentation

NEVER document that you have given a medication until you have actually administered it.

3. The label on the medication must be checked for name, dose, and route, and compared with the MAR at three different times:
  1. When the medication is taken out of the drawer
  2. When the medication is being poured
  3. When the medication is being put away/or at bedside
Perform 7 checks 3 times before administering medication
Perform seven checks three times before administering medication

These checks are done before administering the medication to your patient.

If taking drug to bedside (e.g., eye drops), do third check at bedside.

4. Before instilling ear drops, don clean non-sterile gloves. Using gloves protects the nurse from potential contact with patient body fluids and medications.
Apply non-sterile gloves
5. Cleanse external ear of any drainage using a warm wet washcloth. Drainage or debris may prevent some medication from entering ear canal.
6. Position patient with affected ear uppermost, on unaffected side if lying down, or tilt head to side if sitting up. Proper positioning helps to stop medication from escaping.

Do not tilt head if patient has a cervical spine injury.

7. Draw up medication into ear dropper, ensuring correct dosage.

Do not return excess medication to stock bottle.

Risk for contamination is increased if medication is returned to bottle.
8. Gently pull ear pinna back and up for an adult. Pulling the pinna straightens ear canal.
Pulling the pinna straightens ear canal
Pull the pinna to straighten ear canal
9. Hold dropper tip just above ear canal. Do not touch dropper tip to ear. Touching the ear with the dropper tip will contaminate the dropper and the medication.
10. Allow drops to fall on the side of the ear canal. Dropping the drops directly into the canal and onto the tympanic membrane will cause the patient discomfort.
11. Release ear pinna and have patient remain in the position for at least 5 minutes. This position prevents medication from escaping from ear.
12. Apply gentle pressure to tragus several times. Pressure helps move medication toward tympanic membrane.
13. If ordered, a cotton ball may be placed loosely in the ear canal. Cotton ball helps prevent medication from escaping from ear.
14. Remove gloves and assist patient to a comfortable and safe position. This ensures patient safety and comfort.
15. Perform hand hygiene. Hand hygiene prevents the spread of microorganisms.
Hand hygiene with ABHR
16. Document as per agency policy. Include date, time, dose, route; which ear the medication was instilled into; and patient’s response to procedure. Timely and accurate documentation helps to ensure patient safety.
Data source: BCIT, 2015; Lilley et al., 2011; Perry et al., 2014

Instilling Nasal Medications

Nasal medications are instilled for the treatment of allergies, nasal congestion, and sinus infections. The nose is not a sterile cavity, but medical asepsis must be observed because of its connection to the sinuses.

Checklist 50 outlines the steps for instilling nasal medications.

Checklist 50: Instilling Nasal Medications
Disclaimer: Always review and follow your hospital policy regarding this specific skill.
Safety considerations:
  • Perform hand hygiene.
  • Check room for additional precautions.
  • Introduce yourself to patient.
  • Confirm patient ID using two patient identifiers (e.g., name and date of birth).
  • Check allergy band for any allergies.
  • Complete necessary focused assessments and/or vital signs, and document on MAR.
  • Provide patient education as necessary.
  • Plan medication administration to avoid disruption:
    • Dispense medication in a quiet area.
    • Avoid conversation with others.
    • Follow agency’s no-interruption zone policy.
    • Prepare medications for ONE patient at a time.
    • Follow the SEVEN RIGHTS of medication administration.

Steps

Additional Information

1. Check MAR against doctor’s orders.

Check that MAR and doctor’s orders are consistent.

Comparing physician orders and MAR
Compare physician orders and MAR

Night staff usually complete and verify this check as well.

2. Perform the SEVEN RIGHTS x 3 (must be done with each individual medication):
  • The right patient
  • The right medication (drug)
  • The right dose
  • The right route
  • The right time
  • The right reason
  • The right documentation

Medication calculation: D/H x S = A

(D or desired dosage/H or have available x S or stock = A or amount prepared)

The right patient: check that you have the correct patient using two patient identifiers (e.g., name and date of birth).
Compare MAR with patient name band
Compare MAR with patient wristband

The right medication (drug): check that you have the correct medication and that it is appropriate for the patient in the current context.

The right dose: check that the dose makes sense for the age, size, and condition of the patient. Different dosages may be indicated for different conditions.

The right route: check that the route is appropriate for the patient’s current condition.

The right time: adhere to the prescribed dose and schedule.

The right reason: check that the patient is receiving the medication for the appropriate reason.

The right documentation: always verify any unclear or inaccurate documentation prior to administering medications.

Check the right patient, medication, dose, route, time, reason, documentation

NEVER document that you have given a medication until you have actually administered it.

3. The label on the medication must be checked for name, dose, and route, and compared with the MAR at three different times:
  1. When the medication is taken out of the drawer
  2. When the medication is being poured
  3. When the medication is being put away/or at bedside
Perform 7 checks 3 times before administering medication
Perform seven checks three times before administering medication

These checks are done before administering the medication to your patient.

If taking drug to bedside (e.g., eye drops), do third check at bedside.

4. Before instilling nasal medication, don clean non-sterile gloves. Using gloves protects the nurse from potential contact with patient body fluids and medications.
Apply non-sterile gloves
5. Provide patient with tissues and ask that they blow their nose. This clears the nose prior to medication instillation.
6. Position patient sitting back or lying down with head tilted back over a pillow (underneath neck). This position allows medication to flow back into nasal cavity.

Do not tilt head back if patient has a cervical spine injury.

7. Nose drops: draw fluid into medication dropper with enough for both nares. Do not return excess fluid into stock bottle. Returning fluid to stock bottle increases risk for contamination of medication.
8. Ask patient to breathe through the mouth.

Nose drops: hold dropper about 1 cm above naris and drop medication into one naris and then the other.

Nasal spray: have patient hold one nostril closed and breathe gently through the other as the spray is being administered.

Do not touch the naris with the dropper/spray bottle.

Hold dropper about 1 cm above naris

Breathing through the mouth will help prevent aspiration of the medication.

Touching the naris with the dropper/spray tip will contaminate the dropper/spray bottle and the medication.

9. Position patient with head back for 2 to 3 minutes. This position prevents escape of the medication.
10. Remove gloves and assist patient to a comfortable and safe position. This ensures patient safety and comfort.
11. Perform hand hygiene. Hand hygiene prevents the spread of microorganisms.
Hand hygiene with ABHR
12. Document as per agency policy. Include date, time, dose, route; which naris the medication was instilled into (or whether it was both nares); and patient’s response to procedure. Timely and accurate documentation helps to ensure patient safety.
Data source: BCIT, 2015; Lilley et al., 2011; Perry et al., 2014

Critical Thinking Exercises

  1. Your patient is due to receive a dose of medication instilled into both ears. You find the ear medication stored in the refrigerator. How should you proceed?
  2. Your patient is due to receive medication instilled into her right eye, but you notice that her left eye has crusting and discharge. Discuss how you would proceed in this situation.
  3. Your patient is to receive nasal drops for a sinus infection. Describe how you would position this patient to receive the nasal drops.

48

6.6 Administering Inhaled Medications

Medications administered through inhalation are dispersed via an aerosol spray, mist, or powder that patients inhale into their airways. Although the primary effect of inhaled medications is respiratory, there are likely to be systemic effects as well. Most patients taking medication by inhaler have asthma or chronic respiratory disease and should learn how to administer these medications themselves. A variety of inhalers are available, and specific manufacturers’ instructions should always be checked and followed to ensure appropriate dosing.

Medication by Small-Volume Nebulizers

Nebulization is a process by which medications are added to inspired air and converted into a mist that is then inhaled by the patient into their respiratory system (Lilley et al., 2011; Perry et al., 2014.) (see Figure 6.4). The air droplets are finer than those created by metered dose inhalers, and delivery of the nebulized medication is by face mask or a mouthpiece held between the patient’s teeth.

DSC_0165
Figure 6.4 Example of a small-volume nebulizer

Checklist 51 outlines the steps for delivering medication through a small-volume nebulizer.

Checklist 51: Medication by Small-Volume Nebulizer
Disclaimer: Always review and follow your hospital policy regarding this specific skill.
Safety considerations:
  • Perform hand hygiene.
  • Check room for additional precautions.
  • Introduce yourself to patient.
  • Confirm patient ID using two patient identifiers (e.g., name and date of birth).
  • Check allergy band for any allergies.
  • Complete necessary focused assessments and/or vital signs, and document on MAR.
  • Provide patient education as necessary.
  • Plan medication administration to avoid disruption
    • Dispense medication in a quiet area
    • Avoid conversation with others.
    • Follow agency’s no-interruption zone policy.
    • Prepare medications for ONE patient at a time.
    • Follow the SEVEN RIGHTS of medication administration.

Steps

 Additional Information

1. Check MAR against doctor’s orders. Check that MAR and doctor’s orders are consistent.
Comparing physician orders and MAR
Compare physician orders and MAR

Night staff usually complete and verify this check as well.

2. Perform the SEVEN RIGHTS x 3 (must be done with each individual medication):
  • The right patient
  • The right medication (drug)
  • The right dose
  • The right route
  • The right time
  • The right reason
  • The right documentation

Medication calculation: D/H x S = A

(D or desired dosage/H or have available x S or stock = A or amount prepared)

The right patient: check that you have the correct patient using two patient identifiers (e.g., name and date of birth).
Compare MAR with patient name band
Compare MAR with patient wristband

The right medication (drug): check that you have the correct medication and that it is appropriate for the patient in the current context.

The right dose: check that the dose makes sense for the age, size, and condition of the patient. Different dosages may be indicated for different conditions.

The right route: check that the route is appropriate for the patient’s current condition.

The right time: adhere to the prescribed dose and schedule.

The right reason: check that the patient is receiving the medication for the appropriate reason.

The right documentation: always verify any unclear or inaccurate documentation prior to administering medications.

Check the right patient, medication, dose, route, time, reason, documentation

NEVER document that you have given a medication until you have actually administered it.

3. The label on the medication must be checked for name, dose, and route, and compared with the MAR at three different times:
  1. When the medication is taken out of the drawer
  2. When the medication is being poured
  3. When the medication is being put away/or at bedside
Perform 7 checks 3 times before administering medication
Perform seven checks three times before administering medication

These checks are done before administering the medication to your patient.

If taking drug to bedside (e.g., eye drops), do third check at bedside.

4. Assemble nebulizer as per manufacturer’s instructions. Assembly specific to manufacturer’s instructions ensures proper delivery of medication.
5. Add medication as prescribed by pouring medication into the nebulizer cup.
  • Some medications may be mixed together if there are no contraindications.
  • Some medications may require the addition of saline per prescription for dilution.
This step ensures the proper delivery of medication.


6. Use a mask if patient is unable to tolerate a mouthpiece, and an adaptor specific to tracheostomies if the patient has a tracheostomy. This ensures the proper delivery of medication.
7. Position patient sitting up in a chair or in bed at greater than 45 degrees. This position improves lung expansion and medication distribution.
Position patient sitting up
8. Assess pulse, respiratory rate, breath sounds, pulse oximetry, and peak flow measurement (if ordered) before beginning treatment. Determine a baseline respiratory assessment prior to administration of medication.
NOTE: Attach the nebulizer to compressed air if available; use oxygen if there is no compressed air. If patient is receiving oxygen, do not turn it off. Continue to deliver oxygen through nasal prongs with the nebulizer.
9. Turn on air to nebulizer and ensure that a sufficient mist is visible exiting nebulizer chamber. A flow rate of 6 to 10 L should provide sufficient misting.

Ensure that nebulizer chamber containing medication is securely fastened.

Ensure that chamber is connected to face mask or mouthpiece, and that nebulizer tubing is connected to compressed air or oxygen flowmeter.

This process verifies that equipment is working properly.
Check for misting
Check for misting
10. If mouthpiece is being used, ensure lips are sealed around mouthpiece. Sealed lips ensure proper inhalation of medication.
11. Have patient take slow, deep, inspiratory breaths. Encourage a brief 2- to 3-second pause at the end of inspiration, and continue with passive exhalations.

Note: If patient is dyspneic, encourage holding every fourth or fifth breath for 5 to 10 seconds.

This maximizes effectiveness of medication.
12. Have patient repeat this breathing pattern until medication is complete and there is no visible misting. This process takes approximately 8 to 10 minutes. This maximizes the effectiveness of the medication.
13. Tap nebulizer chamber occasionally and at the end of the treatment. This action releases drops of medication that cling to the side of the chamber.
Tap the nebulizer container to release drops of medication clinging to sides
Tap the nebulizer container
14. Monitor patient’s pulse rate during treatment, especially if beta-adrenergic bronchodilators are being used. Beta-adrenergic bronchodilators have cardiac effects that should be monitored during treatment.
15. Once treatment is complete, turn flowmeter off and disconnect nebulizer. This promotes patient comfort and safety.
16. Rinse, dry, and store nebulizer as per agency policy. Proper care reduces the transfer of microorganisms.
17. If inhaled medication included steroids, have patient rinse mouth and gargle with warm water after treatment. Rinsing removes residual medication from mouth and throat, and helps prevent oral candidiasis related to steroid use.
18. Once treatment is complete, encourage patient to perform deep breathing and coughing exercises to help remove expectorate mucous. Treatments are often prescribed specifically to encourage mucous expectoration.
19. Return patient to a comfortable and safe position. This promotes patient comfort and safety.
20. Perform hand hygiene. This step prevents the transfer of microorganisms.
Hand hygiene with ABHR
21. Document treatment as per agency policy, and record and report any unusual events or findings to the appropriate health care provider. Accurate and timely documentation and reporting promote patient safety.
Data source: BCIT, 2015; Lilley et al., 2011; Perry et al., 2014

Medication by Metered Dose Inhaler (MDI)

A metered dose inhaler (MDI) is a small handheld device that disperses medication into the airways via an aerosol spray or mist through the activation of a propellant. A measured dose of the drug is delivered with each push of a canister, and dosing is usually achieved with one or two puffs.

DSC_0171
Examples of MDIs, with a spacer on the right

Checklist 52 lists the steps for administering medication by MDI.

Checklist 52: Medication by Metered Dose Inhaler (MDI)
Disclaimer: Always review and follow your hospital policy regarding this specific skill.
Safety considerations:
  • Perform hand hygiene.
  • Check room for additional precautions.
  • Introduce yourself to patient.
  • Confirm patient ID using two patient identifiers (e.g., name and date of birth).
  • Check allergy band for any allergies.
  • Complete necessary focused assessments and/or vital signs, and document on MAR.
  • Provide patient education as necessary.
  • Plan medication administration to avoid disruption:
    • Dispense medication in a quiet area.
    • Avoid conversation with others.
    • Follow agency’s no-interruption zone policy.
    • Prepare medications for ONE patient at a time.
    • Follow the SEVEN RIGHTS of medication administration.

Steps

Additional Information

1. Check MAR against doctor’s orders. Check that MAR and doctor’s orders are consistent.
Comparing physician orders and MAR
Compare physician orders and MAR

Night staff usually complete and verify this check as well.

2. Perform the SEVEN RIGHTS x 3 (must be done with each individual medication):
  • The right patient
  • The right medication (drug)
  • The right dose
  • The right route
  • The right time
  • The right reason
  • The right documentation

Medication calculation: D/H x S = A

(D or desired dosage/H or have available x S or stock = A or amount prepared)

The right patient: check that you have the correct patient using two patient identifiers (e.g., name and date of birth).
Compare MAR with patient name band
Compare MAR with patient wristband

The right medication (drug): check that you have the correct medication and that it is appropriate for the patient in the current context.

The right dose: check that the dose makes sense for the age, size, and condition of the patient. Different dosages may be indicated for different conditions.

The right route: check that the route is appropriate for the patient’s current condition.

The right time: adhere to the prescribed dose and schedule.

The right reason: check that the patient is receiving the medication for the appropriate reason.

The right documentation: always verify any unclear or inaccurate documentation prior to administering medications.

Check the right patient, medication, dose, route, time, reason, documentation

NEVER document that you have given a medication until you have actually administered it.

3. The label on the medication must be checked for name, dose, and route, and compared with the MAR at three different times:
  1. When the medication is taken out of the drawer
  2. When the medication is being poured
  3. When the medication is being put away/or at bedside
Perform 7 checks 3 times before administering medication
Perform seven checks three times before administering medication

These checks are done before administering the medication to your patient.

If taking drug to bedside (e.g., eye drops), do third check at bedside.

4. Assemble MDI as per manufacturer’s instructions.

If MDI has not been used for several days, give it a test spray into the air, taking care not to inhale the medication.

Assembly specific to manufacturer’s instructions ensures proper delivery of medication.
Assemble MDI as per manufacturer's instructions
Assemble MDI as per manufacturer’s instructions
5. Ensure that canister is securely inserted into the holder and remove the mouthpiece cover. This ensures proper delivery of medication.
6. Shake canister well before delivery (5 or 6 shakes). This ensures proper delivery of medication.
7. Position patient sitting up in a chair or in bed at greater than 45 degrees. This position improves lung expansion and medication distribution.
8. Assess pulse, respiratory rate, breath sounds, pulse oximetry, and peak flow measurement (if ordered) before beginning treatment. This determines a baseline respiratory assessment prior to administration of medication.
9. Without spacer:
  • Hold inhaler in dominant hand.
  • Place mouthpiece in mouth with opening toward back of mouth, and have patient close lips around mouthpiece.
  • Ask patient to inhale deeply and exhale completely.
  • Ask patient to hold inhaler between thumb at the base and index and middle fingers at the top.
  • Ask patient to tilt head back slightly and inhale deeply and slowly through mouth, while simultaneously depressing inhaler canister.
  • Ask patient to hold breath for about 10 seconds without exhaling medication.
  • Remove MDI while exhaling through nose or pursed lips.

With spacer:

  • Insert MDI into end of spacer device.
  • Ask patient to place spacer mouthpiece in mouth and close lips around mouthpiece, avoiding any exhalation openings on spacer.
  • Ask patient to breathe regularly.
  • Have patient depress medication canister to spray one puff into spacer device.
  • Ask patient to breathe in deeply and slowly for about 5 seconds and to then hold breath at the end of inspiration for about 10 seconds.
  • If one medication: have patient wait 20 to 30 seconds between inhalations
  • If more than one medication: have patient wait 2 to 5 minutes between inhalations.
This process ensures proper inhalation of medication.
Ask patient to breathe regularly
Depress medication canister to spray one puff into spacer device
Ask patient to breathe in deeply and slowly for about 5 seconds and to then hold breath at the end of inspiration for about 10 seconds
10. Have patient rinse mouth and gargle with warm water about 2 minutes after treatment. Rinsing removes residual medication from mouth and throat, and helps prevent oral candidiasis related to steroid use.
11. Return patient to a comfortable and safe position. This promotes patient comfort and safety.
12. Perform hand hygiene. This step prevents the transfer of microorganisms.
Hand hygiene with ABHR
13. Document treatment as per agency policy, and record and report any unusual events or findings to the appropriate health care provider. Accurate and timely documentation and reporting promote patient safety.
Data source: BCIT, 2015; Lilley et al., 2011; Perry et al., 2014

Critical Thinking Exercises

  1. Your patient is receiving supplemental oxygen through nasal prongs, and needs to receive medication via a nebulizer. Please describe whether or not you would remove the nasal prongs and your reasoning for making this decision.
  2. Your patient complains that she can’t seem to breathe in at the same time as she depresses her inhaler. What action should you take in this situation to ensure that your patient receives the appropriate dose of her medication by inhaler.

49

6.7 Administering Topical Medications

In this section, we address how to administer topical medication using three distinct delivery methods: transdermal patch; creams, lotions, or ointments; and powder. Always wear gloves and maintain standard precautions when administering topical medications to the skin, mucous membranes, and tissues. Do not touch any preparations to your own skin, and turn your face away from powdered applications. Always clean the skin or wound before applying a new dose of topical medication.

Checklist 53 lists the steps for applying a transdermal patch.

Checklist 53: Applying a Transdermal Patch
Disclaimer: Always review and follow your hospital policy regarding this specific skill.
Safety considerations:
  • Perform hand hygiene.
  • Check room for additional precautions.
  • Introduce yourself to patient.
  • Confirm patient ID using two patient identifiers (e.g., name and date of birth).
  • Check allergy band for any allergies.
  • Complete necessary focused assessments and/or vital signs, and document on MAR.
  • Provide patient education as necessary.
  • Plan medication administration to avoid disruption:
    • Dispense medication in a quiet area.
    • Avoid conversation with others.
    • Follow agency’s no-interruption zone policy.
    • Prepare medications for ONE patient at a time.
    • Follow the SEVEN RIGHTS of medication administration.

Steps

 Additional Information

1. Check MAR against doctor’s orders. Check that MAR and doctor’s orders are consistent.
Comparing physician orders and MAR
Compare physician orders and MAR

Night staff usually complete and verify this check as well.

2. Perform the SEVEN RIGHTS x 3 (must be done with each individual medication):
  • The right patient
  • The right medication (drug)
  • The right dose
  • The right route
  • The right time
  • The right reason
  • The right documentation

Med calculation: D/H x S = A

(desired dosage/have available x stock = amount prepared)

The right patient: check that you have the correct patient using two patient identifiers (e.g., name and date of birth).
Compare MAR with patient name band
Compare MAR with patient wristband

The right medication (drug): check that you have the correct medication and that it is appropriate for the patient in the current context.

The right dose: check that the dose makes sense for the age, size, and condition of the patient. Different dosages may be indicated for different conditions.

The right route: check that the route is appropriate for the patient’s current condition.

The right time: adhere to the prescribed dose and schedule.

The right reason: check that the patient is receiving the medication for the appropriate reason.

The right documentation: always verify any unclear or inaccurate documentation prior to administering medications.

Check the right patient, medication, dose, route, time, reason, documentation

NEVER document that you have given a medication until you have actually administered it.

3. The label on the medication must be checked for name, dose, and route, and compared with the MAR at three different times:
  1. When the medication is taken out of the drawer
  2. When the medication is being poured
  3. When the medication is being put away/or at bedside
Perform 7 checks 3 times before administering medication
Perform seven checks three times before administering medication
Transdermal patch
Transdermal patch

These checks are done before administering the medication to your patient. If taking drug to bedside (e.g., eye drops), do third check at bedside.

4. Before applying a transdermal patch, remove the old patch if it is still in place. Clean area thoroughly.

Observe for signs of skin irritation at old patch and document as per agency policy.

Not removing previous patch may result in overdose of the medication. Check between skin folds for old patch.
Remove previous patch
5. Dispose of old patch as per agency policy (usually in a biohazard trash bag) by folding in half with sticky sides together and wrapping it in a glove, or cutting it before disposal. This prevents accidental exposure to the medication.
6. Use a felt tip or soft tip pen to write the date, time, and your initials on the outside of the new patch. DO NOT use a ballpoint pen. Initialling patch communicates application date and time to other health care providers.
Write the date, time and your initials on the transdermal patch
Write the date, time, and your initials on the transdermal patch

Ballpoint pen can damage patch and thus affect medication delivery.

7. Apply the new patch to a new site that is clear, dry, hairless, and free of skin irritations. If it is necessary to remove hair, clip the hair instead of shaving to avoid skin irritation.

A consistent surface ensures even medication distribution.

NOTE: It is usual to have a “patch-free period” of 10 to 12 hours when the patch is removed, because tolerance to the medication may develop if the patch is worn 24 hours/day. Check doctor’s orders to determine if the patch should be removed overnight.
8. Carefully remove the backing from the patch, taking care to hold it at the edges and not touch the medication with your fingers. This prevents interference with medication and maintains stickiness of patch.
9. Apply patch by holding one hand firmly over the patch for 10 seconds, then press around the edges to make sure that the patch is securely attached to the skin. This prevents loss of patch and ensures effectiveness of medication delivery.
Apply new transdermal patch
10. Perform hand hygiene. This prevents the transfer of microorganisms.
Hand hygiene with ABHR
NOTE:
  • Do not apply new patch to previously used sites for at least one week, so skin irritation is reduced.
  • Never cut patch in half; a change in dose requires a new transdermal patch.
  • Never apply a heating pad over the patch as it will affect the rate of absorption, with potentially serious adverse effects.
11. Document as per agency policy, making sure to include site of administration on the MAR. Accurate and timely documentation improves patient safety.
Data source: BCIT, 2015; Lilley et al., 2011; Perry et al., 2014

Checklist 54 lists the steps for applying topical medications as creams, lotions, and ointments.

Checklist 54: Applying Topical Creams, Lotions, and Ointments
Disclaimer: Always review and follow your hospital policy regarding this specific skill.
Safety considerations:
  • Perform hand hygiene.
  • Check room for additional precautions.
  • Introduce yourself to patient.
  • Confirm patient ID using two patient identifiers (e.g., name and date of birth).
  • Check allergy band for any allergies.
  • Complete necessary focused assessments and/or vital signs, and document on MAR.
  • Provide patient education as necessary.
  • Plan medication administration to avoid disruption:
    • Dispense medication in a quiet area.
    • Avoid conversation with others.
    • Follow agency’s no-interruption zone policy.
    • Prepare medications for ONE patient at a time.
    • Follow the SEVEN RIGHTS of medication administration.

Steps

 Additional Information

1. Check MAR against doctor’s orders.

Check that MAR and doctor’s orders are consistent.

Comparing physician orders and MAR
Compare physician orders and MAR

Night staff usually complete and verify this check as well.

2. Perform the SEVEN RIGHTS x 3 (must be done with each individual medication):
  • The right patient
  • The right medication (drug)
  • The right dose
  • The right route
  • The right time
  • The right reason
  • The right documentation

Medication calculation: D/H x S = A

(D or desired dosage/H or have available x S or stock = A or amount prepared)

The right patient: check that you have the correct patient using two patient identifiers (e.g., name and date of birth).
Compare MAR with patient name band
Compare MAR with patient wristband

The right medication (drug): check that you have the correct medication and that it is appropriate for the patient in the current context.

The right dose: check that the dose makes sense for the age, size, and condition of the patient. Different dosages may be indicated for different conditions.

The right route: check that the route is appropriate for the patient’s current condition.

The right time: adhere to the prescribed dose and schedule.

The right reason: check that the patient is receiving the medication for the appropriate reason.

The right documentation: always verify any unclear or inaccurate documentation prior to administering medications.

Check the right patient, medication, dose, route, time, reason, documentation

NEVER document that you have given a medication until you have actually administered it.

3. The label on the medication must be checked for name, dose, and route, and compared with the MAR at three different times:
  1. When the medication is taken out of the drawer
  2. When the medication is being poured
  3. When the medication is being put away/or at bedside
Perform 7 checks 3 times before administering medication
Perform seven checks three times before administering medication

These checks are done before administering the medication to your patient. If taking drug to bedside (e.g., eye drops), do third check at bedside.

4. Apply non-sterile gloves unless skin is broken; then apply sterile gloves. Using gloves protects health care provider from contact with medication.
Apply non-sterile gloves

If skin is broken, sterile gloves will prevent the spread of microorganisms.

5. Wash, rinse, and dry the affected area with water and a clean cloth. This removes previous topical medications.
6. If skin is very dry and flaking, apply topical medication while skin is still damp. Applying while skin is damp helps to retain moisture within skin layers.
7. Change gloves, performing hand hygiene in between. Use sterile gloves for open skin lesions to prevent spread of microorganisms.
Apply sterile gloves if open lesions
Apply sterile gloves if patient has open lesions
8. Place required amount of medication in palm of hands and soften by rubbing palms together. Softening makes topical medication easier to spread.
Rub lotion in hands to soften and warm
Rub medication in hands to soften and warm
9. Let patient know that initial application may feel cold. Apply medication using long even strokes that follow the direction of the hair. Do not rub vigorously. This prevents irritation of hair follicles.
10. Let patient know that skin may feel greasy after application. Some topical medications contain oils.
11. Document as per agency policy, making sure to include site of administration on the MAR. Accurate and timely documentation improves patient safety.
12. Perform hand hygiene. This step prevents the transfer of microorganisms.
Hand hygiene with ABHR
Data source: BCIT, 2015; Lilley et al., 2011; Perry et al., 2014

Checklist 55 lists the steps for applying medicinal powder topically.

    Checklist 55: Applying Topical Powder

Disclaimer: Always review and follow your hospital policy regarding this specific skill.
Safety considerations:
  • Perform hand hygiene.
  • Check room for additional precautions.
  • Introduce yourself to patient.
  • Confirm patient ID using two patient identifiers (e.g., name and date of birth).
  • Check allergy band for any allergies.
  • Complete necessary focused assessments and/or vital signs, and document on MAR.
  • Provide patient education as necessary.
  • Plan medication administration to avoid disruption:
    • Dispense medication in a quiet area.
    • Avoid conversation with others.
    • Follow agency’s no-interruption zone policy.
    • Prepare medications for ONE patient at a time.
    • Follow the SEVEN RIGHTS of medication administration.

Steps

 Additional Information

1. Check MAR against doctor’s orders.

Check that MAR and doctor’s orders are consistent.

Comparing physician orders and MAR
Compare physician orders and MAR

Night staff usually complete and verify this check as well.

2. Perform the SEVEN RIGHTS x 3 (must be done with each individual medication):
  • The right patient
  • The right medication (drug)
  • The right dose
  • The right route
  • The right time
  • The right reason
  • The right documentation

Medication calculation: D/H x S = A

(D or desired dosage/H or have available x S or stock = A or amount prepared)

The right patient: check that you have the correct patient using two patient identifiers (e.g., name and date of birth).
Compare MAR with patient name band
Compare MAR with patient wristband

The right medication (drug): check that you have the correct medication and that it is appropriate for the patient in the current context.

The right dose: check that the dose makes sense for the age, size, and condition of the patient. Different dosages may be indicated for different conditions.

The right route: check that the route is appropriate for the patient’s current condition.

The right time: adhere to the prescribed dose and schedule.

The right reason: check that the patient is receiving the medication for the appropriate reason.

The right documentation: always verify any unclear or inaccurate documentation prior to administering medications.

Check the right patient, medication, dose, route, time, reason, documentation

NEVER document that you have given a medication until you have actually administered it.

3. The label on the medication must be checked for name, dose, and route, and compared with the MAR at three different times:
  1. When the medication is taken out of the drawer
  2. When the medication is being poured
  3. When the medication is being put away/or at bedside
Perform 7 checks 3 times before administering medication
Perform seven checks three times before administering medication

These checks are done before administering the medication to your patient. If taking drug to bedside (e.g., eye drops), do third check at bedside.

4. Ensure that skin is completely dry and clean before application. This minimizes potential for powder to cake and crust.
5. If application is near patient’s face, ask patient to turn away from powder or briefly cover face with a clean towel. This prevents patient from inhaling powder.
6. Dust skin with a light layer of powder. Too thick a layer of powder will congeal and crust.
7. If ordered, cover the affected site with the prescribed dressing. Covering site prevents soiling of patient’s clothes and linens.
8. Document as per agency policy, making sure to include site of administration on the MAR. Accurate and timely documentation improves patient safety.
9. Perform hand hygiene. Prevents transfer of microorganisms.
Hand hygiene with ABHR
Data source: BCIT, 2015; Lilley et al., 2011; Perry et al., 2014

Critical Thinking Exercises

  1. Your patient’s MAR states that their Nitro-Patch should be removed at night. Please explain why this is considered safe practice.
  2. Discuss the steps you would take to administer a lotion for a patient with a rash that has several open lesions.
  3. Discuss why it is necessary to ensure that your patient’s skin is clean and dry prior to applying a prescribed topical powder.

50

6.8 Summary

Nurses play an essential role in medical reconciliation; preparing, administering, monitoring, evaluating, teaching patients; and documenting responses to medications. Medication administration requires good decision-making skills and clinical judgment, and the nurse is responsible for ensuring full understanding of medication administration and its implications for patient safety.

This chapter discusses guidelines to follow for mitigating medication errors and adverse drug events (ADEs). Non-parenteral routes of medication administration are discussed, and the steps for following each of these processes safely is outlined.

Key Takeaways

  • Safe and accurate medication administration is a key nursing responsibility.
  • Medication administration is a complex process that requires the full attention of the nurse to avoid medication errors and adverse drug events.
  • Nurses can reduce errors by following guidelines, knowing the types of medication errors that are most likely to occur and strategies for their prevention, and understanding the implications of the medication being given.
  • There are several routes for medication administration. Knowing when it is appropriate to use each route, and knowing the process for medication administration via that route, will help to mitigate medication errors.
  • The seven rights and three checks provide a process for safe drug administration and are a collaborative effort of the nurse, the pharmacist, and the physician.
  • Accurate and timely documentation of medication administration and the effect of the medication on the patient is an important responsibility of the nurse and promotes patient safety.
  • Patient education is an extremely important factor in medication adherence and proper self-administration and is an important nursing responsibility.

 Suggested Online Resources

  1. Canadian Patient Safety Institute (CPSI): Medication safety. This resource explains how to reduce adverse drug events by following the medication reconciliation process.
  2. Centers for Disease Control and Prevention: Medication safety basics. This website outlines medication safety basics and provides several medication safety fact sheets.
  3. Institute for Safe Medication Practices Canada (ISMP). This is the website for an independent national not-for-profit organization committed to the advancement of medication safety in all health care settings.
  4. Institute for Safe Medication Practices Canada (ISMP): Medication reconciliation. This website provides a definition of medication reconciliation and resources to complete the medication reconciliation process to ensure safe and effective communication for all health care providers regarding use of all medications.

References

Agency for Healthcare Research and Quality. (2014). Checklists. Retrieved on June 11, 2015, from http://psnet.ahrq.gov/primer.aspx?primerID=14

Agrawal, A. (2009). Medication errors: Prevention using information technology systems. Br J Clin Pharmacol, 67(6), 681.

British Columbia Institute of Technology (BCIT). (2015). NURS 1020: Clinical techniques. Vancouver: British Columbia Institute of Technology (BCIT).

Butt, A.R. (2010). Medical error in Canada. Issues related to reporting medical error and methods to increase reporting. McMasters Univserity Medical Journal, Clinical Review, 7(1). 15 – 8. Retrieved on June 3, 2015 from http://www.mumj.org/Issues/v7_2010/articles/16.pdf

Canadian Patient Safety Institute. (2012). Canadian incident analysis  framework. Retrieved on Nov 14, 2015, from http://www.patientsafetyinstitute.ca/en/toolsResources/IncidentAnalysis/Documents/Canadian%20Incident%20Analysis%20Framework.PDF#search=canadian%20analysis%20incident%20framework

Centers for Disease Control. (2013). Infection control. Retrieved on June 11, 2015, from http://www.cdc.gov/oralhealth/infectioncontrol/faq/protective_equipment.htm

Debono, D. S., Greenfield, D., Travaglia, J. F., Long, J. C., Black, D., Johnson, J., & Braithwaite, J. (2013). Nurses’ workarounds in acute healthcare settings: A scoping review. BMC Health Services Research, 13, 175. doi:10.1186/1472-6963-13-175

Institute for Healthcare Improvement. (2015). High alert medication safety. Retrieved on June 11, 2015, from http://www.ihi.org/topics/highalertmedicationsafety/pages/default.aspx

Kohn, L. T., Corrigan, J. M., & Donaldson, M. S. (eds). (2000). To err is human: Building a safer health system. Washington, DC: National Academy Press. Retrieved from http://www.iom.edu/~/media/Files/Report%20Files/1999/To-Err-is-Human/To%20Err%20is%20Human%201999%20%20report%20brief.pdf

Lilley, L. L., Harrington, S., Snyder, J. S., & Swart, B. (2011). Pharmacology for Canadian health care practice (2nd ed.). Toronto, ON: Elsevier Canada.

Lowry, M. (2016). Rectal drug administration in adults: How, when, why. Nursing Times, 112(8), 12-14. Retrieved from https://www.nursingtimes.net/clinical-archive/neurology/rectal-drug-administration-in-adults-how-when-why/7002595.article

Lynn, P. (2011). Photo atlas of medication administration (4th ed.). Philadelphia, PA: Lippincott Williams & Wilkins.

National Patient Safety Agency. (2009). Safety in doses. Improving the use of medication in NHS. Retrieved on June 11, 2015, from http://www.nrls.npsa.nhs.uk/resources/?entryid45=61625

National Priority Partnership. (2010). Preventing medical errors: A $21 billion opportunity. Retrieved on June 3, 2015, from http://psnet.ahrq.gov/resource.aspx?resourceID=20529

Perry, A., Potter, P., & Ostendorf, W. (2014). Clinical skills and nursing techniques (8th ed.). St Louis, MO: Elsevier-Mosby.

Poon, E. G. et al. (2010). Effect of bar-code technology on the safety of medication administration. N Engl J Med., 362, 1698.

Prakash, V., Koczmara, C., Saveage, P., Trip, K., Stewart, J., Mccurdie, T., Cafazzo, J., & Trbovich, P. (2014). Mitigating errors caused by interruptions during medication verification and administration: Interventions in a simulated ambulatory chemotherapy setting. BMJ Quality and Safety, 0 (1 – 10). doi:10.1136/bmjqs-2013-002484

The Joint Commission (TJC). (2012). National patient safety goals. Oakbrook Terrace, IL: The Commission. Retrieved on June 3, 2015, from http://www.jointcommission.org/standards_information/npsgs.aspx

Vancouver Coastal Health. (2014). Course catalogue registration system. Retrieved from Medication Reconciliation: Top Ten Tips, https://bcpsqc.ca//documents/2012/09/Top-10-Tips-for-Interviewing-Patients.pdf

VII

Chapter 7. Parenteral Medication Administration

51

7.1 Introduction

Parenteral medications are medications administered directly into body tissue or the circulatory system (according to Merriam-Webster, “parenteral” is a term taken from the Greeks meaning “to avoid the intestines”). They are synonymous with “injectables,” as syringes and needles are used to administer these medications by subcutaneous, intradermal, intramuscular, and intravenous routes. Injections are a direct and reliable way to deliver medication for fast absorption. However, parenteral medications pose a greater risk of harm and adverse reactions than nonparenteral medications. Parenteral medications require special equipment and a specific skill set to ensure that the medication is prepared correctly to have the right therapeutic effect, and to avoid complications (Perry, Potter, & Ostendorf, 2014).

Learning Objectives

  • Describe the advantages and disadvantages of injecting medications by each parenteral route
  • Explain how to safely administer parenteral medication, prevent needle-stick injuries, prevent infection, and minimize patient discomfort during an injection
  • Discuss factors related to equipment and selection of injection site for each parenteral route
  • Describe how to correctly administer intradermal, subcutaneous, and intramuscular injections
  • Review how to administer an intravenous medication via the direct IV route (bolus) and by a piggyback infusion through a continuous IV line and a saline lock
  • Describe how to manage adverse reactions to IV medications
  • Explain the complications associated with intravenous medications
  • Summarize how to manage and report medication errors in the health care setting

52

7.2 Parenteral Medications and Preparing Medications from Ampules and Vials

Parenteral refers to the path by which medication comes in contact with the body. Parenteral medications enter the body by injection through the tissue and circulatory system. Injection medications are absorbed more quickly and are used with patients who are nauseated, vomiting, restricted from taking oral fluids, or unable to swallow. Parenteral medications can be effective and safe when prepared and administered correctly. However, because they are invasive and absorbed readily and quickly into the body, there are numerous risks associated with administering them (Perry et al., 2014).

There are four routes for parenteral medications (also see Figure 7.1). Each type of injection requires a specific skill set to ensure the medication is prepared properly and administered into the correct location (Perry et al., 2014). The four types of injections are:

  1. Subcutaneous (SC): This injection places medication/solution the loose connective tissue just under the dermis.
  2. Intradermal (ID): This injection places the medication into the dermis just under the epidermis.
  3. Intramuscular (IM): This injection places the medication into the body of a muscle.
  4. Intravenous (IV): This injection places the medication/solution into a vein through an existing IV line or a short venous access device (saline lock). Medications given by the intravenous route can be given as an IV bolus, as an intermittent (piggyback) medication, or in a large volume continuous infusion.
Figure 7.1: Insertion angles

To administer parenteral medications safely, it is imperative to understand how to prevent an infection, prevent medication errors, prevent a needle-stick injury, and prevent discomfort to the patient. Tables 7.1 to 7.4 address specific practices to eliminate safety hazards to patients and health care workers.

Preventing Infection During an Injection

According to Seigel et al, (2007), research has shown that unsafe injection practices have resulted in patient exposure to infections leading to outbreaks of infectious diseases. These unnecessary exposures were the result of deficient health care practices. Injectable medications must be given in a safe manner to maintain sterility of equipment and prevent the transmission of infectious diseases between patients and health care workers. Table 7.1 summarizes how to prevent an infection during an injection.

Table 7.1 Preventing Infection During an Injection 
Safety consideration:
  • Always follow the principles of sterile technique when preparing injections.

Principle

 Additional Information

Perform hand hygiene. Always perform hand hygiene before administration and after removing gloves. For hand hygiene with ABHR, use 1 to 2 pumps of product; this volume requires a minimum of 15 seconds for hands to dry.
Hand hygiene with ABHR
Prevent needle/syringe contamination. Keep sterile parts of the needle and syringe sterile. Avoid letting the needle touch unsterile surfaces such as the outer edges of the ampule or vial, surface of the needle cap, or counter. Always keep the needle covered with a cap when not in use, and use the scoop-cap method to avoid needle-stick injuries. Avoid touching the length of the plunger. Keep the tip of the syringe sterile by covering with a cap or needle.
Parts of a Syringe and Needle
Parts of a syringe and needle
Prepare patient’s skin. Wash the patient’s skin with soap and water when it is soiled with dirt, drainage, or fecal matter/urine. Follow agency policy for skin preparation. When using an alcohol swab, use a circular motion to rub the area for 15 seconds, and then let the area dry for 30 seconds. If cleaning a site, move from the centre of the site outward in a 5 cm (2 in.) radius.
Prevent contamination of solution. Use single-dose vials/ampules whenever possible. Do not keep multi-dose vials in patient treatment area. Discard if sterility is compromised or questionable. Do not combine and administer medications from single-dose vials or ampules for later use. Ampules should not sit open and should be used immediately, then discarded appropriately.
Use new, sterile sterile equipment with each injection. Single use syringe and needle must be used with each patient. Always inspect packaging for intactness; inspect for dryness, rips, torn corners and expiry date. If single use equipment is not available, use syringes and needles designed for steam sterilization.
Data source: CDC, 2015; Hutin et al., 2003; Perry et al., 2014; Provincial Infectious Disease Advisory Committee, 2014; Siegel et al., 2007.

Safe Medication Administration

Medication errors have a substantial impact on health care in Canada (Butt, 2010). When preparing and administering medication, and assessing patients after receiving medication, always follow agency policy to ensure safe practice. Review Table 7.2 for guidelines for safe medication administration.

Table 7.2 Guidelines for Safe Medication Administration
Safety consideration:
  • Agency policy on medication administration and on the medication administration record (MAR) may vary. Always receive the required training on the use of each agency’s medication system to avoid preventable errors.

Principle

 Additional Information

Be vigilant when preparing medications. Avoid distractions. Some agencies have a no-interruption zone (NIZ), where health care providers can prepare medications without interruptions.
Check for allergies. Always ask patient about allergies, types of reactions, and severity of reactions.
Use two patient identifiers at all times. Always follow agency policy for patient identification. Use at least two patient identifiers before administration AND compare against the medication administration record (MAR).
Assessment comes before medication administration. All medications require an assessment (review of lab values, pain, respiratory or cardiac assessment, etc.) prior to medication administration to ensure the patient is receiving the correct medication for the correct reason.
Be diligent in all medication calculations. Errors in medication calculations have contributed to dosage errors, especially when adjusting or titrating dosages.
Avoid reliance on memory; use checklists and memory aids. Slips in memory are caused by lack of attention, fatigue, and distractions. Mistakes are often referred to as attentional behaviours, and they account for most errors in health care. If possible, follow a standard list of steps for every patient.
Communicate with your patient before and after administration. Provide information to patient about the medication before administering it. Answer questions regarding usage, dose, and special considerations. Give the patient the opportunity to ask questions. Include family members if appropriate.
Avoid workarounds. A workaround is a process that bypasses a procedure, policy, or problem in a system. For example, nurses may “borrow” a medication from another patient while waiting for an order to be filled by the pharmacy. These workarounds fail to follow agency policies that ensure safe medication practices.
Ensure medication has not expired. Medication may be inactive if expired.
Always clarify an order or procedure that is unclear. Always ask for help whenever you are uncertain or unclear about an order. Consult with the pharmacist, charge nurse, or other health care providers and be sure to resolve all questions before proceeding with medication administration.
Use available technology to administer medications. Bar-code scanning (eMAR) has decreased errors in administration by 51%, and computerized physician orders have decreased errors by 81%. Technology has the potential to help decrease errors. Use technology when administering medications, but be aware of technology-induced errors.
Report all near misses, errors, and adverse reactions. Reporting allows for analysis and identification of potential errors, which can lead to improvements and sharing of information for safer patient care.
Be alert to error-prone situations and high-alert medications. High-alert medications are those that are most likely to cause significant harm, even when used as intended. The most common high-alert medications are anticoagulants, narcotics and opiates, insulins, and sedatives. The types of harm most commonly associated with these medications include hypotension, respiratory depression, delirium, bleeding, hypoglycemia, bradycardia, and lethargy.
If a patient questions or expresses concern regarding a medication, stop and do not administer it. If a patient questions a medication, stop and explore the patient’s concerns, review the physician’s order, and, if necessary, notify the practitioner in charge of the patient.
Data source: Agency for Healthcare Research and Quality, 2014; Canadian Patient Safety Institute, 2012; Debono et al., 2013; Institute for Healthcare Improvement, 2015; National Patient Safety Agency, 2009; National Priority Partnership, 2010; Prakash, et al., 2014

Promoting Safety and Comfort of a Patient During an Injection

Injections can be given safely and effectively, and harm can be prevented if proper injection technique is used. Most complications related to injections are associated with intramuscular injections, but may occur with any route. Complications can occur when an incorrect site is used, or with an inappropriate depth or rate of injection (Malkin, 2008). To promote patient safety and comfort during an injection, review the guidelines in Table 7.3.

Table 7.3 Promoting Patient Safety and Comfort During an Injection 

Principle

 Additional Information

Correct needle

For injections, use a sharp, beveled needle and place bevel side up. Change the needle if liquid coats the shaft of the needle. Correct needle length allows for correct delivery of medication into the correct site and can reduce complications such as abscesses, pain, and bruising. Needle selection should be based on size of patient, gender, injection site, and amount of medication injected. Women tend to have more adipose tissue around the buttocks and deltoid fat pad, which means more than half the injections given do not reach the proper IM depths in women. Large bore needles have been found to reduce pain, swelling, and redness after an injection, as less pressure is required to depress the plunger.

Proper angle of insertion and removal (see Figure 7.1)

Inserting the needle at the proper angle (depending on the type of injection) and entering the skin smoothly and quickly can reduce pain during injection. Hold the syringe steady once the needle is in the tissue to prevent tissue damage. Withdraw the needle at the same angle used for insertion. The angle for an IM injection is 90 degrees. With all injections, the needle should be inserted all the way up to the hub. Holding the syringe like a dart prevents the medication from being injected during insertion of needle. Removing residue (medication on the tip of the needle) has been shown to reduce pain and discomfort. To remove residue from the needle, change needles after preparation and before administration.

Patient position The patient’s position may affect their perception of pain. Proper position will also facilitate proper landmarking of the site. For IM injections, for example, the ventrogluteal site has the greatest muscle thickness and is free of nerves and blood vessels, with a small layer of fat.
Relaxation technique and distraction methods Position the patient’s limbs in a relaxed, comfortable position to reduce muscle tension. For example, lying prone may help a patient relax prior to an IM injection. If giving a deltoid IM injection, have the patient relax the arm by placing the hand in the lap. If a patient is receiving an IM injection in the vastus lateralis or ventrogluteal site, encourage the patient to gently point toes outwards to relax the muscle. Relaxation skills of the health care provider will help decrease the patient’s anxiety-heightened pain. If possible, divert the patient’s attention away from the injection procedure.
Pre-medication, if required To decrease pain upon insertion, a vapocoolant spray, topical anesthetic, or wrapped ice may be placed on the insertion site for a minute prior to injection. For IM injections, two studies found that applying pressure to the injection site for 10 seconds before the injection reduced pain. This data supports the gate theory of pain control.
Z-track method for IM injections Some research shows that the Z-track technique results in reduced pain and complications, and fewer injection lesions. However, other research shows that Z-track injections result in more pain and bleeding at the injection site. (See 7.4 Intramuscular Injections for more on the Z-track method.)
Administration rate Research has found that administrating medications at 10 seconds per ml is an effective rate for IM injections. Increasing the rate to 20 seconds per ml did not show any reduction in pain. Always review drug administration rate as per pharmacy or manufacturer’s recommendations.
Gentle touch with insertion sites Gently apply a dry sterile gauze to the site after the injection. Rotate injection sites to prevent the development of indurations and abscesses.
Aspiration with IM injections Review the latest research regarding the utility of aspirating IM injections. There is lack of strong evidence to support the technique of aspiration with IM injections.
Data source: Ağac & Günes, 2011; Canadian Agency for Drugs and Technologies in Health, 2014; Cocoman & Murray, 2008; Greenway, 2014; Hunter, 2008; Malkin, 2008; Mitchell & Whitney, 2001; Nisbit, 2006; Ogston-Tuck, 2014a; Perry et al., 2014; Rodgers & King, 2000; Sisson, 2015; Workman, 1999

Preventing Needle-Stick Injuries

Health care providers can be at risk for needle-stick injuries in any health care setting. The most common places for needle-stick injuries to occur are in the operating room and patient rooms. Tasks that place the health care provider at risk include recapping needles and mishandling IV lines. Table 7.4 provides guidelines to prevent needle-stick injuries.

Table 7.4 Recommendations for Prevention of Needle-Stick Injuries 

Principle

 Additional Information

Avoid recapping needles.

Recapping needles has led to the transmission of infection. If possible, always use devices with safety features — i.e., safety shield.

Dispose of the needle immediately after injection.

Immediately dispose of used needles in a sharps disposal container (puncture-proof and leak-proof) to avoid unsafe disposal of a sharp.

Reduce or eliminate all hazards related to needles. Avoid using needles if possible. Use a needle only when performing an SC, ID, or IM injection. Use a needleless system and engineered safety devices for prevention of needle-stick injuries.
Plan disposal of sharps before injection. Plan the safe handling and disposal of needles before beginning a procedure that requires a sharp needle. Bring sharps container close to the bedside prior to injection. Sharps containers should be at eye level and within arm’s reach.
Follow all standard policies related to prevention / treatment of injury. Follow all agency policies regarding infection control, hand hygiene, standard and additional precautions, and blood and body fluid exposure management.
Report all injuries. Report all needle-stick injuries and sharp-related injuries immediately. Data collected regarding the nature of injuries help guide needle-stick prevention strategies for new practices and devices. Review how to manage needle-stick injuries and follow agency policy regarding exposure to blood-borne pathogens. Policies help decrease the risk of contracting a blood-borne illness.
Participate in required training and education. Attend training on injury-prevention strategies related to needles and safety devices as per agency policy. Participate in and evaluate the selection of safety devices, and report known needle-stick hazards to managers.
Data source: American Nurses Association, 2002; Centers for Disease Control, 2012; National Institute for Occupational Safety and Health, 1999; Perry et al., 2014; Pratt et al., 2007; Wilburn, 2004; Wilburn & Eijkemans, 2004

Preparing Medications from Ampules and Vials

Specific equipment, such as syringes and needles, is required to prepare and administer parenteral medications. The selection of the syringe and needle is based on the type and location of injection; amount, quality, and type of medication; and the body size of the patient. Many syringes come with needleless systems or needles with safety shields to prevent injuries (Perry et al., 2014). Aseptic technique is paramount to the preparation and administration of these medications.

Parenteral medications are supplied in sterile vials, ampules, and prefilled syringes. Ampules are glass containers in 1 ml to 10 ml sizes that hold a single dose of medication in liquid form. They are made of glass and have a scored neck to indicate where to break the ampule (see Figure 7.2). Medication is withdrawn using a syringe and a filter needle. A blunt fill needle with filter (see Figure 7.3) must be used when withdrawing medication to prevent glass particles from being drawn up into the syringe (see Figure 7.4). Never use a filter needle to inject medication (Perry et al., 2014).

Preparing medication from an ampule
Figure 7.2 Breaking open an ampule
Oct 2, 2015 009
Figure 7.3 Blunt fill needle with filter
Using a blunt filter needle with an ampule
Figure 7.4 Using a blunt fill needle with filter with an ampule
Read this information about ampules to review how to prepare medication from an ampule.

Video 7.1

Watch the video Preparing a Medication from an Ampule by Renée Anderson & Wendy McKenzie, Thompson Rivers University.

A vial is a single- or multi-dose plastic container with a rubber seal top, covered by a metal or plastic cap (see Figure 7.5). A single-use vial must be discarded after one use; a multi-dose vial must be labelled with the date it was opened. Check hospital policy to see how long an open vial may be used. The vial is a closed system, and air must be injected into the vial to permit the removal of the solution (Perry et al., 2014) (see Figure 7.6).

Preparing medications from an ampoule
Figure 7.5 Preparing medications from a vial
Book pictures 2015 527
Figure 7.6 Vial with safety needle inserted
Read this information about vials to review how to prepare medication from a vial and reconstitute medication.

Video 7.2

Watch the video Preparing Medications from a Vial by Renée Anderson & Wendy McKenzie, Thompson Rivers University.

A syringe (see Figure 7.7)is a sterile, single-use device that has a Luer lock (see Figure 7.8) or non-Luer lock tip, which influences the name of the syringe. Syringes come in various sizes from 0.5 ml to 60 ml. Syringes may come with or without a sterile needle and will have a safety shield on the needle.

Figure 7.7 Labelled syringe
Luer lock needle
Figure 7.8 Luer lock needle

Insulin is only given using an insulin syringe (see Figure 7.9). Insulin is ordered in units. It is important to use the correct syringe and needle for the specific injection. Always examine the measurement scale on the syringe to determine that you have the correct syringe (Lynn, 2011).

Book pictures 2015 545
Figure 7.9 Insulin syringe with safety shield
Read this information about syringes to review the different types of syringes.

Needles are made of stainless steel, are sterile and disposable, and come in various lengths and sizes. The needle is made up of the hub, shaft, and bevel. The bevel is the tip of the needle that is slanted to create a slit into the skin. The hub fits onto the tip of the syringe. All three parts must remain sterile at all times. The length of the needle will vary from 1/8 in. to 3 in., depending on the injection. The gauge of a needle is the diameter of the needle. Gauges can vary from very small diameter (25 to 29 gauge) to large diameter (18 to 22 gauge). A needle will have its gauge and length marked on the outer packaging; choose the correct gauge and length for the injection ordered (Lynn, 2011) (see Figures 7.10, 7.11, and 7.12).

Read this information about needles to review needles and how to “scoop cap”.
Variety of needles with different gauges and lengths
Figure 7.10 Variety of needles with different gauges and lengths
Types of needles with safety shields
Figure 7.11 Types of needles with safety shields
Needle with safety cap
Figure 7.12 Needle with safety cap

Critical Thinking Exercises

  1. What are three strategies that can be implemented to reduce distractions while preparing medication?
  2. What are two ways to prevent needle-stick injuries?

53

7.3 Intradermal and Subcutaneous Injections

Intradermal injections (ID) are injections administered into the dermis, just below the epidermis. The ID injection route has the longest absorption time of all parenteral routes. These types of injections are used for sensitivity tests, such as TB (see Figure 7.13), allergy, and local anesthesia tests. The advantage of these tests is that the body reaction is easy to visualize, and the degree of reaction can be assessed. The most common sites used are the inner surface of the forearm and the upper back, under the scapula. Choose an injection site that is free from lesions, rashes, moles, or scars, which may alter the visual inspection of the test results (Lynn, 2011).

Equipment used for ID injections is a tuberculin syringe calibrated in tenths and hundredths of a millilitre, and a 1/4 to 1/2 in., 26 or 27 gauge needle. The dosage of an ID injection is usually under 0.5 ml. The angle of administration for an ID injection is 5 to 15 degrees. Once the ID injection is completed, a bleb (small blister) should appear under the skin. Checklist 56 outlines the steps to administer an intradermal injection.

TB syringe
Figure 7.13 TB syringe
Checklist 56: Administering an Intradermal (ID) Injection
Disclaimer: Always review and follow your hospital policy regarding this specific skill.
Safety Considerations: 
  • Do not aspirate. It is not necessary to aspirate because the dermis is relatively without vessels.
  • Always take steps to eliminate interruptions and distractions during medication preparation.
  • If the patient expresses concerns about the medication or procedure, stop and explore the concerns. Re-verify order with physician if appropriate.

Steps

 Additional Information

1. Prepare medication or solution as per agency policy. Ensure all medication is properly identified. Check physician orders, Parenteral Drug Therapy Manual (PDTM), and MAR to validate medication order and guidelines for administration. Properly identifying medication decreases risk of inadvertently administering the wrong medication.

Preparing medications ensures patient safety with medication administration.

Comparing physician orders and MAR
Compare physician orders and MAR
Preparing medication from an ampoule
Prepare medication from a vial
2. Perform hand hygiene. Gather all supplies: medication syringe, non-sterile gloves, alcohol swab and sterile gauze, Band-Aid (if required).
Required supplies
Required supplies
3. Enter room and introduce yourself, explain procedure and the medication, and allow patient time to ask questions. Explaining rationale increases the patient’s knowledge and reduces their anxiety.
4. Close the door or pull the bedside curtains. This provides patient privacy.
5. Compare MAR to patient wristband and verify this is the correct patient using two identifiers. This ensures accuracy of the medication or solution and prevents errors.

Two patient identifiers are patient name and date of birth.

Identify patient with two identifiers
Compare MAR with patient wristband
6. Assess patient for any contraindications to the medications. Assessment is a prerequisite for every medication given.
7. Select appropriate site for administration. Assist the patient to the appropriate position as required. Site should be free from lesions, rashes, and moles. Selecting the correct site allows for accurate reading of the test site at the appropriate time.
Assess site for ID injection
8. Perform hand hygiene and apply non-sterile gloves. Gloves help prevent exposure to contaminants.
Apply non-sterile gloves
9. Clean the site with an alcohol swab or antiseptic swab. Use a firm, circular motion. Allow the site to dry. Pathogens from the skin can be forced into the tissues by the needle. Allowing the skin to dry prevents introducing alcohol into the tissue, which can be irritating and uncomfortable.
Cleaning injection site
Clean injection site
10. Remove needle from cap by pulling it off in a straight motion. This decreases risk of accidental needle-stick injury.
Remove needle from cap
11. Using non-dominant hand, spread the skin taut over the injection site. Taut skin provides easy entrance for the needle.
Holding skin taut prior to injection
Hold skin taut prior to injection
12. Hold the syringe in the dominant hand between the thumb and forefinger, with the bevel of the needle up. This allows for easy handling of the syringe.
Holding needle bevel up
Hold needle with bevel up
13. Hold syringe at a 5- to 15-degree angle from the site. Place the needle almost flat against the patient’s skin, bevel side up, and insert needle into the skin. Insert the needle only about 1/4 in., with the entire bevel under the skin. Keeping the bevel side up allows for smooth piercing of the skin and induction of the medication into the dermis.
ID injection
ID injection
14. Once syringe is in place, slowly inject the solution while watching for a small weal or bleb to appear. The presence of the weal or bleb indicates that the medication is in the dermis.
Presence of a bleb (white circle)
Presence of a bleb (white raised circle)
15. Withdraw the needle at the same angle as insertion, engage safety shield or needle guard, and discard in a sharps container.

Do not massage area after injection.

Withdrawing at the same angle as insertion minimizes discomfort to the patient and damage to the tissue.

Proper needle disposal prevents needle-stick injuries.

Discard syringe in sharps container

Massaging the area may spread the solution to the underlying subcutaneous tissue.

Gently pat with sterile gauze if blood is present.

16. If injection is a TB skin test, circle the area around the injection site to allow for easy identification of site in three days.
Draw circle around injection site
17. Discard remaining supplies, remove gloves, and perform hand hygiene This prevents the spread of microorganisms.
Hand hygiene with ABHR
18. Document the procedure and findings according to agency policy. Proper documentation helps ensure patient safety. Document time, date, location, and type of medication injected.
19. Evaluate the patient response to injection within appropriate time frame. The patient will need to be evaluated for therapeutic and adverse effects of the medication or solution.
Data source: ATI, 2015a; Berman & Snyder, 2016; Brookside Associates, 2015a; Clayton, Stock, & Cooper, 2010; Perry et al., 2014

Subcutaneous Injections

Subcutaneous (SC) injections are administered into the adipose tissue layer just below the epidermis and dermis. This tissue has few blood vessels, so drugs administered by this route have a slow, sustained rate of absorption. Sites for SC injections include the outer aspect of the upper arm, the abdomen (from below the costal margin to the iliac crest) within one inch of the belly button, anterior aspects of the thighs, upper back, and upper ventral gluteal area (Lynn, 2011) (see Figure 7.14).

SC injection sites
Figure 7.14 SC injection sites

Choose a site that is free of skin lesions and bony prominences. Site rotation prevents the formation of lipohypertrophy or lipoatrophy in the skin. Physical exercise or application of hot or cold compresses influences the rate of drug absorption by altering local blood flow to the tissues. Any condition that impairs that blood flow to the subcutaneous tissue contradicts the use of subcutaneous injections. Examples of subcutaneous medications include insulin, opioids, heparin, epinephrine, and allergy medication (Perry et al., 2014).

To administer an SC injection, a 25 to 30 gauge, 3/8 in. to 5/8 in. needle is used. Some subcutaneous injections come prefilled with the syringe attached. Always confirm that the right-size needle is appropriate for the patient before use. Subcutaneous injections are usually given at a 45- to 90-degree angle. The angle is based on the amount of subcutaneous tissue present. Generally, give shorter needles at a 90-degree angle and longer needles at a 45-degree angle (Lynn, 2011). SC injections do not need to be aspirated as the likelihood of injecting into a blood vessel is small. Usually, no more than 1 ml of medication is given subcutaneously, as larger amounts may cause discomfort to the patient and may not be absorbed appropriately (Lynn, 2011).

There are varying opinions on whether to pinch the skin during administration. Pinching is advised for thinner patients in order to lift the adipose tissue up and away from the underlying muscle and tissue. If pinching is used, release the pinch when the needle is inserted to avoid injecting into compressed tissue. Note, too, that elevating or pinching the skin has been found to increase the risk of injury, as the needle may pierce the opposite side of the skin fold and enter the skin of the health care worker (Black, 2013). The abdomen is the best location for an SC injection if a patient has little peripheral SC tissue. If patient is obese, use a needle that is long enough to insert through the tissue at the base of the skin fold (Perry et al., 2014).

Insulin SC Injections

Insulin is considered a high-risk medication, and special care must be taken to ensure the correct amount of medication and type of insulin is administered at the correct time. As well, safety checks related to a patient receiving SC insulin should be carried out (Ellis & Parush, 2012). Table 7.5 lists specific guidelines for administering insulin (and see Figure 7.15).

Table 7.5 Guidelines for Administering SC Insulin

Insulin

 Additional Information

Insulin is considered a high-risk medication. Special care must be taken to ensure the correct amount of medication and type of insulin is administered, at the correct time. It is highly recommended to always get your insulin dosages double-checked by another health care provider. Always follow the standard for medication preparation at your agency.
Insulin is only administered using an insulin syringe. Insulin is the only drug with its own type of syringe with a needle attached. Insulin is always ordered and administered in units, based on a blood sugar reading and a diabetic insulin protocol (or sliding scale). Some hospitals have preprinted physician orders, and some hospitals have handwritten orders. Insulin syringes can come in 30-, 50-, or 100-unit measurements. Always read the increments (calibration) carefully.
There are different types of insulin. There are rapid-, short-, intermediate-, and long-acting insulins. For each type of insulin, it is important to know how the insulin works and the onset, peak, and duration of the insulin.
Administering two different types of Insulin. If a patient is ordered two types of insulin, some insulins may be mixed together in one syringe. Many insulins MAY NOT be mixed together. Do not mix Lantus (Glargine) or Levemir (Determir).If administering cloudy insulin preparations (Humulin – N), gently roll the vial between the palms of your hands to re-suspend the medication.
Always draw up the short acting insulin first, to prevent it from being contaminated with the long acting. If too much insulin is drawn up from the second vial, discard syringe and start again. Always check with the PDTM for the most current guidelines regarding insulin administration.Insulin orders may change from day to day. Always ensure the most current physician orders are being followed.
Know about rotating injection sites. Injection site rotation is no longer necessary as newer insulins have a lower risk for hypertrophy of the skin. Typically, a patient will pick one anatomic area (e.g., upper arm) and rotate the injection sites within that region to maintain consistent insulin absorption from day to day. Insulin absorption rates vary from site to site. The abdomen absorbs the fastest, followed by the arms, thighs, and buttocks.
Know when to administer insulin. The timing of insulin injections is critical to correct insulin administration based on blood sugar levels and when the patient will eat. Knowing the peak action and duration of insulin is critical to proper insulin medication management. If giving insulin, always ensure the patient is not nauseated, is able to eat, and that food is arriving before the insulin starts working. Typically, short- or rapid-acting insulin is given 15 minutes before meals. Intermediate- or long-acting insulin may be given twice daily, at breakfast and dinner.
Measure blood sugar levels and food intake. Insulin injections are based on blood sugar values and on when the patient will eat. The timing of an insulin injection is critical to ensure the patient receives insulin correctly.
Use insulin injection pens. Injection pens are a new technology used by patients to self-inject insulin using a syringe, needle, and prefilled cartridge of insulin. It is essential that patients be taught how to use injection pens so they understand the technology.

A mini-infusion pump is a battery-operated machine that delivers medications in very small amounts to patients with controlled infusion times. The most common types of mini-infusion sets are insulin pumps or subcutaneous infusion devices. For more information on mini-infusion sets and volume-controlled sets, see Suggested Online Resources in section 7.8.

Data source: Canadian Diabetes Association, 2013; Perry et al., 2014
SC Insulin syringe
Figure 7.15 Insulin syringe with needle attached
Special considerations:

Heparin SC Injections

Heparin is an anticoagulant used to reduce the risk of thrombosis formation by suppressing clot formation (Perry et al., 2014). Heparin is also considered a high-alert medication (ISMP, 2014).

Table 7.6 provides specific guidelines to consider before and after administering heparin.

Table 7.6 Guidelines for Administering SC Heparin

Heparin

 Additional Information

Heparin is considered a high-risk medication. Heparin is available in vials and prefilled syringes in a variety of concentrations. Because of the dangerous adverse effects of the medication, it is considered a high-risk medication. Always follow agency policy regarding the preparation and administration of heparin.
Rotate heparin injection sites. It is important to rotate heparin sites to avoid bruising in one location. To minimize bruising and pain associated with heparin injections, they can be given in the abdominal area, at least 5 cm away from the belly button.
Know the risks associated with heparin. There are many risks associated with the administration of heparin, including bleeding, hematuria, hematemesis, bleeding gums, and melena.
Review lab values. Review lab values (PTT and aPTT) before and after heparin administration.
Use prepackaged heparin syringes. Many agencies use prepackaged heparin syringes. Always follow the standards for safe medication administration when using prefilled syringes. Low molecular weight heparin (LMWH) is more effective in some patients.
Assess patient conditions prior to administration. Some conditions increase the risk for hemorrhage (bleeding), such as recent childbirth, severe diabetes, severe kidney and liver disease, severe traumas, cerebral or aortic aneurysm, cerebral vascular accidents (CVA), blood dyscrasias, and severe hypotension.
Assess medications prior to administration. Over-the-counter (OTC) herbal medications, such as garlic, ginger, and horse chestnut, may interact with heparin. Additional medications that may interact include Aspirin, NSAIDS, cephalosporins, anti-thyroid agents, thrombolytics, and probenecids.
Data source: Clayton et al., 2010; Ogston-Tuck, 2014b; Perry et al., 2014

Checklist 57 provides the steps to complete a subcutaneous injection.

Checklist 57: Administering a Subcutaneous Injections
Disclaimer: Always review and follow your hospital policy regarding this specific skill.
Safety Considerations: 
  • Do not aspirate (pull back on the plunger) after injection.
  • Review lab values and assessment data prior to injection.
  • Avoid sites that are bruised, tender, hard, or swollen.
  • Be vigilant when preparing and administering high-alert medications.

Steps

 Additional Information

1. Prepare medication or solution as per agency policy. Always compare the physician orders with the MAR. Preparing medications ensures patient safety with medication administration.
Preparing medication
Prepare medication
2. Perform hand hygiene; gather supplies. You will need medication syringe, non-sterile gloves, alcohol swab and sterile gauze, Band-Aid.
3. Enter room and introduce yourself. Identify patient using two acceptable identifiers, explain procedure and the medication, and allow patient time to ask questions. Explaining rationale increases the patient’s knowledge and reduces their anxiety.
4. Close the door or pull the bedside curtains. This provides patient privacy.
5. Compare MAR to patient wristband and verify this is the correct patient using two identifiers. This ensures accuracy of the medication or solution and prevents errors.
Identify patient with two identifiers
Compare MAR with patient wristband
6. Assess patient for any contraindications for the medications. Assessment is a prerequisite to the administration of medications.
7. Put on non-sterile gloves. Gloves help prevent exposure to contaminants.
Apply non-sterile gloves
8. Select appropriate site for administration. Assist the patient to the appropriate position as required. Site should be free from lesions, rashes, and moles. Choosing the correct site allows for accurate reading of the test site at the appropriate time.
SC site for injection
SC site for injection (back of upper arm)
9. Clean the site with an alcohol swab or antiseptic swab. Use a firm, circular motion. Allow the site to dry. Pathogens from the skin can be forced into the tissues by the needle. Allowing the skin to dry prevents introducing alcohol into the tissue, which can be irritating and uncomfortable.
Clean site with alcohol
Clean site with alcohol swab
10. Remove the needle cap with the non-dominant hand, pulling it straight off. This technique lessens the risk of an accidental needle-stick injury.
11. Grasp or pinch the area surrounding the injection site, or spread the skin taut at the site. The decision to create a skin fold is based on the nurse’s assessment of the patient and the needle length used. Pinching is advised for thinner patients.
Select SC site
Select SC site (back of upper arm)
12. Hold the syringe in the dominant hand between the thumb and forefinger. Insert the needle quickly at a 45- to 90-degree angle. Inserting quickly causes less pain to the patient. Subcutaneous tissue is abundant in well-nourished, well-hydrated people. For patients with little subcutaneous tissue, it is best to insert the needle at a 45-degree angle.
13. After the needle is in place, release the tissue. Move your non-dominant hand to steady and lower the end of the needle. With your dominant hand, inject the medication at a rate of 10 seconds per ml. Avoid moving the syringe. Keeping the needle steady helps keep the needle in place.
SC injection
SC injection
Injecting medication
Inject medication
14. Withdraw the needle quickly at the same angle at which it was inserted, while supporting the surrounding tissue with your non-dominant hand. Withdrawing at the same angle prevents tissue damage and increased pain at the injection site.
15. Using a sterile gauze, apply gentle pressure at the site after the needle is withdrawn. Do not massage the site. Massage is not necessary and can damage underlying tissue. Massaging after a heparin injection can contribute to the formation of a hematoma.
16. Do not recap the needle. Apply the safety shield or needle guard on needle and dispose in a sharps container. Safety shields and needle guards help prevent accidental needle-stick injuries.
SC needle with safety shield
Discard syringe in sharps container
17. Dispose of supplies; remove gloves and perform hand hygiene. This reduces the risk of infection and the spread of microorganisms.
Hand hygiene with ABHR
18. Document procedure and findings according to agency policy. Timely documentation ensures patient safety.
19. Evaluate patient response to medication. It is important to evaluate the therapeutic effect of the medication and assess for adverse effects.
Data source: ATI, 2015b; Berman & Snyder, 2016; Brookside Associates, 2015b; Clayton et al., 2010; National Institute of Health Clinical Center, 2015; Ogston-Tuck, 2014b; Perry et al., 2014

Video 7.3

Watch the video Administering a Subcutaneous Injection by Renée Anderson & Wendy McKenzie, Thompson Rivers University.

Critical Thinking Exercises

  1. Why should a health care provider rotate sites with a heparin SC injection, but only rotate within a site with insulin SC injections?
  2. What are three risks associated with administering insulin and heparin subcutaneously?

Additional Videos

Video 7.4

54

7.4 Intramuscular Injections

Intramuscular (IM) injections deposit medications into the muscle fascia, which has a rich blood supply, allowing medications to be absorbed faster through muscle fibres than they are through the subcutaneous route (Malkin, 2008; Ogston-Tuck, 2014a; Perry et al., 2014). The IM site is used for medications that require a quick absorption rate but also a reasonably prolonged action (Rodgers & King, 2000). Due to their rich blood supply, IM injection sites can absorb larger volumes of solution, which means a range of medications, such as sedatives, anti-emetics, hormonal therapies, analgesics, and immunizations, can be administered intramuscularly in the community and acute care setting (Hunter, 2008; Ogston-Tuck, 2014a). In addition, muscle tissue is less sensitive than subcutaneous tissue to irritating solutions and concentrated and viscous medications (Greenway, 2014; Perry et al., 2014; Rodgers & King, 2000).

The technique of IM injections has changed over the past years due to evidence-based research and changes in equipment available for the procedure. An IM site is chosen based on the age and condition of the patient and the volume and type of medication injected. When choosing a needle size, the weight of the patient, age, amount of adipose tissue, medication viscosity, and injection site all influence the needle selection (Hunter, 2008; Perry et al., 2014; Workman, 1999).

Intramuscular injections must be done carefully to avoid complications. Complications with IM include muscle atrophy, injury to bone, cellulitis, sterile abscesses, pain, and nerve injury (Hunter, 2008; Ogston-Tuck, 2014a). With IMs, there is an increased risk of injecting the medication directly into the patient’s bloodstream. In addition, any factors that impair blood flow to the local tissue will affect the rate and extent of drug absorption. Because of the adverse and documented effects of pain associated with IM injections, always use this route of administration as a last alternative; consider other methods first (Perry et al., 2014).

Sites for intramuscular injections include the ventrogluteal, vastus lateralis, and the deltoid site. Literature shows inconsistency in the selection of sites for deep muscular injections: selection may be based on familiarity and confidence rather than on “best practice” (Ogston-Tuck, 2014a). However, there is sufficient evidence that the ventrogluteal IM site is the preferred site whenever possible, and is an acceptable site for oily and irritating medications. The ventrogluteal site is free from blood vessels and nerves, and has the greatest thickness of muscle when compared to other sites (Cocoman & Murray, 2008; Malkin, 2008; Ogston-Tuck, 2014a). A longer needle with a larger gauge is required to penetrate deep muscle tissue. The needle is inserted at a 90-degree angle perpendicular to the patient’s body, or at as close to a 90-degree angle as possible. Use a quick, darting motion when inserting the needle.

Aspiration refers to the action of pulling back on the plunger for 5 seconds prior to injecting medication (Ipp, Sam, & Parkin, 2006). Current practice in the acute care setting is to aspirate IM injections to check for blood return in the syringe. Lack of blood in the syringe confirms that the needle is in the muscle and not in a blood vessel. If blood is aspirated, remove the needle, discard it appropriately, and re-prepare and administer the medications (Perry et al., 2014). Recent research has found that there is no evidence to support the practice of aspiration, but despite policy changes, the procedure of aspiration continues to be taught and practised (Canadian Agency for Drugs and Technologies in Health, 2014; Greenway, 2014; Sepah, Samad, & Altaf, 2014; Sisson, 2015). Vaccinations and immunizations given by IM injections are never aspirated (Centers for Disease Control, 2015).

The Z-track method is a method of administrating an IM injection that prevents the medication being tracked through the subcutaneous tissue, sealing the medication in the muscle, and minimizing irritation from the medication. Using the Z-track technique, the skin is pulled laterally, away from the injection site, before the injection; then the medication is injected, the needle is withdrawn, and the skin is released. This method can be used if the overlying tissue can be displaced (Lynn, 2011).

IM Injection Sites

Table 7.7 describes the three injection sites for IM injections.

Table 7.7 Intramuscular Injection Sites

Site

 Additional Information

Ventrogluteal  The site involves the gluteus medius and minimus muscle and is the safest injection site for adults and children. The site provides the greatest thickness of gluteal muscles, is free from penetrating nerves and blood vessels, and has a thin layer of fat.

To locate the ventrogluteal site, place the patient in a supine or lateral position (on their side). The right hand is used for the left hip, and the left hand is used for the right hip. Place the heel or palm of your hand on the greater trochanter, with the thumb pointed toward the belly button. Extend your index finger to the anterior superior iliac spine and spread your middle finger pointing towards the iliac crest. Insert the needle into the V formed between your index and middle fingers. This is the preferred site for all oily and irritating solutions for patients of any age.

Needle gauge is determined by the solution. An aqueous solution can be given with a 20 to 25 gauge needle. Viscous or oil-based solutions can be given with 18 to 21 gauge needles.

The needle length is based on patient weight and body mass index. A thin adult may require a 16 mm to 25 mm (5/8 to 1 inch) needle, while an average adult may require a 25 mm (1 inch) needle, and a larger adult (over 70 kg) may require a 25 mm to 38 mm (1 to 1 1/2 inch) needle. Children and infants will require shorter needles. Refer to the agency policies regarding needle length for infants, children, and adolescents.

For the ventrogluteal muscle of an average adult, give up to 3 ml of medication.

ventrogluteal intramuscular injection
Ventrogluteal intramuscular injection site
Vastus lateralis


The vastus lateralis is commonly used for immunizations in children from infants through to toddlers. The muscle is thick and well developed. This muscle is located on the anterior lateral aspect of the thigh and extends from one hand’s breadth above the knee to one hand’s breadth below the greater trochanter. The middle third of the muscle is used for injections. The width of the muscle used extends from the mid-line of the thigh to the mid-line of the outer thigh. To help relax the patient, ask the patient to lie flat with knees slightly bent, or have the patient in a sitting position.

The length of the needle is based on the patient’s age, weight and body mass index. In general, the recommended needle length for an adult is 25 mm to 38 mm (1 to 1 1/2 inch). The gauge of the needle is determined by the type of medication administered. Aqueous solutions can be given with a 20 to 25 gauge needle; oily or viscous medication should be administered with 18 to 21 gauge needles. A smaller gauge needle (22 to 25 gauge) should be used with children. The length will be shorter for infants and children; see agency guidelines.

The maximum amount of medication for a single injection is 3 ml.

Vastus lateralis intramuscular injection
Vastus lateralis intramuscular injection site
Deltoid muscle The deltoid muscle has a triangular shape and is easy to locate and access, but is commonly underdeveloped in adults. Begin by having the patient relax the arm. The patient can be standing, sitting, or lying down. To locate the landmark for the deltoid muscle, expose the upper arm and find the acromion process by palpating the bony prominence. The injection site is in the middle of the deltoid muscle, about 2.5 to 5 cm (1 to 2 inches) below the acromion process. To locate this area, lay three fingers across the deltoid muscle and below the acromion process. The injection site is generally three finger widths below, in the middle of the muscle.

Select needle length based on age, weight, and body mass. In general, for an adult male weighing 60 to 118 kg (130 to 260 lbs), a 25 mm (1 inch) needle is sufficient. For women under 60 kg (130 lbs), a 16 mm (5/8 inch) needle is sufficient, while for women between 60 and 90 kg (130 to 200 lbs), a 25 mm (1 inch) needle is required. A 38mm (1 1/2 inch) length needle may be required for women over 90 kg (200 lbs) for a deltoid IM injection.

Refer to agency policy regarding specifications for infants, children, adolescents, and immunizations.

The maximum amount of medication for a single injection is generally 1 ml. For immunizations, a smaller 22 to 25 gauge needle should be used.

Deltoid intramuscular injection site
Deltoid IM injection site
Data source: Berman & Snyder, 2016; Davidson & Rourke, 2014; Ogston-Tuck, 2014a; Perry et al., 2014
Special Considerations:

IM Injections

Consider the type of medication and the age, condition, and size of the patient when selecting an IM site. Rotate IM sites to avoid complications. Potential complications include lingering pain, tissue necrosis, abscesses, and injury to blood vessels, bones, or nerves. If administering a vaccination, always refer to the vaccination guidelines for site selection. Checklist 58 outlines the steps to perform an IM injection.

Checklist 58: Administering an Intramuscular Injection
Disclaimer: Always review and follow your hospital policy regarding this specific skill.
Safety Considerations:
  • Ensure the patient’s position for injection is not contraindicated by a medical condition (e.g., circulatory shock, surgery).
  • Always wear gloves to administer injections. Although policy may vary from place to place, the CDC recommends wearing gloves if there is potential for contact with blood and body fluid.
  • If required by agency policy, aspirate for blood prior to administering an IM medication.
  • Upon injection, if a patient complains of radiating pain or a burning or a tingling sensation, remove the needle and discard.
  • Take all necessary steps to avoid interruptions and distractions when preparing and administering medications.
  • If a patient expresses concern or questions the medication, always stop and explore the patient’s concerns by verifying the order.
  • NEVER recap needles after giving an injection. Apply the safety shield and dispose in the closest sharps container.

Steps

 Additional Information

Assessment
1. Perform hand hygiene. Hand hygiene prevents the spread of microorganisms.
Hand hygiene with ABHR
2. Compare MAR to patient wristband and use two patient identifiers to confirm patient. Using two identifiers improves medication safety by ensuring you have selected the correct patient.
Identify patient with two identifiers
Compare MAR to patient wristband
3. Assess the patient’s symptoms, knowledge of the medication to be received, history of allergies, drug allergies, and types of allergic reactions. Assess patient data such as vital signs, laboratory values, and allergies before preparing and administering medications by injection.
Pre-assessment
Pre-assessment
4. Assess for any factors that may contraindicate an IM injection. Factors to look for include circulatory shock, surgery, or muscle atrophy.
Preparation
5. Verify practitioner’s order and MAR.
Comparing physician orders and MAR
Compare physician orders and MAR
6. Review medication information, such as purpose, action, side effects, normal dose, rate of administration, time of onset, peak and duration, and nursing implications. Knowledge of the medication ensures the correct patient receives the correct dose of the correct medication at the correct time via the correct route for the correct reason using the correct documentation.
7. Assemble supplies. Assemble medication, non-sterile gloves, alcohol swabs, syringes, needles, and sharps container.
8. Prepare medication from an ampule or a vial as per hospital policy. Always compare MAR to the practitioner’s original orders to ensure accuracy and completeness. This prevents medication errors by providing an additional check.
Preparing IM injection
Prepare medication from a vial
9. NEVER leave the medication unsupervised once prepared. Medications left unattended may lead to medication errors.
Procedure 
10. Perform hand hygiene. Hand hygiene prevents the transmission of microorganisms.
Hand hygiene with ABHR
11. Close curtains or door. This creates privacy for the patient.
12. Verify patient using two unique identifiers and compare to MAR. This step confirms the correct identity of the patient.
Identify patient with two identifiers
Compare MAR to patient wristband
13. Explain the procedure and the medication, and give the patient time to ask questions. Knowing what is happening helps minimize patient anxiety. Let the patient know there may be mild burning at the injection site.
14. Don non-sterile gloves and prepare the patient in the correct position. Ensure a sharps disposal container is close by for disposal of needle after administration. This prepares the patient for injection.
Deltoid IM injection site

Ensuring the sharps container is close by allows for safe disposal of the needle.

15. Locate correct site using landmarks, and clean area with alcohol or antiseptic swab. Allow site to dry completely. Allowing the site to dry prevents stinging during injection.
Clean injection site
16. Place a clean swab or dry gauze between your third and fourth fingers. This allows for easy access to dry gauze after injection.
Gauze between 3 &amp; 4 finger
Gauze between fingers 3 and 4
17. Remove needle cap by pulling it straight off the needle. Hold syringe between thumb and forefinger on dominant hand as if holding a dart. This prevents needle from touching side of the cap and prevents contamination.
Pulling cap off of needle
Pull cap off needle
18. With non-dominant hand, hold the skin around the injection site. This secures the area for injection.
19. With the dominant hand, inject the needle quickly into the muscle at a 90-degree angle, using a steady and smooth motion. Insert the needle with a dart-like motion.
Inserting needle like a dart
Insert needle like a dart
20. After the needle pierces the skin, use the thumb and forefinger of the non-dominant hand to hold the syringe. Movement of the needle once injected can cause additional discomfort for the patient.
Insert needle with a dart like motion
Insert needle with a dart-like motion
21. If required by agency policy, aspirate for blood. If no blood appears, inject the medication slowly and steadily.

If blood appears, discard syringe and needle, and prepare the medication again.

Because the injection sites recommended for immunizations do not contain large blood vessels, aspiration is not necessary when immunizing.
Aspirate plunger for blood return
22. Once medication is completely injected, remove the needle using a smooth, steady motion. Remove the needle at the same angle at which it was inserted. Using a smooth motion prevents any unnecessary pain to the patient.


23. Cover injection site with sterile gauze, using gentle pressure, and apply Band-Aid as required. Covering prevents infection at the injection site.
Sept 22, 2015 112-001
Cover injection site
24. Place safety shield on needle and discard syringe in appropriate sharps container. Placing sharps in appropriate puncture-proof and leak-proof receptacles prevents accidental needle-stick injuries.
Disposing syringe in sharps container
Dispose of syringe in sharps container
25. Discard supplies, remove gloves, and perform hand hygiene. This step prevents the spread of microorganisms.
Hand hygiene with ABHR
26. Document procedure as per agency policy. Document the medication, time, route, site, date of administration, and effect of the medication; any adverse effects; unexpected outcomes; and any interventions applied.
27. Assess patient’s response to the medication after the appropriate time frame. Assess for effectiveness of the medication (onset, peak, and duration). Assess injection site for pain, bruising, burning, or tingling.
Data source: CDC, 2013, 2015; Perry et al., 2014

Checklist 59 outlines the steps to perform a Z-track IM injection.

    Checklist 59: Administering a Z -Track Intramuscular Injection
Disclaimer: Always review and follow your hospital policy regarding this specific skill.
Safety Considerations:
  • Ensure the patient’s position for injection is not contraindicated by a medical condition (e.g., circulatory shock, surgery).
  • Always wear gloves to administer injections. Although policy may vary (for example, if you are in an acute setting compared to a community setting), the CDC recommends wearing gloves if there is potential for contact with blood and body fluids.
  • If required by agency policy, aspirate for blood prior to administering an IM medication.
  • Upon injection, if a patient complains of radiating pain, burning, or a tingling sensation, remove the needle and discard.
  • Take all necessary steps to avoid interruptions and distractions when preparing and administering medications.
  • If a patient expresses concern or questions the medication, always stop and explore the patient’s concerns by verifying the order.
  • NEVER recap needles after giving an injection. Apply the safety shield and dispose in the closest sharps container.

Steps

 Additional Information

Assessment
1. Perform hand hygiene. Hand hygiene prevents the spread of microorganisms.
Hand hygiene with ABHR
2. Compare Mar to the patient’s wristband and use two patient identifiers to confirm patient. Using two identifiers improves medication safety by ensuring you have selected the correct patient.
Identify patient with two identifiers
Compare MAR to patient wristband
3. Assess the patient’s symptoms, knowledge of the medication to be received, history of allergies, drug allergies, and types of allergic reactions. Assess patient data such as vital signs, laboratory values, and allergies before preparing and administering medications by injection.
4. Assess for any factors that may contraindicate an injection. Factors to look for include circulatory shock, surgery, or muscle atrophy.
Preparation
5. Verify practitioner’s order and MAR.
Verify order on MAR
Verify physicians order on MAR
6. Review medication information such as purpose, action, side effects, normal dose, rate of administration, time of onset, peak and duration, and nursing implications. Knowledge of the medication ensures the correct patient receives the correct dose of the correct medication at the correct time via the correct route for the correct reason using the correct documentation.
7. Verify expiry date and check for particulates, discoloration, or loss of integrity (sterility). Discoloured or outdated medication may be harmful. If a medication is discoloured or cloudy, always check manufacturer’s specification for the medication.
8. Assemble supplies. Assemble medication, non-sterile gloves, syringes, needles, and sharps container.
9. Prepare medication from an ampule or a vial as per hospital policy. Always compare MAR to the practitioner’s original orders to ensure accuracy and completeness. This prevents medication errors by providing an additional check.
Preparing IM injection
Prepare IM injection
10. NEVER leave the medication unsupervised once prepared. Unsupervised medication may lead to medication errors
Procedure 
11. Perform hand hygiene. Hand hygiene prevents transmission of microorganisms
12. Close curtains or door. This creates privacy for the patient.
13. Verify patient using two unique identifiers and compare to MAR. This confirms the correct identity of the patient.

Follow policy for safe medication administration.

Identify patient with two identifiers
Compare identification and allergy band with MAR
14. Explain the procedure and the medication, and give the patient time to ask questions. Knowing what is happening helps minimize patient anxiety. Let the patient know there may be mild burning at the injection site.
15. Don non-sterile gloves, select the correct site, and prepare the patient in the correct position. Ensure a sharp disposal container is close by for disposal of needle after administration. This prepares the patient for injection.

Ensuring the sharps container is close by allows for safe disposal of the needle.

16. Locate correct site using landmarks, and clean area with alcohol or antiseptic swab. Allow site to dry completely. Allowing the site to dry prevents stinging during injection.


17. Place a clean swab or dry gauze between your third and fourth fingers.
Gauze between 3rd &amp; 4th finger
Gauze between fingers 3 and 4

This allows for easy access to dry gauze after injection.

18. Remove needle cap by pulling it straight off the needle. Hold syringe between thumb and forefinger on dominant hand as if holding a dart. This prevents needle from touching side of the cap and prevents contamination.
Pulling cap off of needle
Pull cap off needle
19. Displace skin in a Z-track manner by pulling the skin down or to one side about 2 cm (1 in.) with your non-dominant hand. The Z-track method creates a zigzag path to prevent medication from leaking into the subcutaneous tissue. This method may be used for all injections, or may be specified by the medication.

Z-track-process-1

20. With skin held to one side, quickly insert needle at a 90-degree angle.

After needle pierces skin, continue pulling on skin with non-dominant hand, and at the same time grasp lower end of syringe barrel with fingers of non-dominant hand to stabilize it. Move dominant hand to end of plunger.

If required by agency policy, aspirate for blood. If no blood appears, inject the medication slowly.

Insert the needle with a dart-like motion. A quick injection is less painful. Inject medication at 10 seconds/ml.

Because the injection sites recommended for immunizations do not contain large blood vessels, aspiration is not necessary when immunizing.

Z-track-process-2

21. Once medication is given, leave the needle in place for 10 seconds. Avoid moving the syringe. Leaving the needle in place allows the medication to be displaced.

Movement of the needle can cause additional discomfort for the patient.

22. Once medication is completely injected, remove the needle using a smooth, steady motion. Then release the skin. Using a smooth motion prevents any unnecessary pain to the patient.

Z track process

23. Cover injection site with sterile gauze, using gentle pressure, and apply Band-Aid as required. Do not massage site. Covering prevents infection at the injection site.
Cover injection site with gauze
24. Place safety shield or needle guard on needle and discard syringe in appropriate sharps container. Placing sharps in appropriate puncture-proof and leak-proof receptacles prevents accidental needle-stick injuries.
Disposing syringe in sharps container
Dispose of syringe in sharps container
25. Discard supplies, remove gloves, and perform hand hygiene. This step prevents the spread of microorganisms.
Hand hygiene with ABHR
26. Document procedure as per agency policy. Document the medication, time, route, site, date of administration, and effect of the medication; any adverse effects; unexpected outcomes; and any interventions applied.
27. Assess patient’s response to the medication after the appropriate time frame. Assess for effectiveness of the medication (onset, peak, and duration). Assess injection site for pain, bruising, burning, or tingling.
Data source: Centers for Disease Control, 2013, 2015; Perry et al., 2014

Video 7.5

Video 7.6

Video 7.7

Critical Thinking Exercises

  1. How can you make an injection less painful for a patient? Name four techniques.
  2. When giving an IM injection, how can you avoid injury to a patient who is very thin?

Additional Videos

Video 7.8

55

7.5 Intravenous Medications by Direct IV Route

Intravenous (IV) is a method of administering concentrated medications (diluted or undiluted) directly into the vein using a syringe through a needleless port on an existing IV line or a saline lock. The direct IV route usually administers a small volume of fluid/medicine (max 20 ml) that is pushed manually into the patient. Medications given by IV are usually administered intermittently to treat emergent concerns. Medications administered by direct IV route are given very slowly over AT LEAST 1 minute (Perry et al., 2014). Administering a medication intravenously eliminates the process of drug absorption and breakdown by directly depositing it into the blood. This results in the immediate elevation of serum levels and high concentration in vital organs, such as the heart, brain, and kidneys. Both therapeutic and adverse effects can occur quickly with direct intravenous administration (Alberta Health Services, 2009).

In the past, IV medications have been called IV bolus or IV push medications. It is recommended that these terms NOT be used, as they can be mistakenly interpreted as meaning the drugs are to be pushed quickly, in less than a minute (ISMP, 2003). To administer IV medications safely and effectively, all health care agencies have policies in place and the Parenteral Drug Therapy Manual (PDTM) that identifies medications that may be given intravenously. (The PDTM may also be referred to as a parenteral drug monograph [Alberta Health Services, 2009].) Only specific medications may be administered via the direct IV route. There are many advantages and disadvantages to administering medications via the intravenous injection method — see Table 7.8.

Table 7.8 Advantages and Disadvantages of Intravenous Medications

Advantages 

 Disadvantages

Intravenous medications can deliver an immediate, fast-acting therapeutic effect, which is important in emergent situations such as cardiac arrest or narcotic overdose. They are useful to manage pain and nausea by quickly achieving therapeutic levels, and they are more consistently and completely absorbed compared with medications given by other routes of injection. Once an intravenous medication is delivered, it cannot be retrieved. When giving IV medications, there is very little opportunity to stop an injection if an adverse reaction or error occurs. IV medications, if given too quickly or incorrectly, can cause significant harm or death.
Doses of short-acting medication can be titrated according to patient responses to drug therapy. Medication can be prepared quickly and given over a shorter period of time compared to the IV piggyback route. Any toxic or adverse reaction will occur immediately and may be exacerbated by a rapidly injected medication.
Minimal dilution is required for some medications, which is desirable for patient’s own fluid restrictions. Extravasation of certain medications into surrounding tissues can cause sloughing, nerve damage, and scarring.
There is minimal or no discomfort for the patient in comparison to SC and IM injections. Not all medications can be given via the direct IV route.
They provide an alternative to the oral route for drugs that may not be absorbed by the GI tract, and they are ideal for patients with GI dysfunction or malabsorption, and patients who are NPO (nothing by mouth) or unconscious. There is a high risk for infusion reactions, mild to severe, because most IV medications peak rapidly (i.e., they have a quick onset of effect). A hypersensitivity reaction can occur immediately or be delayed, and requires supportive measures.
IV direct route provides a more accurate dose of medication because none is left in the intravenous tubing. Route for administering medications may damage surrounding tissues. There is an increased risk of phlebitis with highly concentrated medication, especially with small peripheral veins or a short venous access device.
Data source: Albert Health Services, 2009; Lynn, 2011; Perry et al., 2014

Intravenous medications are always prepared using the SEVEN rights x 3 as per agency policy. Because of the high risk associated with direct intravenous medications, additional guidelines are required. A PDTM or drug monograph provides additional information, which includes the generic name, brand name, classification of the drug, and chart defining which parenteral route may be utilized. Some medications may only be given via a piggyback method or large-volume IV solutions; some medications may be given diluted over 1 or 2 minutes. In addition, information regarding indications, contraindications, dosage (age dependent), administration/dilution guidelines, adverse effects, clinical indications (e.g., specialized monitoring required, must be on an IV pump), compatibility, and incompatibility in relation to reconstitution and primary IV solution is specified (Alberta Health Services, 2009).

The Institute for Safe Medication Practices (ISMP) (2014) has created a list of high-alert medications that bear the heightened risk of significant harm when they are used in error. Special safeguards for these medications can be found in the PDTM. It is vital to understand which medications are considered high risk prior to administration. A link to the list of high-risk medications can be found under Suggested Online Resources at the end of this chapter. Review the steps shown in Table 7.9 to prepare a medication by direct IV route. The PDTM must be consulted every time an IV medication is given, as memory-based errors are common (World Health Organization, 2012).

Table 7.9 Preparation Questions for Intravenous Medications
Safety Considerations:
  • Be diligent and follow all policies related to medication calculations, preparation, and thorough assessment of patient status before and after an injection. Medication errors are the most common preventable errors in health care.
  • Use a blunt filter needle or blunt needle when preparing injections. Never use a needle when injecting IV medication. Always use a needleless system.
  • After preparing the medication, always label the medication syringe with the patient name, date, time, medication, and dose. Never leave the syringe unattended.
  • Always administer the post-saline lock flush at the SAME RATE as the IV medication.
  • Always assess the patient’s symptoms and need for IV medication prior to administration.
  • Always assess the patient’s understanding of the medication.

Principle

 Additional Information

Verify qualifications for administration.

Are you qualified to give this medication? What supervision is required? What resources must you consult?

Review route of administration and IV site.

Can this medication be given by the IV route? Is the route of administration (needle insertion site) free from redness, swelling, and discomfort?

Review preparation and how to administer the medication. How is this medication given by the IV route (diluted or undiluted)? Describe the safest way to prepare the medication. Consider the selection of medication. Always use less-concentrated solutions whenever possible. Does the medication require dilution? If diluting the medication, ALWAYS discard (that is, waste) the unused portion before going to the bedside.
  • Preparation and supplies: is a pre-flush required?
  • Patient identification: any allergies?
  • Administration rate: what is the correct rate of administration (over 1 minute, 5 minutes)?
Identify when medication starts to work. What is the onset, peak, and duration of the medication?
Assess dose and range (e.g., 5 to 10 mg). Is the ordered dose safe? When did the patient last receive this medication? What was the effect of the medication on the patient?
Understand the therapeutic effect. What is the expected therapeutic effect of the medication? What preassessment determines if the medication is correct for the patient?
Know adverse effects. What are the potential adverse effects of the medications? How would you manage these adverse effects? Is there an antidote?
Know potential incompatibilities. Are there any potential incompatibilities with existing IV solutions? How would you manage these issues? Is a secondary medication currently running? Are there additives to the IV solution?
Know how to complete the procedure. How do you complete this procedure? Is a post-saline lock flush required?
Document procedure. How and where do you chart this medication: pain assessment sheet, MAR, etc.?
Data source: BCIT, 2015; Berman & Snyder, 2016; Clayton et al., 2010; WHO, 2012

Before giving an intravenous medication, always assess the IV needle insertion site for signs of infiltration or phlebitis. Start a new IV site if current site is red, swollen, or painful when flushing. Intravenous medications by direct IV route can be given three ways:

Checklist 60 reviews the steps to administer an IV medication through a saline lock. Review the preparation questions for intravenous medication in Table 7.9 prior to administering medication.

Checklist 60: Administering an IV Medication via a Saline Lock
Disclaimer: Always review and follow your hospital policy regarding this specific skill.
Safety Considerations: 
  • Review the advantages and disadvantages of IV medications.
  • Be able to answer the preparation questions for intravenous medication in Table 7.9 before administering the medication.
  • If the medication has been diluted and there is wastage, always discard unused diluted portion of the prepared IV medication before going to the bedside.
  • Always label the IV syringe with the patient name, date, time, medication, concentration of the dose, dose, and your initials. Once the medication is prepared, never leave it unattended.
  • NEVER administer an IV medication through an IV line that is infusing blood, blood products, heparin IV, insulin IV, cytotoxic medications, or parenteral nutrition solutions.
  • Central venous catheters (central lines, PICC lines) may require special pre- and post-flushing procedures and specialized training.
  • You will need a watch with a second hand to time the rate of administration.

Steps

 Additional Information

1. Prepare one medication for one patient at the correct time as per agency policy. Review the physician’s order, PDTM, and MAR for the correct order and guidelines. Math calculations may be required to determine the correct dose to prepare the medication. Always apply the SEVEN rights x 3 of medication administration.

Review the agency policy if a medication is a stat, given for the first time, a loading dose, or a one-time dose.

Some agencies require that high-alert medications be double-checked by a second health care provider. Always follow agency policies. For a list of high-alert medications, see Suggested Online Resources.

After preparing the medication, always label the medication syringe with the patient name, date, time, medication, and concentration of the dose (e.g., morphine 2 mg/ml), dose, and your initials. Never leave the medication syringe unattended.

2. Create privacy if possible. This provides comfort to patient.
3. Confirm patient ID using two patient identifiers (e.g., name and date of birth) AND compare the MAR printout with the patient’s wristband to confirm patient ID. This ensures you have the correct patient and complies with agency standard for patient identification.
Compare MAR with patient name band
Compare MAR with patient wristband
4. Check allergy band for any allergies, and ask patient about type and severity of reaction. This ensures allergy status is correct on the MAR and on patient allergy band.
5. Discuss purpose, action, and possible side effects of the medication. Provide patient an opportunity to ask questions. Encourage patient to report discomfort at the IV site (pain, swelling, or burning). Keeping patient informed of what is being administered helps decrease anxiety.
6. Perform hand hygiene. Hand hygiene prevents the transmission of microorganisms.
Hand hygiene with ABHR
7. Clean access port in a circular motion with an alcohol swab for 15 seconds. Allow to dry. This technique prevents introduction of microorganisms by the syringe.
Cleaning positive pressure cap (Max Plus) with alcohol swab
Clean positive pressure cap (Max Plus) with alcohol swab
8. Remove air from prefilled syringe. Release clamp on extension tubing and flush the saline lock with 3 to 5 ml of normal saline to ensure patency. Do not force if resistance is felt. Remove syringe. If swelling, pain, or redness exists, remove IV cannula and restart new IV site. Tenderness is the first sign of phlebitis.
Release clamp
Release clamp
Prepare pre-filled normal saline flush
Prepare prefilled normal saline syringe
9. Attach medication syringe (without needle) to access device. Using a needleless system prevents needle-stick injuries.
IMG_6604
Attach medication to saline lock
10. Using a timer with a second hand, inject medication at the correct rate according to agency policy. Use a push-pause method to inject the medication. Using a timer ensures safe medication administration. Rapid injection of IV medications can be fatal. A slow rate allows medications to be administered correctly.
Inject medication into saline lock
11. Remove used medication syringe. Remove air from prefilled NS syringe and attach to the Max Plus device.

Flush (3 to 5 ml) at the SAME rate as the medication bolus, according to guidelines found in the PDTM or per IV bolus medication policy. (See Rationale for Flushing with NS after Administering an IV Medication.)


Always check hospital policy on the amount of flush and type of solution when using a saline lock for an IV bolus medication.

Flushing the IV line at the same rate as medication delivery ensures that any medication remaining within the IV line is delivered at the correct rate, and avoids giving the patient an accidental bolus of the medication.

Flushing extension tubing with NS at the same rate
Flush extension tubing with NS at the same rate as medication delivery

Flushing the saline lock clears the medication from the device. Establish positive pressure as per manufacturer’s directions.

Assess IV site prior to use
When flushing is complete, detach syringe from positive pressure device and then apply clamp on extension tubing

If a patient has a central venous catheter, access and flush as per agency policy.

12. Dispose of all syringes/filter needles into appropriate puncture-proof containers. This prevents accidental needle-stick injuries.
13. Remove gloves and perform hand hygiene. This reduces transmission of microorganisms.
Hand hygiene with ABHR
14. Document as per agency protocol. Document the time, reason, drug, dose, effect, and any adverse reactions.
15. Observe for expected therapeutic effect and for adverse effects. The patient needs to be evaluated and monitored, especially for high-alert medications. IV medications act rapidly.
Data source: Canadian Institute for Health Information, 2009; Clayton et al., 2010; Perry et al., 2014
Special Considerations:

Rationale for Flushing with NS after Administering an IV Medication

Flushing a Saline Lock after Administering an IV Medication

Flushing after IV medication administration with compatible IV solution is recommended as per the guidelines in Checklists 60, Checklist 61, and Checklist 62 to ensure that medication left in the extension tubing is administered at the appropriate rate. IV medication must be cleared by flushing at the same rate of administration to avoid the risks related to IV push medications. Because 1 ml of medication is left in the extension tubing, due care in flushing is required for the first ml that clears the extension tubing. The remaining saline flush serves to maintain patency of the line.

Here are some examples of clearing IV medication from extension tubing.

  1. If morphine (1 mg) is diluted in 1 ml NS and administered over one minute, the subsequent saline flush will be given in this manner: the first 1 ml of a 5 ml saline flush syringe will be delivered over one minute, and the remaining 4 ml will be given slowly at the level of patient comfort.
  2. If Lasix (40 mg) is given in a 4 ml volume and administered over two minutes, the subsequent saline flush will be given in this manner: the first 1 ml of a 5 ml saline flush syringe will be delivered over 30 seconds, and the remaining 4 ml will be given slowly at the level of patient comfort.
Flushing the Primary IV Line after Administering an IV Medication through an IV Port

When flushing an IV line after administering an IV medication, the following applies:

Checklist 61 lists the steps to administering an IV medication through an existing IV line with compatible IV solution. Review the preparation questions for intravenous medication in Table 7.9 prior to the medication administration.

Checklist 61: Administering an IV medication (with Compatible IV Solution)
Disclaimer: Always review and follow your hospital policy regarding this specific skill.
Safety Considerations: 
  • Review the advantages and disadvantages of IV medications.
  • Be able to answer the preparation questions for intravenous medication in Table 7.9 before administering the medication.
  • If the medication has been diluted and there is wastage, always discard unused diluted portion of the prepared IV medication before going to the bedside.
  • Always label the syringe with the patient name, date, time, medication, concentration of the dose, dose, and your initials. Once the medication is prepared, never leave it unattended.
  • NEVER administer an IV medication through an IV line that is infusing blood, blood products, heparin IV, insulin IV, cytotoxic medications, or parenteral nutrition solutions.
  • Central venous catheters (central lines, PICC lines) may require special pre- and post-flushing procedures and specialized training.
  • You will need a watch with a second hand to time the rate of administration.

Steps

 Additional Information

1. Prepare one medication for one patient at the correct time as per agency policy. Review the physician’s order, PDTM, and MAR for the correct order and guidelines. Math calculations may be required to determine the correct dose to prepare the medication. Always apply the SEVEN rights x 3 of medication administration.

Review the agency policy if a medication is a stat, first-time, loading dose, or a one-time dose.

Some agencies require that high-alert medications be double-checked by a second health care provider. Always follow agency policies.

After preparing the medication, always label the medication syringe with the patient name, date, time, medication and dose concentration (e.g. morphine 2 mg/ml), dose, and your initials. Never leave the syringe unattended.

2. Create privacy if possible. This provides comfort to patient.
3. Confirm patient ID using two patient identifiers (e.g., name and date of birth) AND compare the MAR printout with the patient’s wristband to confirm patient ID. This ensures you have the correct patient and complies with agency standard for patient identification.
Identify patient with two identifiers
Compare MAR to patient wristband
4. Check allergy band for any allergies, and ask patient about type and severity of reaction. This ensures allergy status is correct on the MAR and on patient allergy band.
5. Discuss purpose, action, and possible side effects of the medication. Provide patient an opportunity to ask questions. Encourage patient to report discomfort at the IV site (pain, swelling, or burning). Keeping patient informed of what is being administered helps decrease anxiety.
6. Perform hand hygiene and apply non-sterile gloves. Hand hygiene prevents the transmission of microorganisms.
Hand hygiene with ABHR
7. Select IV access port closest to the patient.
Select closest port to patient
8. Clean port in a circular motion with an alcohol swab for 15 seconds. Allow to dry. This prevents introduction of microorganisms by the syringe.
Clean port with an alcohol swab
9. Attach syringe (without needle) to IV line using needleless system.

If running primary IV solution is medication (e.g., heparin, morphine, pantaloc, insulin, or blood or blood products), do not flush. Start another saline lock on the opposite arm.

Using a needleless system prevents needle-stick injuries.
Attach medication syringe to the lowest port

Never administer a medication using a filter needle.

10. If IV solution is on an IV pump, pause the device. Pinch IV tubing above the lowest access port or use blue slider clamp. This prevents the IV medication from travelling up the IV line.
Pinch IV tubing
Pinch IV tubing
Blue slider clamp
Blue slider clamp
11. Inject medication at the recommended rate according to agency policy. Use a timer to monitor time. Use a push-pause method to inject the medication. This ensures safe medication administration at the correct rate. Rapid injection of IV medications can be fatal.
Inject IV medication slowly
12. Remove used medication syringe. Remove air from prefilled NS syringe and attach to the same IV port.

Flush (3 to 5 ml) at the SAME rate as the medication bolus, according to guidelines found in the PDTM or per IV bolus medication policy. (See Rationale for Flushing with NS after Administering an IV Medication.)


No needle should be present with a needleless system.
Remove medication syringe
Prepare pre-filled normal saline flush
Remove air from prefilled NS syringe
Flush IV line with NS
Flush IV line
13. Unpinch/unclamp the IV tubing and ensure the IV is infusing at the correct rate. Restart IV infusion device as required.
Regulating IV tubing is a roller clamp
Regulate IV tubing
14. Dispose of all syringes/filter needles into appropriate puncture-proof containers if required. This prevents accidental needle-stick injuries.
15. Remove gloves and perform hand hygiene. This reduces transmission of microorganisms.
Hand hygiene with ABHR
16. Document as per agency protocol. Document time, reason, drug, dose, therapeutic effect, and any adverse reactions.
17. Evaluate the patient for therapeutic effect and adverse reactions according to appropriate time frame (onset and peak of medication). Observations provide additional safety measures, especially for high-alert medications. IV medications act rapidly.
Data source: Berman & Snyder, 2016; Canadian Institute for Health Information, 2009; Clayton et al., 2010; Perry et al., 2014; Workers Compensation Act, 2015

Video 7.9

Special Considerations:

Checklist 62 reviews the steps to administer an IV medication through an existing IV line with incompatible IV solution. Review the preparation questions for intravenous medication in Table 7.9 prior to the medication administration.

Checklist 62: Administering an IV Medication (with Incompatible IV Solution)
Disclaimer: Always review and follow your hospital policy regarding this specific skill.
Safety Considerations: 
  • Review the advantages and disadvantages of IV medications.
  • Be able to answer the preparation questions for intravenous medication in Table 7.9 before administering the medication.
  • If the medication has been diluted and there is wastage, always discard unused diluted portion of the prepared IV medication before going to the bedside.
  • Always label the IV syringe with the patient name, date, time, medication, concentration of the dose, dose, and your initials. Once the medication is prepared, never leave it unattended.
  • NEVER administer an IV medication through an IV line that is infusing blood, blood products, heparin IV, insulin IV, cytotoxic medications, or parenteral nutrition solutions.
  • Central venous catheters (central lines, PICC lines) may require special pre- and post-flushing procedures and specialized training.
  • You will need a timer with a second hand to time the rate of administration.

Steps

 Additional Information

1. Prepare one medication for one patient at the correct time as per agency policy. Review the physician orders, PDTM, and MAR for the correct order and guidelines. Math calculations may be required to determine the correct dose to prepare the medication. Always apply the SEVEN rights x 3 of medication administration.

Review the agency policy if a medication is a stat, first-time, loading dose, or a one-time dose.

Some agencies require that high-alert medications be double-checked by a second health care provider. Always follow agency policies.

After preparing the medication, always label the medication syringe with the patient name, date, time, medication and dose concentration (e.g. morphine 2 mg/ml), dose, and your initials. Never leave the syringe unattended.

2. Create privacy if possible. This provides comfort to patient.
3. Confirm patient ID using two patient identifiers (e.g., name and date of birth) AND compare the MAR printout with the patient’s wristband to confirm patient ID. This ensures you have the correct patient and complies with agency standard for patient identification.
Identify patient with two identifiers
Compare MAR to patient wristband
4. Check allergy band for any allergies, and ask patient about type and severity of reaction. This ensures allergy status is correct on the MAR and on patient allergy band.
5. Discuss purpose, action, and possible side effects of the medication. Provide patient an opportunity to ask questions. Encourage patient to report discomfort at the IV site (pain, swelling, or burning). Keeping patient informed of what is being administered helps decrease anxiety.
6. Perform hand hygiene and apply non-sterile gloves. Hand hygiene prevents the transmission of microorganisms.
Hand hygiene with ABHR
7. Clamp or pinch the IV line, and pause the infusion pump if required. Always ensure the needle insertion site is patent, free from redness and swelling.

Always check agency policy to ensure an IV solution or medication can be stopped temporarily.

Blue slider clamp
Blue slider clamp
Pinch IV tubing
Pinch IV tubing

Some IV solutions may not be stopped. If unable to temporarily stop an IV solution or IV medication, start a new IV site.

8. Clean the lowest port on the IV tubing with an alcohol swab in a circular motion for 15 seconds. Allow to dry. Clamp IV tubing above the lowest port on the IV tubing. This prevents the transmission of microorganisms.
Clean port with an alcohol swab
9. Flush the IV line with 10 ml of normal saline or as per agency policy. This step clears the IV line to prevent any mixing of incompatible medications.
Flush IV line with NS

If running primary IV solution is medication (e.g., heparin, morphine, pantaloc, or insulin) or blood or blood products, do not flush. Start another saline lock on the opposite arm.

10. Inject medication at the recommended rate according to agency policy. Use timer with second hand to time injection. Use a push-pause method to inject the medication. Medications can be given safely when guidelines are followed. This ensures the medication is delivered at proper intervals according to agency policy.
Inject IV medication slowly
11. Remove used medication syringe. Remove air from prefilled NS syringe and attach to the same IV port.

Flush (3 to 5 ml) at the SAME rate as the medication bolus, according to guidelines found in the PDTM or per IV bolus medication policy. (See Rationale for Flushing with NS after Administering an IV Medication.)

Flushing at the same rate prevents patient from accidentally receiving a bolus of the medication. Flushing also ensures the line is patent and clears the IV line of all incompatible medications.
Flush IV line with NS
12. Unclamp/unpinch IV line and restart IV infusion device as required. Recheck infusion rate if IV solution is running by gravity. Rechecking infusion rate prevents accidental fluid overload and keeps patient safe.
Regulating IV tubing is a roller clamp
Recheck IV rate
13. Dispose of all syringes/filter needles into appropriate puncture-proof containers. This prevents accidental needle-stick injuries.
14. Remove gloves and perform hand hygiene. This reduces the transmission of microorganisms.
Hand hygiene with ABHR
15. Document as per agency protocol. Document time, reason, drug, dose, effect, and any adverse reactions.
16. Evaluate the patient’s response to the medication in the appropriate time frame. Observe patient for expected therapeutic effects and adverse reactions.
Data source: Berman & Snyder, 2016; Canadian Institute for Health Information, 2009; Clayton et al., 2010; Perry et al., 2014

Video 7.10

Special considerations:

Critical Thinking Exercises

  1. What resource could you consult to determine the onset, peak, and duration of morphine IV?
  2. What information should be on the label of an IV medication syringe?

56

7.6 Administering Intermittent Intravenous Medication (Secondary Medication) and Continuous IV Infusions

Intravenous intermittent infusion is an infusion of a volume of fluid/medication over a set period of time at prescribed intervals and then stopped until the next dose is required. An intermittent IV medication may be called a piggyback medication, a secondary medication, or a mini bag medication (see Figure 7.16). Intravenous medications may be given in small volumes of sterile IV solution (25 to 250 ml) and infused over a desired amount of time (given for 30 minutes every 4 hours) or as a single dose. Many medications must be given slowly to prevent harm to the patient, and this method of administration reduces the risk of rapid infusion. A piggyback medication is given through an established IV line that is kept patent by a continuous IV solution or by flushing a short venous access device (saline lock). Always check the Parenteral Drug Therapy Manual PDTM to ensure the correct guidelines are followed for each specific medication given in IV solution. The PDTM provides guidelines on how to mix the IV medication, the amount and type of solution, and the rate of infusion (Perry et al., 2014).

An intermittent medication may be administered by gravity or on an electronic infusion device (EID), also known as an infusion (IV) pump. Many piggyback IV medications must be on an IV pump, which requires programming and specialized training to prevent medication errors. The IV infusion pumps provide hard- and soft-dose limits and safety practice guidelines to aid in safe medication administration (Lynn, 2011). IV medications may also be given by gravity infusion, in which case the health care provider must calculate the infusion rate for drops per minute. The best practice for piggyback infusions is to use an IV infusion pump.

Secondary medication set up by gravity
Figure 7.16 Secondary medication (upper IV mini bag) set up with primary infusion set (lower IV bag)

At times, a volume-controlled (intermittent infusion) set may be used to deliver medication for children, older adults, or critically ill patients where fluid volume is a concern. A volume-controlled intermittent set is a small device attached below the primary infusion to regulate the mini bag. The medication is added to a small amount of IV solution and administered through an IV line (Lynn, 2011).

Intravenous medications are always prepared using the seven rights x 3 as per agency policy. Because of the many high-risk events associated with intravenous medications, additional guidelines are required. A PDTM or monograph provides this additional information, which includes the generic name, brand name, classification of the drug, and a chart defining which parenteral route may be utilized. Some medications may only be given via a piggyback method or large-volume IV solutions, and some medications may be given diluted over 1 to 2 minutes. In addition, information on indications, contraindications, dosage (age dependent), administration/dilution guidelines, adverse effects, clinical indications (e.g., specialized monitoring required, must be on an IV pump), and compatibility and incompatibility in relation to reconstitution and primary IV solution are specified (Alberta Health Services, 2009).

The Institute for Safe Medication Practices (2014) has created a list of high-alert medications that bear the heightened risk of significant harm when they are used in error. Specific safeguards for these medications can be found in the PDTM. It is vital to understand which medications are considered high risk prior to administration. A link to the list of high-alert medications can be found under Suggested Online Resources at the end of this chapter. In addition to the seven rights x 3 for medication preparation, Table 7.10 summarizes what to review in the PDTM when preparing and administering an intravenous medication. The acronym RED CARS can be used as a reminder.

Table 7.10 The Acronym RED CARS for Intravenous Medications

Mnemonic 

 Additional Information

R Rate: What is the rate of injection?
E Equipment: Equipment may include a syringe, filter needle (vial), or non-filter needle (ampule), label for the syringe, alcohol swab, solution to prepare the medications, PDTM, MAR, non-sterile gloves, normal saline flushes, and a watch with a second hand.
D Dilution: How much solution is required to dilute the medication, and what type of solution (normal saline or dextrose)? Some intravenous medications must be administered in a piggyback or mini bag, and some may be given diluted directly into the vein through an existing IV line.
C Compatibility: Is the medication compatible with the primary IV solution and additives? NEVER inject intravenous medications into blood or blood products, or IV continuous infusions such as heparin IV or insulin IV.
A Allergies: What are the patient’s allergies and types of reactions?
R Reconstitution: If the medication requires reconstitution, follow directions for adding the correct amount of dilution and type of dilution. Use the information to accurately achieve the correct concentration of the medication.
S Stability: How long is the medication stable at room temperature or when reconstituted?
Data source: BCIT, 2015
Special considerations when preparing IV intermittent medications:

Using sterile technique, prepare the intravenous medication as per agency policy, using the PDTM and the seven rights x 3. Many piggyback medications come prepared from the pharmacy and still require a complete check (SEVEN rights x 3) prior to administration. Checklist 63 lists the steps to administering an intermittent IV medication by gravity or an IV infusion pump.

Checklist 63: Administering an Intermittent Intravenous Infusion (First Time)
Disclaimer: Always review and follow your hospital policy regarding this specific skill.
Safety Considerations: 
  • Review the advantages and disadvantages of IV medications.
  • Always label the IV mini bag with the patient name, date, time, medication, concentration of dose, dose, and your initials. Once the medication is prepared, keep in a secure area.
  • NEVER administer an IV medication through an IV line that is infusing blood, blood products, heparin IV, insulin IV, cytotoxic medications, or parenteral nutrition solutions.
  • Central venous catheters (central lines, PICC lines) require special pre- and post-flushing procedures and specialized training.
  • You will need a watch with a second hand to time the rate of administration (if infusing medication by gravity).
  • The use of IV infusion pumps requires specialized training to avoid programming errors. Refer to the resources at the end of this chapter for links to reviewing IV infusion devices.

Steps

 Additional Information

1. Prepare one medication for one patient at the correct time as per agency policy. Always check the physician orders, PDTM, and MAR.

Mathematical calculations may be required to determine the correct dose to prepare.

Always apply the SEVEN rights of medication administration.

Review the agency policy and the PDTM. If a medication is a stat, first-time, loading, or one-time dose, be extra diligent in reviewing the PDTM. Memory slips are a common source of error with medication administration.

Complete all assessments (vital signs) and check laboratory values that may influence the medication administration.

If piggyback (secondary) medication is made up by the health care provider, ensure the medication label on the mini bag includes the patient name, date, time, medication added, dose and concentration, expiry time, and your initials.

Some health agencies require a second independent check with high-alert medications. Always follow agency policy.

2. Perform hand hygiene and bring medication and MAR to bedside. Create privacy if possible. Additional equipment required includes secondary tubing, a metal or plastic extension hanger, an alcohol swab, and a timer with a second hand.

Creating privacy provides comfort to patient.

3. Compare the MAR with the patient’s wristband, and use two patient identifiers (name and birth date),  according to agency policy, to confirm patient ID. This ensures you have the correct patient and complies with agency standard for patient identification.
Identify patient with two identifiers
Compare MAR with patient’s wristband
4. Ask about allergies. This ensures allergy status is correct on the MAR and patient’s allergy band.
5. Discuss purpose, action, and possible side effects of the medication. Provide patient an opportunity to ask questions. Encourage patient to report discomfort at the IV site (pain, swelling, or burning). Keeping patient informed of what is being administered helps decrease anxiety.
6. Perform hand hygiene. Hand hygiene prevents the transmission of microorganisms.
7. Assess IV site. Select upper port on the IV tubing. IV medications may require assessment of vital signs and lab values prior to administration.
8. Complete necessary assessments as required. Assess IV site and flush for patency. Ensure IV site is free from redness, swelling, and pain prior to administering the medication.
Assess IV site prior to use
9. Prime secondary tubing. Remove secondary tubing from packaging and close the clamp. Hang the medication IV bag on the IV pole and remove the sterile blue protective cap.
Removing sterile blue cap from IV bag
Remove sterile blue cap from IV bag
Remove protective cover off spike on IV tubing
Remove protective cover of spike on IV tubing
Fill drip chamber 1/2 to 1/3 full

Slowly open the clamp and prime the tubing.

open clamp and prime tubing
Open clamp and prime tubing

Clean the upper injection port on the primary IV tubing with an alcohol swab for 15 seconds using a circular motion.

Clean upper port on primary IV tubing

Allow to dry. Remove the cap on the distal end of the secondary tubing and carefully insert the upper injection port.

Insert secondary IV tubing into primary IV tubing port
Insert secondary IV tubing into upper port on primary IV tubing

Label the secondary tubing with date and time.

Label IV tubing
Label IV tubing
10. Lower the primary IV solution bag using the extension hook. Ensure piggyback mini bag is hung above the primary IV solution bag. Position of the IV solutions influences the flow of the IV fluid into the patient. The setup is the same if the medication is given by gravity or through an IV infusion pump. Always follow manufacturer’s directions for infusion pumps.
Set up for secondary IV medication
11. Ensure clamp on secondary tubing is open. This prevents the patient from missing a dose of medication.
Open clamp on secondary IV line.
Open clamp on secondary IV line
12a. If using gravity infusion, use the roller clamp on the primary set to regulate the rate. The rate will need to be calculated for gtts/mins.

12b. If using an IV infusion pump, set the rate according to the PDTM. Most infusion pumps automatically restart the primary infusion at the previously established rate.

Regulate infusion with primary IV line roller clamp

If the medication is administered via gravity, remember to return to the patient and readjust the rate for the primary IV infusion. The primary IV solution will resume infusing at the rate of the secondary infusion, which could lead to rapid infusion of the primary solution.

If medication is being given for the first time, stay with the patient for the first 5 minutes to monitor for any potential adverse effects.

Encourage patient to notify the health care provider if IV site becomes red, painful, or swollen, or if patient notices any adverse effects from the medication.

13. Leave IV piggyback mini bag and tubing in place for future drug administration. Check agency policy to verify if this practice is acceptable. Repeated changes in IV tubing increase risk for infection transmission. Secondary IV tubing should be changed as per agency policy.
14. Perform hand hygiene. Hand hygiene reduces the transmission of microorganisms.
Hand hygiene with ABHR
15. Document administration of the IV piggyback on MAR, the I/O sheet, and as per agency policy. Document time, therapeutic effect, and any adverse reactions.

Prompt documentation avoids the possibility of accidentally repeating the administration of the drug. If the drug was omitted or refused, record this appropriately and notify the primary health care provider.

Data source: Berman & Snyder, 2016; Lynn, 2011; Perry et al., 2014; WHO, 2012

Checklist 64 lists the steps to administer an intermittent IV medication using an existing secondary line, by gravity or an IV infusion pump.

Checklist 64: Administering an Intermittent Intravenous Infusion Using Existing Secondary Line
Disclaimer: Always review and follow your hospital policy regarding this specific skill.
Safety Considerations: 
  • Review the advantages and disadvantages of IV medications.
  • Always label the IV mini bag at the medication cart with the patient name, date, time,  medication dose (e.g., Gravol 50 mg), concentration, and your initials. Once the medication is prepared, keep in a secure area.
  • NEVER administer an IV medication through an IV line that is infusing blood, blood products, heparin IV, insulin IV, cytotoxic medications, or parenteral nutrition solutions.
  • Central venous catheters (central lines, PICC lines) require special pre- and post-flushing procedures and specialized training.
  • You will need a watch with a second hand to time the rate of administration.
  • The use of IV infusion pumps requires specialized training to avoid programming errors. Refer to the resources at the end of this chapter for links to reviewing IV infusion devices.

Steps

 Additional Information

1. Prepare one medication for one patient at the correct time as per agency policy. Always check the physician’s order, PDTM, and MAR.

Mathematical calculations may be required to determine the correct dose to prepare.

Always apply the SEVEN rights of medication administration.

Review the agency policy and the PDTM. If a medication is a stat, first-time, loading, or one-time dose, be extra diligent in reviewing the PDTM. Memory slips are a common source of error with medication administration.

Complete all assessments and laboratory values that may influence the medication administration.

If piggyback (secondary) medication is made up by the health care provider, ensure the medication label on the mini bag includes the patient name, date, time, medication added, dose and concentration, expiry time, and your initials.

Some health agencies require a second independent check with high-alert medications. Always follow agency policy.

2. Bring medication and MAR to bedside. Create privacy if possible. Additional equipment required includes secondary tubing, a metal or plastic extension hanger, an alcohol swab, and a timer with a second hand.

Creating privacy provides comfort to patient.

3. Compare the MAR printout with the patient’s wristband, and use two patient identifiers (name and birth date), according to agency policy, to confirm patient ID. This ensures you have the correct patient and complies with agency standard for patient identification.
Identify patient with two identifiers
Compare MAR with patient’s wristband
4. Ask about allergies. This ensures allergy status is correct on the MAR and the patient’s allergy band.
5. Discuss purpose, action, and possible side effects of the medication. Provide patient an opportunity to ask questions. Encourage patient to report discomfort at the IV site (pain, swelling, or burning). Keeping patient informed of what is being administered helps decrease anxiety.
6. Perform hand hygiene. Hand hygiene prevents the transmission of microorganisms.
Hand hygiene with ABHR
7. Complete necessary assessments as required. Assess IV site for patency. IV medications may require assessment of vital signs and lab values prior to administration.

IV site must be patent prior to use.

8. Prime the secondary IV line by “back filling” using the empty IV mini bag attached to the secondary IV line. Check expiration date on secondary IV tubing.

Open the clamp on the secondary IV line and lower the mini bag below the primary IV line. This will cause IV solution from the primary IV bag to enter the old mini bag and clear out the secondary IV line. Allow approximately 25 ml of IV solution to enter the used mini bag.

Lower secondary IV bag below primary and open clamp to flush out secondary IV line

Once the secondary IV line is cleared, close the clamp on the secondary IV line, and ensure the drip chamber is 1/2 full. Remove the old mini bag from the secondary IV tubing and place on the bedside table. Carefully remove sterile blue cover on new medication bag, and insert the spike of the secondary IV tubing into the new IV bag, being careful to avoid accidental contamination.

Inserting spike into secondary IV bag
Insert spike into secondary IV bag

Open clamp on the secondary IV tubing.

Open clamp on secondary IV line.
Open clamp on secondary IV line
9. Ensure piggyback mini bag is hung above the primary IV solution bag. Position of the IV solutions influences the flow of the IV fluid into the patient. The setup is the same if the medication is given by gravity or through an IV infusion pump. Always follow manufacturer’s directions for infusion pumps.
Set up for secondary IV infusion
10. Ensure clamp on secondary tubing is open. This prevents the patient from missing a dose of medication.
Open clamp on secondary IV tubing
11a. If using gravity infusion, use the roller clamp on the primary set to regulate the rate. The rate will be calculated for gtts/mins.

11b. If using an IV infusion pump, set the rate according to the PDTM. Most infusion pumps automatically restart the primary infusion at the previously established rate.

Regulate infusion with primary IV line roller clamp

If administering IV medication by gravity, remember to return to the patient and readjust the rate for the primary IV infusion. The primary IV solution will resume infusing at the rate of the secondary infusion, which could lead to rapid infusion of the primary solution.

If medication is being given for the first time, stay with the patient for the first 5 minutes to monitor for any potential adverse effects.

Encourage patient to notify the health care provider if IV site becomes red, painful, or swollen, or if patient notices any adverse effects from the medication.

12. Leave IV mini bag and tubing in place for future drug administration. Check agency policy to verify if this practice is acceptable. Repeated changes to IV tubing increase risk for infection transmission. Secondary IV tubing should be changed as per agency policy.
13. Perform hand hygiene. Hand hygiene reduces the transmission of microorganisms.
Hand hygiene with ABHR
14. Document administration of the IV piggyback on MAR, and as per agency policy. Document time, therapeutic effect, and any adverse reactions

Prompt documentation avoids the possibility of accidentally repeating the administration of the drug. If the drug was omitted or refused, record this appropriately and notify the primary health care provider.

Data source: Clayton et al., 2010; Lynn, 2011; Perry et al., 2014; WHO, 2012

Continuous Intravenous (Medication) Infusion

continuous intravenous infusion is the infusion of a parenteral drug over several hours (continuous drip) to days. It involves adding medication to sterile IV solution (100 to 1,000 ml bag), and then hanging the IV solution as a primary infusion. A continuous drip must be ordered by the physician and listed in the PDTM as a medication to be given by IV continuous infusion. Most IV continuous infusions are given for a short duration. Examples of continuous IV infusion medications include heparin, insulin R, and pantaprazole. Continuous intravenous infusions may come pre-made from the pharmacy, and are labelled with the patient name; IV solution; volume, amount, and concentration of medication; initials of the RN; and date and time prepared (Alberta Health Services, 2009). Always refer to the PDTM for guidelines on how to administer, regulate, and titrate continuous infusions.

An electronic infusion device (EID) must be used to infuse continuous IV medications. Assessments and lab values must be monitored following the PDTM guidelines. A health care provider must assess the continuous medication for the dose, rate, and patency of the IV site, and assess the patient for therapeutic and adverse reactions to the medication. The Institute for Safe Medication Practices (ISMP) (2013) recommends that all high-alert medications be independently double-checked to detect potential harmful errors before they reach the patient. Independent double checks have been shown to detect up to 95% of errors (ISMP Canada, 2013).

Critical Thinking Exercises

  1. Can the same secondary IV tubing be used more than once? Explain your answer.
  2. What is the purpose of hanging the piggyback IV medication higher than the primary IV solution?

57

7.7 Complications Related to Parenteral Medications and Management of Complications

Safe medication administration requires special attention to transition points where medication errors are more likely to occur. For example, many errors occur in the ordering and preparing phase. Many parenteral medications are considered high-alert medications because of the potential significant harm when used in error. Therefore, these medications require special safeguards to reduce the risk of error. ISMP (2014) lists IV medications classified as high alert. All parenteral routes of insulin (SC/IV) are considered high alert (ISMP, 2014). Specific safeguards may include:

In addition, complications may occur if medication is injected incorrectly, if incorrect equipment (needle or syringe) is used to prepare the medication, or if an error occurs in preparing (calculation, selection of the med), administration, or post-assessment of the patient receiving the medication. Additional complications may include nerve or tissue damage, medication being absorbed too fast or too slow, wrong location for the medication, pain, bleeding, or a sterile abscess (Perry et al., 2014).

Despite safe medication administration practices, an adverse reaction may happen to a patient for a variety of complex reasons and contributing factors (College of Nurses of Ontario, 2015). An adverse reaction, also known as an adverse event, is an undesirable effect of any health product such as prescription and non-prescription pharmaceuticals, vaccines, serums, and blood-derived products; cells, tissues, and organs; disinfectants; and radiopharmaceuticals. An adverse reaction may occur under normal use and conditions of the product. Reactions may be evident within minutes or years after exposure to the product and may range from minor reactions, like a skin rash, to serious and life-threatening events such as a heart attack or liver damage (Health Canada, 2012). For example, some IV bolus medications may cause a sudden drop in blood pressure or heart rate, or hives may result.

Table 7.11 lists five steps to manage an adverse reaction.

Table 7.11 Managing Adverse Reactions to IV Medications

Step 

 Additional Information

 1. Immediately stop the injection (or infusion) of the medication. Keep syringe of medication for further investigation of the reaction.
 2. Assess and monitor vital signs. Alert other members of the health care team and ask for assistance as required. Provide reassurance to the patient about the event.
 3. Notify responsible health care provider.
 4. Perform interventions (CPR, O2 support) as required. Ensure patient has a patent IV site for any required medications to manage the adverse reaction.
 5. Document and report the event through PSLS or agency-specified reporting system.
Data source: Alberta Health Services, 2009; Clayton et al., 2010; College of Nurses of Ontario, 2015; Health Canada, 2012

Complications of Intravenous Medications

Complications may result from direct, continuous, or secondary IV medications. The complications are not specific to one medication. It is important for the health care provider to know which adverse event may occur with each individual medication. For example, the administration of an IV opioid (narcotic) medication could result in respiratory depression. Table 7.12 provides a list of possible complications and related interventions.

Table 7.12 Possible Complications and Related Interventions

Complications

 Related Interventions

Speed shock: A systemic reaction caused by the rapid injection of a medication into the circulation, resulting in toxic levels of medication in the plasma. Symptoms can include cardiac arrest, flushed face, headache, irregular pulse, shock, syncope, and tightness in the chest. Use a peripheral IV site, if possible, to allow for maximum hemodilution before the medication reaches the heart/brain. Stay with the patient and observe for symptoms or changes in vital signs and level of consciousness during and after administration. Stop the injection immediately if the patient develops signs or symptoms of circulatory (drop in BP), respiratory (dyspnea), or neurological (decrease in LOC) deterioration during administration.
IV medication is incompatible with IV fluids: Results in chemical or physical changes in their composition. Precipitates may form, colour may change (e.g., IV fluid becomes cloudy in the IV tubing), or the change may not be visible. Therapeutic effect of the medication may be reduced, obliterated, or potentiated. Toxic substances may be formed. Always follow the guidelines in the PDTM. Do not mix medications in one syringe and only give one medication at a time. Never add medications to blood, blood products, or total parenteral nutrition. To avoid mixing of medications, ensure IV tubing and injection ports are flushed adequately between medication administrations.

Stop the IV medication and flush with normal saline. If unable to give an IV medication due to incompatibles, start a new IV site or a new IV system (prime a new primary and secondary line) to administer the medication.

Document changes and notify physician.

IV site shows signs of phlebitis or irritation: Injection of medication into a vein may cause inflammation or roughening of the endothelial lining, which can result in thrombus formation. Medication may also be inadvertently injected into surrounding tissue, resulting in tenderness, pain, tissue necrosis, or nerve damage.

Septic thrombophlebitis can result from poor aseptic technique.

Monitor for signs and symptoms, such as redness, swelling, pain, blanching, and streaking. If these signs are present, stop infusion immediately. Discontinue access device and restart in another site. If required, provide extravasation care as per agency policy.
Data source: Alberta Health Services, 2009; Lynn, 2011

Reporting Medication Errors

Medication errors are the leading cause of preventable errors in Canada (ISMP Canada, 2014). A medication incident is “any preventable event that may cause or lead to inappropriate medication use or patient harm while the medication is in the control of the healthcare professional, patient, or consumer. Medication incidents may be related to professional practice, drug products, procedures, and systems, and include prescribing, order communication, product labelling / packaging / nomenclature, compounding, dispensing, distribution, administration, education, monitoring, and use.” (ISMP Canada, 2014, p.8)

Most of the critical incidents reported to the ISMP occurred during administration of a medication, with the wrong quantity of medication. The top five medications were hydromorphone, desmopressin, epinephrine, heparin, and morphine. Opioids continue to be the top medication classes associated with harmful incidents reported. Most of the opioid-related deaths involved overdoses, overlapping drug toxicities, administration of opioids to people who should not have received them, and use of hydromorphone (ISMP Canada, 2014).

Overall, the top three contributing factors were communication, independent check processes, and insufficient knowledge (ISMP Canada, 2014). Table 7.13 lists areas for improvement to prevent IV medication errors.

Table 7.13 Areas for Improvement to Prevent IV Medication Errors
Area Additional Information
Monitoring of patient after medication administration Be diligent in post-assessments of all IV medications. However, be particularly aware of high-alert medications, such as insulin, opioids, and anticoagulants.

Many incident reports state that timely observation by a health care provider or family member prevents a bad outcome.

Many overdoses can be reversed if caught in a timely manner.

IV infusion pump errors Errors can include:
  • Lack of available IV pumps
  • Transcription errors such as:
    • Decimal point omitted
    • Decimal point moved
    • Concentration input
  • Incorrect drug selection
  • Multiple line confusion
  • Pump setup

To decrease patient harm, hospitals need additional funding to purchase more IV pumps.

Health care technology Computer-prescribed order entry (CPOE), automated dispensing cabinets (ADC), and other tools seek to improve patient safety and decrease errors.

Protocols and force functioning need to be developed to minimize potential errors and to identify potential gaps in the system process.

Reporting, analysis, and knowledge translation The collection and analysis of incident reports is the backbone to further improvements. Without a robust system, there cannot be the identification of contributing factors to medication incidents.

Always report near misses, adverse reactions, and medication errors to ensure investigation and improvement is initiated.

In addition, shared learning and strategies are vital for safer health care.

Data source: Clayton et al., 2010; ISMP Canada, 2014

Critical Thinking Exercises

  1. List three types of complications and preventive measures for each one.
  2. Name two strategies to reduce the risk of harm from high-alert medications, and consider a method of sharing your strategies with your colleagues.

58

7.8 Summary

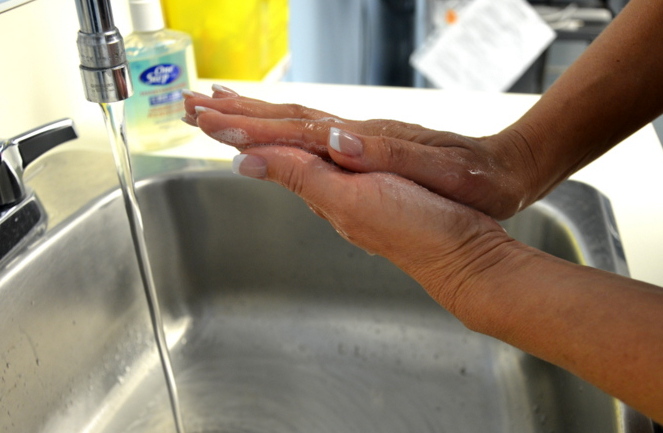
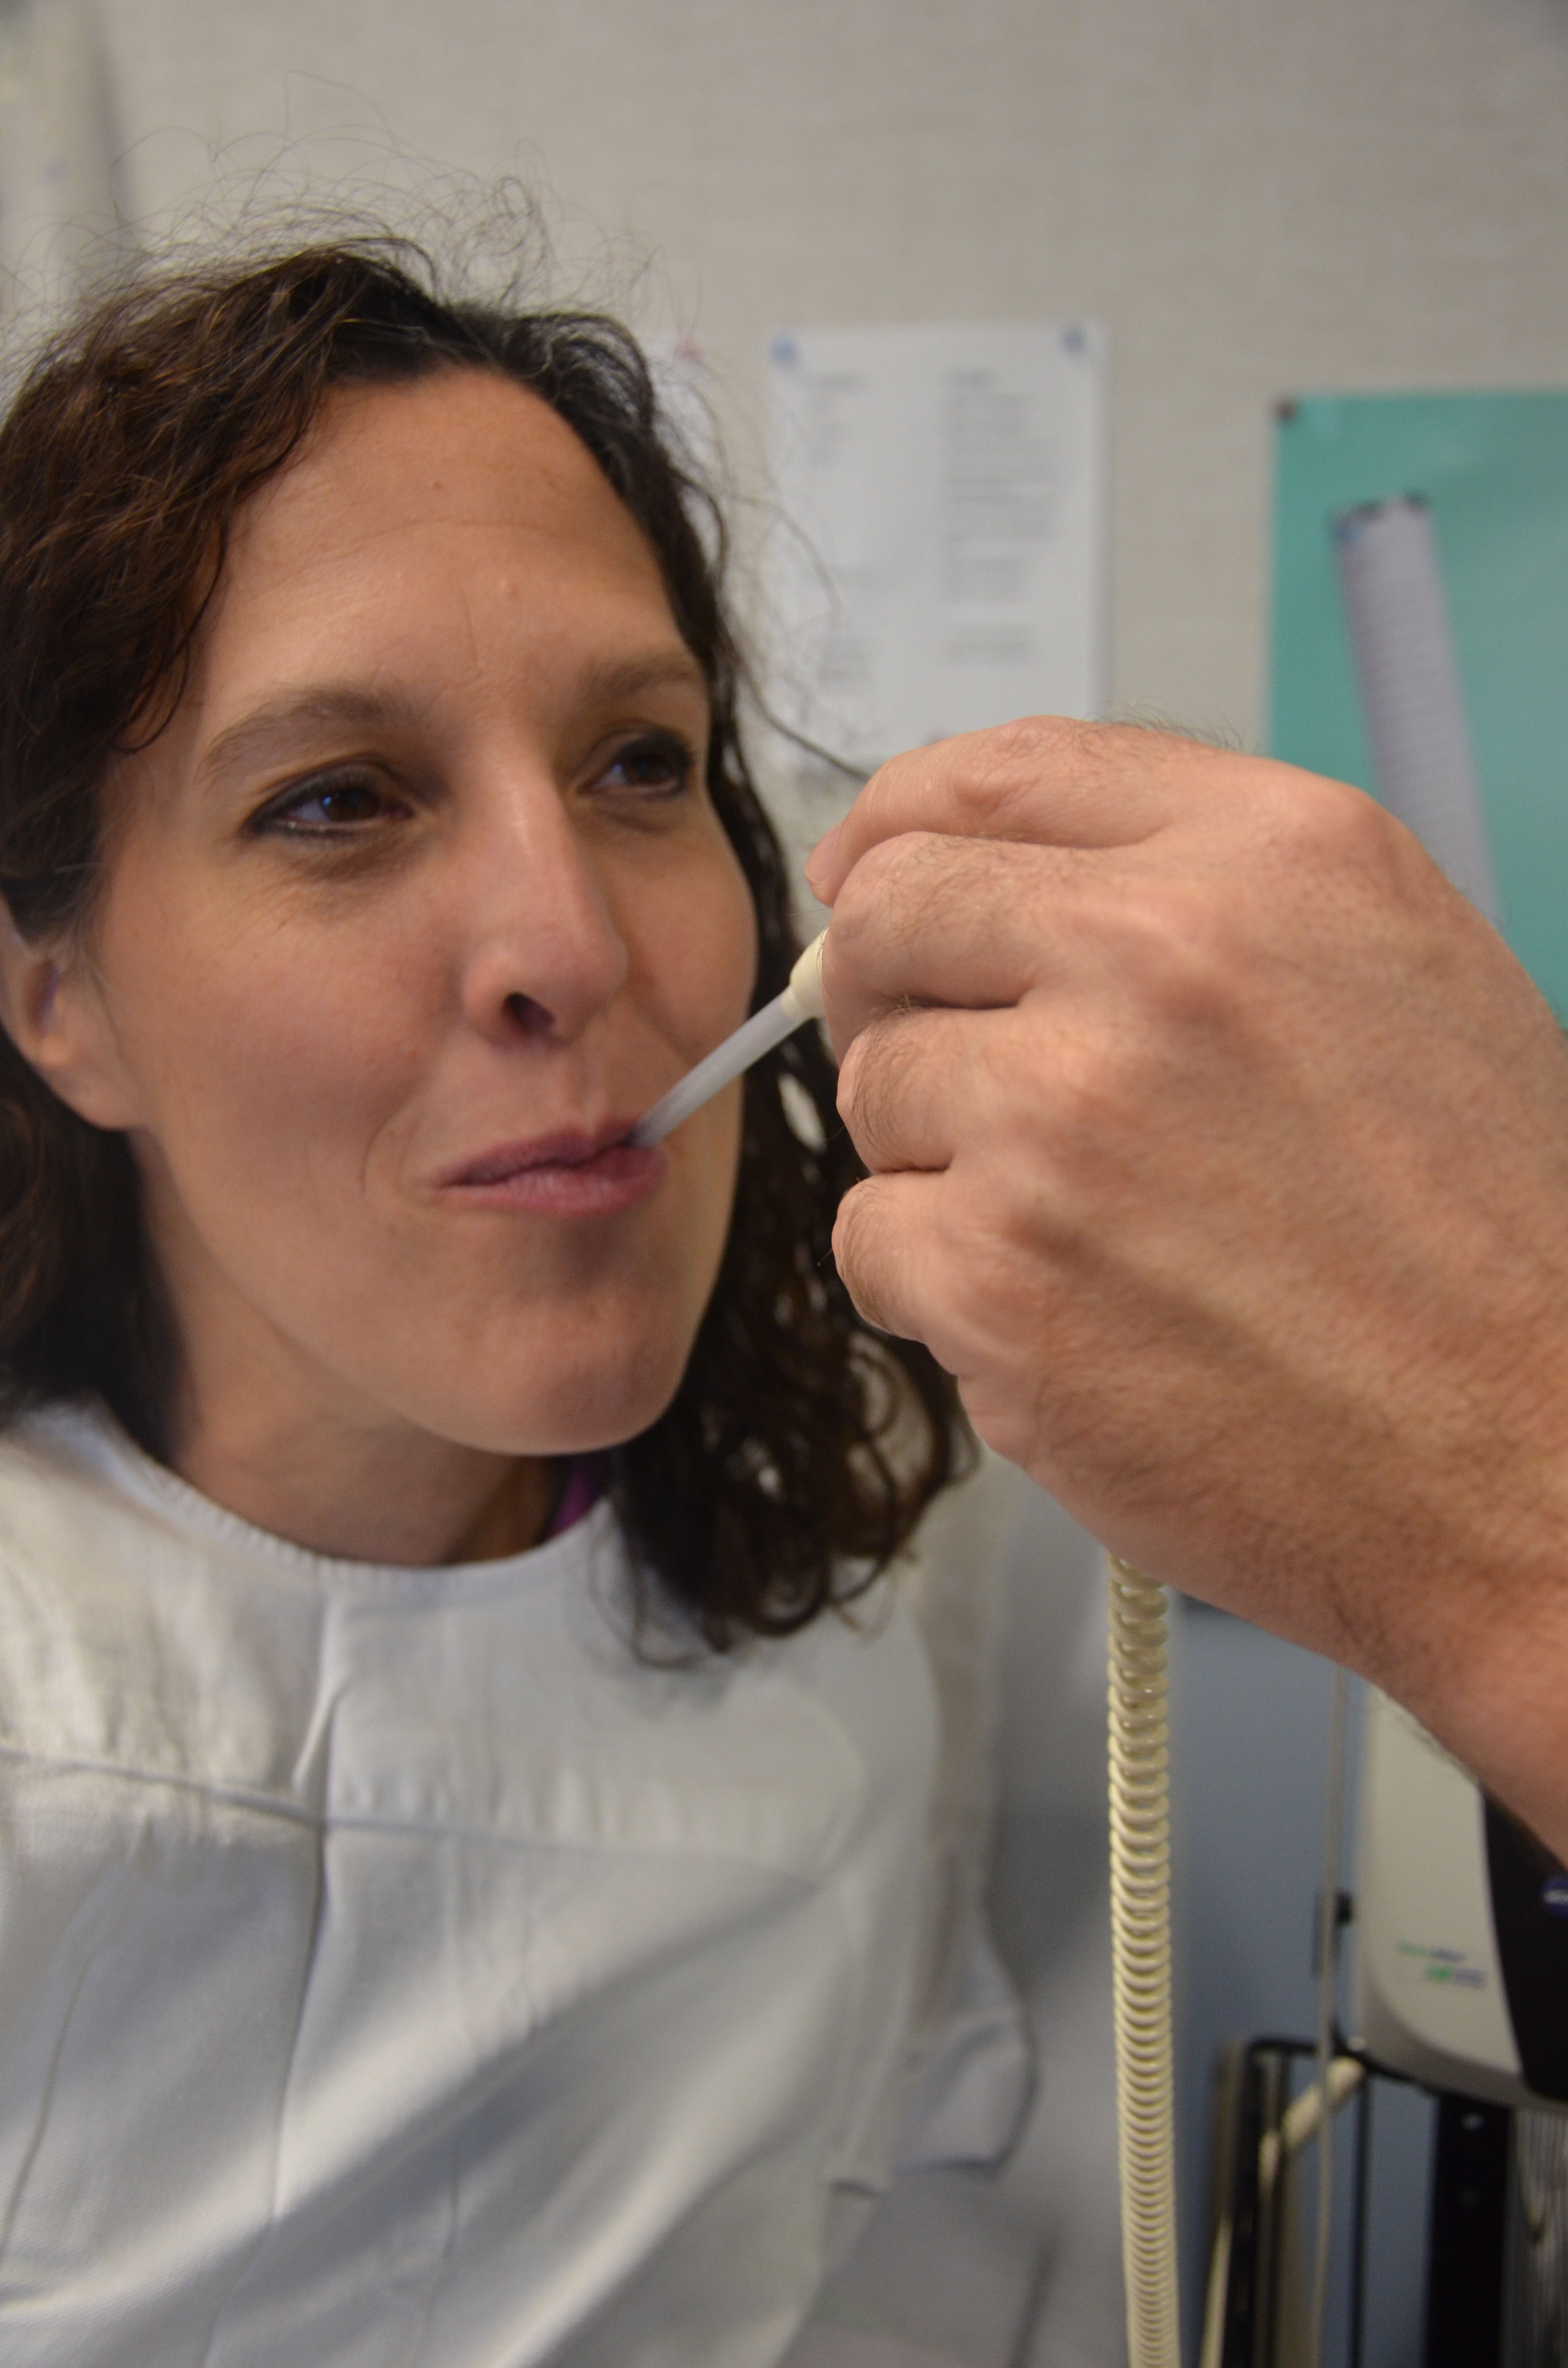
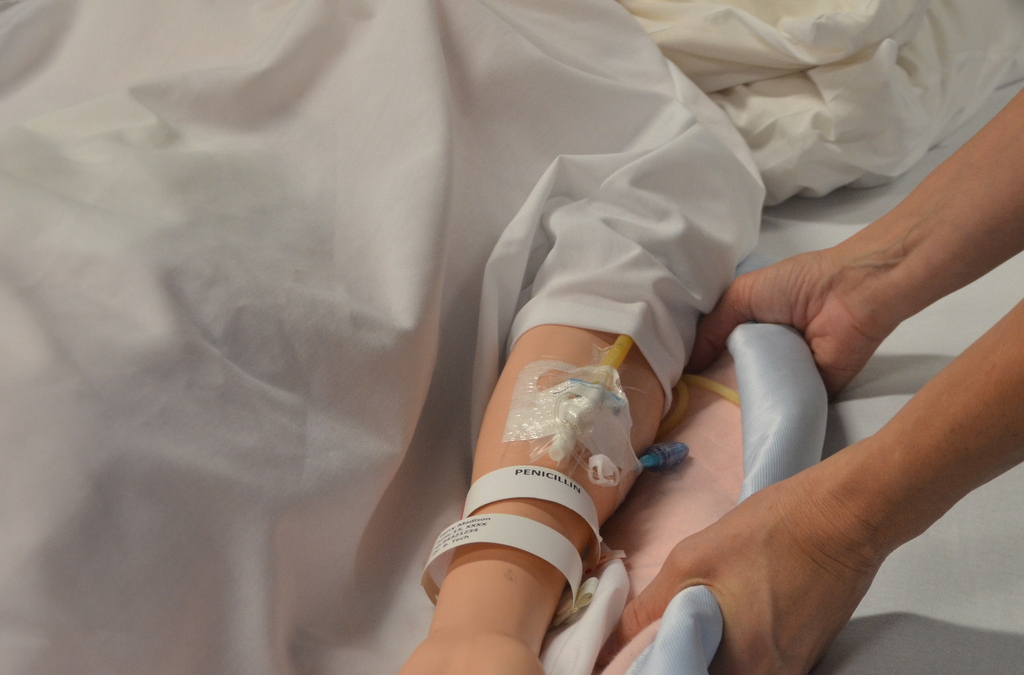
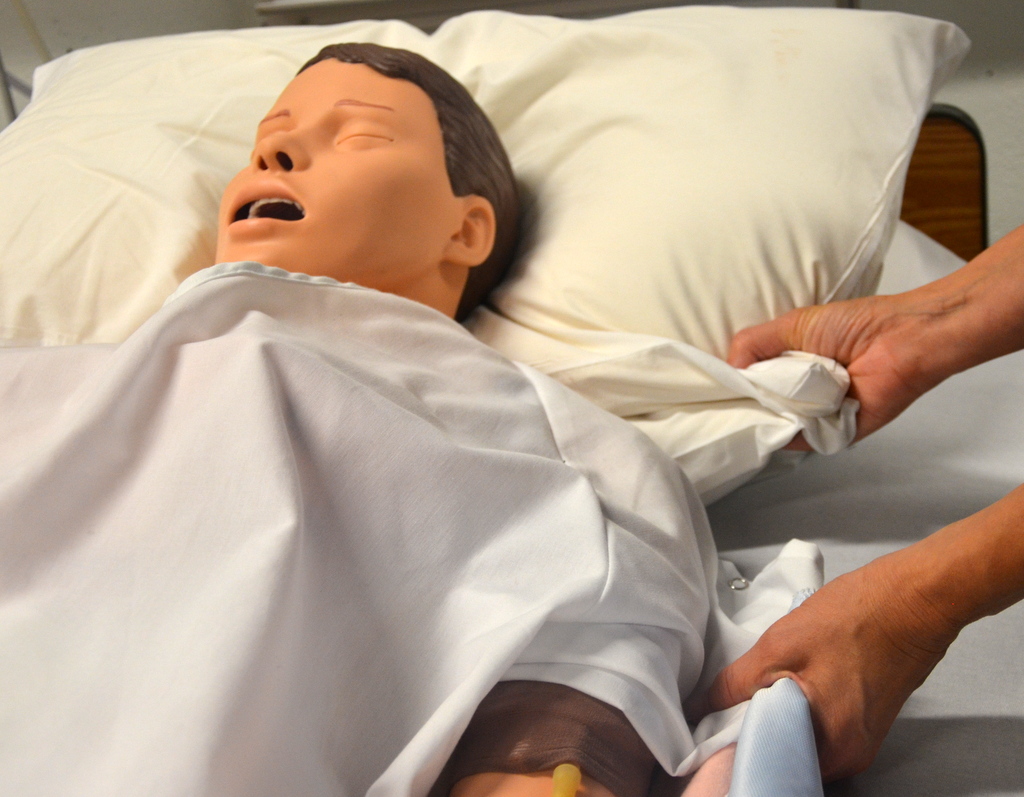
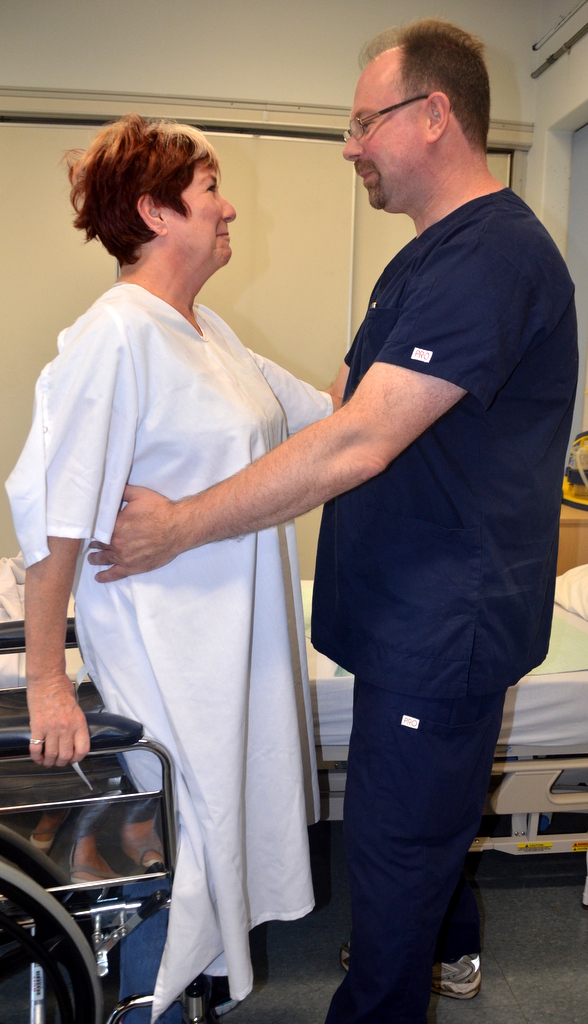
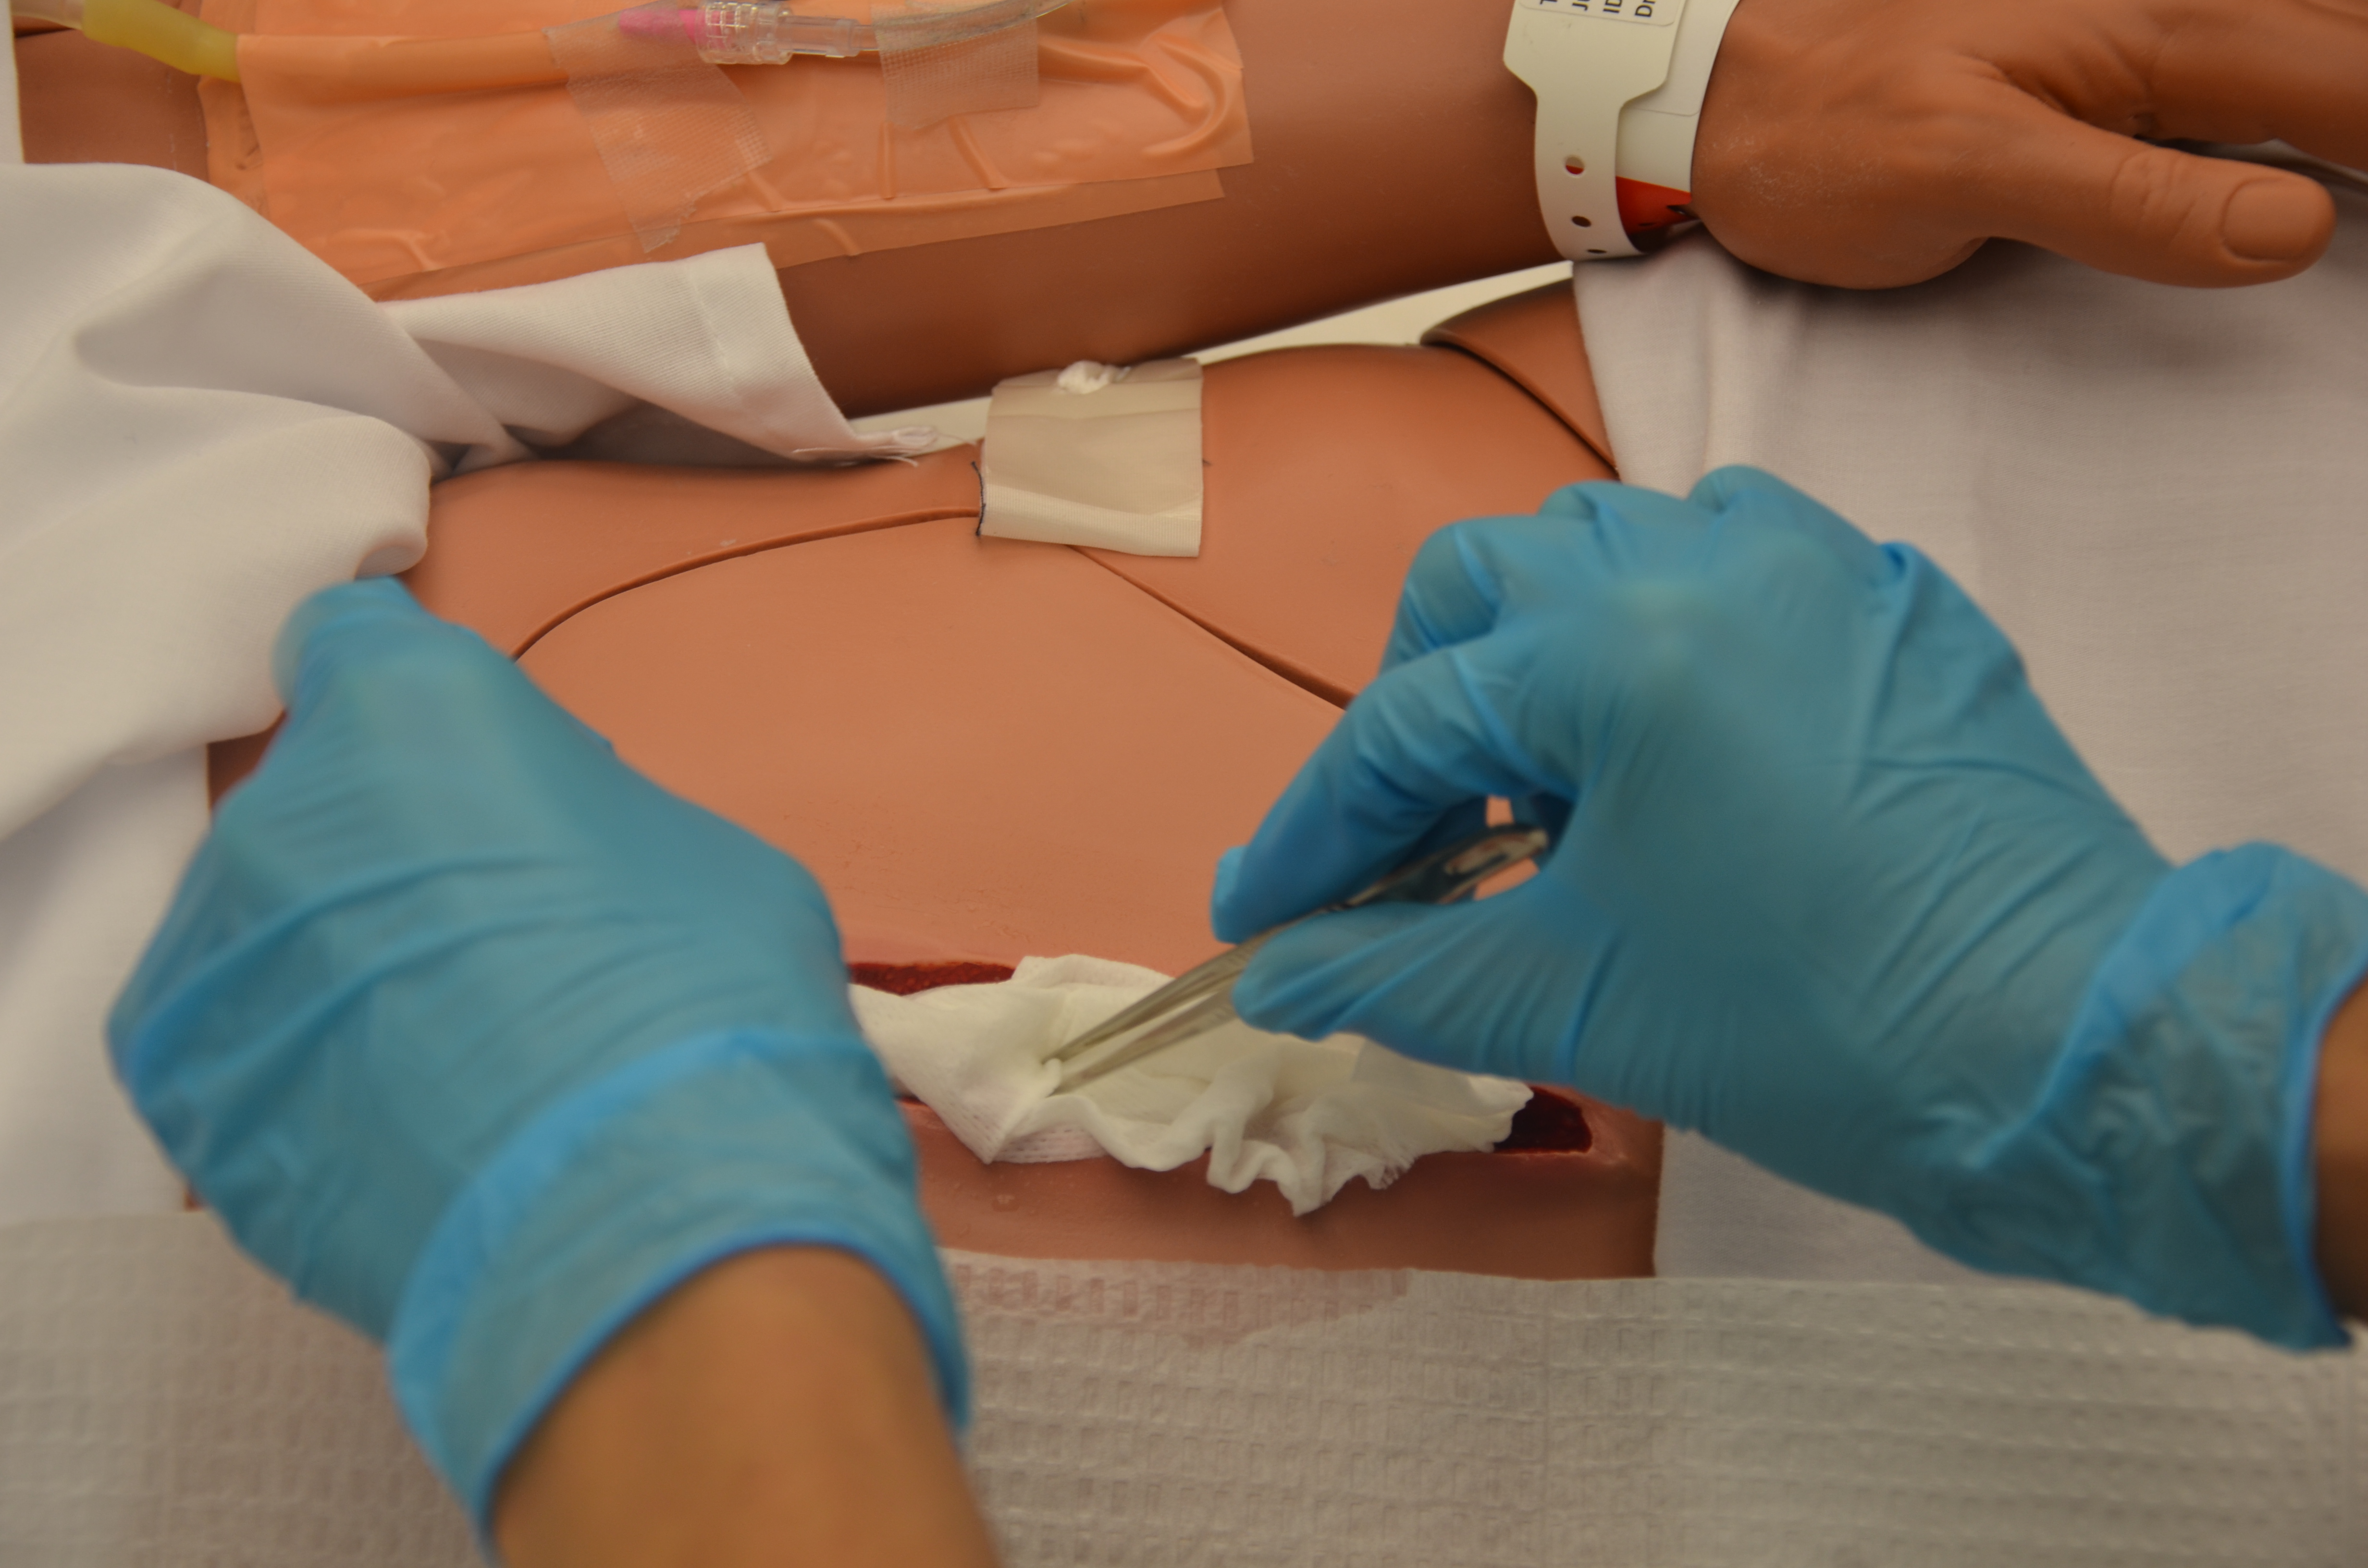
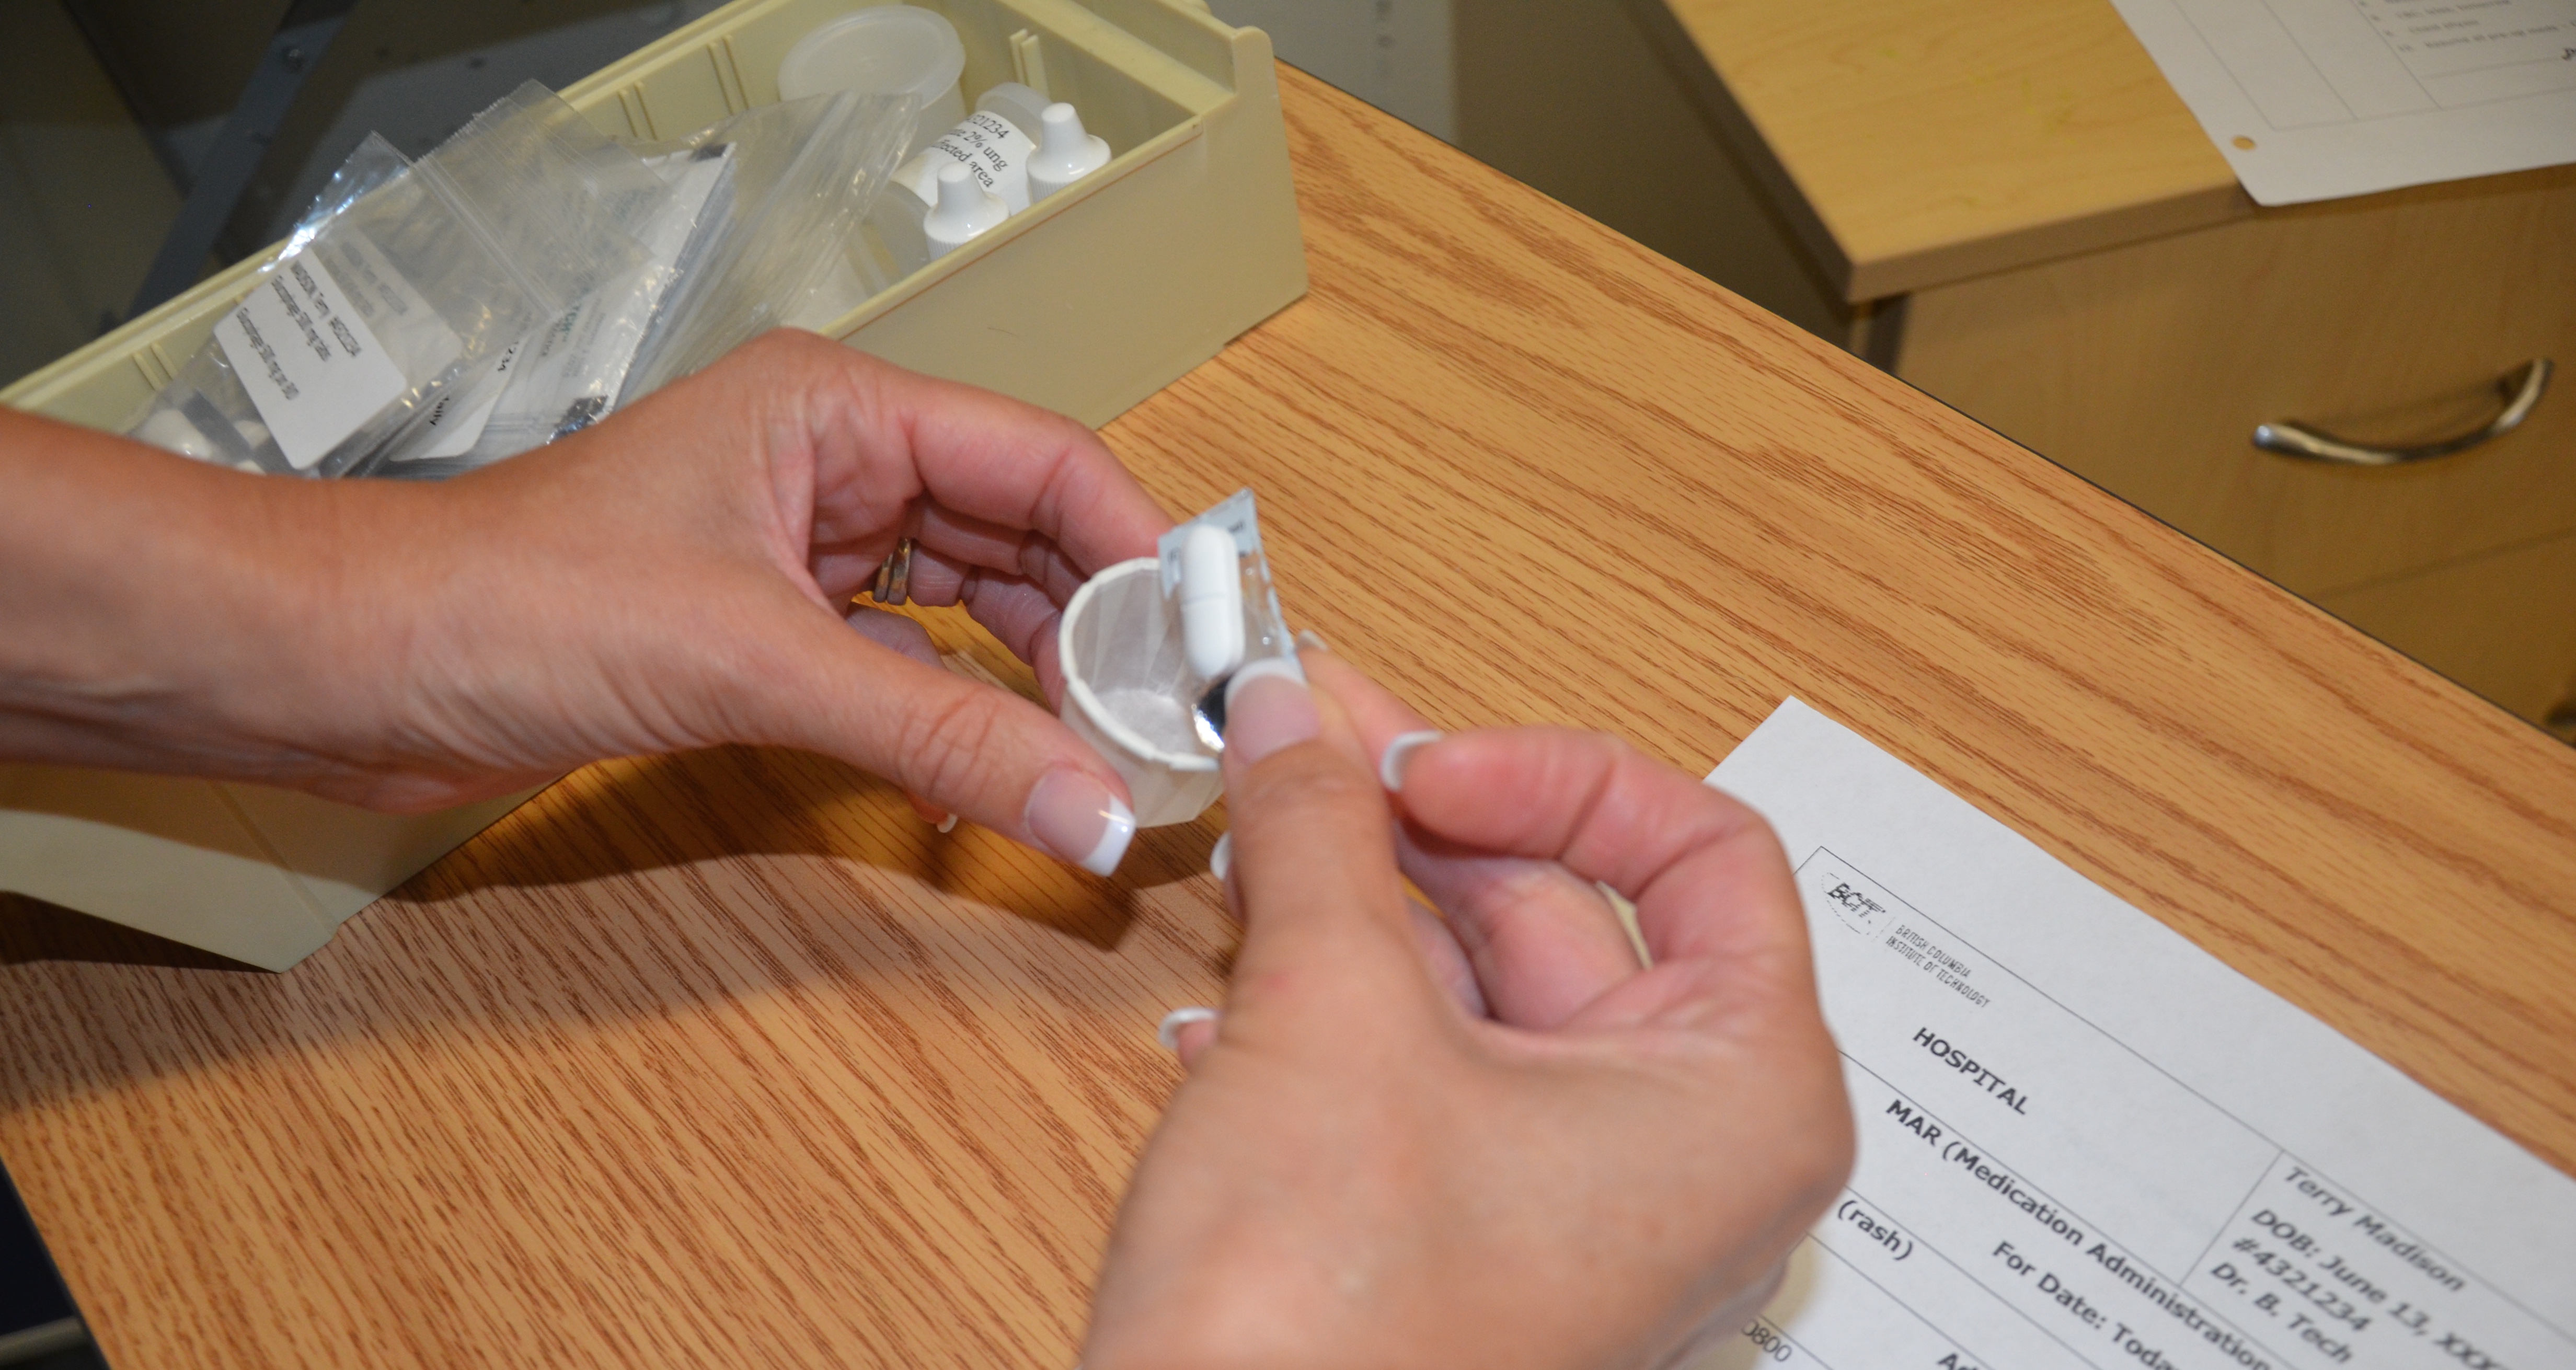
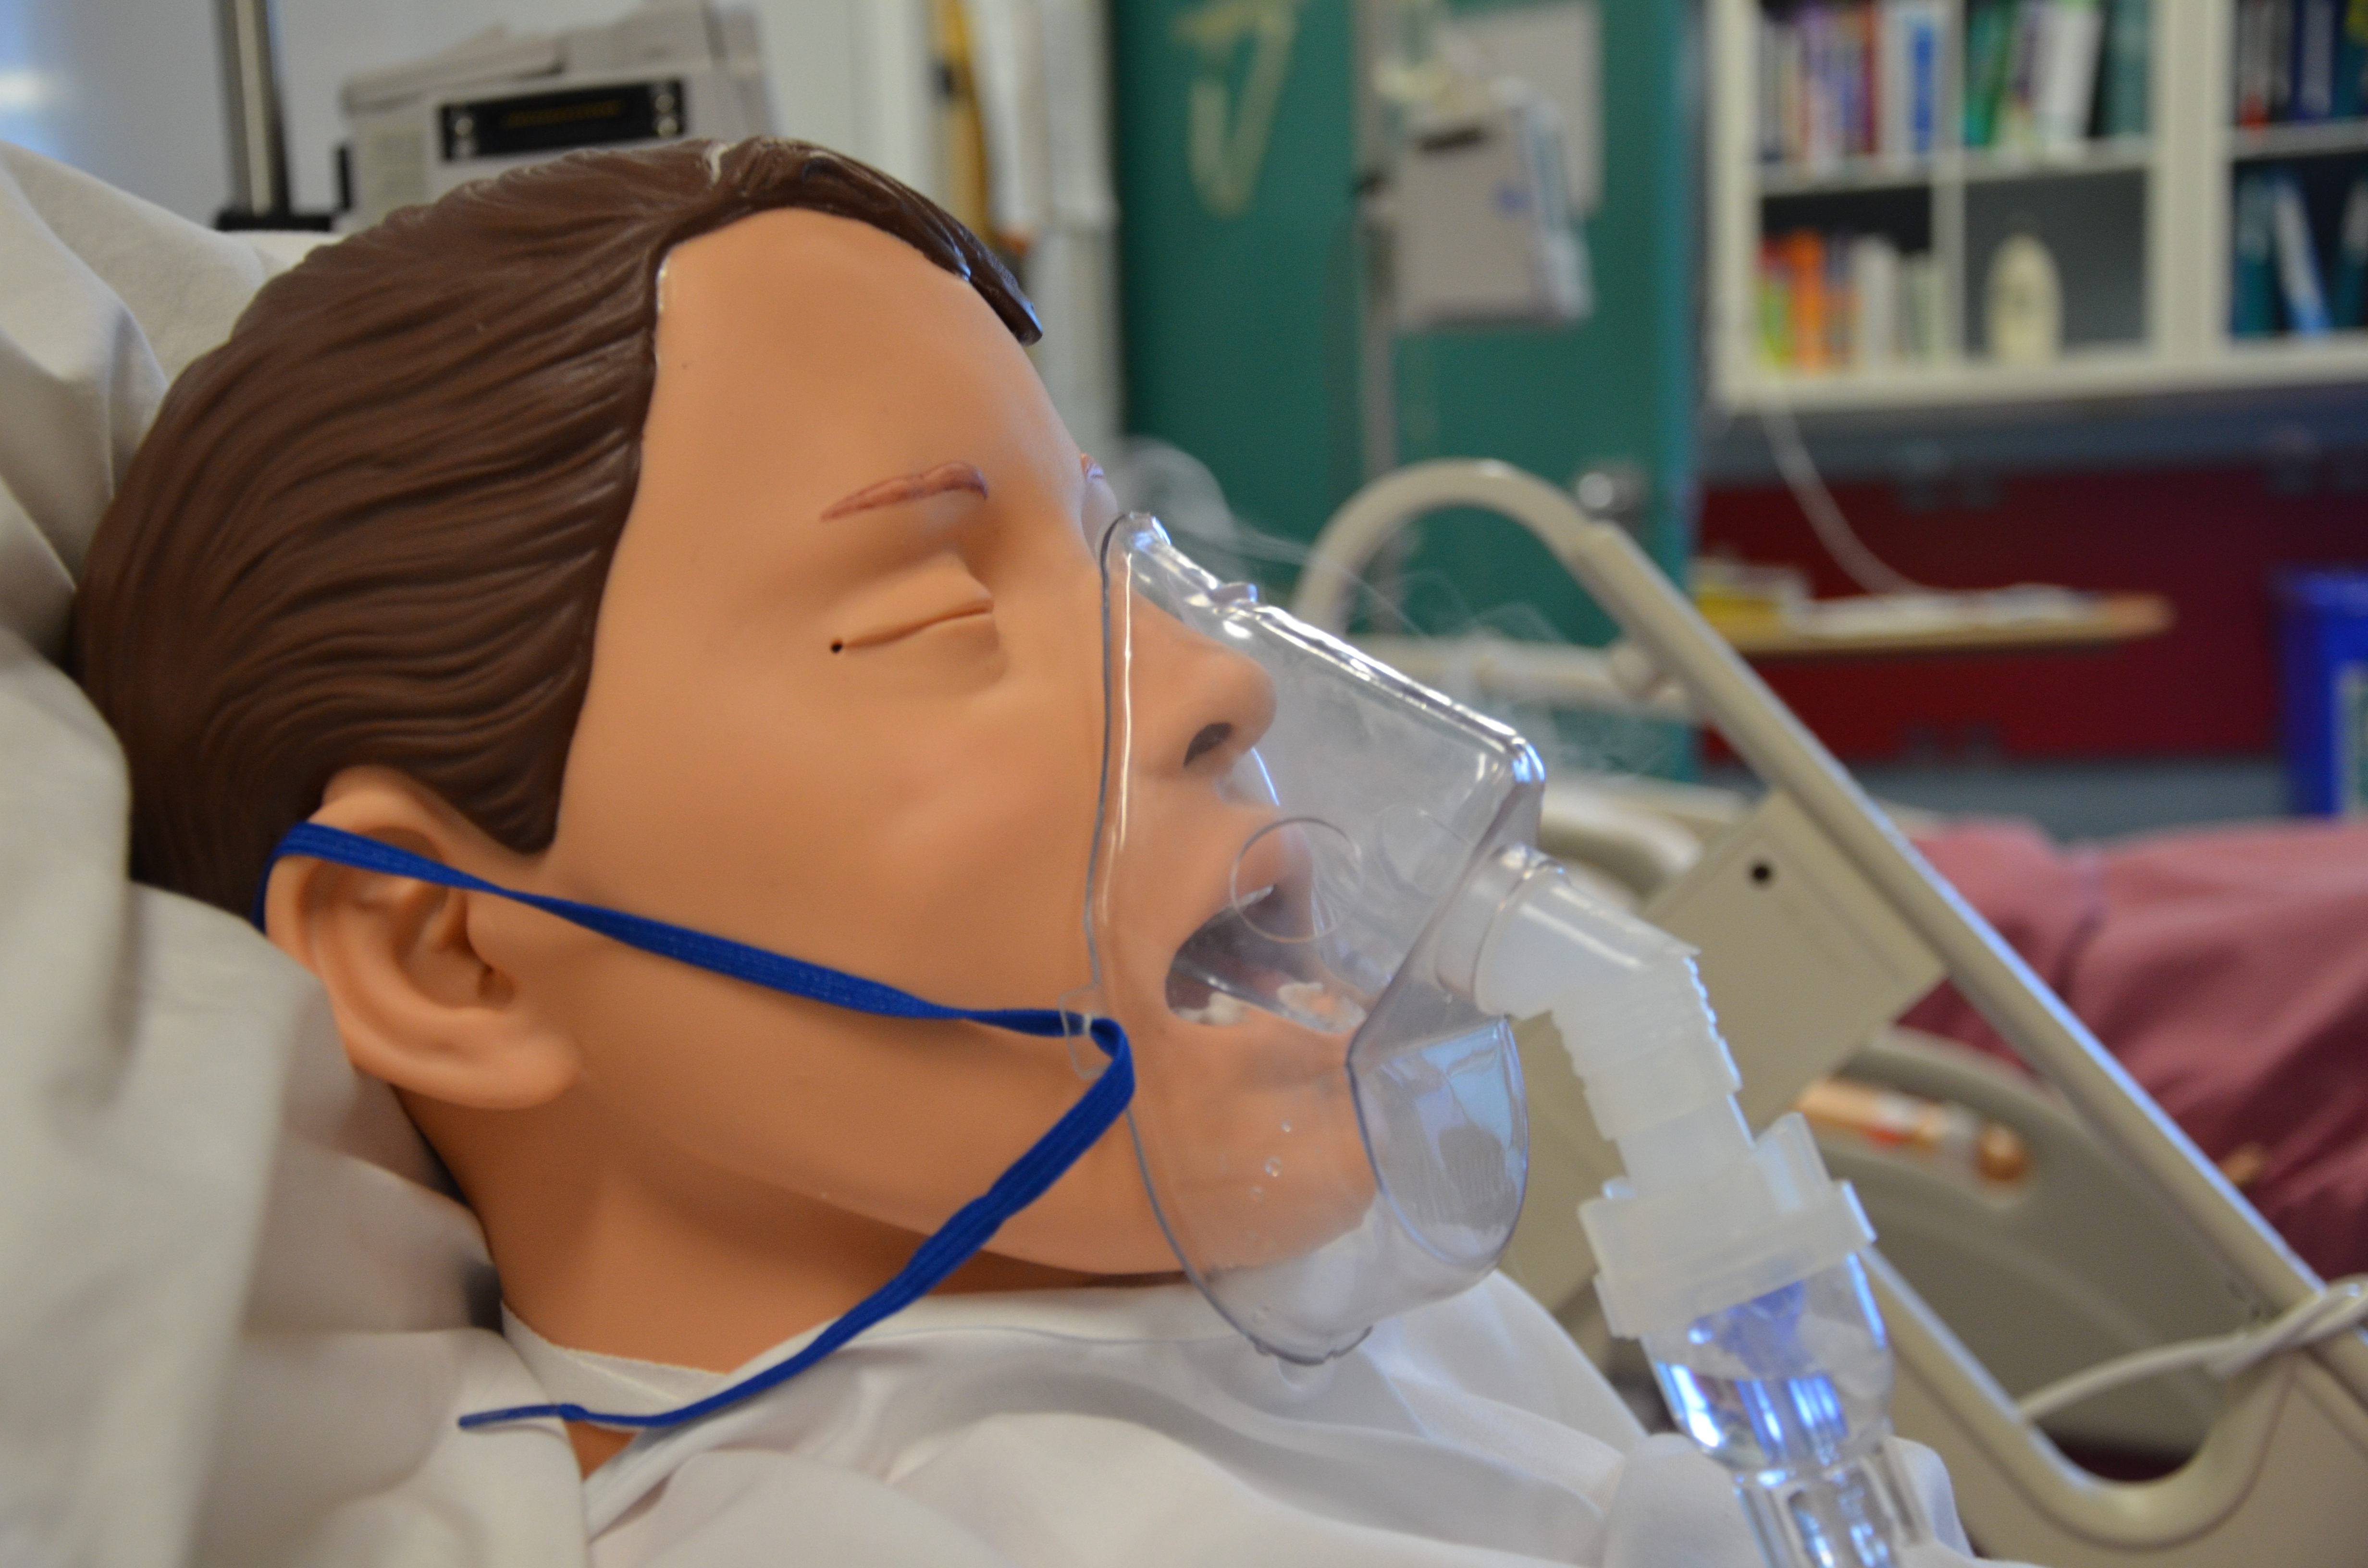
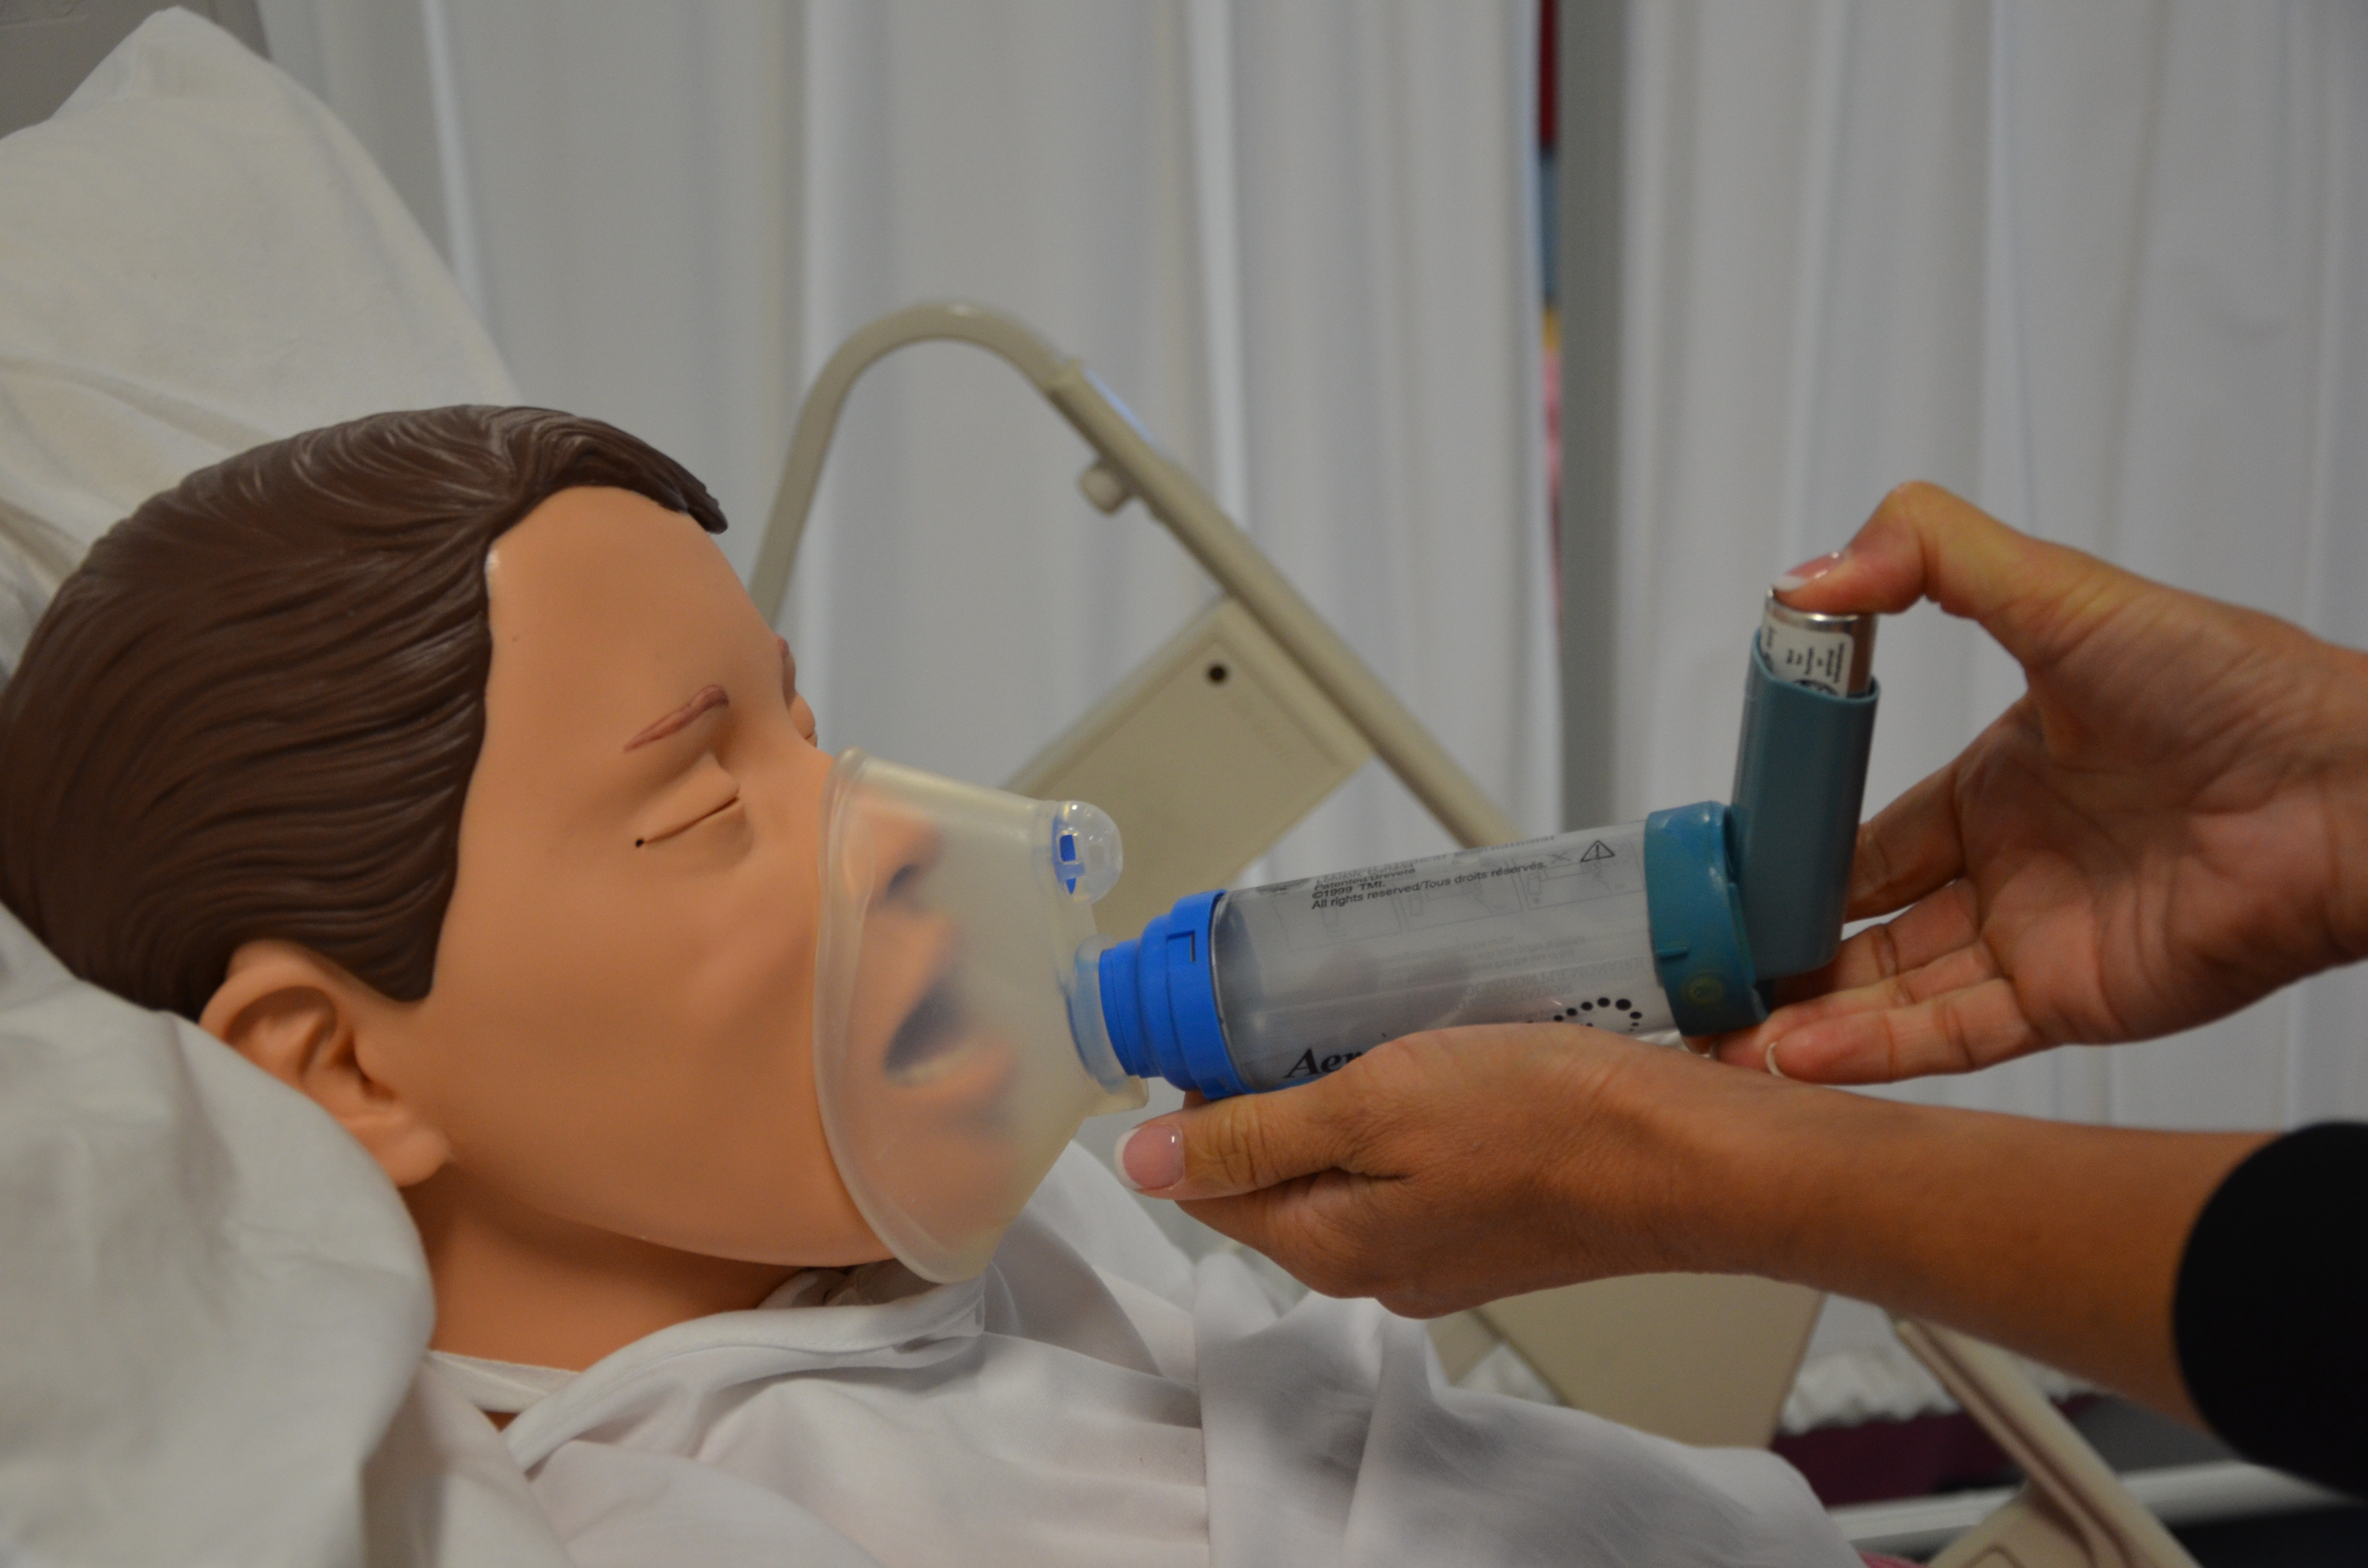
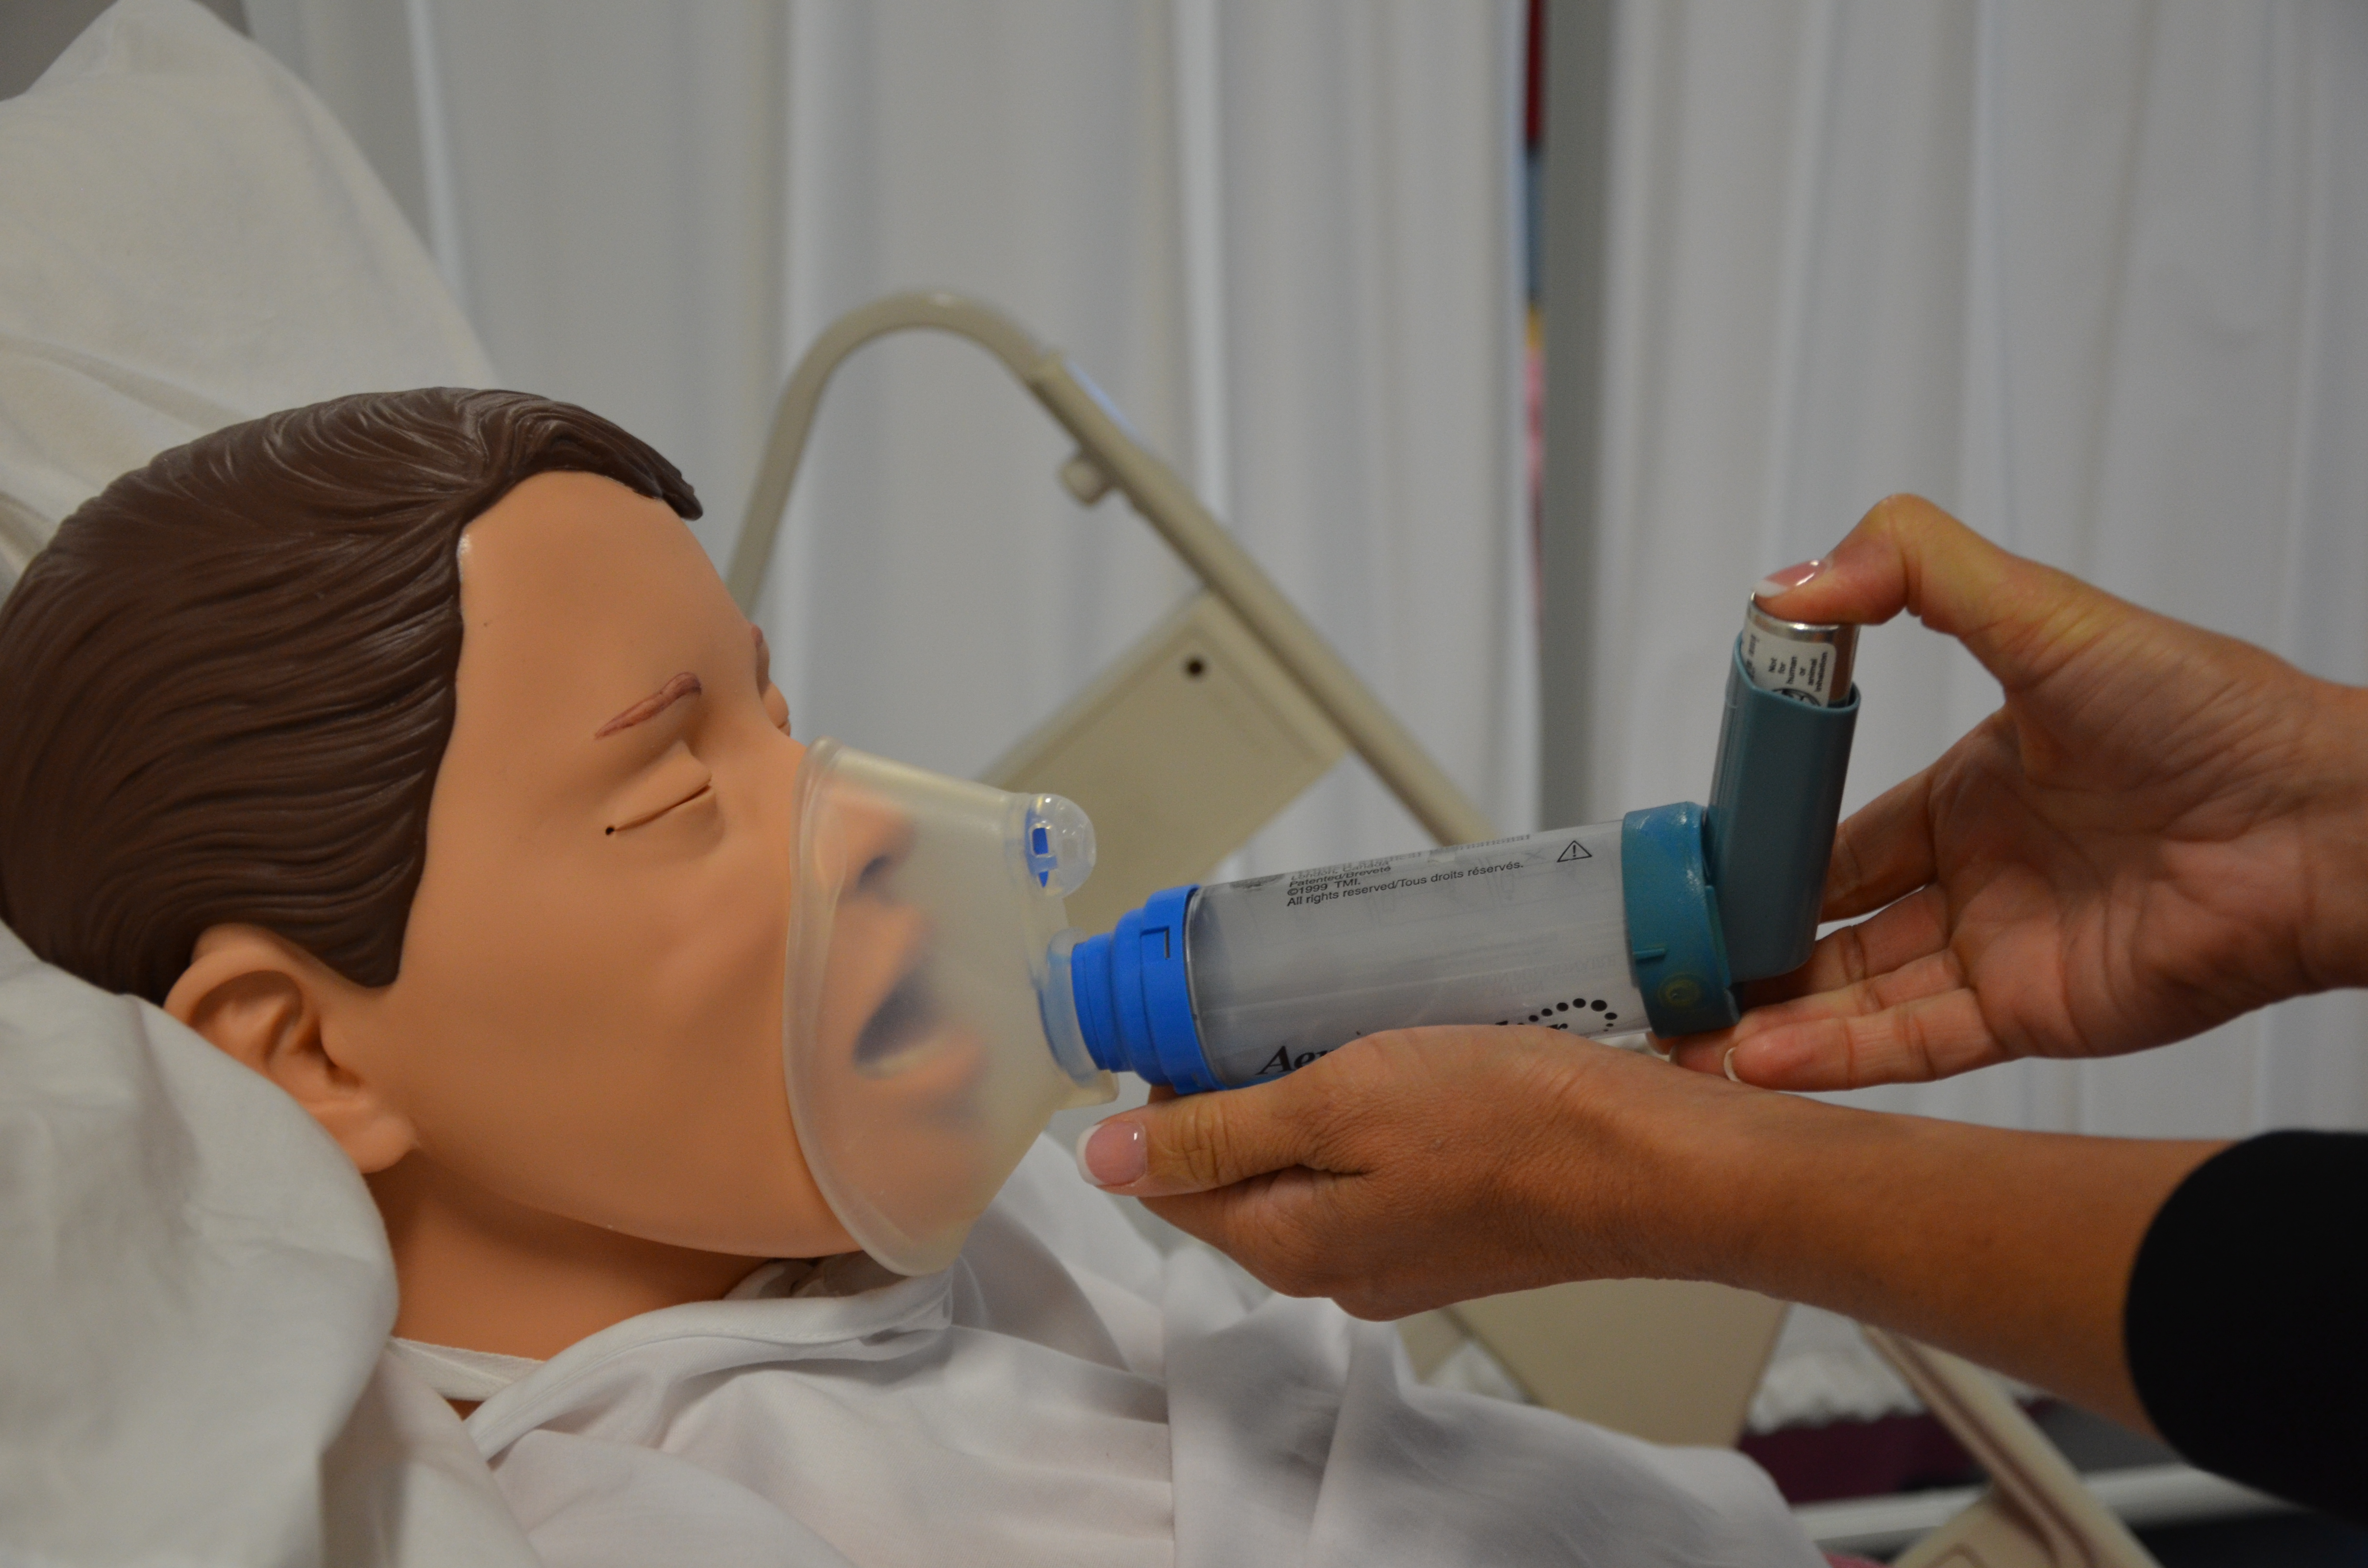
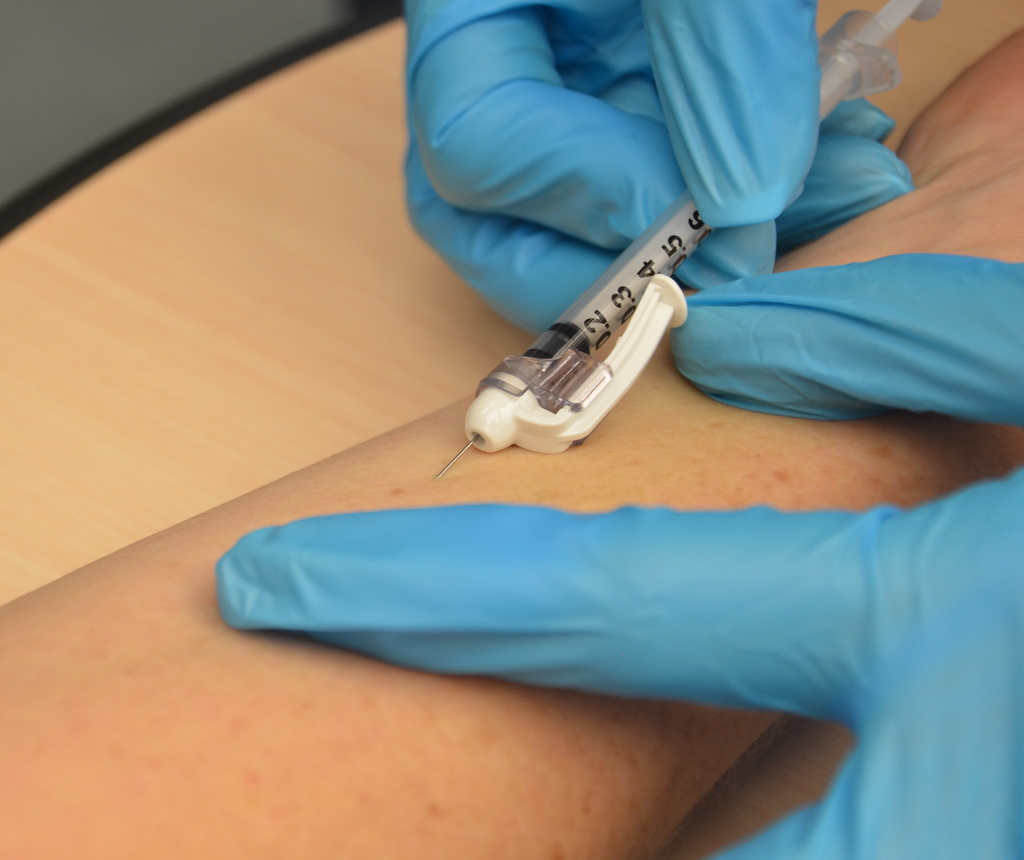
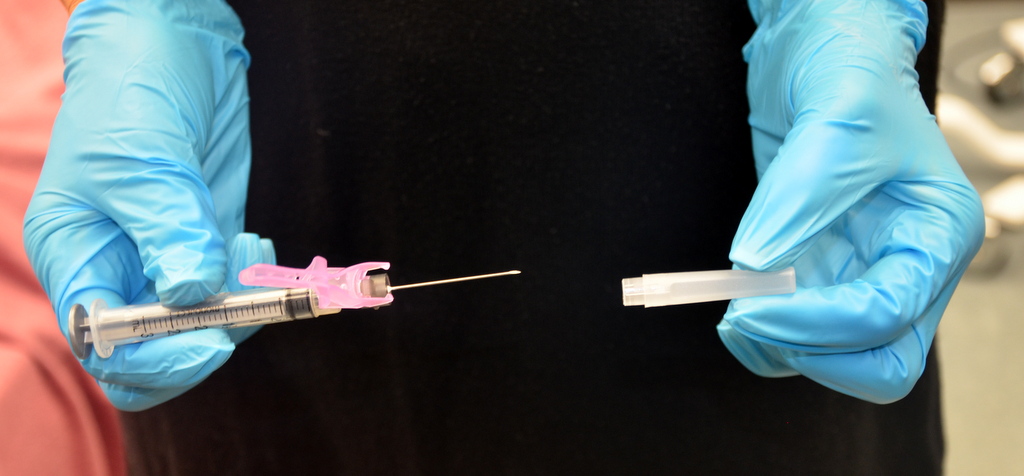
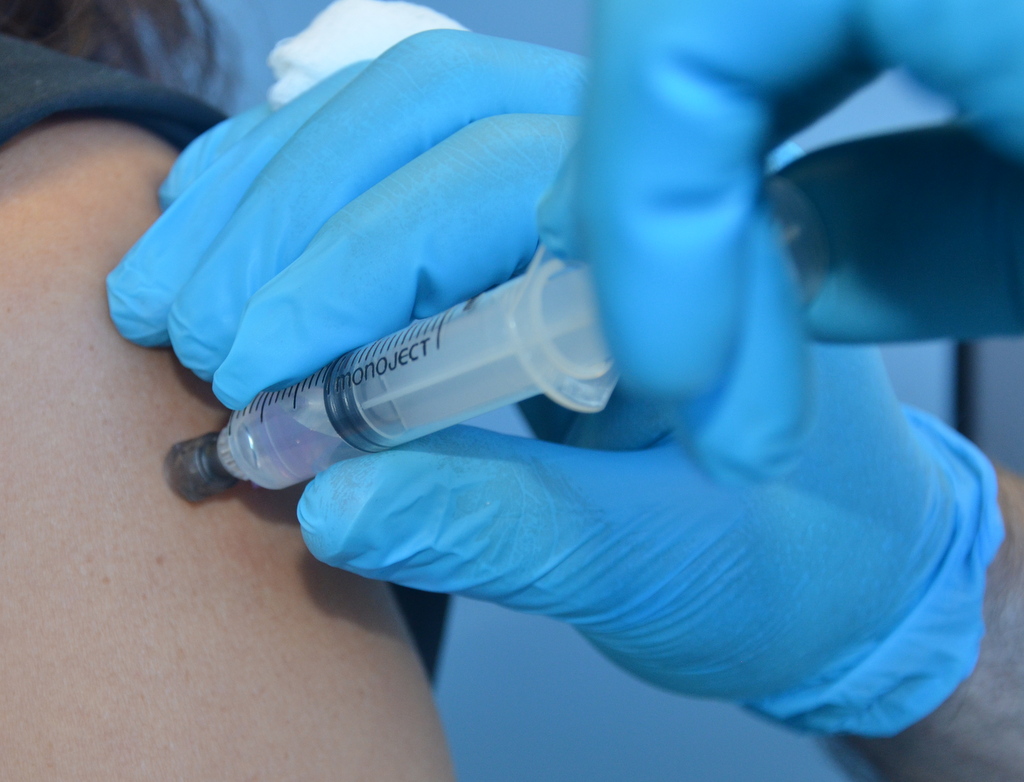
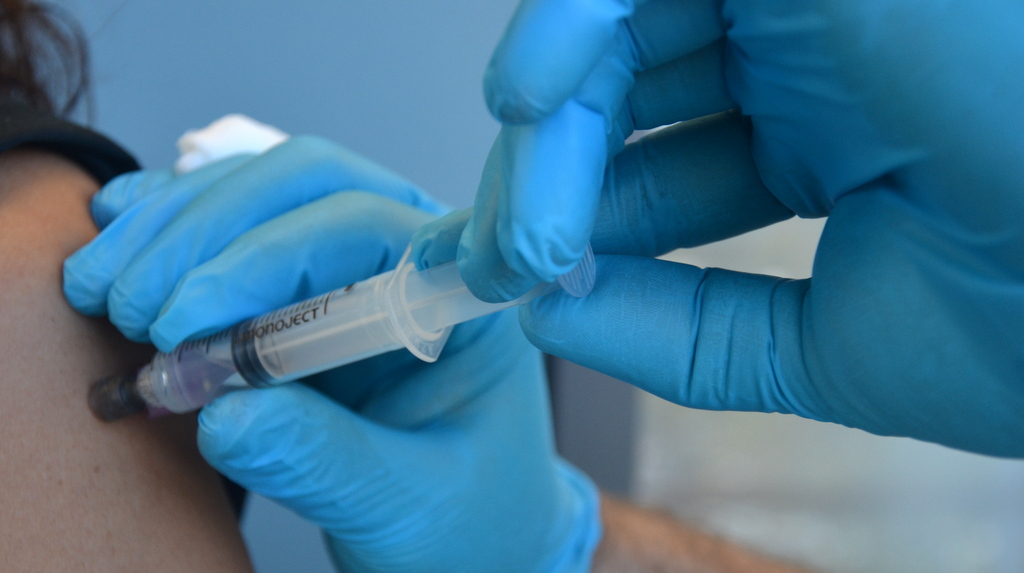
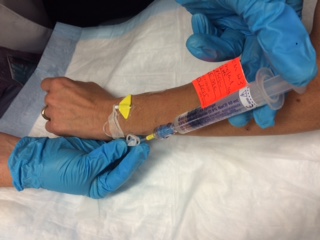
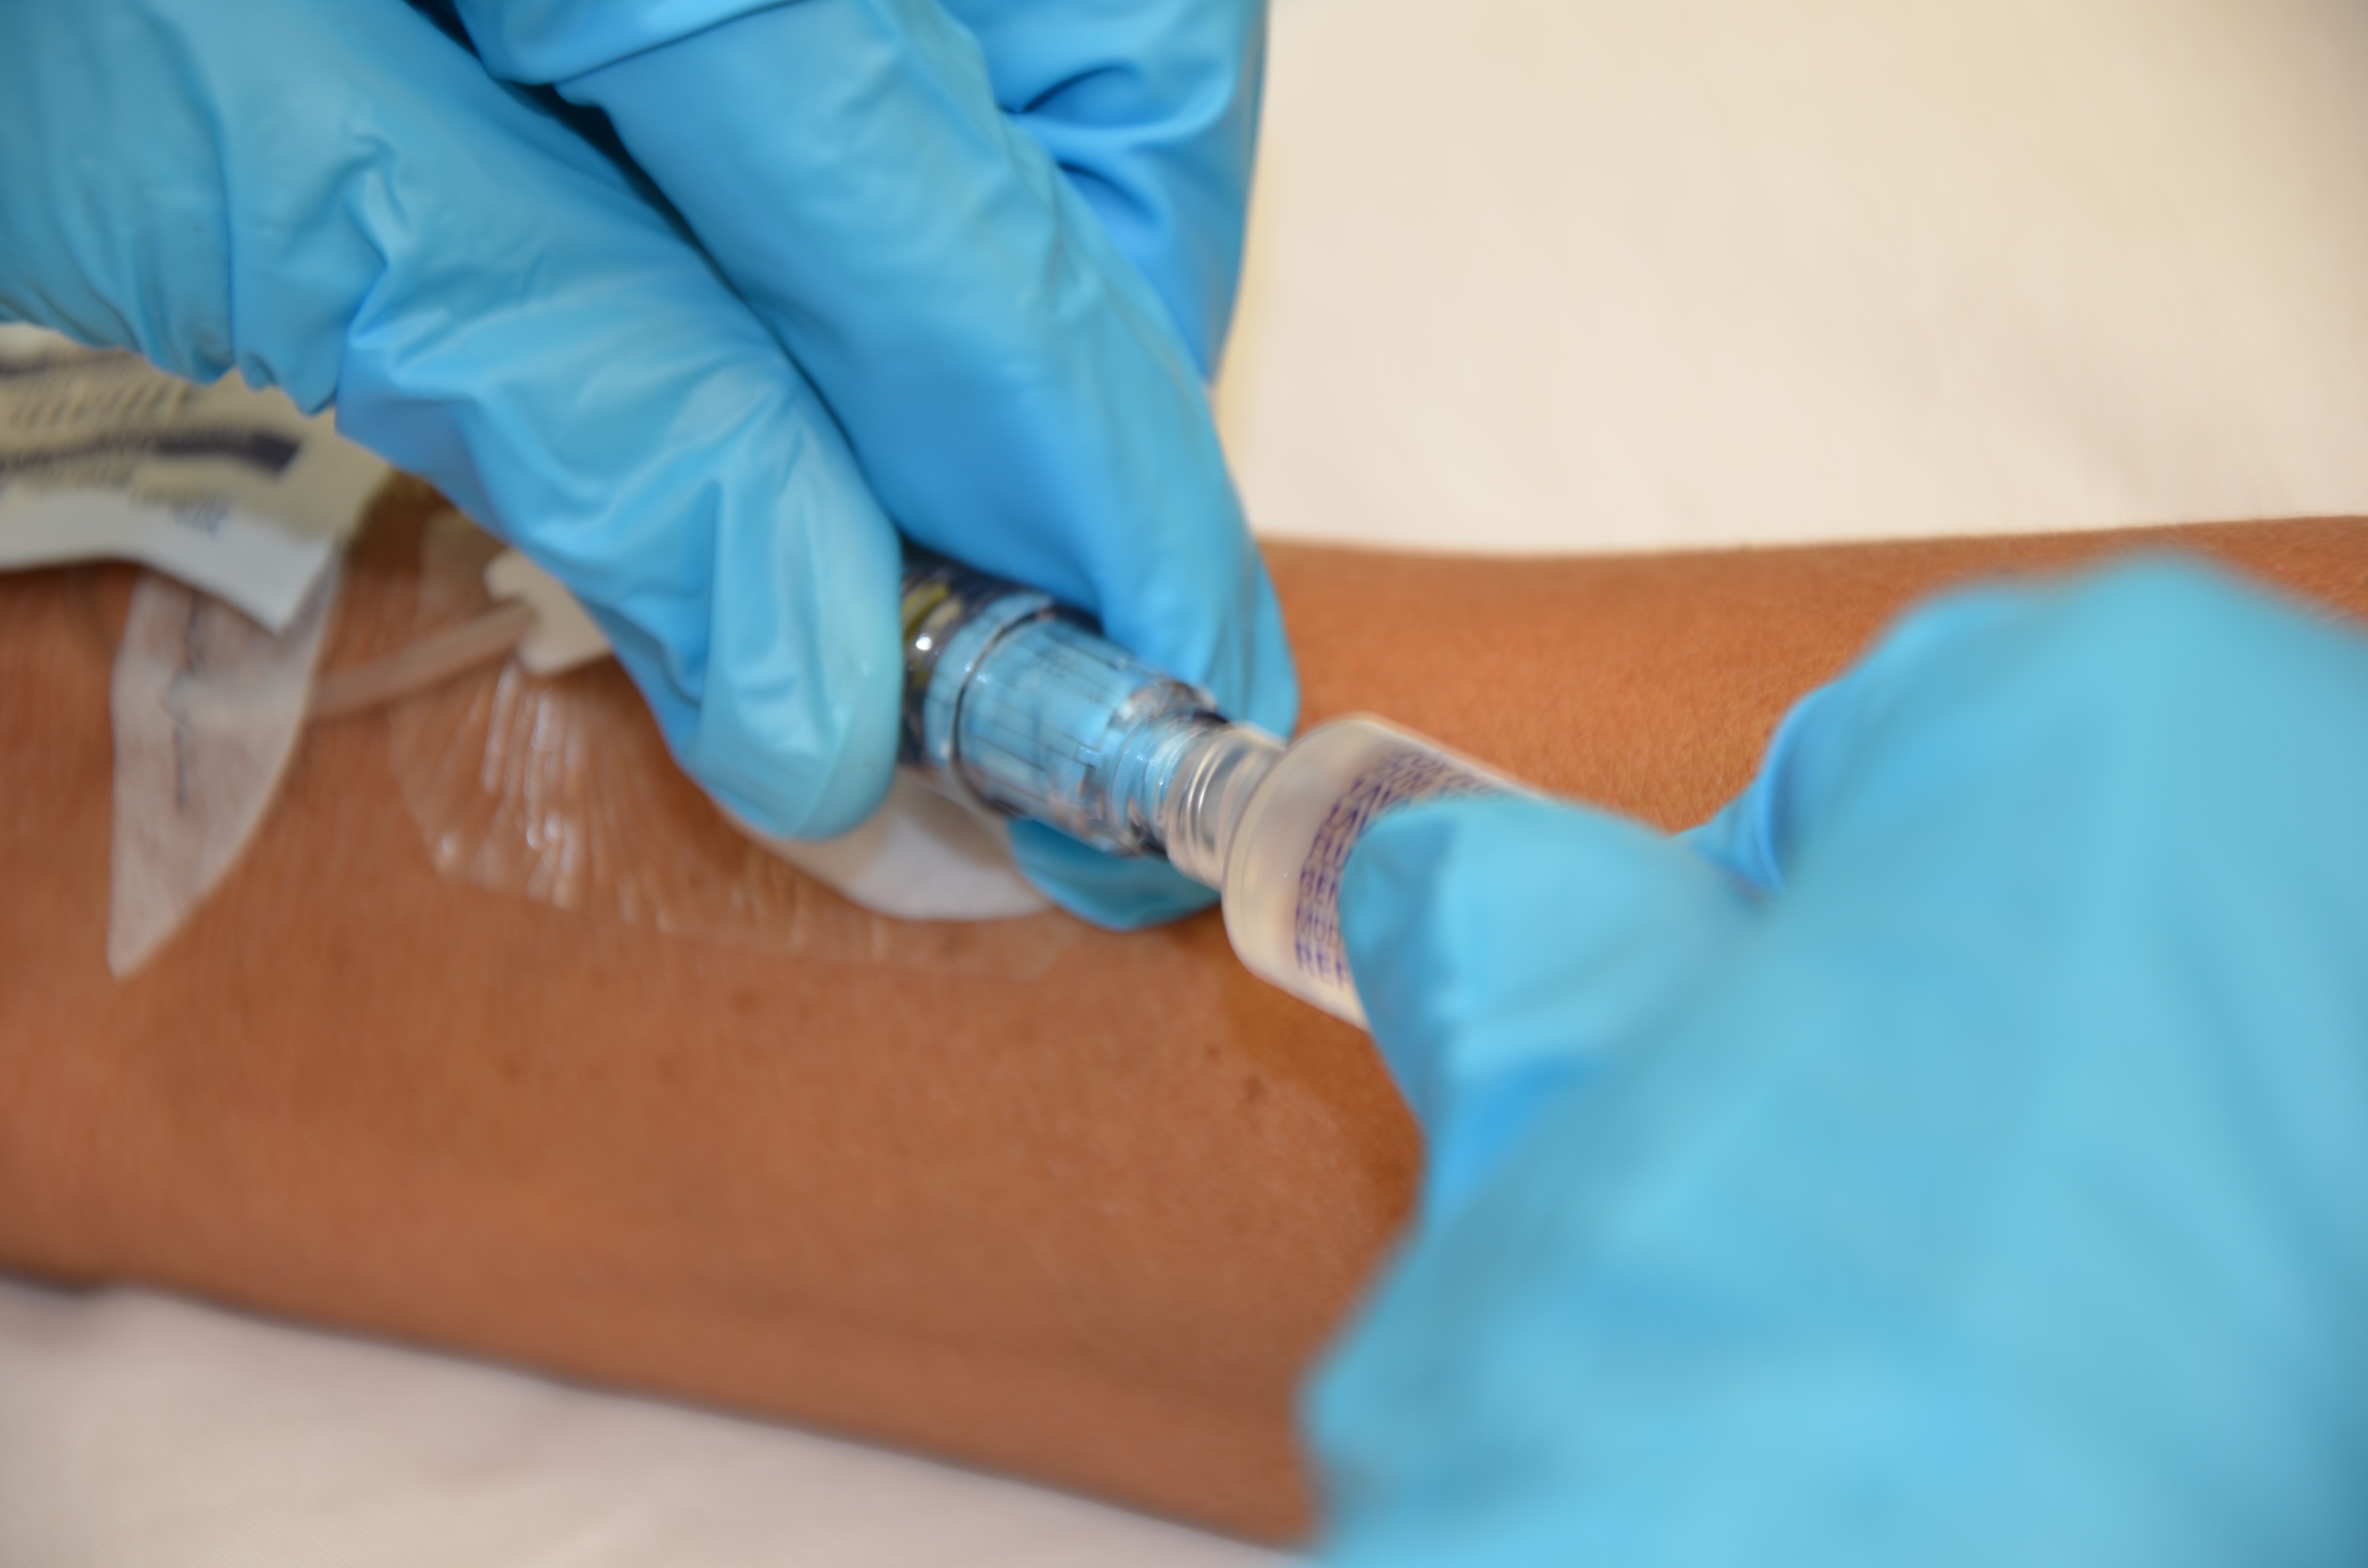
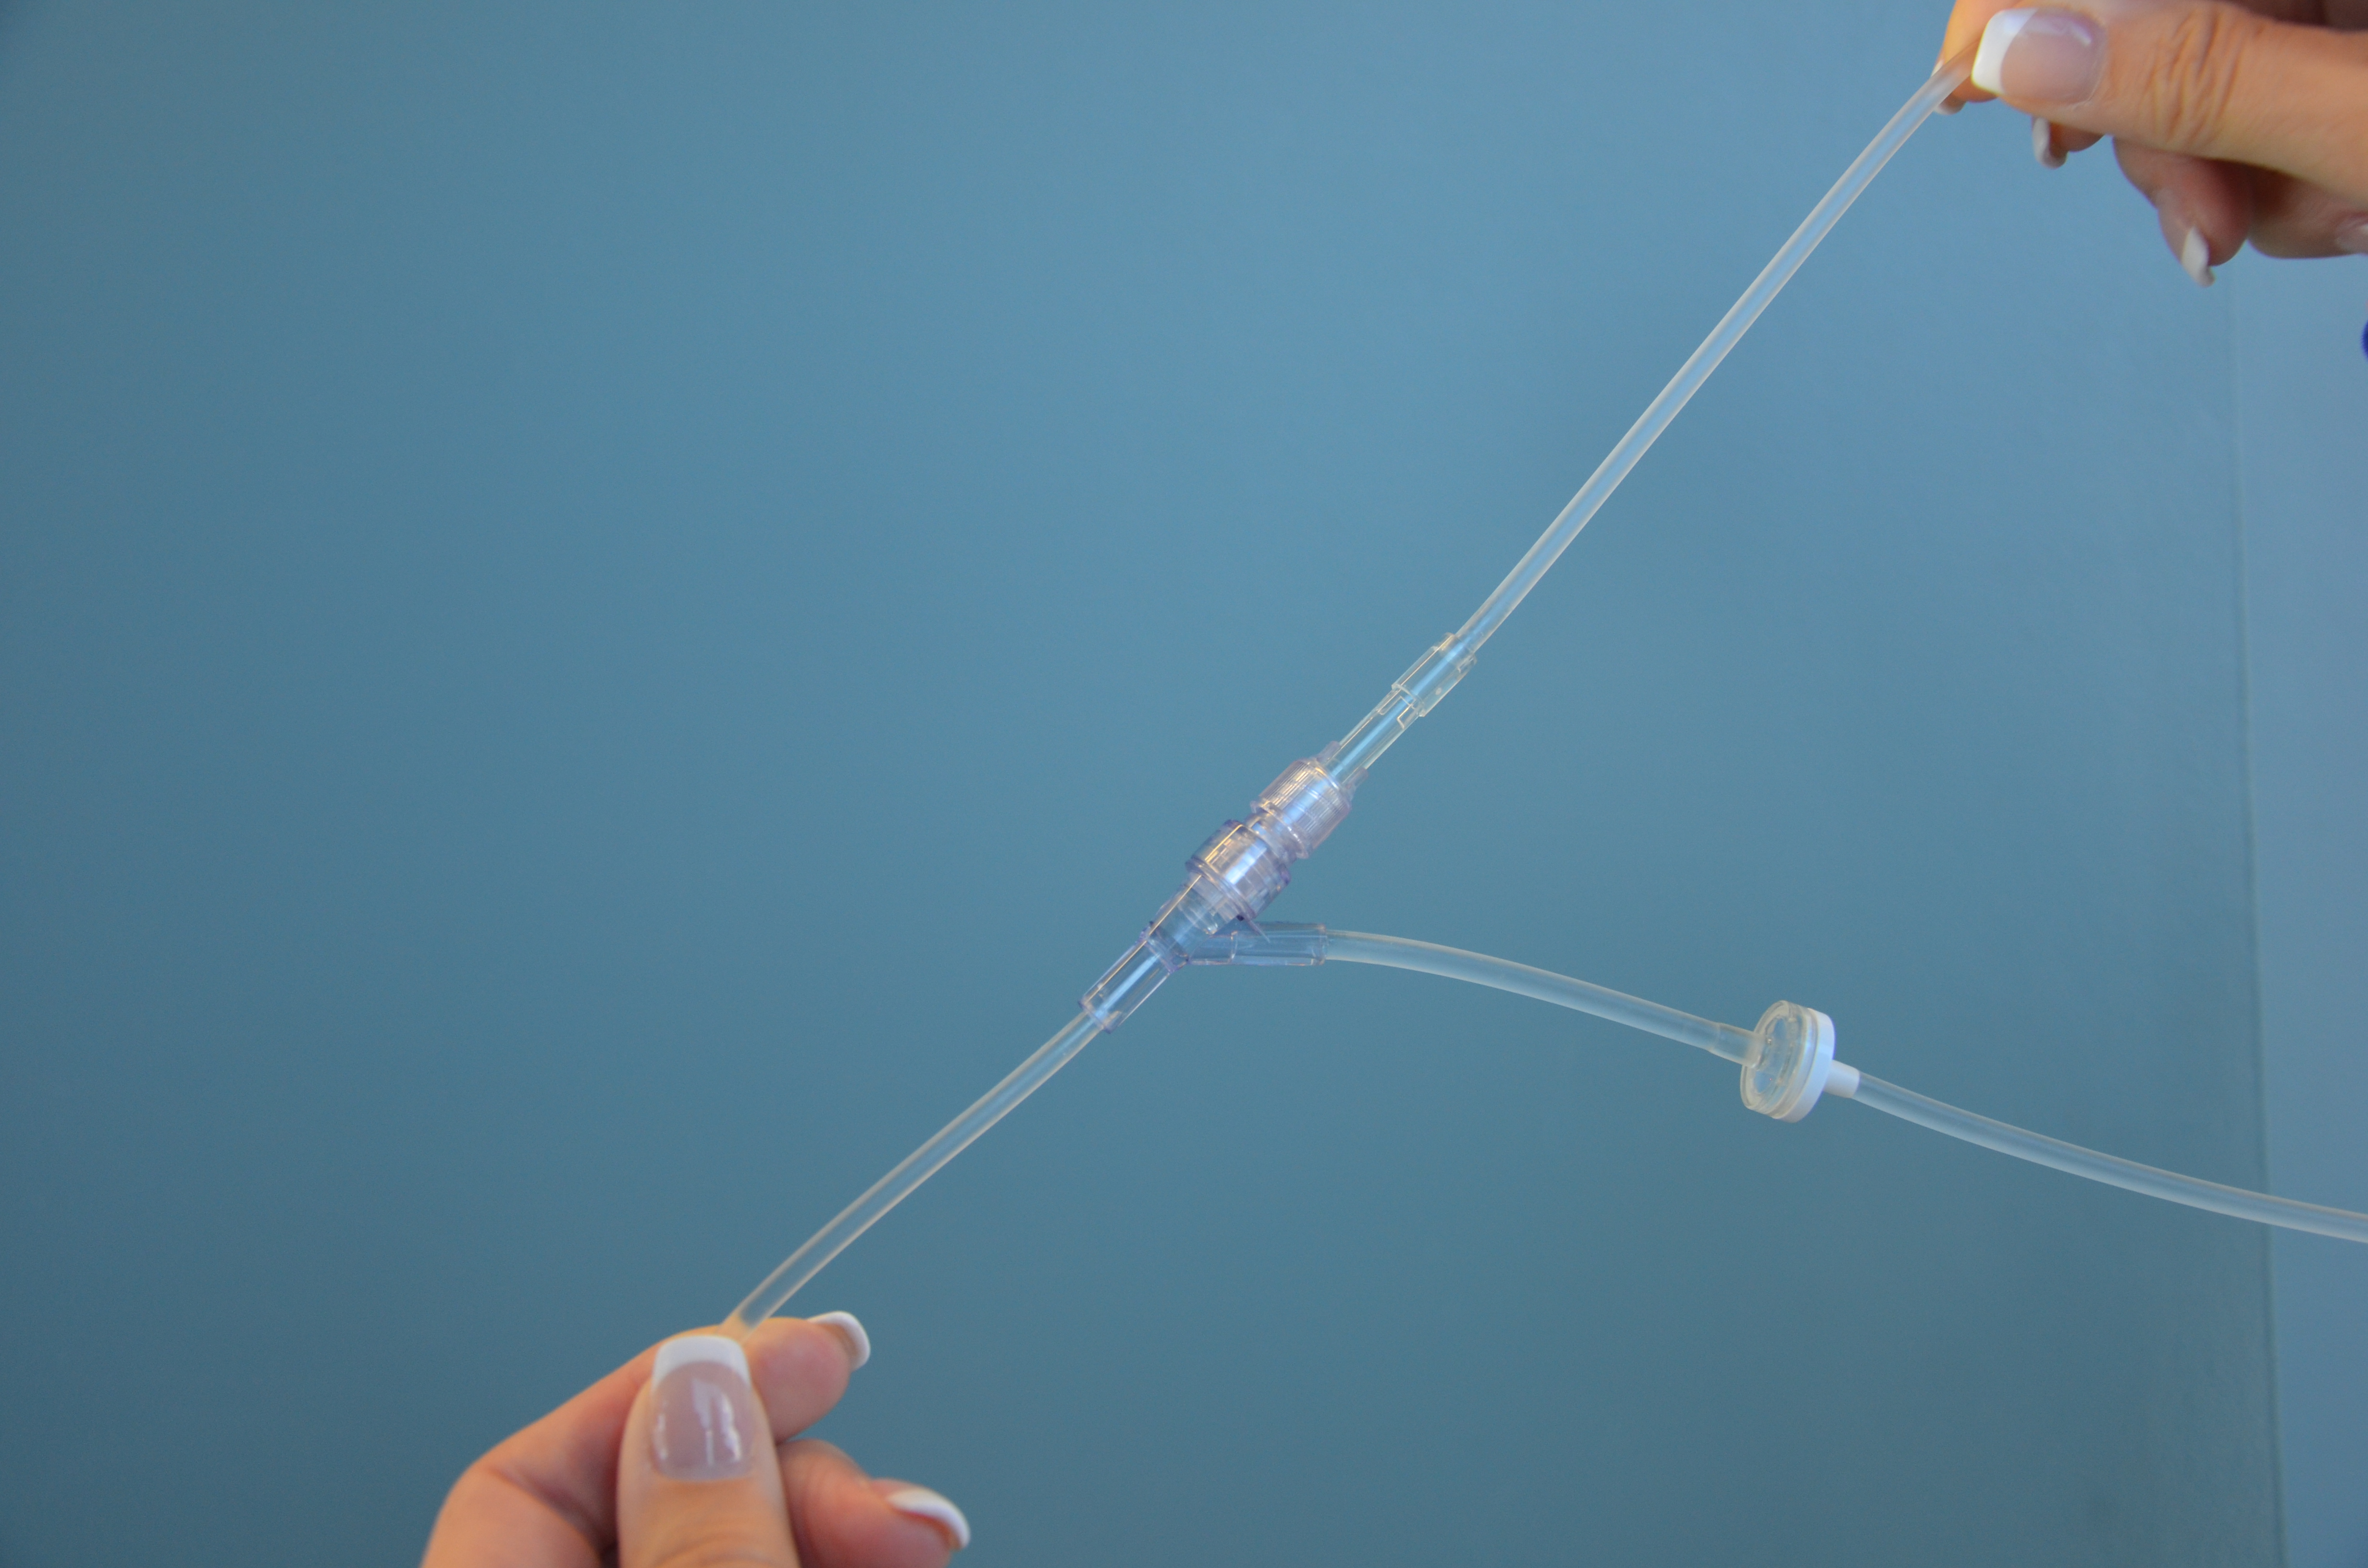
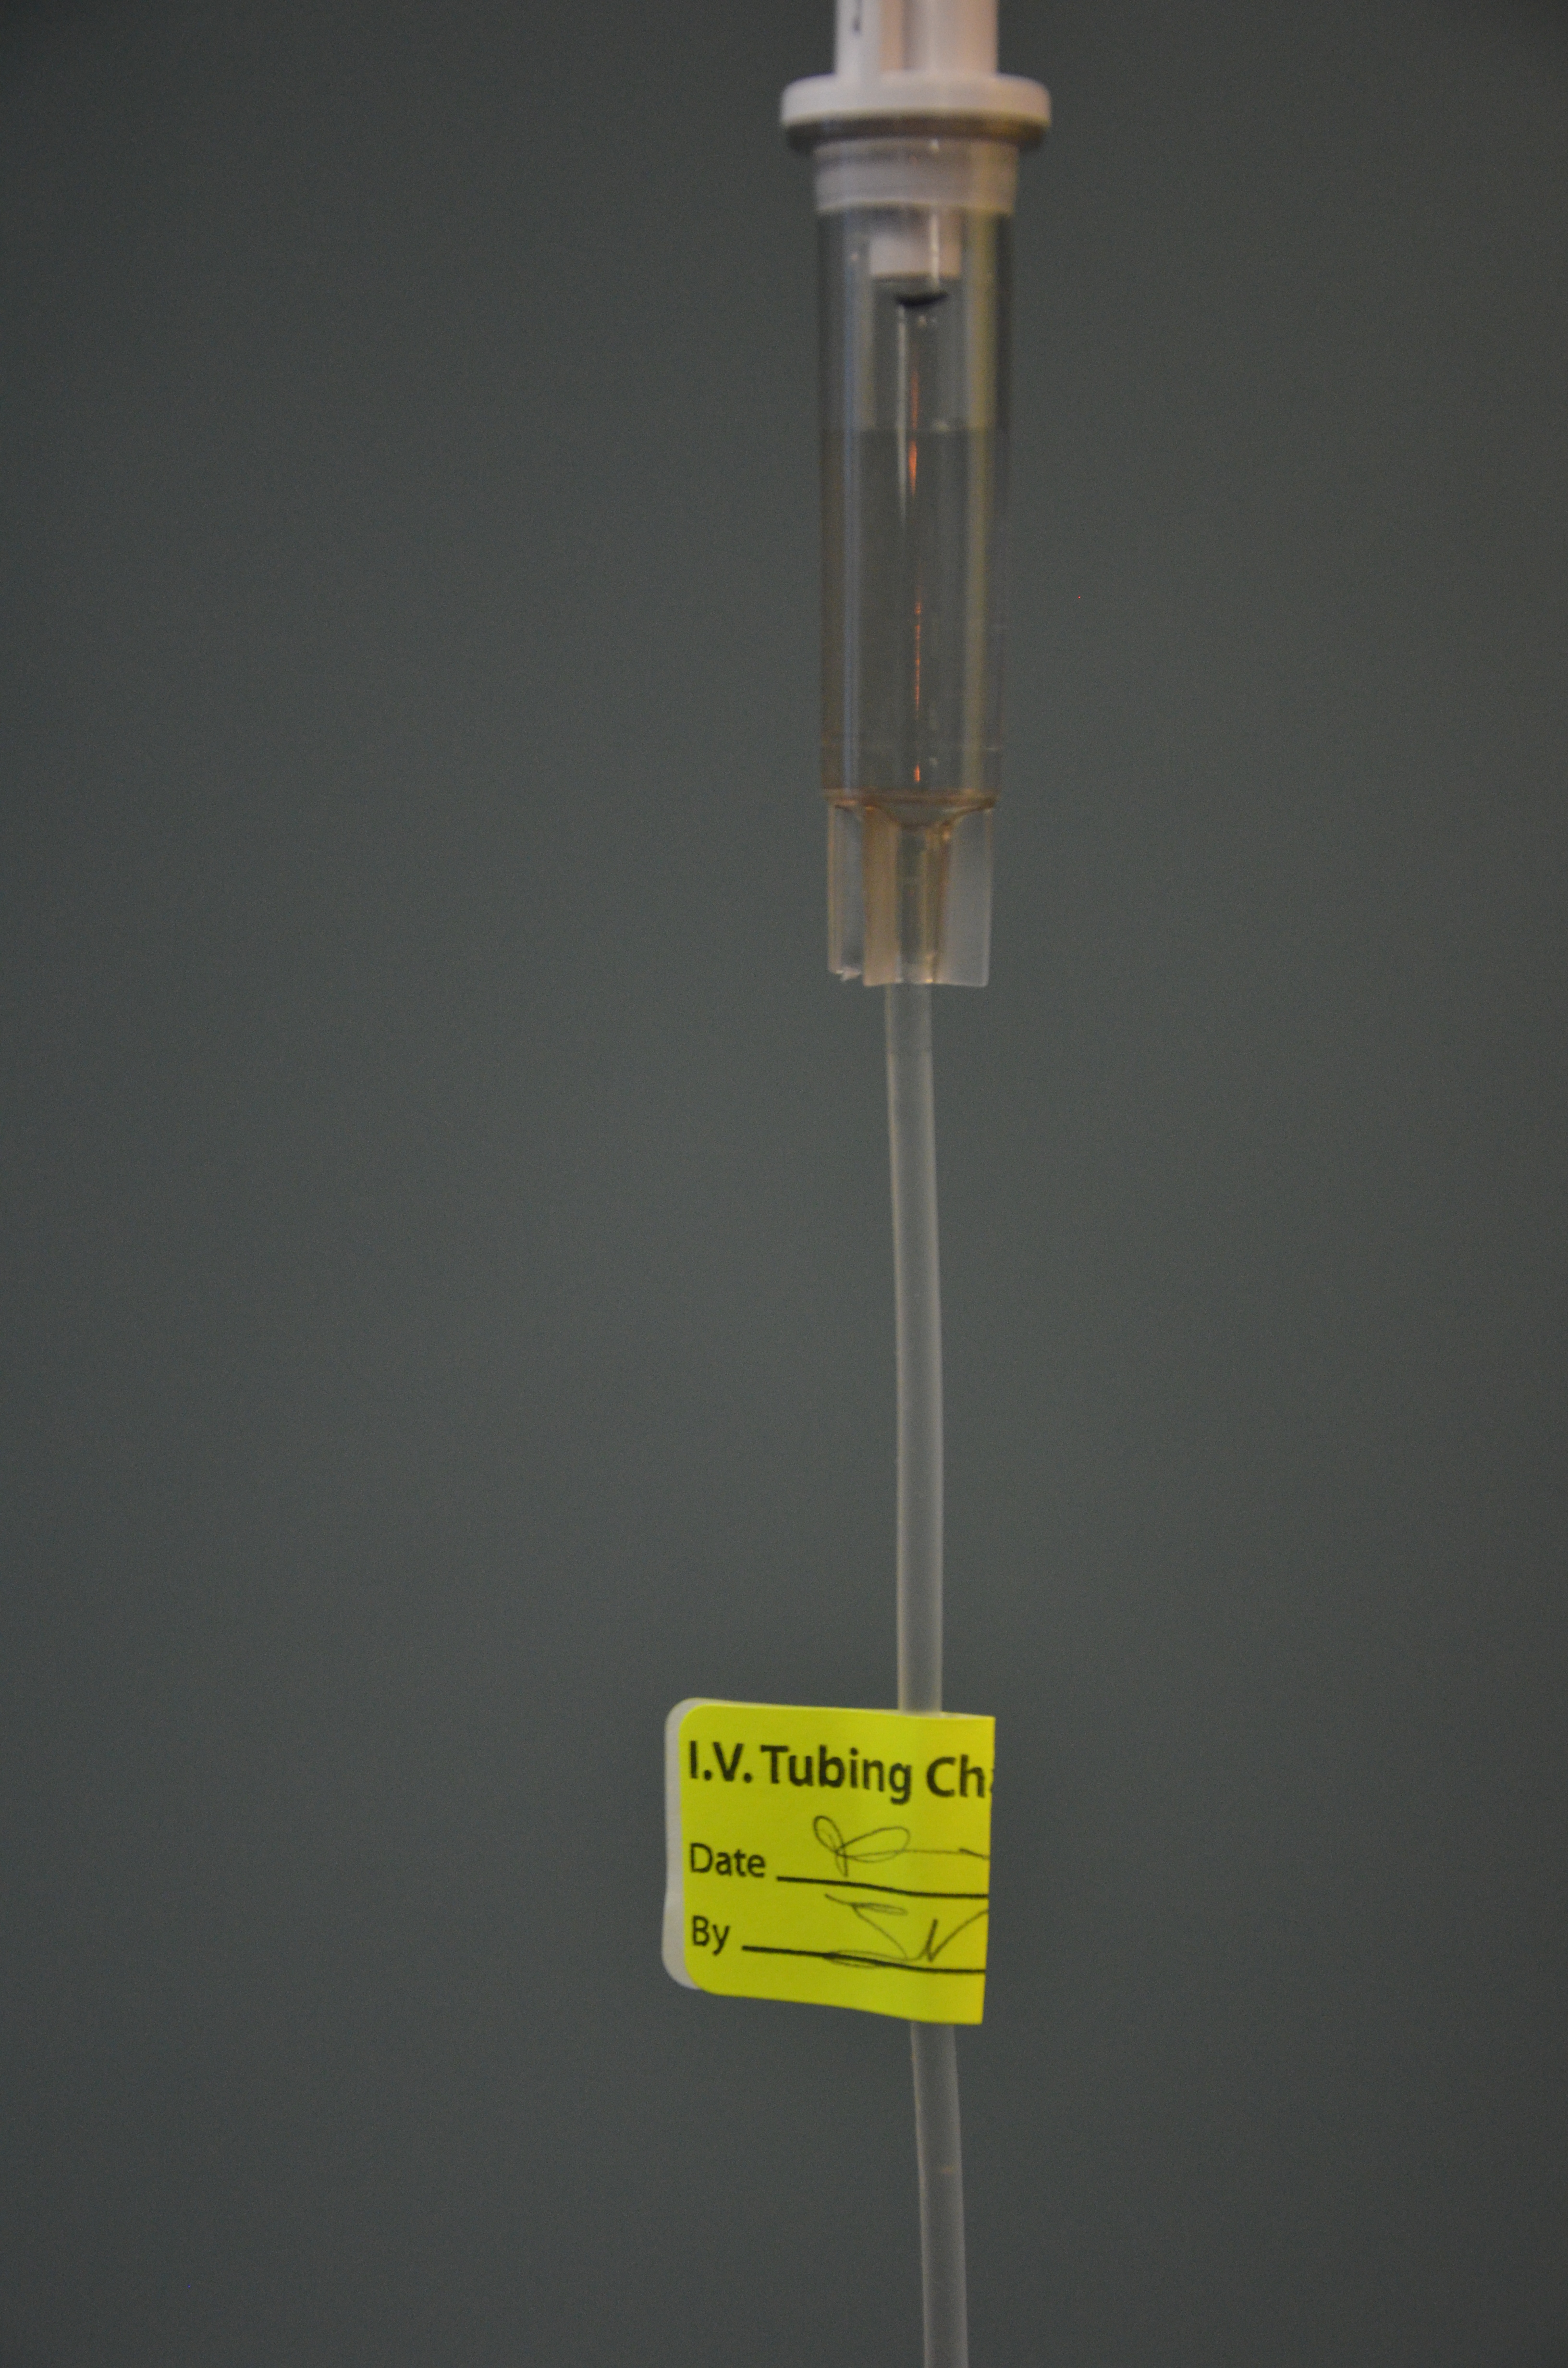
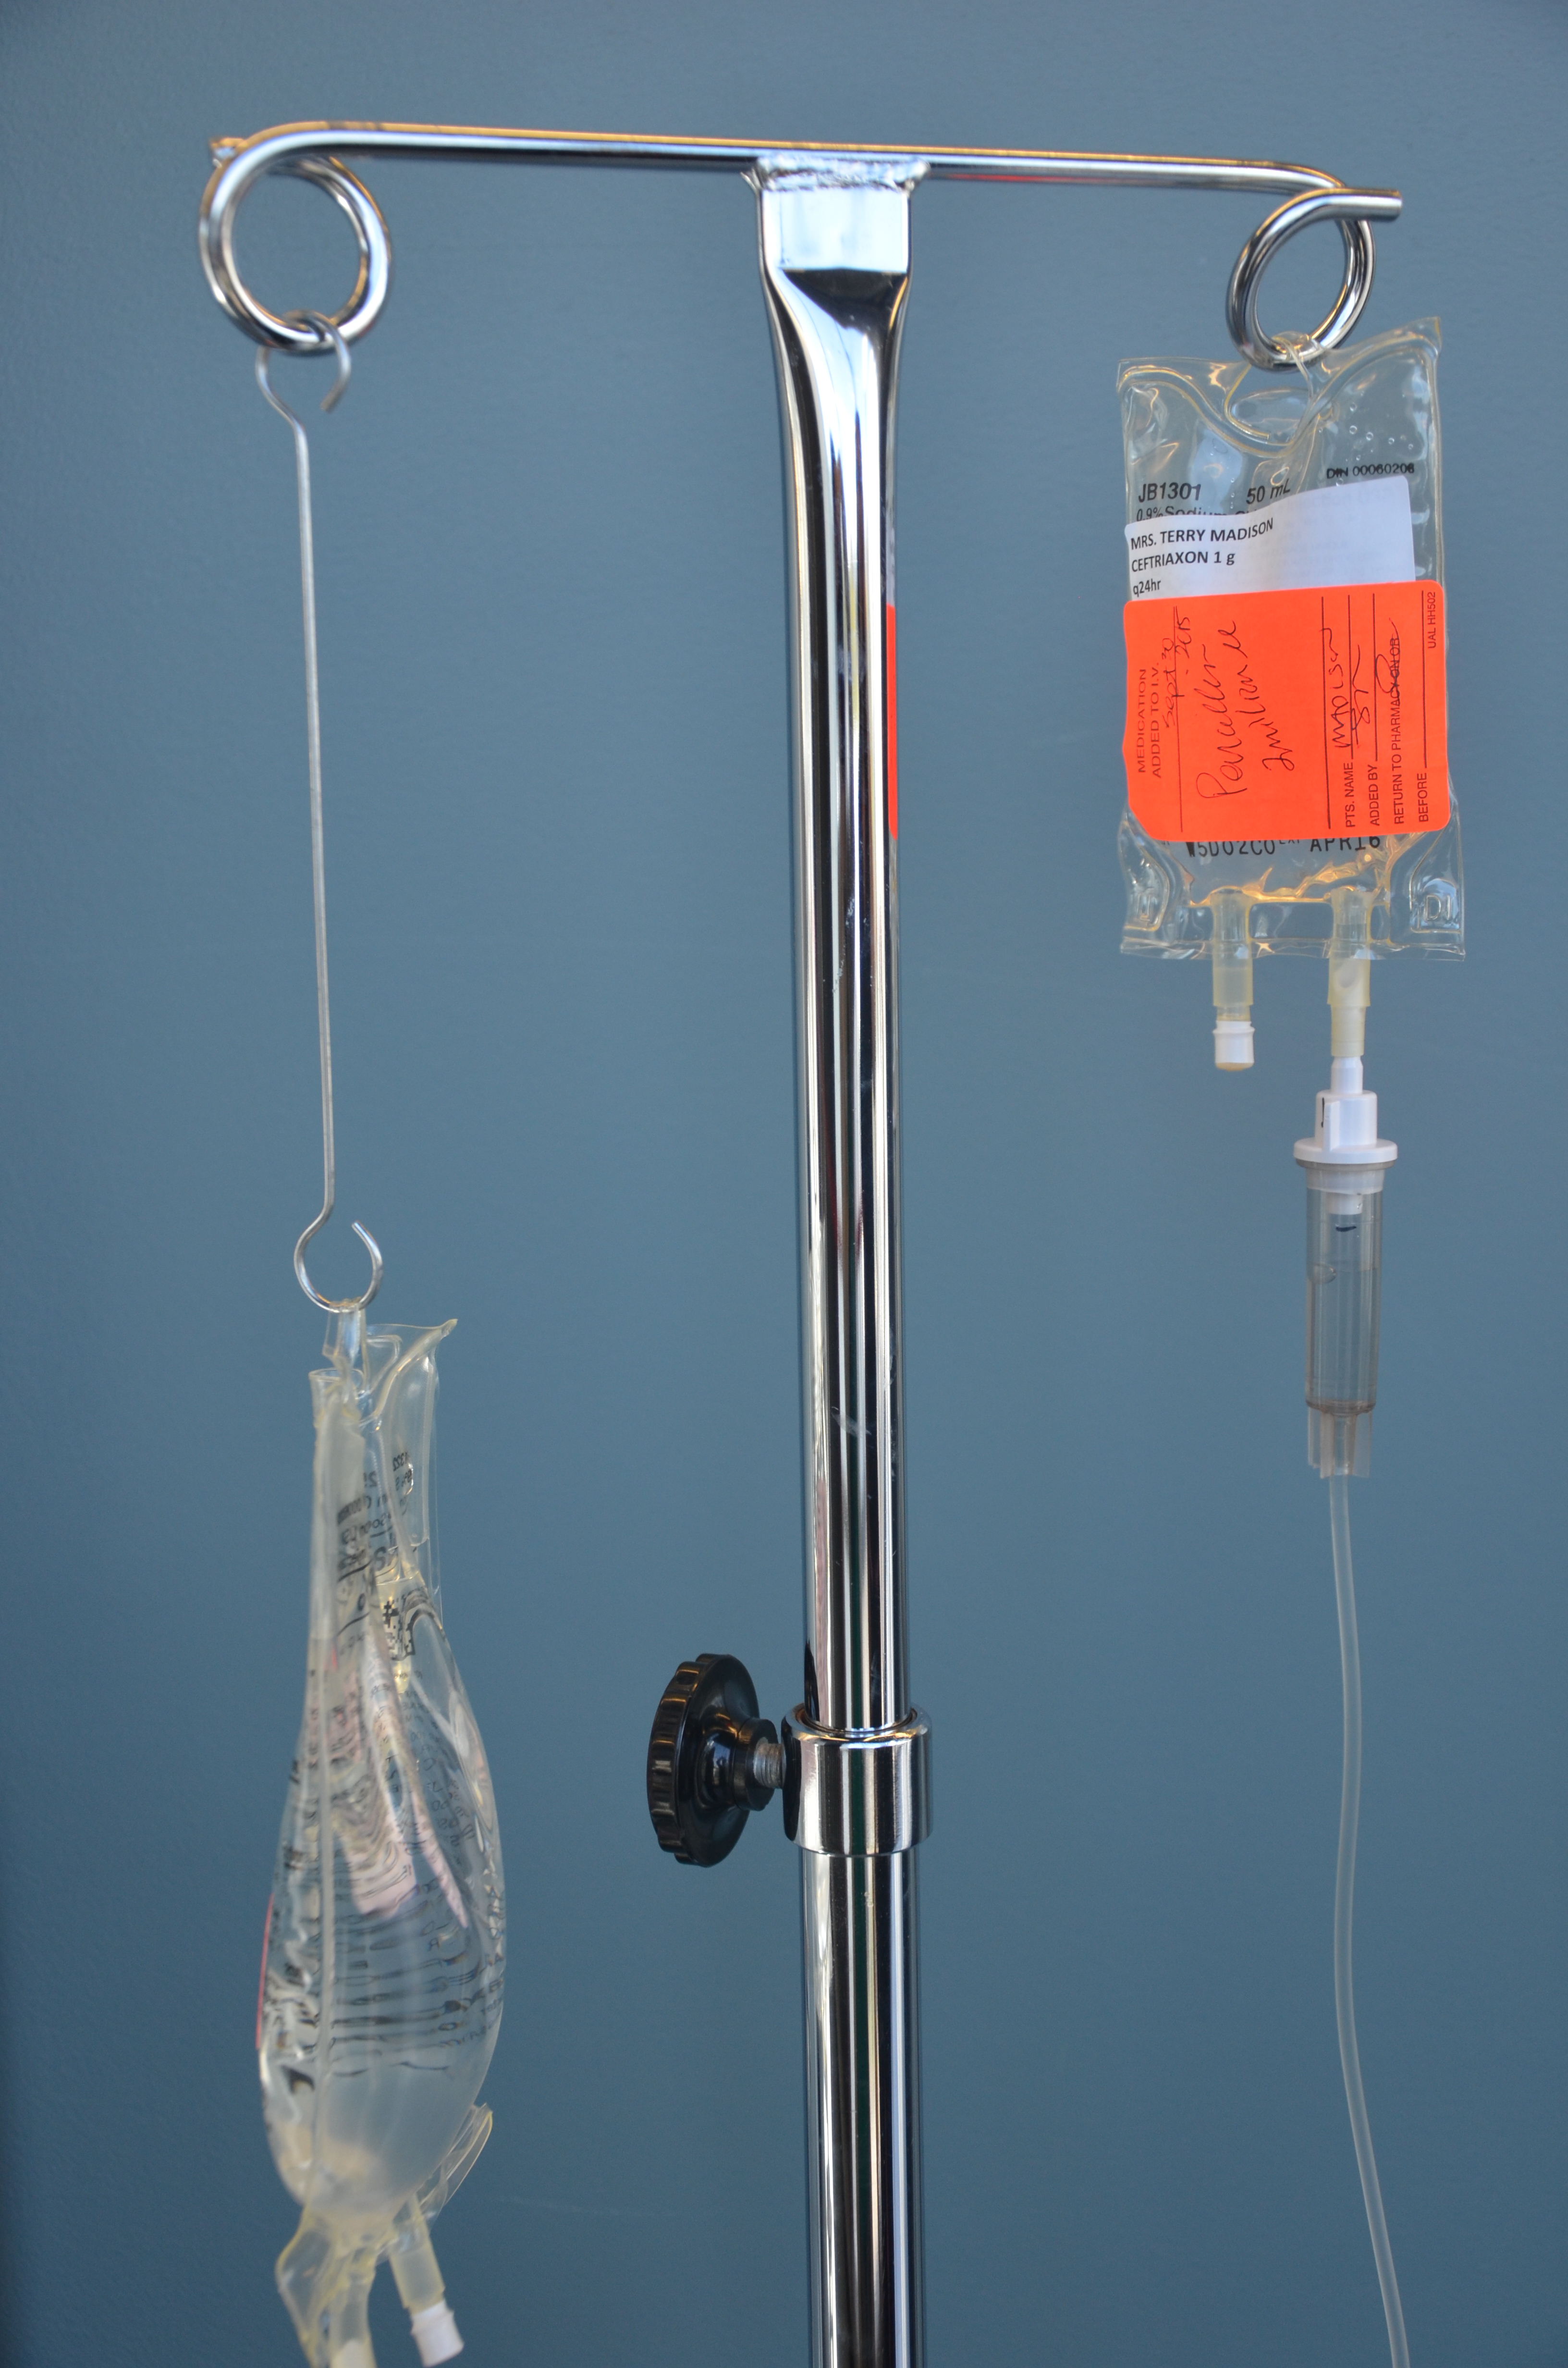
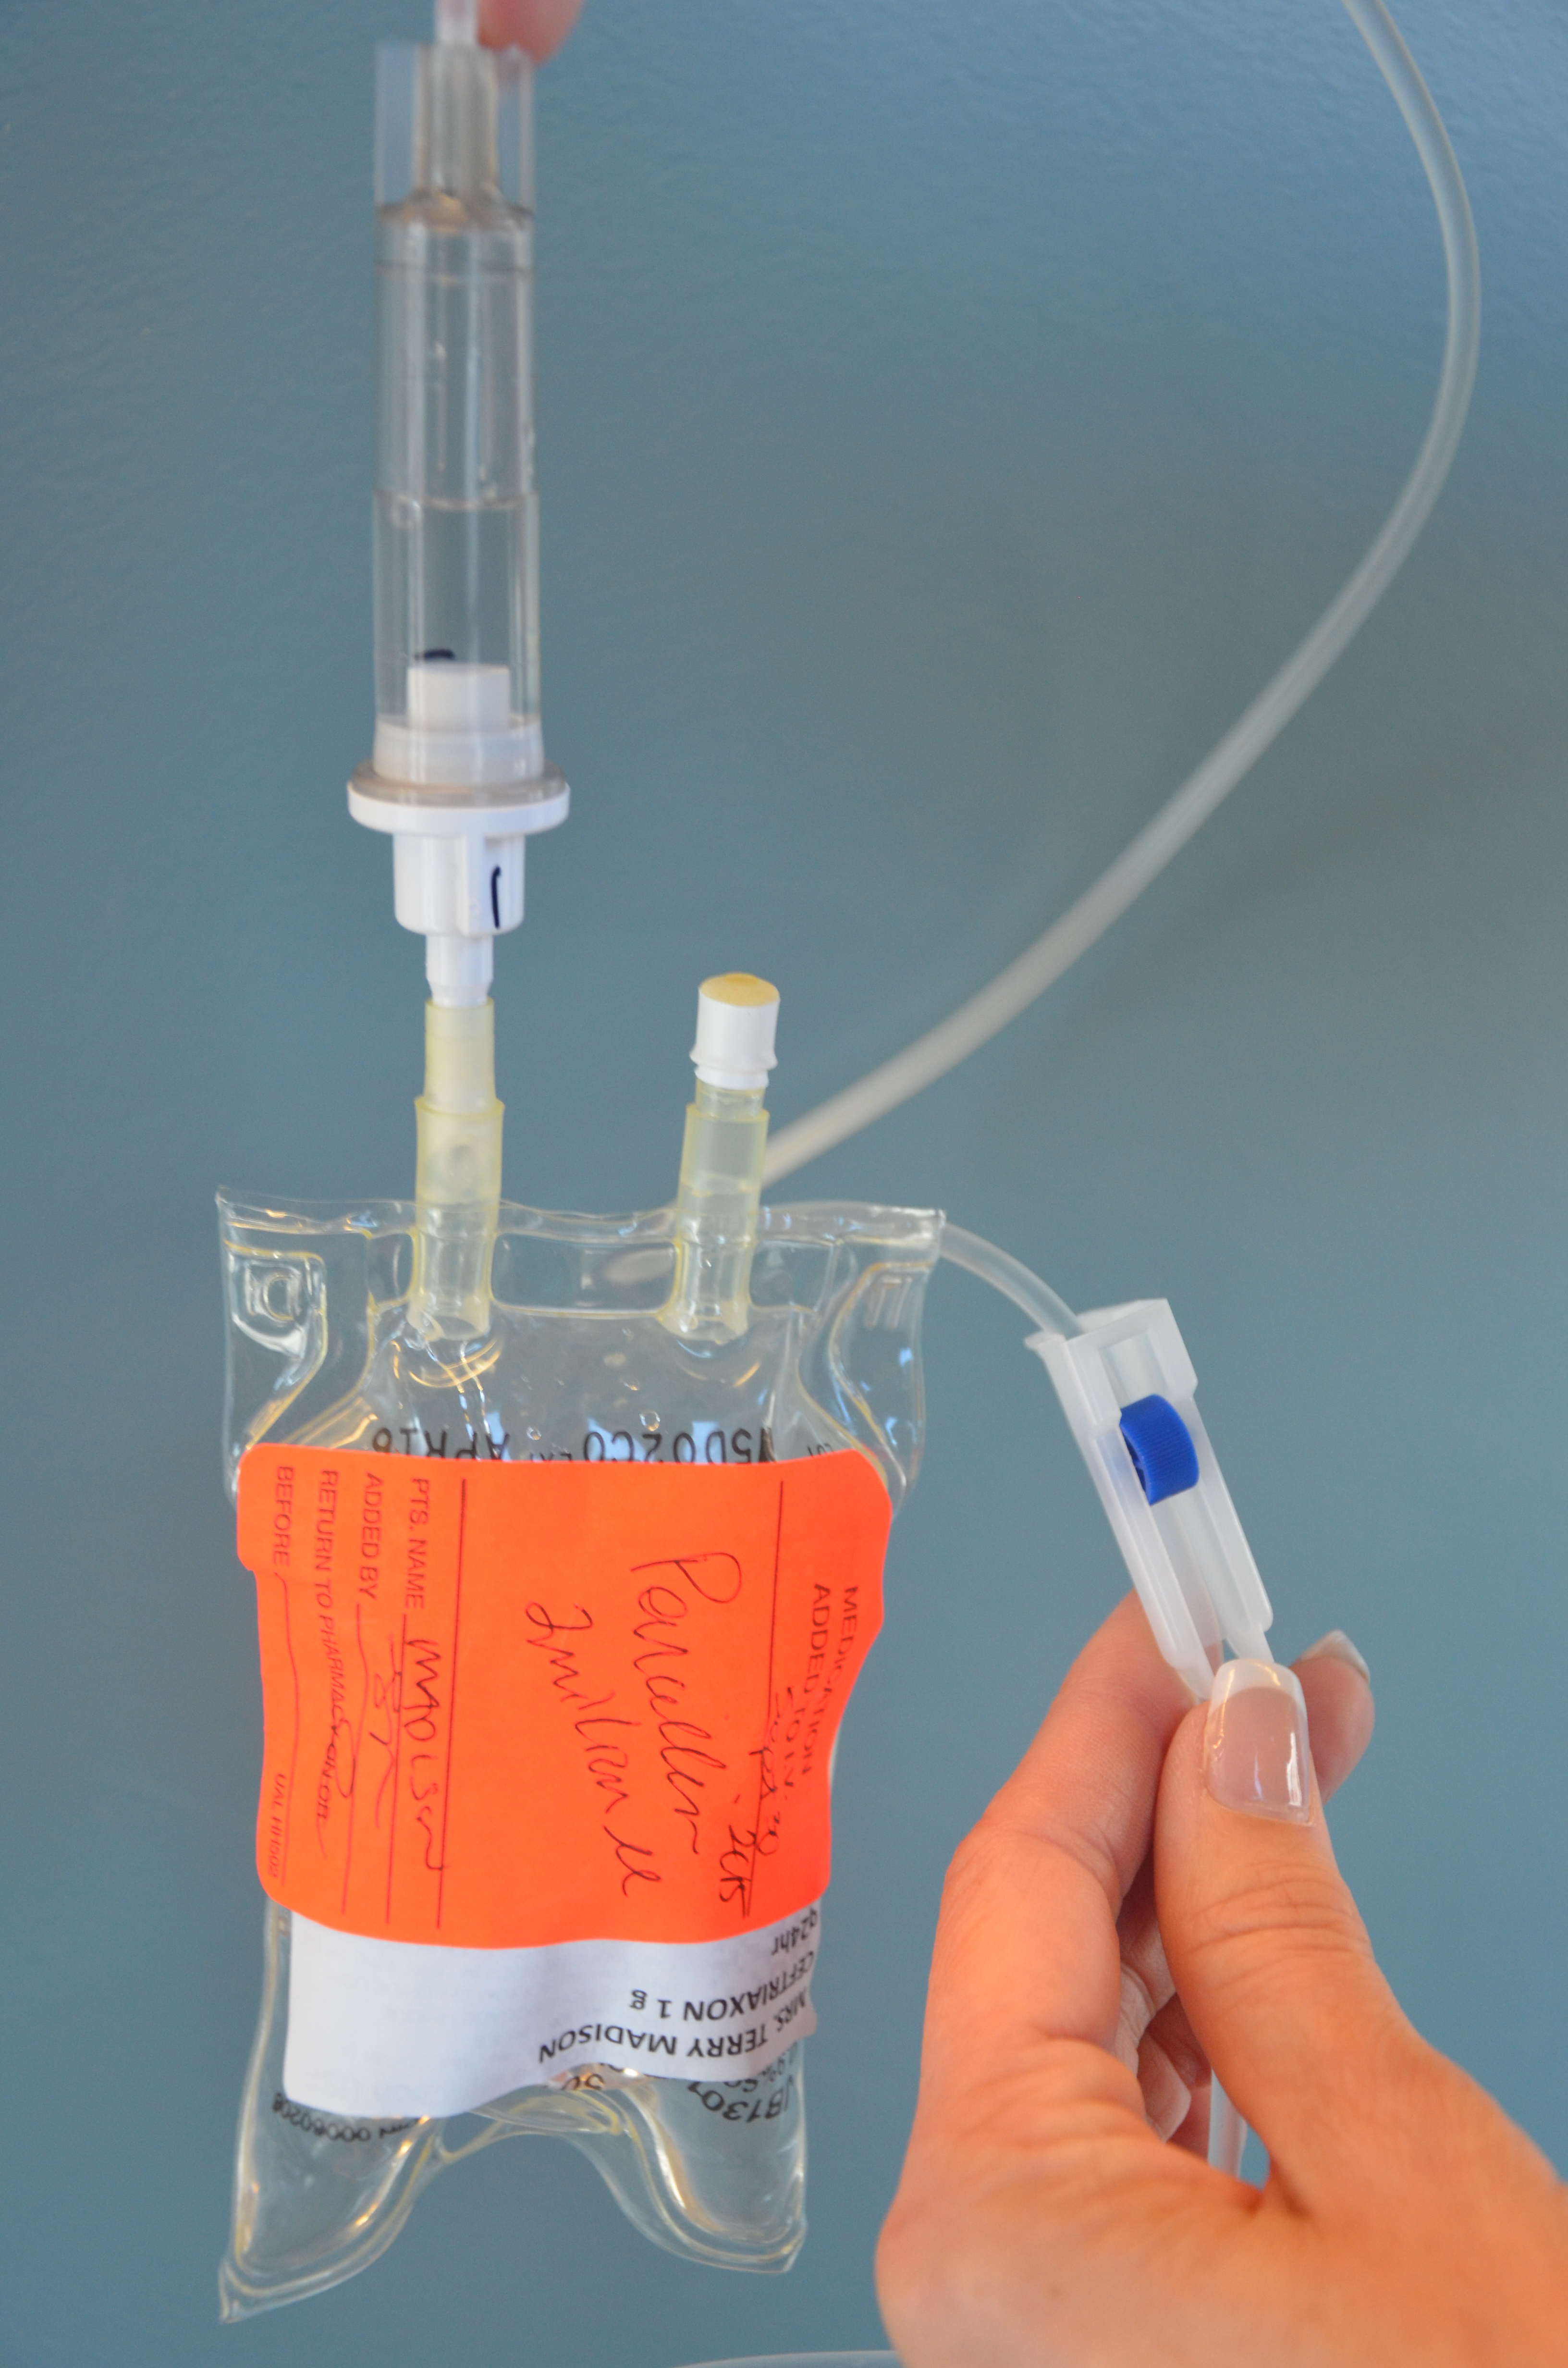
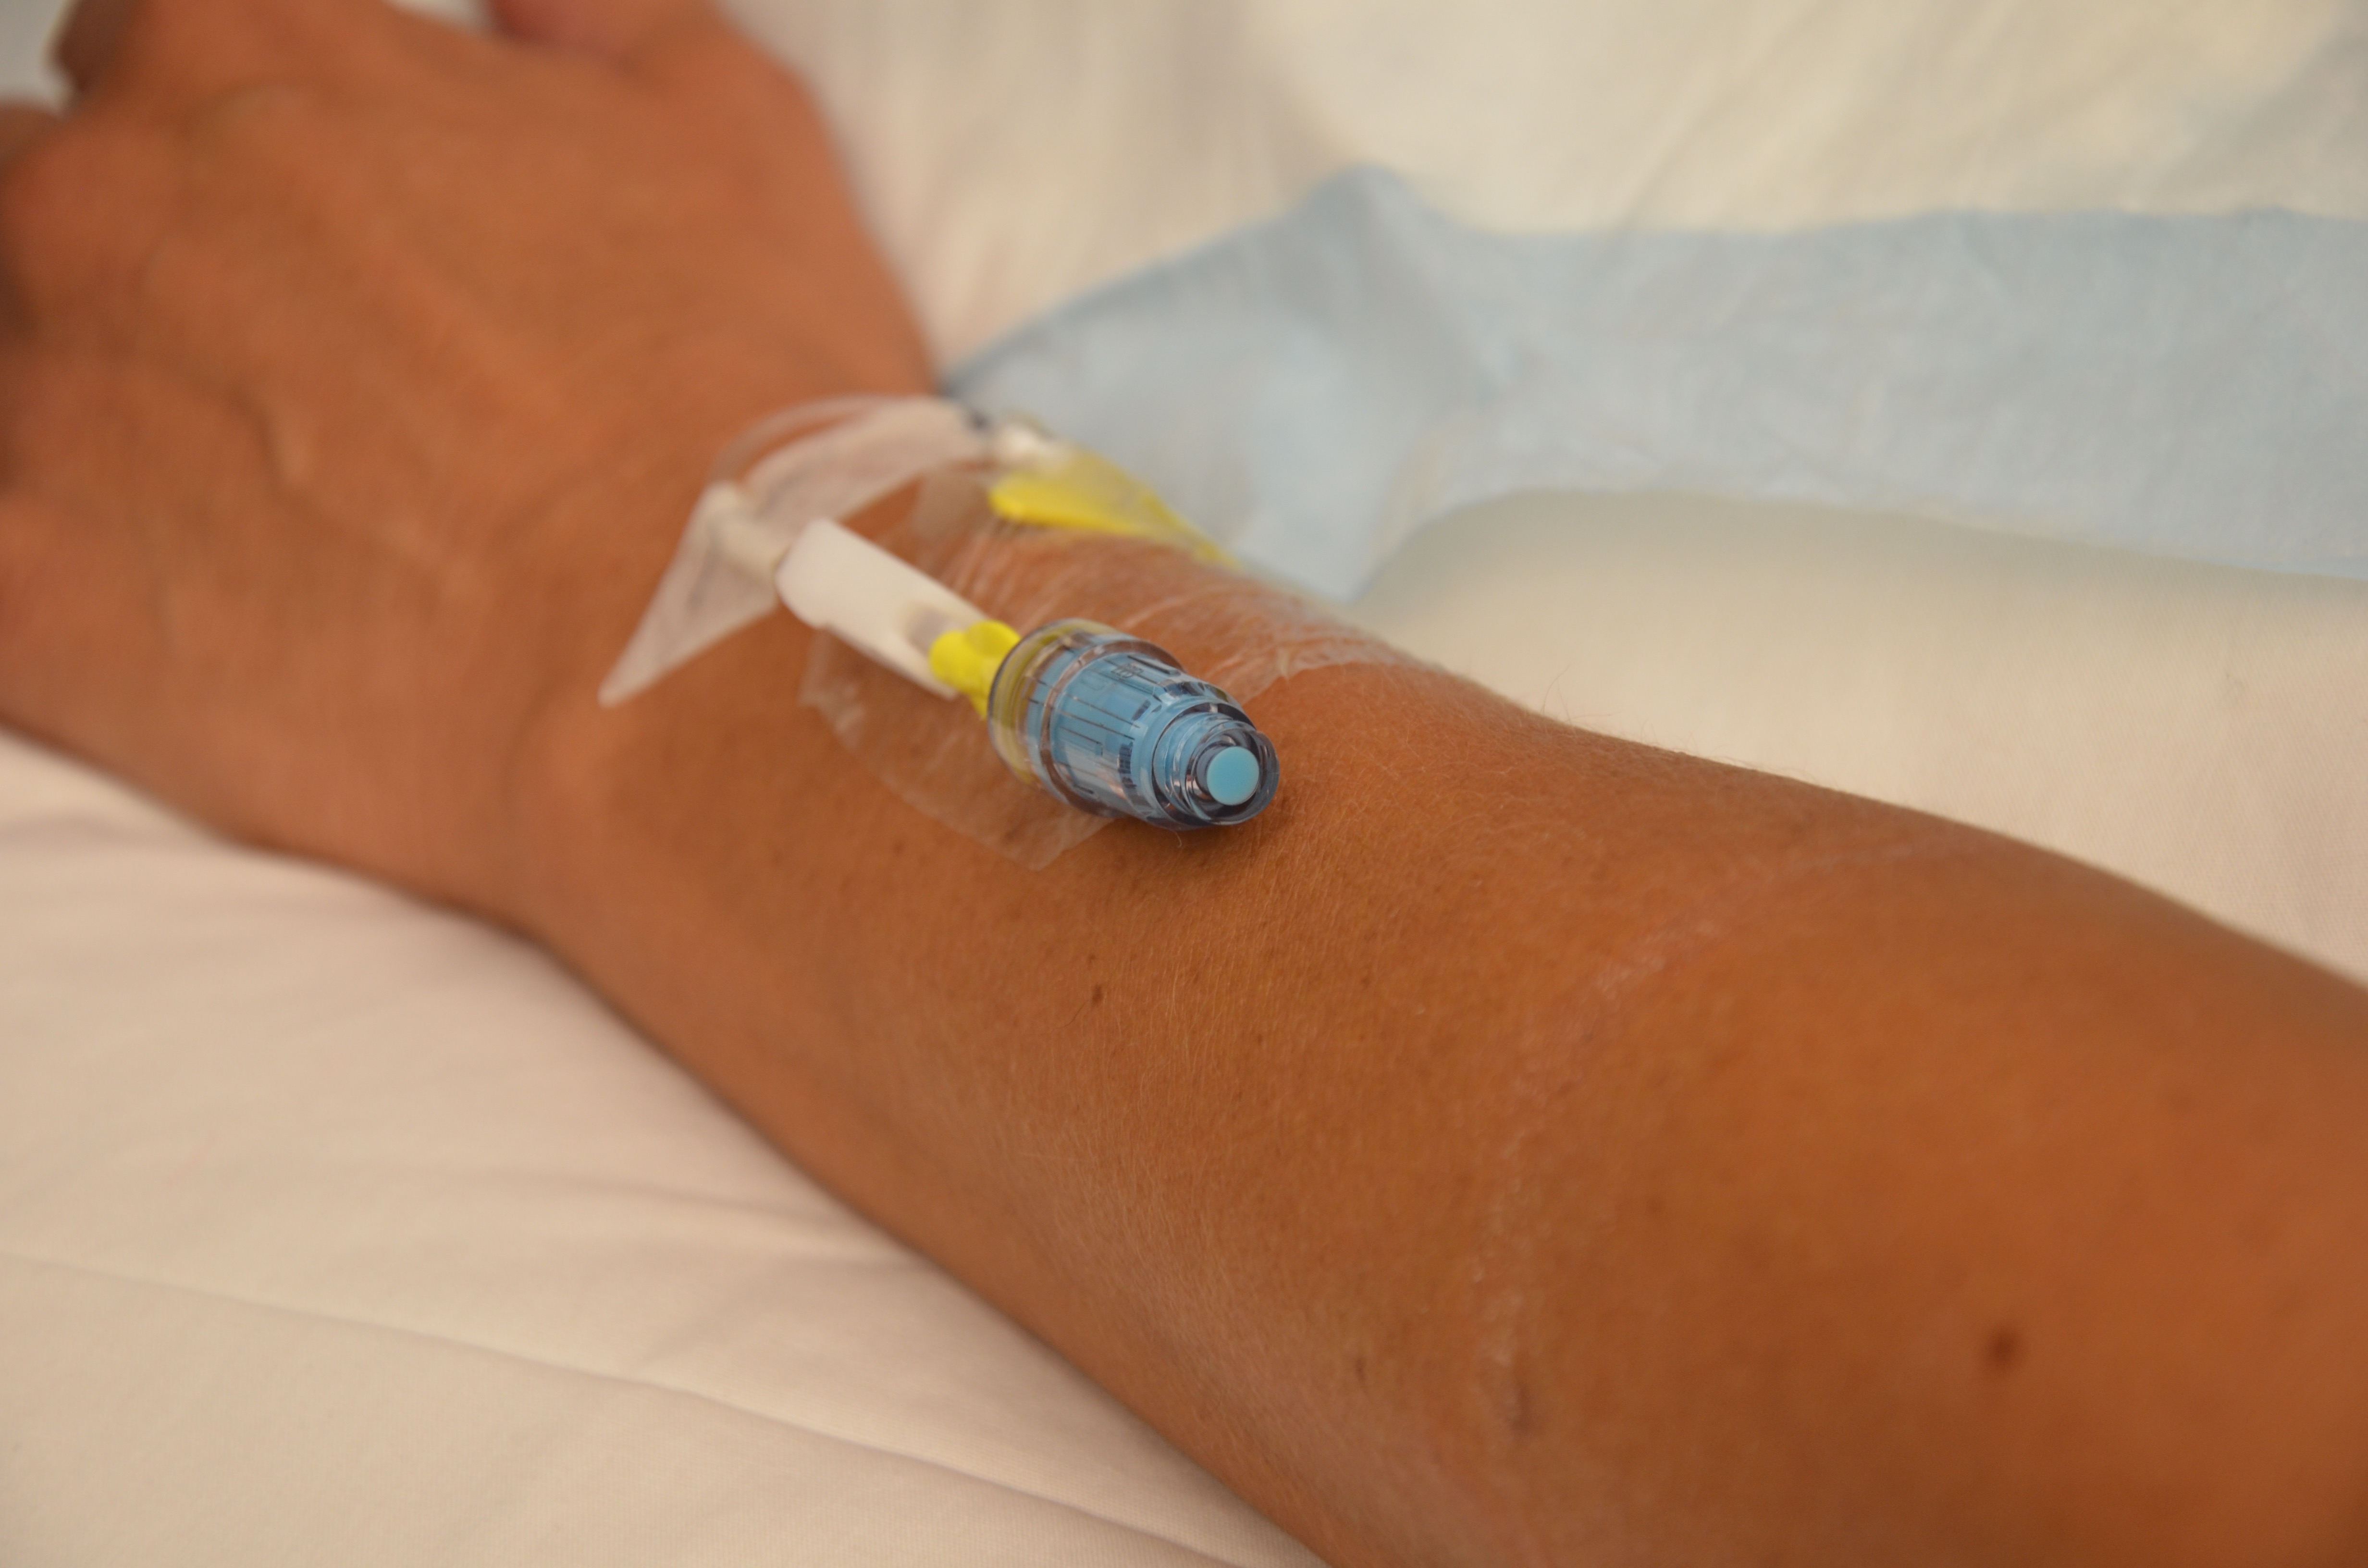
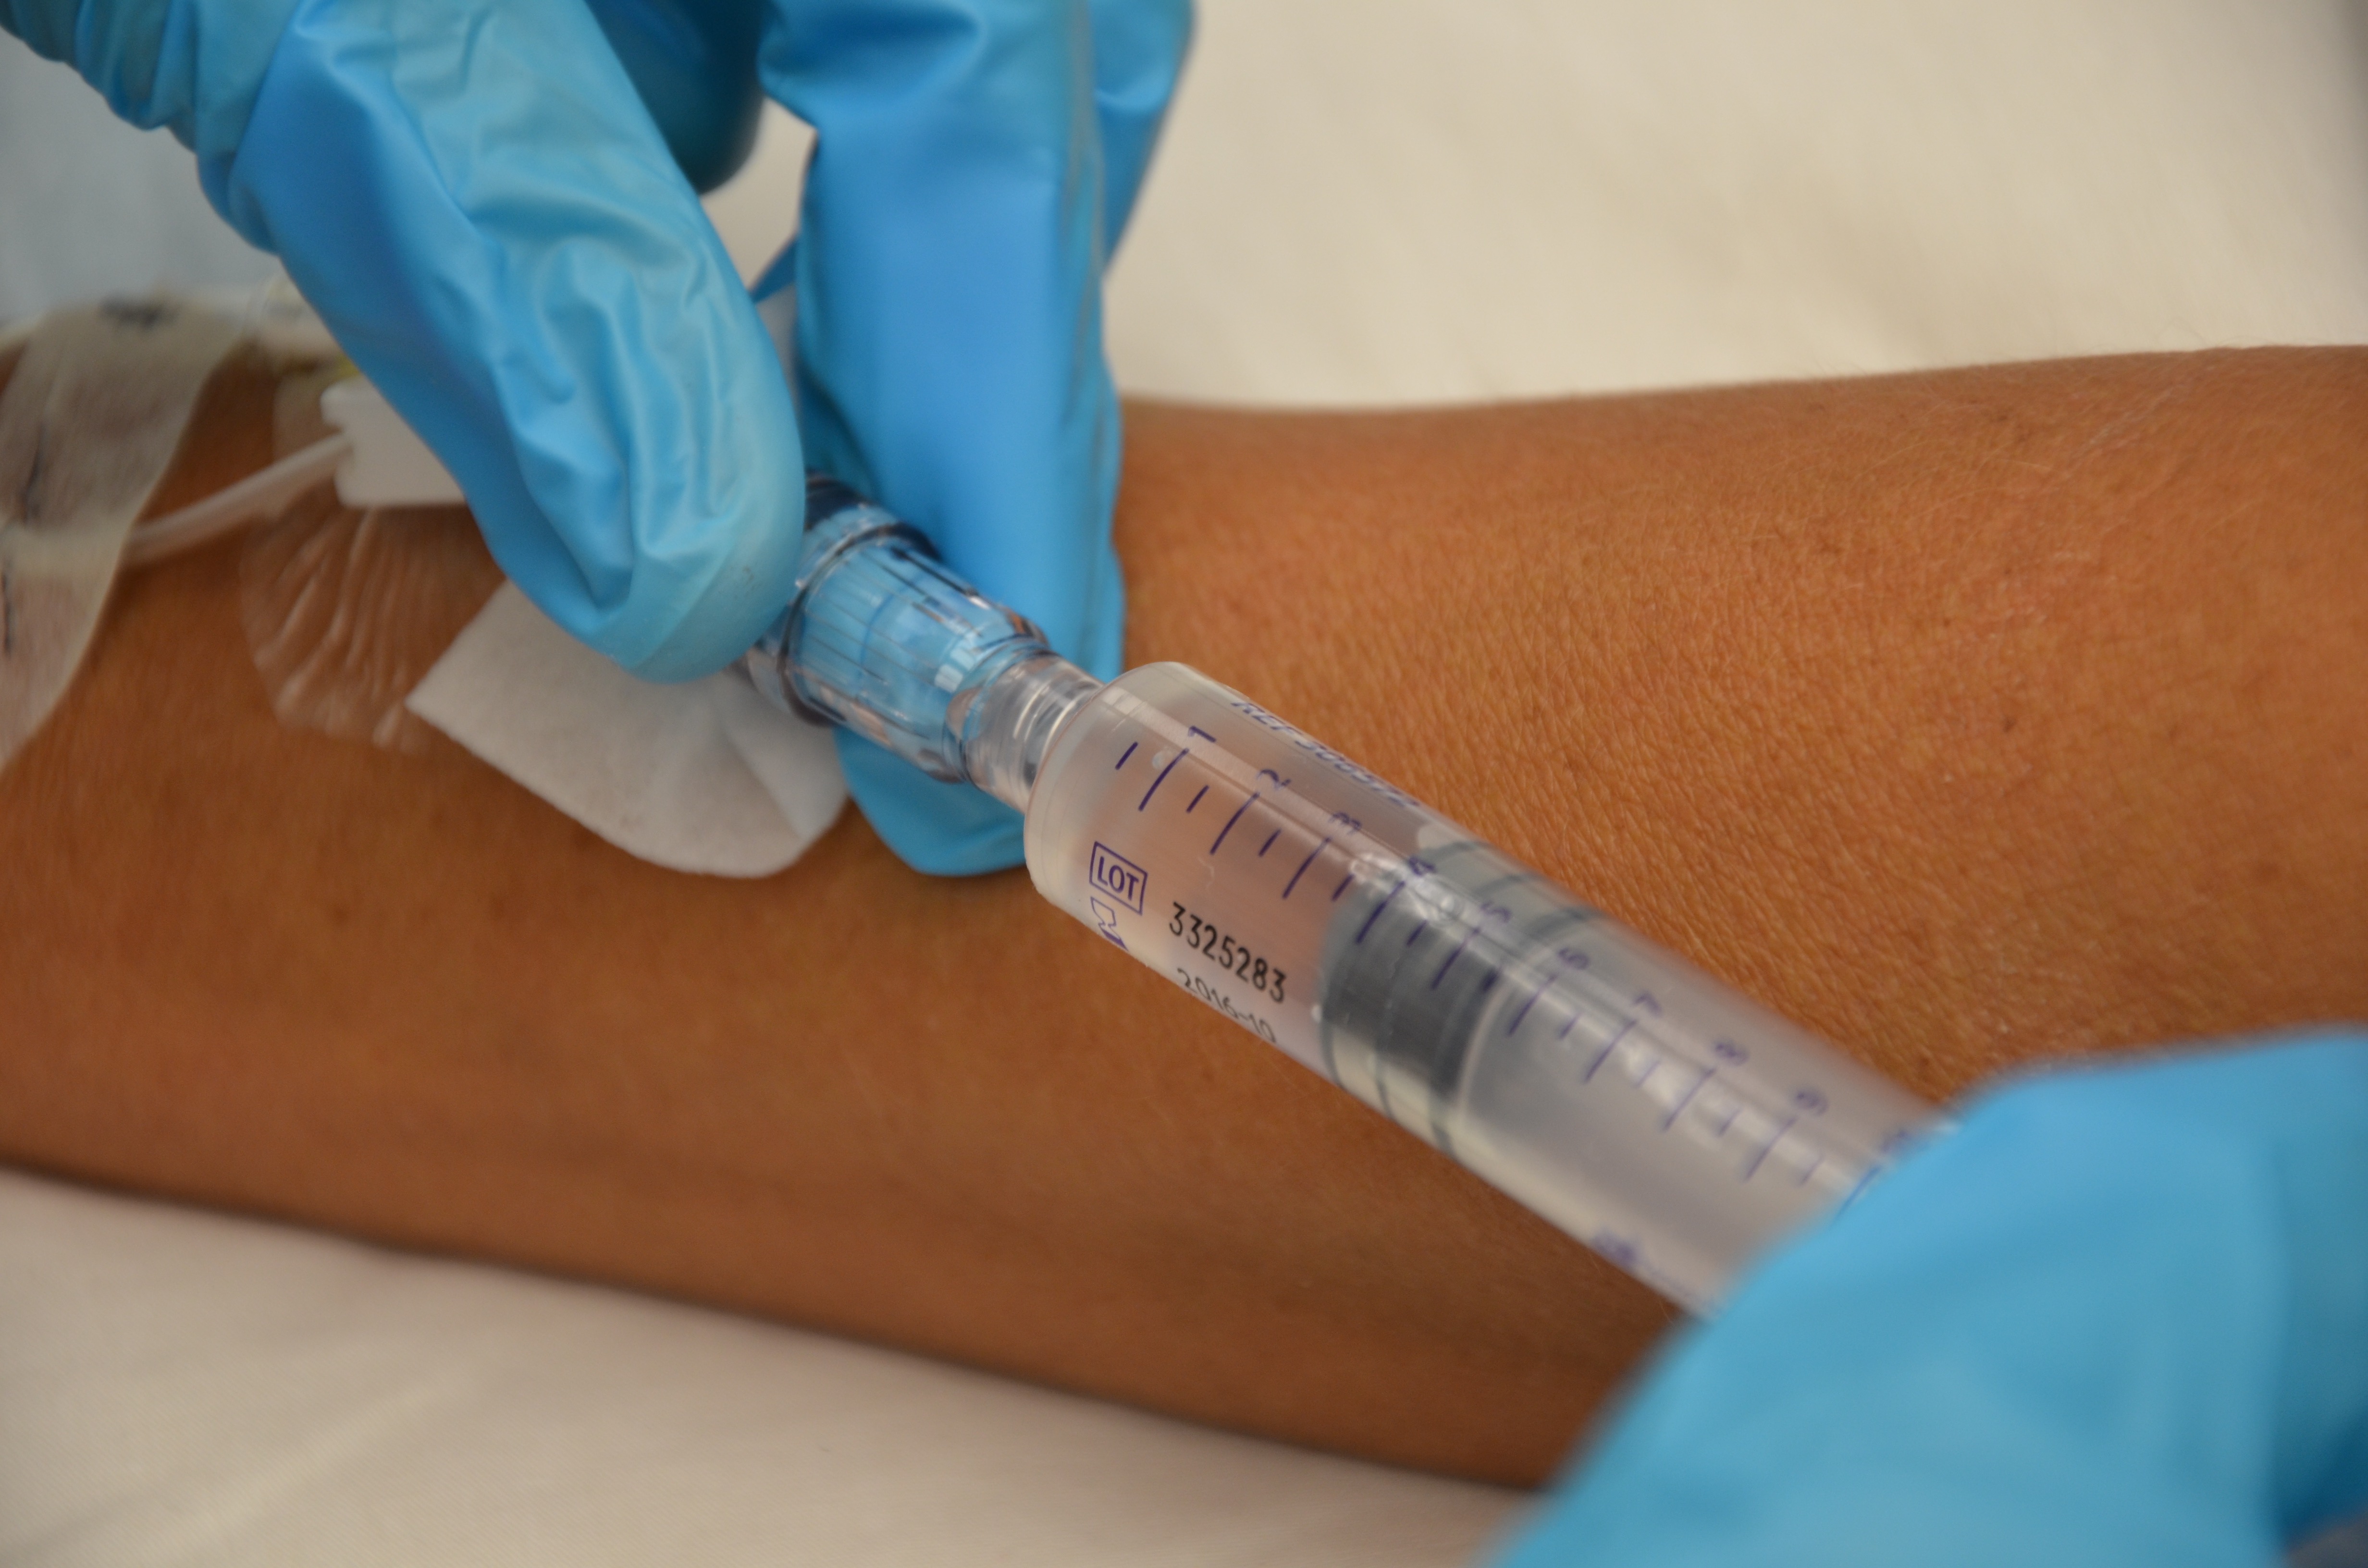
Parenteral medication administration is an effective method of delivering medication to patients, and can be safely accomplished by utilizing the appropriate guidelines and policies in place to keep patients safe from harm. IV medications have a higher risk of harm than non-parenteral medication. The ever-increasing complexity of the health care environment increases the risk of a medication error with parenteral medications. The key takeaways below provide advice for preventing errors with parenteral medications.

Key Takeaways

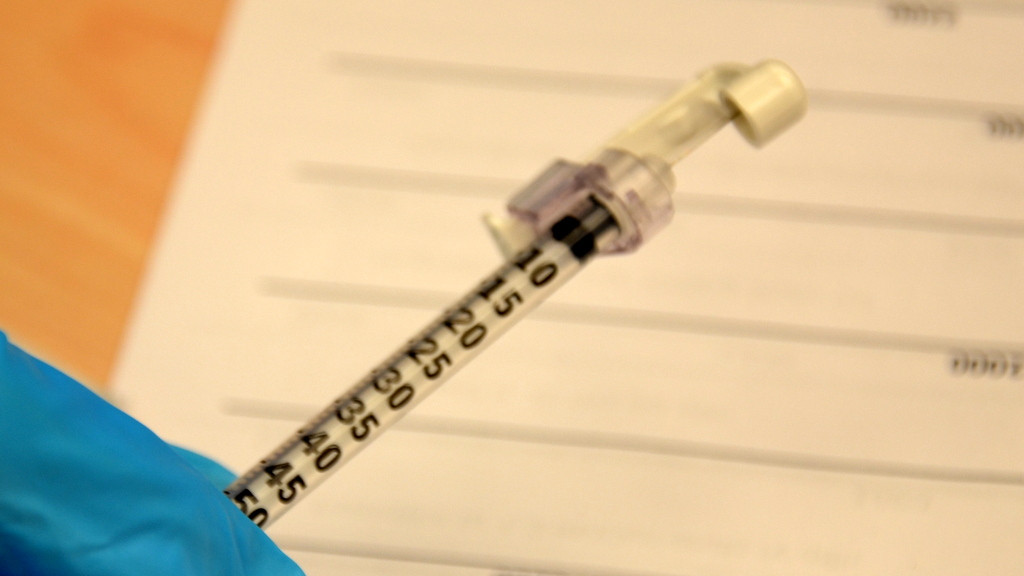
  • Parenteral medications have a quicker onset of therapeutic effects. Be aware of the onset, peak, and duration of all parenteral medications.
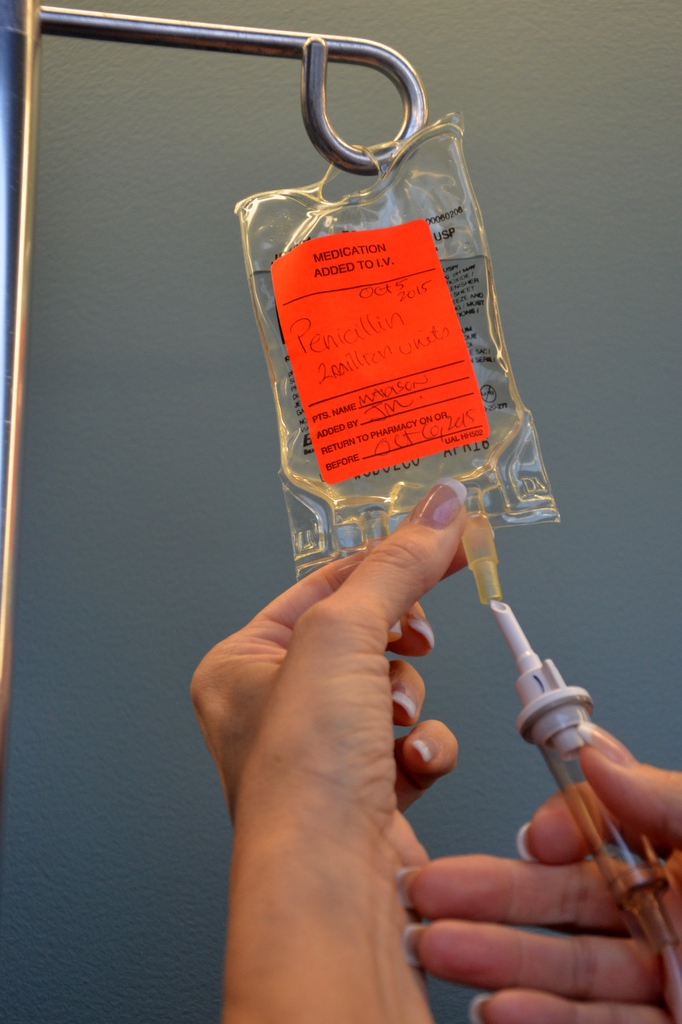
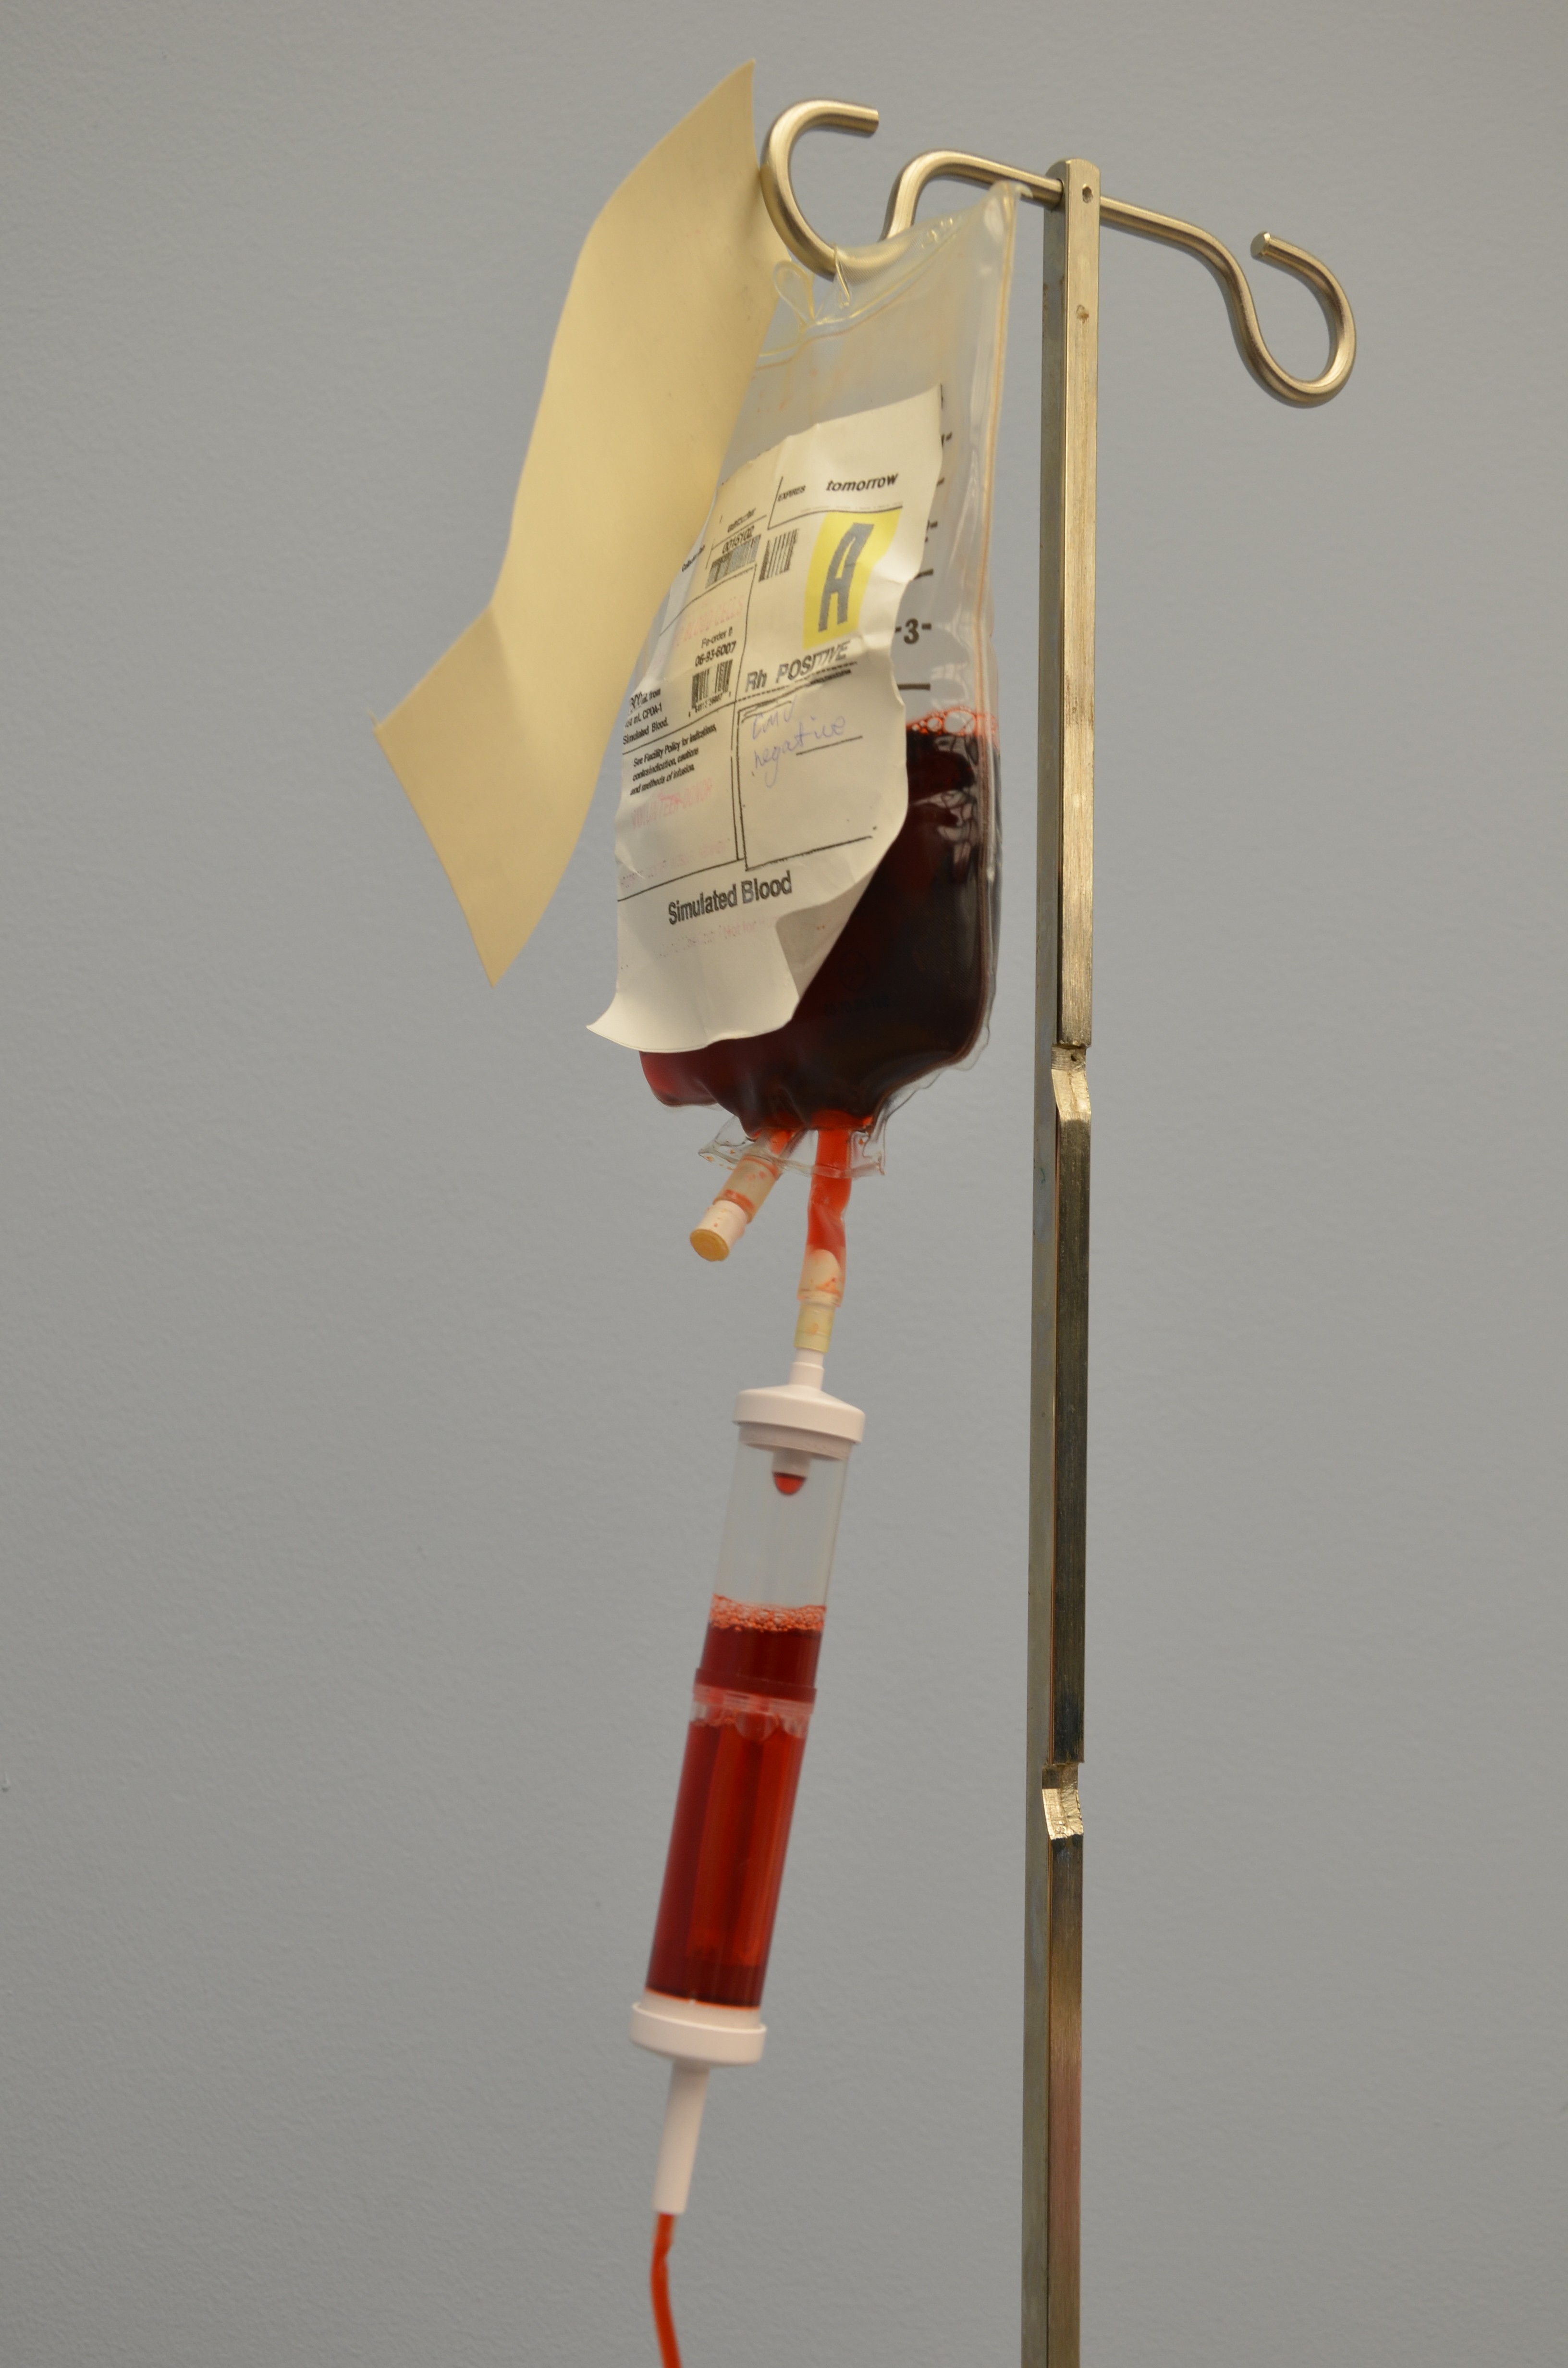
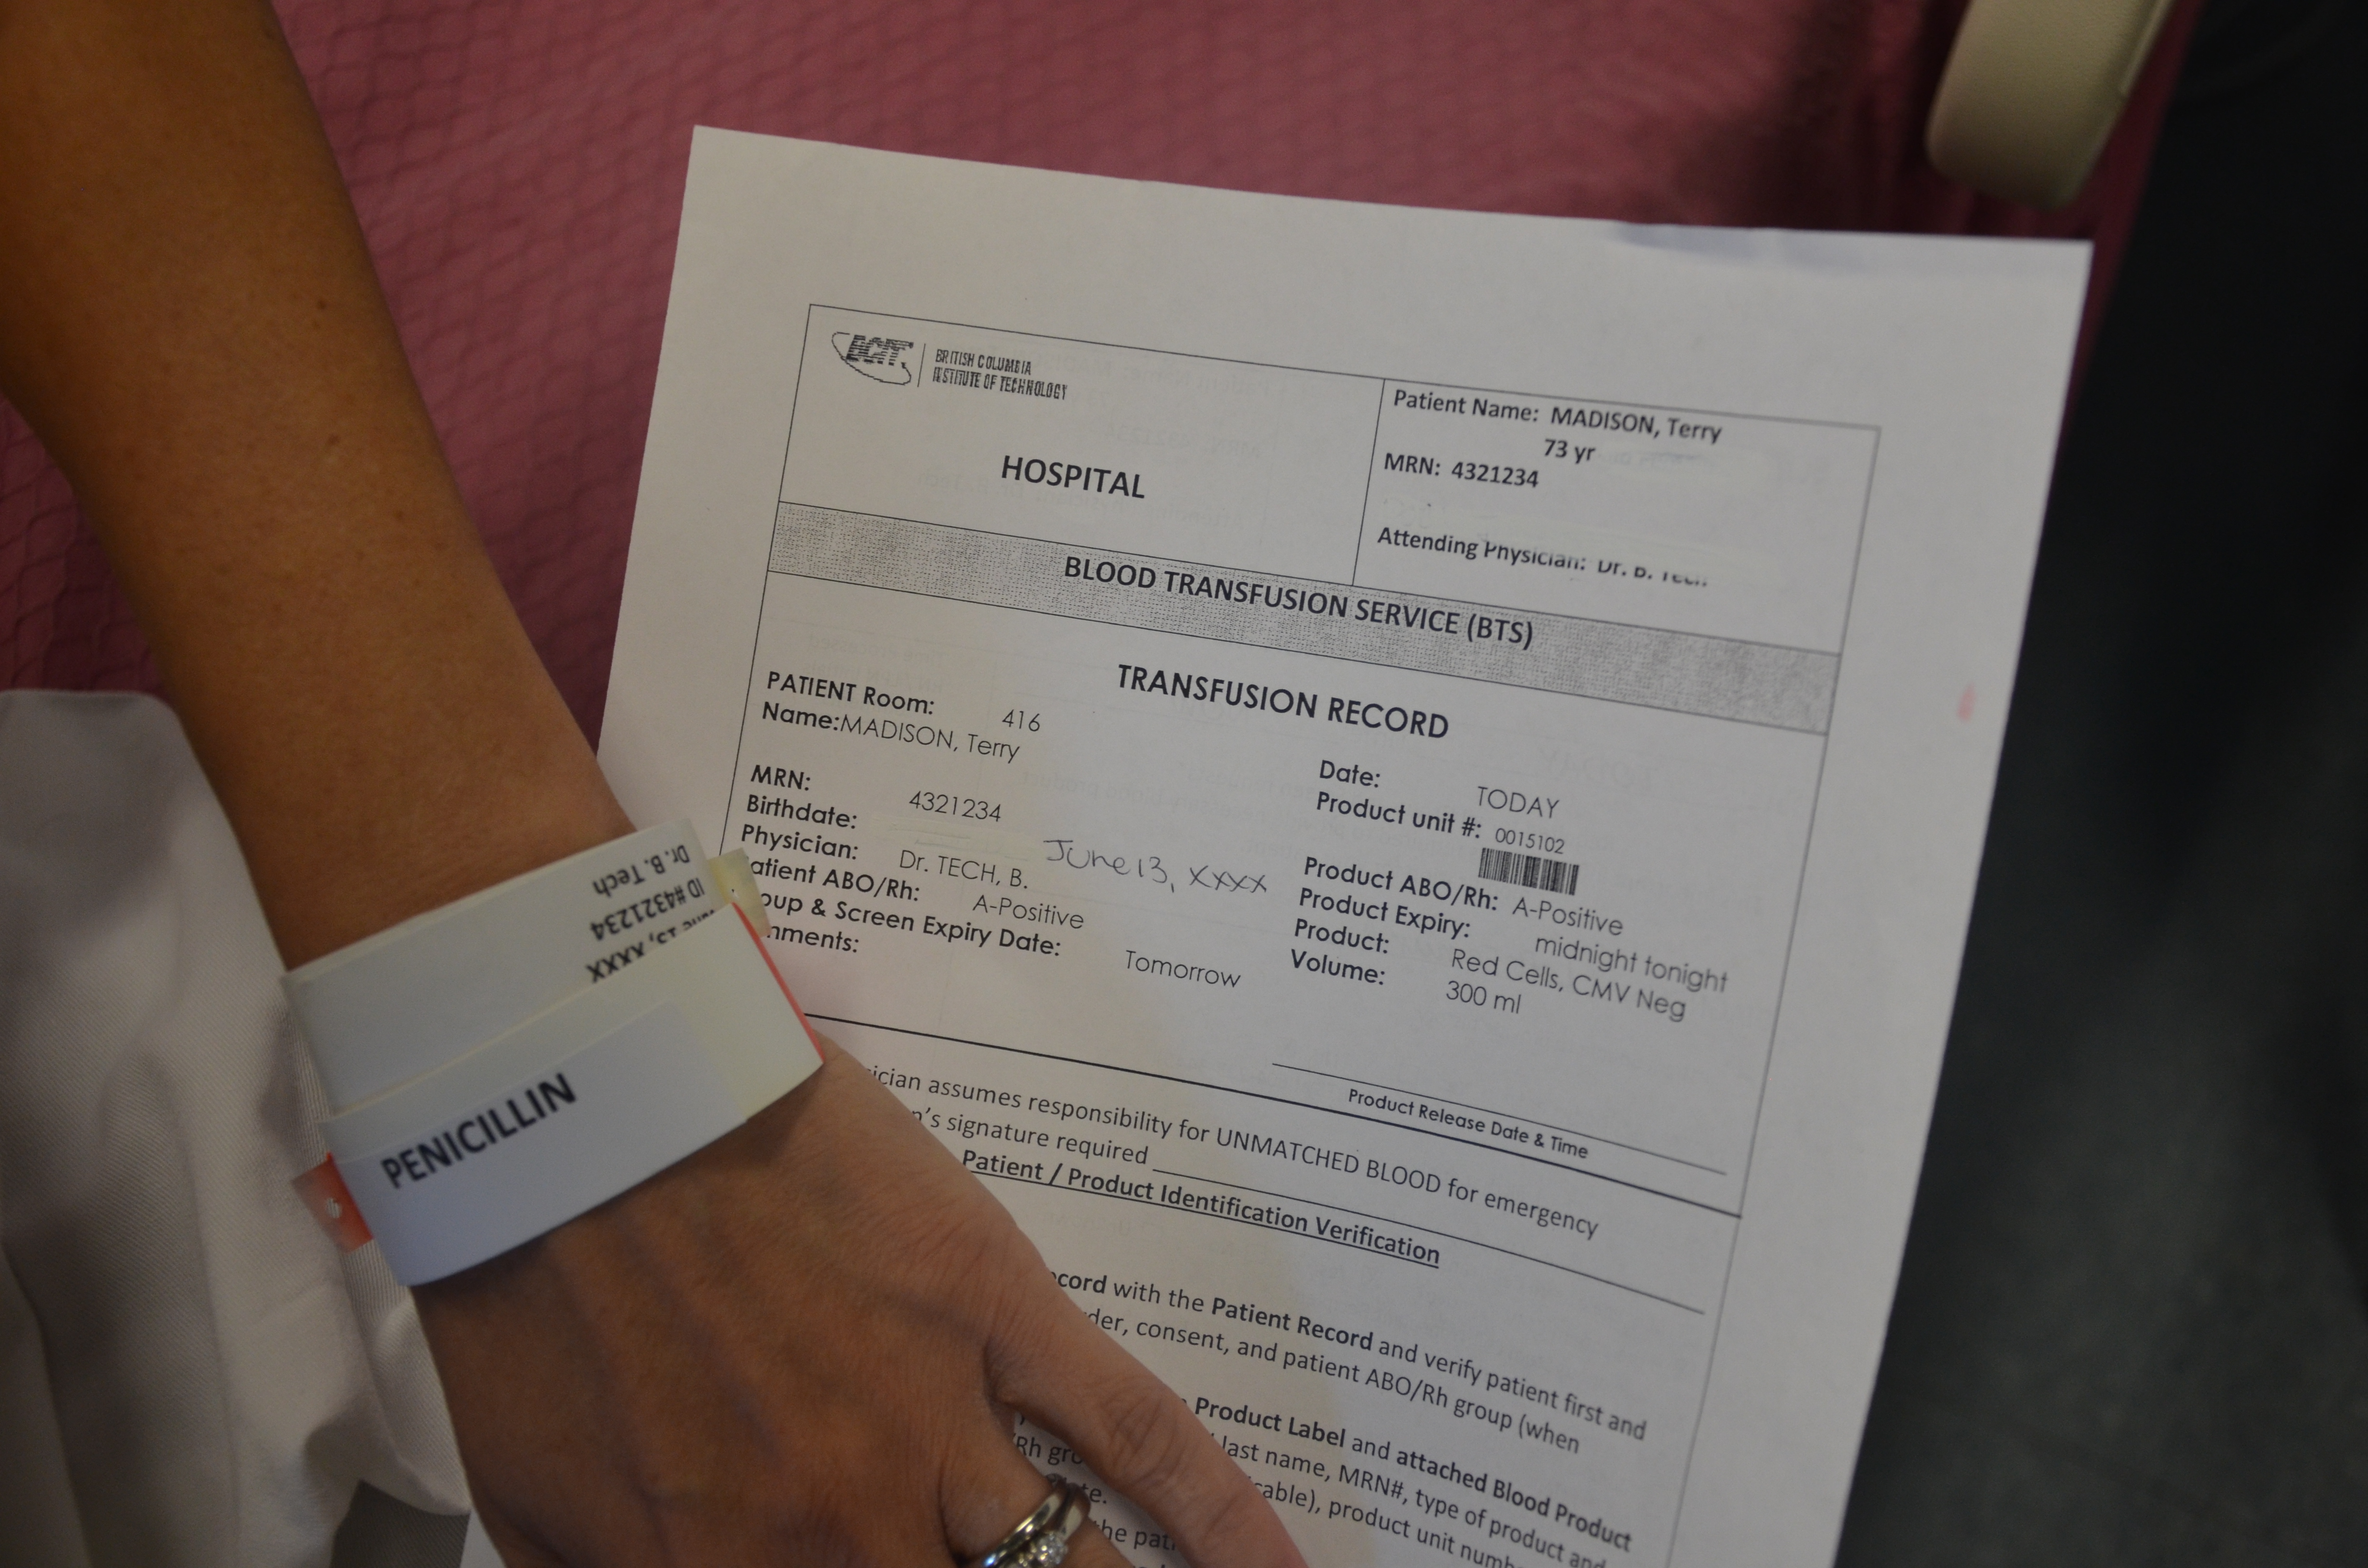
  • Know which medications are considered high-alert medications and perform independent double checks to minimize errors.
  • Always consider the therapeutic effects and adverse effects when administering parenteral medications.
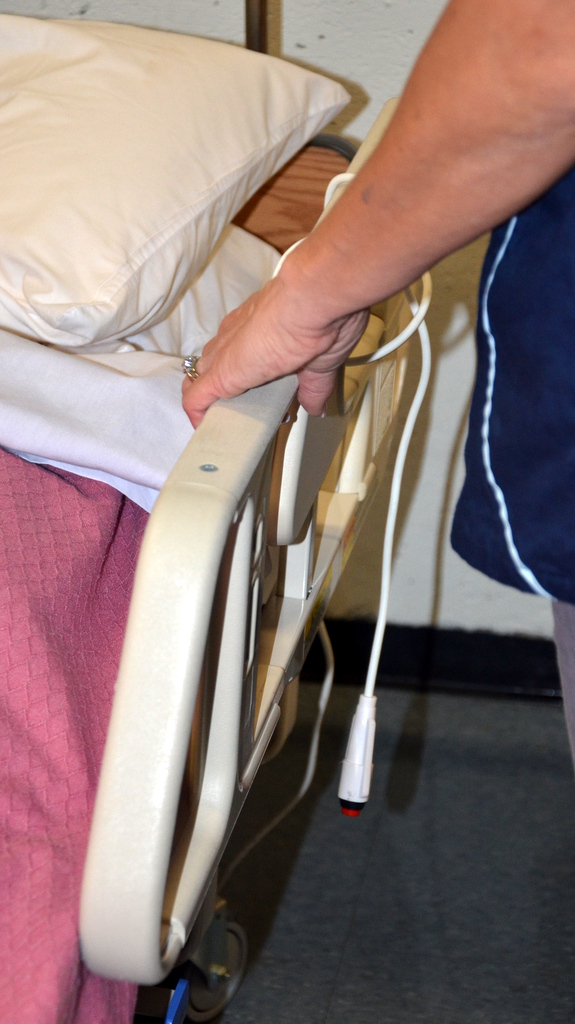
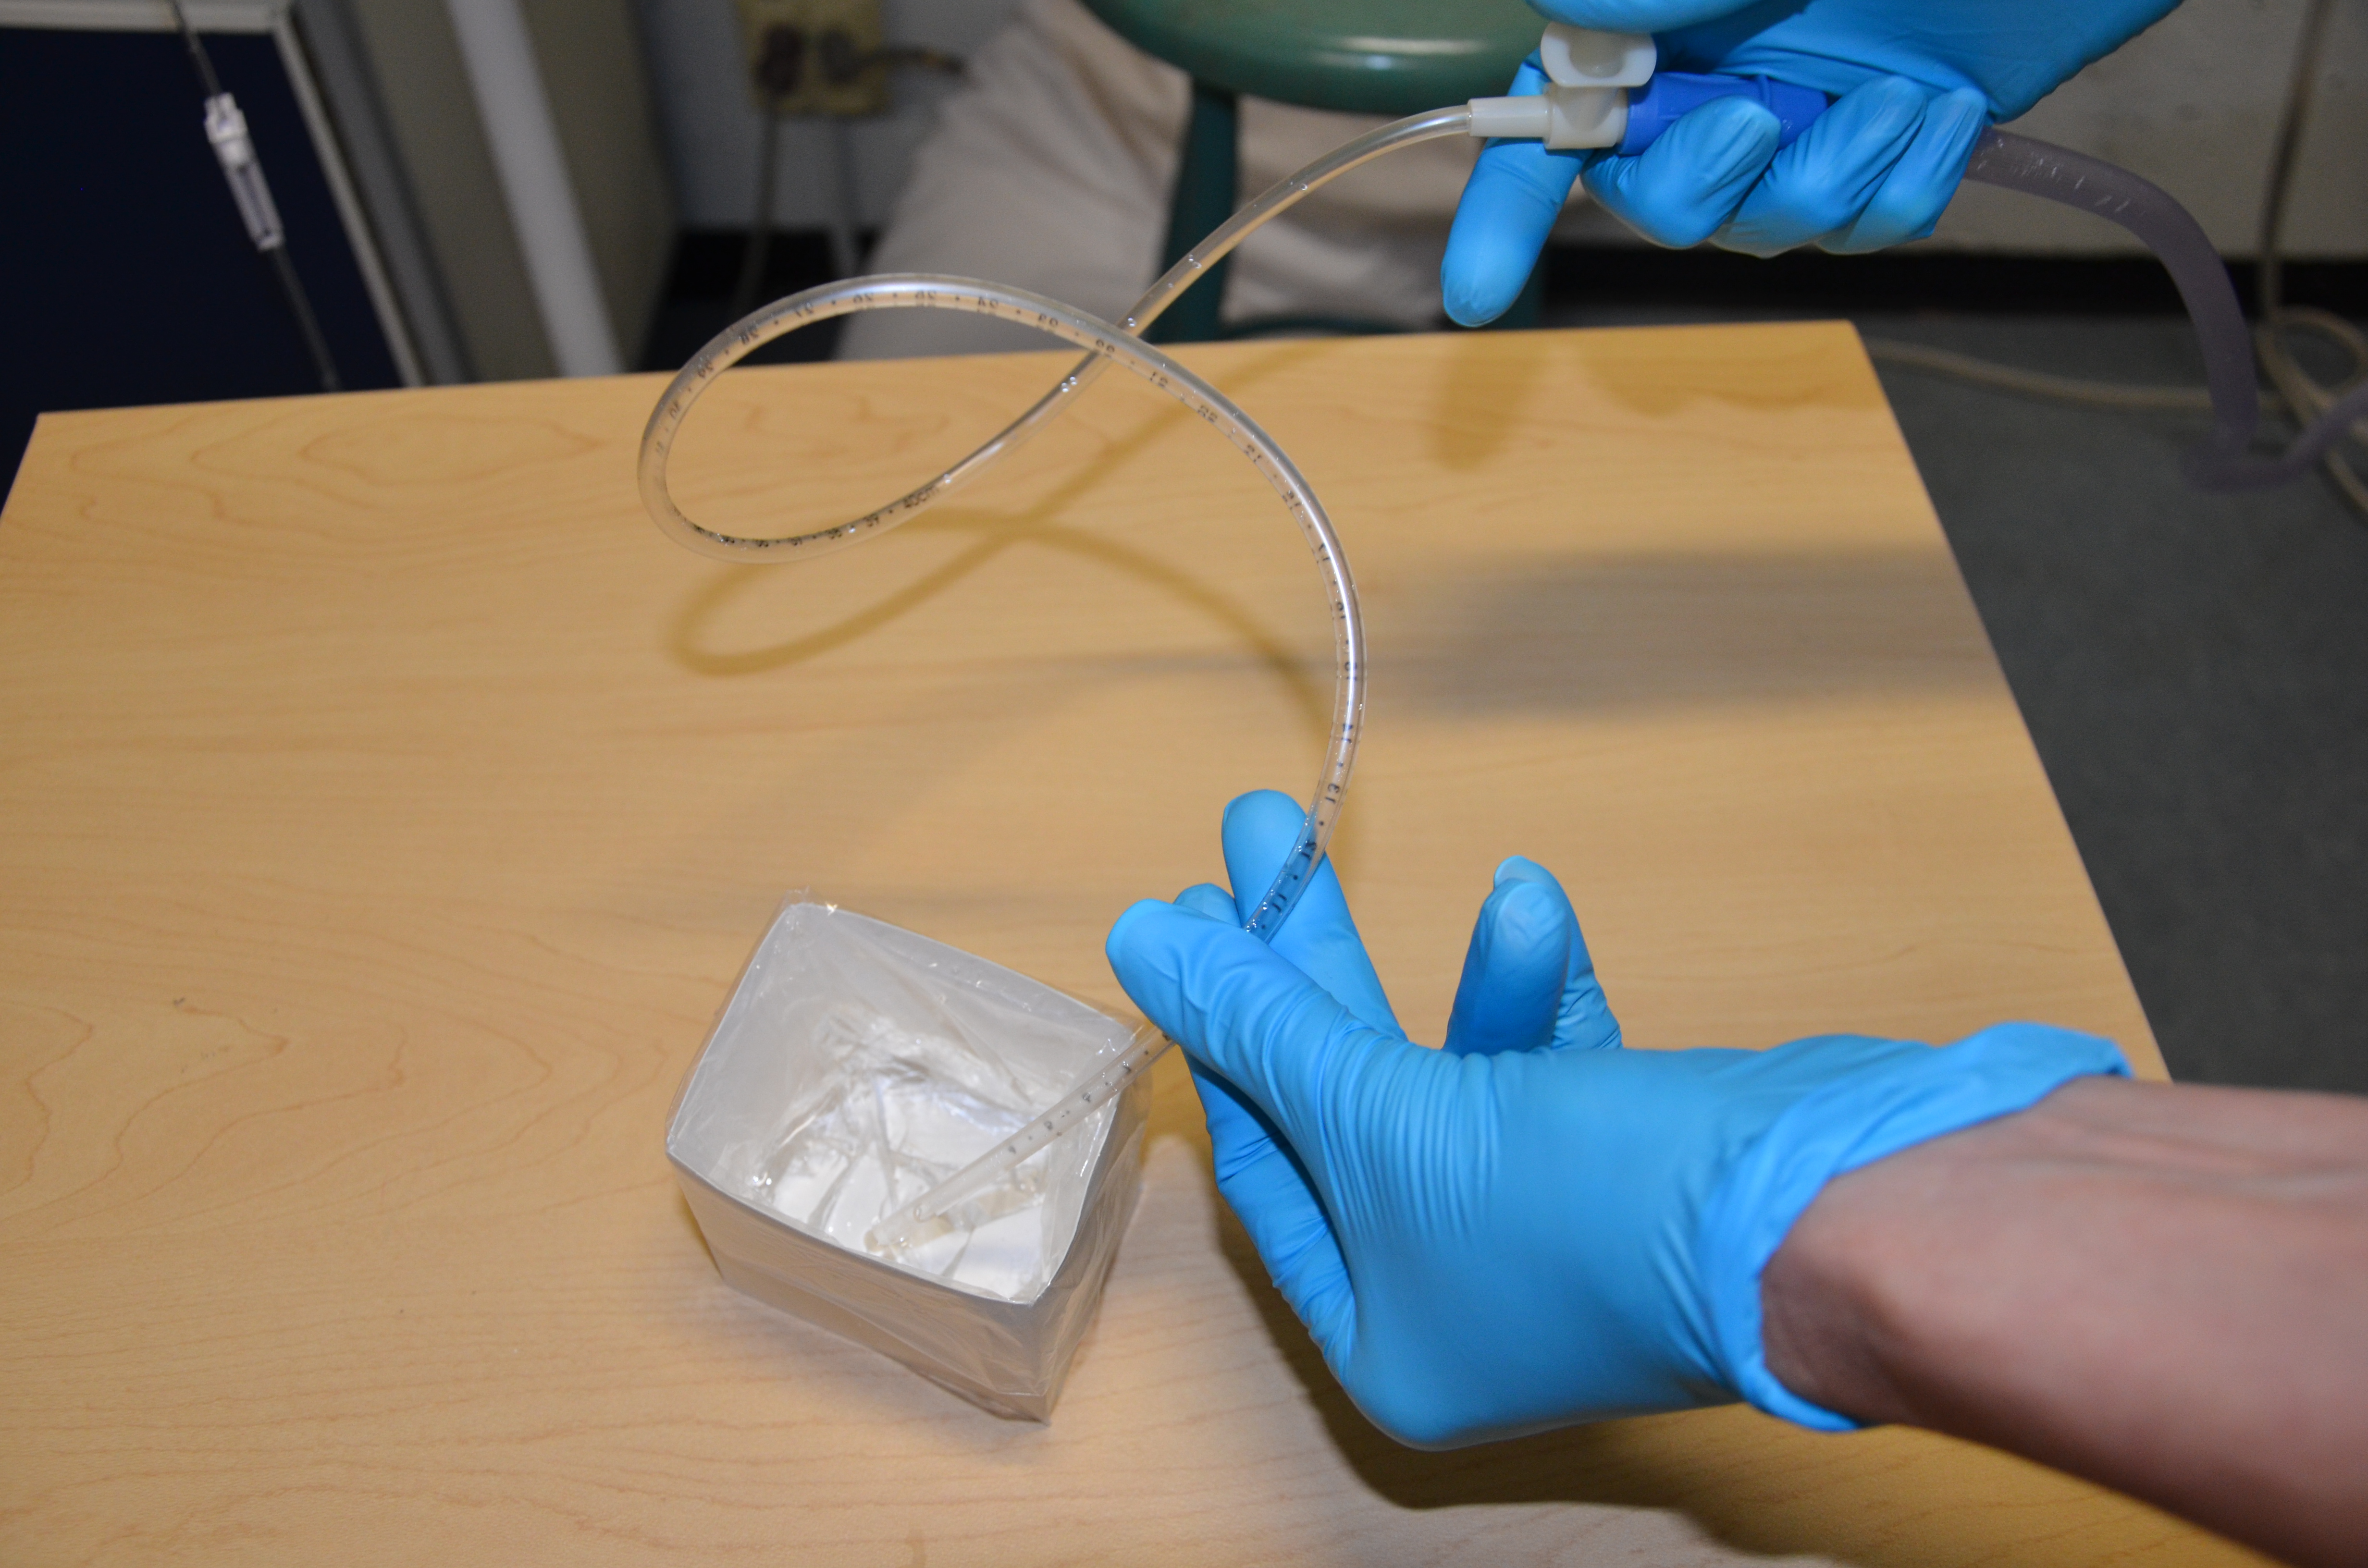
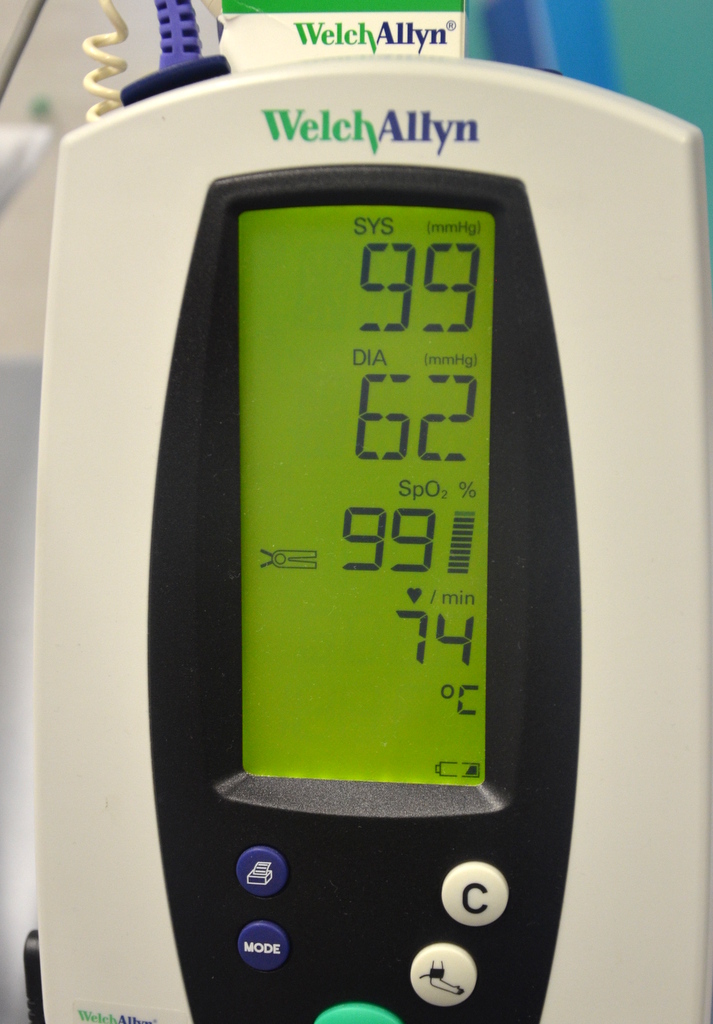
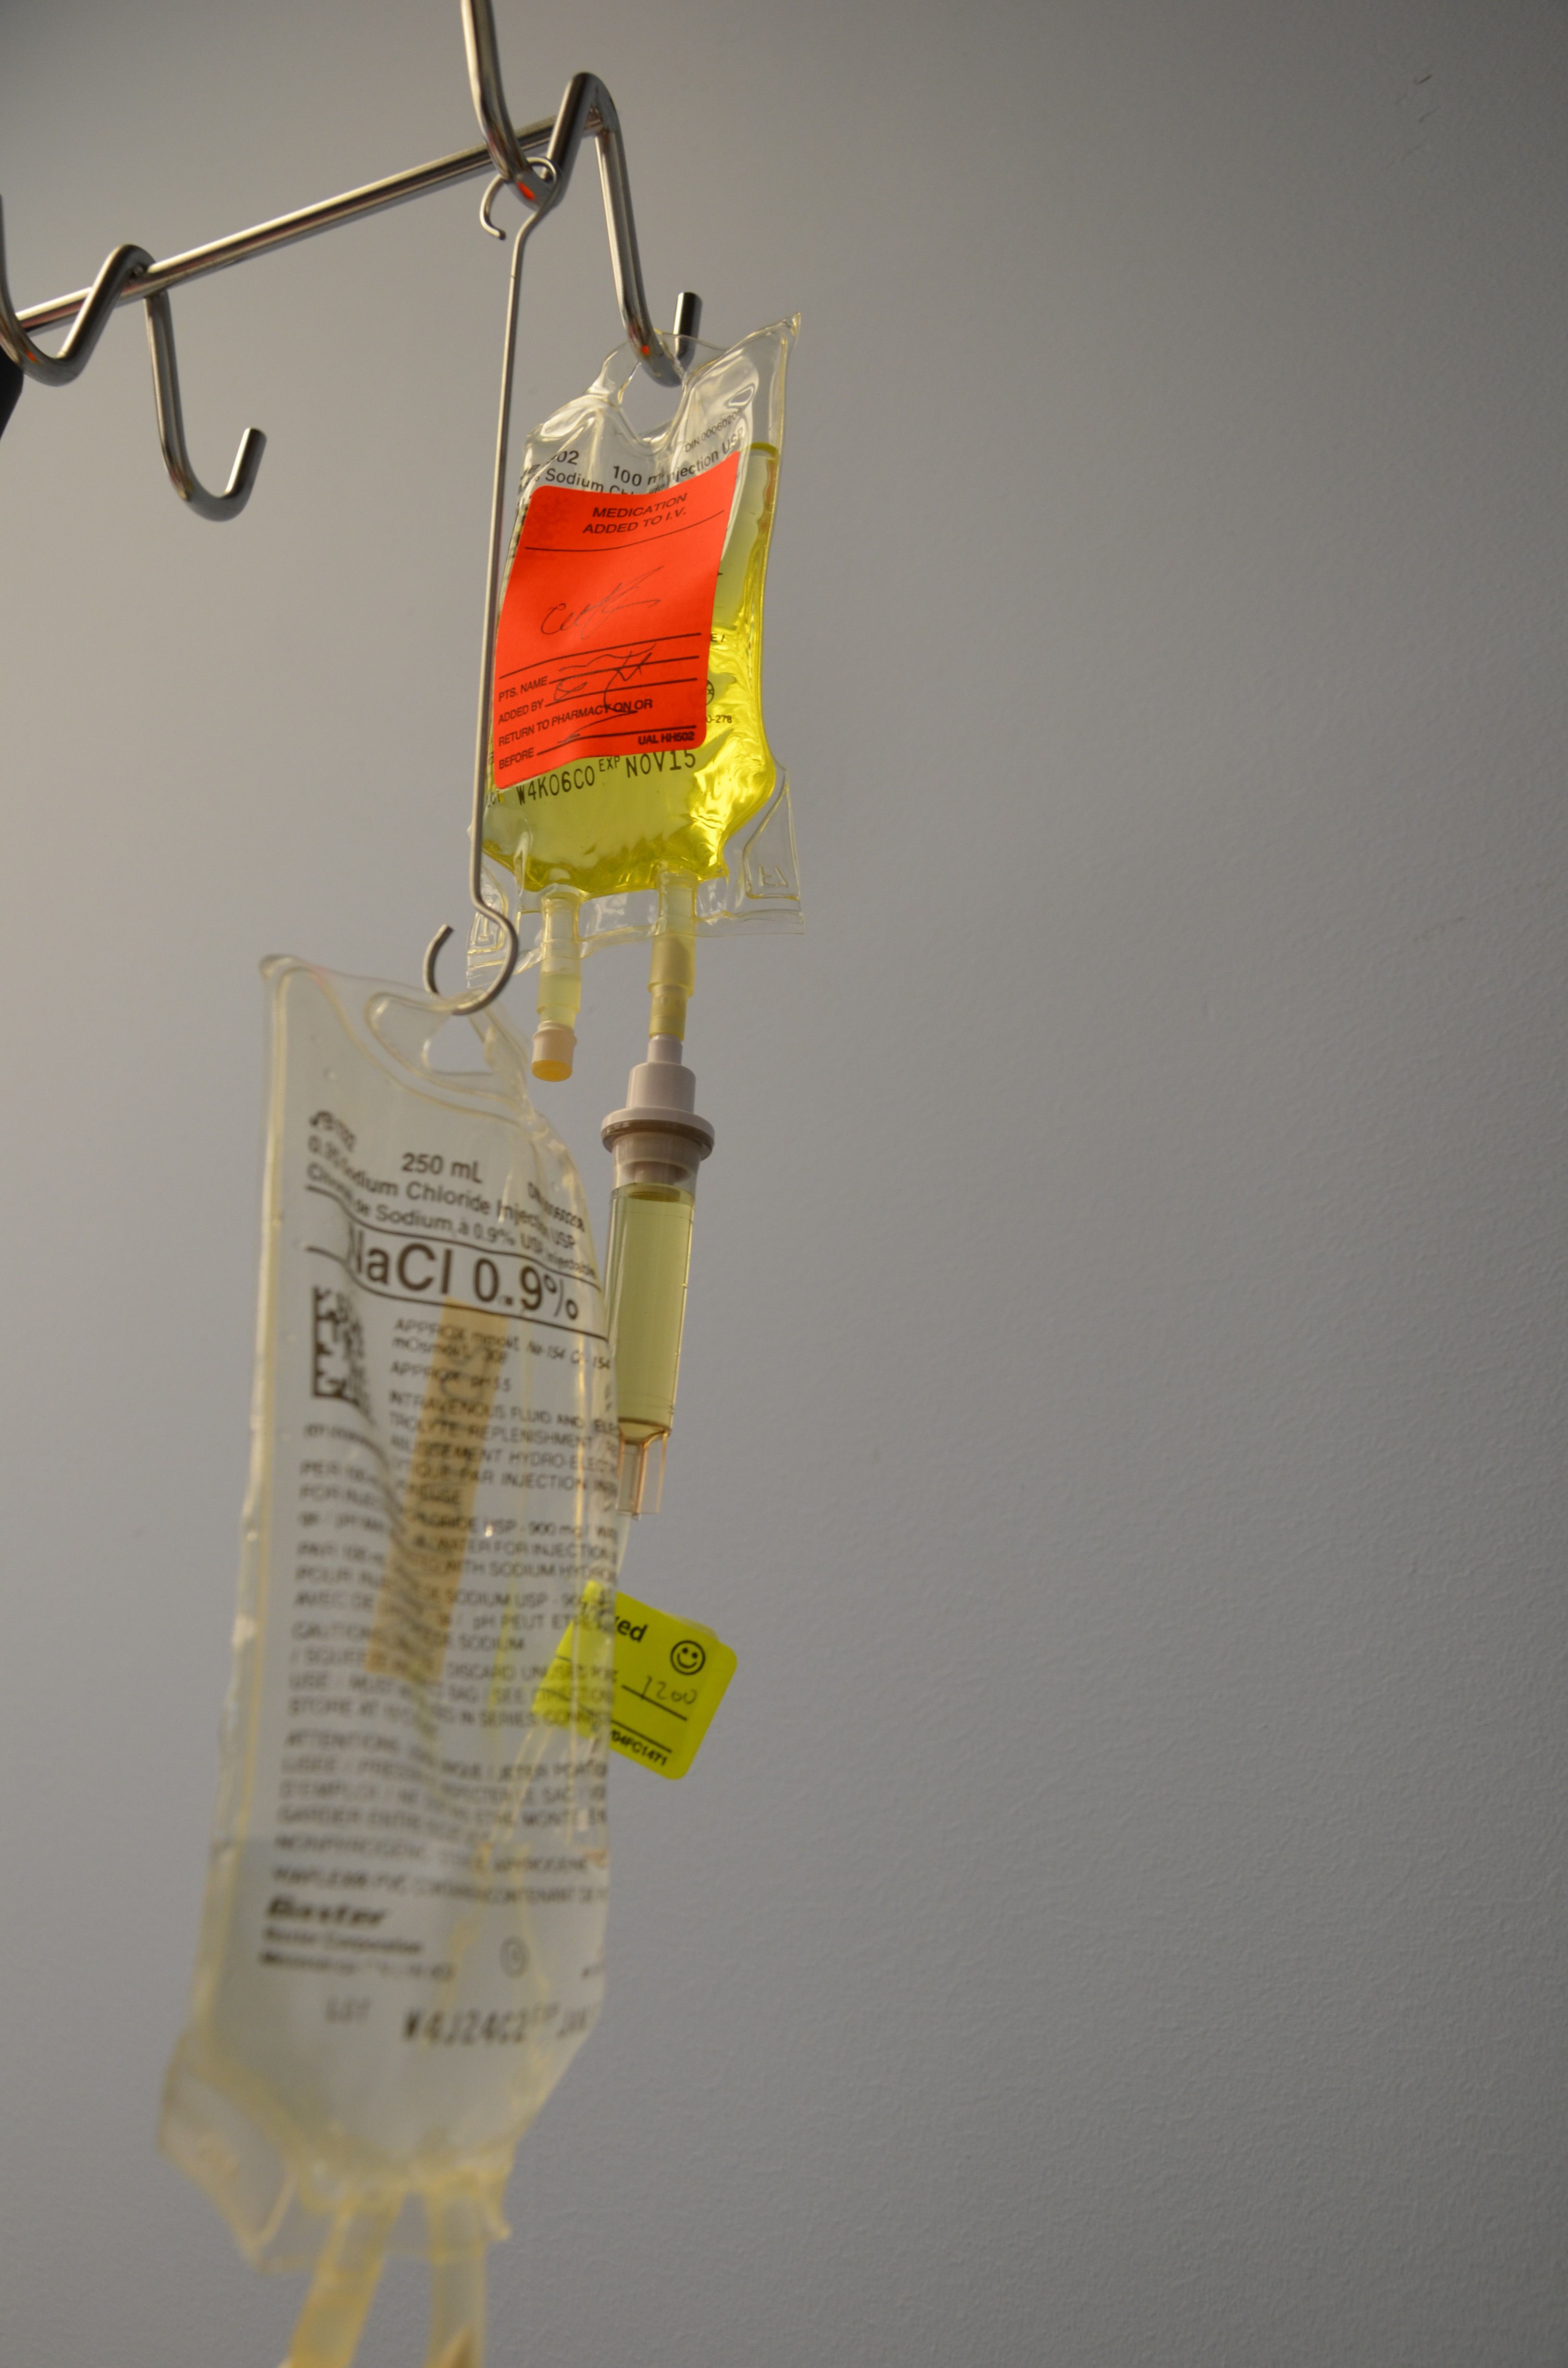
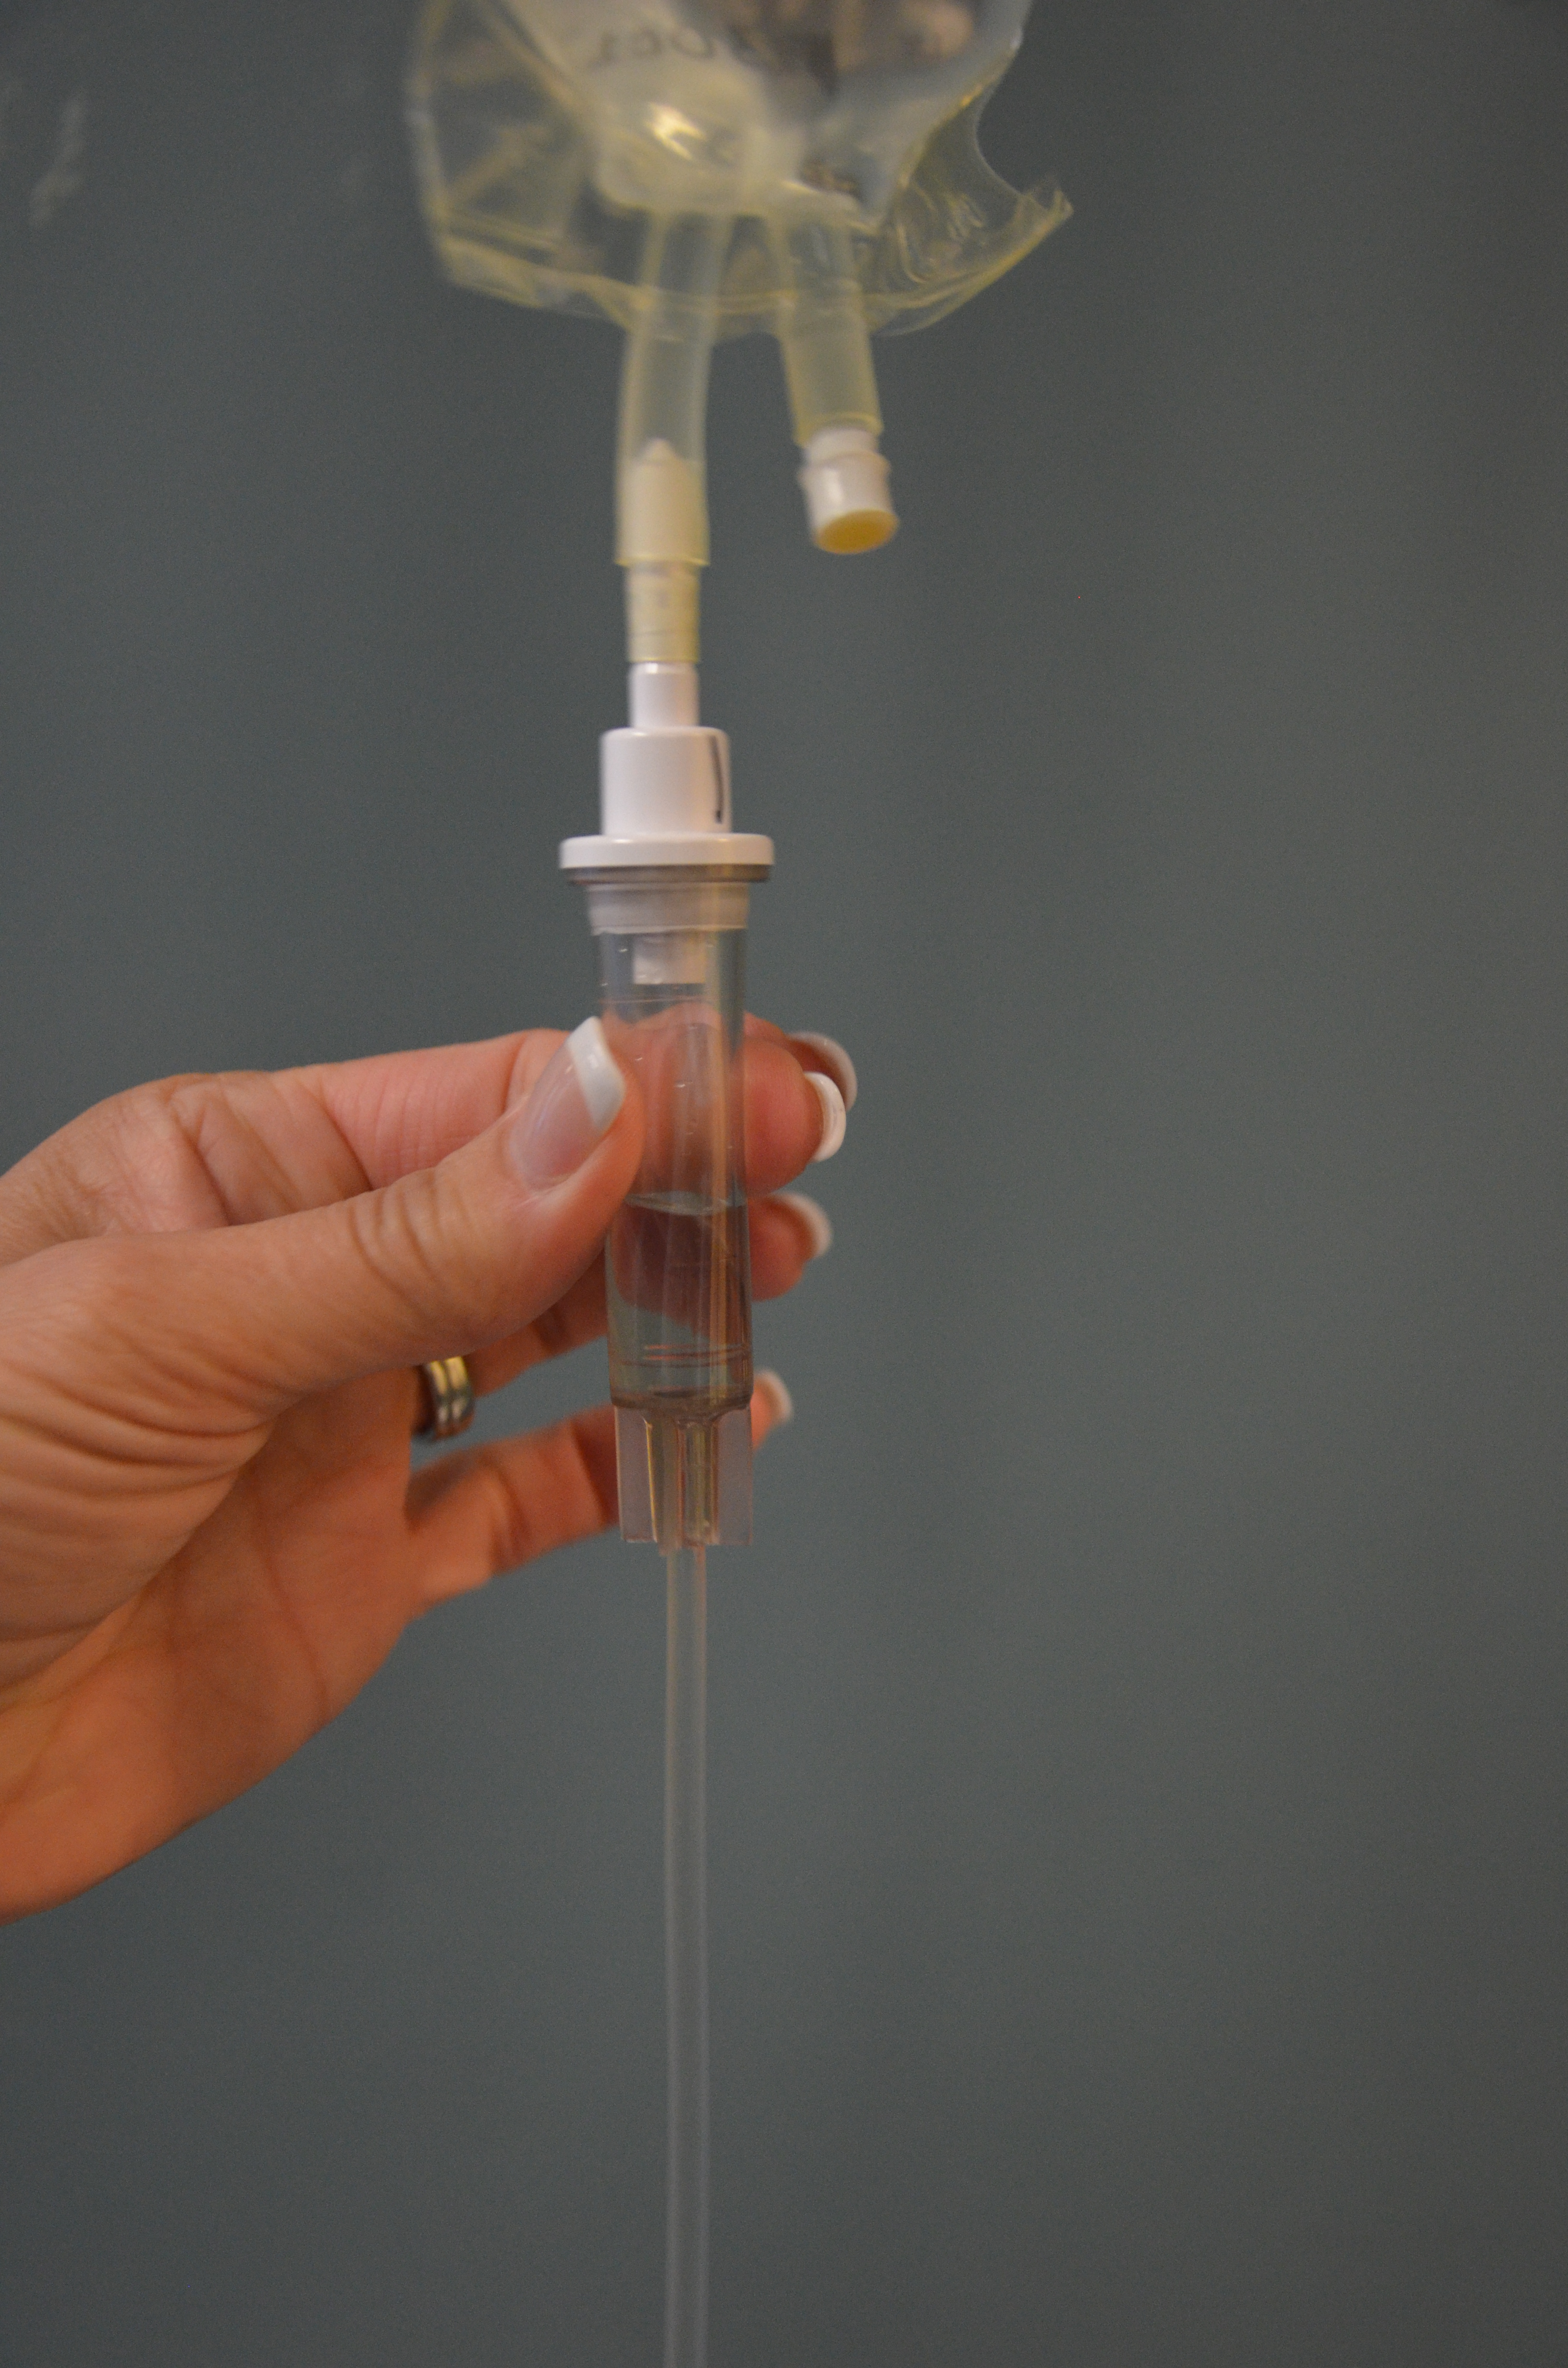
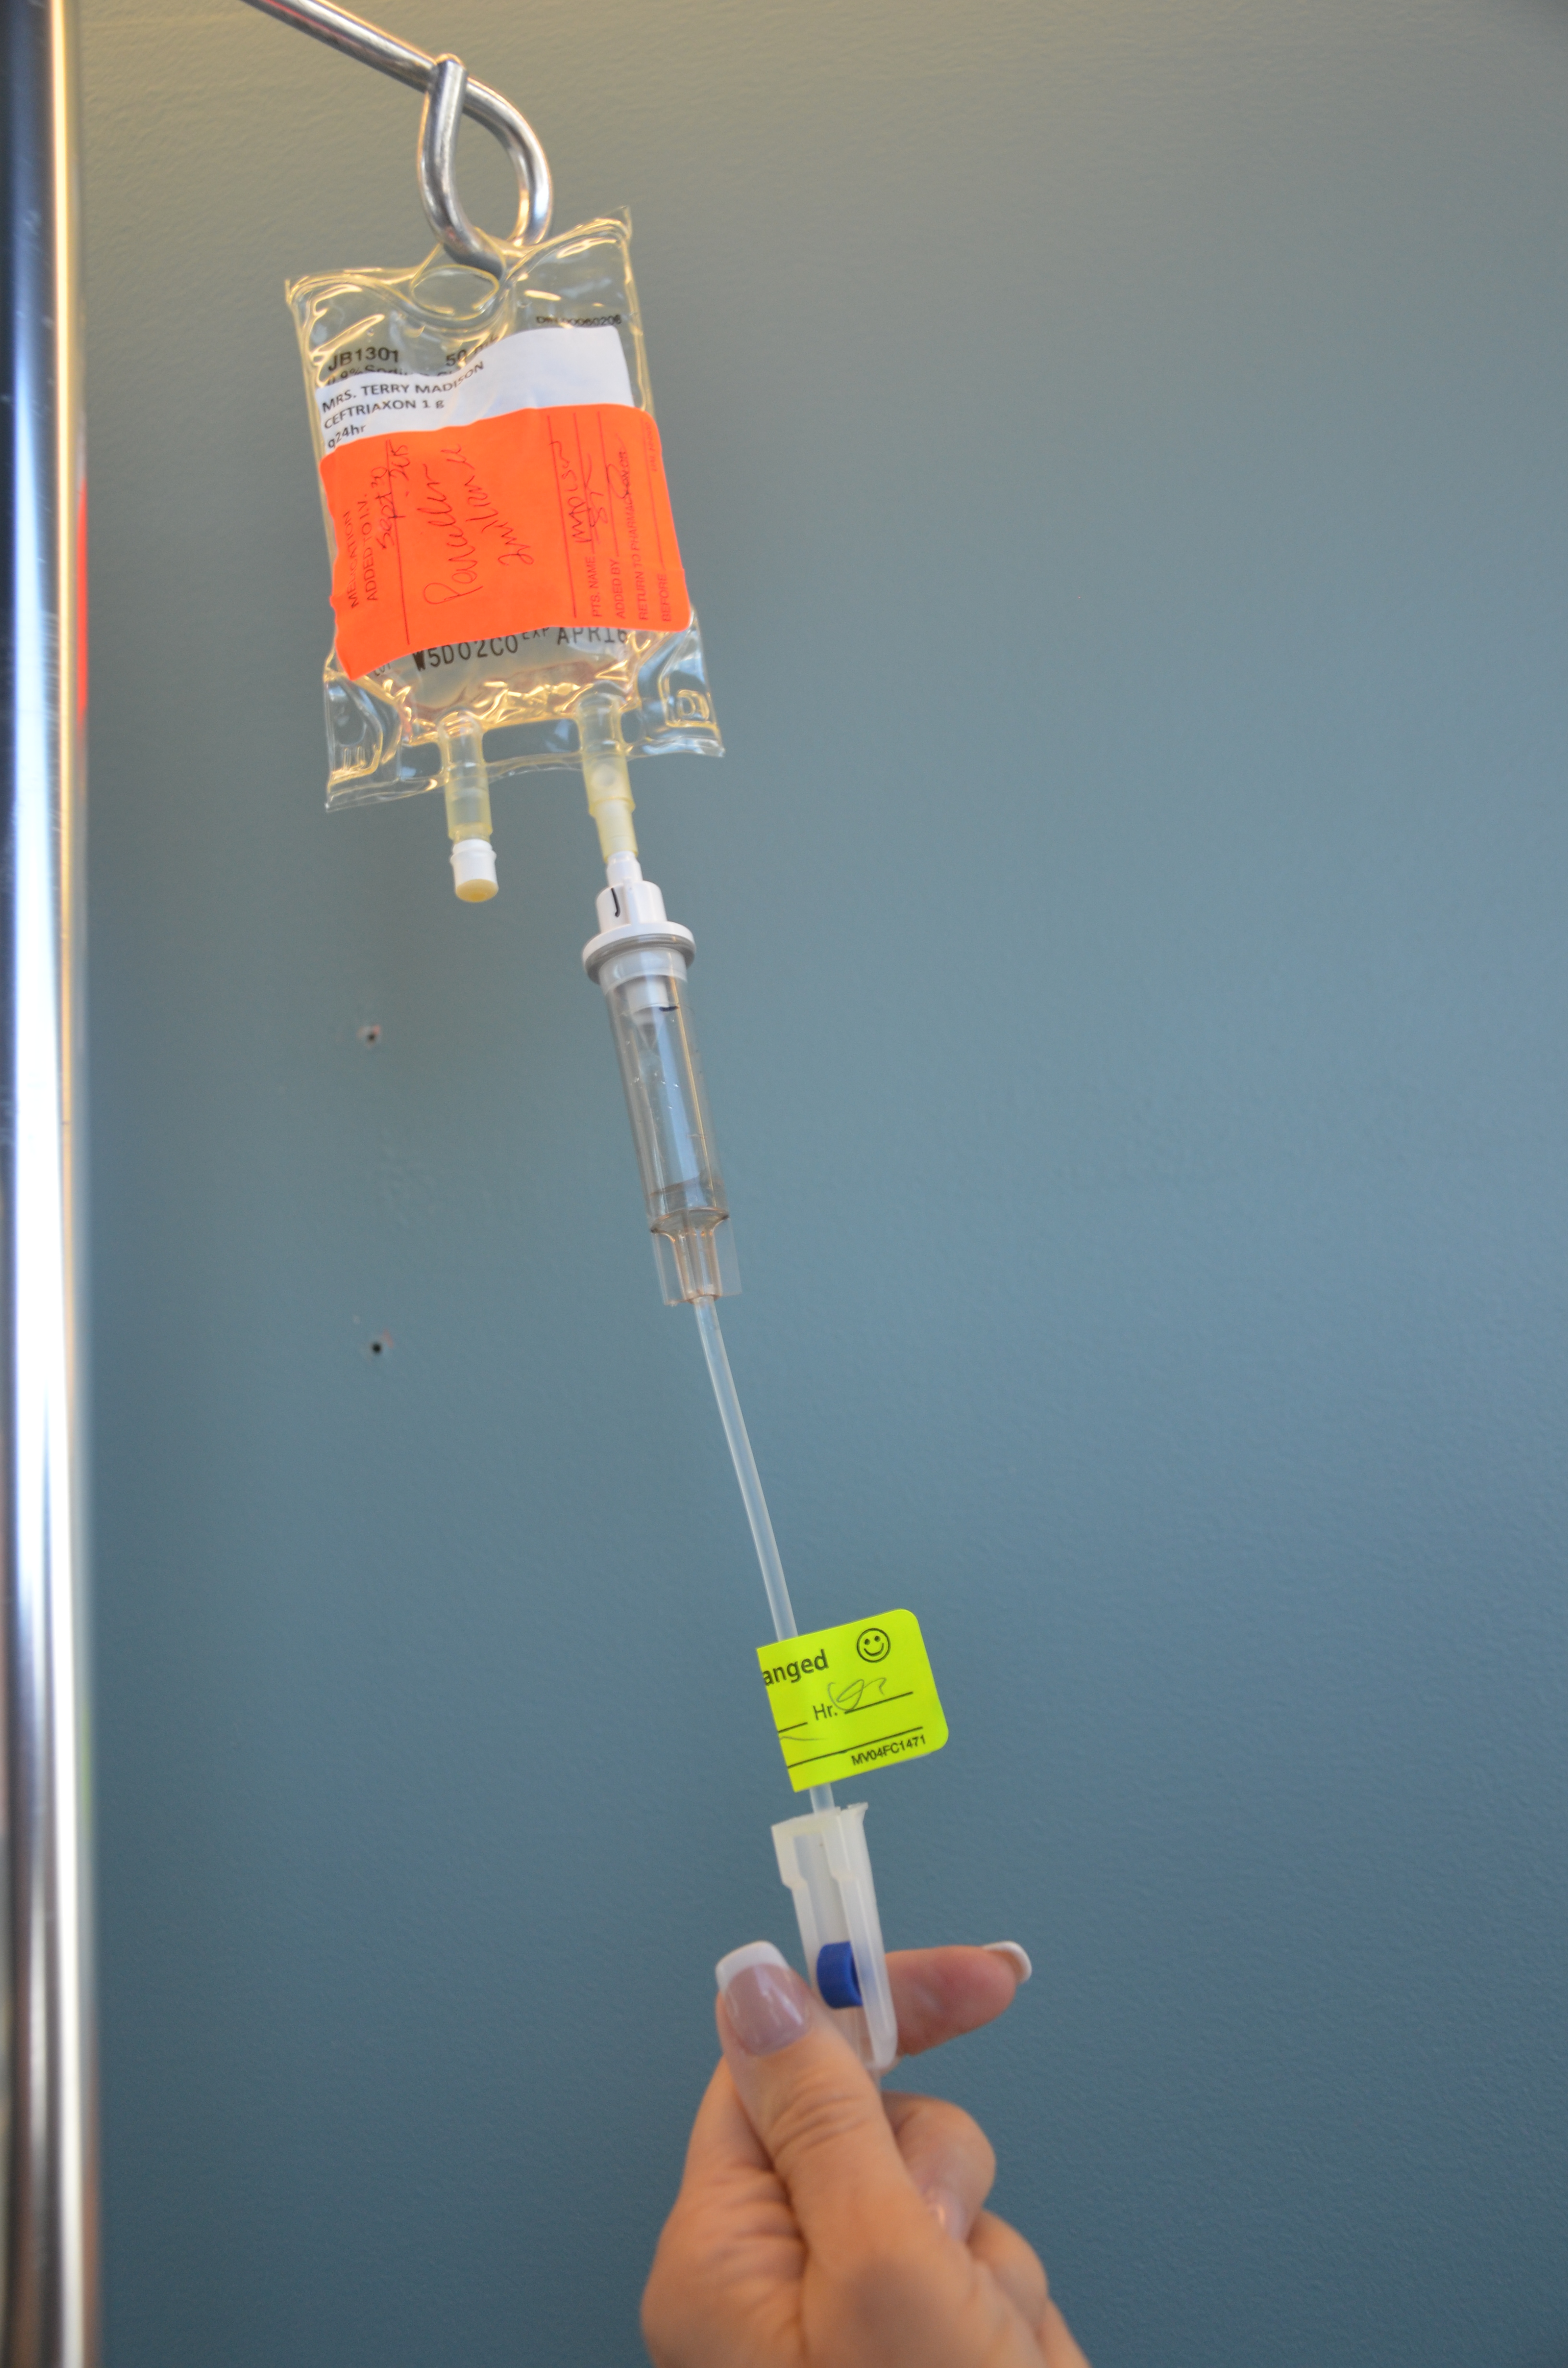
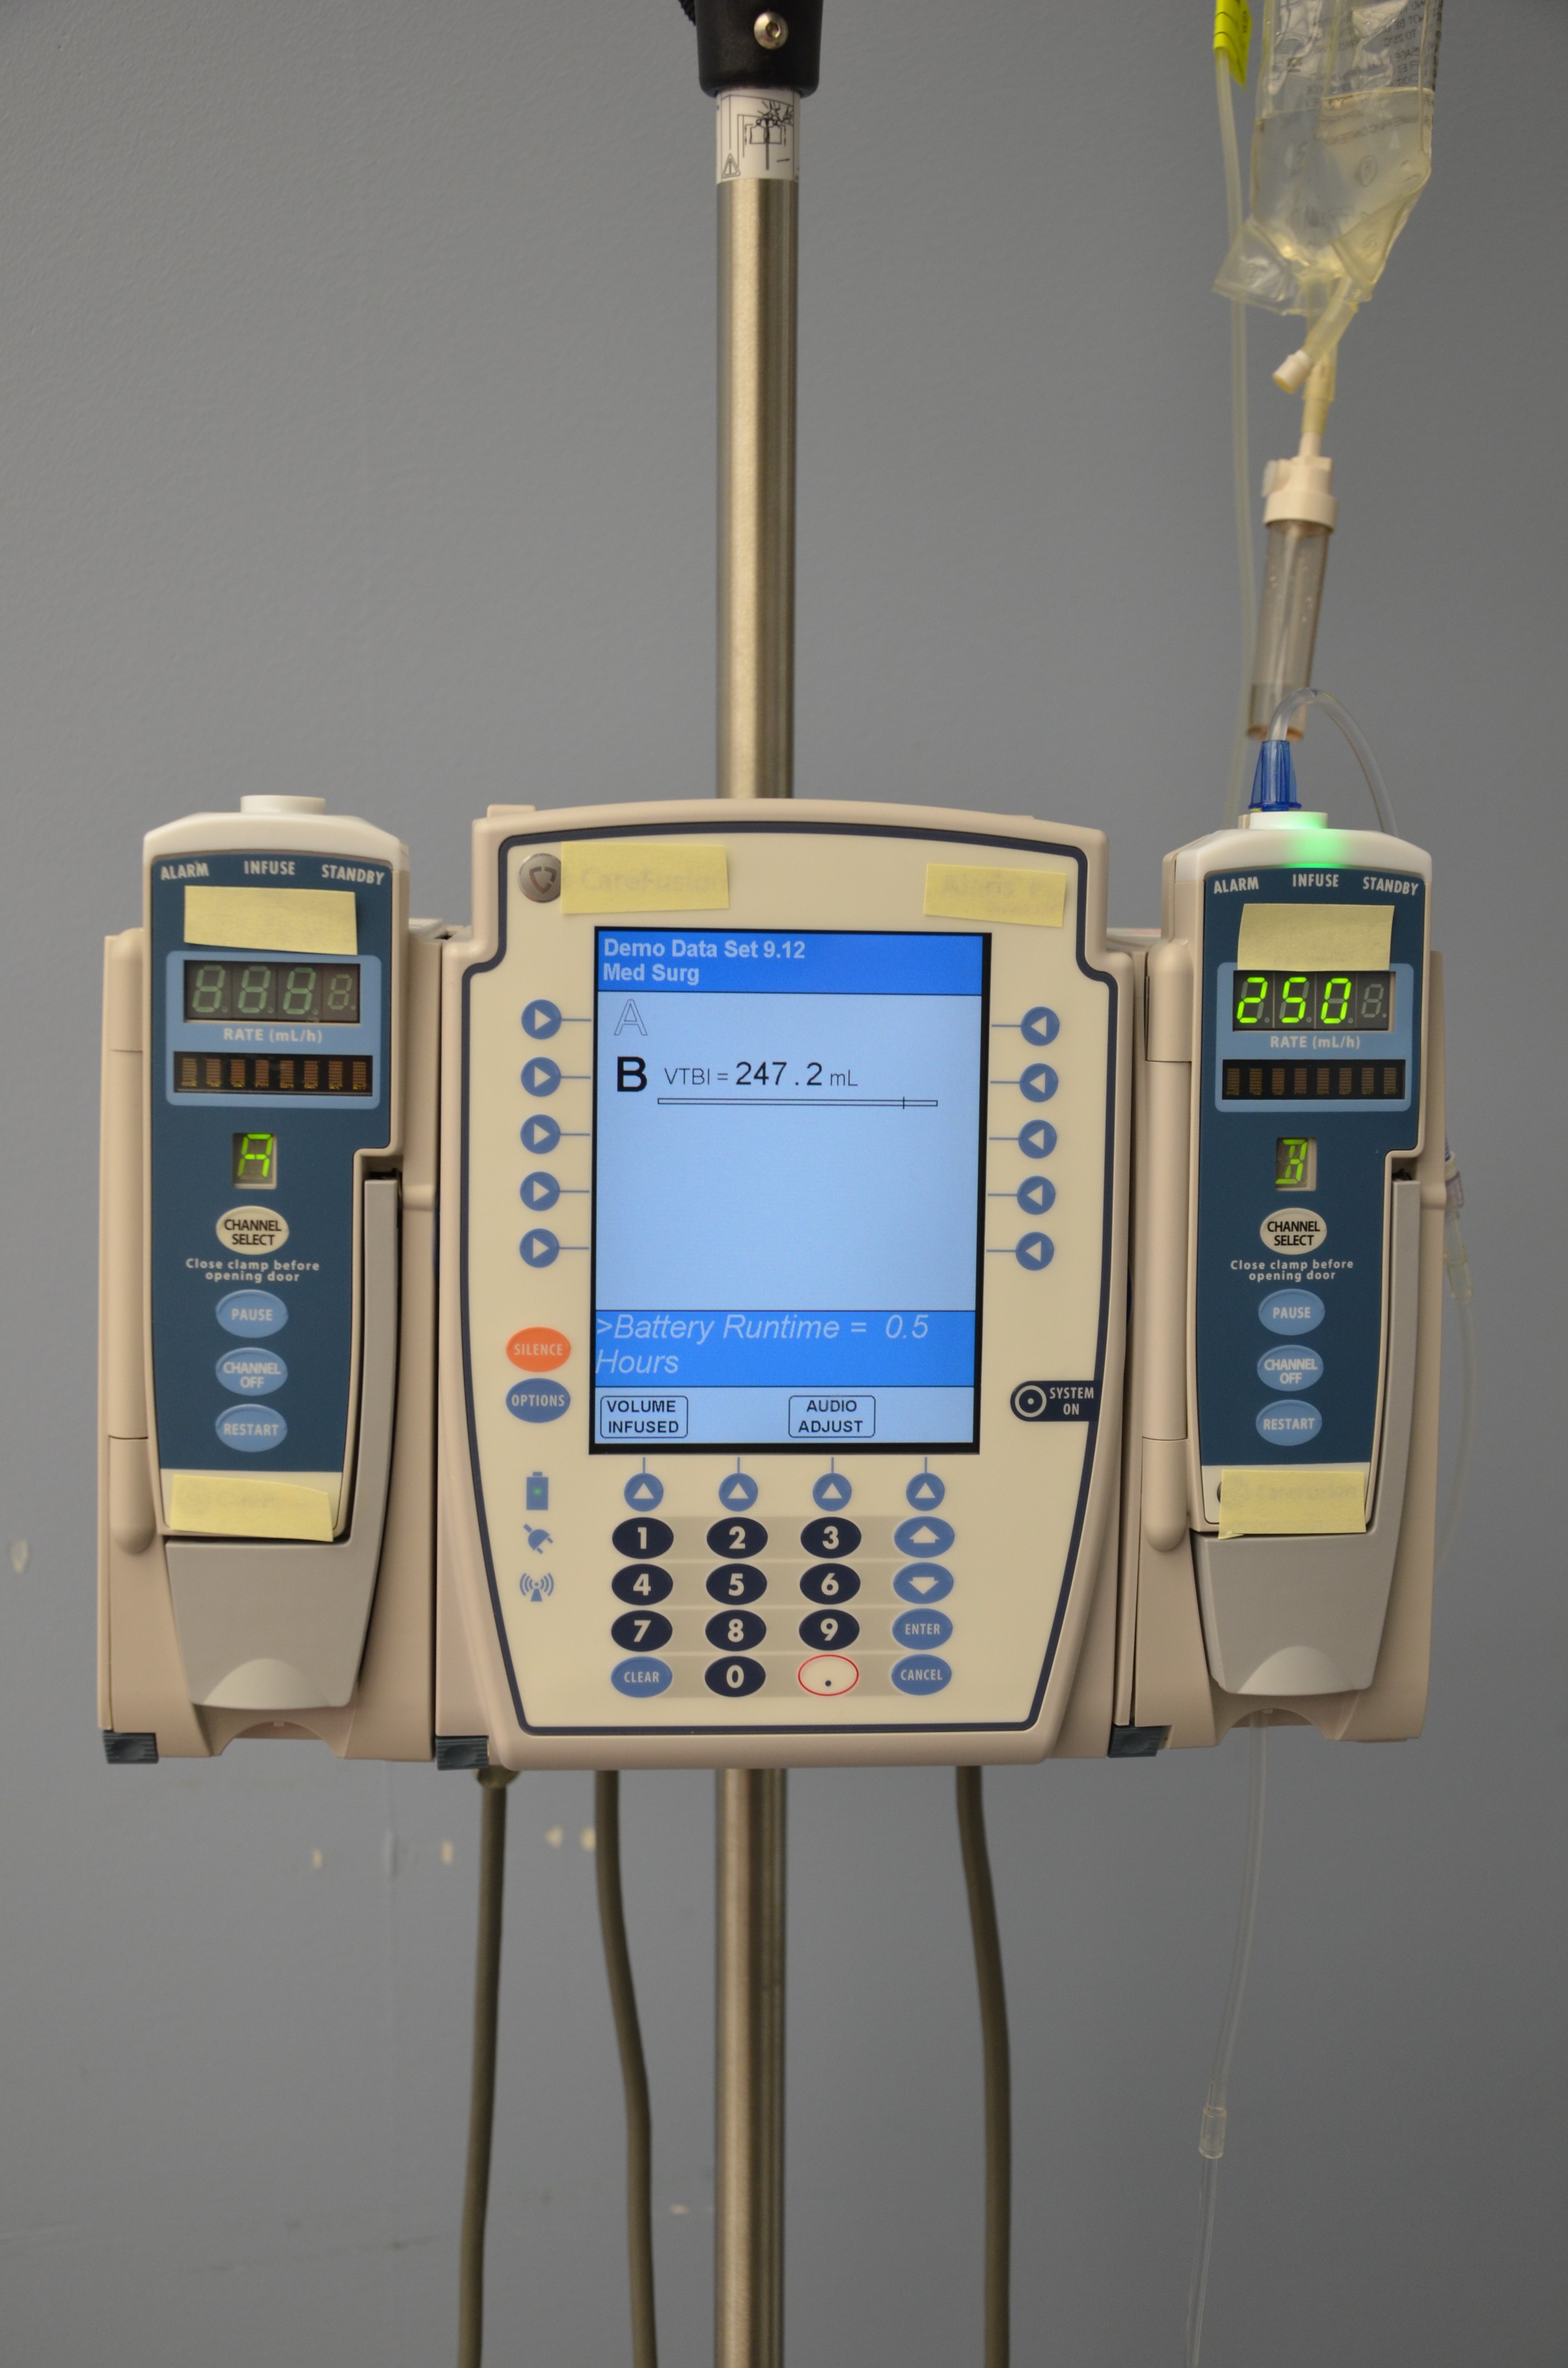
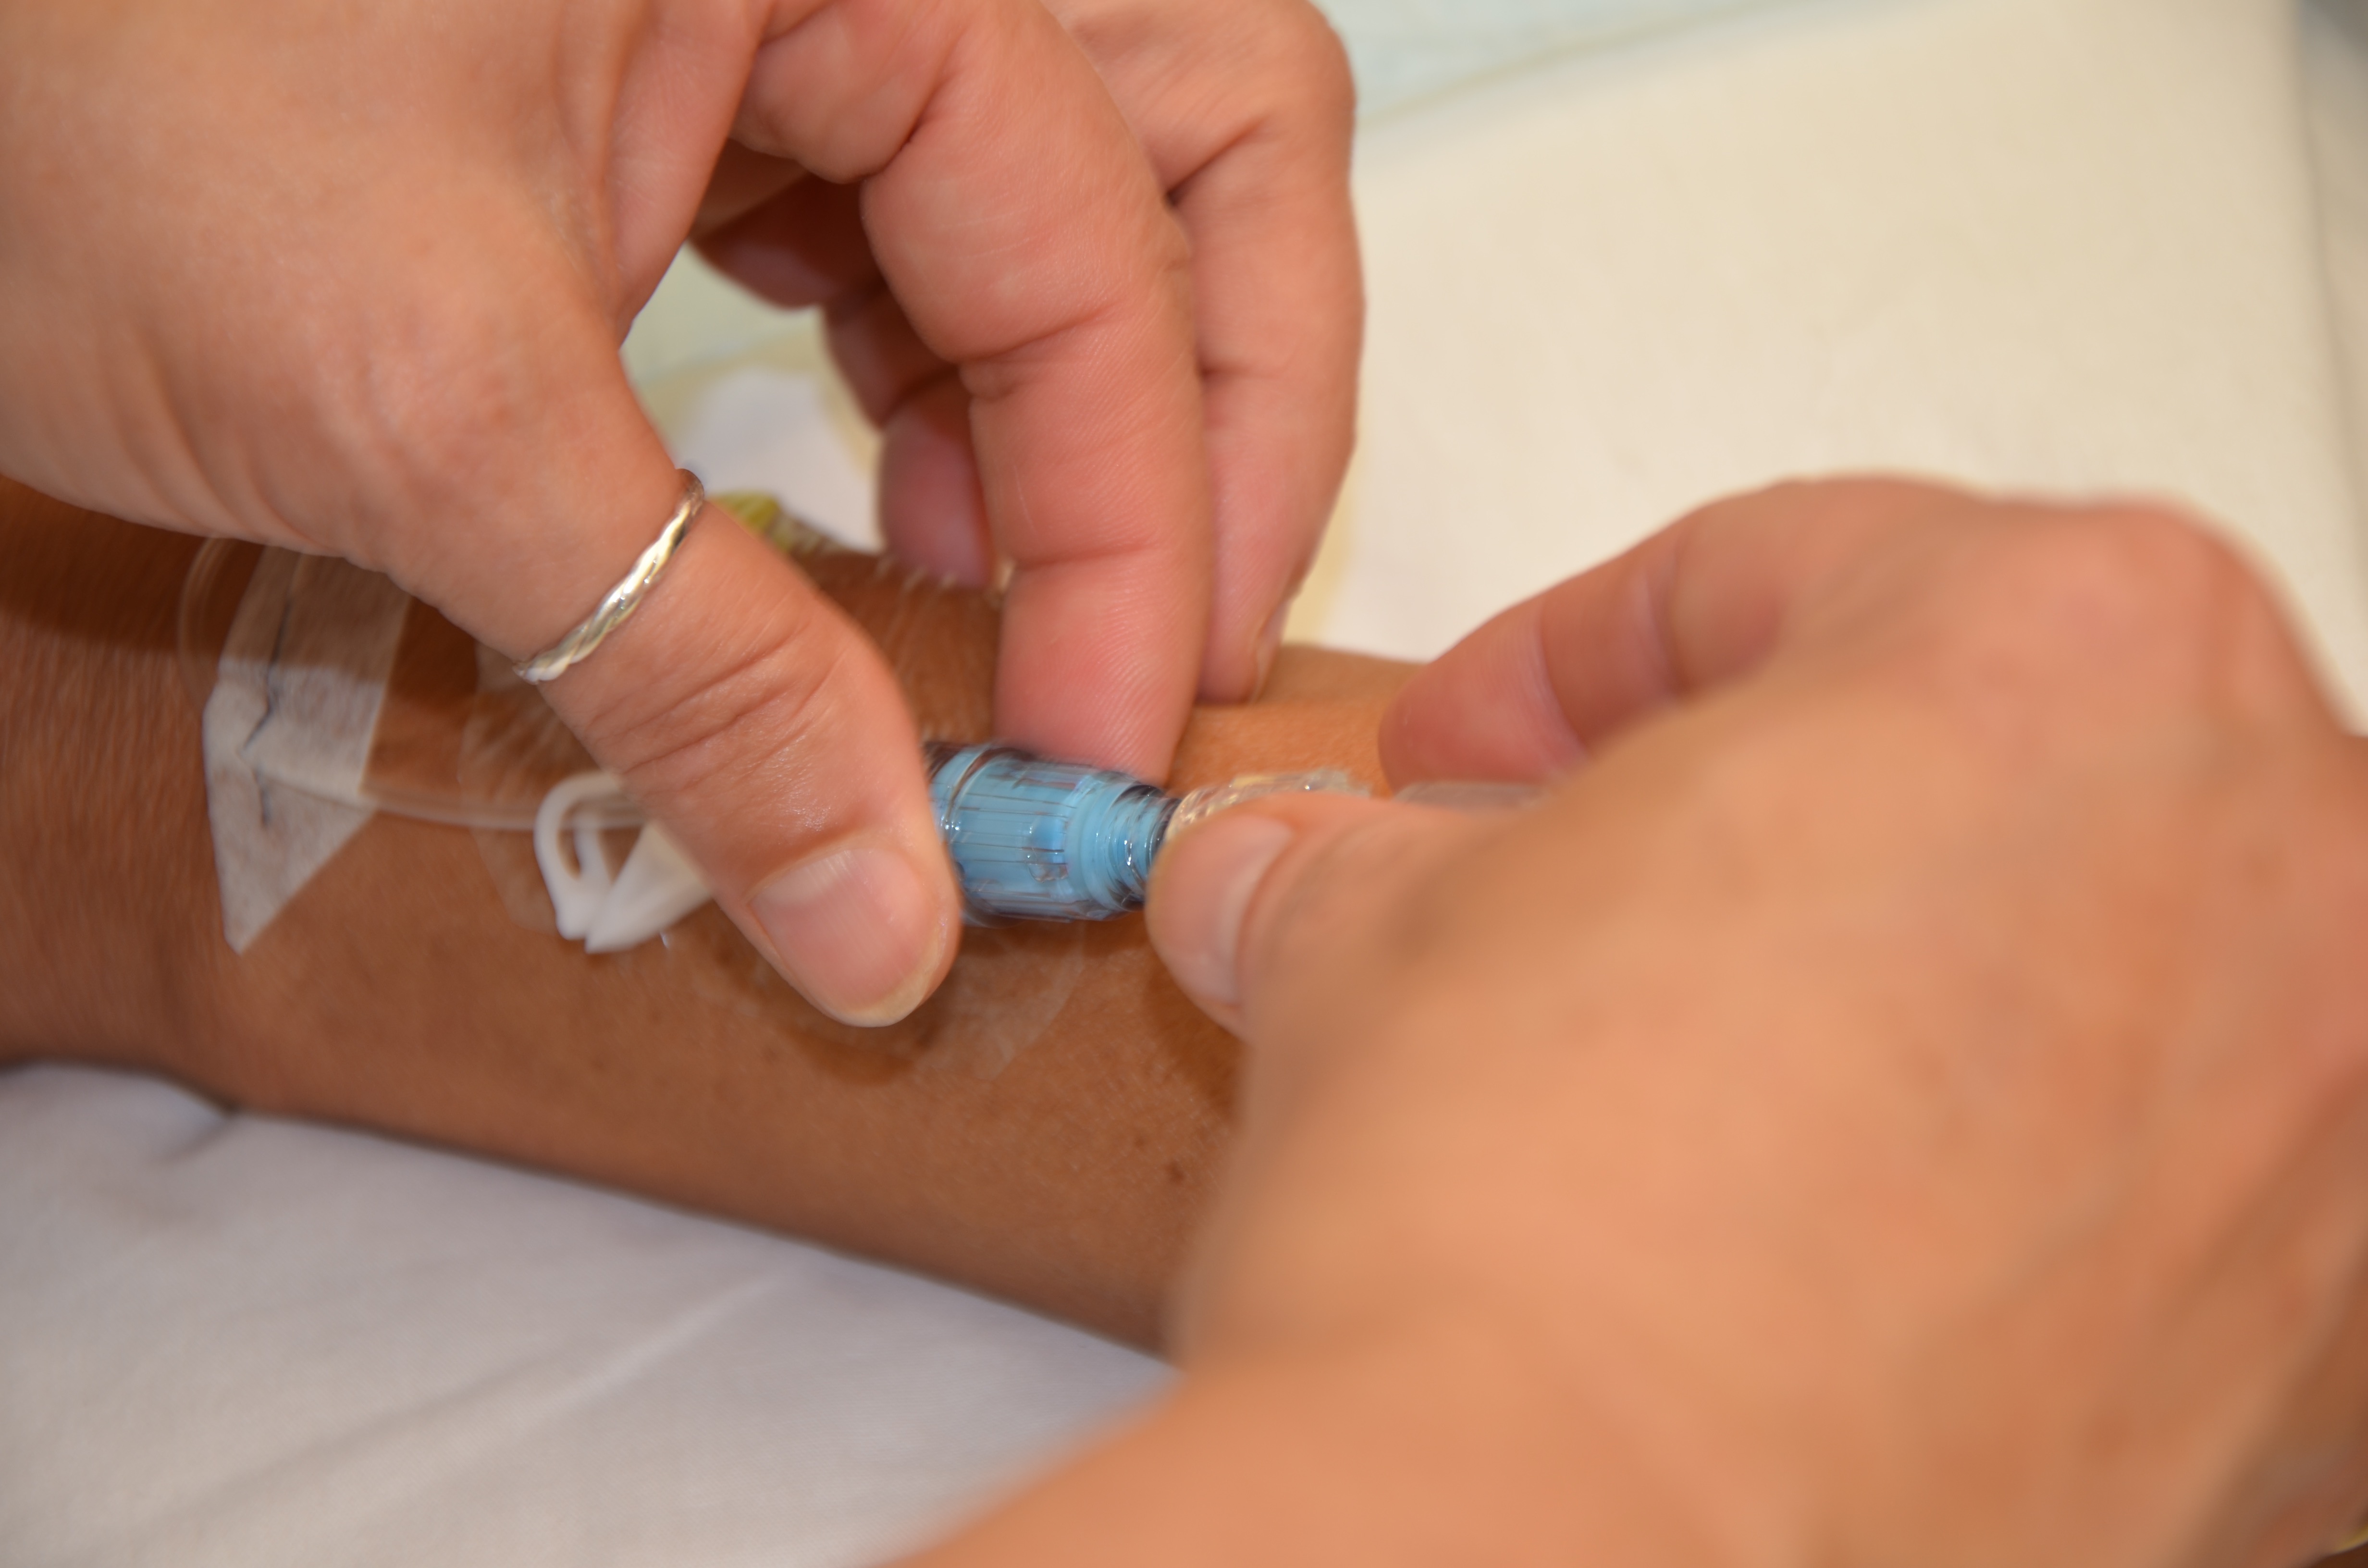
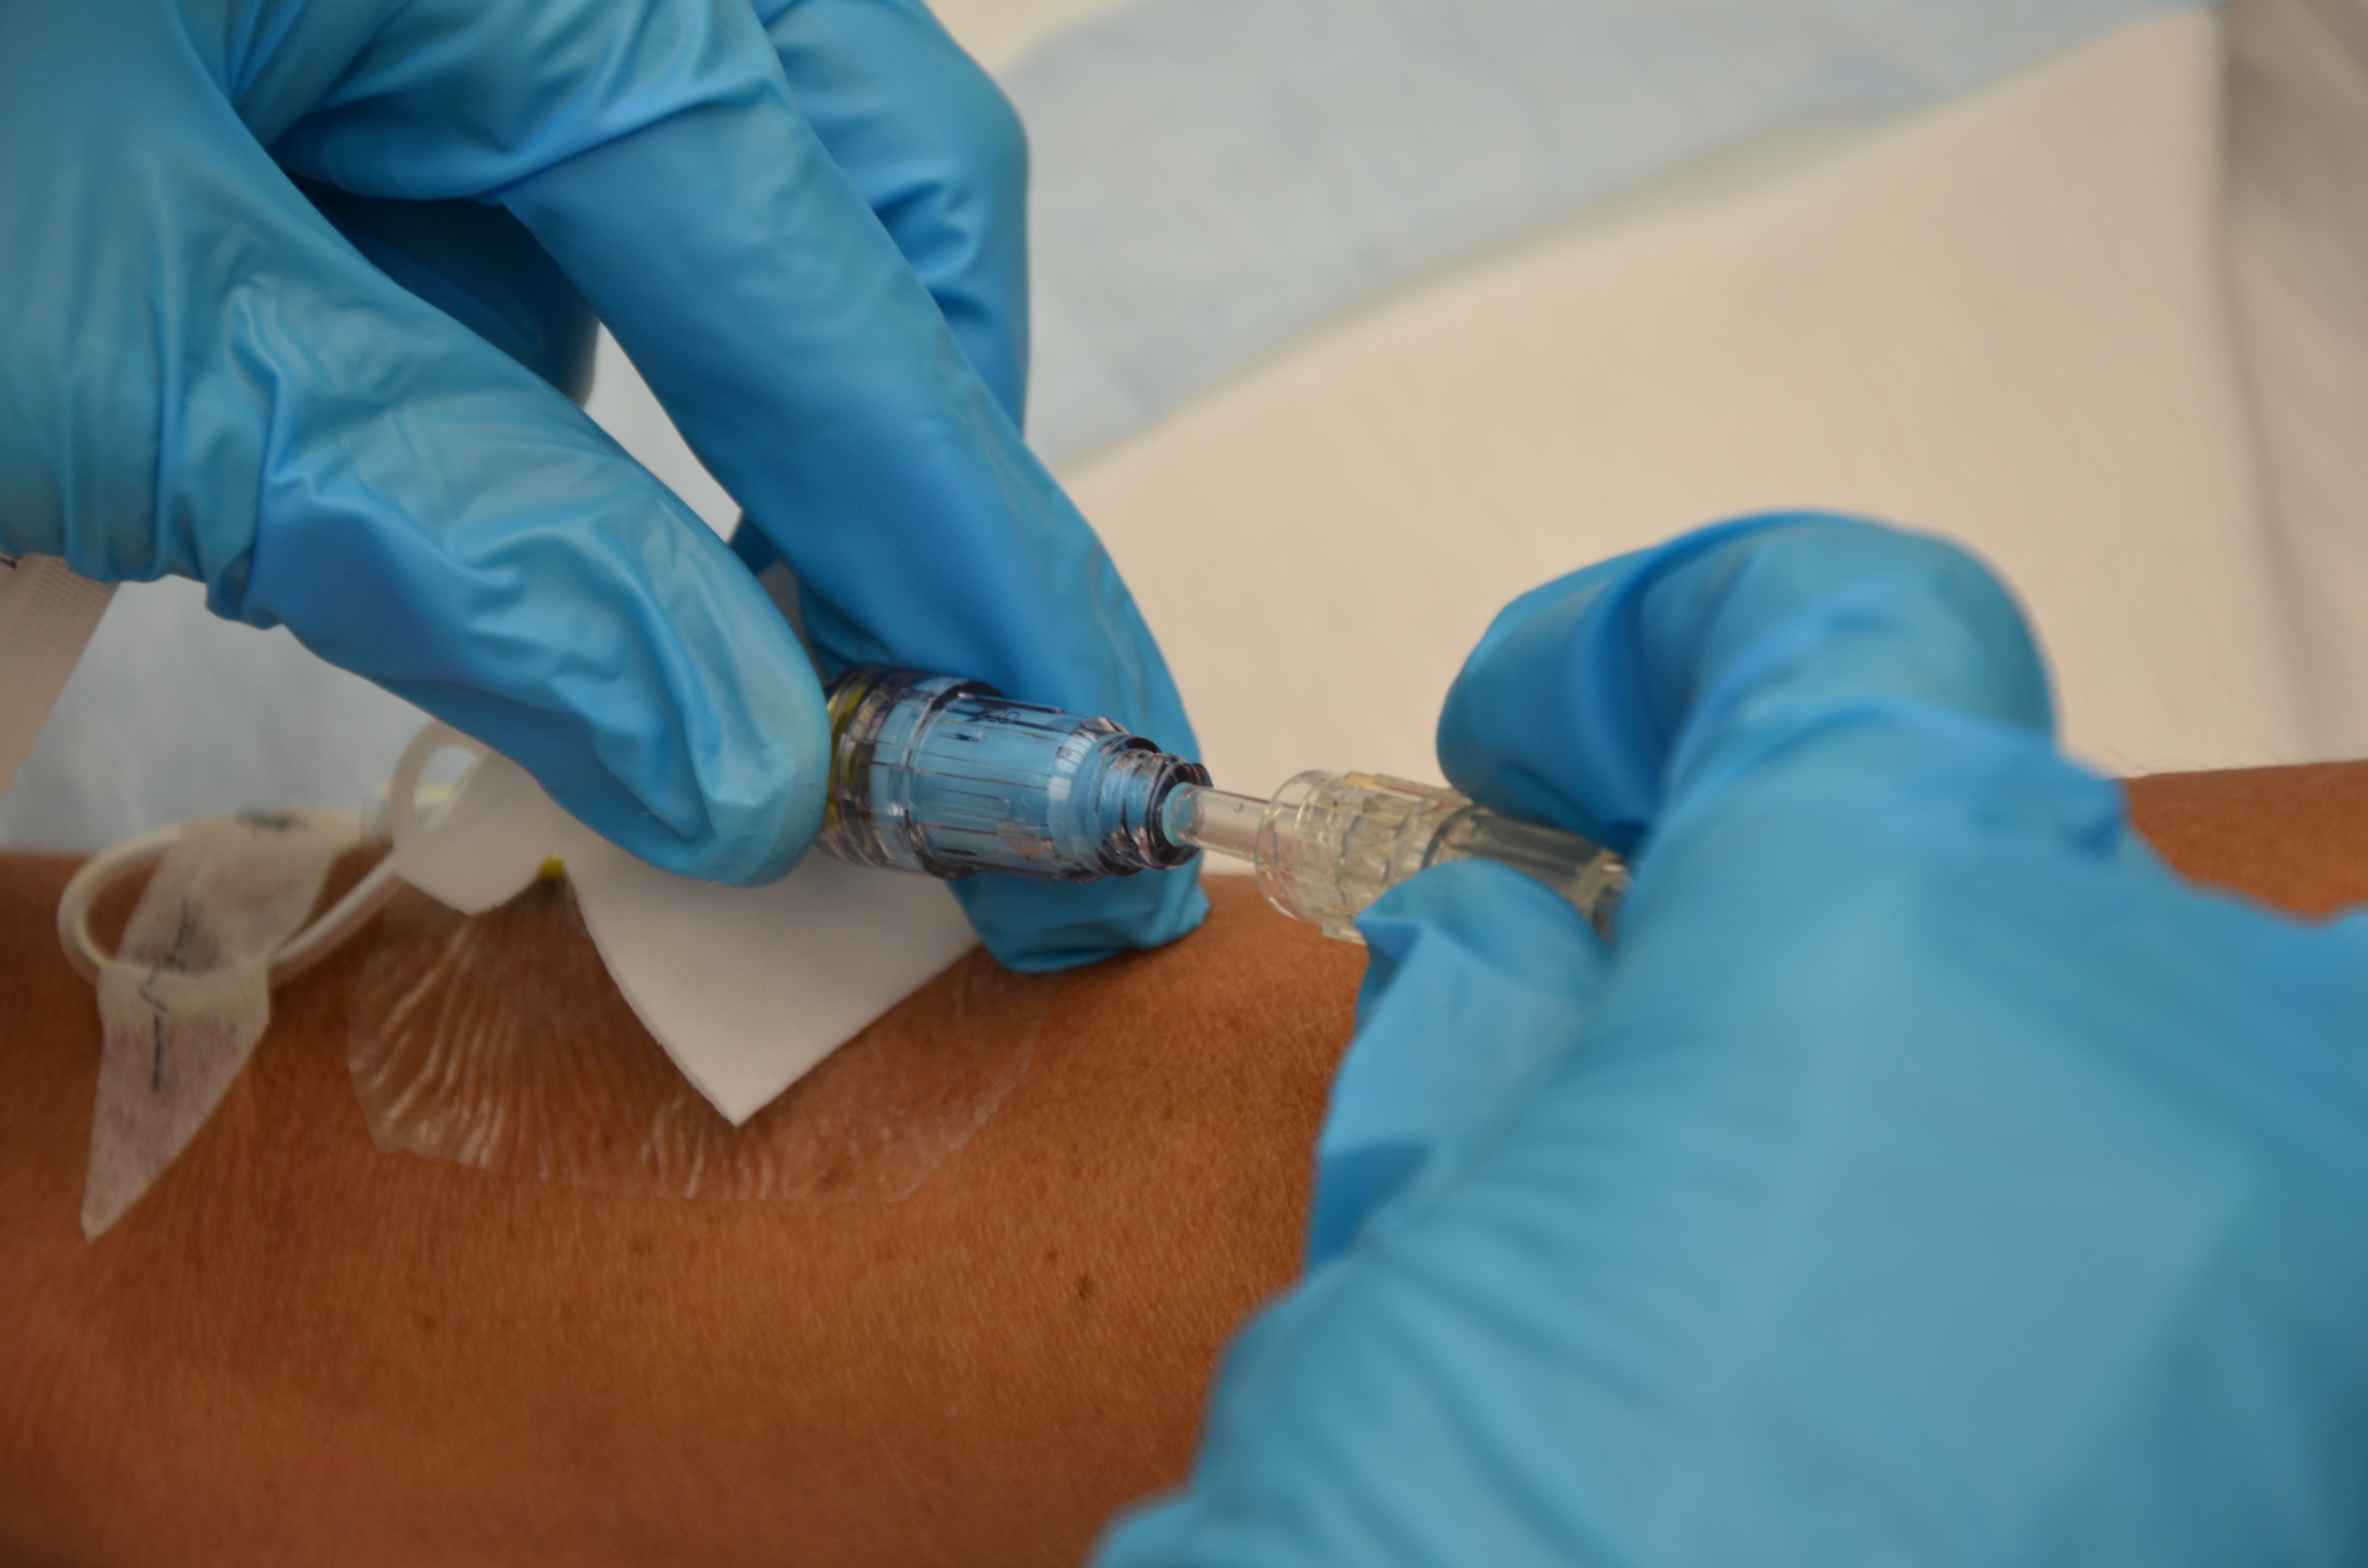
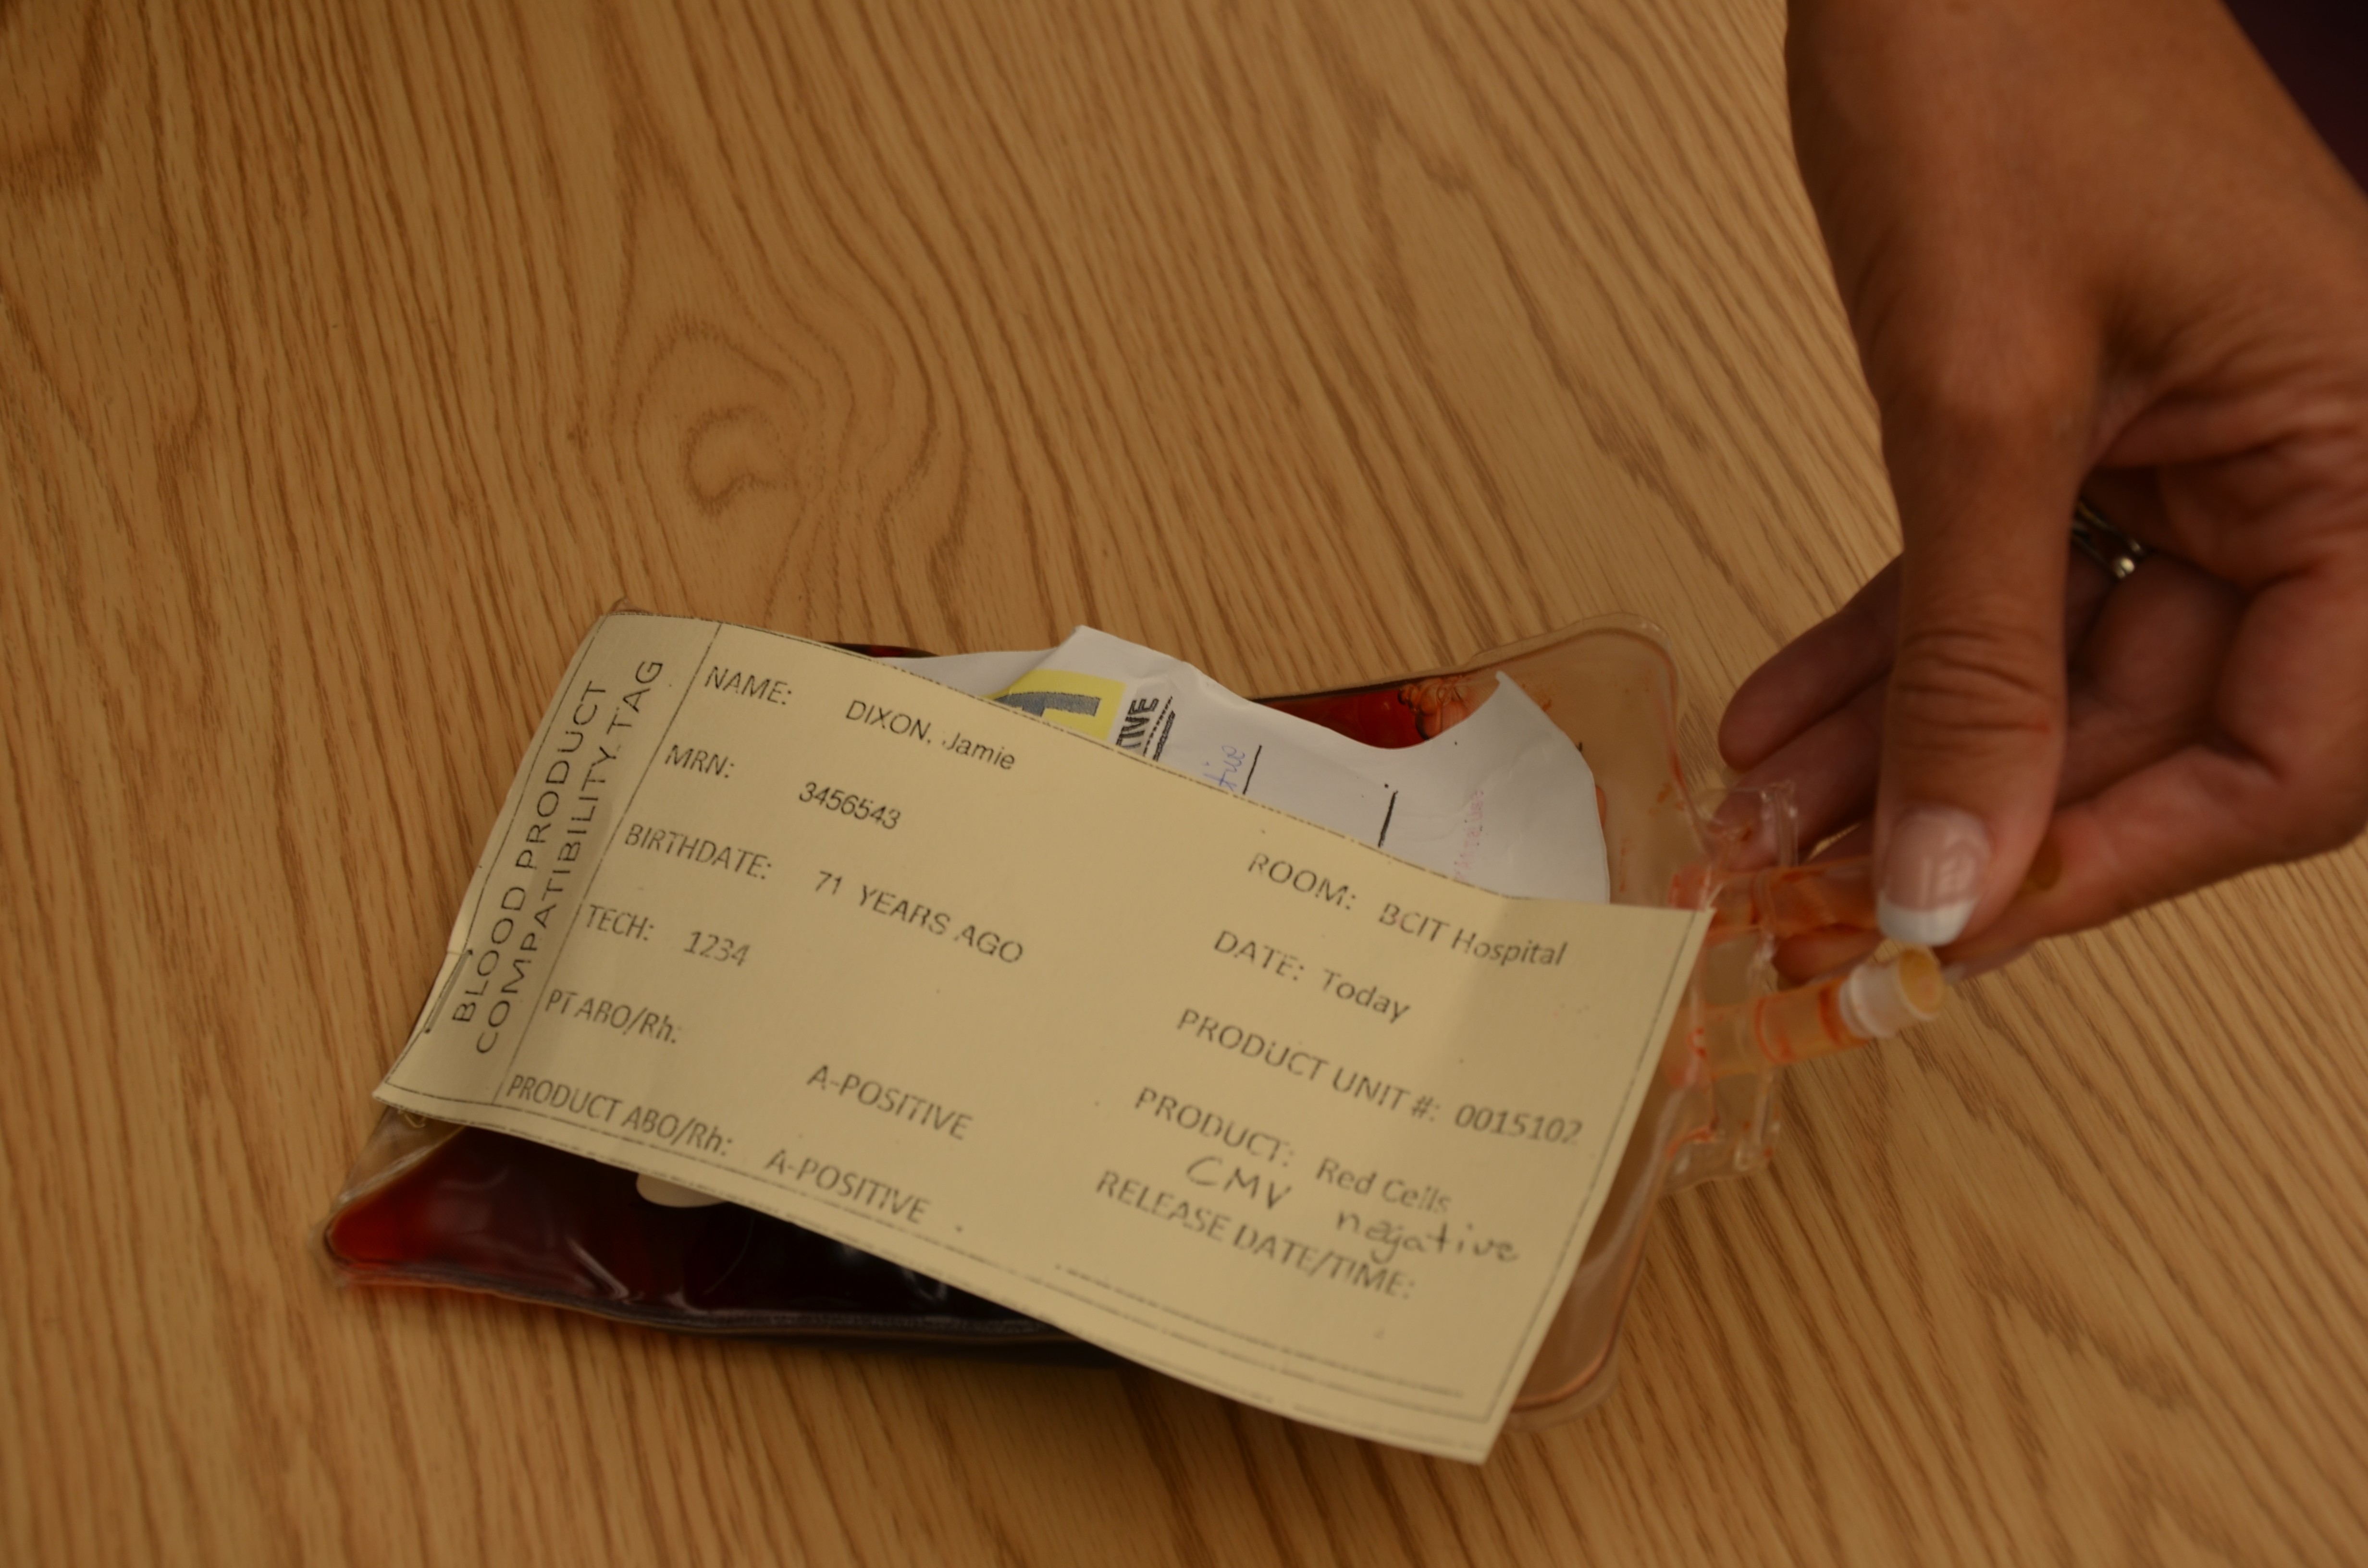
  • Safeguards for medication administration exist in most hospitals. Make use of all safety strategies (such as smart IV pumps, no-interruption zones, two patient identifiers, and checklists) to administer medications safely.
  • Quality and safety controls for safe medication administration must be considered along the entire process, not just at the point of administration.
  • It is human nature to look for quick and easy ways to perform a task, but doing so may lead to errors. Avoid workarounds: Most hospitals have operational failures that lead to front line health care providers finding ways to manage deficiency in hospital operating systems. Rather than creating workarounds, engage in the additional steps to prevent re-occurrence of issues.
  • Stay current with evidence-based research regarding potential system errors in health care. Commit to improving patient safety with medication administration.
  • Report all errors, near misses, and adverse reactions to ensure knowledge is shared, and to prevent further errors from occurring.

Suggested Online Resources

  1. Agency for Healthcare Research and Quality (AHRQ). This website provides evidence-based research, guidelines, recommendations, and resources on improving patient safety .
  2. Canadian Patient Safety Institute (CPSI). This organization’s website provides guidelines, research, and recommendations for improving patient safety in Canada.
  3. Drug calculations. This medication calculation website reviews how to calculate the dosages for parenteral and non-parenteral medications, and IV fluids. It also includes metric conversions and IV drop rate calculations.
  4. Institute for Healthcare Improvement (IHI). This group’s website provides educational resources, webinars, publications, and improvement stories and tools to enhance patient safety.
  5. Institute for Safe Medication Practices (ISMP). This organization focuses on improving medication administration. Its website lists high-alert medications, offers newsletters and webinars, and provides a system for reporting medication errors, guidelines, and policies on safe practices.

References

Ağac, E., & Günes, U. Y. (2011). Effect on pain of changing the needle prior to administering medication intramuscularly: A randomized controlled trial. Journal of Advanced Nursing, 67(3) 563-568. doi: 10.1111/j.1365-2648.2010.05513.x.

Agency for Healthcare Research and Quality. (2014). Checklists. Retrieved on June 11, 2015, from http://psnet.ahrq.gov/primer.aspx?primerID=14

Alberta Health Services. (2009). Direct IV medications. Specialized clinical competency program. Retrieved on June 2, 2015, from http://extcontent.covenanthealth.ca/Policies/iii-45_Learning_Module.pdf

American Nurses Association. (2002). Needlestick prevention guide. Retrieved on Oct 5, 2015, from http://www.who.int/occupational_health/activities/2needguid.pdf

ATI. (2015a). Administering an ID injection. Retrieved on Oct 7, 2015, from http://www.atitesting.com/ati_next_gen/skillsmodules/content/medication-administration-3/equipment/intradermal-injections.html

ATI. (2015b). Administering an SC injection. Retrieved on Oct 7, 2015, from http://www.atitesting.com/ati_next_gen/skillsmodules/content/medication-administration-3/viewing/subcutaneous_injection.html

Berman, A., & Snyder S. J. (2016). Skills in clinical nursing (8th ed.). New Jersey, New York: Pearson.

Black, L. (2013). Ditch the pinch: Bilateral exposure injuries during subcutaneous injections. American Journal of Infection Control, 41(9), 815-819. doi: 10.1016/j.ajic.2012.10.017

British Columbia Institute of Technology (BCIT). (2015). NURS 3020: Clinical techniques. Week 11, power point notes.

Brookside Associates. (2015a). Procedure for administering an intradermal injection. Retrieved on Oct 8, 2015, from http://brooksidepress.org/intramuscular/lessons/lesson-2-administer-an-intramuscular-injection/2-07-procedure-for-administering-an-intradermal-injection/

Brookside Associates. (2015b). Procedure for administering a subcutaneous injection. Retrieved on Oct 7, 2015, from http://brooksidepress.org/intramuscular/lessons/lesson-2-administer-an-intramuscular-injection/2-05-procedure-for-administering-a-subcutaneous-injection/

Butt, A. R. (2010). Medical error in Canada. Issues related to reporting medical error and methods to increase reporting. McMaster University Medical Journal, Clincal Review, 7(1). 15-18.

Canadian Agency for Drugs and Technologies in Health. (2014). Aspirating versus not aspirating prior to injection of medication: Comparative clinical evidence and guidelines. Retrieved on Oct 7, 2015, from
https://www.cadth.ca/sites/default/files/pdf/htis/nov-2014/RB0669%20Aspiration%20Prior%20to%20Injection%20Final.pdf

Canadian Diabetes Association. Clinical Practice Guidelines Expert Committee. (2013). Clinical practice guidelines for the prevention and management of diabetes in Canada. Canadian journal of diabetes, 37(supp 1), s1-s212.

Canadian Institute for Health Information. (2009). National system for incident reporting: An innovative approach to information management. CPSI forum, 2009. Retrieved on June 2, 2015, from http://www.patientsafetyinstitute.ca/English/toolsResources/Presentations/Documents/2009/Canada%27s%20Forum%20-%20Presentation%20A4-b.pdf

Canadian Patient Safety Institute. (2012). Canadian analysis incident framework. Retrieved on June 3, 2015, from http://www.patientsafetyinstitute.ca/english/toolsresources/incidentanalysis/documents/canadian%20incident%20analysis%20framework.pdf

Centers for Disease Control (CDC). (2012). NOISH fast facts (home healthcare workers). How to prevent needlestick and sharp injuries. Retrieved on Oct 7, 2015, from http://www.cdc.gov/niosh/docs/2012-123/pdfs/2012-123.pdf

Centers for Disease Control (CDC). (2013). Infection control. Retrieved on June 11, 2015, from http://www.cdc.gov/oralhealth/infectioncontrol/faq/protective_equipment.htm

Centers for Disease Control (CDC). (2015). Injection safety. Retrieved on June 2, 2015, from http://www.cdc.gov/injectionsafety/

College of Nurses of Ontario. (2015). Medication practice standard. Retrieved on June 1, 2015, from http://www.cno.org/Global/docs/prac/41007_Medication.pdf

Clayton, B. D., Stock, Y.  N., & Cooper, S. E. (2010). Basic pharmacology for nurses. St Louis, MO: Mosby Elsevier.

Cocoman, A., & Murray, J. (2008). Intramuscular injections: A review of best practice for mental health nurses. Journal of Psychiatry Mental Health Nursing, 15(5), 424-434. doi: 10.1111/j.1365-2850.2007.01236

Davidson, K.M. & Rourke, L. (2014). Teaching best evidence: Deltoid intramuscular injection techniques. Retrieved on Oct 15, 2015, from http://www.sciedu.ca/journal/index.php/jnep/article/view/1888/1291

Debono, D. S., Greenfield, D., Travaglia, J. F., Long, J. C., Black, D., Johnson, J., & Braithwaite, J. (2013). Nurses’ workarounds in acute healthcare settings: A scoping review. BMC Health Services Research, 13(175). doi:10.1186/1472-6963-13-175

Ellis, J., & Parush, A. (2012). Preventing errors with high alert drugs: Testing a computerized double check. Retrieved on June 5, 2015, from http://www.patientsafetyinstitute.ca/English/research/cpsiResearchCompetitions/2009/Documents/Ellis/Ellis%20Techinical%20Report%20English.pdf

Greenway, K. (2014). Rituals in nursing: Intramuscular injection. Journal of Clinical Nursing, 23(23-24), 3583-3588. doi: 10.1111/jocn.12627

Health Canada. (2012). Adverse reaction information. Retrieved on June 1, 2015, from http://www.hc-sc.gc.ca/dhp-mps/medeff/advers-react-neg/index-eng.php

Hunter, J. (2008). Intramuscular injection techniques. Nursing Standard, 22 (24), 35-40.

Hutin, Y., Hauri, A., Chiarello, L., Caitlin, M., Stillwell, B., Ghebrehiwet, T., Garner, J., and Members of the Safe Injection Practice Group (2003). Best infection control practices for intradermal, subcutaneous and intramuscular injections. Retrieved on Nov. 8, 2015 from http://www.who.int/bulletin/volumes/81/7/Hutin0703.pdf

Institute for Healthcare Improvement. (2015). High alert medication safety. Retrieved on June 11, 2015, from http://www.ihi.org/topics/highalertmedicationsafety/pages/default.aspx

Institute for Safe Medication Practices (ISMP). (2003). How fast is too fast for IV push medications? Retrieved on June 3, 2015, from http://www.ismp.org/newsletters/acutecare/articles/20030515.asp

Institute for Safe Medication Practices (ISMP). (2013). Independent double checks: Undervalued and misused: Selective use of this strategy can play an important role in medication safety. Retrieved on June 5, 2015, from https://www.ismp.org/newsletters/acutecare/showarticle.aspx?id=51

Institute for Safe Medication Practices (ISMP). (2014). ISMP list of high alert medications in acute care settings. Retrieved on June 1, 2015, from https://www.ismp.org/tools/highalertmedications.pdf

Institute for Safe Medication Practices Canada (ISMP Canada). (2013). Ontario hospital critical incident related to medications or IV fluids analysis report. January-December 2013. Retrieved on June 4, 2015, from http://www.ismp-canada.org/download/ocil/ON_Critical_Incidents_Analysis_Report_3JUL2014.pdf

Institute for Safe Medication Practices Canada (ISMP Canada). (2014). Opioid-related deaths associated with medication incidents. Findings of multi-incident analysis. Retrieved on June 4, 2015, from http://www.ismp-canada.org/download/OpioidStewardship/Opioid-Related_Deaths_Associated_with_Medication_Incidents_Nov2014.pdf

Ipp, M., Sam, J., & Parkin, P. C. (2006). Needle aspiration and intramuscular vaccination. Arch Pediatr Adolesc Med, 160(4), 451-453. doi:10.1001/archpedi.160.4.451-a

Lynn, P. (2011). Photo atlas of medication administration (4th ed.). Philadelphia, PA: Lippincott Williams & Wilkins.

Malkin, B. (2008). Are techniques used for intramuscular injection based on research evidence? Nursing times, 104: 50-51, 48–51.

Merriam-Webster. (2015). Definition of parenteral. Retrieved on June 5, 2015, from http://www.merriam-webster.com/medical/parenteral

Mitchell, J. R., & Whitney, F. W. (2001). The effect of injection speed on the perception of intramuscular injection pain. A clinical update. Retrieved on Oct 7, 2015, from http://www.ncbi.nlm.nih.gov/pubmed/11760527

National Institute for Occupational Safety and Health. (1999). Preventing needle stick injuries in the health care setting. Retrieved on Oct 5, 2015, from http://www.cdc.gov/niosh/docs/2000-108/pdfs/2000-108.pdf

National Institute of Health Clinical Center. (2015). NIH Clinical Center patient education material. Giving a subcutaneous injection. Retrieved on Oct 7, 2015, from http://www.cc.nih.gov/ccc/patient_education/pepubs/subq.pdf

National Patient Safety Agency. (2009). Safety in doses. Improving the use of medication in NHS. Retrieved on June 11, 2015, from http://www.nrls.npsa.nhs.uk/resources/?entryid45=61625

National Priority Partnership. (2010). Preventing medical errors: A $21 billion opportunity. Retrieved on June 3, 2015, from http://psnet.ahrq.gov/resource.aspx?resourceID=20529

Nisbet, A. C. (2006). Intramuscular gluteal injections in the increasingly obese population: Retrospective study. British Medical Journal, 332(7542), 637-638. doi: http://dx.doi.org/10.1136/bmj.38706.742731.47

Ogston-Tuck, S. (2014a). Intramuscular injection technique: An evidence-based approach. Nursing Standard, 29(4), 52-59. Retrieved on Oct 7, 2015, from http://journals.rcni.com/doi/pdfplus/10.7748/ns.29.4.52.e9183

Ogston-Tuck, S. (2014b). Subcutaneous injection technique: An evidence-based approach. Nursing Standard, 29(3), 53-58.

Perry, A., Potter, P., & Ostendorf, W. (2014). Clinical skills and nursing techniques (8th ed.). St Louis, MO: Elsevier-Mosby.

Prakash, V., Koczmara, C., Saveage, P., Trip, K., Stewart, J., Mccurdie, T., Cafazzo, J., & Trbovich, P. (2014). Mitigating errors caused by interruptions during medication verification and administration: Interventions in a simulated ambulatory chemotherapy setting. BMJ Quality and Safety, 0 (1-10). doi:10.1136/bmjqs-2013-002484

Pratt, J. R., Pellowe, C. M., Wilson, J. A., Loveday, H. P., Harper, P. J., Jones, S. L. R. J., McDougall, C., & Wilcox, M. J. (2007). Epic2: National evidence based guidelines for preventing health care associated infections in NHS hospitals in England. J Hosp Infect 65, Suppl 1, S1 – 64.

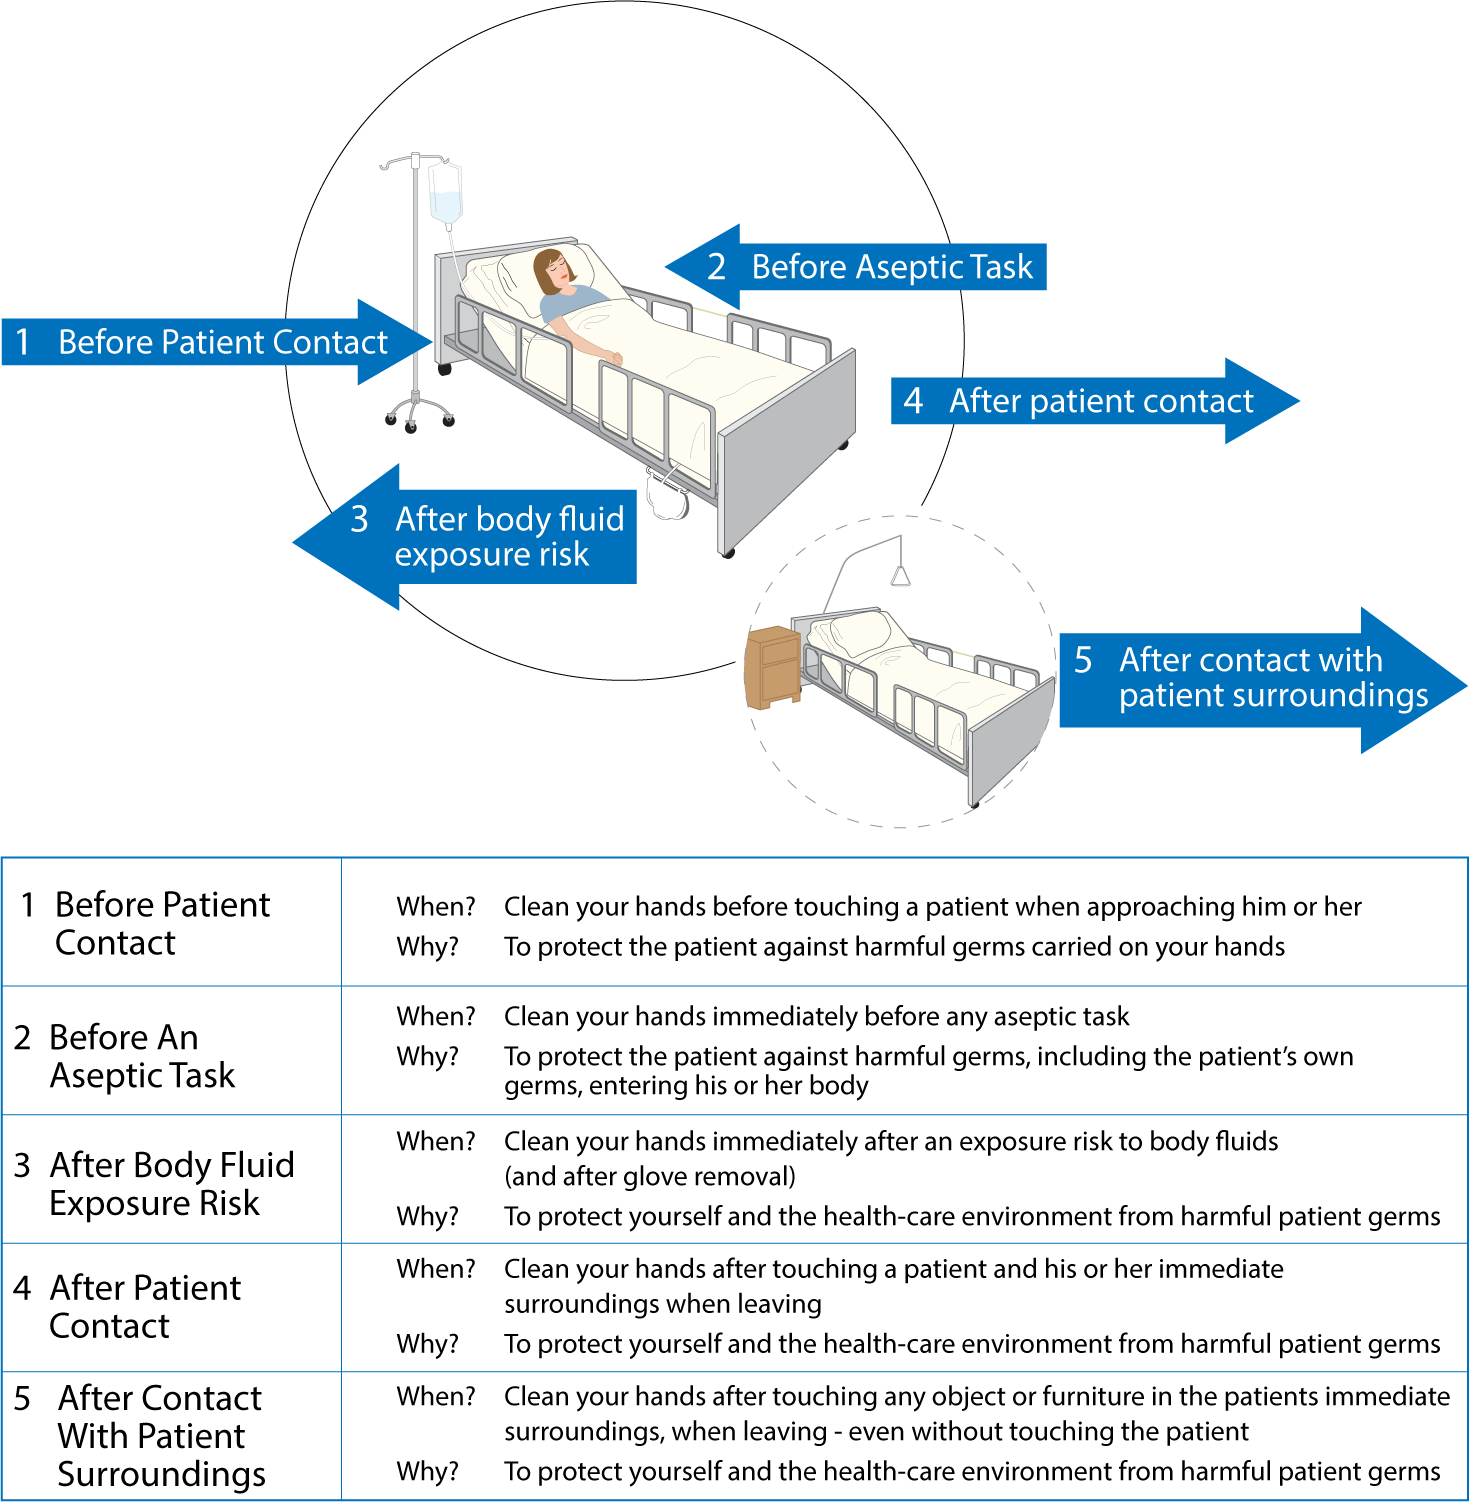
Provincial Infectious Disease Advisory Committee. (2014). Best practices for hand hygiene in all health care settings (4th ed.). Retrieved on June 4, 2015, from http://www.publichealthontario.ca/en/eRepository/2010-12%20BP%20Hand%20Hygiene.pdf

Rodgers, M.A., & King, L. (2000). Drawing up and administering intramuscular injections: A review of the literature. Journal of Advanced Nursing, 31(3), 574–582. doi: 10.1046/j.1365-2648.2000.01312.x

Sepah, Y., Samad, L., & Altaf, A. (2014). Aspiration in injections: Should we continue or abandon the practice? F1000Research, 3(157) doi:10.12688/f1000research.1113.1

Siegel, J.D., Rhinehart, E., Jackson, M., Chiarello, L., and the Healthcare Infection Control Practices Advisory Committee (2007). Guideline for Isolation Precautions: Preventing Transmission of Infectious Agents in Healthcare Settings. Retrieved on Nov. 8, 2015, from http://www.cdc.gov/ncidod/dhqp/pdf/isolation2007.pdf

Sisson, H. (2015). Aspirating during the intramuscular injection procedure: A systematic literature review. Journal of Clinical Nursing, Sept 24 (17-18), 2368-2375. doi: 10.1111/jocn.12824

Wilburn, S. Q. (2004). Needlestick sharps injury and prevention. The Online Journal of Issues in Nursing. Retrieved on Oct 5, 2015, from http://www.nursingworld.org/MainMenuCategories/ANAMarketplace/ANAPeriodicals/OJIN/TableofContents/Volume92004/No3Sept04/InjuryPrevention.html

Wilburn, S. Q., & Eijkemans, G. (2004). Preventing needle stick injuries among health care workers. International Journal of Occupational and Environmental Health, 10(4), 451-456.

Workers Compensation Act. (2015). Occupational health and safety regulation. Retrieved on July 20, 2015, from http://www.bclaws.ca/Recon/document/ID/freeside/296_97_04

Workman, B. (1999). Safe injection techniques. Nursing standard, 13(39), 47-53.

World Health Organization. (2012). Course: Knowledge is the enemy of unsafe care. Retrieved on June 1, 2015, from http://who.int/patientsafety/education/curriculum/course7_handout.pdf

VIII

Chapter 8. Intravenous Therapy

59

8.1 Introduction

The use of intravenous (IV) therapy is common in the health care setting. IV therapy is a treatment that infuses fluids, nutrients, blood, blood products, or medication directly into a vein. It is a fast, efficient way to infuse fluids and medications into the body.

This chapter will review how to care for a patient with peripheral intravenous therapy and central venous catheters. It will cover how to prepare IV infusions, and how to assess, maintain, and prevent complications related to intravenous therapy.

Learning Objectives

  • Define patient conditions
  • Discuss how to prevent infections related to IV therapy, general guidelines, and complications associated with IV therapy
  • Compare the benefits and complications related to a peripheral IV for administering IV therapy
  • Identify common types of central venous catheters and the benefits and complications associated with them
  • Demonstrate how to flush a saline lock, start a continuous IV infusion, discontinue a continuous infusion, and discontinue a peripheral IV
  • Describe how to change IV solution and IV tubing, and how to calculate IV rates
  • Discuss indications for blood and blood product transfusions
  • Describe how to prepare, administer, and monitor blood and blood products and manage transfusion reactions according to Canadian standards
  • Define total parenteral nutrition (TPN), explain how to care for a patient receiving TPN, and identify potential complications
  • Explain how to administer TPN

60

8.2 Intravenous Fluid Therapy

Intravenous therapy is treatment that infuses intravenous solutions, medications, blood, or blood products directly into a vein (Perry, Potter, & Ostendorf, 2014). Intravenous therapy is an effective and fast-acting way to administer fluid or medication treatment in an emergency situation, and for patients who are unable to take medications orally. Approximately 80% of all patients in the hospital setting will receive intravenous therapy.

The most common reasons for IV therapy (Waitt, Waitt, & Pirmohamed, 2004) include:

  1. To replace fluids and electrolytes and maintain fluid and electrolyte balance: The body’s fluid balance is regulated through hormones and is affected by fluid volumes, distribution of fluids in the body, and the concentration of solutes in the fluid. If a patient is ill and has fluid loss related to decreased intake, surgery, vomiting, diarrhea, or diaphoresis, the patient may require IV therapy.
  2. To administer medications, including chemotherapy, anesthetics, and diagnostic reagants: About 40% of all antibiotics are given intravenously.
  3. To administer blood or blood products: The donated blood from another individual can be used in surgery, to treat medical conditions such as shock or trauma, or to treat a failure in the production of red blood cells. The infusion restores circulating volumes, improving the ability to carry oxygen and replace blood components that are deficient in the body.
  4. To deliver nutrients and nutritional supplements: IV therapy can deliver some or all of the nutritional requirements for patients unable to obtain adequate amounts orally or by other routes.

Guidelines Related to Intravenous Therapy

The following are general guidelines for peripheral IV therapy:

Types of Venous Access

Safe and reliable venous access for infusions is a critical component of patient care in the acute and community health setting. There are a variety of options available, and a venous access device must be selected based on the duration of IV therapy, type of medication or solution to be infused, and the needs of the patient. In practice, it is important to understand the options of appropriate devices available. This section will describe two types of venous access: peripheral IV access and central venous catheters.

Peripheral IV

A peripheral IV is a common, preferred method for short-term IV therapy in the hospital setting. A peripheral IV (PIV) (see Figure 8.1) is a short intravenous catheter inserted by percutaneous venipuncture into a peripheral vein, held in place with a sterile transparent dressing to keep the site sterile and prevent accidental dislodgement (CDC, 2011). Upper extremities (hands and arms) are the preferred sites for insertion by a specially trained health care provider. If a lower extremity is used, remove the peripheral IV and re-site in the upper extremities as soon as possible (CDC, 2011; McCallum & Higgins, 2012). The hub of a short intravenous catheter is usually attached to IV extension tubing with a positive pressure cap (Fraser Health Authority, 2014).

PIVs are used for infusions under six days and for solutions that are iso-osmotic or near iso-osmotic (CDC, 2011). They are easy to monitor and can be inserted at the bedside. CDC (2011) recommends that PIVs be replaced every 72 to 96 hours to prevent infection and phlebitis in adults. Most agencies require training to initiate IV therapy, but the care and preparation of equipment, and the maintenance of an IV system can be completed each shift by the trained health care provider. For more information on how to initiate IV therapy, see the resources at the end of the chapter.

Saline lock
Figure 8.1 Peripheral intravenous (IV) catheter (PIV)

PIVs are prone to phlebitis and infection, and should be removed (CDC, 2011) as follows:

Several potential complications may arise from peripheral intravenous therapy. It is the responsibility of the health care provider to monitor for signs and symptoms of complications and intervene appropriately. Complications can be categorized as local or systemic. Most complications are avoidable if simple hand hygiene and safe principles are adhered to for each patient at every point of contact (Fraser Health Authority, 2014; McCallum & Higgins, 2012). Table 8.1 lists the potential local and complications and treatment.

Table 8.1 Potential Local Complications of Peripheral IV Therapy

Complication

 Signs, Symptoms, and Treatment

Phlebitis Phlebitis is the inflammation of the vein’s inner lining, the tunica intima. Clinical indications are localized redness, pain, heat, and swelling, which can track up the vein leading to a palpable venous cord.

Mechanical causes: Inflammation of the vein’s inner lining can be caused by the cannula rubbing and irritating the vein. It is recommended to use the smallest gauge possible to deliver the medication or required fluids.

Chemical causes: Inflammation of the vein’s inner lining can be caused by medications with a high alkaline, acidic, or hypertonic solutions. To avoid chemical phlebitis, follow the Parenteral Drug Therapy Manual (PDTM) guidelines for administering IV medications for the appropriate amount of solution and rate of infusion.

Treatment: Immediately remove cannula. May elevate arm or apply a warm compress. Document findings in chart. Initiate a new peripheral IV if necessary.

Infiltration Infiltration occurs when a non-vesicant solution (IV solution) is inadvertently administered into surrounding tissue. Signs and symptoms include pain, swelling, redness, skin surrounding insertion site is cool to touch, change in quality or flow of IV, tight skin around IV site, IV fluid leaking from IV site, and frequent alarms on the IV pump.

Treatment: Stop infusion and remove cannula. Follow agency policy related to infiltration. Always secure peripheral catheter with tape or IV stabilization device to avoid accidental dislodgement. Avoid areas of flexion and always assess IV site prior to giving IV fluids or IV medications.

Extravasation Extravasation occurs when vesicant solution (medication) is administered and inadvertently leaks into surrounding tissue, causing damage to surrounding tissue. Characterized by the same signs and symptoms as infiltration but also includes burning, stinging, redness, blistering, or necrosis of the tissue.

Treatment: Stop infusion and remove cannula. Follow agency policy for extravasation for specific medications. For example, toxic medications have a specific treatment plan.

Hemorrhage Hemorrhage is defined as bleeding from the puncture site.

Treatment: Apply gauze to the site until the bleeding stops, then apply a sterile transparent dressing.

Local infection at IV site Local infection is indicated by purulent drainage from site, usually two to three days after an IV site is started.

Treatment: Remove cannula and clean site using sterile technique. Monitor for signs and symptoms of systemic infection.

Data source: Fraser Health Authority, 2014; McCallum & Higgins, 2012

Systemic complications can occur apart from chemical or mechanical complications. To review the systemic complications of IV therapy, see Table 8.2.

Table 8.2 Systemic Complications of Peripheral IV Therapy
Safety considerations:
  • Cardiac and renal patients have increased risk of systemic complications.
  • Pediatric patients, neonates, and elderly people have increased risk of systemic complications.

Complication

 Signs, Symptoms and Treatment

Pulmonary edema Pulmonary edema, also known as fluid overload or circulatory overload, is a condition caused by excess fluid accumulation in the lungs, due to excessive fluid in the circulatory system. It is characterized by decreased oxygen saturation, increased respiratory rate, fine or coarse crackles at lung bases, restlessness, breathlessness, dyspnea, and coughing up pinky frothy sputum. Pulmonary edema requires prompt medical attention and treatment. If pulmonary edema is suspected, raise the head of the bed, apply oxygen, take vital signs, complete a cardiovascular assessment, and notify the physician.
Air embolism Air embolism refers to the presence of air in the vascular system and occurs when air is introduced into the venous system and travels to the right ventricle and/or pulmonary circulation. An air embolism is reported to occur more frequently during catheter removal than during insertion, and the administration of up to 10 ml of air has been proven to have serious and fatal effects. Small air bubbles are tolerated by most patients.

Signs and symptoms of an air embolism include sudden shortness of breath, continued coughing, breathlessness, shoulder or neck pain, agitation, feeling of impending doom, lightheadedness, hypotension, wheezing, increased heart rate, altered mental status, and jugular venous distension.

Treatment: Occlude source of air entry. Place patient in a Trendelenburg position on the left side (if not contraindicated), apply oxygen at 100%, obtain vital signs, and notify physician promptly.

To avoid air embolisms, ensure drip chamber is one-third to one-half filled, ensure all IV connections are tight, ensure clamps are used when IV system is not in use, and remove all air from IV tubing by priming prior to attaching to patient.

Catheter embolism A catheter embolism occurs when a small part of the cannula breaks off and flows into the vascular system. When removing a peripheral IV cannula, inspect tip to ensure end is intact.
Catheter-related bloodstream infection Catheter-related bloodstream infection (CR-BSI) is caused by microorganisms that are introduced into the blood through the puncture site, the hub, or contaminated IV tubing or IV solution, leading to bacteremia or sepsis. A CR-BSI is a nosocomial preventable infection and an adverse event.

CR-BSI is confirmed in a patient with a vascular device (or a patient who had such a device in the last 48 hours before the infection) and no apparent source for the infection other than the vascular access device with one positive blood culture.

Treatment: IV antibiotic therapy

To avoid CR-BSI, perform hand hygiene prior to care and maintenance of an IV system, and use strict aseptic technique for care and maintenance of all IV therapy procedures.

Data source: Fraser Health Authority, 2014; Fulcher & Frazier, 2007; McCallum & Higgins, 2012; Perry et al., 2014

Central Venous Catheters

A central venous catheter (CVC) (see Figure 8.2), also known as a central line or central venous access device, is an intravenous catheter that is inserted into a large vein in the central circulation system, where the tip of the catheter terminates in the superior vena cava (SVC) that leads to an area just above the right atrium. CVCs have become common in health care settings for patients who require IV medication administration and other IV treatment requirements. CVCs can remain in place for more than one year. Some CVC devices may be inserted at the bedside, while other central lines are inserted surgically. Central lines are inserted by a physician or specially trained health care provider, and the use of ultrasound guided placement is recommended to reduce time of insertion and complications (Safer Healthcare Now, 2012).

A CVC has many advantages over a peripheral IV line, including the ability to deliver fluids or medications that would be overly irritating to peripheral veins, and the ability to access multiple lumens to deliver multiple medications at the same time (Fraser Health Authority, 2014). Central venous catheters can be inserted percutaneously or surgically through the jugular, subclavian, or femoral veins, or via the chest or upper arm peripheral veins (Perry et al., 2014). Femoral veins are not recommended, as the rate of infection is increased in adults (CDC, 2011; Safer Healthcare Now, 2012). To have a CVC inserted or removed, an order by a physician or nurse practitioner must be obtained. Site selection for a CVC may be based on numerous factors, such as the condition of the patient, patient’s age, and type and duration of IV therapy.

The majority of patients in an ICU will have a CVC to receive fluids and medications. A chest X-ray is given to determine correct placement before inserting, or to confirm a suspected dislodgement (Fraser Health Authority, 2014). An IV pump must be used with all CVCs to prevent complications.

CVCs are typically inserted for patients requiring more than six days of intravenous therapy or who:

Central venous catheter (CVC) prior to insertion
Figure 8.2 Central venous catheter (CVC) with three lumens
Peripherally inserted central catheter (PICC)
Figure 8.3 Peripherally inserted central catheter (PICC) with one lumen

A central line is made up of lumens. A lumen is a small hollow channel within the CVC tube. A CVC may have single, double, triple, or quadruple lumens (Perry et al., 2014). Depending on the type of CVC, it may be internally or externally inserted, and may have an open-ended or valved tip. Open-ended devices are those in which the catheter tip is open like a “straw.” These have a higher risk for complications, such as hemorrhage, air embolism, and occlusion from fibrin or clots. Valved devices are those in which the tip is configured with a three-way pressure-activated valve (Perry et al., 2014). It is important to know what type of central line is being used, as this will impact how to care for and manage the equipment for specific procedures. Table 8.3 lists various types of central lines.

Table 8.3 Types of Central Venous Catheters (CVCs) 
Safety considerations:
  • CVC care and maintenance requires specialized training to prevent complications.
  • Central lines heighten the risk for patients to develop a nosocomial infection. Strict adherence to aseptic technique is required for all CVC care.

Type

Location and Additional Information

Percutaneous central venous catheter (CVC) Tip location: The tip of the catheter is located in the SVC. The entry site is the exit site.

Can be inserted at the bedside by specially trained physician or nurse. The percutaneous CVC is inserted directly through the skin. The internal or external jugular, subclavian, or femoral vein is used.

Most commonly used in critically ill patients. Can be used for days to weeks, and the patient must remain in the hospital. Usually held in place with sutures or a manufactured securement device.


Central venous catheters
Central venous catheter
Internal jugular venous catheter (upper CVC)
Peripherally inserted central catheter (PICC) Tip location: The tip is located in the SVC.

A PICC (see Figure 8.3) may be inserted at the bedside, in a home or radiology setting. The line is inserted through the antecubital fossa or upper arm (basilic or cephalic vein) and is threaded the full length until the tip reaches the SVC. Can provide venous access for up to one year. The patient may go home with a PICC. PICCs can easily occlude and may not be used with dilantin IV. It is held in place with sutures or a manufactured securement device.

picc
PICC line inserted in the upper arm (through the basilic vein)
Subcutaneous or tunnelled central venous catheter A tunnelled CVC, also known as a Hickman, Broviac, or Groshong, is a long-term CVC with a proximal end tunnelled subcutaneously from the insertion site and brought out through the skin at an exit site. Insertion is a surgical procedure, in which the catheter is tunnelled subcutaneously under the skin in the chest area before it enters the SVC. A tunnelled catheter may remain inserted for months to years. These CVCs have a low infection rate due to a Dacron cuff, an antimicrobial cuff surrounding the catheter near the entry site, which is coated in antimicrobial solution and holds the catheter in place after two to three weeks of insertion.
tunneled-venous-access-device
Tunnelled CVC
Implanted central venous catheter (ICVC, port a cath) The implanted central venous catheter (ICVC) is inserted into a vessel, body cavity, or organ and is attached to a reservoir or “port,” located under the skin. The ICVC is also referred to as a port a catheter or port a cath. A surgical procedure is required to insert the device, which is considered permanent. The device may be placed in the chest, abdomen, or inner aspect of the forearms. It is often better for body image. The ICVC can be accessed using a non-coring needle. A patient may return home with this type of CVC.
IVAD inserted under the skin
Chest with ICVC inserted
IVAD under the skin
ICVC under the skin
Data source: Fulcher & Frazier, 2011; Perry et al., 2014

CVCs have specific protocols for accessing, flushing, disconnecting, and assessment. All health care providers require specialized training to care for, manage complications related to, and maintain CVCs as per agency policy. Never access or use a central line for IV therapy unless trained as per agency policy. For more information on CVC care and maintenance, see the suggested online reference list at the end of this chapter.

Health care providers should assess a patient with a central line at the beginning and the end of every shift, and as needed. For example, if the central line has been compromised (pulled or kinked), ensure it is functioning correctly. Each assessment should include:

See Table 8.4 for a list of complications, signs and symptoms, and interventions.

Table 8.4 Potential Complications with Central Venous Catheters

Complication

 Signs and Symptoms

 Interventions
Pulmonary edema Also known as fluid overload (circulatory overload); characterized by decreased oxygen saturation, increased respiratory rate, fine or coarse crackles at lung bases, restlessness, breathlessness, dyspnea, coughing up pinky frothy sputum. Accurate fluid balance assessments, monitor electrolytes and vital signs, provide chest auscultation, elevate head of bed, administer oxygen and diuretic therapy
Mechanical complications A mechanical complication that mainly occurs during insertion of the CVC due to failure to correctly place the catheter, which may lead to asystolic cardiac arrest, bleeding, subcutaneous hematoma, hemothorax, catheter mal-position, or pneumothorax. These complications are usually detected at the time of insertion. Treatment will be specific to the complication.
Catheter-related bloodstream infection Infection is a common complication of indwelling CVCs in patients with a vascular device and no apparent source for the bloodstream infection other than the device. Confirmed with one positive blood culture in patients who have had a vascular device implanted within the last 48 hours.

Catheter-related bloodstream infection (CR-BSI) is caused by microorganisms that are introduced into the blood through the puncture site, the hub, or contaminated IV tubing or IV solution, leading to bacteremia or sepsis. A CR-BSI is a nosocomial preventable infection and an adverse event.

Systemic: elevated temperature, flushed, headache, malaise, tachycardia, decreased BP, and additional signs and symptoms of sepsis

Strict hand-washing, aseptic technique for all procedures, close monitoring of vital signs, strict protocols for dressing, tubing and cap changes, blood cultures as required, IV antibiotic therapy, remove/replace catheter, prevent contamination of hub
Infection at insertion site Insertion site may become red, tender, swollen, or have purulent drainage. Monitor blood work and temperature. Notify physician, clean area using strict aseptic technique, send C & S swab (swab for bacterial wound culture) as per policy
Catheter-related thrombosis Catheter-related thrombosis (CRT) is the development of a blood clot related to long-term CVC use. It mostly occurs in the upper extremities and can lead to further complications, such as pulmonary embolism, post-thrombotic syndrome, and vascular compromise. Symptoms include pain, tenderness to palpation, swelling, edema, warmth, erythema, and development of collateral vessels in the surrounding area. Most CRTs are asymptomatic, and prior catheter infections increase the risk for developing a CRT. Routine flushing with positive pressure, vital signs, repositioning, IV bolus, notify physician, venogram/X-rays likely; will require anticoagulant therapy and possible removal of the CVC
Air embolism An air embolism is the presence of air in the vascular system and occurs when air is introduced into the venous system and travels to the right ventricle and/or pulmonary circulation. An air embolism can occur during CVC insertion, while catheter is in place, or at time of removal. Administration of up to 10 ml of air has been proven to have serious effects, and is sometimes fatal. Tiny air bubbles are tolerated by most patients.

Signs and symptoms of an air embolism include sudden shortness of breath, continued coughing, breathlessness, shoulder or neck pain, agitation, feeling of impending doom, lightheadedness, hypotension, wheezing, increased heart rate, altered mental status, and jugular venous distension. The effects of air embolism depend on the rate and volume of air introduced.


Occlude source of air entry. Place patient in a Trendelenburg position on the left side (if not contraindicated), apply oxygen at 100%, obtain vital signs, and notify physician promptly.

To avoid an air embolism, ensure drip chamber is one-third to one-half filled, ensure all IV connections are tight, ensure clamps are used when IV system is not in use, and remove all air from IV tubing by priming prior to attaching to patient.

Occlusions of CVC (mechanical or thrombus) Occlusions may be mechanical (pinch-off syndrome, due to an internal pinching of the central line between the first rib and clavicle), caused by medication (unplanned/accidental precipitation in the IV line), or from parenteral nutrition (may leave a lipid residue inside the catheter). Thrombus formation (fibrin sheath around the tip of the catheter) may occur as soon as 24 hours after CVC is inserted. Thrombotic occlusions are responsible for approximately 58% of all occlusions. In addition to causing catheter dysfunction, thrombotic occlusions can lead to catheter-related thrombosis. Signs include sluggish flow rate, inability to flush or infuse medications, and frequent downstream occlusion alarms on the EID. Follow agency-specific guidelines for managing various types of occlusions. Thrombolytic therapy may be initiated.

Do not flush against resistance, flush well between medications, and always flush using positive pressure through a positive pressure cap.

Damage to CVC line CVCs may become broken or cracked. Assess for pinholes, cracks, or tears during routine care. Assess for drainage after routine care.

Avoid using sharp objects around CVCs, and only use a needleless device when accessing a central line.

Clamp immediately and seal with a sterile, occlusive dressing to prevent an air embolism, bleeding, or a CR-BSI. The CVC may be repaired or replaced. Notify health care provider promptly. Repair should only be completed by a trained CVC specialist.
Catheter migration Patient may experience dysrhythmias caused by tip of the catheter moving from original position to an unwanted position. Migration may occur due to increased intrathoracic pressure due to coughing, change in body position, or physical movement (of the arms), sneezing, or weightlifting. Call physician and stop all fluid infusions. You may need to pull back on tubing and X-ray CVC again for placement confirmation.

Tape catheter securely using tape and devices.

Do not pull on central lines; prevent IV lines from being caught on other equipment.

Data source: Baskin et al., 2009; BCIT, 2015a; Brunce, 2003; Fraser Health Authority, 2014; Perry et al., 2014; Prabaharan & Thomas, 2014

Critical Thinking Exercises

  1. What is the difference between a non-tunnelled (percutaneous) catheter and a tunnelled catheter?
  2. Name three advantages and three disadvantages of a central line.

61

8.3 IV Fluids, IV Tubing, and Assessment of an IV System

Patients are prescribed an IV solution (fluids) based on their electrolyte and fluid volume status. IV fluids are commonly categorized as colloids and crystalloids. Colloid solutions contain large molecules that cannot pass through semi-permeable membranes and are used to expand intravascular volume by drawing fluid from extravascular space via high osmotic pressure. Examples of colloid solutions are albumin, dextrans, and hydroxyethyl starches (Crawford & Harris, 2011). Crystalloid solutions contain solutes such as electrolytes or dextrose, which are easily mixed and dissolvable in solution. Crystalloids contain small molecules that flow easily across semi-permeable membranes, which allows for transfer from the bloodstream into the cells and tissues (Crawford & Harris, 2011). They may increase fluid volume in interstitial and intravascular space. Examples of crystalloid solutions are isotonic, hypotonic, and hypertonic solutions.

Isotonic solutions have an osomolality of 250 to 375 mOsm/L. Isotonic solutions have the same osmotic pressure as plasma, creating constant pressure inside and outside the cells, which causes the cells to remain the same (they will not shrink or swell) and does not cause any fluid shifts within compartments. Isotonic solutions are useful to increase intravascular volume, and are utilized to treat vomiting, diarrhea, shock, and metabolic acidosis, and for resuscitation purposes and the administration of blood and blood products. Examples of isotonic solutions include normal saline (0.9% sodium chloride), lactated Ringer’s solution, 5% dextrose in water (D5W), and Ringer’s solution. It is important to monitor patients receiving isotonic solutions for fluid volume overload (hypervolemia) (Crawford & Harris, 2011).

Hypotonic solutions have a lower concentration, or tonicity, of solutes and have an osomolality equal to or less than 250 mOsm/L. The infusion of hypotonic solutions lowers the osmolality within the vascular space and causes fluid to shift to the intracellular and interstitial space. Cells will swell but may also delete fluid within the vascular space. Examples of hypotonic solutions include 0.45% sodium chloride, 0.33% sodium chloride, 2.5% dextrose in water, and 0.2% sodium chloride. Monitor for hypovolemia and hypotension related to fluid shifting out of the vascular space, and do not administer to patients with increased intracranial pressure (ICP), as it may exacerbate cerebral edema. Use cautiously in patients with burns, liver failure, and traumas (Crawford & Harris, 2011).

Hypertonic solutions have a higher concentration, or tonicity, of solutes and have an osomolality equal to or greater than 375 mOsm/L. The osmotic pressure gradient draws water out of the intracellular space into the extracellular space. Examples of hypertonic solutions include D5W and 0.45% sodium chloride, D10W, and 3% sodium chloride. Hypertonic solutions may cause intravascular fluid volume overload and pulmonary edema, and they should not be used for an extended period of time. Hypertonic solutions should not be used in patients with heart or renal disease who are dehydrated (Crawford & Harris, 2011).

Read the article IV fluids: what nurses need to know for more in-depth information regarding colloid and crystalloid solutions.

Although all IV fluids must be administered carefully, hypertonic solutions are additionally risky.

An order for IV fluids may be continuous or as a bolus, depending on the needs of the patient. IV solutions are available in 25 ml to 1000 ml bags. The frequency, duration, amount, and additives to solution must be ordered by a physician or nurse practitioner; for example, an order may be “give NS at 125 ml/hr.”

The most common types of solutions include normal saline (NS) and D5W. Patients may also have medications, such as potassium chloride, thiamine, and multivitamins, added to IV solutions. To discontinue an IV infusion, an order must be obtained from the physician or nurse practitioner (Perry et al., 2014).

IV Administration Equipment

When a peripheral vein has a cannula inserted, an extension tubing is connected to the hub on the cannula and flushed with normal saline to maintain patency of the cannula. Most peripheral intravenous cannulas will have extension tubing, a short, 20 cm tube with a positive fluid displacement/positive pressure cap attached to the hub of the cannula for ease of access and to decrease manipulation of the catheter hub (Vancouver Coastal Health, 2008). The extension tubing must be changed each time the peripheral catheter is changed. When the peripheral cannula is not in use, the extension tubing attached to the cannula is called a saline lock.

Intravenous fluids are administered through thin, flexible plastic tubing called an infusion set or primary infusion tubing/administration set (Perry et al., 2014). The infusion tubing/administration set connects to the bag of IV solution. Primary IV tubing is either a macro-drip solution administration set that delivers 10, 15, or 20 gtts/ml, or a micro-drip set that delivers 60 drops/ml. Macro-drip sets are used for routine primary infusions. Micro-drip IV tubing is used mostly in pediatric or neonatal care, when small amounts of fluids are to be administered over a long period of time (Perry et al., 2014). The drop factor can be located on the packaging of the IV tubing.

Primary IV tubing is used to infuse continuous or intermittent fluids or medication. It consists of the following parts:

Figure 8.4 IV Primary and secondary tubing set up

IV solution bags should have the date, time, and initials of the health care provider marked on them to be valid. Add-on devices (e.g., extension tubing or dead-enders) should be changed every 96 hours, if contaminated when administration set is replaced, or as per agency policy. Intravenous solution and IV tubing should be changed if:

Primary and secondary administration sets (see Figure 8.4) should be changed regularly to minimize risk and prevent infection (CDC, 2011; Fraser Health Authority, 2014). Change IV tubing according to agency policy. Table 8.5 lists the frequency of IV tubing change.

Table 8.5 Frequency of IV Tubing Changes
Safety considerations:
  • All IV tubing must be changed using sterile technique.
  • IV tubing is changed based on the type of tubing, time used, and the type of solution.
  • If possible, coordinate IV tubing changes with IV solution changes.

Frequency of IV Tubing Change

Type of IV Tubing and Solution

Every 72 -96 hours Primary tubing with hypotonic, isotonic, or hypertonic continuous solution, when insertion site is changed, or when indicated by the type of solution or medication being administered.
Every 24 hours Secondary or intermittent IV solution or medication. Rationale: When an intermittent infusion is repeatedly disconnected and reconnected for infusion, there is increased risk of contamination at the catheter hub, needleless connector, and the male Luer end of the administration set, potentially increasing risk for CR-BSI.
Every 24 hours Infusions containing fat emulsions (IV solutions combined with glucose and amino acids infused separately or in a 3 in 1 admixture). Example: Total parenteral nutrition (TPN).
4 hours or 4 units, whichever comes first, or between products Blood and blood products
Data source: CDC, 2011

Infusing IV Fluids by Gravity or an Electronic Infusion Pump (EID)

To ensure therapeutic effectiveness of IV fluids, a constant, even flow is necessary to prevent complications from too much or too little fluid. A physician must order a rate of infusion for IV fluids or for medications. The rate of infusion for medications (given via a secondary or primary infusion) can be found in the Parenteral Drug Therapy Manual (PDTM). If an order for IV fluids is “to keep vein open” (TKVO), the minimum flow rate is 20 to 50 ml per hour, or according to physician’s orders (Fraser Heath Authority, 2014).

A health care provider is responsible for regulating and monitoring the amount of IV fluids being infused. IV fluid rates are regulated in one of two ways:

  1. Gravity. The health care provider regulates the infusion rate by using a clamp on the IV tubing, which can either speed up or slow down the flow of IV fluids. An IV flow rate for gravity is calculated in gtts/min.
  2. Electronic infusion device (EID) (see Figure 8.5). The infusion rate is regulated by an electronic pump to deliver the fluids at the correct rate and volume. All IV pumps regulate the rate of fluids in ml/hr. An IV pump (EID) is used for many types of patients, solutions, and medications (Vancouver Coastal Health, 2008).

An IV pump must be used for:

To calculate the drops per minute for an infusion by gravity, follow the steps in Table 8.6.

Table 8.6 Calculating the Drops per Minute (gtts/min) for an Infusion by Gravity

Steps

Additional Information

1. Verify the physician order. An order may read:

Example 1. Give NS IV 125 ml/hr

Example 2. Give 1000 ml of NS IV over 8 hours.

2. Determine the drop factor on the IV administration set. The drop factor is the amount of drops (gtts) per minute. IV tubing is either macro tubing (10, 15, or 20 gtts/min) or micro tubing (60 gtts/min). The drop factor (or calibration of the tubing) is always on the packaging of the IV tubing.
3. Complete the calculation using the formula. Use the formula:
Infusion rate (ml/hr) × IV  drop factor (gtts/min) = drops per minute
60 (Administration time is always in minutes)

To calculate ml/hr, divide 1000 ÷ 8 = 125 ml/hr.

Example: Infuse IV NS at 125 ml/hr. IV tubing drop factor is 20 gtts/min

125 × 20 = 41.6 gtts/min, round up to 42 gtts/min (Round down or up to the nearest whole number)
60
4. Regulate IV infusion using the roller clamp. Observe and count the drips in the drip chamber and regulate for 42 gtts/min (one full minute). Alternatively, divide 42 by 4 (rounded down from 10.4 to 10 gtts/min) to count for 15 seconds. The gtts/min should be assessed regularly to ensure the IV is infusing at the correct rate (e.g., every 1 to 2 hours, if the patient accidentally bumps the IV tubing, or if a patient returns from another department).
Regulating IV tubing is a roller clamp
Regulate IV tubing by using a roller clamp
Data source: Fulcher & Frazier, 2007; Perry et al., 2014
Take the IV calculations quiz for more practice with IV fluid dose calculation.

When an infusion is by gravity, there are several factors that may alter the flow/infusion rate (Fulcher & Frazier, 2007). In addition to regulating the flow rate, assess the IV system to ensure these factors are not increasing or decreasing the flow of the IV solution. These factors are listed in Table 8.7.

Table 8.7 Factors Influencing the Flow Rate of Infusions

Factors

Additional Information

Tube occlusion May occur if the tubing is kinked or bent. Tubing may become kinked if caught under the patient or on equipment, such as beds and bed rails.
Vein spasms Irritating or chilled fluids (fluids stored in the fridge) may cause a reflex action that causes the vein to go into spasm at or near the intravenous infusion site. If fluids or medications are chilled, bring to room temperature prior to infusion.
Height of the fluid container The IV tubing drip chamber should be approximately 3 feet above IV insertion site.
Location/position of IV cannula If the cannula is located in an area of flexion (bend of an arm), the IV flow may be interrupted when the patient moves around. To avoid this issue, replace IV cannula.
Infiltration or extravasation If the cannula punctures the vein, the fluid will leak into the surrounding tissue and slow or stop the flow, and swelling will develop.
Accidental touching/bumping of the control clamp or raising arm above heart level Instruct the patient not to touch the roller clamp and to take care not to bump the clamp, as this may accidentally change the flow rate. Instruct patient to keep hand/arm below heart level; an elevated hand/arm will slow or stop an infusion running by gravity.
Needle or cannula gauge/diameter The smaller the needle or cannula, the slower the fluid will flow.
Data source: Fulcher & Frazier, 2007; Perry et al., 2014

Assessing an IV System

All patients with IV fluid therapy (PIV and CVC) are at risk for developing IV-related complications. The assessment of an IV system (including the IV site, tubing, rate, and solution) (see Figure 8.6) often depends on what is being infused, the patient’s age and medical condition, type of IV therapy (PIV or CVC), and agency policy. Generally, an IV system should be assessed as described in Checklist 65.

Assess IV site prior to use
Figure 8.6 Assess IV site prior to use
    Checklist 65: Assessing an IV System
Disclaimer: Always review and follow your hospital policy regarding this specific skill.
Safety considerations: 
  • IV systems must be assessed every 1 to 2 hours or more frequently if required.
  • An IV system should be assessed at the beginning of a shift, at the end of a shift, if the electronic infusion device alarms or sounds, or if a patient complains of pain, tenderness, or discomfort at the IV insertion site.
  • Review the patient’s chart to determine insertion date and type of solution ordered.
  • A peripherally inserted catheter is usually replaced every 72 to 96 hours, depending on agency policy.
  • If the peripheral catheter or central venous catheter is not in use, or is being used intermittently, flushing is required to keep the site patent. Refer to agency policy for flushing guidelines.
  • A not-in-use peripheral IV site is generally flushed every 12 hours with 3 to 5 ml of normal saline.
  • Review the in-and-out sheet to determine expected amount in the IV solution bag.
  • Patients with cardiac or renal disease, as well as pediatric patients, are at a higher risk for IV-related complications.
  • Elderly patients often have fragile veins and may require closer monitoring.

Steps

 Additional Information

1. Perform hand hygiene. This step reduces the transmission of microorganisms.
2. Introduce yourself and explain the purpose of the assessment. This builds trust with patient and allows time for the patient to ask questions.
3. Confirm patient ID using two patient identifiers (e.g., name and date of birth), and compare the MAR printout with the patient’s wristband. This step ensures you have the correct patient and complies with agency standard for patient identification.
Compare MAR with patient name band
Compare MAR with patient wristband
4. Apply non-sterile gloves (optional). This reduces the transmission of microorganisms.
5. Assess the IV insertion site and transparent dressing on IV site. Check IV insertion site for signs and symptoms of phlebitis or infection. Check for fluid leaking, redness, pain, tenderness, and swelling. IV site should be free from pain, tenderness, redness, or swelling.

Ensure patient is informed to alert the health care provider if they experience pain or notice swelling or redness at the IV site. If patient is unable to report pain at IV site, more frequent checks are required.

6. Inspect the patient’s arm for streaking or venous cords; assess skin temperature. Assess complications on hand and arm for signs and symptoms of phlebitis and infiltration/extravasation.
7. Assess IV tubing for kinks or bends. Kinks or bends in tubing may decrease or stop the flow of IV fluids. Ensure tubing is not caught on equipment or side rails on bed.

Tubing should be properly labelled with date and time.

8. Check the rate of infusion on the primary and secondary IV tubing. Verify infusion rate in physician orders or medication administration record (MAR). If IV solution is on gravity, calculate and count the drip rate for one minute.

If solution is on an IV pump, ensure the rate is correct and all clamps are open as per agency protocol.

If secondary IV medication is infusing, ensure clamp on secondary IV tubing is open. The EID is unable to distinguish if the primary bag or secondary bag is infusing.

9. Assess the type of solution and label it on bag. Check volume of solution in bag. IV solutions become outdated every 24 hours.

Ensure the correct solution is given.

If 100 ml of solution or less is left in the bag, change the IV solution and document on in-and-out sheet.

If an IV pump is used, ensure it is plugged into an outlet.

Ideally, the IV solution should be 90 cm above patient heart level.

10. Assist patient into comfortable position, place call bell in reach, and put up side rails on bed as per agency policy. These precautions prevent injury to the patient.
11. Perform hand hygiene. This step prevents the spread of microorganisms.
12. Document procedure and findings as per agency policy. Timely and accurate documentation promotes patient safety.
Data source: Fulcher & Frazier, 2007; Perry et al., 2014

Critical Thinking Exercises

  1. What are the signs and symptoms of phlebitis?
  2. What types of patients should not receive hypotonic IV solutions?

62

8.4 Priming IV Tubing and Changing IV Fluids and Tubing

Primary and secondary IV tubing and add-on devices (extension tubing) must be primed with IV solution to remove air from the tubing. Priming refers to placing IV fluid in IV tubing to remove all air prior to attaching the IV tube to the patient. IV tubing is primed to prevent air from entering the circulatory system. An air embolism is a potential complication of IV therapy and can enter a patient’s blood system through cut tubing, unprimed IV tubing, access ports, and drip chambers with too little fluid (Perry et al., 2014). It is unknown how much air will cause death, but deaths have been reported with as little as 10 ml of air. The best way to avoid air bubbles in IV tubing is to prevent them in the first place (Perry et al., 2014). New IV tubing may also be required if leaking occurs around the tube connecting to the IV solution, if the tubing becomes damaged, or if it becomes contaminated. Checklist 66 outlines the process of priming IV tubing.

Checklist 66: Priming IV Tubing
Disclaimer: Always review and follow your hospital policy regarding this specific skill.
Safety considerations: 
  • Primary IV tubing can be macro-drip or micro-drip tubing. The drop factor of the IV tubing is required to complete the IV drip rate calculation for a gravity infusion.
  • Remember to invert all access ports and backcheck valve.

Steps

 Additional Information

1. Perform hand hygiene. This step prevents the transmission of microorganisms.
2. Check order to verify solution, rate, and frequency. This ensures IV solution is correct and helps prevent medication error.
3. Gather supplies. You will need IV solution, primary IV tubing, time label, change label, alcohol swab, and basin or sink.
Sterile IV solution
Sterile IV solution
4. Remove IV solution from outer packaging and gently squeeze. Tear the perforated corner of the outer packaging; check colour, clarity, and expiration date.
Remove IV solution from packaging
5. Remove primary IV tubing from outer packaging.
IV tubing
IV tubing
6. Move the roller clamp about 3 cm below the drip chamber and close the clamp.
Moving roller clamp
Move roller clamp
7. Remove the protective cover on the IV solution port and keep sterile. Remove the protective cover on the IV tubing spike. Be careful and do not contaminate the spike.
Remove protective cover off spike on IV tubing
Remove protective cover from spike on IV tubing
8. Without contaminating the solution port, carefully insert the IV tubing spike into the port, gently pushing and twisting.
Spiking an Iv solution bag with IV tubing
Insert IV spike into sterile solution using sterile technique
9. Hang bag on IV pole. The IV bag should be approximately one metre above the IV insertion site.
10. Fill the drip chamber one-third to one-half full by gently squeezing the chamber. Remove protective cover on the end of the tubing and keep sterile. Filling the drip chamber prevents air from entering the IV tubing.
Fill drip chamber
Fill drip chamber
11. With distal end of tubing over a basin or sink, slowly open roller clamp to prime the IV tubing. Invert backcheck valve and ports as the fluid passes through the tubing. Tap gently to remove air and to fill with fluid. Inverting and tapping the access ports and backcheck valve helps displace and remove air when priming the IV tubing.
Invert IV tubing when priming with solution
12. Once IV tubing is primed, check the entire length of tubing to ensure no air bubbles are present. This step confirms that air is out of the IV tubing.
13. Close roller clamp. Cover end with sterile dead-ender or sterile protective cover. Hang tubing on IV pole to prevent from touching the ground. Keep the distal end sterile prior to connecting IV to patient.
14. Label tubing and IV bag with date, time, and initials. Label IV solution bag as per agency policy. Do not write directly on the IV bag.
Labeled IV bag
Labelled IV bag
15. Perform hand hygiene. This reduces the transmission of microorganisms.
Hand hygiene with ABHR
Data source: Fulcher & Frazier, 2007; Perry et al., 2014.

Video 8.1

Watch the video Priming IV Lines by Renée Anderson & Wendy McKenzie, Thompson Rivers University.

IV solutions are considered sterile for 24 hours. An IV solution may be changed if the physician’s order changes, if an IV solution infusing at TKVO is expired after 24 hours, or if the IV solution becomes contaminated. To change an IV solution bag, follow Checklist 67.

Checklist 67: Changing an IV Solution Bag
Disclaimer: Always review and follow your hospital policy regarding this specific skill.

Steps

 Additional Information

1. Verify and select correct IV solution bag and compare to the medication administration record (MAR) or physician orders. IV solutions are considered a medication and must be checked using the SEVEN RIGHTS x 3, as per agency policy.
Sterile IV solution
Sterile IV solution
2. Introduce yourself, identify patient, and explain procedure. Proper identification of a patient prevents medication errors. Explaining the procedure provides an opportunity for the patient to ask questions.
3. Perform hand hygiene. Hand hygiene prevents the transmission of microorganisms.
4. Remove outer plastic packaging and squeeze bag to test for leaks and expiration date. Assess for precipitates or cloudiness. Hang new IV solution on IV pole. This ensures the correct IV solution is used.
Remove IV solution from packaging
5. Pause the EID or close the roller clamp on a gravity infusion set. Stops the infusion to prevent air bubbles from forming in IV tubing.
6. Remove protective plastic cover from the new IV solution tubing port. Keep IV tubing port sterile at all times. If IV tubing port becomes contaminated, dispose of it immediately and replace.
7. Remove the old IV solution bag from the IV pole. Turn IV bag upside down, grasping the tubing port.

With a twisting motion, carefully remove IV tubing spike from old IV solution bag.

Removing old solution from IV pole prevents spilling of solution.

Ensure IV tubing spike remains sterile during removal to avoid contaminating IV tubing.


8. Using a gentle twisting motion, firmly insert the spike into the new IV bag. This ensures that a sterile technique is used during the process.
Spiking new IV solution
Spike new IV solution
9. Fill the drip chamber by compressing it between your thumb and forefinger. Ensure the drip chamber is one-third to one-half full. Check IV tubing for air bubbles. Fluid in the drip chamber helps prevent air from being introduced into IV tubing.
Filling drip chamber
Fill drip chamber
IV tubing labe
IV tubing label
10. Open clamp and regulate IV infusion rate via gravity, or press start on the EID as per physician orders. Once rate is set, count the drops per minute on the gravity set or ensure the EID is running at the correct rate as per physician orders.
Regulating IV tubing is a roller clamp
Regulate IV tubing with a roller clamp
11. Label new IV solution bag as per agency policy. Time tape gravity IV solutions as per agency policy Labelling IV solutions provides easy viewing of infusing solutions and additives.
Labeled IV bag
Labelled IV bag
12. Dispose of used supplies, perform hand hygiene, and document IV solution bag change according to agency policy. Document time, date, type of solution, rate, and total volume.
Data source: Fulcher & Frazier, 2007; Perry et al., 2014.

Video 8.2

Watch the video Changing IV bags by Renée Anderson & Wendy McKenzie, Thompson Rivers University.

Checklist 68 describes how to change the IV tubing administration set and IV solution at the same time.

Checklist 68: IV Tubing Administration Set and IV Solution Change
Disclaimer: Always review and follow your hospital policy regarding this specific skill.

Steps

 Additional Information

1. Verify physician orders for the type of solution, rate, and duration. Collect necessary supplies. This step verifies the patient’s need for IV fluids/medications. It also confirms the correct rate and solution for patient safety.
2. Perform hand hygiene. Hand hygiene prevents the transmission of microorganisms.
3. Identify yourself, identify the patient using two identifiers, and explain the procedure to the patient. Proper identification of patient prevents errors.
Compare MAR with patient name band
Compare MAR with patient wristband
4. Prime new administration set using a new IV solution bag and new IV tubing. IV solutions are considered a medication. Prime as per Checklist 66. Keep distal protective cap attached to IV tubing to ensure sterility of distal end. Label IV solution and IV tubing as per agency policy.
Keep distal end sterile with sterile cap
5. Hang new administration set (primed primary line and IV solution) on IV pole. This prepares the equipment and adheres to the principles of aseptic technique.
6. Clamp old IV administration set. Remove IV tubing if on an EID. Stop the flow of infusion during tubing and solution change.
7. Clean the connection between the distal end of old IV tubing and the positive pressure cap. Scrub the area for 15 seconds and let it dry for 30 seconds. Proper disinfection of equipment decreases bacterial load and prevents infections.
Scrub the connection between the IV tubing and positive pressure cap
8. Remove the protective cap on the distal end of the new IV administration set.
Removing sterile cap
Remove sterile cap
9. Carefully disconnect the old tubing from the positive pressure cap and insert the new IV tubing into the positive pressure cap attached to the extension tubing.
Disconnecting IV tubing from hub
Disconnect IV tubing from hub
10. Open the roller clamp on the new tubing to regulate flow rate, or insert new tubing into the EID and restart IV rate. This step ensures the IV solution is infusing at the correct rate.
Regulating IV tubing is a roller clamp
Regulate IV tubing using a roller clamp
11. Check IV site for patency, and signs and symptoms of phlebitis. IV site should be free from redness, swelling, and pain. Dressing on IV site should be dry and intact.
Assess IV site for patency
12. Discard old supplies and perform hand hygiene. This step prevents the spread of microorganisms.
Perform hand hygiene
13. Document procedure as per agency policy. Document the date and time of IV tubing and solution change.
Data source: BCIT, 2015b; Fulcher & Frazier, 2007; Perry et al., 2014

Critical Thinking Exercises

  1. How long can IV solution be used?
  2. What is the purpose of removing air from IV tubing?

63

8.5 Flushing a Saline Lock and Converting a Saline Lock to a Continuous IV Infusion

A saline lock (SL), also known as a heparin lock, is a peripheral intravenous cannula connected to extension tubing with a positive pressure cap (see Figure 8.7). This device allows easy access to the peripheral vein for intermittent IV fluids or medications (Perry, et al., 2014). The saline lock is “flushed” or filled with normal saline to prevent clotting when not in use. To use an SL, the cannula is flushed with 3 to 5 ml of normal saline to assess patency. After the saline lock is used, the cannula is flushed again with 3 to 5 ml of normal saline or heparin to “lock” the saline in the cannula in order to keep it patent. Once the saline lock is inserted, it can be left in a vein for up to 72 hours or as per agency policy. Saline locks are usually inserted in the arm or hand. If a saline lock is removed, the extension tubing and positive pressure cap are also changed (Vancouver Coastal Health, 2012).

Saline lock (Max Plus end attached)
Figure 8.7 Saline lock with positive pressure cap (Max Plus)

A saline lock can be used for continuous and intermittent short-term IV therapy. Flushing is performed:

A saline lock must be flushed in a specific manner to prevent blood being drawn into the IV catheter and occluding the device between uses. Checklist 69 describes the process of flushing an SL.

Checklist 69: Flushing a Saline Lock
Disclaimer: Always review and follow your hospital policy regarding this specific skill.
Safety considerations: 
  • Poor standards of aseptic technique are the primary cause of health care infections. Be diligent with disinfecting and sterile technique. Sterile technique must be used with all IV procedures.
  • An alcohol swab (70% isopropyl alcohol) must be used to clean the hub prior to access. The hub is scrubbed for 15 seconds and allowed to dry completely (30 seconds).
  • Never attempt to flush a “blocked” saline lock. If unable to flush, remove the SL.
  • Never use a needle to access a positive pressure cap. Attach a Luer lock syringe to the positive pressure cap to flush.

Steps

 Additional Information

1. Perform hand hygiene; gather supplies. You will need alcohol swabs, 3 to 5 ml syringe prefilled with 0.9% normal saline, clean gloves.
Hand hygiene with ABHR
2. Compare MAR to patient’s wristband, identify patient using two identifiers, and explain procedure to patient. Follow agency policy for proper patient identification.
Compare MAR with patient name band
Compare MAR with patient wristband
3. Clean work surface with CaviWipes and let dry. This prevents the spread of microorganisms.
4. Perform hand hygiene and apply clean gloves. This prevents and minimizes the spread of microorganisms.
Apply non-sterile gloves
5. Assess IV site for signs and symptoms of phlebitis. If IV site is red, tender, or swollen, the SL needs to be discontinued; do not flush.
Assess site for Phlebitis
Assess site for phlebitis
6. Scrub the top of the positive pressure cap for 15 seconds and let dry for 30 seconds. Aseptic technique is required for all IV procedures. All access ports must be disinfected to decrease the bacterial load prior to use.
Cleaning hub (Max Plus) with alcohol wipe
Clean the positive pressure device (Max Plus) prior to use
7. Open clamp on extension tubing. Clamp must be open to flush the saline lock.
Open clamp on saline lock
8. If using a prefilled normal saline syringe for flushing, the air must be “purged” from the syringe. To remove air from a syringe, apply gentle pressure to the syringe plunger until a click, snap, or pop sound is heard.

Next, remove the sterile dead-ender on the Luer lock end of the syringe, and remove the air by gently pushing the plunger upwards, keeping the syringe vertical.

Purging the air prevents it from being injected into the patient. Air should never be injected into a patient.
Book pictures 2015 506
Apply pressure to the plunger until a click, snap, or pop sound is heard
Tp purge air, remove the sterile dead ender and push up gently on the plunger until all air is removed.
Purge a prefilled syringe
9. Attach NS prefilled Luer lock syringe by twisting the syringe onto the positive pressure cap. Undo clamp on extension tubing. Inject 3 to 5 ml of solution using turbulent stop-start technique. Flush until visibly clear. Do not bottom out syringe (leave 0.2 to 0.5 ml in the syringe). Turbulent stop-start flush ensures full flushing of the catheter.

Bottoming out the saline syringe with the plunger can cause reflux of fluid back into the catheter.

If resistance is felt, do not force flush.

Flushing the saline lock
Flush the saline lock
10. Remove syringe from positive pressure cap; THEN clamp the extension tubing. Always clamp after removing syringe from the positive pressure cap. Positive displacement occurs when the syringe is disconnected from the positive pressure cap.
Close clamp on saline lock

Clamp the extension tubing as close to the IV site as possible to prevent negative fluid displacement and accidental aspiration of blood at the catheter tip.

11. Wipe top of the positive pressure cap with an alcohol swab to remove fluid residue. Moisture promotes the growth of microorganisms.
Wipe top of pressure cap
12. Ensure dressing is dry and intact, and the extension tubing is properly secured with tape. Properly secured extension tubing prevents accidental dislodgement of SL.
Dressing dry and intact
Dry and intact dressing
13. Remove gloves; discard supplies and perform hand hygiene. Proper disposal of equipment prevents the spread of microorganisms.
Hand hygiene with ABHR
14. Document procedure. Document IV site assessment, location of PIV, procedure, date, and time.
Data source: Perry et al., 2014; Vancouver Coastal Health, 2008

Video 8.3

An SL can be converted to a continuous or intermittent IV to infuse fluids or medications. Prior to converting an SL to a continuous infusion, review the physician’s orders for type of solution, infusion rate, additives, and duration. IV solutions are considered a medication. Follow the seven rights × 3 when preparing IV solution. To convert a saline lock to a continuous IV, review Checklist 70.

Checklist 70: Converting a Saline Lock to a Continuous IV Infusion
Disclaimer: Always review and follow your hospital policy regarding this specific skill.
Safety considerations: 
  • If at any time you think a piece of equipment has been contaminated, dispose of it immediately and obtain a new sterile piece.
  • Always assess IV site and flush SL prior to initiating an IV infusion.
  • Always follow the safety seven rights x 3 for IV fluids and medications.
  • Educate the patient on signs and symptoms of phlebitis and when to call for assistance (unexpected or adverse reactions).
  • IV solutions must be recorded on the in-and-out sheet or patient chart.
  • Patients on continuous IV solutions are at risk for fluid overload, especially patients with renal or cardiac conditions. Monitor output and input when patients are on a continuous infusion.

Steps

 Additional Information

1. Verify physician orders and collect supplies. You will need clean gloves, 3 to 5 ml prefilled 0.9% normal saline syringe, IV solution, IV pump if indicated.

Verify the rate and duration of solution.

Review the rationale/reason for the IV fluids to provide an explanation to the patient.

2. Perform hand hygiene and prime IV tubing with IV solution. Prime IV tubing with correct IV solution as per Checklist 66. Ensure IV tubing and IV solution bag are labelled.
IV tubing
Prime IV tubing
3. Enter room and identify patient using two identifiers. Identifying patient correctly prevents errors and enhances safe practices.
Compare MAR with patient name band
Compare MAR with patient wristband
4. Explain procedure, clean work surface and let dry, and perform hand hygiene. Educate patient about why IV fluids are being initiated.

Hand hygiene prevents the spread of microorganisms.

Hand hygiene with ABHR
5. Apply gloves, scrub the top of the positive pressure cap for 15 seconds, and let dry for 30 seconds. Appropriately disinfecting the positive pressure cap decreases the bacterial count and adheres to the principles of infection control.
Cleaning positive pressure cap (Max Plus) with alcohol swab
Clean positive pressure cap (Max Plus) with alcohol swab
6. Open clamp on extension tubing and assess IV site.
Open clamp on saline lock

Clamp must be released to flush the extension tubing.

7. If using a prefilled normal saline syringe for flushing, the air must be “purged” from the syringe. To remove air from a syringe, apply gentle pressure to the syringe plunger until a click, snap, or pop sound is heard.

Next, remove the sterile dead-ender on the Luer lock end of the syringe, and remove the air by gently pushing the plunger upwards.

Purging the air prevents it from being injected into the patient. Air should never be injected into a patient.
Push up gently on plunger until a click is heard
To purge air, remove the sterile dead ender and push up gently on the plunger until all air is removed.
To purge air, remove the sterile dead-ender and push up gently on the plunger until all air is removed
8. Attach NS prefilled Luer lock syringe by twisting the syringe to the positive pressure cap. Inject 3 to 5 ml of solution using turbulent stop-start technique. Flush until visibly clear. Do not bottom out syringe (leave 0.2 to 0.5 ml in the syringe). Turbulent stop-start flush ensures full flushing of the catheter.

Bottoming out the saline syringe with the plunger can cause reflux of fluid back into the catheter.

If resistance is felt, do not force flush.

Flush with normal saline
9. Remove syringe and discard. Proper disposal of equipment decreases the spread of microorganisms.
10. Scrub the top of the positive pressure cap for 15 seconds and let dry for 30 seconds. Appropriately disinfecting the positive pressure cap decreases the bacterial count and adheres to the principles of infection control.
Cleaning positive pressure cap (Max Plus) with alcohol swab
Clean positive pressure cap (Max Plus) with alcohol swab
11. Without breaking sterile technique, remove the cap on the distal end of the IV tubing. Using a twisting motion, connect Max Plus end to IV tubing. Do not let the positive pressure cap touch any non-sterile surface prior to attaching the IV tubing. If required, place the positive pressure cap on sterile gauze while preparing tubing.
Connecting IV tubing to saline lock
Connect IV tubing to saline lock
Continuous IV infusion
12. Initiate IV infusion. Adjust IV infusion rate by gravity or IV pump as per physician’s orders. Monitor for factors that may affect flow rate.
Adjust IV rate
Adjust IV rate
13. Secure IV tubing to patient with tape. Properly secured extension tubing prevents accidental dislodgement of tubing.
Secure with tape
Secure IV tubing with tape
14. Document procedure and monitor expected response to IV fluids. Chart type of solution, rate, date, and time of infusion as per agency policy.
Data source: Perry et al., 2014; Vancouver Coastal Health, 2008

Critical Thinking Exercises

  1. A continuous infusion is started on your patient. As you leave the room, your patient complains of pain at the insertion site. What should you do?
  2. When flushing a positive pressure cap, when do you clamp the extension tubing?

64

8.6 Converting an IV Infusion to a Saline Lock and Removal of a Peripheral IV

A peripheral IV may be converted to a saline lock when a prescribed continuous IV therapy is switched to intermittent IV or a saline lock for future use. A physician’s order is required to stop a continuous infusion. Checklist 71 describes how to convert an infusion to a saline lock.

Checklist 71: Converting an IV Infusion to a Saline Lock
Disclaimer: Always review and follow your hospital policy regarding this specific skill.

Steps

 Additional Information

1. Verify physician orders to convert IV infusion to a saline lock. Ensures correct order is being implemented.
2. Perform hand hygiene; collect supplies. This prevents the transmission of microorganisms.
Hand hygiene with ABHR
3. Identify yourself; identify the patient using two identifiers and comparing the MAR to the patient’s wristband; explain the procedure to the patient. Proper identification prevents errors. Explaining the procedure educates the patient and allows time for patient to ask questions.
Compare MAR with patient name band
Compare MAR with patient wristband
4. Perform hand hygiene. This step prevents the transmission of microorganisms.
5. Stop IV infusion with clamp or turn off EID. Apply clean gloves. This prevents fluid from escaping from tubing when disconnecting tubing from positive pressure cap (hub).
6. Scrub the connection area between the hub and IV tubing for 15 seconds and let dry for 30 seconds.
Scrub the connection between the IV tubing and positive pressure cap
7. Disconnect primary tubing from the extension tubing; ensure the positive pressure cap remains on the extension tubing. Place a sterile cap on end of IV tubing if tubing will be reconnected for later infusion.
Disconnect IV tubing from saline lock
8. Scrub the hub for 15 seconds and let dry for 30 seconds. Aseptic technique is required for all IV procedures. All access ports must be disinfected to decrease the bacterial load prior to use.
Cleaning positive pressure cap (Max Plus) with alcohol swab
Clean positive pressure cap (Max Plus) with alcohol swab
9. Attach 10 ml syringe prefilled with 0.9% normal saline and flush saline lock to clear the positive pressure cap. Do not bottom out syringe. Turbulent stop-start flush ensures full flushing of the catheter.

Bottoming out the saline syringe with the plunger can cause reflux of fluid back into the catheter.

If resistance is felt, do not force flush. Assess IV site for pain, redness, or swelling.

Flushing saline lock
Flush saline lock
10. Remove syringe and discard. Proper disposal of equipment prevents the spread of microorganisms.
Discard syringe
Discard syringe
11. Clamp extension tubing. Clamping the extension tubing as close to the IV site as possible prevents negative fluid displacement and accidental aspiration of blood at the catheter tip.
Close clamp on saline lock
Saline lock
Saline lock
12. Wipe top of positive pressure cap with alcohol swab to remove fluid residue. Removal of excess fluid prevents bacterial growth on the hub.
13. Document procedure as per agency policy. Document date, time, and IV site assessment.
Data source: Perry et al., 2014; Vancouver Coastal Health, 2008

Video 8.4

Video 8.5

A peripheral IV (saline lock) may be discontinued if ordered by a physician or nurse practitioner; if the patient is discharged from a health care facility; if signs of phlebitis, infiltration, or extravasation occur; or if the saline lock is no longer required for fluids or medication (Fulcher & Fraser, 2007). Peripheral IV’s should be removed promptly when no longer needed to avoid a catheter-related bloodstream infection (CR-BSI), as well as unnecessary pain and trauma (Infusion Nurses Society, 2012). In general, saline locks are changed every 72 hours. If a patient has a peripheral IV in an area of flexion, the IV site should be replaced within 24 hours, or when the patient is stable. Other research shows that peripheral IV cannulas should not be routinely changed but replaced based on whether the site is functioning, the saline lock is required, the insertion site is patent, and/or the insertion site is a source of infection (CDC 2011; Infusion Nurses Society, 2011).

At times, a physician may order IV fluids to be discontinued but request to have the IV converted to saline lock. Be sure to assess the order for discontinuing an IV. Before removing an IV, consider the following:

Review the steps in Checklist 72 for removing a peripheral IV.

Checklist 72: Removing a Peripheral IV
Disclaimer: Always review and follow your hospital policy regarding this specific skill.
Safety considerations: 
  • Assess the patient and be sure they are medically stable prior to removing SL. Check the following: lab values, ongoing need for fluids or IV medications, inability to eat or drink, presence of nausea or vomiting.
  • If patient has ongoing medical concerns requiring an IV, alert the physician.

Steps

 Additional Information

1. Confirm physician’s order or the reason to remove the IV cannula. This step prevents errors in the health care setting.
2. Perform hand hygiene and collect supplies. You will need sterile gauze (two 2x2s), clean gloves, tape, alcohol swab as required, C & S swab if purulent drainage present.
3. Identify yourself; identify the patient using two identifiers and comparing the MAR to the patient’s wristband; explain the procedure to the patient. Proper identification prevents errors. Explaining the procedure educates the patient and allows patient to ask questions.
Compare MAR with patient name band
Compare MAR with patient wristband
4. Perform hand hygiene and apply clean gloves. Open up sterile gauze for easy access and place close by. Preparing gauze allows for easy access once cannula is removed.
5. Remove tape on extension tubing. Tape must be removed prior to removing cannula.
6. Remove transparent dressing:
  • Stabilize the IV cannula.
  • Loosen one edge of transparent dressing toward the IV site by stretching the dressing in the direction of loosened edge.
  • Loosen the other edge of the dressing and repeat previous step.
Removing transparent dressing
Completely remove dressing from IV site.
Completely remove dressing from IV site
7. If purulent drainage is present, perform C & S swab and clean area with alcohol swab. This provides follow-up data for potential infection.
8. Hold sterile gauze above the insertion site; do not apply pressure. Keeping the cannula parallel to the skin, pull out in a straight, slow, steady motion. Assess catheter tip and discard cannula as per agency policy. Applying pressure to the IV site upon removal of the catheter is painful for the patient. Remove catheter first, then apply pressure.
Gauze over cannula
Gauze over cannula
Removing saline lock
Remove saline lock
9. Place sterile gauze over insertion site and apply gentle pressure until bleeding stops, usually for 2 to 3 minutes. If patient is on coagulation therapy, extended pressure will be required to stop bleeding at IV site for 5 minutes.
10. Apply new sterile gauze and tape to create occlusive dressing on old IV site. This prevents bacteria from entering the old IV site.
Apply pressure over site
Apply sterile gauze over IV insertion site
11. Discard supplies, remove gloves, and perform hand hygiene. These steps prevent the spread of microorganisms.
Hand hygiene with ABHR
12. Document procedure as per agency policy. Document date, time, condition of cannula, appearance of IV site, and type of dressing applied.
Data source: ATI, 2015; Perry et al., 2014; Phillips, 2005

Video 8.6

Watch a video Removing a PVAD-Short Cannula by Renée Anderson & Wendy McKenzie, Thompson Rivers University.

Critical Thinking Exercises

  1. What is the purpose of applying pressure to the site after the cannula has been removed?
  2. Name five factors to consider prior to discontinuing an IV.

65

8.7 Transfusion of Blood and Blood Products

All health care practitioners who administer blood or blood products must complete specific training for safe transfusion practices and be competent in the transfusion administration process. Always refer to your agency policy for guidelines for preparing, initiating, and monitoring blood and blood product transfusions. These guidelines apply to adult patients only.

The transfusion of blood or blood products (see Figure 8.8) is the administration of whole blood, its components, or plasma-derived products. The primary indication for a red blood cell (RBC) transfusion is to improve the oxygen-carrying capacity of the blood (Canadian Blood Services, 2013). A health care provider order is required for the transfusion of blood or blood products. RBC transfusions are indicated in patients with anemia who have evidence of impaired oxygen delivery. For example, individuals with acute blood loss, chronic anemia and cardiopulmonary compromise, or disease or medication effects associated with bone marrow suppression may be candidates for RBC transfusion. In patients with acute blood loss, volume replacement is often more critical than the composition of the replacing fluids (Canadian Blood Services, 2013). Transfusions can restore blood volume, restore oxygen-carrying capacity of blood with red blood cells, and provide platelets and clotting factors. The most common type of blood transfusion is blood that is donated by another person (allogeneic). Autologous transfusion is the transfusion of one’s own blood (Perry et al., 2014).

Red Blood Cells and Blood IV tubing
Figure 8.8 Red blood cells and blood IV tubing

Transfusion therapy is considered safe, and stringent precautions are followed in the collection, processing, and administration of blood and blood components. However, transfusions still carry risks such as incompatibility, human error, and disease transmission, and blood transfusion must be taken seriously at all times. Incompatibility can be decreased by using irradiated red blood cells or leukocyte-reduced blood. The majority of blood transfusion complications are a result of human error (Perry et al., 2014).

Compatibility testing is vital for all recipients of blood or blood products. Recipients must be transfused with an ABO group specific to their own blood type or ABO group-compatible. There are three types of blood typing systems: ABO, Rh, and human leukocyte antigen (HLA). For more information on these, refer to the online resources at the end of this chapter. It is vital to understand what types of blood groups are compatible for transfusions (Canadian Blood Services, 2013).

When administering blood and blood products, it is important to know the patient’s values and beliefs regarding blood products. Some groups of individuals, mainly Jehovah Witnesses, will refuse blood transfusions or blood products based on religious beliefs. These individuals will refuse transfusion of whole blood and primary blood components but may accept transfusion of derivatives of primary blood components such as albumins solutions, clotting factors and immunoglobulins. Always assess each individual preference to establish if a blood component is an acceptable treatment to manage their illness or condition (Canadian Blood Services, 2007).

When managing blood transfusions, it is important to prevent complications from occurring and to identify issues promptly to manage reactions effectively. Transfusion reactions (mild to life-threatening) may occur despite all safety measures taken. All transfusion reactions and transfusion errors must be reported to the hospital’s transfusion services (blood bank). It is imperative to know what signs and symptoms to look for, and to educate your patient on what to report and when to report potential transfusion reactions. Mild to severe reactions may include (Canadian Blood Services, 2011):

For more information on types of reactions, signs and symptoms, and treatments, review the article adverse events related to blood transfusions, or see the online resources at the end of this chapter. If patient has a blood transfusion reaction, always follow agency policy to manage mild to severe blood reactions. In general, if a reaction occurs, follow the steps outlined in Checklist 73.

Checklist 73: Managing a Blood or Blood Product Transfusion Reaction
Disclaimer: Always review and follow your hospital policy regarding this specific skill.
Safety considerations: 
  • Always review your agency’s algorithm for managing mild to severe reactions. If a reaction is mild (e.g., fever), and without any other complications, a patient may continue the transfusion if monitored closely. Most other transfusion reactions require the transfusion to be stopped immediately.
  • A blood transfusion reaction may occur 24 to 48 hours post-transfusion.
  • Each separate unit presents a potential for an adverse reaction.
  • Follow emergency transfusion guidelines when dealing with an emergency blood or blood product transfusion.
  • Be aware of which types of blood or blood products cause the most types of transfusion reactions.
  • Be aware of the types of patients at high risk for blood or blood product transfusion reactions.
  • Always have emergency equipment and medications available during a transfusion. For example, epinephrine IV should always be readily available.

Steps

 Additional Information

1. Stop transfusion immediately. The severity of a blood transfusion reaction is related to the amount of product infused and the amount of time it has been infusing.
2. Keep IV line open with 0.9% saline. Keeps IV site patent for emergency medications if required.
3. Complete cardiovascular and vital signs assessment. Assessment monitors the type and severity of reaction. In addition to assessment:
  • Maintain good urinary output.
  • Avoid fluid overload.
  • Manage DIC (disseminated intravascular coagulation) or hemorrhage if clinically indicated.
  • Provide supportive measures as required (oxygen, etc.).
4. Contact physician for medical assessment and to inform about reaction. The physician responsible for the patient must be informed of all transfusion reactions.
5. Check vital signs every 15 minutes until stable. Vital signs must be monitored to identify improving or worsening condition.
6. Obtain blood and urine samples as soon as possible. Blood and urine samples can help identify the type of blood transfusion reaction.
7. Check all labels, tags, forms, blood order, and patient’s identification band to determine if there is a clerical discrepancy. Clerical errors account for the majority of blood transfusion reactions.
8. Keep all blood and IV tubing for further testing by the blood bank for verification of blood product and patient identification. All blood products and IV tubing are investigated by the transfusion services and reported to Canadian Blood Services and Public Health Agency of Canada. These professional bodies are responsible for reporting and recording incidents of reactions.
9. Notify blood bank. Notify blood bank when an adverse reaction occurs, even if transfusion is continued.
10. Document as per agency policy. Document time, date, signs and symptoms, type of product, notification to the physician and management of reaction, and patient response to management of reaction.

Documentation includes, but is not limited to:

  • Transfusion reaction form
  • Patient chart
  • Report for transfusion services (blood bank)
  • Adverse event form (Patient Safety Learning System or PSLS)
Data source: Alberta Health Services, 2015a; Canadian Blood Services, 2011; Perry et al., 2014; Vancouver Coastal Health, 2008

In preparation for a blood or blood product transfusion (Alberta Health Services, 2015a, 2015b; Perry et al., 2014; Vancouver Coastal Health, 2008), the steps listed in Checklist 74 must be completed. These steps must be completed before obtaining the blood or blood product from the blood bank.

Checklist 74: Preparing for a Blood or Blood Product Transfusion
Disclaimer: Always review and follow your hospital policy regarding this specific skill.
Safety considerations: 
  • If there is any discrepancy between patient information, group and screen, product ordered, etc., do not proceed. Stop and verify any discrepancies.
  • Be diligent when preparing to infuse blood. Distractions may lead to errors when verifying information.

Steps

 Additional Information

1. Verify the physician’s order for the specific blood or blood product. Order must be verified for the type of product; the amount, date, time, and rate and duration of infusion; any modifications to a blood component (e.g., irradiation); specific transfusion requirements; and possible sequence in which multiple components are to be transfused.
Physician orders for a blood transfusion
2. Verify the health care provider’s orders for any pre- or post-transfusion medications to be administered. Some patients may require Benadryl IV or Tylenol pretransfusion or Lasix post-transfusion.
3. Obtain the patient’s transfusion history, and note any known allergies and previous transfusion reactions. Past complications may require patient to have pre- and post-transfusion medications to prevent further transfusion reactions.
4. Verify that type and cross-match (also known as a G & S) have been completed within the past 96 hours. Verification allows for the identification of any newly developed antibodies, and ensures current compatibility between donor red blood cells and recipient’s plasma. If G & S is outdated or not available, initiate process for new G & S sample.
5. Verify patency of IV site. The patient’s IV cannula must be patent and without complications, such as infiltration or phlebitis. The size of cannula (#18 to #20) must match the guidelines set by Canadian Blood Services.
Assess patency of IV site
6. Ensure appropriate patient identification band is available and legible. To complete all safety identification checks, proper identification must be on the patient.
7. Assess laboratory values, such as hematocrit, coagulation values, and platelet count. This ensures the transfusion is appropriate for the patient.
8. Check that the patient has properly completed and signed the transfusion consent form.

Assess patient’s understanding of the procedure and its rationale. Consent is required for the transfusion of blood and blood components and products.

All blood products must have a consent form signed prior to the transfusion.
Consent
Example of a consent form

Consent is mandatory for all blood and blood product transfusions. Follow agency policy if patient is unable to sign or consent to blood or blood product transfusions.

9. Know the indications for the transfusion. Know why the patient is receiving the transfusion.
10. Obtain and record the patient’s pretransfusion baseline vital signs, including temperature, pulse, respiration, blood pressure, and oxygen saturation level. If the patient is febrile, which means the patient’s temperature is higher than 37.8°C (100°F), notify the health care provider before initiating the transfusion. Pretransfusion vital signs are a mandatory component of blood administration.
Pre-assessment of vital signs
11. Have emergency equipment available at the bedside (oxygen, suction, etc.). Be prepared for potential complications, as prompt intervention may be required to prevent serious complications.
Emergency equipment at bedside
Emergency equipment check at bedside
12. Complete all documentation as required per agency policy. Proper documentation provides evidence that all required procedures have been followed to prepare for a transfusion.
Data source: Alberta Health Services, 2015b; Canadian Blood Services, 2011; Perry et al., 2014; Vancouver Coastal Health, 2008

Checklist 75 provides steps to administering blood and blood products safely in the acute care setting.

Checklist 75: Transfusion of Blood and Blood Products
Disclaimer: Always review and follow your hospital policy regarding this specific skill.
Safety considerations: 
  • No medications may be added to blood units or through IV tubing.
  • Specific blood administration tubing is required for all blood transfusions. Blood tubing is changed every 4 hours or 4 units, whichever comes first.
  • See agency policy for using EID for the administration of blood products.
  • Intravenous immunoglobulin (IVIG) is only compatible with D5W.
  • All blood products taken from the blood bank must be hung within 30 minutes and administered (infused) within 4 hours due to the risk of bacterial proliferation in the blood component at room temperature.

Steps

 Additional Information

1. Verify physician orders and all preparation steps as listed in Checklist 74.
2. Assess or initiate venous access. Appropriate needle gauge is based on clinical status of patient, urgency of transfusion, and venous access:
  • #18 gauge for trauma/surgery
  • #20 to #22 for elective medical/geriatric

Transfusion set must be Luer-locked to a 2.0 ml maximum extension tubing, either directly to cannula or through a Max Plus positive pressure cap.

Saline lock
Saline lock
3. Initiate primary infusion at TKVO. Prime an IV line following Checklist 66.
  • 0.9% NS for RBC
  • D5W for IVIG

Refer to blood product fact sheets for all other products.

Sterile IV solution
Normal saline IV solution
4. Complete and document cardiovascular assessments and initial vital signs. Document any clinical sign or symptom that may be confused with a transfusion reaction (e.g., existing fever).
5. Obtain products from the transfusion areas within 30 minutes of planned transfusion. Plan for pickup or delivery of blood and blood products. Do not request blood or blood products if Steps 1 to 4 are not complete.
6. Complete visual inspection of product. Assess blood bag for any signs of leaks or contamination, such as clumping, clots, gas bubbles, or a purplish discoloration. Return to blood bank if blood bag contains any of the above signs.
Visual inspection of the blood bag
7. Initial verification:

a. Compare the transfusion medical services (TMS) documentation with the patient record to verify:

  • Patient first and last name and unique identifier number
  • Physician order
  • Consent
  • Patient ABO grouping (G & S)

b. Compare the TMS documentation with the product label attached to the product tab and verify:

  • Patient first and last name and unique identifier number
  • Type of blood product and ABO blood grouping
  • 11-digit serial number
  • Product expiry date and time
  • Special requirements (e.g., irradiated)
  • G & S expiry date
All verification numbers/information must match exactly.

Must be completed by two trained staff members competent in blood transfusion administration process as set out by the agency.

Confirm the patient blood type and Rh are compatible with the donor blood type and Rh.

If there are any discrepancies, stop the process and contact the TMS for resolution and direction. Do not proceed.

Ensure the blood product matches the physician’s orders (red blood cells or platelets).

TMS record
TMS record
8 Administer pre-medications as ordered. Medications must be administered through an IV infusion set, and the IV site cleared with 0.9% NS.
9. Final verification (must be completed by the same two staff members as noted in Step 7).

Compare the patient’s first and last name and unique identifier number using all of the following:

  • Patient identification band or equivalent ID process as approved by the TMS (Ask the patient to spell first and last name and state date of birth.)
  • TMS documentation
  • Compatibility tag and label attached to blood product

Only after recipient identification and product check is confirmed, invert product 5 to 10 times and insert spike of the blood administration set into the blood product container.

All verification numbers must match exactly. If there are any discrepancies, stop the process and contact the TMS for resolution and direction. Do not proceed.
Identify patient
Identify patient

Patients who are alert and oriented should be asked to:

  • Spell first and last name
  • State their date of birth

All identifying information attached to the blood bag must remain attached at least until completion of transfusion.

10. Perform hand hygiene. Prime the blood product administration set:
  • Close clamp. Completely cover the filter with product.
  • A straight blood administration set is used for all transfusions.
  • A Y-type blood administration set should only be considered in clinical situations where additional fluid volume may be required.
Do not remove the product from the presence of the patient; prime at bedside. If product is removed from bedside, the final verification process must be completed again.
Prime blood tubing
Prime blood tubing
11. Initiate transfusion:
  • Obtain vital signs immediately prior to transfusion, then 15 minutes after initiation, then every hour until transfusion is complete.
  • Maintaining asepsis, disconnect the NS infusion and connect blood administration set and start transfusion.
  • Advise patient on the signs and symptoms of transfusion reaction and what and when to report.
Adults: Initiate red cells slowly (25 ml in the first 15 minutes). For all other blood transfusions, refer to the blood and product sheet as per your agency policy.

Some agencies use an EID to administer blood transfusions. Always check agency policy prior to transfusion.

For each and every unit:

  • Remain with the patient for the first 5 minutes and assess for clinical signs of transfusion reaction.
  • Complete transfusion within 4 hours of removal from the blood bank.

Most transfusion reactions occur within first 15 minutes of a transfusion. Infusing small amounts of blood component initially minimizes volume of blood to which patient is exposed, thereby minimizing severity of reaction.

Infusion of packed RBC
Infusion of packed red blood cells
12. Monitor:
  • Assess and observe for clinical signs and symptoms of reactions up to 24 hours post-transfusion.
  • Complete all appropriate clinical documentation.
Vital signs must be monitored:
  • Immediately prior to infusion
  • Within 10 to 15 minutes
  • Every hour until transfusion is complete
vital signs
Vital signs
13. In the event of a transfusion reaction, stop the infusion.
  • Manage transfusion reactions as per protocol.
  • Complete required transfusion reaction form.
  • Return remaining blood to blood bank for further investigation.
14. For additional units, repeat steps 6 to 12. Follow the same process to ensure patient safety.
15. Flush administration set with maximum of 50 ml of normal saline and re-establish IV or SL as per physician orders. Flushing displaces any blood or blood product from the administration set. It is not necessary to flush between units of the same blood product.
16. Discard waste in biohazard waste container. This prevents the spread of biohazard waste.
17. Complete all documentation as required by agency. Documentation may include:
  • Transfusion record form
  • All vital signs and reactions
  • Any significant findings, initiation and termination of transfusion
  • Record of transfusion on the in-and-out sheet
Data source: Alberta Health Services, 2015a, 2015b; Perry et al., 2014; Vancouver Coastal Health, 2008

Critical Thinking Exercises

  1. How many units of blood can be transfused through one blood administration set?
  2. What are the steps to managing a blood transfusion reaction?

66

8.8 Total Parenteral Nutrition (TPN)

Total parenteral nutrition (TPN), also known as parenteral nutrition (PN) is a form of nutritional support given completely via the bloodstream, intravenously with an IV pump. TPN administers proteins, carbohydrates, fats, vitamins, and minerals. It aims to prevent and restore nutritional deficits, allowing bowel rest while supplying adequate caloric intake and essential nutrients, and removing antigenic mucosal stimuli (Perry et al., 2014).

TPN may be short-term or long-term nutritional therapy, and may be administered on acute medical floors as well as in critical care areas. The caloric requirements of each patient are individualized according to the degree of stress, organ failure, and percentage of ideal body weight. TPN is used with patients who cannot orally ingest or digest nutrition (Triantafillidis & Papalois, 2014). TPN may be administered as peripheral parenteral nutrition (PPN) or via a central line, depending on the components and osmolality. Central veins are usually the veins of choice because there is less risk of thrombophlebitis and vessel damage (Chowdary & Reddy, 2010). According to Chowdary & Reddy (2010), candidates for TPN are:

TPN is made up of two components: amino acid/dextrose solution and a lipid emulsion solution (see Figure 8.9). It is ordered by a physician, in consultation with a dietitian, depending on the patient’s metabolic needs, clinical history, and blood work. The amino acid/dextrose solution is usually in a large volume bag (1,000 to 2,000 ml), and can be standard or custom-made. It is often yellow in colour due to the multivitamins it contains. The ingredients listed on the bag must be confirmed by the health care provider hanging the IV bag. The solution may also include medication, such as insulin and heparin. The amino acid/dextrose solution is reviewed and adjusted each day based on the patient’s blood work. Lipid emulsions are prepared in 100 to 250 ml bags or glass bottles and contain the essential fatty acids that are milky in appearance. At times, the lipid emulsion may be added to the amino acid/dextrose solution. It is then called 3 in 1 or total nutrition admixture (Perry et al., 2014).

TPN is prepared by a pharmacy, where the calories are calculated using a formula, and is usually mixed for a 24-hour continuous infusion to prevent vascular trauma and metabolic instability (North York Hospital, 2013). TPN orders should be reviewed each day, so that changes in electrolytes or the acid-base balance can be addressed appropriately without wasting costly TPN solutions (Chowdary & Reddy, 2010).

Oct 2, 2015 060
Figure 8.9 Types of TPN (amino acids and lipids)
TPN tubing with special filter
Figure 8.10 TPN tubing with special filter

TPN is not compatible with any other type of IV solution or medication and must be administered by itself. TPN must be administered using an EID (IV pump), and requires special IV filter tubing (see Figure 8.10) for the amino acids and lipid emulsion to reduce the risk of particles entering the patient. Agency policy may allow amino acids and lipid emulsions to be infused together above the filters. TPN tubing will not have any access ports and must be changed according to agency policy. Always review agency policy on setup and equipment required to infuse TPN.

A physician may order a total fluid intake (TFI) for the amount of fluid to be infused per hour to prevent fluid overload in patients receiving TPN. It is important to keep track of all the fluids infusing (IV fluids, IV medications, and TPN) in order to avoid fluid overload (Perry et al., 2014). Do not abruptly discontinue TPN (especially in patients who are on insulin) because this may lead to hypoglycemia. If for whatever reason the TPN solution runs out while awaiting another bag, hang D5W at the same rate of infusion while waiting for the new TPN bag to arrive (North York Hospital, 2013). Do not obtain blood samples or central venous pressure readings from the same port as TPN infusions. To prevent severe electrolyte and other metabolic abnormalities, the infusion rate of TPN is increased gradually, starting at a rate of no more than 50% of the energy requirements (Mehanna, Nankivell, Moledina, & Travis, 2009).

Complications Related to TPN

There are many complications related to the administration of TPN (Perry et al., 2014). Table 8.8 lists potential complications, rationale, and interventions.

Table 8.8 TPN Complications, Rationale, and Interventions

Complication

 Rationale and Interventions

Catheter-related bloodstream infection (CR-BSI), also known as sepsis CR-BSI, which starts at the hub connection, is the spread of bacteria through the bloodstream. There’s an increased risk of CR-BSI with TPN, due to the high dextrose concentration of TPN. Symptoms include tachycardia, hypotension, elevated or decreased temperature, increased breathing, decreased urine output, and disorientation.

Interventions: Strict adherence to aseptic technique with insertion, care, and maintenance; avoid hyperglycemia to prevent infection complications; closely monitor vital signs and temperature. IV antibiotic therapy is required. Monitor white blood cell count and patient for malaise. Replace IV tubing frequently as per agency policy (usually every 24 hours).

Localized infection at exit or entry site Due to poor aseptic technique during insertion, care, or maintenance of central line or peripheral line

Interventions: Apply strict aseptic technique during insertion, care, and maintenance. Frequently assess CVC site for redness, tenderness, or drainage. Notify health care provider of any signs and symptoms of infection.

Pneumothorax A pneumothorax occurs when the tip of the catheter enters the pleural space during insertion, causing the lung to collapse. Symptoms include sudden chest pain, difficulty breathing, decreased breath sounds, cessation of normal chest movement on affected side, and tachycardia.

Interventions: Apply oxygen, notify physician. Patient will require removal of central line and possible chest tube insertion.

Air embolism An air embolism may occur if IV tubing disconnects and is open to air, or if part of catheter system is open or removed without being clamped. Symptoms include sudden respiratory distress, decreased oxygen saturation levels, shortness of breath, coughing, chest pain, and decreased blood pressure.

Interventions: Make sure all connections are clamped and closed. Clamp catheter, position patient in left Trendelenburg position, call health care provider, and administer oxygen as needed.

Hyperglycemia Related to sudden increase in glucose after recent malnourished state. After starvation, glucose intake suppresses gluconeogenesis by leading to the release of insulin and the suppression of glycogen. Excessive glucose may lead to hyperglycemia, with osmotic diuresis, dehydration, metabolic acidosis, and ketoacidosis. Excess glucose also leads to lipogenesis (again caused by insulin stimulation). This may cause fatty liver, increased CO2 production, hypercapnea, and respiratory failure.

Interventions: Monitor blood sugar frequently QID (four times per day), then less frequently when blood sugars are stable. Follow agency policy for glucose monitoring with TPN. Be alert to changes in dextrose levels in amino acids and the addition/removal of insulin to TPN solution.

Refeeding syndrome Refeeding syndrome is caused by rapid refeeding after a period of malnutrition, which leads to metabolic and hormonal changes characterized by electrolyte shifts (decreased phosphate, magnesium, and potassium in serum levels) that may lead to widespread cellular dysfunction. Phosphorus, potassium, magnesium, glucose, vitamin, sodium, nitrogen, and fluid imbalances can be life-threatening. High-risk patients include the chronically undernourished and those with little intake for more than 10 days. Patients with dysphagia are at higher risk. The syndrome usually occurs 24 to 48 hours after refeeding has started. The shift of water, glucose, potassium, phosphate, and magnesium back into the cells may lead to muscle weakness, respiratory failure, paralysis, coma, cranial nerve palsies, and rebound hypoglycemia.

Interventions: Rate of TPN should be based on the severity of undernourishment for moderate- to high-risk patients. TPN should be initiated slowly and titrated up for four to seven days. All patients require close monitoring of electrolytes (daily for one week, then usually three times/week). Always follow agency policy. Blood work may be more frequent depending on the severity of the malnourishment.

Fluid excess or pulmonary edema Signs and symptoms include fine crackles in lower lung fields or throughout lung fields, hypoxia (decreased O2 sats).

Interventions: Notify primary health care provider regarding change in condition. Patient may require IV medication, such as Lasix to remove excess fluids. A decrease or discontinuation of IV fluids may also occur. Raise head of bed to enhance breathing and apply O2 for oxygen saturation less than 92% or as per agency protocol. Monitor intake and output. Pulmonary edema may be more common in the elderly, young, and patients with renal or cardiac conditions.

Data source: Chowdary & Reddy, 2010; Mehanna et al., 2009; O’Connor, Hanly, Francis, Keane, & McNamara, 2013; Perry et al., 2014

A patient on TPN must have blood work monitored closely to prevent the complications of refeeding syndrome. Blood work may be ordered as often as every six hours upon initiation of TPN. Most hospitals will have a TPN protocol to follow for blood work. Common blood work includes CBC (complete blood count), electrolytes (with special attention to magnesium, potassium, and phosphate), liver enzymes (total and direct bilirubin, alanine aminotransferase [ALT], aspartate aminotransferase [AST], alkaline phosphatase [ALP], gamma-glutamyl transferase [GGT], total protein, albumin), and renal function tests (creatinine and urea). Compare daily values to baseline values, and investigate and report any rapid changes in any values (Chowdary & Reddy, 2010; Perry et al., 2014). Table 8.9 outlines a plan of care when a patient is receiving TPN.

Table 8.9 Assessment of a Patient with TPN

Assessment

 Additional Information

CVC/peripheral IV line Intravenous line should remain patent, free from infection.

Dextrose in TPN increases risk of infection. Assess for signs and symptoms of infections at site (redness, tenderness, discharge) and systemically (fever, increased WBC, malaise). Dressing should be dry and intact.

Daily or biweekly weights Monitor for evidence of edema or fluid overload. Over time, measurements will reflect weight loss/gain from caloric intake or fluid retention.
Capillary or serum blood glucose levels QID (4 times a day) capillary blood glucose initially to monitor glycemic control, then reduce monitoring when blood sugars are stable or as per agency policy. May be done more frequently if glycemic control is difficult. Indicates metabolic tolerance to dextrose in TPN solution and patient’s glycemic status.
Monitor intake and output Monitor and record every eight hours or as per agency policy. Monitor for signs and symptoms of fluid overload (excessive weight gain) by completing a cardiovascular and respiratory assessment. Assess intakes such as IV (intravenous fluids), PO (oral intake), NG (nasogastric tube feeds). Assess outputs: NG (removed gastric content through the nasogastic tube), fistula drainage, BM (liquid bowel movements), colostomy/ileostomy drainage, closed suction drainage devices (Penrose or Jackson-Pratt drainage) and chest tube drainage.
Daily to weekly blood work Review lab values for increases and decreases out of normal range. Lab values include CBC, electrolytes, calcium, magnesium, phosphorus, potassium, glucose, albumin, BUN (blood urea nitrogen), creatinine, triglycerides, and transferrin.
Mouth care Most patients will be NPO. Proper oral care is required as per agency policy. Some patients may have a diet order.
Vital signs Vital signs are more frequently monitored initially in patients with TPN.
Data source: BCIT, 2015a; Perry et al., 2014

TPN may be administered in the hospital or in a home setting. Generally, patients receiving TPN are quite ill and may require a lengthy stay in the hospital. The administration of TPN must follow strict adherence to aseptic technique, and includes being alert for complications, as many of the patients will have altered defence mechanisms and complex conditions (Perry et al., 2014). To administer TPN, follow the steps in Checklist 76.

Checklist 76: TPN Administration
Disclaimer: Always review and follow your hospital policy regarding this specific skill.
Safety considerations: 
  • Compare the patient’s baseline vital signs; electrolyte, glucose, and triglyceride levels; weight; and fluid intake and output with treatment values, and investigate any rapid change in such values.
  • To identify signs of infection early, be aware of the patient’s recent temperature range.
  • Use strict aseptic technique when caring for central venous catheters and PICC lines.
  • Do not use TPN solution if it has coalesced, as evidenced by formation of a thick, dense layer of fat droplets on its surface. If the solution appears abnormal in any way, request a replacement from the pharmacy.
  • Never try to catch up with a delayed infusion.

Steps

 Additional Information

1. Review physician’s orders and compare to MAR and content label on TPN solution bag and for rate of infusion. Each component of the TPN solution must be verified with the physician’s orders. Check date and time of last TPN tubing change, lab values, and expiry date of TPN to prevent medication error.

Assess CVC, WBC, and patient for malaise.

Medications may be added to the TPN.

Ensure the rate of infusion is verified in the doctor’s order each time new TPN bag is initiated.

2. Collect supplies, prepare TPN solution, and prime IV tubing with filter as per agency protocol. TPN requires special IV tubing with a filter. Generally, new TPN tubing is required every 24 hours to prevent catheter-related bacteremia. Follow agency policy.

Ensure tubing is primed correctly to prevent air embolism.

TPN tubing with special filter
3. <a href=”/clinicalskills/chapter/1-6-hand-hygiene/”>Perform hand hygiene, identify yourself, and identify patient using two patient identifiers. Compare the MAR to the patient’s wristband. Explain the procedure to the patient. Hand hygiene prevents the spread of microorganisms.

Proper identification prevents patient errors.

Identify patient with two identifiers
Compare MAR to patient wristband
4. Complete all safety checks for CVC as per agency policy. This adheres to safety policies related to central line care.
5. If changing TPN solution, pause EID and remove old TPN administration set. Disinfect connections and change IV tubing as per agency policy.

If starting TPN for the first time, flush and disinfect CVC lumens as per agency policy.

Change TPN IV tubing as per agency policy. Use strict aseptic technique with IV changes as patients with high dextrose solutions are at greater risk of developing infections.
6. Insert new TPN solution and IV tubing into EID. EID must be used with all TPN administration.
7. Start TPN infusion rate as per physician orders. Prevents medication errors.
8. Discard old supplies as per agency protocol, and perform hand hygiene. These steps prevent the spread of microorganisms.
9. Monitor for signs and symptoms of complications related to TPN. See Table 8.8 for list of complications related to TPN.
10. Complete daily assessments and monitoring for patient on TPN as per agency policy. See daily and weekly assessments in Table 8.9. Flow rate may be monitored hourly.
11. Document the procedure in the patient chart as per agency policy. Note time when TPN bag is hung, number of bags, and rate of infusion, assessment of CVC site and verification of patency, status of dressing, vital signs and weight, client tolerance to TPN, client response to therapy, and understanding of instructions.
Data source: North York Hospital, 2013; Perry et al., 2014

Critical Thinking Exercises

  1. Describe refeeding syndrome and state one method to reduce the risk of refeeding syndrome.
  2. A patient receiving TPN for the past 48 hours has developed malaise and hypotension. What potential complication are these signs and symptoms related to?

Additional Videos

Video 8.7

Video 8.8

67

8.9 Summary

Infusion therapy is a common treatment in the hospital setting, and vital for patient recovery. The safe management of IV equipment and procedures related to IV therapy is an essential skill for safe patient care. This chapter reviewed the skills necessary to care for a patient receiving IV therapy, and the benefits and complications related to peripheral intravenous therapy, central venous catheters, blood and blood products, and TPN.

Key Takeaways

  • Use strict aseptic technique when preparing and maintaining all IV solutions and equipment. Most complications related to IV therapy can be prevented.
  • Be alert and vigilant, and assess for complications as per agency policy.
  • Keep up to date with recommendations for safe care with IV therapy from the Centers for Disease Control and Canadian Patient Safety Institute.
  • There are many types of equipment and procedures related to IV therapy. Educate yourself on the various types of equipment and devices to care for your patient safely.
  • Receive the appropriate training for initiating IVs, CVC care and maintenance, and blood and blood product transfusions.
  • Remember that patients on IV therapy are at an increased risk for fluid overload. These patients include the elderly, young, and those with cardiac and renal disease.
  • Follow all transfusion policies to avoid transfusion errors. Be alert to the potential complications of blood and blood product transfusions.
  • Complete all daily assessments related to a patient receiving TPN. These patients are generally quite ill and have a diminished ability to tolerate complications.

Additional Videos

Video 8.9

Watch a video Blood draw through a CVAD by Renée Anderson & Wendy McKenzie, Thompson Rivers University.

Video 8.10

Watch a video PVAD-Short Dressing Change by Renée Anderson & Wendy McKenzie, Thompson Rivers University.

Video 8.11

Watch a video PICC Dressing Change by Renée Anderson & Wendy McKenzie, Thompson Rivers University.

Suggested Online Resources

  1. ATI Nursing Education: Blood administration. This module provides comprehensive information about blood administration, including practice questions and step-by-step videos.
  2. ATI Nursing Education: Intravenous therapy. This American-based online module covers all topics related to IV therapy including definitions, a review of equipment, step-by-step videos, evidence-based research, frequently asked questions, and quizzes.
  3. Canadian Blood Services: Clinical guide to transfusion. These educational materials provide guidelines for the care of patients receiving blood or blood products. This information includes blood administration, adverse reactions, blood components, emergency transfusions, pediatric and neonatal transfusions, and more.
  4. Drug calculations. This medication calculation website reviews how to calculate the dosages for parenteral and non-parenteral medications, and IV fluids. It also includes metric conversions and IV drop rate calculations.
  5. Fraser Health: Central venous catheters in adult patients. This self-learning online module is designed for health care professionals and covers central venous catheter (CVC) care and maintenance.
  6. Fraser Health: Peripheral intravenous initiation. This self-study online module covers initiating intravenous (IV) therapy.
  7. Intravenous fluid selection. This sample chapter from a textbook describes the selection of IV fluids and solutions, and includes study questions as well.
  8. Mosby’s Nursing Video Skills – Advanced. These Canadian-based online module with various videos and procedure checklists related to IV therapy, central lines, blood and blood product transfusions, and TPN.
  9. Nursing Made Incredibly Easy: The nurse’s quick guide to IV drug calculations. This article provides a simple and concise way to perform accurate IV drug calculations.

References

Alberta Health Services. (2015a). Transfusion of blood and blood components. Retrieved on July 15, 2015, from https://extranet.ahsnet.ca/teams/policydocuments/1/clp-prov-transfusion-blood-product-policy-ps-59.pdf

Alberta Health Services. (2015b). Transfusion of blood and blood components — Acute adult. Retrieved on July 15, 2015, from https://extranet.ahsnet.ca/teams/policydocuments/1/clp-prov-transfusion-blood-product-adult-acute-procedure-ps-59-01.pdf

ATI. (2015). Discontinuing a peripheral intravenous line. ATI Nursing Education. Intravenous Therapy. Retrieved on Oct 10, 2015 from http://atitesting.com/ati_next_gen/skillsmodules/content/iv-therapy/equipment/discontinuing-iv.html

Baskin, J. L., Pui, C. H., Reiss, U., Wilimas, J. A., Metzger, L. M., Ribeiro, R. C., & Howard, S. C. (2009). Management of occlusion and thrombosis associated with long-term indwelling central venous catheters. Lancet, 374(9684), 159. doi: 10.1016/S0140-6736(09)60220-8

British Columbia Institute of Technology (BCIT). (2015a). CVC complications worksheet: NURS 3020. BCIT BSN program.

British Columbia Institute of Technology (BCIT). (2015b). Checklist: IV tubing administration set and IV solution change. NURS 2020. BCIT BSN program.

Brunce, M. (2003). Troubleshooting central lines. Retrieved on Aug 28, 2015, from http://www.modernmedicine.com/modern-medicine/content/troubleshooting-central-lines 

Canadian Blood Services (2007). Blood Administration. Retrieved on Nov. 6, 2015 from http://www.transfusionmedicine.ca/sites/transfusionmedicine/files/PDF/CBC_CGT_09.pdf

Canadian Blood Services. (2011). Clinical guide to transfusions. Adverse reactions. Retrieved on July 9, 2015, from http://www.transfusionmedicine.ca/sites/transfusionmedicine/files/articles/CGTTChapter10_MAY2011_FINAL.pdf

Canadian Blood Services. (2013). Clinical guide to transfusions. Blood components. Retrieved on July 9, 2015, from http://www.transfusionmedicine.ca/sites/transfusionmedicine/files/articles/CGTTChapter2_MAR2013_FINAL.pdf

Centers for Disease Control. (2011). Guidelines for the prevention of intravascular catheter related infections. Retrieved on July 5, 2015, from http://www.cdc.gov/hicpac/pdf/guidelines/bsi-guidelines-2011.pdf

Chowdary, K. V. R., & Reddy, P. N. (2010). Parenteral nutrition: Revisited. Indian Journal of Anaethestic, 54(2), 95-103. doi: 10.4103/0019-5049.63637

Crawford, A., & Harris, H. (2011). IV fluids: What nurses need to know. Nursing 2015, 41(5), 30-38. Retrieved on July 9, 2015, from http://journals.lww.com/nursing/Fulltext/2011/05000/I_V__fluids_What_nurses_need_to_know.10.aspx?WT.mc_id=HPxADx20100319xMP

Fraser Health. (2007). Central venous catheters in adult patients. A self-learning module. Retrieved on Oct 10, 2015, from https://www.fraserhealth.ca/media/CentralVenousCatheters.pdf

Fraser Health Authority. (2014). Clinical practice guidelines: Intravenous therapy. Retrieved on July 2, 2015, from http://physicians.fraserhealth.ca/media/2014%2005%2015%20IV%20Therapy%20CPG%20FINAL.pdf

Fulcher, E. M., & Fraser, M. S. (2007). Introduction to intravenous therapy for health professionals. St Louis, MO: Elsevier.

Infusion Nurses Society. (2011). Infusion nursing standards of practice. Journal of Infusion Nursing, 34(1). Retrieved on July 2, 2015, from http://www.ins1.org/i4a/ams/amsstore/category.cfm?product_id=192

Infusion Nurses Society. (2012). INS Position paper: Recommendations for frequency of assessment of the short peripheral catheter site. Journal of infusion nursing, 35(5), 290 -292.

McCallum L., & Higgins, D. (2012). Care of peripheral venous cannula sites. Nursing times, 108(34-35), 12-15.

Mehanna, H., Nankivell, P. C., Moledina, J., & Travis, J. (2009). Refeeding syndrome — awareness, prevention and management. Head and Neck Oncology, 1(4). doi: 10.1186/1758-3284-1-4

North York Hospital. (2013). Care of the patient receiving total parenteral nutrition (TPN). Retrieved on July 6, 2015, from
http://www.nygh.on.ca/cernercbt/files%5CCONTENT_Day_2%5CTPN%202013%5CTPN%20learning%20pkg%20revised%20July%202013.pdf

O’Connor, A., Hanly, A. M., Francis, E., Keane, N., & McNamara, D. (2013). Catheter associated blood stream infections in patient receiving parenteral nutrition: A prospective study of 850 patients. Journal of Clinical Medical Research, 5(1),18-21. doi: 10.4021/jomr1032w

Perry, A. G., Potter, P. A., & Ostendorf, W. R. (2014). Clinical skills and nursing techniques (8th ed.). St Louis, MO: Elsevier-Mosby.

Phillips, L. D. (2005). Manual of IV therapies. Philadelphia, PA: F.A. Davis Company.

Prabaharan, B., & Thomas, S. (2014). Spontaneous migration of central venous catheter tip following extubation. Saudi J Anaesth, 8(1): 131–133. doi: 10.4103/1658-354X.125975

Safer Healthcare Now. (2012). Interventions. Retrieved on July 9, 2015, from: http://www.patientsafetyinstitute.ca/en/toolsResources/pages/interventions-default.aspx

Triantafillidis, J. K., & Papalois, A. E. (2014). The role of total parenteral nutrition in inflammatory bowel disease: Current aspects. Scandinavian Journal of Gastroenterology, 49(1), 3-14. doi: 10.3109/00365521.2013.860557.

Vancouver Coastal Health. (2008). Administration of blood components and blood products. Vancouver, BC: Vancouver Health Authority.

Vancouver Coastal Heath. (2012). Saline locks: Care and maintenance. Vancouver, BC: Vancouver Health Authority.

Waitt, C., Waitt, P., & Pirmohamed, M. (2004). Intravenous therapy. Postgraduate Medicine, 80(939), 1-6. doi: 10.1136/pmj.2003.010421

IX

Chapter 9. Blood Glucose Monitoring

68

9.1 Introduction

Blood glucose monitoring allows people with diabetes to monitor their blood glucose levels and manage their condition accordingly.

Types of Diabetes

Type 1 diabetes usually develops in childhood or adolescence and used to be called juvenile-onset diabetes. It occurs when the beta cells of the pancreas are destroyed by the immune system and no longer produce insulin, or produce very little insulin. People with this form of diabetes need injections of insulin every day in order to control the levels of glucose in their blood. If they do not have access to insulin, they will die. There is no known way to prevent type 1 diabetes.

Type 2 diabetes used to be called non-insulin-dependent diabetes or adult-onset diabetes. It accounts for at least 90% of all cases of diabetes and can occur at any age. With type 2 diabetes, the body does not make enough insulin or does not respond well to the insulin it makes. Either or both of these characteristics — relative insulin deficiency and insulin resistance — may be present at the time diabetes is diagnosed.

Type 2 diabetes may remain undetected for many years, and the diagnosis is often made when a complication appears or a routine blood or urine glucose test is done. It is often, but not always, associated with overweight or obesity, which itself can cause insulin resistance and lead to high blood glucose levels. People with type 2 diabetes can often initially manage their condition through exercise and diet. However, over time most people will require oral drugs and or insulin.

Gestational diabetes is a form of diabetes that develops in women during pregnancy and disappears after delivery. Gestational diabetes affects about 4% of all pregnancies and increases the risk of developing type 2 diabetes.

Other specific types of diabetes also exist, and more information can be found at the Canadian Diabetes Association website.

Managing Diabetes

People with diabetes can manage their disease by monitoring their blood glucose levels. To measure blood glucose levels, blood is obtained through a skin puncture using a specified needle system, which is less painful and invasive than venipuncture. The ease of this skin puncture method makes it possible for patients to perform this procedure themselves.

In the hospital setting, a blood glucose machine (glucometer) is used to provide an accurate blood glucose level in less than a minute using a reagent strip with a drop of blood dropped or wicked onto a new, dry, specifically indicated portion of the reagent strip. These machines must be regularly calibrated according to agency policy, and each machine should be cleaned between use on different patients.

Ensure that you read and understand the manufacturer’s instructions and your agency policy for the blood glucose monitoring machines used in your clinical setting.

Learning Objectives

  • State the abnormal and normal ranges for blood glucose levels in Canadian (SI) values
  • Demonstrate the safe use of a glucometer machine
  • Collect and organize appropriate equipment to perform a blood glucose test
  • Describe the steps in performing a capillary blood glucose test
  • Demonstrate dexterity and ability to accurately obtain a blood glucose sample
  • Identify when a patient is hypoglycemic or hyperglycemic
  • Discuss the management of hypoglycemia using a hypoglycemic protocol

69

9.2 Glucometer Use

People with diabetes require regular monitoring of their blood glucose to help them achieve as close to normal blood glucose levels as possible for as much of the time as possible. The benefits of maintaining a blood glucose level that is consistently within the range of 4-7 mmol/L will reduce the short-term, potentially life-threatening complications of hypoglycemia as well as the occurrence rate and severity of the long-term complications of hyperglycemia.

Patients in the hospital setting are likely to have inconsistent blood glucose levels as they are affected by changes in diet and lifestyle, surgical procedures, and the stress of being in a hospital. The physician will prescribe how regularly the blood glucose should be monitored. In acute situations, a sliding-scale treatment for insulin will be individually prescribed per patient. The medication administration record (MAR) or sliding scale will provide directions for the amount of medication to be given based on the blood glucose reading.

It is usually the responsibility of the nurse to perform blood glucose readings. As with any clinical procedure, ensure that you understand the patient’s condition, the reason for the test, and the possible outcomes of the procedure. Prior to performing a blood glucose test, ensure that you have read and understood the manufacturer’s instructions and your agency’s policy for the blood glucose monitoring machines (see Figure 9.1) used in your clinical setting, as these vary. It is also important that you determine the patient’s understanding of the procedure and the purpose for monitoring blood glucose level. Before you begin, you should also determine if there are any conditions present that could affect the reading. For example, is the patient fasting? Has the patient just had a meal? Is the patient on any medications that could affect the reading (e.g., anticoagulants)? In these situations, draw on your knowledge and understanding of diabetes, the medication you are administering, the uniqueness of your patient, and the clinical context. Use your knowledge and critical thinking to make a clinical judgment.

DSC_0718
Figure 9.1 A blood glucose monitoring machine with cotton balls, lancets, and reagent strips

Inspect the area of skin that will be used as the puncture site and ask the patient if they are in agreement with the site you have identified to use for the skin puncture. Your patient may have a preference for the puncture site. For example, some patients prefer not to use a specific finger for the skin puncture. Or a particular site may be contraindicated. For example, you shouldn’t use the hand on the same side as a mastectomy.

Patients who do their own blood glucose testing at home may prefer to handle the skin-puncturing device themselves and continue self-testing while they are in the hospital. 

Checklist 77 outlines the steps for taking a skin-puncture blood sample and using a blood glucose monitor (glucometer) to measure a patient’s blood glucose level.

Checklist 77: Blood Glucose Monitoring
Disclaimer: Always review and follow your hospital policy regarding this specific skill.
Safety considerations:
  • Perform hand hygiene.
  • Check room for additional precautions.
  • Introduce yourself to patient.
  • Confirm patient ID using two patient identifiers (e.g., name and date of birth).
  • Check allergy band for any allergies.
  • Complete necessary focused assessments and/or vital signs and document on MAR.
  • Provide patient education as necessary.

Steps

 Additional Information

1. Review the patient’s medical history for diabetes type, medications, and/or anticoagulant therapy. A thorough knowledge of the patient’s medical history is important even when the test performed is a relatively simple procedure.

Anticoagulant therapy may result in prolonged bleeding at the skin-puncture site and require pressure to the site.

2. Determine if the test requires special timing; for example, before or after meals. Blood glucose monitoring is usually done prior to meals and the administration of antidiabetic medications. Blood glucose levels are affected by diet, and the test may be scheduled at very specific intervals.

Diet and medication orders are based on the assumption that the test results are accurate.

3. Gather equipment needed:
  • Disposable latex-free gloves
  • Alcohol swab
  • Lancet or automatic lancing device
  • 2 x 2 gauze
  • Reagent strips
  • Blood glucose meter
Having equipment prepared and available promotes organization, safety, and timeliness.
DSC_1101
Gloves, alcohol swab, lancet, gauze, reagent strips, glucometer
4. Determine if blood glucose meter needs to be calibrated. Calibration should be done regularly according to agency policy to ensure accuracy of readings.
5. Assess patient’s sites for skin puncture. Skin integrity at the puncture site minimizes the risk of infection and promotes healing.
6. Perform hand hygiene. Hand hygiene prevents the transfer of microorganisms.
Hand hygiene with ABHR
7. Have patient wash hands with soap and warm water, and position the patient comfortably in a semi-upright position in bed or upright in a chair. Encourage patient to keep hands warm.

Hospital policy may require use of an alcohol swab only, not water, to clean the puncture site.

Ensure that puncture site is completely dry prior to skin puncture.

Washing reduces transmission of microorganisms and increases blood flow to the puncture site.
DSC_1100
Have patient wash hands with warm water
DSC_1118
Or clean with an alcohol swab if that is agency policy
8. Remove a reagent strip from the container and reseal the container cap. Do not touch the test pad portion of the reagent strip. Tight closure of the container keeps strips from damage due to environmental factors.
DSC_1108
Remove reagent strip from container and close container tightly
9. Follow the manufacturer’s instructions to prepare the meter for measurement. This prepares meter for accurate readings.
Prepare the glucometer
10. Place the unused reagent strip in the glucometer or on a clean, dry surface (e.g., paper towel) with the test pad facing up. This step is dependent on the manufacturer’s instructions.
DSC_1110
Prepare the reagent strip according to the manufacturer’s instructions

Moisture may alter the test results.

11. Apply non-sterile gloves.
Apply non-sterile gloves

Gloves protect health care provider from contamination by blood.

12. Keep area to be punctured in a dependent position. Do not milk or massage finger site. Dependent position will increase blood flow to the area. Milking or massaging the finger may introduce excess tissue fluid and hemolyze the specimen.

Avoid having the patient stand during the procedure to reduce the risk of fainting.

13. Select appropriate puncture site and perform skin puncture. Your patient may have a preference of site used. For example, the patient may prefer not to use a specific finger for the skin puncture. Or the site may be contraindicated. For example, do not use the hand on the same side as a mastectomy. Avoid fingertip pads; use sides of finger.
DSC_1130
Perform skin puncture using a lancet
14. Gently squeeze above the site to produce a large droplet of blood. Do not contaminate the site by touching it.

The droplet of blood needs to be large enough to cover the test pad on the reagent strip.

Gently squeeze site to produce a large droplet of blood
15. Transfer the first drop of blood (or second drop if indicated by agency policy or manufacturer’s instructions) to the reagent strip and apply following the manufacturer’s instructions. The test pad must absorb the droplet of blood for accurate results. Smearing the blood will alter results.
DSC_1141
The test pad must absorb the droplet of blood for accurate results

The timing and specific instructions for measurement will vary between blood glucose meters. Be sure to read the instructions carefully to ensure accurate readings.

16. Immediately press the timer on the meter (unless it starts automatically with insertion of reagent strip). Timing is critical to produce accurate results.

Always check the manufacturer’s instructions because the technique varies between meters.

17. Apply pressure, or ask patient to apply pressure, to the puncture site using a 2 x 2 gauze pad or clean tissue.
DSC_1146
Apply pressure to the puncture site

This will stop the bleeding at the site.

18. Read the results on the unit display. Each meter has a specified time for the reading to occur.
DSC_1152
Read the blood glucose results on the glucometer
19. Turn off the meter and dispose of the test strip, 2 x 2 gauze, and lancet according to agency policy. This reduces contamination by blood to other individuals.
20. Remove non-sterile gloves and place them in the appropriate receptacle. This reduces transmission of microorganisms.
Remove non-sterile gloves
21. Perform hand hygiene. This reduces the transmission of microorganisms.
Hand hygiene with ABHR
22. Review test results with the patient. This promotes patient participation in health care.
23. Document results according to agency policy. Results will be used to determine the patient’s treatment plan.
Data source: BCIT, 2015; Hortensius et al., 2011; Pagana & Pagana, 2011; Perry, Potter, & Ostendorf, 2014; VCH & PHC Professional Practice, 2013; Weiss Behrend, Kelley, & Randoloph, 2004

Converting to Canadian (SI) measurements

Many nursing resources are from the United States, where glucose values are reported as mg/dl. Canadian laboratories use the international system of units (SI), which are mmol/L. Therefore, it is important to convert your patient’s laboratory values to SI units. For glucose, divide the mg/dl by 18 to find the comparable SI unit (e.g., 65 mg/dl = 3.61 mmol/L). This conversion chart shows specific conversions.

Blood Glucose Readings that Require Follow-up

The concerns listed in Table 9.1 must be attended to and reported immediately to the relevant health care provider. Please consult hospital/unit-specific recommendations for exact values. The concerns and actions in Table 9.1 are guidelines only.

Table 9.1 Blood Glucose Readings that Require Follow-up
Concern Action
Blood sugar outside “acceptable range” (<2.2 mmol/L or >20 mmol/L) Repeat capillary test to confirm, and report if reading remains out of range.
Blood sugar <2.2 mmol/L or >20 mmol/L Order a stat blood glucose (venous sample) by laboratory staff and initiate hypoglycemia or hyperglycemia protocol according to agency policy.
Blood sugar <4 mmol/L Initiate hypoglycemia protocol according to agency policy.
Preoperative blood sugar <4 mmol/L or >20 mmol/L Call physician.
Post-operative blood sugar >13.5 mmol/L (acceptable post-operative range = 8-13 mmol/L) Test urine for ketones. If positive, monitor urine ketones every 4 hours.
Data source: BCIT, 2015

Critical Thinking Exercises

  1. Describe two methods for increasing blood flow to a patient’s finger prior to lancing the finger.
  2. What is one thing that you must wait for before administering rapid-acting insulin to a patient on your ward?

70

9.3 Hypoglycemia and Hyperglycemia

The overlapping symptoms of hypo- and hyperglycemia (e.g., hunger, sweating, trembling, confusion, irritability, dizziness, blurred vision) make the two conditions difficult to distinguish from one another (Paradalis, 2005). Since the treatment is different for each condition, it is critical to test the patient’s blood glucose when symptoms occur. The risk factors that may have led to the condition, and the recent medical history of the patient also help to determine the cause of symptoms.

Hypoglycemia

Hypoglycemia is a condition occurring in diabetic patients with a blood glucose of less than 4 mmol/L. If glucose continues to remain low and is not rectified through treatment, a change in the patient’s mental status will result. Patients with hypoglycemia become confused and experience headache. Left untreated, they will progress into semi-consciousness and unconsciousness, leading rapidly to brain damage. Seizures may also occur.

Common initial symptoms of hypoglycemia include:

These symptoms will progress to mood or behaviour changes, vision changes, slurred speech, and unsteady gait if the hypoglycemia is not properly managed.

The hospitalized patient with type 1 or type 2 diabetes is at an increased risk for developing hypoglycemia. Potential causes of hypoglycemia in a hospitalized diabetic patient include:

Hypoglycemia is a medical emergency that must be treated immediately. An initial blood glucose reading may confirm suspicion of hypoglycemia. If you suspect that your patient is hypoglycemic, obtain a blood glucose level through skin puncture. A 15 g oral dose of glucose should be given to produce an increase in blood glucose of approximately 2.1 mmol/L in 20 minutes (Canadian Diabetes Association, 2013). Table 9.2 outlines an example of a protocol that may be used in the treatment of hypoglycemia.

Table 9.2 Hypoglycemia Treatment
Disclaimer: This is an example only of a hypoglycemia protocol. Always follow the protocol of your agency.
Capillary Blood Gas (CBG) Able to Swallow Nil per Mouth with IV Access Nil per Mouth with No IV Access
≥ 4 mmol/L No treatment necessary No treatment necessary No treatment necessary
2.2-3.9 mmol/L Give 15 g of glucose in the form of:
  • 3-5 dextrose/glucose tabs (check the label) (best choice), OR
  • 175 ml of juice or soft drink (containing sugar), OR
  • 1 tablespoon of honey, OR
  • 3 tablespoons of table sugar dissolved in water

Note: Milk, orange juice, and glucose gels increase blood glucose (BG) levels more slowly and are not the best choice unless the above alternatives are not available.

Repeat CBG every 15 to 20 minutes and repeat above if BG remains below 4 mmol/L.

Once BG reaches 4 mmol/L, give patient 6 crackers and 2 tablespoons of peanut butter. If meal is less than 30 minutes away, omit snack and give patient meal when it is available.

Notify physician.
Give 10-25 g (20-50 ml of D50W — dextrose 50% in water) of glucose intravenously over 1 to 3 minutes,
OR as per agency policy.

Repeat CBG every 15 to 20 minutes until 4 mmol/L.

Continue with BG readings every 30 minutes for 2 hours.

Notify physician.

Give glucagon 1 mg subcutaneously (SC) or intramuscularly (IM).

Position patient on side.

Repeat CBG every 15 to 20 minutes. Give second dose of glucagon 1 mg SC or IM if BG remains below 4 mmol/L.

≤ 2.2 mmol/L Call lab for STAT BG level.

Continue as above.

Call lab for STAT BG level.

Continue as above.

Call lab for STAT BG level.

Continue as above.

Data source: Canadian Diabetes Association, 2013; Paradalis, 2005; Rowe et al., 2015; VCH 2009

Hyperglycemia

Hyperglycemia occurs when blood glucose values are greater than 7 mmol/L in a fasting state or greater than 10 mmol/L two hours after eating a meal (Pardalis, 2005). Hyperglycemia is a serious complication of diabetes that can result from eating too much food or simple sugar; insufficient insulin dosages; infection, illness, or surgery; and emotional stress. Surgical patients are particularly at risk for developing hyperglycemia due to the surgical stress response (Dagogo-Jack & Alberti, 2002; Mertin, Sawatzky, Diehl-Jones, & Lee, 2007). Classic symptoms of hyperglycemia include the three Ps: polydipsia, polyuria, and polyphagia.

The common symptoms of hyperglycemia are:

Other symptoms include glycosuria, nausea and vomiting, abdominal cramps, and progression to diabetic ketoacidosis (DKA).

Potential causes of hyperglycemia in a hospitalized patient include:

Note that testing blood glucose levels too soon after eating will result in higher blood glucose readings. Blood glucose levels should be taken one to two hours after eating.

If hyperglycemia is not treated, the patient is at risk for developing DKA. This is a life-threatening condition in which the body produces acids, called ketones, as a result of breaking down fat for energy. DKA occurs when insulin is extremely low and blood sugar is extremely high.

DKA presents clinically with symptoms of hyperglycemia as above, Kussmaul respiration (deep, rapid, and laboured breathing that is the result of the body attempting to blow off excess carbon dioxide to compensate for the metabolic acidosis), acetone-odoured breath, nausea, vomiting, and abdominal pain (Canadian Diabetes Association, 2013). Patients in DKA also undergo osmotic diuresis. They pass large amounts of urine because of the high solute concentration of the blood and the body’s attempts to get rid of excess sugar.

DKA is treated with the administration of fluids and electrolytes such as sodium, potassium, and chloride, as well as insulin. Be alert for vomiting and monitor cardiac rhythm. Untreated DKA can be fatal.

Patients with hyperglycemia may also exhibit a non-ketotic hyperosmolar state, also known as hyperglycemic hyperosmolar syndrome (HHS). This is a serious diabetic emergency that carries a mortality rate of 10% to 50%. Hyperosmolarity is a condition in which the blood has a high sodium and glucose concentration, causing water to move out of the cells into the bloodstream.

Further information on the treatment of DKA and HHS can be found on the Canadian Diabetes Association clinical guidelines website.

Critical Thinking Exercises

  1. At 0930 hours, your diabetic patient complains of feeling faint. You check his blood sugar and get a reading of 2.8 mmol/L. What actions will you take?
  2. What blood glucose level range do you expect immediately post-operatively from your patient who has type 2 diabetes? Why?

71

9.4 Summary

Blood glucose monitoring is an important procedure that allows people with diabetes to monitor their blood glucose level and manage their condition. Each blood glucose monitor is slightly different, and it is essential that you read and follow the manufacturer’s instructions for each monitor you are using.

When working with patients with diabetes, it is also important to be able to recognize and manage patients with hypoglycemia and hyperglycemia.

Key Takeaways

  • Understand the condition of diabetes and how it affects blood glucose levels.
  • Always read the manufacturer’s instructions for using specific blood glucose machines.
  • Know how to recognize and manage patients with hypoglycemia and hyperglycemia.

Suggested Online Resources

  1. Canadian Diabetes Association: Antihyperglycemic agents for use in type 2 diabetes. This guideline is laid out in a handy reference table. Information covered includes: drug brand names, drug class and mechanism of action, therapeutic considerations, and more.
  2. Canadian Diabetes Association: Clinical practice guidelines. Organization of diabetes care.  This resource covers the prevention and management of diabetes in Canada. It was developed under the auspices of the Clinical and Scientific Section of the Canadian Diabetes Association in 2013.
  3. Canadian Diabetes Association: Diabetes. This fact sheet outlines the risk factors, symptoms, treatments, and other important information for patients.
  4. Canadian Diabetes Association: Diabetes charter for Canada. This is the companion document for the Clinical practice guidelines. Organization of diabetes care.
  5. Canadian Diabetes Association: Diabetes: Canada at the tipping point. This document reports results from a 2011 national survey conducted online with over 2,000 adults, both with and without diabetes.
  6. Canadian Nurses Association: Diabetes toolkit. This website provides evidence-based practice resources for registered nurses and nurse practitioners. Scroll down the page to “Diabetes” to access these PDF files.
  7. Canadian Diabetes Association: Standards for diabetes education in Canada 2014. This document describes the standards of diabetes education for diabetes educators.
  8. Canadian Diabetes Association: Types of insulin. This reference table lists the insulin types used in Canada, along with the onset, peak times, and duration of each type of insulin.
  9. Fraser Health: Glucose monitoring: By point of care (beside testing). This document reviews the Accu-check glucose monitoring system, as well as the quality control procedure and patient test procedure.
  10. Registered Nurses Association of Ontaio (RNAO): Reducing foot complications for people with diabetes. This clinical guideline focuses on best practices to help practitioners reduce foot complications for patients with diabetes. The information included in this resource: how to conduct a risk assessment of foot ulcers, basic education for patients, and appropriate interventions.
  11. Roche: Accu Chek Inform II: Operator training.These Powerpoint slides, from a presentation by the BC Provincial Health Services Authority, covers the Accu Chek blood glucose monitoring machine.

References

British Columbia Institute of Technology (BCIT). (2015). NURS 2020: Clinical techniques. Vancouver: BCIT.

Canadian Diabetes Association. (2013). Canadian diabetes association clinical practice guidelines expert committee. Clinical practice guidelines for the prevention and management of diabetes in Canada. Can J diabetes, 37(suppl 1):S1-S212.

Dagogo-Jack, S., & Alberti, K. G. (2002). Management of diabetes mellitus in surgical patients. Diabetes spectrum, 15(1), 44-48.

Hortensius, J., Slingerland, R. J., Kleefstra, N., Logtenberg, S. J. J., Groenier, K. H., Houweling, S. T., & Bilo, H. J. G. (2011). Self-monitoring of blood glucose: The use of the first or the second drop of blood. Diabetes care, 34(3), 556–560.

Mertin, S., Sawatzky, J., Diehl-Jones, W., & Lee, T. (2007). Roadblock to recovery: The surgical stress response. Dynamics, 18(1), 14-22.

Pagana, K., & Pagana, T. (2011). Mosby’s diagnostic and laboratory test reference (10th ed.). St Louis, MO: Mosby.

Pardalis, D. (2005). Diabetes: Treatment of hyper- and hypoglycemia. Retrieved on Nov 14, 2015, from Tech Talk: The national continuing education program for pharmacy technicians, http://www.canadianhealthcarenetwork.ca/files/2009/10/TTCE_Sept05_Eng.pdf

Perry, A., Potter, P., & Ostendorf, W. (2014). Clinical skills and nursing techniques (8th ed.). St Louis, MO: Elsevier-Mosby.

Rowe, B. H., Singh, M., Villa-Roel, C., Leiter, L. A., Hramiak, I., Edmonds, M. L., & … Campbell, S. (2015). Acute management and outcomes of patients with diabetes mellitus presenting to Canadian emergency departments with hypoglycemia. Canadian Journal Of Diabetes39(1), 55-64. doi:10.1016/j.jcjd.2014.04.001

Vancouver Coastal Health (VCH). (2009). Hypoglycemia algorithm. Vancouver: Vancouver Coastal Health.

VCH & PHC Professional Practice. (2013). Capillary blood glucose monitoring using the Accu-Chek blood glucose meter. Vancouver: Vancouver Coastal Health & Providence Health Care.

Weiss Behrend, S., Kelley, K., & Randoloph, S. (2004). Measuring blood-glucose levels. In Gaylene, A. (2004). Delmar’s fundamental and advanced nursing skills (2nd ed.). Clifton Park, NY: Thomson Delmar Learning.

X

Chapter 10. Tubes and Attachments

72

10.1 Introduction

Patients in acute care and community settings often have various tubes and attachments to assist their recovery from surgeries, medical conditions, or procedures. Health care providers must understand how these devices work — their purpose, function, insertion, or removal — and how to prevent complications from these various tubes and attachments.

Learning Objectives

  • Describe principles related to the function of tubes and drainage systems
  • Identify factors that affect the flow of fluid through tubes
  • Describe guidelines for working with patients with drainage systems
  • Discuss the purposes, types, special precautions, potential complications, and interventions for
    • Nasogastric tubes
    • Indwelling catheters
    • Closed chest drainage systems
    • Ostomies/urostomies
    • Tracheostomy tubes

73

10.2 Caring for Patients with Tubes and Attachments

The following five principles apply to the care of drainage tubes. It is important that you remember these principles when you are working with patients who have drainage tubes.

1. Closed cavities of the body are sterile cavities. Insertion of any tube must be performed with adherence to the principles of sterile asepsis.

2. A portal of entry that comes into contact with a non-sterile surface immediately renders an otherwise sterile field non-sterile. When disconnecting drainage tubes, such as a urinary catheter or a T-tube, the ends must be kept sterile.

3. Gravity promotes the flow of drainage from a cavity. Keep drainage tubes and collection bags at a lower level than the cavity being drained. Position the tube so the drainage will not have to run upward.

4. Drainage will flow out of the tubing if the lumen is not occluded. Avoid kinks and coils in the tubing and watch that the person does not lie on the tubing. Do not clamp tubes without a doctor’s order.

5. Properly cleanse the site before accessing any tubing to reduce possible introduction of microorganisms into a cavity. Sometimes contrast media and radiopharmaceuticals are injected via the tubing. An alcohol swab may be used to clean the entry point prior to accessing the tubing.

The following four factors affect the flow of fluid through tubes.

1. Pressure difference

2. Diameter

3. Length

4. Viscosity

Caring for patients with multiple tubes and attachments can be challenging. Follow the guidelines in Table 10.1 to help you care for patients with tubes and attachments.

Table 10.1 Guidelines for Caring for Patients with Tubes and Attachments

Guideline

Rationale

Secure tubes to the skin with tape (non-allergenic or waterproof). A good method of taping is to loop the tape around the tubing, make a “neck” of tape, and secure the tape to the skin (except for nasogastric tubes). This allows some gentle moving of the tube without kinking and protects it from the danger of being pulled out. When tension is applied to the tube, the stress will be taken by the tape rather than by the tube.
Drainage bags should be secured to stretchers, patient gowns, etc., as appropriate. This prevents undue stress on the drainage tube and/or accidental removal from the wound or body cavity.
Connect tube to sterile tubing and drainage receptacle. Do not clamp tubing unless ordered. This helps keep wound or body cavity sterile and promotes flow of drainage.
To ensure continuous drainage, be sure tubing is not kinked, not caught in the bed rails, not underneath the patient, and free from tension when turning, etc. Any kinks in tubing can stop drainage from the patient and cause further complications.
Dressing around tube, if any, should be clean and dry. Sterile technique is used if it is necessary to change the dressing. This avoids irritation from tube rubbing the skin or from excessive drainage.
Record and report patency of tube and amount, colour, character, and odour of drainage. If an unusual situation occurs in your department (i.e., if the bag is full and must be emptied), call for help. If the contents of a drainage tube are spilled, the approximate amount must be reported. This will help inform ward staff of an unusual situation that happened in your department.
If you are unsure how to empty the container or how to close it after a spill, seek help. Most drainage tubes must have the ends kept sterile. Always follow agency regulations on how to clean up a blood or body fluid spill.
Data source: BCIT, 2015a

Critical Thinking Exercises

  1. A patient arrives in your department holding her urinary catheter drainage bag in her hand. What should you do?
  2. When settling a patient into bed, what factors must be considered to ensure drainage devices are able to flow and drain continuously?

74

10.3 Nasogastric Tubes

Using a Nasogastric Tube

A nasogastric (NG) tube is a flexible plastic tube inserted through the nostrils, down the nasopharynx, and into the stomach or the upper portion of the small intestine. Placement of NG tubes is always confirmed with an X-ray prior to use (Perry, Potter, & Ostendorf, 2014).

NG tubes are used to:

An NG tube used for feeding should be labelled. The tube is used to feed patients who may have swallowing difficulties or require additional nutritional supplements. These tubes are narrower and smaller bored than a Salem sump or Levine tube.

An NG tube can also remove gastric content, either draining the stomach by gravity or by being connected to a suction pump. In these situations, the NG tube is used to prevent nausea, vomiting, or gastric distension, or to wash the stomach of toxins.

The NG tube is fastened to the patient using a nose clip, and is taped and pinned to the patient’s gown to prevent accidental removal of the tube and to prevent the tube from slipping from the stomach area into the lungs.

When working with people who have nasogastric tubes, remember the following care measures:

Checklist 78 outlines the steps for inserting a nasogastric tube.

Checklist 78: Inserting a Nasogastric tube
Disclaimer: Always review and follow your hospital policy regarding this specific skill.
Safety considerations: 
  • Perform hand hygiene.
  • Check room for additional precautions.
  • Introduce yourself to patient.
  • Confirm patient ID using two patient identifiers (e.g., name and date of birth).
  • Explain process to patient; offer analgesia, bathroom, etc.
  • Listen and attend to patient cues.
  • Ensure patient’s privacy and dignity.
  • Assess ABCCS/suction/oxygen/safety.
  • Apply principles of asepsis and safety.
  • Check vital signs.
  • Complete necessary focused assessments.

Steps

 Additional Information

1. Perform hand hygiene and gather supplies. This prevents the transmission of microorganisms.
Gather supplies
Gather supplies
2. Visually inspect condition of patient’s nasal and oral cavities. Check for signs of infection or skin breakdown.
3. Assess for the best nostril before you begin.

Do this by occluding one side and asking the patient to sniff. Ask the patient about previous injuries or history of a deviated septum.

If either nostril is equally suitable, select the nostril closest to the suction.
Assess for most patent nostril
4. Palpate patient’s abdomen for distension, pain, and/or rigidity.

Auscultate for bowel sounds.

Document assessment findings and determine appropriateness of NG tube insertion related to reason for insertion and patient’s physical assessment.
5. Assess patient’s level of consciousness and understanding of procedure. Patient must be able to follow instructions related to NG insertion to allow for passage of tube through nasal and gastrointestinal tracts.
6. Check doctor’s orders for type of NG tube to be placed and reason for placement. Check appropriate orders relevant to patient safety.
7. Check doctor’s orders to determine whether the NG tube is to be attached to suction or a drainage bag. This should be commensurate with the reason for the NG tube.
8. Position patient sitting up at 45 to 90 degrees (unless contraindicated by the patient’s condition), with a pillow under the head and shoulders. This allows the NG tube to pass more easily through the nasopharynx and into the stomach.
9. Raise bed to a comfortable working height. This helps prevent biomechanical injury to the health care provider.
10. Agree on a signal the patient can use if they wish you to pause during the procedure. This procedure can be anxiety-provoking and uncomfortable for many patients. Providing a means for the patient to communicate discomfort and a desire to pause during the procedure helps alleviate anxiety.
11. Place a towel on the patient’s chest and provide facial tissues and an emesis basin. Nasal and oral secretions may be evident during the procedure.
12. Provide patient with drinking water and a straw if the patient is not fluid restricted. Sipping water through a straw helps to initiate the swallowing reflex and facilitate passing of NG tube.
13. Stand on patient’s right side if you are right-handed and the left side if you are left-handed. You will use your dominant hand to insert the tube.
14. Measure distance of the tube from
  • The tip of the nose, to…
  • The earlobe, to…
  • The xiphoid process

and then mark the tube at this point.


This determines the appropriate length of NG tube to be inserted.
Measure from tip of nose to earlobe
Measure from earlobe to xiphoid process
15. Lubricate NG tube tip according to your agency policy. Tube may be lubricated internally using tap water or externally using water-soluble lubricating jelly. Agency policy varies and should be checked.
Lubricate tip of tube as per agency policy

Never use non-water-soluble lubricant (e.g., Vaseline), as it will not dissolve and may cause respiratory complications if it enters the lungs.

16. Apply clean non-sterile gloves. Using gloves decreases the transfer of microorganisms.
Apply clean disposable gloves
Apply clean non-sterile gloves
17. Curve 10 to 15 cm of the end of the NG tube around your gloved finger, and then release it. Curling the NG tube around your finger helps it conform to the normal curve of the nasopharynx.
Curl the NG tube around your finger to help it conform to the normal curve of the nasopharynx
Curl the NG tube around your finger
18. Have patient drop head forward and breathe through the mouth. Dropping the head forward closes the trachea and opens the esophagus, which allows the NG tube to pass more easily through the nasopharynx and into the stomach.
19. Insert NG tube tip slowly into the patient’s nostril and advance it steadily, in a downward direction, along the bottom of the nasal passage, with the curved end pointing downward in the direction of the ear on the same side as the nostril. This follows the natural anatomical alignment of the nasopharynx.
Insert nasogastric tube slowly into patient's nostril
Insert nasogastric tube slowly into patient’s nostril
20. You may feel slight resistance as you advance along the nasal passage. Twist the tube slightly, apply downward pressure, and continue trying to advance the tube. If significant resistance is felt, remove the tube and allow the patient to rest before trying again in the other nostril. It is common for the patient to feel discomfort, and this may be expressed with light coughing and gagging. More aggressive coughing and gagging may indicate that the tube has entered the airways, in which case you should withdraw the NG tube.
Advance the tube gently
21. If there is difficulty in passing the NG tube, you may ask the patient to sip water slowly through a straw unless oral fluids are contraindicated. If oral fluids are not allowed, ask the patient to try dry swallowing while you advance the tube. If patient continues to gag or cough, check that the tube is not coiled in the back of the mouth, using a tongue blade and a flashlight to check the back of the mouth. If tube is coiled, withdraw the tube until only the tip of the tube is seen in the back of the mouth. Then try advancing the tube again while patient tries to swallow.
Patient may sip water slowly through a straw
22. Continue to advance NG tube until you reach the mark/tape you had placed for measurement. This ensures accurate placement.
23. Temporarily anchor the tube to patient’s cheek with a piece of tape until you can check for correct placement. This prevents displacement of the NG tube while checking placement.
Anchor tube
Anchor tube
24. Verify tube placement according to agency policy.

Colour-coded pH paper is usually used, as an initial and interim check, to confirm that acidic contents are present. Then an X-ray is taken to confirm placement prior to using NG tube for feeding.

The contents aspirated from the tube should be acidic with a pH <5. If the pH is more than 6, it may indicate the presence of respiratory fluids or small bowel content, and the tube should be removed.
Verify tube placement using pH paper
25. Once the tube placement has been confirmed, mark (with a permanent marker) and record the length of tubing extending from the nose to the outer end of the tube. This aids in timely recognition and identification of tube displacement or migration.
26. Secure the tube to the patient’s gown with a safety pin, allowing enough tube length for comfortable head movement. This keeps the NG tube in place.
Secure the tube to the patient's gown with a safety pin
Secure the tube to the patient’s gown with a safety pin
27. Document the procedure according to agency policy, and report any unexpected findings to the appropriate health care provider. Timely and accurate documentation promotes patient safety.
Data source: ATI, 2015a; BCIT, 2015c; Berman & Snyder, 2016
Special considerations with NG tubes:

Video 10.1

Watch the video Nasogastric tube insertion by Renée Anderson & Wendy McKenzie, Thompson Rivers University.

Removing an NG Tube

An NG tube should be removed if it is no longer required. The process of removal is usually very quick. Prior to removing an NG tube, verify physician orders. If the NG tube was ordered to remove gastric content, the physician’s order may state to “trial” clamping the tube for a number of hours to see if the patient tolerates its removal. During the trial, the patient should not experience any nausea, vomiting, or abdominal distension.

To review how to remove an NG tube, refer to Checklist 79.

Checklist 79: Removal of an NG Tube
Disclaimer: Always review and follow your hospital policy regarding this specific skill.
Safety considerations: 
  • Perform hand hygiene.
  • Check room for additional precautions.
  • Introduce yourself to patient.
  • Confirm patient ID using two patient identifiers (e.g., name and date of birth).
  • Explain process to patient; offer analgesia, bathroom, etc.
  • Listen and attend to patient cues.
  • Ensure patient’s privacy and dignity.
  • Assess ABCCS/suction/oxygen/safety.
  • Apply principles of asepsis and safety.
  • Check vital signs.
  • Complete necessary focused assessments.

Steps

 Additional Information

1. Verify health care provider’s orders to remove NG tube. An order is required to remove an NG tube.
2. Collect supplies. Supplies include waterproof pads, 20 ml syringe, tissues, non-sterile gloves, and garbage bag.
3. Verify patient using two identifiers. Explain procedure to patient and place patient in high Fowler’s position. Follow agency policy for proper patient identification.
4. Perform hand hygiene. Place waterproof pad on patient’s chest. This reduces the transmission of microorganisms.
Perform hand hygiene
5. Disconnect tube from feed if present. This prevents risk of aspiration of tube feed.
Disconnect tube from feed or suction
6. Remove tape or securement device from nose. This allows for the tube to be easily removed.
Remove tape or securement device from nose
7. Unclip NG tube from patient’s gown. This allows for tube to be easily removed.
Unclip NG tube from patient's gown
Unclip NG tube from patient’s gown
8. Clear NG tube by inserting 10 to 20 ml of air into tube. This prevents aspiration of tube feed falling out of tube.
Insert 10-20 mL of air into NG tube
Insert 10 to 20 ml of air into NG tube
9. Instruct patient to take a deep breath and hold it. This prevents aspiration; holding the breath closes the glottis.
10. Kink the NG tube near the naris and gently pull out tube in a swift, steady motion, wrapping it in your hand as it is being pulled out. Dispose of tube in garbage bag. This prevents any residual feed from flowing out of tube upon removal.
Pull out tube in a swift, steady motion


Wrap tube in glove and dispose as per agency policy
11. Offer tissue or clean the nares for the patient and offer mouth care as required. This clears the nares/nasal passages of any remaining secretions.
Offer tissue or clean the nares for the patient
12. Remove gloves and place patient in a comfortable position. Assess patient’s level of comfort. Perform hand hygiene. This promotes patient comfort and reduces the transmission of microorganisms.
Hand hygiene with ABHR
13. Document procedure according to agency policy Document removal of NG tube and patient response to the removal.
Data source: ATI, 2015a; BCIT, 2015b; Perry et al., 2014

Critical Thinking Exercises

  1. You are inserting a nasogastric tube and the tube is not advancing. Explain your next steps, with rationale.
  2. Your patient has a nasogastric tube and is requesting water because her throat feels dry. Describe your next actions.

75

10.4 Urinary Catheters

Urinary elimination is a basic human function that can be compromised by illness, surgery, and other conditions. Urinary catheterization may be used to support urinary elimination in patients who are unable to void naturally. Urinary catheterization may be required:

Catheter-Associated Urinary Tract Infections

Catheter-associated urinary tract infections (CAUTI) are a common complication of indwelling urinary catheters and have been associated with increased morbidity, mortality, hospital cost, and length of stay (Gould et al., 2009). Urinary drainage systems are often reservoirs for multidrug-resistant organisms (MDROs) and a source of the transmission of microorganisms to other patients (Gould et al., 2009). The most important risk factor for developing a CAUTI, a health care associated infection (HAI), is the prolonged use of a urinary catheter (Centers for Disease Control and Prevention [CDC], 2015). Urinary tract infections (UTIs) are the most commonly reported HAIs in acute care hospitals and account for more than 30% of all reported infections (Gould et al., 2009). Catheters in place for more than a few days place the patient at risk for a CAUTI. A health care provider must assess patients for signs and symptoms of CAUTIs and report immediately to the primary health care provider. Signs and symptoms of a CAUTI include:

The following are practices for preventing CAUTIs (Perry et al., 2014):

Urinary Catheterization

Urinary catheterization refers to the insertion of a catheter tube through the urethra and into the bladder to drain urine. Although not a particularly complex skill, urethral catheterization can be difficult to master. Both male and female catheterizations present unique challenges.

Having adequate lighting and visualization is helpful, but does not ensure entrance of the catheter into the female urethra. It is not uncommon for the catheter to enter the vagina. Leaving the catheter in the vagina can assist in the correct insertion of a new catheter into the urethra, but you must remember to remove the one in the vagina.

For some women, the supine lithotomy position can be very uncomfortable or even dangerous. For example, patients in the last trimester of pregnancy may faint with decreased blood supply to the fetus in this position. Patients with arthritis of the knees and hips may also find this position extremely uncomfortable. Catheterization may also be accomplished with the patient in the lateral to Sims position (three-quarters prone).

The male urinary sphincter may also be difficult to pass, particularly for older men with prostatic hypertrophy.

There are two types of urethral catheterization: intermittent and indwelling.

Intermittent catheterization (single-lumen catheter) is used for:

Indwelling catheterization (double- or triple-lumen catheter) is used for:

The steps for inserting an intermittent or an indwelling catheter are the same, except that the indwelling catheter requires a closed drainage system and inflation of a balloon to keep the catheter in place. Indwelling catheters may have two or three lumens (double or triple lumens). Double-lumen catheters comprise one lumen for draining the urine and a second lumen for inflating a balloon that keeps the catheter in place. Triple-lumen catheters are used for continuous bladder irrigation and for instilling medications into the bladder; the additional lumen delivers the irrigation fluid into the bladder.

Indwelling urinary catheters are made of latex or silicone. Intermittent catheters may be made of rubber or polyvinyl chloride (PVC), making them softer and more flexible than indwelling catheters (Perry et al., 2014). The size of a urinary catheter is based on the French (Fr) scale, which reflects the internal diameter of the tube. Recommended catheter size is 12 to 16 Fr for females, and 14 to 16 Fr for males. Smaller sizes are used for infants and children. The balloon size also varies with catheters: smaller for children (3 ml) and larger for continuous bladder irrigation (30 ml). The size of the catheter is usually printed on the side of the catheter port.

An indwelling catheter is attached to a drainage bag to allow for unrestricted flow of urine. Make sure that the urinary bag hangs below the level of the patient’s bladder so that urine flows out of the bladder. The bag should not touch the floor, and the patient should carry the bag below the level of the bladder when ambulating. To review how to insert an indwelling catheter, see Checklist 80.

Checklist 80: Insertion of an Intermittent or Indwelling Urinary Catheter
Disclaimer: Always review and follow your hospital policy regarding this specific skill.
Safety considerations: 
  • Perform hand hygiene.
  • Check room for additional precautions.
  • Introduce yourself to patient.
  • Confirm patient ID using two patient identifiers (e.g., name and date of birth).
  • Explain process to patient; offer analgesia, bathroom, etc.
  • Listen and attend to patient cues.
  • Ensure patient’s privacy and dignity.
  • Assess ABCCS/suction/oxygen/safety.
  • Apply principles of asepsis and safety.
  • Check vital signs.
  • Complete necessaryfocused assessments.

Steps

 Additional Information

1. Verify physician order for catheter insertion. Assess for bladder fullness and pain by palpation or by using a bladder scanner. Palpation of a full bladder will cause an urge to void and/or pain.
2. Position patient prone to semi-upright with knees raised; apply gloves; and inspect perineal region for erythema, drainage, and odour. Also assess perineal anatomy. Assessment of perineal area allows for determination of perineal condition and position of anatomical landmarks to assist with insertion.
Apply non-sterile gloves
3. Remove gloves and perform hand hygiene. This prevents transmission of microorganisms.
Remove non-sterile gloves
Perform hand hygiene
4. Gather supplies:
  • Sterile gloves
  • Catheterization kit
  • Cleaning solution
  • Lubricant (if not in kit)
  • Prefilled syringe for balloon inflation as per catheter size
  • Urinary bag
  • Foley catheter
Preparation ahead of time enhances patient comfort and safety.
Prepare sterile field
5. Check for size and type of catheter, and use smallest size of catheter possible. Larger catheter size increases the risk of urethral trauma.
Choose smallest catheter size possible
6. Place waterproof pad under patient. This step prevents soiling of bed linens.
Place waterproof pad under patient
7. Positioning of patient depends on gender.

Female patient: On back with knees flexed and thighs relaxed so that hips rotate to expose perineal area. Alternatively, if patient cannot abduct leg at the hip, patient can be side-lying with upper leg flexed at knee and hip, supported by pillows.

Male patient: Supine with legs extended and slightly apart.

Patient should be comfortable, with perineum or penis exposed, for ease and safety in completing procedure.
8. Place a blanket or sheet to cover patient and expose only required anatomical areas. This step helps protect patient dignity.
9. Apply clean gloves and wash perineal area with warm water and soap or perineal cleanser according to agency policy. Cleaning removes any secretions, urine, and feces, and reduces risk of CAUTI.
10. Ensure adequate lighting. Adequate lighting helps with accuracy and speed of catheter insertion.
11. Perform hand hygiene. This reduces the transmission of microorganisms.
Perform hand hygiene
12. Add supplies and cleaning solution to catheterization kit, and according to agency policy. This step ensures preparation and organization for procedure.
Open sterile catheterization kit and add supplies as necessary
Add supplies as necessary
13. If using indwelling catheter and closed drainage system, attach urinary bag to the bed and ensure that the clamp is closed. Urinary bag should be closed to prevent urine drainage leaving bag.
Urinary bag
Urinary bag
14. Apply sterile gloves using sterile technique. This reduces the transmission of microorganisms.
Apply sterile gloves
15. Drape patient with drape found in catheterization kit, either using sterile gloves or using ungloved hands and only touching the outer edges of the drape. Ensure that any sterile supplies touch only the middle of the sterile drape (not the edges), and that sterile gloves do not touch non-sterile surfaces. Drape patient to expose perineum or penis. The outer 2.5 cm is considered non-sterile on a sterile drape.
Cover patient with sterile drape
16. Lubricate tip of catheter using sterile lubricant included in tray, or add lubricant using sterile technique. Lubrication minimizes urethral trauma and discomfort during procedure.
Lubricate tip of catheter
17. Check balloon inflation using a sterile syringe. This maintains sterility of catheter.
Check balloon inflation using a sterile syringe
18. Place sterile tray with catheter between patient’s legs. Sterile tray will collect urine once catheter tip is inserted into bladder.
19. Clean perineal area as follows.

Female patient: Separate labia with fingers of non-dominant hand (now contaminated and no longer sterile). Using sterile technique and dominant hand, clean labia and urethral meatus from clitoris to anus, and from outside labia to inner labial folds and urethral meatus. Use sterile forceps and a new cotton swab with each cleansing stroke.

Male patient: Gently grasp penis at shaft and hold it at right angle to the body throughout procedure with non-dominant hand (now contaminated and no longer sterile). Using sterile technique and dominant hand, clean urethral meatus in a circular motion working outward from meatus. Use sterile forceps and a new cotton swab with each cleansing stroke.

This reduces the transmission of microorganisms.
Cleanse perineal area
20. Pick up catheter with sterile dominant hand 7.5 to 10 cm below the tip of the catheter. Holding catheter closer to the tip will help to control and manipulate catheter during insertion.
21. Insert catheter as follows.

Female patient:

  • Ask patient to bear down gently (as if to void) to help expose urethral meatus.
  • Advance catheter 5 to 7.5 cm until urine flows from catheter, then advance an additional 5 cm.

Male patient:

  • Hold penis perpendicular to body and pull up slightly on shaft.
  • Ask patient to bear down gently (as if to void) and slowly insert catheter through urethral meatus.
  • Advance catheter 17 to 22.5 cm or until urine flows from catheter.
This process helps visualize urethral meatus and relax external urinary sphincter.
Insert catheter gently
Note: If urine does not appear in a female patient, the catheter may be in the patient’s vagina. You may leave catheter in vagina as a landmark, and insert another sterile catheter.
Note: If catheter does not advance in a male patient, do not use force. Ask patient to take deep breaths and try again. If catheter still does not advance, stop procedure and inform physician. Patient may have an enlarged prostate or urethral obstruction.
22. Place catheter in sterile tray and collect urine specimen if required. Urine specimen may be required for analysis. Collect as per agency policy.
23. Slowly inflate balloon for indwelling catheters according to catheter size, using prefilled syringe. The size of balloon is marked on the catheter port.
Slowly inflate balloon
Note: If patient experiences pain on balloon inflation, deflate balloon, allow urine to drain, advance catheter slightly, and reinflate balloon.
24. After balloon is inflated, pull gently on catheter until resistance is felt and then advance the catheter again. Moving catheter back into bladder will avoid placing pressure on bladder neck.
25. Connect urinary bag to catheter using sterile technique. Keep urinary bag below level of patient’s bladder.
Connect urinary bag to catheter using sterile technique
26. Secure catheter to patient’s leg using securement device at tubing just above catheter bifurcation.

Female patient: Secure catheter to inner thigh, allowing enough slack to prevent tension.

Male patient: Secure catheter to upper thigh (with penis directed downward) or abdomen (with penis directed toward chest), allowing enough slack to prevent tension. Ensure foreskin is not retracted.

Securing catheter reduces risk of CAUTI, urethral erosion, and accidental catheter removal.
Secure catheter to patient's leg
Secure catheter to patient’s leg

For male patients, leaving the foreskin retracted can cause pain and edema.

27. Dispose of supplies following agency policy. This reduces the transmission of microorganisms.
28. Remove gloves and <a href=”/clinicalskills/chapter/1-6-hand-hygiene/”>perform hand hygiene. This reduces the transmission of microorganisms.
Hand hygiene with ABHR
29. Document procedure according to agency policy, including patient tolerance of procedure, any unexpected outcomes, and urine output. Timely and accurate documentation promotes patient safety.
Data source: BCIT, 2015c; Perry et al., 2014

Video 10.2

Watch the video Urinary Catheterization (Male) by Renée Anderson and Wendy McKenzie, Thompson Rivers University.

Video 10.3

Watch the video Urinary Catheterization (Female) by Renée Anderson and Wendy McKenzie, Thompson Rivers University.

Removing a Urinary Catheter

Patients require an order to have an indwelling catheter removed. Although an order is required, it remains the responsibility of the health care provider to evaluate if the indwelling catheter is necessary for the patient’s recovery.

A urinary catheter should be removed as soon as possible when it is no longer needed. For post-operative patients who require an indwelling catheter, the catheter should be removed preferably within 24 hours. The following are appropriate uses of an indwelling catheter (Gould et al., 2009):

When a urinary catheter is removed, the health care provider must assess if normal bladder function has returned. The health care provider should report any hematuria, inability or difficulty voiding, or any new incontinence after catheter removal. Prior to removing a urinary catheter, the patient requires education on the process of removal, and on expected and unexpected outcomes (e.g., a mild burning sensation with the first void) (VCH Professional Practice, 2014). The health care provider should instruct patients to

Review the steps in Checklist 81 on how to remove an indwelling catheter.

Checklist 81: Removing an Indwelling Catheter
Disclaimer: Always review and follow your hospital policy regarding this specific skill.
Safety considerations:
  • Perform hand hygiene.
  • Check room for additional precautions.
  • Introduce yourself to patient.
  • Confirm patient ID using two patient identifiers (e.g., name and date of birth).
  • Explain process to patient; offer analgesia, bathroom, etc.
  • Listen and attend to patient cues.
  • Ensure patient’s privacy and dignity.
  • Assess ABCCS/suction/oxygen/safety.
  • Apply principles of asepsis and safety.
  • Check vital signs.
  • Complete necessary focused assessments.

Steps

 Additional Information

1. Verify physician orders, perform hand hygiene, and gather supplies. Supplies include non-sterile gloves, sterile syringe (verify size of balloon on Foley catheter), waterproof pad, garbage bag, and cleaning supplies for perineal care.
2. Identify patient using two identifiers. Create privacy and explain procedure for catheter removal. This ensures you have the correct patient and follows agency policy on proper patient identification.
3. Educate patient on catheter removal and post-urinary catheter care. Patient must be informed of what to expect after catheter is removed and how to measure urine output, etc.
4. Perform hand hygiene and set up supplies.
Perform hand hygiene

Raise bed to working height.

Organize supplies.

Position patient supine for easy access.

5. Apply non-sterile gloves. This reduces the transfer of microorganisms.
Apply non-sterile gloves
6. Measure, empty, and record contents of catheter bag. Remove gloves, perform hand hygiene, and apply new non-sterile gloves.

Remove catheter securement/anchor device.

Record drainage amount, colour, and consistency according to agency policy.

Always change gloves after handling a urinary catheter bag.

Removing catheter securement device provides easy access to catheter for cleaning and removing.

Remove catheter securement device
7. Perform catheter care with warm water and soap or according to agency protocol. This reduces the transfer of microorganisms into the urethra.
8. Insert syringe in balloon port and drain fluid from balloon. Verify balloon size on catheter to ensure all fluid is removed from balloon. A partially deflated balloon will cause trauma to the urethra wall and pain.
Insert syringe in balloon port and drain fluid from balloon
9. Pull catheter out slowly and smoothly. Catheter should slide out slowly and smoothly. If resistance is felt, stop removal and reattempt to remove the fluid from the balloon. Attempt removal again. If unable to remove the catheter, stop and notify physician.
Pull catheter out slowly and smoothly
10. Wrap used catheter in waterproof pad or gloves. Unhook catheter tube from urinary bag. Discard equipment and supplies according to agency policy. This prevents accidental spilling of urine from the catheter.
Wrap used catheter in waterproof pad or gloves
11. Provide perineal care as required and reposition patient to a comfortable position. This promotes patient comfort.
12. Review post-catheter care, fluid intake, and expected and unexpected outcomes with patient. Ensure patient has access to toilet, commode, bedpan, or urinal. Place call bell within reach. Ensure first void (urine output) is measured as per agency policy.
Encourage patient to maintain or increase fluid intake to maintain normal urine output (unless contraindicated).
13. Lower bed to safe position, remove gloves, and perform hand hygiene. Lowering the bed helps prevent falls. Hand hygiene prevents the transmission of microorganisms from patient to health care provider.
Hand hygiene with ABHR
14. Document procedure according to agency policy. Document time of catheter removal, condition of urethra, and any teaching related to post-catheter care and fluid intake.

Document time, amount, and characteristics of first void after catheter removal.

Data source: ATI, 2015d; BCIT, 2015b; Perry et al., 2014; VCH Professional Practice, 2014

If a patient is unable to void after six to eight hours of removing a urinary catheter, or has the sensation of not emptying the bladder, or is experiencing small voiding amounts with increased frequency, a bladder scan may be performed. A bladder scan can assess if excessive urine is being retained. Notify the health care provider if patient is unable to void within six to eight hours of removal of a urinary catheter. If a patient is found to have retained urine in the bladder and is unable to void, an intermittent/straight catheterization should be performed (Perry et al., 2014).

Video 10.4

Watch the video Foley Catheter Removal by Renée Anderson and Wendy McKenzie, Thompson Rivers University.
Read the To Scan or Not To Scan journal article for more information on bladder scanning.

Critical Thinking Exercises

  1. Describe the different techniques for cleansing a female and a male patient prior to catheterization.
  2. Your male patient complains of pain while you are inserting a urinary catheter. Describe your next steps.

76

10.5 Tracheostomies

A tracheostoma is an artificial opening made in the trachea just below the larynx. A tracheostomy tube is a tube that is inserted through the opening, or stoma, to create an artificial airway. Patients who need long-term airway support (long-term patients who are intubated) or who have a need to bypass the upper airway may receive a tracheostomy. A tracheostomy (see Figure 10.1) can be very traumatic for a patient, and many find it difficult to adjust to having one.

The tracheostomy may be permanent or temporary. It is created surgically through the trachea (upper airway remains intact), larynx (upper airway is not patent), or cricothyroid (usually for temporary emergency access to airway). Tracheostomy tubes are inserted for airway maintenance, ventilation, removal of secretions, or as an alternate airway (e.g., following laryngectomy).

DSC_0683
Figure 10.1 Cross-section view of a tracheostomy (on a model) inserted in the trachea anterior to the esophagus

Tracheostomy Tubes

Tracheostomy tubes can be soft plastic, hard plastic, or, at times, metal. All tracheostomy devices are made up of an outer cannula, inner cannula, and an obturator used to insert the tube (see Figure 10.2). They come in different sizes and may have a cuff. A cuff tracheostomy produces a tight seal between the tube and the trachea. This seal prevents aspiration of oropharyngeal secretions and air leakages between the tube and the trachea. Tracheostomies are firmly tied and secured around the patient’s neck. The ties prevent accidental de-cannulation of the trachea. Sterile gauze and cleaning supplies are used daily to clean the trachea stoma and prevent infection to the site.

Figure 10.5.2 Left to right: Obturator, cuffed tracheostomy tube, non-cuffed tracheostomy tube, tracheal dilators
Figure 10.2 Left to right: obturator, cuffed tracheostomy tube, non-cuffed tracheostomy tube, tracheal dilators

Humidification

When a patient has a tracheostomy, air is no longer filtered and humidified as it is when passing through the upper airways. Most patients will have humidification and oxygen support. The following is a list of the special considerations of patients with a tracheostomy tube (BCIT, 2015c).

Potential Complications

Early potential complications may include hemorrhage, pneumothorax, subcutaneous emphysema, cuff leak, tube dislodgement, and respiratory/cardiovascular arrest. Late potential complications may include airway obstruction, fistulae, infection, aspiration, and tracheal damage/erosion.

Emergency supplies at the bedside must include the following:

1. Suction equipment

2. Oxygen equipment with humidification

3. An emergency bag containing (see Figure 10.3):

Equipment for emergency bag for tracheostomy patients.
Figure 10.3 Equipment for emergency bag for tracheostomy patients. Clockwise from top left: sterile gloves, spare tracheostomy tube, scissors, lubricant, cotton-tip applicators, ties, 10ml syringe, tracheal dilators, inner cannula, obturator, sterile gauze

The emergency bag must accompany patients when they are transported off the unit. Table 10.2 outlines methods to prevent possible complications that may arise from tracheostomies, and how to intervene if they do occur.

Table 10.2 Prevention and Interventions for Complications
 Complication Prevention Interventions
Hemorrhage
  • Assess stoma for bleeding (excessive suctioning may also result in blood-streaked secretions).
  • Report neck swelling.
  • Report vigorous pulsation around the trachea.
  • Inflate cuff.
  • Suction.
  • Notify physician immediately if you suspect bleeding.
  • CODE BLUE if pulsating frank blood.
  • Monitor vital signs.
  • Apply pressure to bleed if possible.
Stomal/pulmonary infection
  • Perform dressing changes and tracheostomy care every 8 hours and as needed.
  • Use sterile technique for tracheostomy suctioning.
  • Use clean technique for tracheostomy care.
  • Use humidified oxygen or air.
  • Follow respiratory assessment as per agency policy.
  • Have patient do deep breathing and coughing (DB&C) exercises every 2 to 4 hours and as needed.
  • Instill small amounts of normal saline when suctioning to help loosen secretions as needed.
  • Suction as necessary.
  • Maintain hydration.
  • Take vital signs every four hours.
Report potential signs of infection:
  • Redness
  • Sweeping
  • Purulent drainage
  • Fever
  • Abnormal breath sounds
  • Increased secretions
  • Decreased oxygen sats
Tube occlusion
  • Keep inner cannula of dual tracheostomy tube in situ at all times.
  • Check patency of single-lumen tracheostomy tube regularly.
  • Clean inner cannula every 8 hours at a minimum, and as needed.
  • Maintain humidification.
  • Maintain hydration (secretions should be loose and thin).
  • Do DB&C exercises every 2 to 4 hours and as needed.
  • Suction and instill normal saline to loosen secretions as needed.
If tube occludes:
  • Place patient supine to expose neck and check for tube dislodgement.
  • Try ventilation using ambu-bag but do not force air entry.
  • If unable to ventilate, try suction and instillation of normal saline to clear cannula.
  • Remove inner cannula if suction catheter still does not pass; check patency and replace with new inner cannula.
  • If still unable to ventilate, deflate cuff or cuffed tube and notify physician and/or respiratory therapist.
  • If patient is still unable to ventilate, call CODE BLUE and cut tie tapes, remove tracheostomy tube, insert dilators, and hold stoma open with tracheal dilators until trained health care professional is able to reinsert a tracheostomy tube.
Aspiration
  • All tracheostomy patients require a swallow assessment (usually requires a physician order) prior to oral feeding.
  • No swallow assessment or feeding occurs when cuff is inflated.
  • Consult speech and language therapist.
  • Patient should be placed in a semi- to high-upright sitting position.
  • Ensure cuff is inflated and check cuff pressure once per shift and as needed.
  • Always suction above cuff prior to cuff deflation.
Report any signs of aspiration:
  • Excessive coughing and gagging (particularly with eating and drinking)
  • Increased or changed secretions
  • Presence of food in secretions
  • Drop in O2 sats

If patient vomits:

  • Inflate cuff if present.
  • Suction immediately.
  • Raise head of bed; sit patient upright.
Accidental decannulation
  • Tracheostomy ties must be secure.
  • Secure new ties before removing old ties.
  • Assess patient for restlessness/confusion.
If partial decannulation occurs (air movement is felt from tube):
  • Deflate cuff if inflated.
  • Remove inner cannula and insert obturator.
  • Gently reinsert tube while holding obturator in place.
  • Remove obturator and replace inner cannula.
  • Check correct placement.
    • Feel for air movement from tube.
    • Check patient’s O2 sats.
    • Ensure patient’s breathing returns to baseline.
  • Ensure tie tapes are secure and cuff is inflated if ordered.

If complete decanulation occurs, call for trained health care professional to reinsert tracheostomy tube. In the meantime:

  • Maintain tracheal airway and ventilation with bag tracheostomy mask as best as possible.
  • Protect airway from foreign-body aspiration.
  • If stoma is less than 7 days old, use tracheal dilators to maintain stoma potency if necessary.
  • If patient is not ventilating adequately, close stoma and ventilate with bag and face mask with 100% O2 until CODE team arrives. If patient has known upper-airway obstruction, or a laryngectomy, ventilate via stoma with a tracheostomy or pediatric mask.

Note: Do not hyperextend neck if patient has a known or suspected neck injury.
Data source: BCIT, 2015c; Vancouver Coastal Health, 2012a

Video 10.5

Tracheal Suctioning

The purpose of suctioning is to maintain a patent airway, to remove secretions from the trachea and bronchi, and to stimulate the cough reflex (Vancouver Coastal Health, 2006). Patients with tracheostomies often have more secretions than normal and will require suctioning to remove secretions from the airway to prevent airway obstruction. Tracheostomy patients should be assessed every two hours and as required to see if suctioning is required. Sterile suction equipment is used each time tracheal suctioning is performed. Secretions can be aspirated using a suction catheter connected to a suction source.

Tracheal suctioning is indicated with noisy respirations, decreased O2 sats, anxiousness, restlessness, increased respirations or work of breathing, change in skin colour, or wheezing or gurgling sounds. These are signs and symptoms of respiratory distress, and the patient should be suctioned immediately. Checklist 82 outlines the steps for tracheal suctioning.

Checklist 82: Tracheal Suctioning
Disclaimer: Always review and follow your hospital policy regarding this specific skill.
Safety considerations: 
  • Perform hand hygiene.
  • Check room for additional precautions.
  • Introduce yourself to patient.
  • Confirm patient ID using two patient identifiers (e.g., name and date of birth).
  • Explain process to patient; offer analgesia, bathroom, etc.
  • Listen and attend to patient cues.
  • Ensure patient’s privacy and dignity.
  • Assess ABCCS/suction/oxygen/safety.
  • Apply principles of asepsis and safety.
  • Check vital signs.
  • Complete necessary focused assessments.
  • Pre-hyperoxygenate patient if required and as per agency policy.

Steps

 Additional Information

1. Connect one end of connecting tubing to suction machine and place other end in convenient location near patient. Preparing equipment ahead of time promotes safety, organization, and timeliness.
2. Turn suction device on and set suction pressure to as low a level as possible that is still able to effectively clear secretions (between 80 and 120 mmHg in adults).
Set suction pressure between 80-120mmHg for adults
Set suction pressure between 80 and 120mmHg for adults

Excessive negative pressure damages mucosa and induces greater possibility for hypoxia.

3. Occlude end of suction tubing to check suction pressure between 80 and 20 mmHg. This step ensures that equipment is functioning safely.
4. Using aseptic technique, open suction kit or catheter.

Do not allow suction catheter to touch any non-sterile surfaces.

Keep open suction package at bedside as a sterile surface on which to lay catheter between passes.

This prepares catheter, maintains asepsis, and reduces transmission of microorganisms.

This provides sterile surface on which to lay catheter between passes.

5. Unwrap or open sterile container and place on bedside table. Be careful not to touch inside of container. Fill with about 100 ml sterile normal saline solution or water.
Fill sterile container with about 100 mL sterile normal saline solution or water
Fill sterile container with about 100 ml sterile normal saline solution or water

Saline or water is used to clean tubing after each suction pass.

6. Apply PPE as per agency policy (e.g., goggles and mask). This prevents transmission of microorganisms to health care provider.
7. Apply sterile glove to each hand or apply non-sterile glove to non-dominant hand and sterile glove to dominant hand.


This reduces the transmission of microorganisms and maintains sterility of suction catheter.
Apply sterile glove to each hand or apply non-sterile glove to non-dominant hand and sterile glove to dominant hand
8. Pick up suction catheter with dominant hand without touching non-sterile surfaces. Pick up connecting tubing with non-dominant hand and secure catheter to tubing. This maintains catheter sterility and connects catheter to suction.
Use aseptic technique to attach suction catheter to suction tubing
9. Check that equipment is functioning properly by suctioning small amount of sterile normal saline or water from sterile container. Suction is initiated by covering the hole on the suctioning tube with your thumb. This ensures equipment is functioning and lubricates internal catheter and tubing.

Too high suction may increase tracheal damage.

Check that equipment is functioning properly by suctioning small amount of sterile normal saline or water from sterile container
Suction is initiated by covering the hole on the suctioning tube with your thumb
10. Insert suction catheter into tracheostomy until resistance is felt, then pull back about 1/2 inch. Do not apply suction when inserting suction catheter. Resistance is felt at the level of the patient’s carina.
Insert suction catheter into tracheostomy until resistance is felt, then pull back about 1/2 inch
11. Suction intermittently while simultaneously rotating and withdrawing catheter for a maximum of 10 seconds.

Immediately reapply oxygen in between suctions to reoxygenate the patient.

*Instill sterile normal saline into tracheostomy prior to suction only if prescribed to induce coughing.

This reduces risk of tracheal damage and optimizes suction of secretions.
Suction intermittently while simultaneously rotating and withdrawing catheter for a maximum of 10 seconds

Suctioning decreases patient’s supply of oxygen. Oxgyen supports patient’s return to adequate oxygenation.

*Evidence-based practice indicates that normal saline is not effective in loosening or mobilizing secretions. Normal saline may occasionally be prescribed to induce coughing in patient.

12. Clear secretions from suction catheter by suctioning sterile normal saline or water from sterile container.
Clear secretions from suction catheter by suctioning sterile normal saline or water from sterile container

This clears catheter of secretions and avoids reintroducing pathogens into the airway.

13. Allow periods of rest between suction. The length of time between suctioning depends on patient tolerance. Patient may be suctioned up to three times with the same suction catheter. Do not pass (insert) suction catheter more than three times.
Release suction to allow patient time to rest

This reduces the risk of tracheal damage.

14. Reassess respiratory status and O2 saturation for improvements. Call for help if any abnormal signs and symptoms appear, or if respiratory status does not improve. This identifies positive response to suctioning procedure and provides objective measure of effectiveness.
15. When suctioning is complete, wrap catheter around gloved hand, pull glove over catheter, and disconnect from suction. Discard supplies in appropriate garbage bags. Turn off suction.

Ensure all supplies are readily available at the bedside for next suction procedure.

Wrapping catheter in glove prevents secretions from being spilled from the catheter.
Wrap suction catheter in glove and dispose

Supplies are essential in case of an emergency or respiratory distress.

16. Return patient to a safe and comfortable position and ensure that call bell is within patient’s reach. This promotes patient safety.DSC_2074
17. Clean up and dispose of suction supplies according to agency policy. This reduces the transmission of microorganisms.
18. Perform hand hygiene. Hand hygiene reduces the transmission of microorganisms.
Hand hygiene with ABHR
19. Document procedure according to agency policy. Documentation may include the suction procedure; patient reaction; amount, thickness, and colour of secretions; if normal saline was instilled; and if sputum samples were sent to the lab. Documentation provides accurate details of response to suctioning and clear communication among the health care team.
Data source: BCIT, 2015c; Halm & Krisko-Hagel, 2008; Perry et al., 2014; Vancouver Coastal Health, 2006
Special considerations:

Video 10.6

Tracheostomy Care

Tracheostomy care is performed routinely and as required. Tracheostomy care is essential to avoid potential complications such as obstruction and infection. In addition to suctioning, tracheostomy care includes the following tasks:

If possible, these three tasks of tracheostomy care should be performed at the same time to minimize handling of the tracheal device. Collect all supplies at once and complete the procedure in the order listed above. However, there may be times when each task may be performed separately. Ongoing assessment is essential when caring for a patient with a tracheostomy.

Additional care includes:

Replacing and Cleaning an Inner Cannula

The primary purpose of the inner cannula is to prevent tracheostomy tube obstruction. Many sources of obstruction can be prevented if the inner cannula is regularly cleaned and replaced. The inner cannula can be cleansed with half-strength hydrogen peroxide or sterile normal saline. Always check the manufacturer’s recommendations for tube cleaning. Some inner cannulas are designed to be disposable, while others are reusable for a number of days. Inner tube cleaning should be done as often as two or three times per day, depending on the type of equipment, the amount and thickness of secretions, and the patient’s ability to cough up the secretions.

Changing the inner cannula may encourage the patient to cough, bringing mucous out of the tracheostomy. For this reason, the inner cannula should be replaced prior to changing the tracheostomy dressing to prevent secretions from soiling the new dressing. If the inner cannula is disposable, no cleaning is required. Checklist 83 describes how to clean and replace an inner tracheal cannula.

Checklist 83: Cleaning an Inner Tracheal Cannula
Disclaimer: Always review and follow your hospital policy regarding this specific skill.
Safety considerations: 
  • Reassess your patient’s tolerance for tracheostomy care and watch for signs of respiratory distress.
  • Pre-hyperoxygenate patient if required and according to agency policy.
  • If removing oxygen while performing tracheostomy care, remember to replace it often to reoxygenate the patient.
  • Disposable inner cannulae should be inspected/cleaned every 8 hours or as needed.
  • Disposable inner cannulae should be inspected every 8 hours (during tracheostomy care) and replaced every 24 hours and as needed.

Steps

 Additional Information

1. Perform hand hygiene, collect supplies, and verify whether inner cannula needs to be cleaned as per policy. Supplies include cotton-tip applicator, sterile pipe cleaner, sterile dressing tray, NS, hydrogen peroxide, non-sterile gloves, waterproof pad, and PPE if required.
2. Perform hand hygiene, ID patient using two identifiers, explain procedure to patient, and create privacy if required. Ensure patient has a method to communicate with you during the procedure. Hand hygiene reduces the transmission of microorganisms.
Hand hygiene with ABHR

Tracheal patients always require a method to communicate with the health care provider.

3. Apply gloves and PPE (if required), and cover chest with waterproof pad. This prevents contact with secretions and prevents gown from becoming soiled.
4. Set up sterile tray field; add cleaning solution and supplies. Organization ensures the process is efficient and fast for the patient.
Set up sterile tray and add cleaning solution and supplies
5. Remove oxygen mask to clean dressing but replace frequently as required by patient.
Remove oxygen mask to clean dressing

Replace the tracheal oxygen mask frequently to prevent hypoxia.

6. Remove inner cannula by stabilizing neck plate and gently grasping the outer white area. Rotate inner cannula counter-clockwise to unlock it. Pull cannula out in a downward motion. Some inner cannulae will “click” on, some twist on/off. Do not touch the inner cannula; only handle the white outer area unless you are wearing sterile gloves. Review policy for cleaning frequency and cleaning solution.
Remove inner cannula by stabilizing neck plate and gently grasping the outer white area
7. Soak in appropriate solution and, if necessary, use a sterile pipe cleaner to remove exudate from the inner cannula. Soaking the cannula helps loosen the secretions.
Soak in appropriate solution and, if necessary, use a sterile pipe cleaner to remove exudate from the inner cannula
8. Once clean, rinse off inner cannula and ensure all solution is removed. The inner portion may be dried off with a sterile pipe cleaner prior to reinsertion. Ensure all cleaning solution is removed to prevent tracheal damage from the hydrogen peroxide (if used).
9. Reinsert inner cannula by stabilizing neck plate, holding the white part with the end upright, and twisting into the shape of the tracheostomy. This prevents trauma to the tracheal stoma.
10. Ensure the inner cannula has “clicked” on by aligning the two dots, or ensure the clamp is secure.
Ensure that inner cannula is 'clicked' securely into place
Ensure that inner cannula is “clicked” securely into place
11. Perform hand hygiene. Hand hygiene reduces the transmission of microorganisms.
Hand hygiene with ABHR
Data source: ATI, 2015b; BCIT, 2015c; Morris, Whitmer & McIntosh, 2013; Perry et al., 2014; Vancouver Coastal Health, 2012b

Video 10.7

Cleaning Stoma and Changing the Sterile Dressing

The stoma should be cleaned and the dressing changed every 6 to 12 hours or as needed, and the peristomal skin should be inspected for skin breakdown, redness, irritation, ulceration, pain, infection, or dried secretions. Patients with copious amounts of secretions often require frequent dressing changes to prevent maceration of the tissue and skin breakdown. Cotton-tip applicators can be used to get under the tracheostomy device, where cleaning can be done using a semi-circular motion, inward to outward. Always use aseptic technique. Checklist 84 provides a safe method to clean the tracheal stoma and replace the sterile dressing.

Checklist 84: Cleaning Stoma and Changing a Sterile Dressing
Disclaimer: Always review and follow your hospital policy regarding this specific skill.
Safety considerations: 
  • Reassess your patient’s tolerance for tracheostomy care and watch for signs of respiratory distress.
  • Pre-hyperoxygenate patient if required and according to agency policy.
  • If removing oxygen while preforming tracheostomy care, remember to replace it often to reoxygenate the patient.

Steps

 Additional Information

1. Perform hand hygiene, verify physician orders for tracheostomy care, and collect supplies. Supplies include sterile dressing change, pre-cut 4 x 4 gauze, normal saline, cotton-tip applicators, non-sterile gloves, and garbage bag.
2. Perform hand hygiene, ID patient using two identifiers, explain procedure to patient, and create privacy if required. Ensure patient has a method to communicate with you during the procedure. This reduces the transmission of microorganisms.
Hand hygiene with ABHR

Tracheal patients always require a method to communicate with the health care provider.

3. Apply non-sterile gloves and cover chest with waterproof pad. This prevents gown from becoming soiled.
4. Organize all supplies and set up sterile tray field; add cleaning solution to sterile tray. Organization ensures the process of cleaning is efficient and fast.
Set up sterile tray and add cleaning solution and supplies
5. Remove oxygen mask to clean dressing but replace frequently as required by patient. This prevents hypoxia.
Remove oxygen mask to clean dressing
6. Using forceps, remove the soiled dressing around the tube and discard in garbage bag. All soiled dressings should be removed, as they may excoriate the surrounding peristomal skin.
Use forceps to remove the soiled dressing
7. Assess the stoma site for bleeding, appearance of stoma edges, and peristomal skin for evidence of infection or redness (assess for increase in pain, odour, or abscess formation). Assessment is important to identify and prevent further complications.
Assess stoma site
Assess stoma site
8. Clean the stoma site with a gauze or cotton-tip applicator soaked in normal saline. Be careful not to disturb the tracheostomy tube. Dry surrounding area if required. Cleaning around the stoma removes any debris or exudate from the stoma. A tracheal stoma should be cleaned with normal saline.
Clean the stoma site with a gauze or cotton-tip applicator soaked in normal saline
9. Assess the site to determine if barrier film is required. Follow agency policy.
10. Apply new manufactured pre-cut tracheostomy dressing to tube using sterile forceps. Avoid cutting gauze for tracheostomy care. Use non-fraying material. The small fibres from the cut gauze may become loose and accidentally travel into the inner cannula. Always use manufactured pre-cut gauze.
Apply new manufactured pre-cut tracheostomy dressing to tube using sterile forceps
Data source: BCIT 2015c; Morris et al., 2013; Perry et al., 2014; Vancouver Coastal Health, 2012

Video 10.8

Watch this video Changing a Trachestomy Site Dressing by Renée Anderson & Wendy McKenzie, Thompson Rivers University.

Replacing Tracheostomy Ties (Velcro or Twill Tape)

Tracheal ties will become dirty and require replacing. Ties should be replaced as required, according to agency policy. Ideally, one person should hold the tracheostomy tube in place while the tracheostomy ties are replaced by another person. Alternatively, secure the new tracheostomy ties prior to removing the old tracheostomy ties to avoid accidental dislodgement of the tracheostomy tube if the patient coughs or the tracheostomy is accidentally bumped out. Once the new tracheostomy ties are on, only one finger should fit between the tracheostomy ties and the neck. Ensure twill ties are knotted using a square knot.

Checklist 85 lists the steps for replacing tracheostomy ties.

Checklist 85: Replacing Tracheostomy Ties (Velcro or Twill Tape)
Disclaimer: Always review and follow your hospital policy regarding this specific skill.
Safety considerations: 
  • Reassess your patient’s tolerance for tracheostomy care and watch for signs of respiratory distress.
  • Pre-hyperoxygenate patient if required and according to agency policy
  • If removing oxygen while preforming tracheostomy care, remember to replace it often to reoxygenate the patient.

Steps

 Additional Information

1. Perform hand hygiene, verify physician orders for tracheostomy care, and collect supplies. Use twill ties or Velcro ties.
Wash hands
Wash hands
2. Have an additional health care provider assist with the tracheal tie change as required. If tracheostomy is less than 24 hours old, or patient is confused, agitated, or unpredictable, always have an additional helper at the bedside to prevent accidental dislodgement.
3. Perform hand hygiene, ID patient using two identifiers, explain procedure to patient, and create privacy if required. Ensure patient has a method to communicate with you during the procedure. This reduces the transmission of microorganisms.
Hand hygiene with ABHR

Tracheal patients always require a method to communicate with the health care provider.

4. Apply non-sterile gloves. This reduces the transmission of microorganisms.
Apply non-sterile gloves
5. To secure the tracheostomy tube with Velcro ties:
  • If patient is at risk of tracheostomy dislodgement due to confusion or agitation, replace Velcro with ribbon tapes.
  • If possible, one health care worker can keep the tracheostomy tube in place by holding the flange with gloved hands, while the other can replace the tapes. This avoids potential dislodgement of the tube as this procedure can make the patient cough.
  • Thread the narrow Velcro tab through the slit in the flange of the tracheostomy tube and fold it back to adhere to the main tube holder; repeat on other side. Overlap the shorter length of collar with the longer length of collar and secure with the wider Velcro tab. Trim any excess length of collar to fit the size of the patient’s neck.
  • Check how secure the collar feels. Ensure you can fit one little finger between the collar and the patient. The tape should be tight enough to keep the tracheostomy tube securely in place but loose enough to allow the little finger to fit between the tapes and the neck.

To secure the tracheostomy tube with ribbon/twill tape:

  • Cut two pieces of cotton tape, each approximately 50 cm in length (depending on neck size).
  • Divide the tape into thirds and fold the first third over the remaining two-thirds of the ribbon.
  • Thread the folded edge through one flange hole, forming a loop.
  • Thread the loose tape ends through this loop and pull until tight and secure.
  • Repeat the process for the other side, securing the tapes with square knots on each side of the neck.
Tracheostomy ties are used to promote patient comfort and keep the tracheostomy secured and in situ.
Velcro ties
Velcro ties
Cotton twill ties
Cotton twill ties
6. Perform hand hygiene. Hand hygiene reduces the transmission of microorganisms.
Hand hygiene with ABHR
Data source: BCIT, 2015c; Morris et al., 2013; Perry et al., 2014

Video 10.9

Watch a video Changing Tracheostomy Ties by Renée Anderson & Wendy McKenzie, Thompson Rivers University.

Critical Thinking Exercises

  1. When suctioning your patient, you notice thick, tenacious secretions. What interventions should be implemented?
  2. What methods of communication can you use for your patient with a tracheostomy tube who is unable to speak?

77

10.6 Chest Tube Drainage Systems

A chest tube, also known as a thoracic catheter, is a sterile tube with a number of drainage holes that is inserted into the pleural space. The pleural space is the space between the parietal and visceral pleura, and is also known as the pleural cavity. A patient may require a chest drainage system any time the negative pressure in the pleural cavity is disrupted, resulting in respiratory distress. Negative pressure is disrupted when air, or fluid and air, enters the pleural space and separates the visceral pleura from the parietal pleura, preventing the lung from collapsing and compressing at the end of exhalation. A small amount of fluid or air may be absorbed by the body without a chest tube. A large amount of fluid or air cannot be absorbed by the body and will require a drainage system (Bauman & Handley, 2011; Perry et al., 2014).

The chest tube is connected to a closed chest drainage system, which allows for air or fluid to be drained, and prevents air or fluid from entering the pleural space. The system is airtight to prevent the inflow of atmospheric pressure. Because the pleural cavity normally has negative pressure, which allows for lung expansion, any tube connected to it must be sealed so that air or liquid cannot enter the space where the tube is inserted (Bauman & Handley, 2011; Rajan, 2013).

The location of the chest tube depends on what is being drained from the pleural cavity. If air is in the pleural space, the chest tube will be inserted above the second intercostal space at the mid-clavical line. If there is fluid in the pleural space, the chest tube is inserted at the fourth to fifth intercostal space, at the mid-axillary line. A chest tube may also be inserted to drain the pericardial sac after open heart surgery, and may be placed directly under the sternum (Perry et al., 2014).

The following are some of the conditions that may require a chest tube drainage system (Bauman & Handley, 2011; Perry et al., 2014):

A chest tube drainage system must always be placed below the drainage site and secured in an upright position (attached to the floor or an IV pole, as in Figure 10.4) to prevent it from being knocked over.

Chest tube drainage system
Figure 10.4 Chest tube drainage system secured to IV pole
Book pictures 2015 661
Figure 10.5 Chest tube drainage system
Chest tube drainage system with labelled parts
Figure 10.6 Chest tube drainage system with labelled parts

A chest tube drainage system is a sterile, disposable system that consists of a compartment system that has a one-way valve, with one or multiple chambers, to remove air or fluid and prevent return of the air or fluid back into the patient (see Figures 10.5 and 10.6). The traditional chest drainage system typically has three chambers (Bauman & Handley, 2011; Rajan, 2013). Always review what type of system is used in your agency, and follow the agency’s and the manufacturer’s directions for setup, monitoring, and use. In general, a traditional chest tube drainage system will have these three chambers:

  1. Collection chamber: The chest tube connects directly to the collection chamber, which collects drainage from the pleural cavity. The chamber is calibrated to measure the drainage. The outer surface of the chamber has a “write-on” surface to document the date, time, and amount of fluid. This chamber is typically on the far right side of the system (Teleflex Medical Incorporated, 2009).
  2. Water-seal chamber: This chamber has a one-way valve that allows air to exit the pleural cavity during exhalation but does not allow it to re-enter during inhalation due to the pressure in the chamber. The water-seal chamber must be filled with sterile water and maintained at the 2 cm mark to ensure proper operation, and should be checked regularly. Fill with additional sterile water as required. The water in the water-seal chamber should rise with inhalation and fall with exhalation (this is called tidaling), which demonstrates that the chest tube is patent. Continuous bubbling may indicate an air leak, and newer systems have a measurement system for leaks — the higher the number, the greater the air leak. The water-seal chamber can also monitor intrathoracic pressure (Teleflex Medical Incorporated, 2009).
  3. Wet or dry suction control chamber: Not all patients require suction. If a patient is ordered suction, a wet suction system is typically controlled by the level of water in the suction control chamber and is typically set at -20 cm on the suction control chamber for adults. If there is less water, there is less suction. The amount of suction may vary depending on the patient and is controlled by the chest drainage system, not the suction source. Monitor the fluid level to ensure there is gentle bubbling in the chamber. A dry suction system uses a self-controlled regulator that adjusts the amount of suction and responds to air leaks to deliver consistent suction for the patient. If suction is discontinued, the suction port on the chest drainage system must remain unobstructed and open to air to allow air to exit and minimize the development of a tension pneumothorax (Teleflex Medical Incorporated, 2009).

In addition to the three chambers, the drainage system has many safety features to ensure that high negative pressures can be monitored and relieved quickly. To review these safety features and additional information regarding the chambers of a closed chest tube drainage system, visit the Teleflex Medical Incorporated website.

When a patient has a closed chest tube drainage system, it is the health care provider’s responsibility to assess the patient and the equipment frequently to ensure the equipment is patent and working effectively. The health care provider should:

Checklist 86 reviews the management of a patient with a chest tube drainage system.

Checklist 86: Management of a Chest Tube Drainage System (Pleur-evac)
Disclaimer: Always review and follow your hospital policy regarding this specific skill.
Safety considerations:
  • A chest tube may be inserted at the bedside, in procedure room, or in the surgical suite. Health care providers often assist physicians in the insertion and removal of a closed chest tube drainage system.
  • After initial insertion of a chest tube drainage system, assess the patient every 15 minutes to 1 hour. Once the patient is stable, and depending on the condition of the patient and the amount of drainage, monitoring may be less frequent. If the patient is stable (vital signs within normal limits; drainage amount, colour, or consistency is within normal limits; the patient is not experiencing any respiratory distress or pain), assessment may be completed every 4 hours. Always follow hospital policy for frequency of monitoring a patient with a chest tube.
  • Prior to managing a patient with a chest tube, review reason for the chest tube, the location of the chest tube, normal volume of drainage, characteristics of the drainage, date of last dressing change, and any previously recorded air leaks measurements.
  • Safety/emergency equipment must always be at the patient’s bedside and with the patient at all times during transportation to other departments. Safety equipment includes:
    • Two guarded clamps
    • Sterile water
    • Vaseline gauze (Jelonet)
    • 4 x 4 sterile dressing
    • Waterproof tape
  • Never clamp a chest tube without a doctor’s order or valid reason. The tube must remain unobscured and unclamped to drain air or fluid from the pleural space. There are a few exceptions where a chest tube may be clamped; see special considerations below.
  • Chest tube drainage systems are replaced only when the collection chamber is full or the system is contaminated.

Steps

 Additional Information

1. Review the patient chart for the reason for the chest tube and location and insertion date. Knowing the reason for the chest tube and location informs the health care provider on the type of expected drainage.
2. Perform hand hygiene. identify patient using two identifiers and explain assessment process to patient. Create privacy to assess the patient and drainage system. Hand hygiene reduces the transmission of microorganisms.

Proper identification provides patient safety measures for safe care.

3. Complete respiratory assessment, ensure patient has minimal pain, and measure vital signs. Place patient in semi-Fowler’s position for easier breathing. Patient should be in a semi-Fowler’s position, have minimal pain, have no respiratory distress, and have no evidence of an air leak around the insertion site, and no drainage from the insertion site or chest tube equipment.

Frequent assessment of the respiratory status is important if the patient’s condition is stable, resolving, or worsening, and ensures that the chest tube is functioning correctly.

Assessment should be every 15 minutes to 1 hour until patient is stable. Increase monitoring if patient’s condition worsens.

Chest tubes are painful, as the parietal pleura are very sensitive. Ensure patient has adequate pain relief, especially prior to repositioning, sitting, or ambulation.

4. Assess chest tube insertion site to ensure sterile dressing is dry and intact.

Check insertion site for subcutaneous emphysema.

Dressing should remain dry and intact; no drainage holes should be visible in the chest tube.

Dressing is generally changed 24 hours post-insertion, then every 48 hours. Chest tubes are generally sutured in place.

There should be no fluid leaking from around the site or sounds of air leaks from insertion site.

Chest tube Insertion site
Chest tube insertion site
5. Maintain a closed system. Ensure all connections are taped and secured according to agency policy. These measures are important to keep the system intact and prevent accidental tube removal or disruption of the drainage system.
6. Ensure tubing is not kinked or bent under the patient or in the bed rails, or compressed by the bed. Kinked or bent tubing could interfere with the drainage of the pleural fluid.

Dependent loops may collect fluid and impede drainage.

The long tube may be coiled and secured to a draw sheet with a safety pin (allowing enough tubing so that the patient can move in bed comfortably) to prevent dependent loops.

Tubing free from kinks or dependent loops
Tubing free from kinks and dependent loops
7. Collection chamber (drainage system) is below the level of the chest and secured to prevent it from being accidentally knocked over. The drainage system must remain upright for the water-seal chamber to function correctly.

The chest drainage system must be lower than the chest to facilitate drainage and prevent back flow.

Chest tube lower than insertion site
Chest drainage system lower than insertion site
8. Periodically check water-seal chamber to ensure water level is to the dotted line (2 cm) — at least once every shift. Add water as necessary. Adequate water in the water-seal chamber prevents excess suction being placed on the delicate tissue.

Water levels should be checked each shift as the water may evaporate.

9. Check water-seal chamber for tidaling (water moving up and down) with respirations. Gentle bubbling is normal as the lungs expand. If the water in the water seal does not move up and down with respirations, the system might not be intact or patent. Periodic bubbling in the water-seal chamber is normal and indicates that air that is trapped is being removed. Frequent assessment of the system is required to ensure proper functioning.
Chest tube drainage system with labelled parts

Excessive bubbling may cause unnecessary noise and faster evaporation.

If there is no tidaling, consider 1) an occlusion somewhere between the pleural cavity and the water seal, or 2) a full expansion of the lung, where suction has drawn the lung up against the holes in the chest tubes.

If patient is on positive pressure ventilation, the tidaling will be the opposite: the water will move down with inspiration and up with expiration.

10. Ensure suction control dial is set to ordered level (usually 20 cm). The amount of suction in the chamber is regulated by the suction control dial, not the suction source.
11. If suction is ordered, a “float” (or equivalent) must be visible clearly in the window. In wet suction control, gentle bubbling is normal. If there is no bubbling, ensure the connections are tight and turn the suction higher.
Suction set at -20cm
Suction pressure set at – 20 cm
12. If suction is not ordered, ensure the suction port is left open to air. Suction window will appear blank if suction is not in use or not working. The suction port must be left open to the air and free of obstruction to prevent a tension pneumonthorax.
Suction port on the top of a chest tube drainage system
Suction control window
Suction control window (white rectangle)
13. In wet suction systems, expect gentle bubbling in the chamber. Gentle bubbling is normal. Vigorous bubbling is noisy and can be disturbing to the patient. Periodically check the air vent to ensure it is not blocked or occluded.
14. Assess air leak meter to determine progress of patient’s internal air level, measured as level 1 to 7. On every shift, document the level of air leak, and if the air leak occurs at rest or with coughing. Bubbling in the air leak meter indicates an air leak. Measure and monitor.

The source of the leak may be identified by:

  • Checking and tightening connections.
  • Testing the tube for leaks (see special considerations below). If leak is in the tubing, replace the unit.
  • If the leak may be at the insertion site, remove the chest tube dressing and inspect. Has the chest tube been pulled out beyond the chest wall? If you cannot see or hear any obvious leaks at the site, the leak is from the lung.
  • Check patient history. Would you expect a patient air leak?

Notify doctor of any new, increased, or unexpected air leaks that are not corrected by the above actions.

To document the air leak, note the numbered column through which the bubbling occurs. If bubbling is present in first three columns of the air leak meter, document “air leak 3.”

Air leak meter
Air leak meter
15. Check that the clamp is open. The chest tube should not be clamped unless for specific reasons. See special considerations below.
Blue clamp is open
Blue clamp is open
16. Measure date and time, and the amount of drainage, and mark on the outside of the chamber. Record amount and characteristics of the drainage on the fluid balance sheet and patient chart. Drainage that is red and free-flowing indicates a hemorrhage. A large amount of drainage, or drainage that changes in colour, should be recorded and reported to the primary health care provider.

Drainage that suddenly decreases may indicate a blood clot or obstruction in the chest tube drainage system.

Drainage in collection chamber
17. Encourage frequent position changes as well as deep-breathing and coughing exercises. Deep-breathing and coughing exercises promote lung expansion and promote fluid drainage.
18. The following should be documented and assessed according to agency policy:
  • Presence of air leaks
  • Fluctuation of water in water-seal chamber
  • Amount of suction
  • Amount of drainage and type
  • Presence of crepitus (subcutaneous emphysema)
  • Breath sounds
  • Patient comfort level or pain level
  • Appearance of insertion site and/or dressing
Proper documentation is required to manage a chest tube drainage system to ensure it is functioning effectively.
Data source: Bauman & Handley, 2011; BCIT, 2015c; Durai, Hoque, & Davies, 2010; Rajan, 2013; Teleflex Medical Incorporated, 2009
Special considerations:

Video 10.10

Watch the video Chest tube care & maintenance by Renée Anderson & Wendy McKenzie, Thompson Rivers University.

Video 10.11

Watch the video Dry suction chest drainage system by Renée Anderson & Wendy McKenzie, Thompson Rivers University.

Table 10.3 provides a list of potential complications and interventions related to chest tube drainage systems.

Table 10.3 Complications and Interventions Related to Chest Tube Drainage Systems

Complications

Interventions

Potential pneumothorax/respiratory distress This is the primary concern for a patient with a chest tube drainage system.
  • Signs and symptoms include decreased SaO2, increased work of breathing (WOB), diminished breath sounds, decreased chest movement, complaints of chest pain, tachycardia or bradycardia, hypotension.
  • Notify health care provider.
  • Request urgent chest X-ray.
  • Ensure drain system is intact with no leaks or blockages such as kinks or clamps.
  • Apply oxygen and take a set of vital signs.
Air leak An air leak may occur from the chest tube insertion site or the drainage system. Do the following to test the system for the site of an air leak:
  • Using a booted (or padded) clamp, begin at the dressing and clamp the drainage tubing momentarily.
  • Look at the water-seal/air leak meter chamber. Keep moving the clamp down the drainage tubing toward the chest drainage system, placing it at 20 to 30 cm intervals. Each time you clamp, check the water-seal/air leak meter chamber.
  • When you place the clamp between the source of the air leak and the water-seal/air leak meter chamber, the bubbling will stop. If bubbling stops the first time you clamp, the air leak must be at the chest tube insertion site or the lung.
Accidental chest tube removal or chest tube falls out A chest tube falling out is an emergency. Immediately apply pressure to chest tube insertion site and apply sterile gauze or place a sterile Jelonet gauze and dry dressing over insertion site and ensure tight seal. Apply dressing when patient exhales. If patient goes into respiratory distress, call a code. Notify primary health care provider to reinsert new chest tube drainage system.
Accidental disconnection of the drainage system A chest tube drainage system disconnecting from the chest tube inside the patient is an emergency. Immediately clamp the tube and place the end of chest tube in sterile water or NS. The two ends will need to be swabbed with alcohol and reconnected.
Bleeding at the insertion site Bleeding may occur after insertion of the chest tube. Apply pressure to site and monitor.
Subcutaneous emphysema Subcutaneous emphysema is painless tracking of air underneath the subcutaneous tissue. It may be seen in the chest wall, down limbs, around drain sites, or around the head or neck. When the skin is palpated, it feels similar to having tissue paper trapped beneath the skin. Monitor and report to primary health care provider.
Drainage suddenly stops and respiratory distress increases The chest tube may be clogged by a blood clot or by fluid in a dependent loop.

Assess the drainage system and the patient and notify primary health care provider if required.

Sudden increase in bright red drainage This may indicate an active bleed. Monitor amount of drainage and vital signs, and notify the primary health care provider.
Data source: ATI, 2015c; BCIT, 2015c; Perry et al., 2014; Teleflex Medical Incorporated, 2009

Heimlich Valve

A Heimlich valve (see Figures 10.7 and 10.8) is a small, specially designed flutter valve that is portable and mobile, allowing the patient to ambulate with ease. It attaches to the chest tube at one end and a drainage bag at the other. The drainage bag allows air and fluid to escape but prevents their re-entering the pleural space. The valve can be worn under clothing. The valve functions in any position, never needs to be clamped, and can be hooked up to suction if required (Gogakos et al., 2015).

Heimlich valve
Figure 10.7 Heimlich valve
End connection to chest tube; other end may be left open to air or attached to a small drainage bag
Figure 10.8 Blue end connects to chest tube; other end may be left open to air or attach to a small drainage bag

Critical Thinking Exercises

  1. What should you do if your patient’s chest tube becomes disconnected from the chest tube drainage system?
  2. When a patient has a chest tube, what emergency supplies must be at the patient’s bedside at all times?

78

10.7 Ostomy Care

An ostomy is a surgically created opening from the urinary tract or intestines, where effluent (fecal matter, urine, or mucous) is rerouted to the outside of the body using an artificially created opening called a stoma. A stoma typically protrudes above the skin, is pink to red in colour, moist, and round, with no nerve sensations. Ostomy surgeries are performed when part of the bowel or urinary system is diseased and therefore removed. The output from the stoma (urine, feces, or mucous) is called effluent.

An ostomy is named according to the part of intestine used to construct it. A colostomy is the creation of a stoma from part of the colon (large bowel), where the intestine is brought through the abdominal wall and attached to the skin, diverting normal intestinal fecal matter through the stoma instead of the anus. An ileostomy is created from the ileum (small bowel), which is brought through the abdominal wall and used to create a stoma. A urostomy or ileal conduit is a stoma created using a piece of the intestine to divert urine to the outside of the body. The ureters are sewn to a piece of the intestine, brought through the abdominal wall, and sutured to create the stoma. These surgeries are performed on patients with diseases such as cancer of the bowel or bladder, inflammatory bowel diseases (such as colitis or Crohn’s), or perforation of the colon. Emergencies that may require an ostomy include diverticulitis, trauma, necrotic bowel, or radiation complications. An ostomy may be permanent or temporary, depending on the reason for the surgery. Other types of ostomies are called jejunostomy, double-barrel ostomy, and loop ostomy (Perry et al., 2014).

Pouching Systems (Ostomy Appliances)

Individuals with colostomies, ileostomies, or urostomies have no control or sensation of frequency or output of the stoma. Patients with ostomies must wear a pouching system to collect the effluent from the stoma and protect the skin from irritation. The pouching system must be completely sealed to prevent leaking of the effluent and to protect the surrounding peristomal skin. The disposable pouching systems can be either a one-piece or a two-piece flexible system consisting of a plastic bag and a flange (skin barrier) that sit against the patient’s skin. The flange may be flat or convex. The ostomy pouch and flange come together to form one integrated, leakproof unit. The pouch has an open end to allow effluent to be drained, and may be closed using a plastic clip or Velcro strip. There are many different types of pouching systems to meet different needs. Step 2 in Checklist 87 shows ostomy supplies including a flange, an ostomy bag, and a one-piece system (Perry et al., 2104; United Ostomy Association of America, 2011).

The flange is cut to fit around the stoma without impinging on it. Ostomy pouching systems vary and are based on type of stoma, stoma characteristics, stoma location, patient abilities, skin folds, and patient preference. Depending on the type of pouching system, the system can last from four to seven days. The pouch must be changed if it is leaking, odour is present, there is excessive skin exposure, or the patient complains of itching or burning under the skin barrier. Patients with pouches can swim and take showers with the pouching system on. All patients are expected to participate in all aspects of the care of their ostomy; if they cannot, a caregiver may be taught to care for the ostomy (Perry et al., 2014).

Depending on the patient, a surgical procedure may be performed to create an internal pouch to collect feces or urine, which eliminates the need for an external pouch. The continent ileostomy is made from part of the ileum and is flushed a number of times each day to clean out the effluent. An ileoanal ostomy is a pouch created above the anal sphincter and is also created from a portion of the ileum. Two types of internal urinary diversions may be created from part of the intestine. The first is an orthotopic neobladder, where a bladder is created and placed in the body at a normal bladder position; over time, with continent training, the patient can learn to void normally. The second type is a continent urinary reservoir, where a pouch is created from part of the intestine, and a catheter is inserted a number of times during the day to remove the urine (Perry et al., 2014; United Ostomy Association of America, 2011).

Physical and Emotional Assessment

Patients may have co-morbidities that affect their ability to manage their ostomy care. Conditions such as arthritis, vision changes, Parkinson’s disease, or post-stroke complications may hinder a patient’s coordination and function to manage the ostomy. In addition, the emotional burden of coping with an ostomy may be devastating for some patients and may affect their self-esteem, body image, quality of life, and ability to be intimate. It is common for ostomy patients to struggle with body image and an altered pattern of elimination. Ensure the patient has the appropriate referrals to the wound and ostomy nurse and social workers, as well as access to support groups or online support groups. As a health care provider, be very aware of non-verbal cues: take care not to show disgust at the ostomy or at odour that may be present when changing an appliance or pouching system (Perry et al., 2014).

Checklist 87 reviews the steps to change an ostomy pouching system (ostomy appliance).

Checklist 87: Changing a Pouching System/Ostomy Appliance (Ileostomy or Colostomy)
Disclaimer: Always review and follow your hospital policy regarding this specific skill.
Safety considerations: 
  • Pouching system should be changed every 4 to 7 days, depending on the patient and type of pouch.
  • Always consult a wound care specialist or equivalent if there is skin breakdown, if the pouch leaks, or if there are other concerns related to the pouching system.
  • Patients should participate in the care of their ostomy, and health care providers should promote patient and family involvement.
  • Encourage the patient to empty the pouch when it is one-quarter to one-half full of urine, gas, or feces.
  • Ostomy product choices are based on the patient’s needs and preference.
  • Follow all post-operative assessments for new ostomies according to agency policy.
  • Medications and diet may need adjusting for new ileostomies/ colostomies.
  • An ostomy belt may be used to help hold the ostomy pouch in place.
  • Factors that affect the pouching system include sweating, high heat, moist or oily skin, and physical exercise.
  • Always treat minor skin irritations right away. Skin that is sore, wet, or red is difficult to seal with a flange for a proper leakproof fit.

Steps

 Additional Information

1. Perform hand hygiene. This prevents the spread of microorganisms.
Hand hygiene with ABHR
2. Gather supplies. Supplies include flange, ostomy bag and clip, scissors, stoma measuring guide, waterproof pad, pencil, adhesive remover for skin, skin prep, stomahesive paste or powder, wet cloth, non-sterile gloves, and additional cloths.
Ostomy supplies
Ostomy supplies
3. Identify the patient and review the procedure. Encourage the patient to participate as much as possible or observe/assist patient as they complete the procedure. Proper identification complies with agency policy.

Encouraging patients to participate helps them adjust to having an ostomy.

4. Create privacy. Place waterproof pad under pouch. The pad prevents the spilling of effluent on patient and bedsheets.
5. Apply gloves. Remove ostomy bag, and measure and empty contents. Place old pouching system in garbage bag.
Removing ostomy bag from flange-001
Remove ostomy bag from flange
6. Remove flange by gently pulling it toward the stoma. Support the skin with your other hand. An adhesive remover may be used.

If a rod is in situ, do not remove.

Gentle removal helps prevent skin tears. An adhesive remover may be used to decrease skin and hair stripping.
Removing flange-001
Remove flange

A rod may be used during the formation of a stoma. It can only be removed by a physician or wound care nurse. If a rod is in place, it can be slid to allow the pouch to be removed.

7. Clean stoma gently by wiping with warm water. Do not use soap. Aggressive cleaning can cause bleeding. If removing stoma adhesive paste from skin, use a dry cloth first.
Clean stoma and peristomal skin
8. Assess stoma and peristomal skin. A stoma should be pink to red in colour, raised above skin level, and moist.
Assess stoma
Assess stoma

Skin surrounding the stoma should be intact and free from wounds, rashes, or skin breakdown. Notify wound care nurse if you are concerned about peristomal skin.

9. Measure the stoma diameter using the measuring guide (tracing template) and cut out stoma hole.

Trace diameter of the measuring guide onto the flange, and cut on the outside of the pen marking.

The opening should be 2 mm larger than the stoma size.

Keep the measurement guide with patient supplies for future use.

Tracing template
Trace template
DSC_1284
Once size is traced onto back of flange, cut out size to fit stoma
Assess flange for proper fit to stoma
10. Prepare skin and apply accessory products as required or according to agency policy. Accessory products may include stomahesive paste, stomahesive powder, or products used to create a skin sealant to adhere pouching system to skin to prevent leaking.

Wet skin will prevent the flange from adhering to the skin.

Prepare peristomal skin for flnage-001
Peristomal skin prep
Stomahesive paste
Stomahesive paste
11. Remove inner backing on flange and apply flange over stoma. Leave the border tape on. Apply pressure. Hold in place for 1 minute to warm the flange to meld to patient’s body. Then remove outer border backing and press gently to create seal.

If rod is in situ, carefully move rod back and forth but do not pull up on rod.

The warmth of the hand can help the appliance adhere to the skin and prevent leakage.
Remove backing from flange
Apply flange around stom
Apply flange around stoma
Press gently to create seal
12. Apply the ostomy bag. Attach the clip to the bottom of the bag. This step prevents the effluent from soiling the patient or bed.
Apply ostomy pouch
Apply ostomy pouch
Attach clip to bottom of bag
13. Hold palm of hand over ostomy pouch for 2 minutes to assist with appliance adhering to skin. The flange is heat activated.
14. Clean up supplies, and place patient in a comfortable position. Remove garbage from patient’s room. Removing garbage helps decrease odour.
15. Perform hand hygiene. This minimizes the transmission of microorganisms.
16. Document procedure. Follow agency policy for documentation. Document appearance of stoma and peristomal skin, products used, and patient’s ability to tolerate procedure and assistance with procedure.
Data source: BCIT, 2015b; Berman & Snyder, 2016; Perry et al., 2014.
Special Considerations

Urostomy Care

A urostomy is similar to a fecal ostomy, but it is an artificial opening for the urinary system and the passing of urine to the outside of the abdominal wall through an artificially created hole called a stoma. A urostomy is created for the following reasons:

A urostomy patient has no voluntary control of urine, and a pouching system must be used and emptied regularly. Many patients empty their urostomy bag every two to four hours, or as often as they regularly used the bathroom prior to their surgery. Urostomy pouches (see Figure 10.9) have a drain at the end, and the pouch should be emptied when one-third full. The pouch may also be attached to a drainage bag for overnight drainage. Patients with a urostomy are more at risk for urinary tract infections (UTIs) and should be educated on the signs and symptoms of such infections (Perry et al., 2014).

Urostomy pouch
Figure 10.9 Urostomy pouch

Checklist 88 describes how to change a urostomy pouch.

Checklist 88: Changing a Urostomy Pouch/Appliance
Disclaimer: Always review and follow your hospital policy regarding this specific skill.
Safety considerations: 
  • Urine flows continually from a urostomy; thus, applying a pouch is more challenging than applying a regular ostomy.
  • A stent is usually placed in the stoma post-operatively to prevent stenosis of the ureters. The stents are usually removed in the hospital or at the first physician visit.
  • Sterile technique must be used when changing a urostomy pouch on a new urostomy. Always follow agency policy.
  • Since bacteria grow readily in urine, it is important to empty the pouch regularly and use a pouch with an anti-reflux valve to prevent backup of urine into the urostomy.
  • An ostomy belt may be used to hold the pouch in place.
  • A urostomy pouch should be changed every three to seven days, depending on the supplies used. It is best to change it before it leaks.
  • It is best to wait one or two hours after drinking fluids to change a urostomy appliance.
  • Sterile supplies are used in acute care with a fresh post-surgical urostomy. A patient in the community may not use sterile supplies, but strict adherence to proper hand hygiene is required to prevent infections of the bladder, kidney, or urinary tract.
  • Never place anything inside the stoma.
  • Bacteria can rapidly replicate and cause an infection. Educate the patient on the importance of proper hand hygiene and keeping supplies clean.
  • Factors that affect the pouching system include sweating, high heat, moist or oily skin, and physical exercise.
  • Always treat minor skin irritations right away. Skin that is sore, wet, or red is difficult to seal with a flange for a proper leakproof fit.

Steps

 Additional Information

1. Perform hand hygiene and collect supplies. Hand hygiene reduces the transmission of microorganisms.

Supplies include urostomy bag (one- or two-piece system), measuring guide, urinary collection bag, non-sterile gloves, scissors, pencil, adhesive remover, skin barrier pad, wick made from sterile gauze (rolled 2 x 2 gauze), waterproof garbage bag, waterproof pad, cleaning cloth, and drying cloth.

2. Identify the patient and review the procedure. Encourage patient to participate as much as possible or observe/assist as they complete the procedure. Proper identification complies with agency policy.

Encouraging patients to participate helps them adjust to having an ostomy.

3. Create privacy and place waterproof pad under pouch. This maintains patient dignity and the pad protects the patient’s bed.
4. Apply non-sterile gloves. Empty and measure urostomy contents. Discard old urostomy pouch. A full urostomy bag may spill on the patient or bed.
5. Remove flange by gently pulling it toward the stoma. Support the skin with your other hand. An adhesive remover may be used. If stent is in place, do not remove it. Gentle removal helps prevent skin tears. An adhesive remover may be used to decrease skin and hair stripping.
6. Place rolled gauze at stoma opening. Maintain gauze at the stoma opening continuously during pouch measurement and change. This prevents urine from spilling on cleaned skin and new pouching system.
7. While keeping rolled gauze in contact with the stoma, cleanse peristomal skin gently with warm tap water using washcloth; do not scrub skin. If you touch stoma, minor bleeding is normal. Pat skin dry. Aggressive cleaning can cause bleeding. If removing stomahesive paste from skin, use a dry cloth first.
8. Assess stoma and peristomal skin. A stoma should be pink to red in colour, raised above skin level, and moist.

Skin surrounding the stoma should be intact and free from wounds, rashes, or skin breakdown. Notify wound care nurse if concerned about peristomal skin.

9. Measure the stoma diameter using the measuring guide (tracing template) and cut out stoma hole.

Trace diameter of the measuring guide onto the flange and cut on the outside of the pen marking.

Customizing the opening of the flange is important to ensure proper fit and prevent leakage.The opening should be 2 mm larger than the stoma.

Keep the measurement guide with patient supplies for future use.

10. Prepare the skin and apply accessory products as required or according to agency policy. Accessory products may include stomahesive paste, stomahesive powder, or products used to create a skin sealant to adhere pouching system to skin to prevent leaking.

Wet skin will not allow for proper adhesion of flange.

11. Remove inner backing on flange. Prepare flange to be placed on stoma.
12. Remove wick from stoma and apply flange around stoma. Leave the border tape on. Apply pressure. Hold in place for 1 minute to warm the flange to meld to patient’s body. Then remove border backing and attach to patient. The flange is heat activated.
13. Apply the urostomy bag by ensuring the drain is turned to the “off” position, or connect the urostomy bag to a drainage bag at the bedside. This prevents effluent from soiling the patient or bed.

If drainage bag is used, ensure the bag is hanging below the urostomy to prevent backflow of urine into the stoma.

14. Hold palm of hand over pouch for 2 minutes to assist with appliance adhering to skin. Pouches are heat activated and adhere more effectively when heat is applied.
15. Remove waterproof pad, clean up supplies, place patient in a comfortable position, and perform hand hygiene. This step prevents contamination from equipment and reduces the transmission of microorganisms.
Data source: BCIT, 2015b; Perry et al., 2014; Vancouver Coastal Health, 2014b
Special Considerations:

Critical Thinking Exercises

  1. What dietary or medication changes might be considered for a patient who has a new ileostomy and no longer has a small bowel?
  2. A patient with a new colostomy refuses to look at his stoma or participate in changing the pouching system. What are some suggestions to help your patient adjust to the stoma?

79

10.8 Summary

When patients have tubes and attachments to aid in their recovery, health care providers are required to understand the type, purpose, precautions, complications, and interventions to ensure treatment is effective and to prevent patient harm. Each tube and attachment is unique, and the function of the tube, care of the patient, and safety precautions must be understood. This chapter reviewed many common types of tubes and attachments found in the acute and community setting, and reviewed the care and maintenance of nasogastric tubes, indwelling catheters, ostomies, urostomies, chest tube drainage systems, and tracheostomies.

Key Takeaways

  • Specific guidelines and procedures must be followed when working with tubes and attachments to prevent complications from the device.
  • Patients with tubes and attachments are more at risk for infection. Take care to maintain sterility of all tubes and ensure device insertion sites stay dry and intact, and all connection points stay intact.
  • Be aware of potential complications of each tube and attachment, and prevention strategies. Regularly assess the patient and the device for complications.
  • If unfamiliar with a specific device, review all policies and procedures prior to using the device to prevent harm to the patient.
  • Know the purpose, type, and special precautions for all tubes and devices that are used in your agency. Complete all training as required.

 Suggested Online Resources

  1. ATI Nursing Education: Airway management. This resource provides information and videos on the types of airway management devices, suctioning (open and inline), and endotracheal and tracheostomy care.
  2. ATI Nursing Education: Closed chest tube drainage systems. This resource provides information and videos on the types of chest tube drainage systems, how to manage a chest tube, how to manage complications, how to replace a closed chest tube drainage system, and how to change a dressing on a chest tube insertion site.
  3. ATI Nursing Education: Nasogastric intubation. This resource provides information and videos on the insertion, care, gastric compression, and removal of an NG tube.
  4. ATI Nursing Education: Ostomy care. This resource provides information on caring for an ostomy and urostomy, draining an ostomy, changing a pouching system, and colostomy irrigation.
  5. ATI Nursing Education: Urinary catheter care. This resource provides information and videos on the insertion of indwelling and straight catheters, applying a condom catheter, and removing an indwelling catheter.
  6. Ostomy Canada Society: Library of ostomy information. This is a resource for individuals and their families living with ostomies. The website contains up-to-date information on ostomy care, research, new items, blogs, events, information about ostomy supplies, support and advocacy groups, healthy living tips, and personal journeys and stories about individuals living with ostomies.

References

ATI. (2015a). Inserting a nasogastic tube. Retrieved from ATI Nursing Education: Nasogastric intubation. http://www.atitesting.com/ati_next_gen/skillsmodules/content/nasogastric-intubation/viewing/insert-naso-tube.html?id=undefined

ATI. (2015b). Tracheostomy care. Retrieved from ATI Nursing Education: Airway management. Retrieved on Aug 24, 2015, from http://www.atitesting.com/ati_next_gen/skillsmodules/content/airway-management/viewing/trach_care.html

ATI. (2015c). Managing complications. Retrieved from ATI Nursing Education. Closed chest drainage. Retrieved on Aug 24, 2015, from http://www.atitesting.com/ati_next_gen/skillsmodules/content/closed-chest-drainage/equipment/managing.html

Bauman, M., & Handley, C. (2011). Chest tube care: The more you know, the easier it gets. Retrieved on Aug 26, 2015, from http://www.americannursetoday.com/assets/0/434/436/440/8172/8174/8176/8256/1d298438-82c6-439d-8b2e-77ffaf165fca.pdf

Berman, A., & Snyder S. J. (2016). Skills in clinical nursing (8th ed.). New Jersey, New York: Pearson.

British Columbia Institute of Technology (BCIT). (2015a). NURS 1186: Patient care for sonography. Vancouver: BCIT.

British Columbia Institute of Technology (BCIT). (2015b). NURS 2020: Clinical techniques. Vancouver: BCIT.

British Columbia Institute of Technology (BCIT). (2015c). NURS 3020: Clinical techniques. Vancouver: BCIT.

Centers for Disease Control and Prevention. (2015). Healthcare associated infections. Retrieved on Aug 26, 2015, from http://www.cdc.gov/HAI/ca_uti/uti.html

Durai, R., Hoque, H., & Davies, T. W. (2010). Managing a chest tube and drainage system. Retrieved on Aug 26, 2015, from http://www.ncbi.nlm.nih.gov/pubmed/20152201

Gogakos, A. et al. (2015). Heimlich valve and pneumothorax. Retrieved on Aug 26, 2015, from http://www.ncbi.nlm.nih.gov/pmc/articles/PMC4381465/

Gould, C. V., Umscheid, C. A., Agarwal, R. K., Kuntz, G., Pegues, D. A., & Healthcare Infection Control Practice Advisory Committee. (2009). Guidelines for Prevention of Catheter Associated Urinary Tract Infections 2009. Center for Disease Control. Retrieved on Aug 26, 2015 from www.cdc.gov/hicpac/pdf/CAUTI/CAUTIguideline2009final.pdf

Halm, M. A. (2007). To strip or not to strip? Physiological effects of chest tube manipulation. Retrieved on Aug 26, 2015, from http://ajcc.aacnjournals.org/content/16/6/609.full

Halm, M., & Krisko-Hagel, K. (2008). Instilling normal saline with suctioning: Beneficial technique or potentially harmful sacred cow? American journal of critical care, 17(5), 469-472.

Morris, L. L., Whitmer, A., & McIntosh, E. (2013). Tracheostomy care and complications in the intensive care unit. Retrieved on Aug 26, 2015, from http://www.aacn.org/wd/Cetests/media/C135.pdf

Ostomy Canada Society. (n.d.). Passing gas with an ostomy. Retrieved on Aug 24, 2015, from http://stolencolon.com/passing-gas-farting-ostomy/

Perry, A. G., Potter, P. A., & Ostendorf, W. R. (2014). Clinical skills and nursing techniques (8th ed.). St Louis, MO: Elsevier-Mosby.

Rajan, C. S. (2013). Tube thoracostomy management. Retrieved on Aug 26, 2015, from http://emedicine.medscape.com/article/1503275-overview#a7

Registered Nurses Association of Ontario. (2009). Ostomy care and management. Toronto: Registered Nurses Association of Ontario.

Salmon, N., Lynch, S., & Muck, K. (2013). Chest tube management. Retrieved on Aug 26, 2015, from http://ajcc.aacnjournals.org/content/16/6/609.full

Teleflex Medical Incorporated. (2009). Chest drainage systems. Retrieved on Aug 26, 2015, from http://www.teleflex.com/en/usa/ucd/chest_drainage_systems.php

United Ostomy Association of America. (2011). Ileostomy guide. Retrieved on Aug 24, 2015, from http://www.ostomy.org/uploaded/files/ostomy_info/IleostomyGuide.pdf?direct=1

Vancouver Coastal Health. (2006). Tracheostomy and endotracheal tubes – suctioning. Vancouver: Vancouver Coastal Health.

Vancouver Coastal Health. (2012a). Tracheostomy: Care and management of a patient with a tracheostoma. Vancouver: Vancouver Coastal Health.

Vancouver Coastal Health. (2012b). Tracheostomy tubes: Dressing changes and inner cannula cleaning. Vancouver: Vancouver Coastal Health.

VCH Professional Practice. (2014). Indwelling urinary catheter: Procedure for insertion and removal (adult). Vancouver: Vancouver Coastal Health.

1

Appendix 1: Glossary

Glossary

  • 2 x 2: Small, commonly used gauze pad measuring 2 inches by 2 inches, or approximately 5 cm x 5 cm.
  • 4 x 4: Medium size, commonly used gauze pad measuring 4 inches by 4 inches, or approximately 10 cm x 10 cm.
  • Absorption atelectasis: A form of lung collapse that occurs when high concentrations of oxygen displace nitrogen in the alveoli and, as a result, reduce alveolar volume.
  • Additional precautions: Practices in addition to routine practices for certain pathogens or clinical presentations. These precautions are based on the type of transmission, such as contact, droplet, or airborne.
  • Adverse reaction (also known as adverse event): An undesirable effect of any health product such as prescription and non-prescription pharmaceuticals, vaccines, serums, and blood-derived products, cells, tissues, and organs; disinfectants; and radiopharmaceuticals. An adverse reaction may occur under normal use and conditions of the product.
  • Air embolism: The presence of air in the vascular system that occurs when air is introduced into the venous system and travels to the right ventricle and/or pulmonary circulation.
  • Airborne precautions: Precautions used in addition to routine practices for patients with known or suspected illness that is transmitted by the airborne route.
  • Alcohol-based hand rub (ABHR): A liquid, foam, or gel formation of an alcohol-based solution used to reduce the number of microorganisms on the hands when the hands are not visibly soiled. A form of hand hygiene.
  • Ambulation: Moving from one place to another.
  • Ampule: A glass container that holds a single dose of medication in liquid form in 1 ml to 10 ml sizes.
  • Antibiotic-resistant organisms (ARO): Microorganisms that have developed resistance to the action of various antibiotic agents. Common AROs are MRSA and VRE.
  • Arterial blood gas (ABG): Analysis of an arterial blood sample to evaluate the adequacy of ventilation, oxygen delivery to the tissues, and acid-base balance status.
  • Asepsis: The absence of infectious material (microorganisms) or infection.
  • Aspiration: The action of pulling back on the plunger of a syringe for 5 to 10 seconds prior to injecting medication.
  • Assistive device: An object or piece of equipment designed to help a patient with activities of daily living, such as a walker, cane, gait belt, or mechanical lifts.
  • Base of support: The space between the feet that bears the weight of the body, and the centre of gravity that falls within the base of support.
  • Blood or body fluid (BBF) exposure: A splash or puncture exposing you to another person’s blood, urine, feces, vomit, or secretions.
  • Body alignment: The optimal placement of the body parts, working with the pull of gravity to contribute to body balance. Without this balance, the risk of falls and injuries increases.
  • Body balance: A state of equilibrium achieved by creating a wide base of support, the space between the feet that bears the weight of the body, and the centre of gravity that falls within the base of support.
  • Body mechanics: The coordinated effort of muscles, bones, and the nervous system to maintain balance, posture, and alignment during moving, transferring, and positioning patients.
  • British Columbia Patient Safety and Learning System (BCPSLS): A web-based tool used to report and learn about safety events, near misses, and hazards in health care settings.
  • C & S swab: Swab for culture and sensitivity blood test to determine if a bacterial infection is present in the blood.
  • Capillary refill: The process whereby blood returns to a portion of the capillary system after its blood supply has been interrupted briefly. For example, depress the nail edge to cause blanching and then release. Colour should return to the nail instantly or in less than three seconds. If it takes longer than three seconds, this suggests decreased peripheral perfusion and may indicate cardiovascular or respiratory dysfunction.
  • Catheter embolism: Occurs when a small part of the cannula breaks off and flows into the vascular system.
  • Catheter-related blood stream infection (CR-BSI): An infection caused by microorganisms that are introduced into the blood through the puncture site, the hub of the needle, or contaminated IV tubing or IV solution, leading to bacteremia or sepsis.
  • Catheter-related thrombosis (CRT): The development of a blood clot related to long-term use of CVCs. Mostly occurs in the upper extremities and can lead to further complications such as pulmonary embolism, post thrombotic syndrome, and vascular compromise.
  • Central venous catheter (CVC) (also known as central line or central venous access device): An intravenous catheter that is inserted into a large vein in the central circulation system, where the tip of the catheter terminates in the superior vena cava (SVC).
  • Centre of gravity: The point at which the mass of a body or object is centred when weight on all sides is equal.
  • Cerebral vascular accident (CVA): Also known as a stroke, a CVA is the interruption of blood flow to the brain (i.e., an ischemic stroke) or the rupture of a blood vessel (i.e., a hemorrhagic stroke) causing brain cells in the affected area to die. This event usually results in the loss of some brain function.
  • Chain of infection: The transmission of microorganisms and subsequent infections is often referred to as the chain of infection. This infectious process can be thought of as a circular chain with six links that represent the specific circumstances needed for the infectious process to occur.
  • Chest tube: A sterile tube with a number of drainage holes that is inserted into the pleural space. Also known as a thoracic catheter.
  • Chest tube drainage system: A sterile, disposable system that consists of a compartment system that has a one-way valve, with one or multiple chambers, to remove air or fluid and prevent return of the air or fluid back into the patient.
  • Clean technique: See medical asepsis.
  • Clostridium difficile infection (CDI): Infection caused by a bacterium that causes mild to severe intestinal problems and diarrhea. It is the most frequent cause of diarrhea in the hospital setting.
  • Clubbing: A description of nails, usually presenting in the early stages as being straightened out to 180 degrees, with the nail base feeling spongy. Clubbing occurs with heart disease, emphysema, and chronic bronchitis.
  • Cohorting: Placing patients with the same infections in the same room if a private room is not available.
  • Colloid solutions: Solutions made up of large molecules that cannot pass through semi-permeable membranes and are used to expand intravascular volume by drawing fluid from extravascular space via high osmotic pressure. Examples include albumin, dextrans, and hydroxyethyl starches.
  • Colostomy: The creation of a stoma from part of the colon (large bowel), where the intestine is brought through the abdominal wall and attached to the skin, diverting normal intestinal fecal matter through the stoma instead of the anus.
  • Contact precautions: Precautions used in addition to routine practice for patients who are known or suspected to be infected with microorganisms that can be transferred by the direct or indirect contact route.
  • Continent ileostomy: Made from part of the ileum and is flushed a number of times each day to clean out the effluent.
  • Continent urinary reservoir: Where a pouch is created from part of the intestine, and a catheter is inserted a number of times during the day to remove the urine.
  • Continuous intravenous infusion: The infusion of a parenteral drug over several hours (continuous drip) to days. It involves adding medication to sterile IV solution (100-1,000 ml bag) and hanging the IV solution as a primary infusion.
  • Crystalloids solutions: Solutions made up of solutes such as electrolytes or dextrose that are easily mixed and dissolvable in solution. Crystalloids contain small molecules that flow easily across semi-permeable membranes, which allows for transfer from the bloodstream into the cells and tissues.
  • CWMS: An initialism used to remember “colour, warmth, movement, sensation of extremities.”
  • Cyanosis: A bluish, mottled discoloration that signifies decreased perfusion and indicates that the tissues are not being adequately oxygenated.
  • D50W: Fifty-percent dextrose in water.
  • D5W: Five-percent dextrose in water.
  • Dacron cuff: An antimicrobial cuff surrounding a tunnelled CVC near the entry site, which is coated in antimicrobial solution to help prevent infection and holds the CVC in place.
  • Deep venous thrombosis (DVT): The formation of a blood clot within a deep vein, predominantly in the legs.
  • Droplet precautions: Precautions used in addition to routine practices for patients who are known or suspected to be infected with microorganisms that are spread by large droplets.
  • Effluent: The output from the stoma (urine, feces, or mucous).
  • Extension tubing: Short, 20 cm, flexible sterile tube with a positive fluid displacement/positive pressure cap attached to the hub of the peripheral cannula.
  • Extravasation: When vesicant solutions (medication) are administered and inadvertently leaked into surrounding tissue, causing damage to surrounding tissue.
  • Fowler’s position: The patient’s head of bed is placed at a 45-degree angle. Hips may or may not be flexed. Common position to provide patient comfort and care.
  • Fraction of inspired oxygen (FiO2): Fraction or percentage of oxygen being measured. Natural air includes 20.9% oxygen, which is equivalent to FiO2 of 0.21.
  • Gait belt or Transfer belt: A two-inch-wide (5 mm) belt, with or without handles, that is placed around a patient’s waist and fastened with Velcro. A transfer belt can be used with patients who are a one-person pivot transfer, a two-person pivot transfer, or a transfer with a slider board.
  • Gauge of a needle: The diameter of the needle.
  • Gestational diabetes: A form of diabetes that develops in women during pregnancy and disappears after delivery. Gestational diabetes affects about 4% of all pregnancies and increases the risk of developing Type 2 diabetes.
  • Hand hygiene: A general term used to describe any action of hand cleaning. It refers to the removal of soil and oil, and the killing or removal of transient microorganisms from the hands. Hand hygiene may be accomplished using an alcohol-based hand rub or soap and water. Surgical hand scrub is also a method of hand hygiene.
  • Hand hygiene with soap and water: Hand hygiene using friction, soap, and water to remove microorganisms from hands.
  • Health care associated infection (HAI): An infection that develops as a result of contact with a pathogen in the health care setting or from a health care worker, that was not present at the time of admission. Also known as a nosocomial infection.
  • High alert medications: Medications that are most likely to cause significant harm, even when used as intended. Mistakes may or may not be more common with high alert medications, but the harm to patients is more serious.
  • Hypertonic solution: An IV solution that has a higher osmolality than plasma (serum), with an osmolality greater than 375 mOsm/L.
  • Hypotonic solution: A solution that has an osmolality of less than 25 mOsm/L, a lower osmolality than intravascular space.
  • Hypoxemia: A condition where arterial oxygen tension or partial pressure of oxygen (PaO2) is below normal (<80 mmHg).
  • Hypoxia: The reduction of oxygen supply at the tissue level, which is not measured directly by a laboratory value but by pulse oximetry and SpO2.
  • Hypoxic drive: A condition found in some patients with a chronically high level of PaCO2, such as those with chronic obstructive pulmonary disease (COPD), where the stimulus and drive to breathe is caused by a decrease in PaO2, not by an increase of CO2.
  • Ileal conduit: See urostomy.
  • Ileoanal ostomy: A pouch created above the anal sphincter and is also created from a portion of the ileum.
  • Ileostomy: Created from the ileum (small bowel), which is brought through the abdominal wall and used to create a stoma.
  • Implanted central venous catheter (ICVC): A CVC inserted into a vessel, body cavity, or organ and attached to a reservoir or “port” located under the skin. The device may be placed in the chest, abdomen, or inner aspect of the forearms. Also known as an implanted venous access device (IVAD), port a catheter, or port a cath.
  • Infection prevention and control (IPAC) practices: Evidence-based procedures and practices that, when used consistently in a health care setting, can prevent and reduce disease transmission, eliminate sources of potential infections, and prevent the transfer of pathogens from one person to another.
  • Infiltration: When non-vesicant solutions (IV solutions) are inadvertently administered into surrounding tissue.
  • Injection pens: A new technology used by patients to self-inject insulin using a syringe, needle, and pre-filled cartridge of insulin.
  • Intradermal (ID) injection: An injection that places the medication into the dermis, just under the epidermis.
  • Intramuscular (IM) injection: An injection that places the medication into the body of a muscle.
  • Intravenous (IV) injection: An injection that places the medication/solution into a vein through an existing IV line or a short venous access device (saline lock). Medications given by the intravenous route can be given as an IV bolus, as an intermittent (piggyback) medication, or in a large-volume continuous infusion.
  • Intravenous therapy: Treatment that infuses intravenous solutions, medications, blood, or blood products directly into a vein.
  • Isotonic solution: A solution in which the concentration of the dissolved particles is similar to that of plasma, with an osmolality of 250 to 375 mOsm/L.
  • Keloid formation: A firm scar-like mass of tissue that occurs at the wound site. The scarring tends to extend past the wound and is darker in appearance.
  • Kussmaul respiration: Deep, rapid, and laboured breathing that is characteristic of patients with acidosis (excess acidity of tissues).
  • Lateral position: The patient lies on the side of the body with the top leg over the bottom leg. This position helps relieve pressure on the coccyx.
  • Latex allergy: A reaction to latex products made from natural rubber in which people become allergic (or sensitive) to the proteins found in natural rubber.
  • Line of gravity: The vertical line extending from the centre of gravity to the base of support, down the centre of the body. If the line of gravity moves outside the base of support, the amount of energy required to maintain equilibrium is increased.
  • Lumen: A small, hollow channel within the CVC tube.
  • Mechanical lift: A hydraulic lift, usually attached to a ceiling, used to move patients who cannot bear weight, who are unpredictable or unreliable, or who have a medical condition that does not allow them to stand or assist with moving.
  • Medical asepsis (also known as clean technique): Includes procedures used for reducing the number of microorganisms and preventing their spread.
  • Medication incident: Any preventable event that may cause or lead to inappropriate medication use or patient harm while the medication is in the control of the health care professional, patient, or consumer.
  • Methicillin-resistant Staphylococcus aureus (MRSA): A strain of Staphylococcus aureus that is resistant to beta-lactam classes of antibiotics such as penicillin, cloxacillin, and cephalosporin.
  • Musculoskeletal injury (MSI): An injury or disorder of the muscles, tendons, ligaments, joints or nerves, blood vessels, or related soft tissue including a sprain, strain, or inflammation related to a work injury.
  • Nasogastric (NG) tube: A flexible plastic tube inserted through the nostrils, down the nasopharynx, and into the stomach or the upper portion of the small intestine.
  • Needles: Hollow cylindrical objects, made of stainless steel, with a sharp point used to inject medications into or draw fluids from the body. Needles are made up of the hub, shaft, and bevel.
  • No-Interruption Zone (NIZ): A place where health care providers can prepare medications without interruptions.
  • Nosocomial infection: See health care associated infection (HAI).
  • Obturator: A small plastic device used as a guide during tracheostomy tube insertion.
  • Oral suctioning: The use of a rigid, plastic suction catheter, known as a yankauer, to remove pharyngeal secretions through the mouth.
  • Orthopneic or tripod position: The patient sits at the side of the bed with head resting on an over-bed table on top of several pillows. This position is used for patients with breathing difficulties.
  • Orthostatic hypotension: A form of low blood pressure that occurs when changing position from lying down to sitting, making the patient feel dizzy, faint, or lightheaded.
  • Ostomy: A surgically created opening from the urinary tract or intestines, where effluent (fecal matter, urine, or mucous) is rerouted to the outside of the body using an artificially created opening called a stoma.
  • Oxygen therapy: Treatment to provide oxygen according to target saturation rates (as per physician orders or hospital protocol) in order to achieve normal or near normal oxygenation saturation levels for acute and chronically ill patients.
  • Oxygen toxicity: A condition caused by excessive or inappropriate supplemental oxygen, which can lead to severe damage to the lungs — ranging from mild tracheobronchitis to diffuse alveolar damage — and other organ systems.
  • Parenteral medications: Refers to the path by which the medication comes in contact with the body. Medications that enter the body by the parenteral route enter the tissue and circulatory system by injection.
  • PaCO2: The partial pressure of carbon dioxide in the arterial blood, which is measured by using a PaCO2 analyzer.
  • Percutaneous central venous catheter: A CVC inserted directly through the skin into the internal or external jugular, subclavian, or femoral vein. The tip of the catheter is located in the superior vena cava (SVC).
  • Peripheral IV (PIV): A short intravenous catheter inserted by percutaneous venipuncture into a peripheral vein.
  • Peripherally inserted central catheter (PICC): A central line inserted through the antecubital fossa or upper arm (basilic or cephalic vein) and threaded the full length until the tip reaches the superior vena cava (SVC).
  • Personal protective equipment (PPE): Clothing or equipment worn to protect against hazards.
  • Phlebitis: The inflammation of the vein’s inner lining, the tunica intima.
  • Pinch-off syndrome: An internal pinching of a central line between the first rib and clavicle; can contribute to a mechanical occlusion of a CVC.
  • Port a catheter/port a cath: See implanted central venous catheter (ICVC).
  • Primary infusion tubing/administration set: A thin, flexible plastic sterile tubing used to infuse IV therapy.
  • Primary intention: A type of wound healing where the wound edges are sutured or stapled closed, and the wound heals quickly with minimal tissue loss. Examples of wounds healing by primary intention are simple surgical wounds that heal without complications.
  • p.r.n.: From the Latin pro re nata and means “as needed.”
  • Prone position: When the patient lies on the stomach with the head turned to the side.
  • Pulmonary edema (also known as circulatory overload or fluid overload): A condition caused by excess fluid accumulation in the lungs, due to excessive fluid in the circulatory system.
  • Refeeding syndrome: Caused by rapid refeeding after a period of under-nutrition, leads to metabolic and hormonal changes characterized by electrolyte shifts (decreased phosphate, magnesium, and potassium in serum levels), which may lead to widespread cellular dysfunction.
  • Routine practices: A system of prevention and control practices recommended by the Public Agency of Canada to be used for all patients/residents/clients during all care to prevent and control all transmission of microorganisms in all health care settings.
  • Saline lock (also known as heparin lock): A peripheral intravenous cannula with extension tubing attached to the hub, usually inserted in the arm or hand.
  • Secondary intention: A type of wound healing where the wound is left open to heal by scar formation. Healing is slow, which places the patient at risk for infection, there is a loss of skin, and granulation tissue fills the area left open. Examples of wounds healing by secondary intention include severe lacerations or massive surgical interventions.
  • Secondary tubing administration set: Flexible, sterile tubing used to hang a secondary IV medication, which connects to an access port on the primary IV tubing.
  • Semi-Fowler’s position: The patient’s head of bed is placed at a 30-degree angle. This position is used for patients who have cardiac or respiratory conditions, and for patients with a nasogastric tube.
  • Sims position: Patient lies between supine and prone with legs flexed in front of the patient. Arms should be comfortably placed beside the patient, not underneath.
  • Slider board or Transfer board: Board used to transfer immobile patients from one surface to another surface while the patient lies supine. The board allows health care providers to move immobile, bariatric, or complex patients in a safe manner.
  • Speed shock: A systemic reaction caused by the rapid injection of a medication into the circulatory system, resulting in toxic levels of medication in the plasma.
  • Sterile asepsis: See sterile technique.
  • Sterile field: A sterile surface on which to place sterile equipment that is considered free from microorganisms.
  • Sterile gloves: Gloves that are free from all microorganisms; required for contact with any invasive procedure and when contact with any sterile site, tissue, or body cavity is expected.
  • Sterile technique (also known as sterile asepsis): A set of specific practices and procedures performed to make equipment and areas free from all microorganisms and to maintain that sterility.
  • Stoma: See ostomy.
  • Subcutaneous (SC) injection: An injection that places medication/solution into the loose connective tissues just under the dermis.
  • Supine position: In this position, patients lie flat on their back. Additional supportive devices may be added for comfort.
  • Surgical asepsis: The absence of all microorganisms within any type of invasive procedure.
  • Surgical hand scrub: An antiseptic surgical scrub or antiseptic hand rub performed prior to donning surgical attire.
  • Surgical site infection (SSI): An infection that occurs after surgery in the area of surgery.
  • Syringe: A sterile, single-use device with a Luer lock or non-Luer lock tip, which influences the name of the syringe. Syringes come in various sizes from 0.5 ml to 60 ml.
  • Tertiary intention: A type of wound healing where the wound closing is intentionally delayed. On occasion, wounds are left open (covered by a sterile dressing) to allow an infection or inflammation to subside. Once the wound is closed with staples or sutures, the scarring is minimal.
  • Total parenteral nutrition (TPN): The infusion of nutrients, including amino acids, vitamins, electrolytes, dextrose, fat, and trace elements. It is most commonly administered through a central venous catheter.
  • Transfers: Moving a patient from one flat surface to another, such as from a bed to a stretcher.
  • Transfusion medical services (TMS): Blood bank.
  • Trendelenburg position: A position that places the head of the bed lower than the feet. Used in situations such as hypotension and medical emergencies. Helps promote venous return to major organs such as the head and heart.
  • Tunnelled central venous catheter: A long-term CVC with a proximal end tunnelled subcutaneously from the insertion site and brought out through the skin at an exit site. It is a surgical procedure, where the catheter is tunnelled subcutaneously under the skin in the chest area before it enters the superior vena cava (SVC).
  • Type 1 diabetes: A condition that usually develops in childhood or adolescence, and used to be called juvenile-onset diabetes. It occurs when the beta cells of the pancreas are destroyed by the immune system and no longer produce insulin, or produce very little insulin.
  • Type 2 diabetes: A condition that used to be called non-insulin-dependent diabetes or adult-onset diabetes. With Type 2 diabetes, the body does not make enough insulin or does not respond well to the insulin it makes.
  • Urostomy or ileal conduit: A stoma created using a piece of the intestine to divert urine to the outside of the body.
  • Vancomycin-resistant Enterococci (VRE): Strains of Enterococcus faecium or Enterococcus faecalis that are resistant to antibiotics. A type of ARO.
  • Vertigo: A sensation of dizziness.
  • Vial: A single- or multi-dose plastic container with a rubber seal top, covered by a metal or plastic cap.
  • Volume-controlled intermittent set: A small device attached below the primary infusion to regulate the mini bag. The medication is added to a small amount of IV solution and administered through an IV line.
  • Workaround: A process that bypasses a procedure, policy, or problem in a system. For example, nurses may “borrow” a medication from another patient while waiting for an order to be filled by the pharmacy.
  • Wound dehiscence: A mechanical failure of wound healing; remains a problem and can be affected by multiple factors.
  • Z-Track method: A method of administrating an intramuscular injection that prevents the tracking of the medication through the subcutaneous tissue and seals the medication in the muscle, minimizing irritation from the medication.

2

Appendix 2: Checklists Summary

Chapter 1

Chapter 2

Chapter 3

Chapter 4

Chapter 5

Chapter 6

Chapter 7

Chapter 8

Chapter 9

Chapter 10

3

Appendix 3: Videos Summary

The videos listed below and placed throughout this textbook are from  Clinical Procedures for Safer Patient Care – Thompson Rivers University Edition by Renée Anderson licensed under a Creative Commons Attribution 4.0 International License.

Chapter 1

Chapter 2

Chapter 3

Chapter 4

Chapter 5

Chapter 7

Chapter 8

Chapter 10

4

About the Authors

Glynda Rees Doyle

Glynda_OER

Glynda Rees Doyle teaches at the British Columbia Institute of Technology (BCIT) in Vancouver, British Columbia. She completed her MSN at the University of British Columbia with a focus on education and health informatics, and her BSN at the University of Cape Town in South Africa. Glynda has many years of national and international clinical experience in critical care units in South Africa, the UK, and the USA. Her teaching background has focused on clinical education, problem-based learning, clinical techniques, and pharmacology.

Glynda is involved in several interprofessional research projects within BCIT and also in collaboration with other Canadian nursing schools, studying the impact of mobile devices laden with clinical resources, social networks, and e-portfolios on nursing students and their education. Her interests include the integration of health informatics in undergraduate education, and the impact of educational technologies on nursing students’ clinical judgment and decision making at the point of care to improve patient safety and quality of care.

Glynda currently sits on the Research Ethics Board at BCIT, is a digital health peer leader for the Canadian Association of Schools of Nursing and Canada Health Infoway, the communications director for the Canadian Nursing Informatics Association, and a member of the American Medical Informatics Association’s Education and Nursing Informatics Working Groups.

Jodie Anita McCutcheon

Bookpic #1
Jodie McCutcheon teaches in the undergraduate BSN program at the British Columbia Institute of Technology (BCIT). She is currently the nursing lab coordinator for the BSN program. She completed her BSN at the University of Victoria and came to BCIT to teach with experience in medical, geriatric, and cardiac nursing, as well as leadership experience as a nurse educator and clinical coordinator at VGH. She completed her MSN at the University of British Columbia with a focus on clinical education and online learning.

Jodie chose to become an educator because she wanted to impact the future of nursing by preparing individuals to practise safely and effectively in a complex health care environment. Jodie has many years of teaching experience in problem-based learning, skill acquisition, and course development for the nursing program and allied health care programs at BCIT. Her interests include lab education and simulation as effective teaching strategies to promote learning. Jodie is involved in many Interprofessional Education (IPE) projects at BCIT. Her primary passion in nursing education is the promotion of patient safety and quality initiatives and teaching strategies in the School of Health Sciences at BCIT. She is the co-chair of the patient safety and quality committee in the BSN program and has brought various safety initiatives to BCIT, including Change Day and Canadian Patient Safety Week. Jodie is a member of the BC Lab Educators committee, Western and Northern Region Canadian Association of Schools of Nursing, and the International Nursing Association for Clinical Simulation and Learning.

5

Versioning History

This page provides a record of edits and changes made to this book since its initial publication. Whenever edits or updates are made in the text, we provide a record and description of those changes here. If the change is minor, the version number increases by 0.01. If the edits involve substantial updates, the version number increases to the next full number

The files posted by this book always reflect the most recent version. If you find an error in this book, please fill out the Report an Open Textbook Error form.

 Version Date Change Details
1.00 November 24, 2015 Book published.
1.01 May 16, 2018 Several broken video links were removed and replaced with text suggesting the student watch a video or demonstration for the cited skill.
1.02 November 16, 2018 Made correction to section 7.4. Replaced “NEVER give an IM injection in the dorsogluteal muscle. If a needle hits the sciatic nerve, the patient may experience partial or permanent paralysis of the leg.”

with

“The dorsogluteal site should be avoided for intramuscular injections. If a needle hits the sciatic nerve, the patient may experience partial or permanent paralysis of the leg.”

1.03 December 14, 2018 Made correction to section 6.4 and set table widths to 100%. Replaced “The rectal route (see Figure 6.1) is not as reliable in absorption and distribution as oral and parenteral routes. The rectal route is, however, relatively safe because there is less potential for adverse effects (Perry et al., 2014).”

with

“Drugs administered PR have a faster action than via the oral route and a higher bio-availability – that is, the amount of effective drug that is available is greater as it has not been influenced by upper gastrointestinal tract digestive processes. Rectal absorption results in more of the drug reaching the systemic circulation with less alteration on route. As well as being a more effective route for delivering medication, rectal administration also reduces side-effects of some drugs, such as gastric irritation, nausea and vomiting” (Lowry, 2016, para 2).”

Pages numbers in PDF will change.

1.04 June 5, 2019 Updated the book’s theme The styles of this book have been updated, which may affect the page numbers of the PDF and print copy.
1.05 October 9, 2020 Added replacement videos to body and appendix of book. Links to openly licensed videos created by TRU were added throughout this book. A summary of these videos are listed in the newly created Appendix 3.
1.06 April 16 and May 5, 2021 Added remaining TRU videos body and appendix of book. A summary of these videos are listed in the newly created Appendix 3.
1.07 May 20, 2021 Updated metadata and front/back matter. Updated theme and styles.
  • Added ISBNs
  • Changed theme to “Clarke”
  • Changed “About this Book” to “About BCcampus Open Education” and replaced content
1.08 October 15, 2021 Error correction. Corrected mislabeling of dorsiflexion and plantarflexion images in 2.5 Head-to-Toe Assessment and 2.7 Focused Assessments.