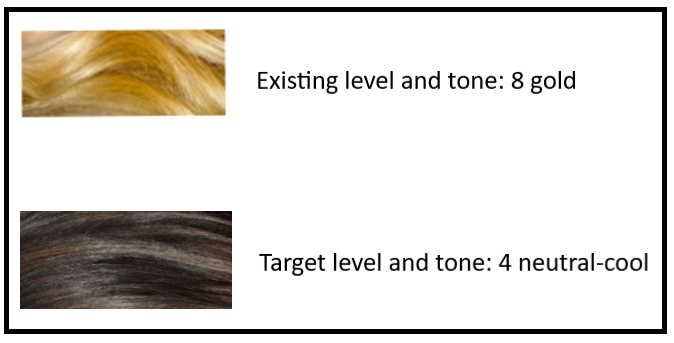
A decolorization service is required when a client’s coloured hair is darker than their target level, and artificial pigment must be removed in order to achieve their desired outcome.
There are many factors to be considered when performing a decolorization service, and it is important to remember that multiple steps and multiple appointments may be required. It is crucial to educate the client and set realistic expectations prior to beginning the service.
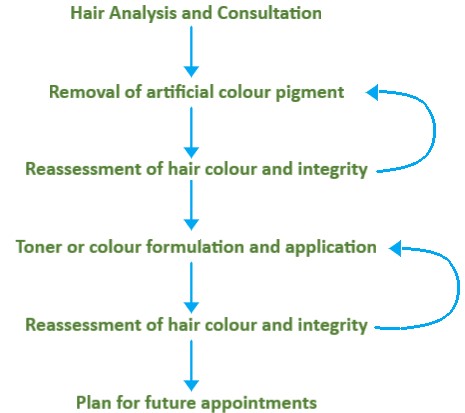
A decolourization service involves many steps, some of which may need to be repeated more than once.
Step 1: Determine the Type of Colour You Will be Removing
The first step to a decolorization service is the consultation and hair analysis, in which you must determine whether the artificial colour present on the hair is non-oxidative or oxidative dyes. As you learned in Chapter 1, these dyes work very differently.
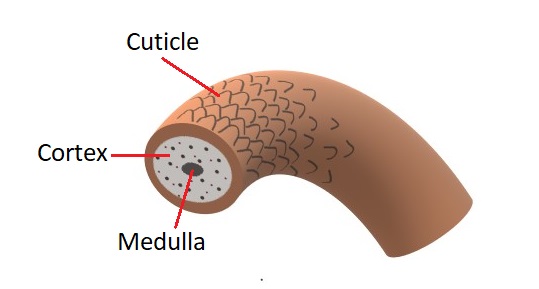
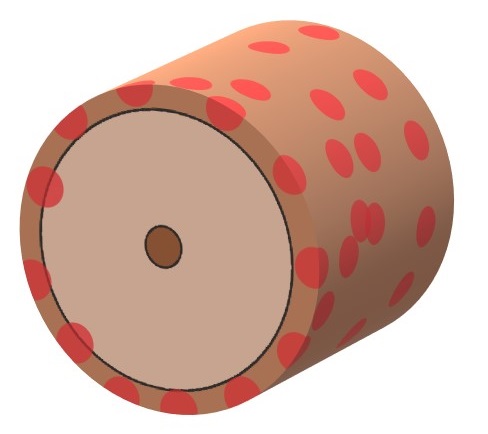
Non-oxidative direct dyes or semi-permanent colour products contain large colour molecules that either stain the cuticle or sit within the cuticle layers. They do not form molecular links.
Oxidative demi-permanent or permanent colour products contain a combination of large and small colour molecules. The smaller colour molecules enter the cortex and form molecular links, which hold them in place.
This is an important distinction as the two types of colour products must be removed differently.
Step 2: Remove Artificial Colour
There are several ways to remove artificial colour, depending on the type of colour product, the hair integrity, and the hair texture. The methods covered in this chapter are:
- Colour removers
- Shampoo cocktail/ bleach bath
- Bleach application
Colour Removers: Non-oxidative Direct Dyes and Semi-Permanent Colouring Products
As previously mentioned, direct dyes and semi-permanent colour products have large colour molecules that stain, or sit in, the cuticle layer only. So it would make sense that they would be easiest to remove, right? Unfortunately, this is not always the case, and one must be cautious. The best place to start with these types of colour products is with a colour remover that is specifically meant to remove these types of dyes. Most colour lines will include such removal products specific to their brand.
The problem with reaching for bleach in this case is that the lightening product will open up the cuticle and often drive the colour molecules deeper into the cortex, thus making them even more difficult to remove. You will most likely end up with a different shade of the colour that you are attempting to remove.
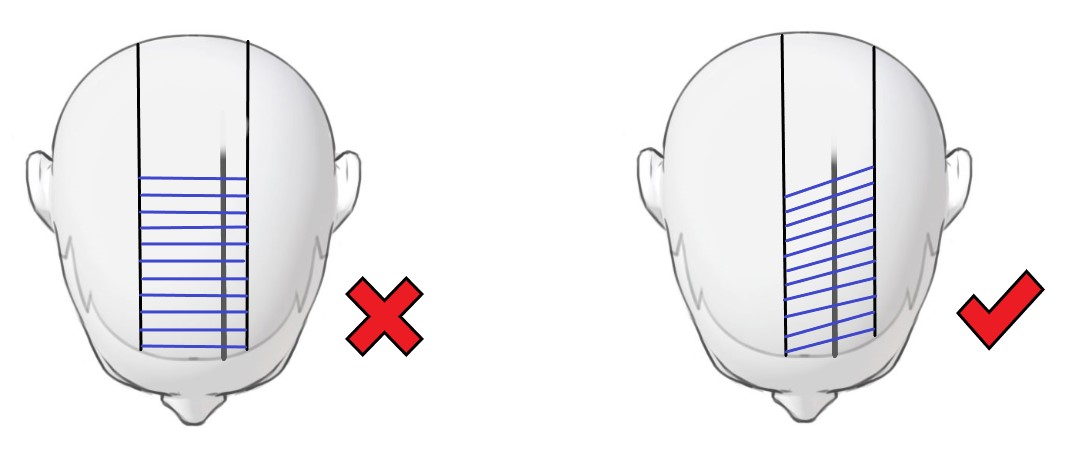
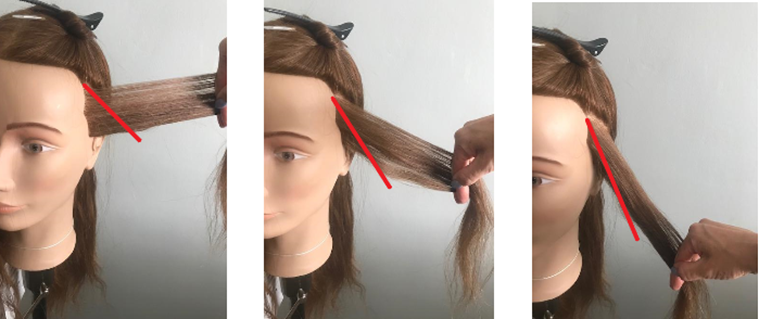
When using an appropriate removal product, take care to apply it only to the areas of the hair where the artificial colour is visible, as these products will also affect the natural melanin in virgin hair.
A few examples of appropriate direct dye and semi-permanent colour removal products are Joico Colour Eraser, Pulp Riot Blank Canvas, and Malibu DDL.
Colour Removers for Oxidative Colouring Products
When removing oxidative colour, a permanent colour remover has its pros and cons. It is gentler on the hair than bleach and does not affect the natural melanin. The downside is that after you use one, you may need to wait 1–2 weeks before you move into the next step of your colour correction.
The reason for this is related to how these products work. Oxidative colour removers work by entering the cortex, shrinking the colour molecules, and dissolving the molecular links, thus allowing the molecules to simply be rinsed from the hair. BUT, if the hair is not rinsed enough to remove all of the artificial pigments, as soon as you move on to your next step in the corrective colour process (whether that is bleach or colour application), the developer in your formula will reactivate the remaining colour molecules, returning the hair to a form of its previously coloured state. This is why it is especially important to be absolutely sure the colour removal product is 100% rinsed from the hair before proceeding.
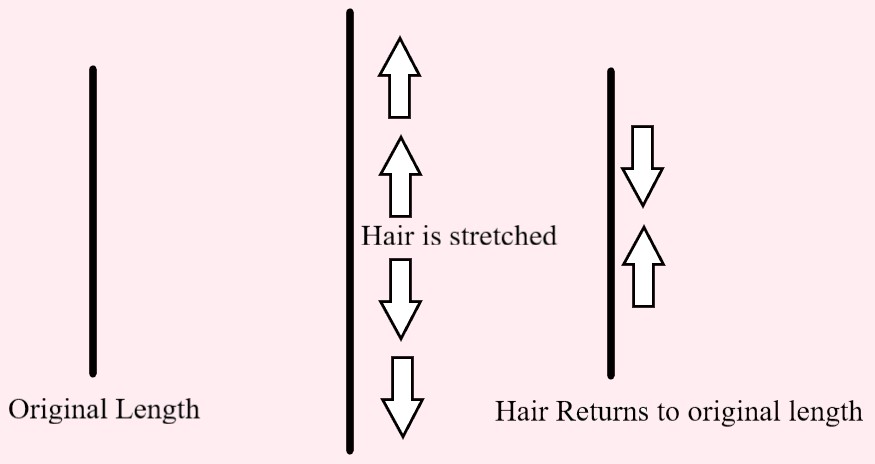
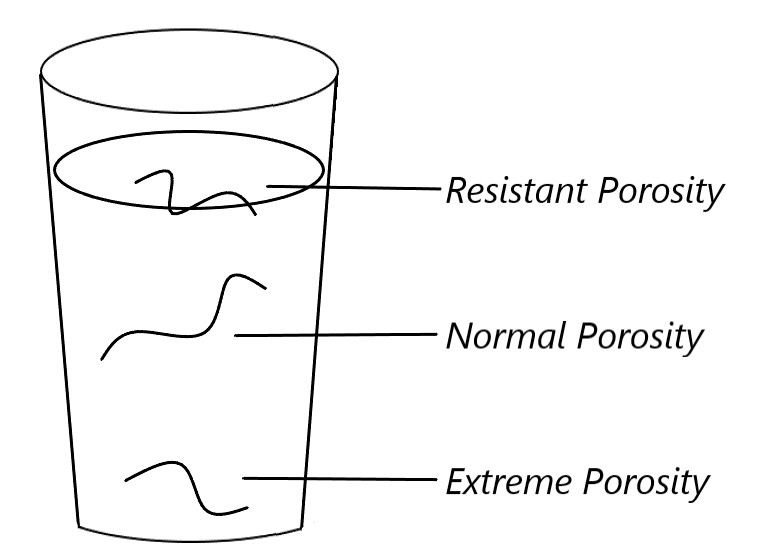
Porosity plays a big part in this process, as hair that is more porous will generally release the colour molecules more easily. In such a case, it is possible for the artificial colour to be removed in one appointment. Just one more reason why hair analysis is such an important part of your consultation!
Note: You can check the success of the removal process by applying 20-volume developer to a test strand of hair. If the strand shows signs of re-colourization, the hair is not yet entirely rinsed.
Permanent colour removers are a great gentle option in the right circumstances. But keep in mind their limitations. For example, if both non-oxidative and oxidative colour products are present in the hair, these removal products will not work on their own.
They also do not have the ability to restore the hair to its natural state once its been bleached. Bleach destroys melanin, and once that has been done, there’s no way to reverse the process.
Shampoo Cocktail/ Bleach Bath
A shampoo cocktail is a process that is gentler on the hair than bleach, and is a great option under the following conditions:
- The hair does NOT contain non-oxidative direct dyes or temporary colour products
- The colour only needs 1–2 levels of lift
- The client has pre-lightened hair that has been over-toned
- The hair is too fragile to use a full-strength bleach product
The mixing ratio for a shampoo cocktail is:
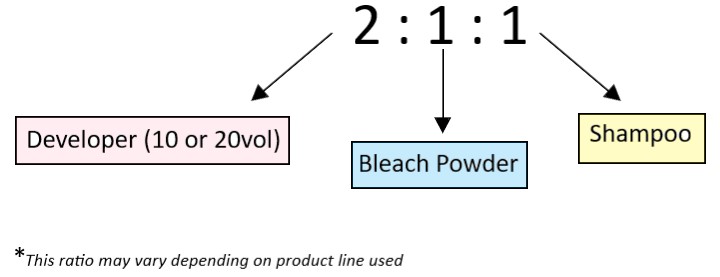
To perform a shampoo cocktail:
- Shampoo the hair well to remove any residue. Do not condition.
- Towel dry the hair. It should be damp, but not dripping.
- Don gloves.
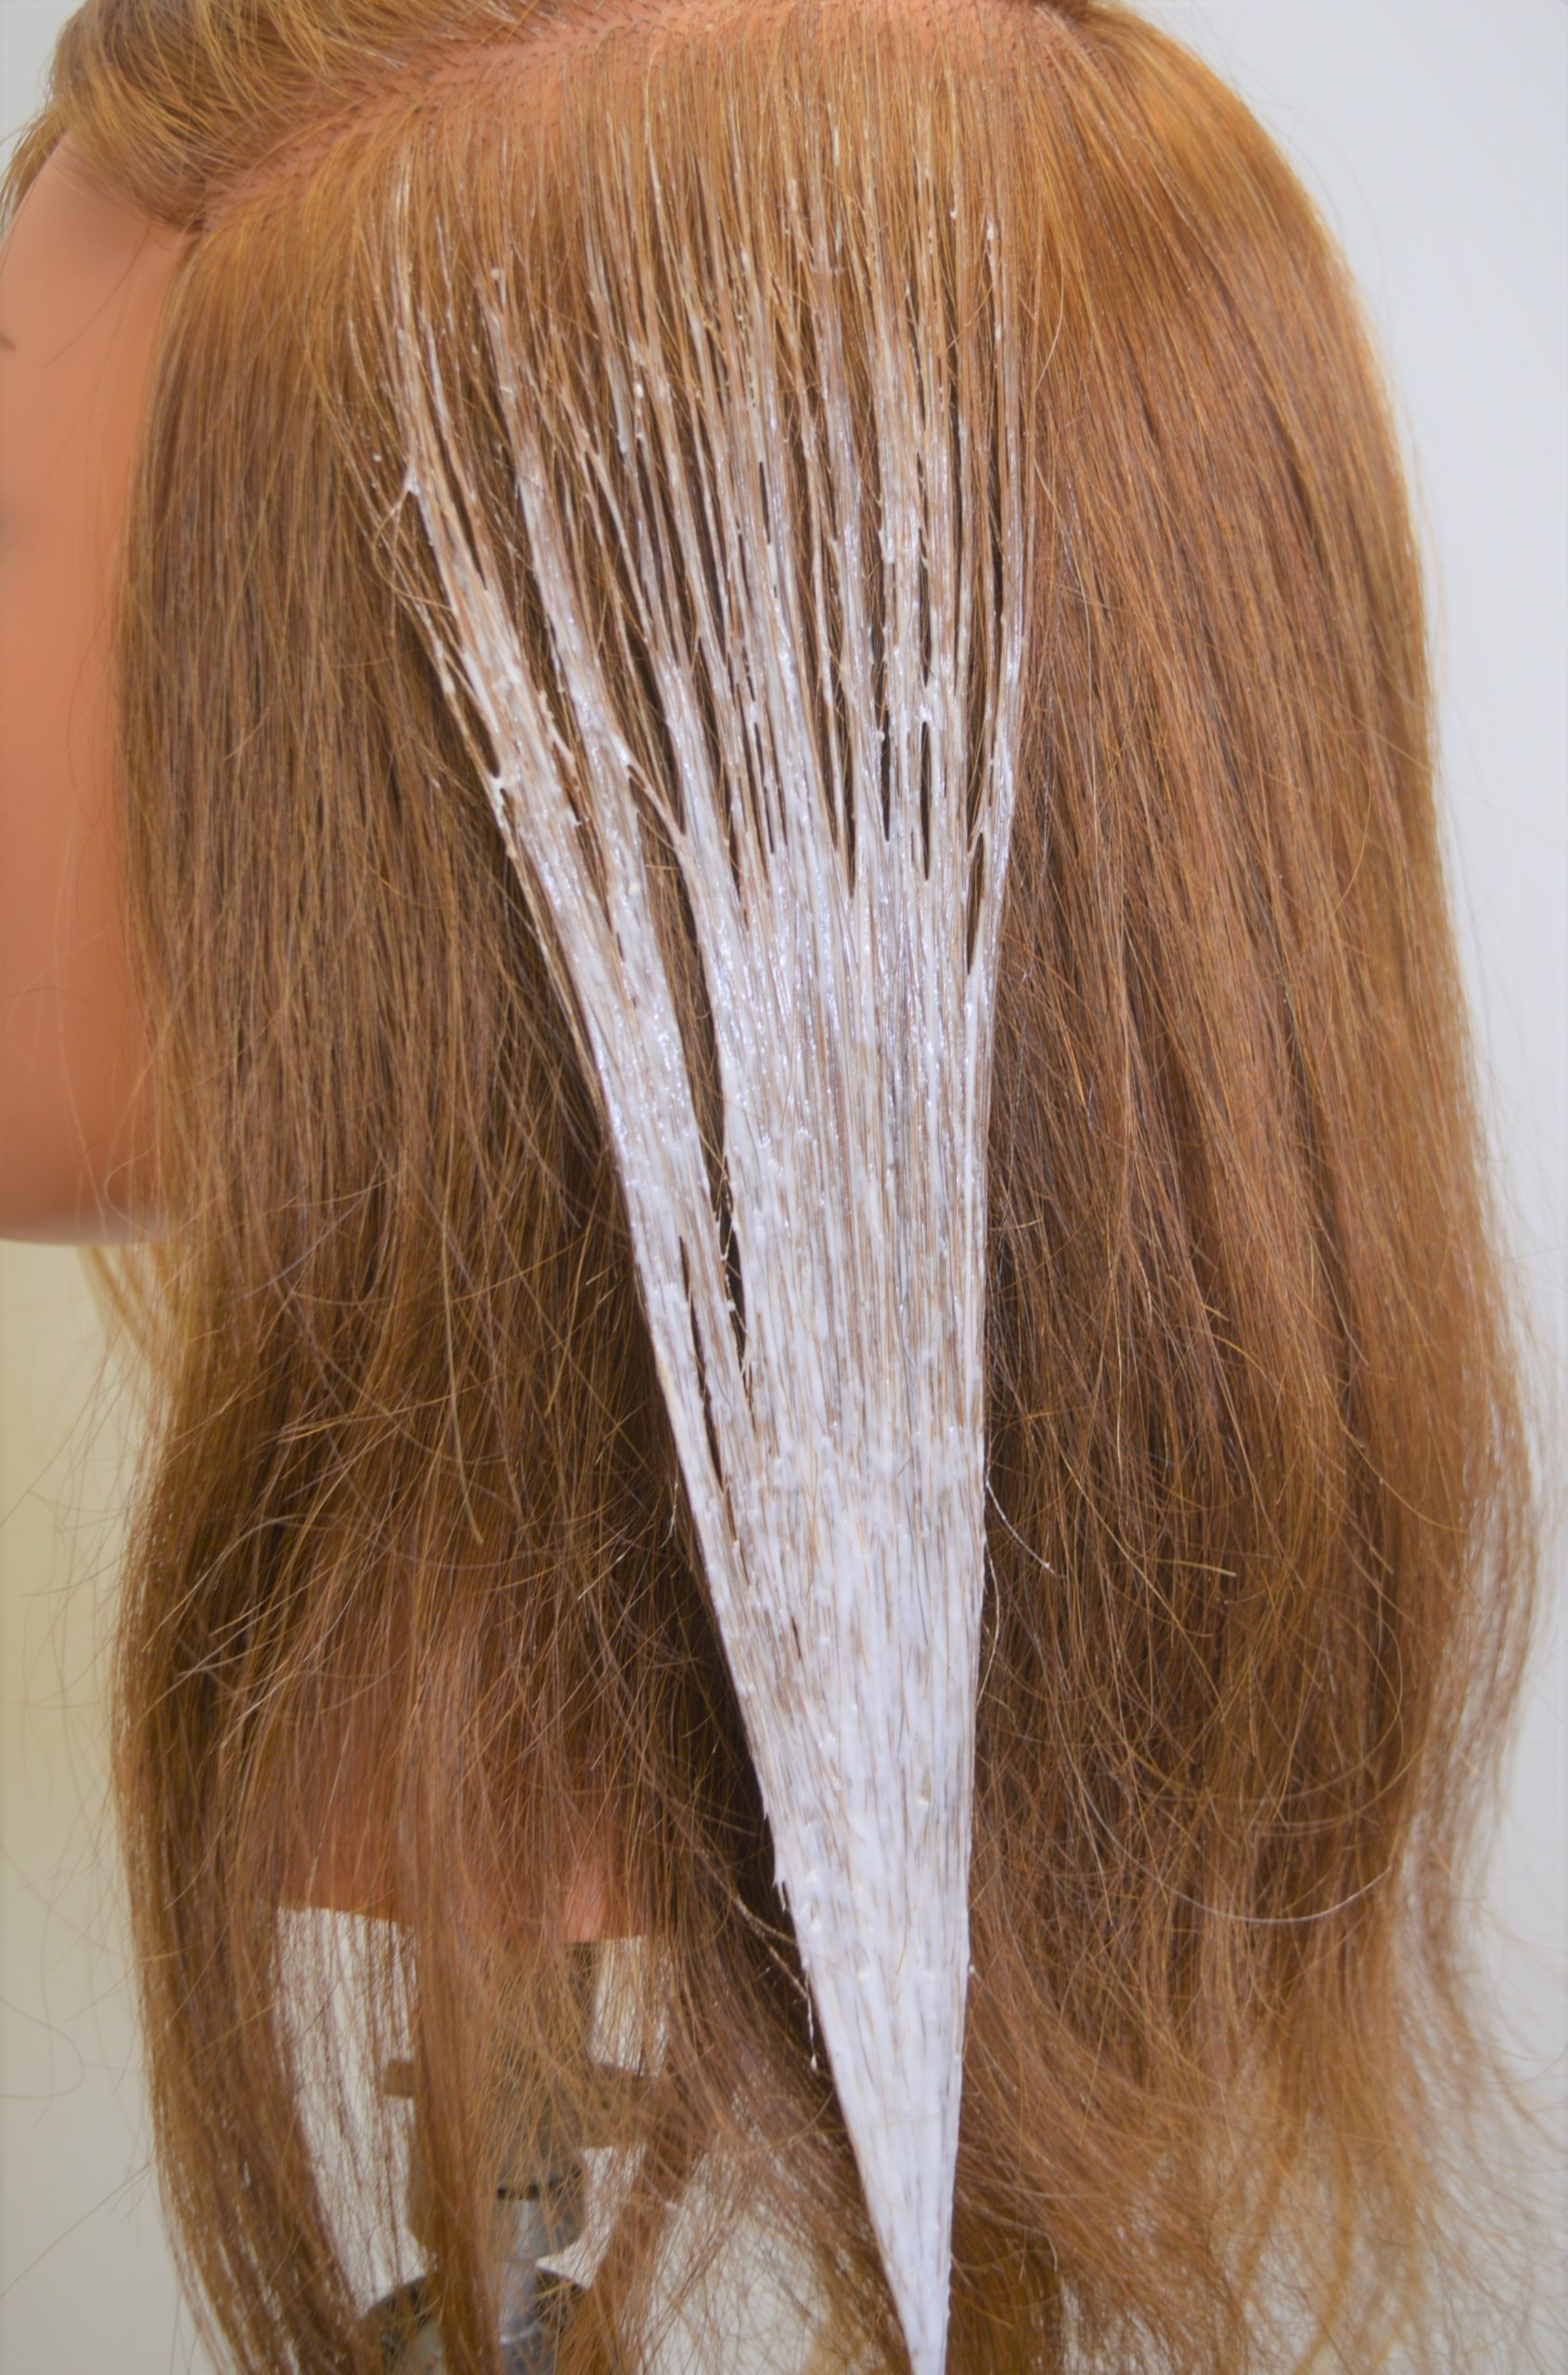
- Apply the mixture to the artificially coloured hair.
- Allow to process for 10–30 minutes while monitoring the lift. You may need to emulsify continuously for optimal results.
- Rinse thoroughly and shampoo.
- Reassess and reapply a fresh mixture if more lift is needed and the hair integrity will allow it.
It is important to note that this solution will be quite thin and runny. Take care to avoid any virgin hair, as the solution will lift and expose the underlying pigment.
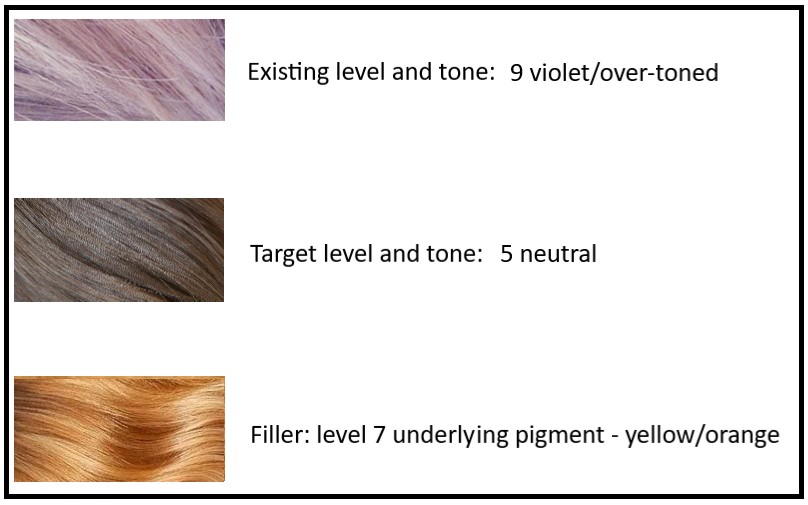
Note: A shampoo cocktail is also useful in correcting over-toned pre-lightened hair.
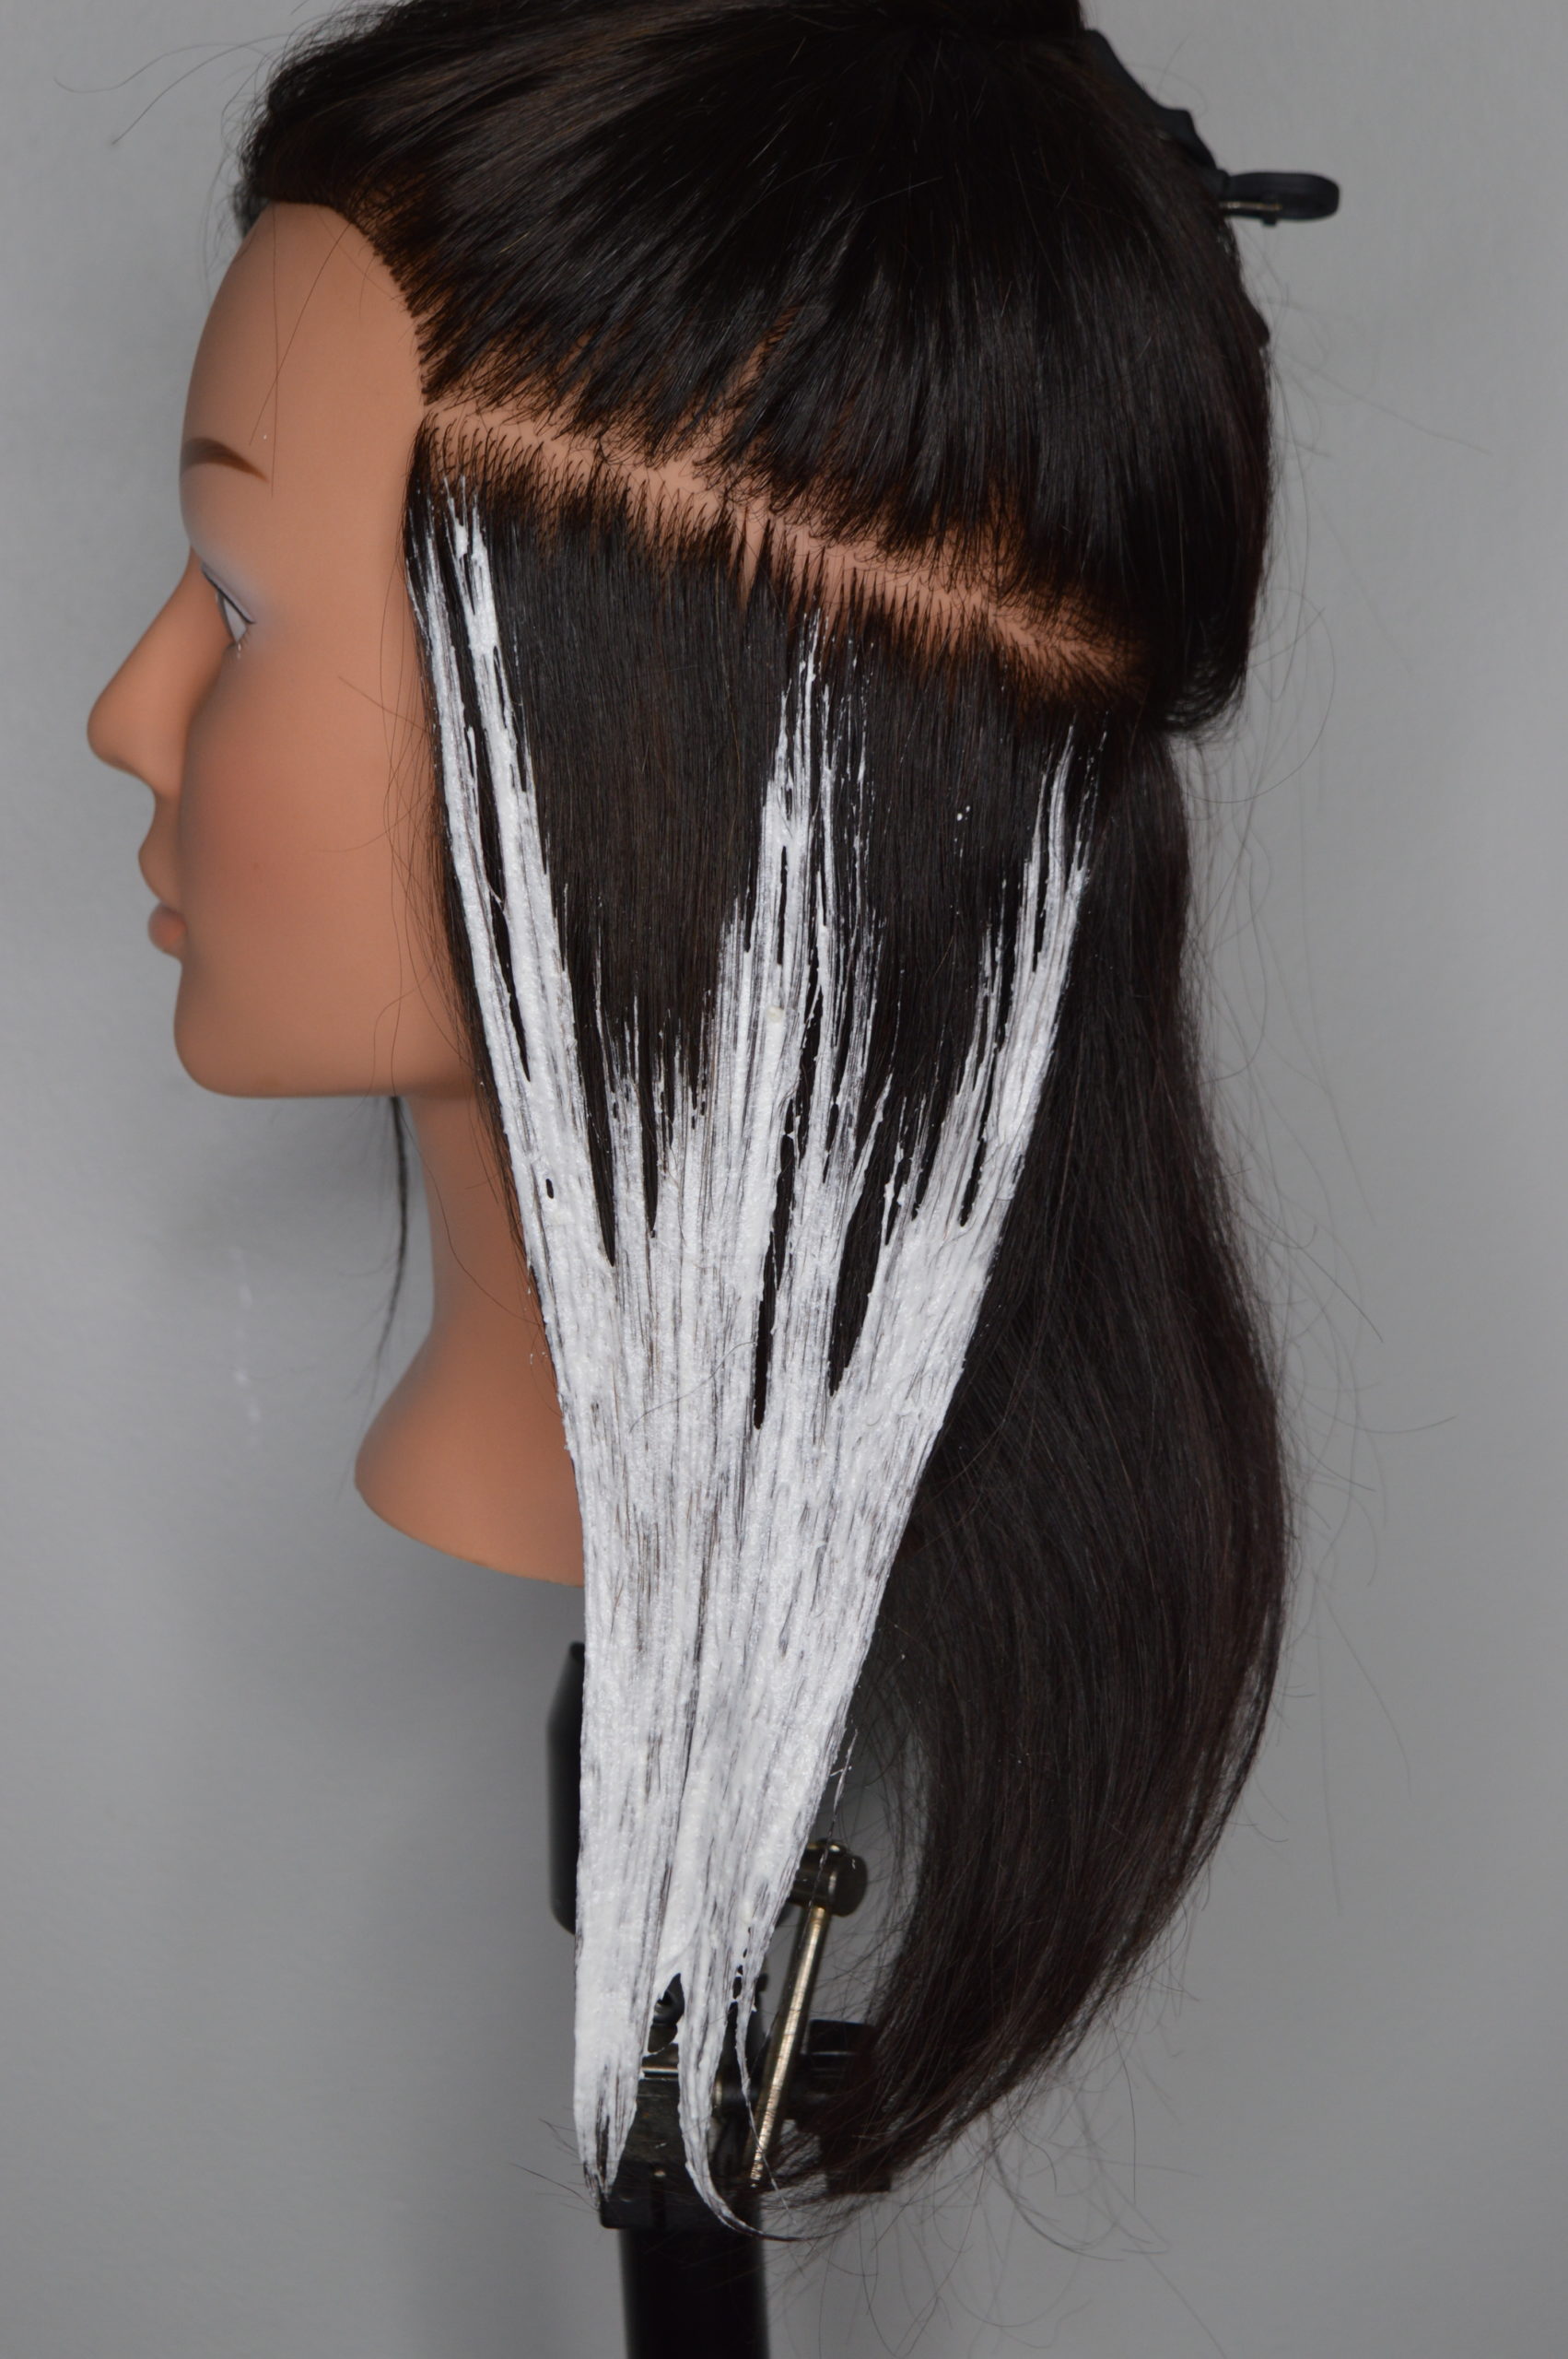
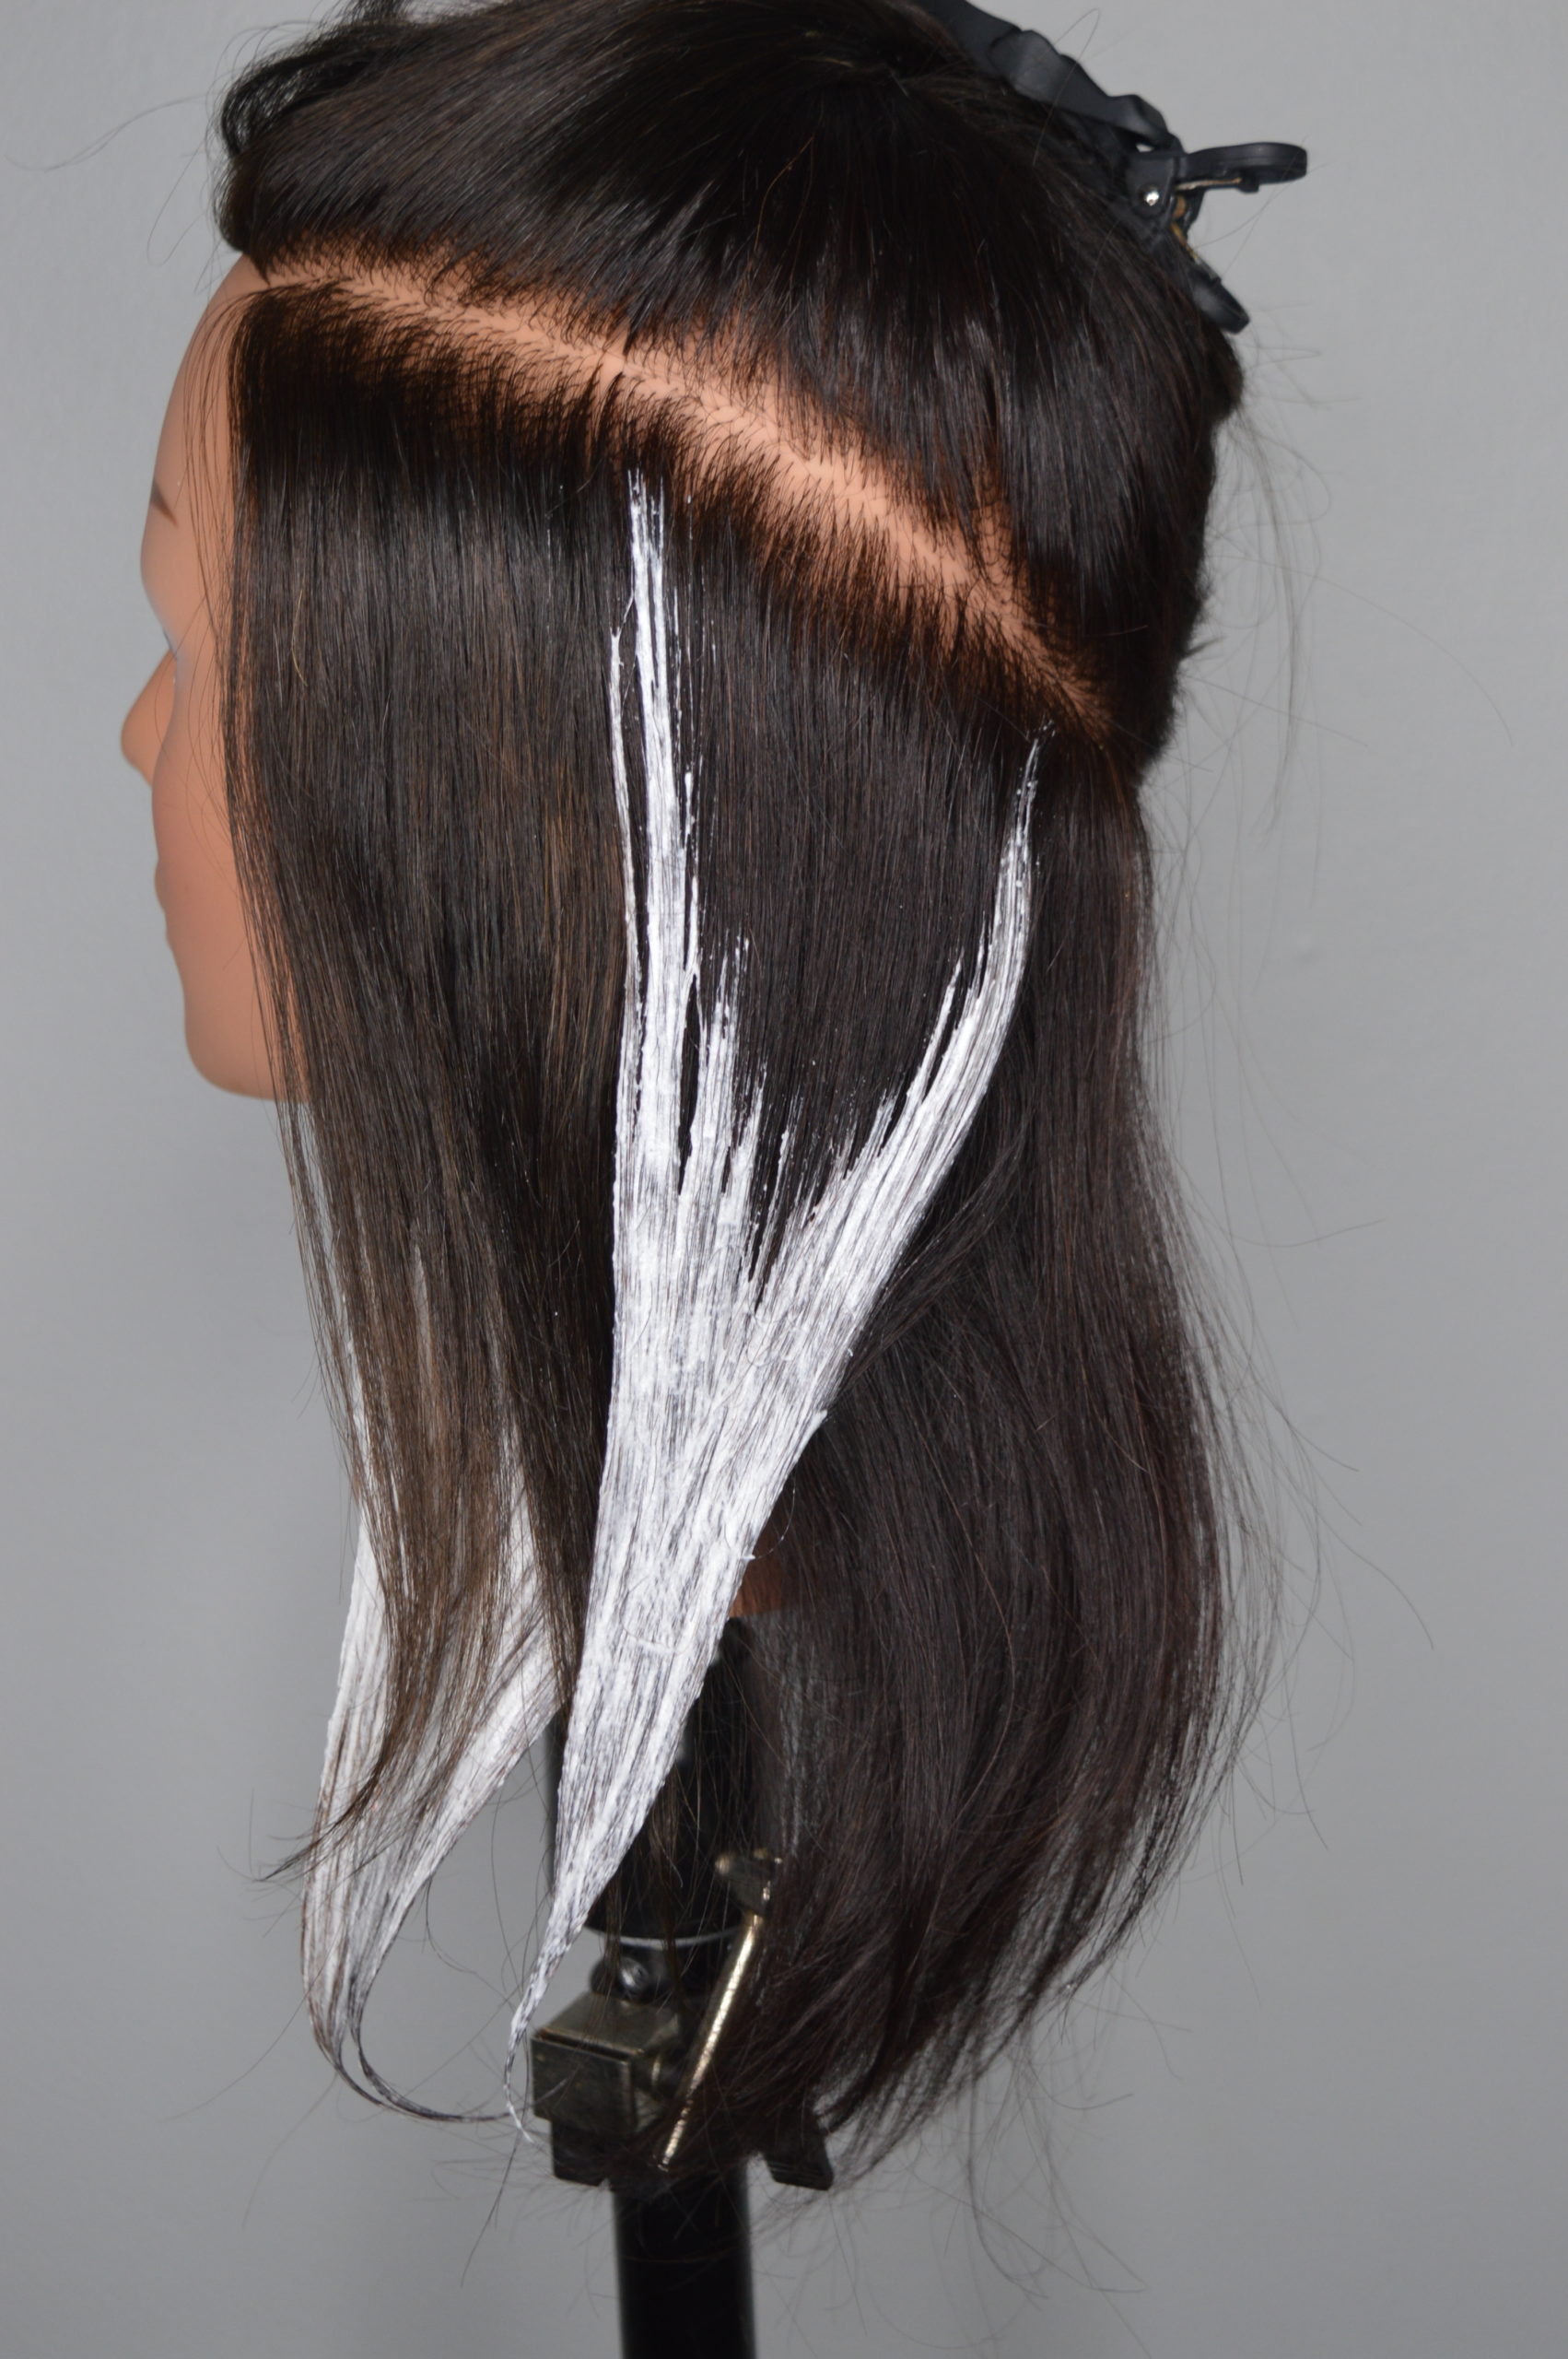
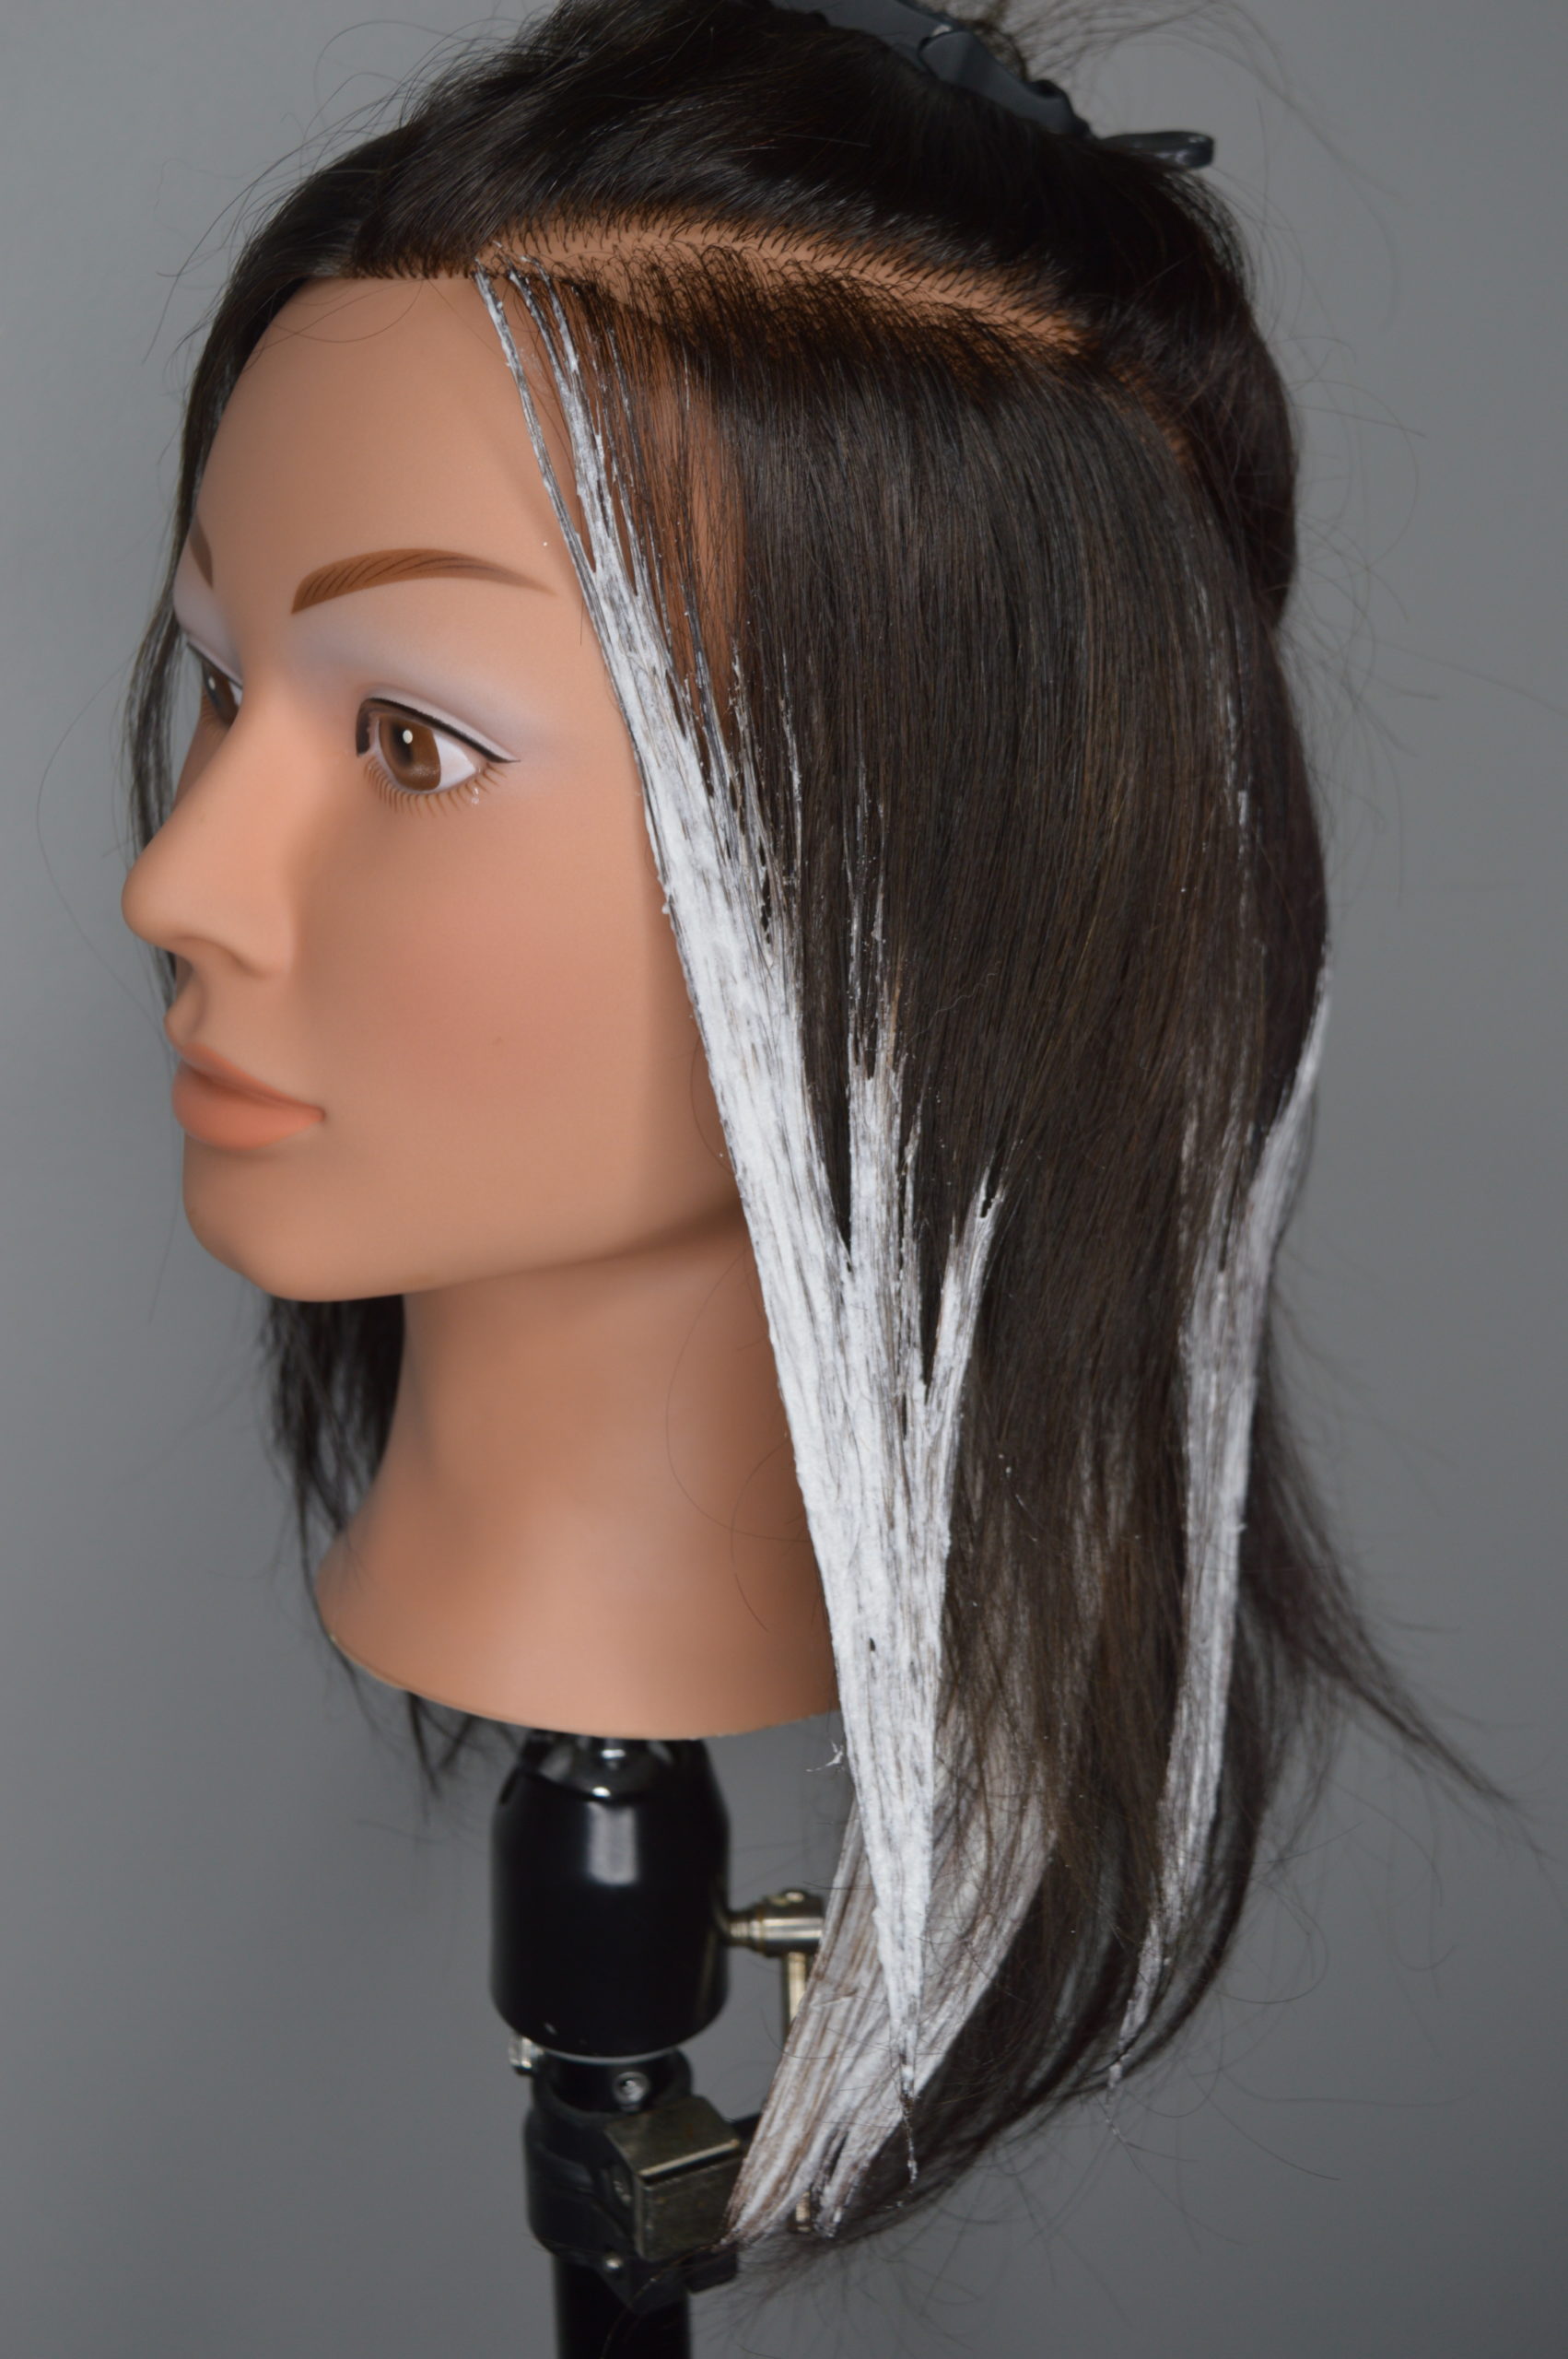
Bleach Application
The final method of decolourization is a bleach application.
What is the first step of this method? You guessed it! Hair analysis and consultation.
Any time you are using a bleach product, you must consider the hair integrity and texture, as well as determining how many layers of colour you will need to remove.
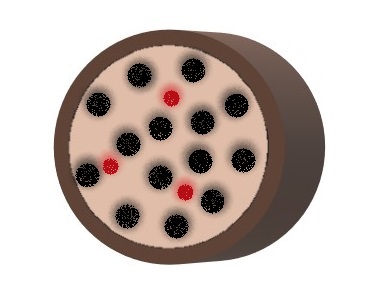
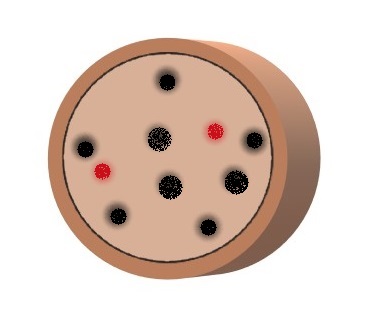
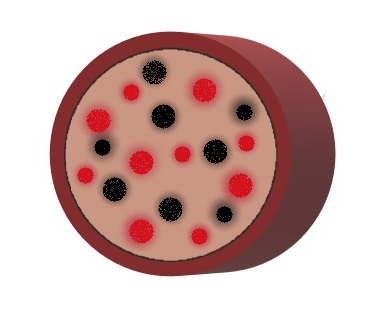
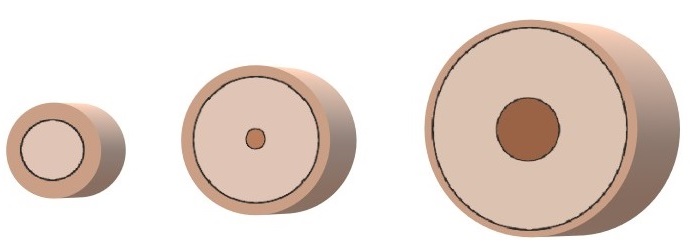
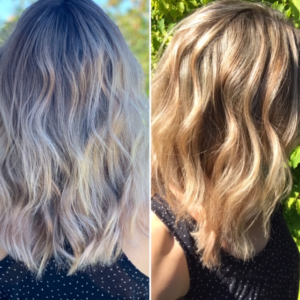
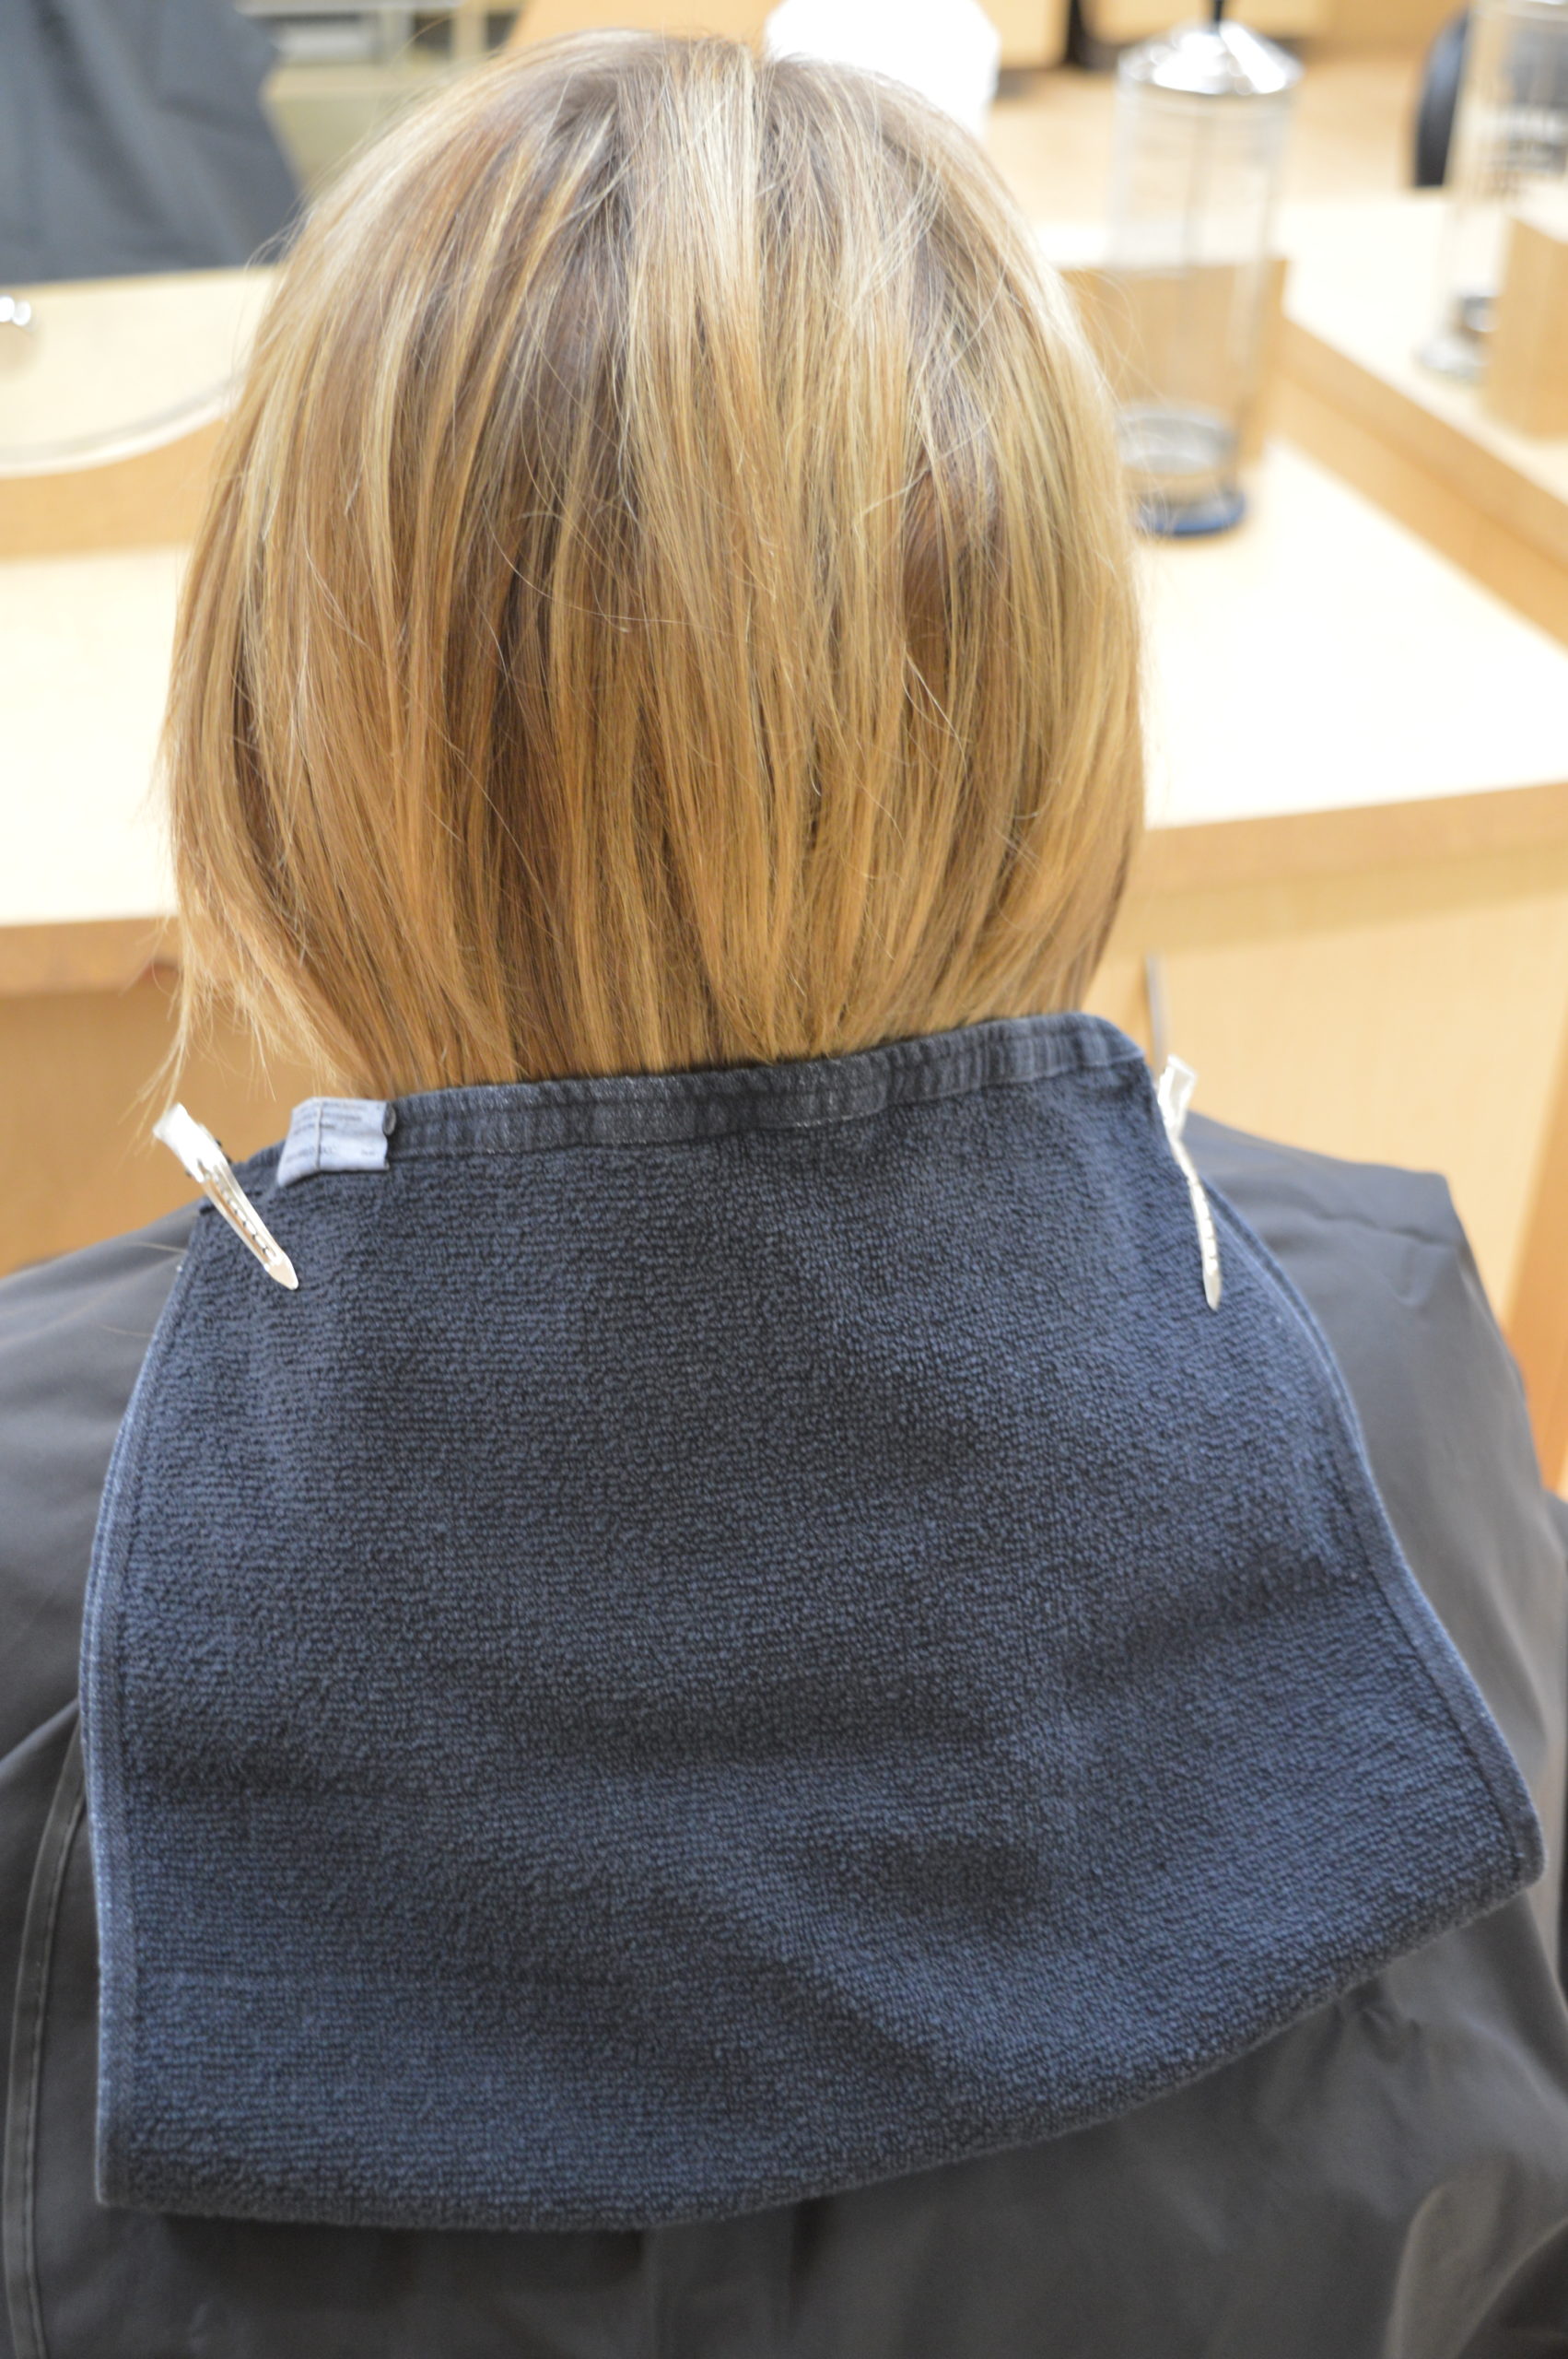
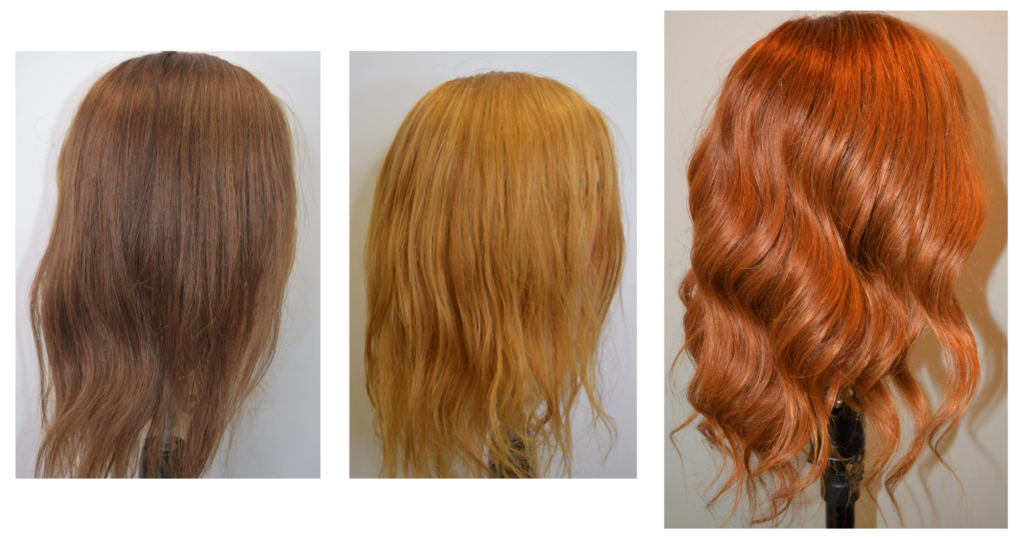
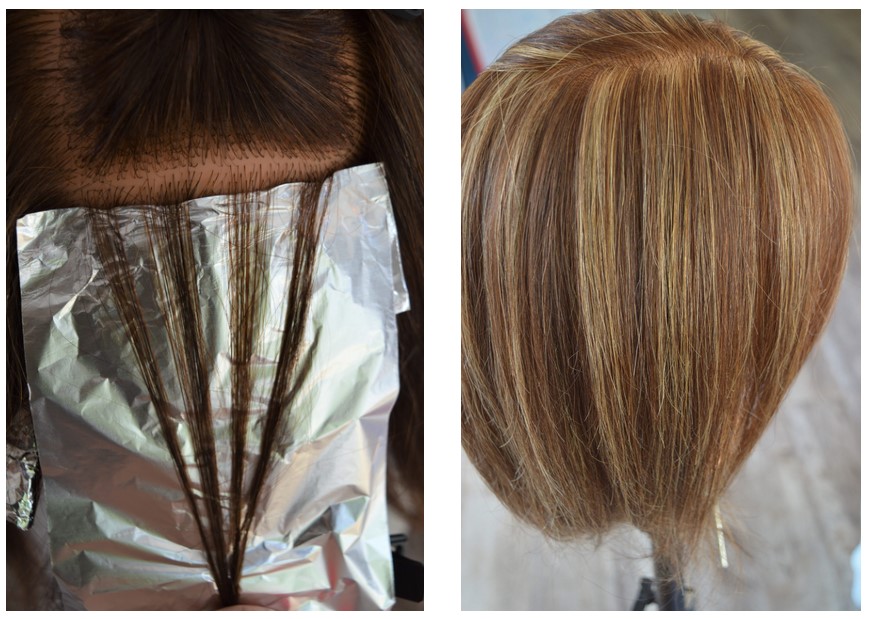
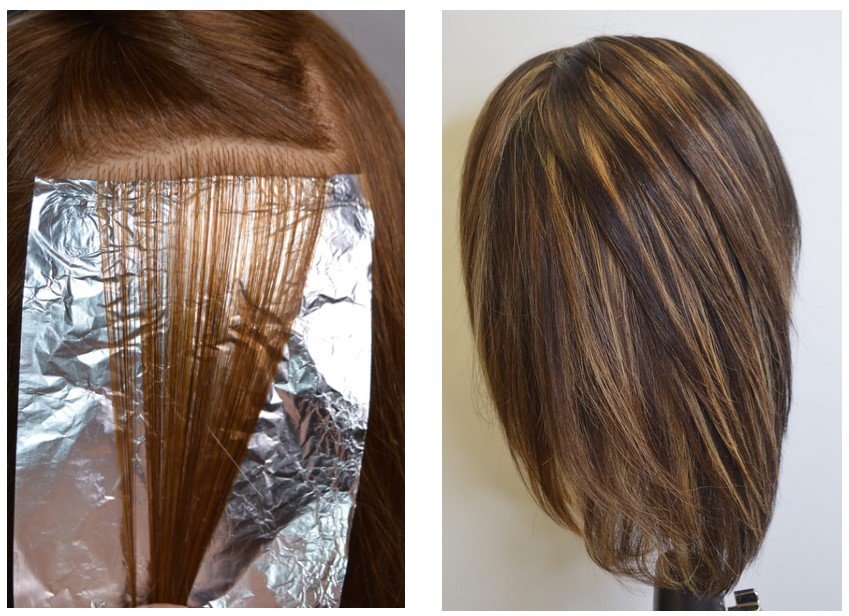
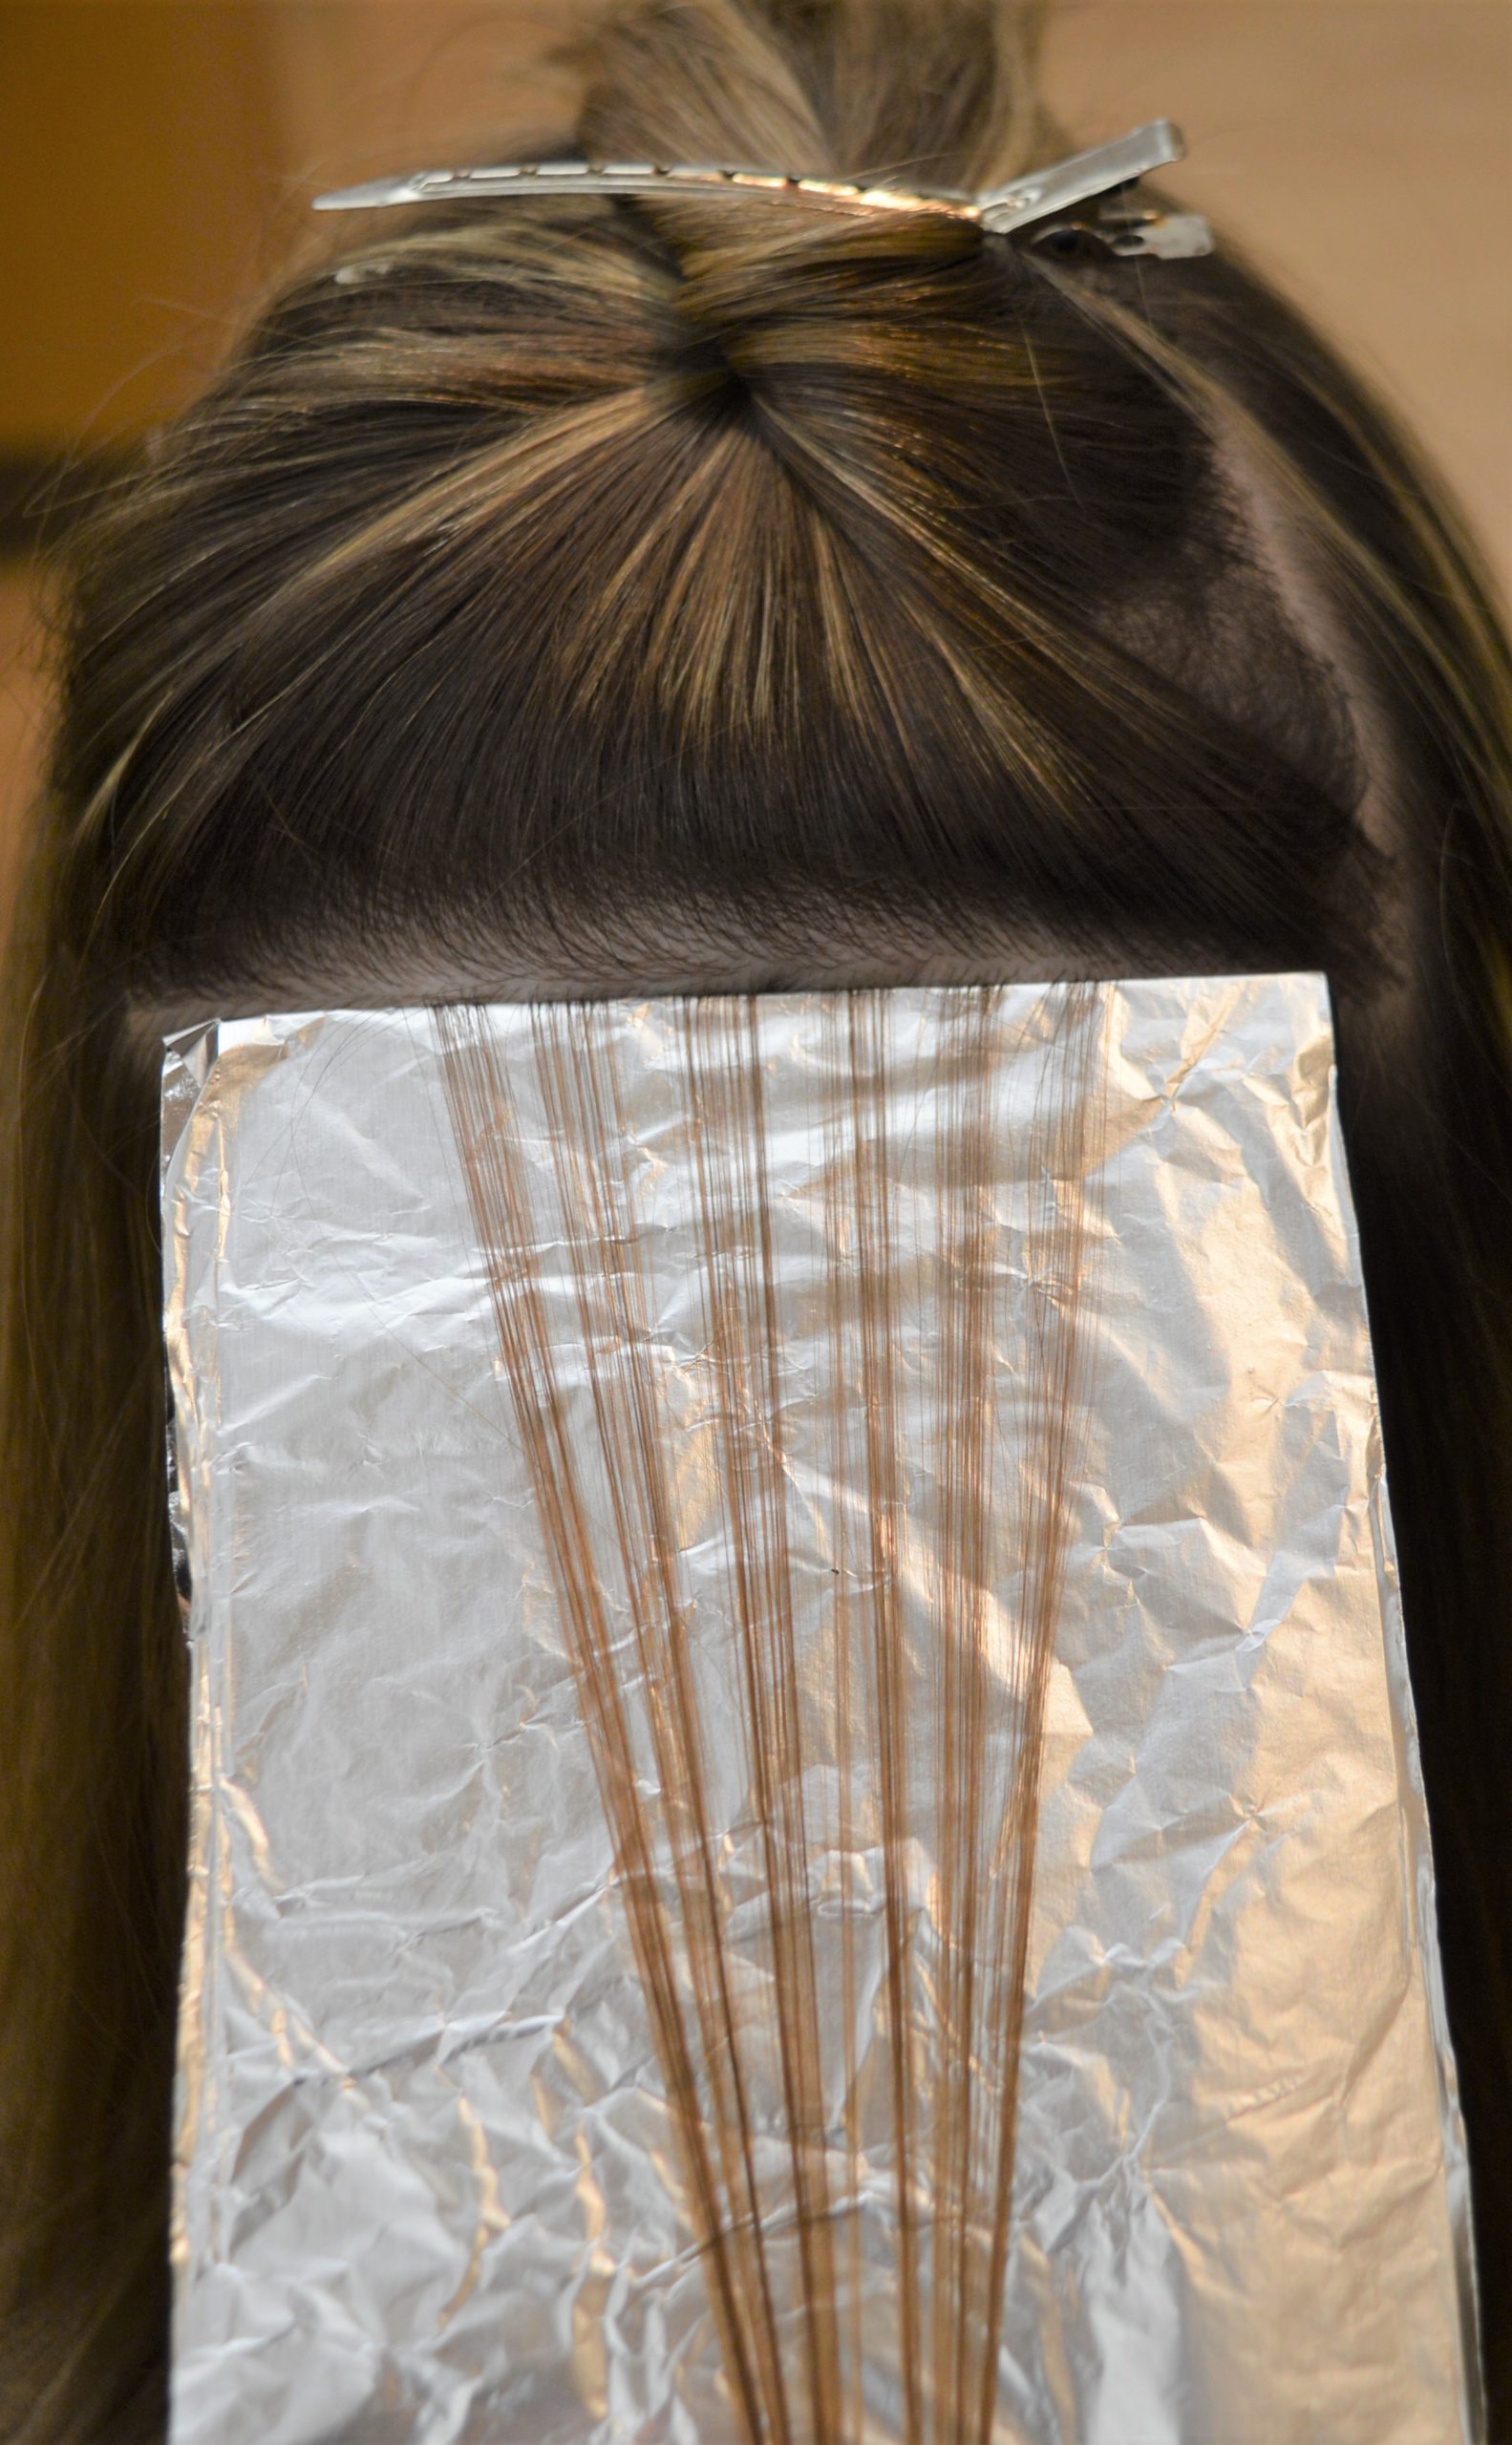
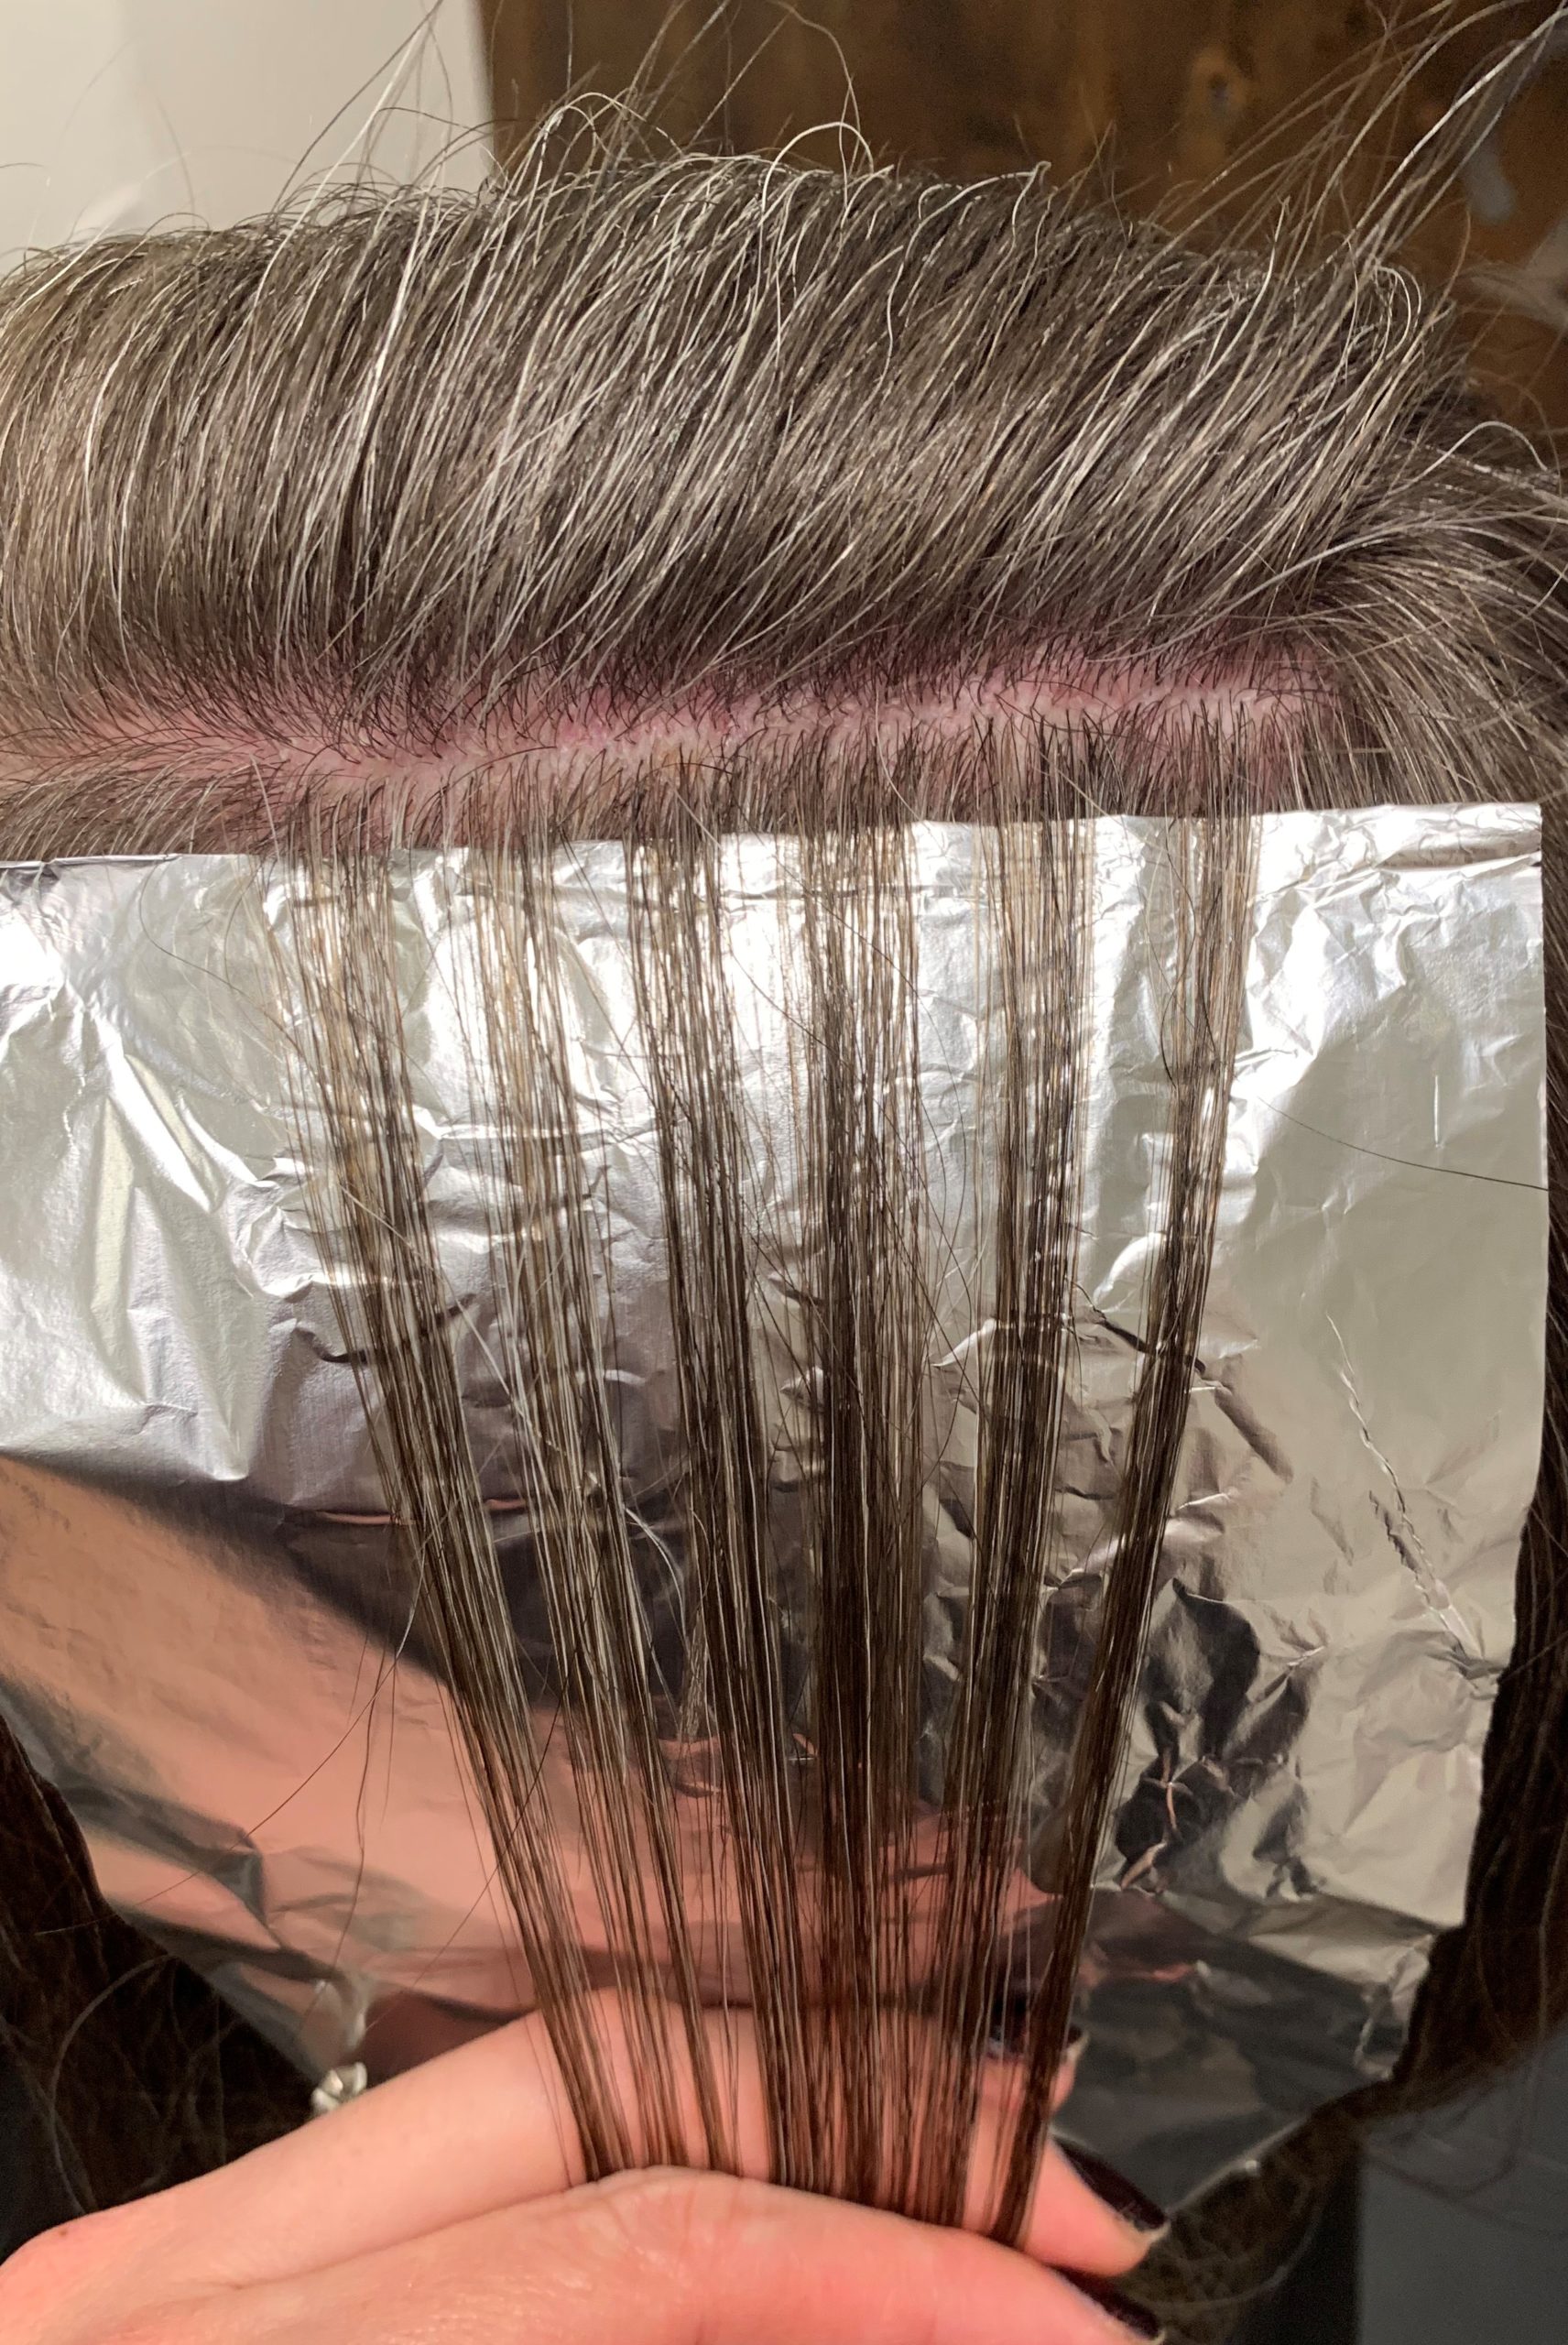
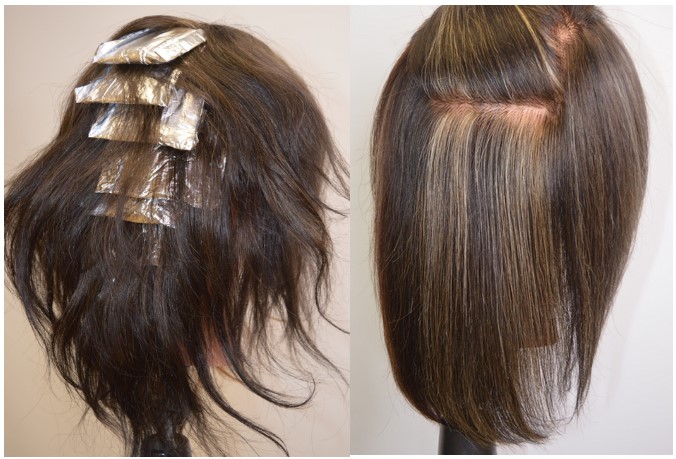
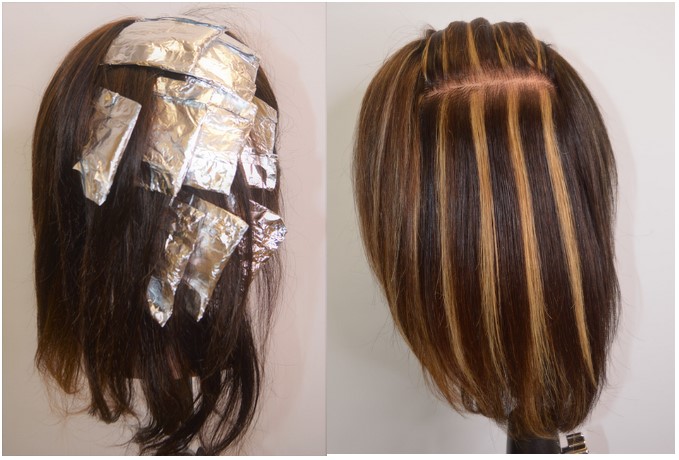
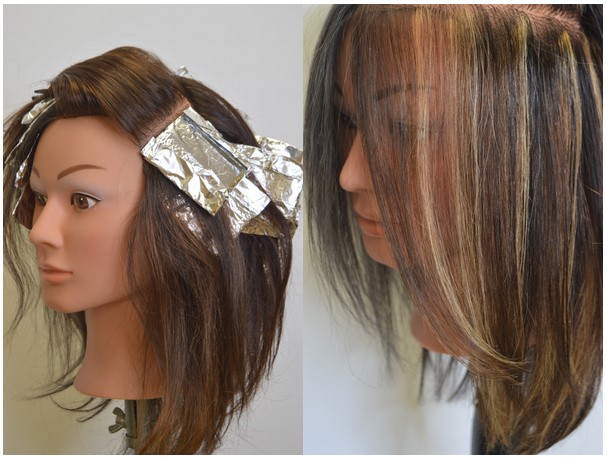
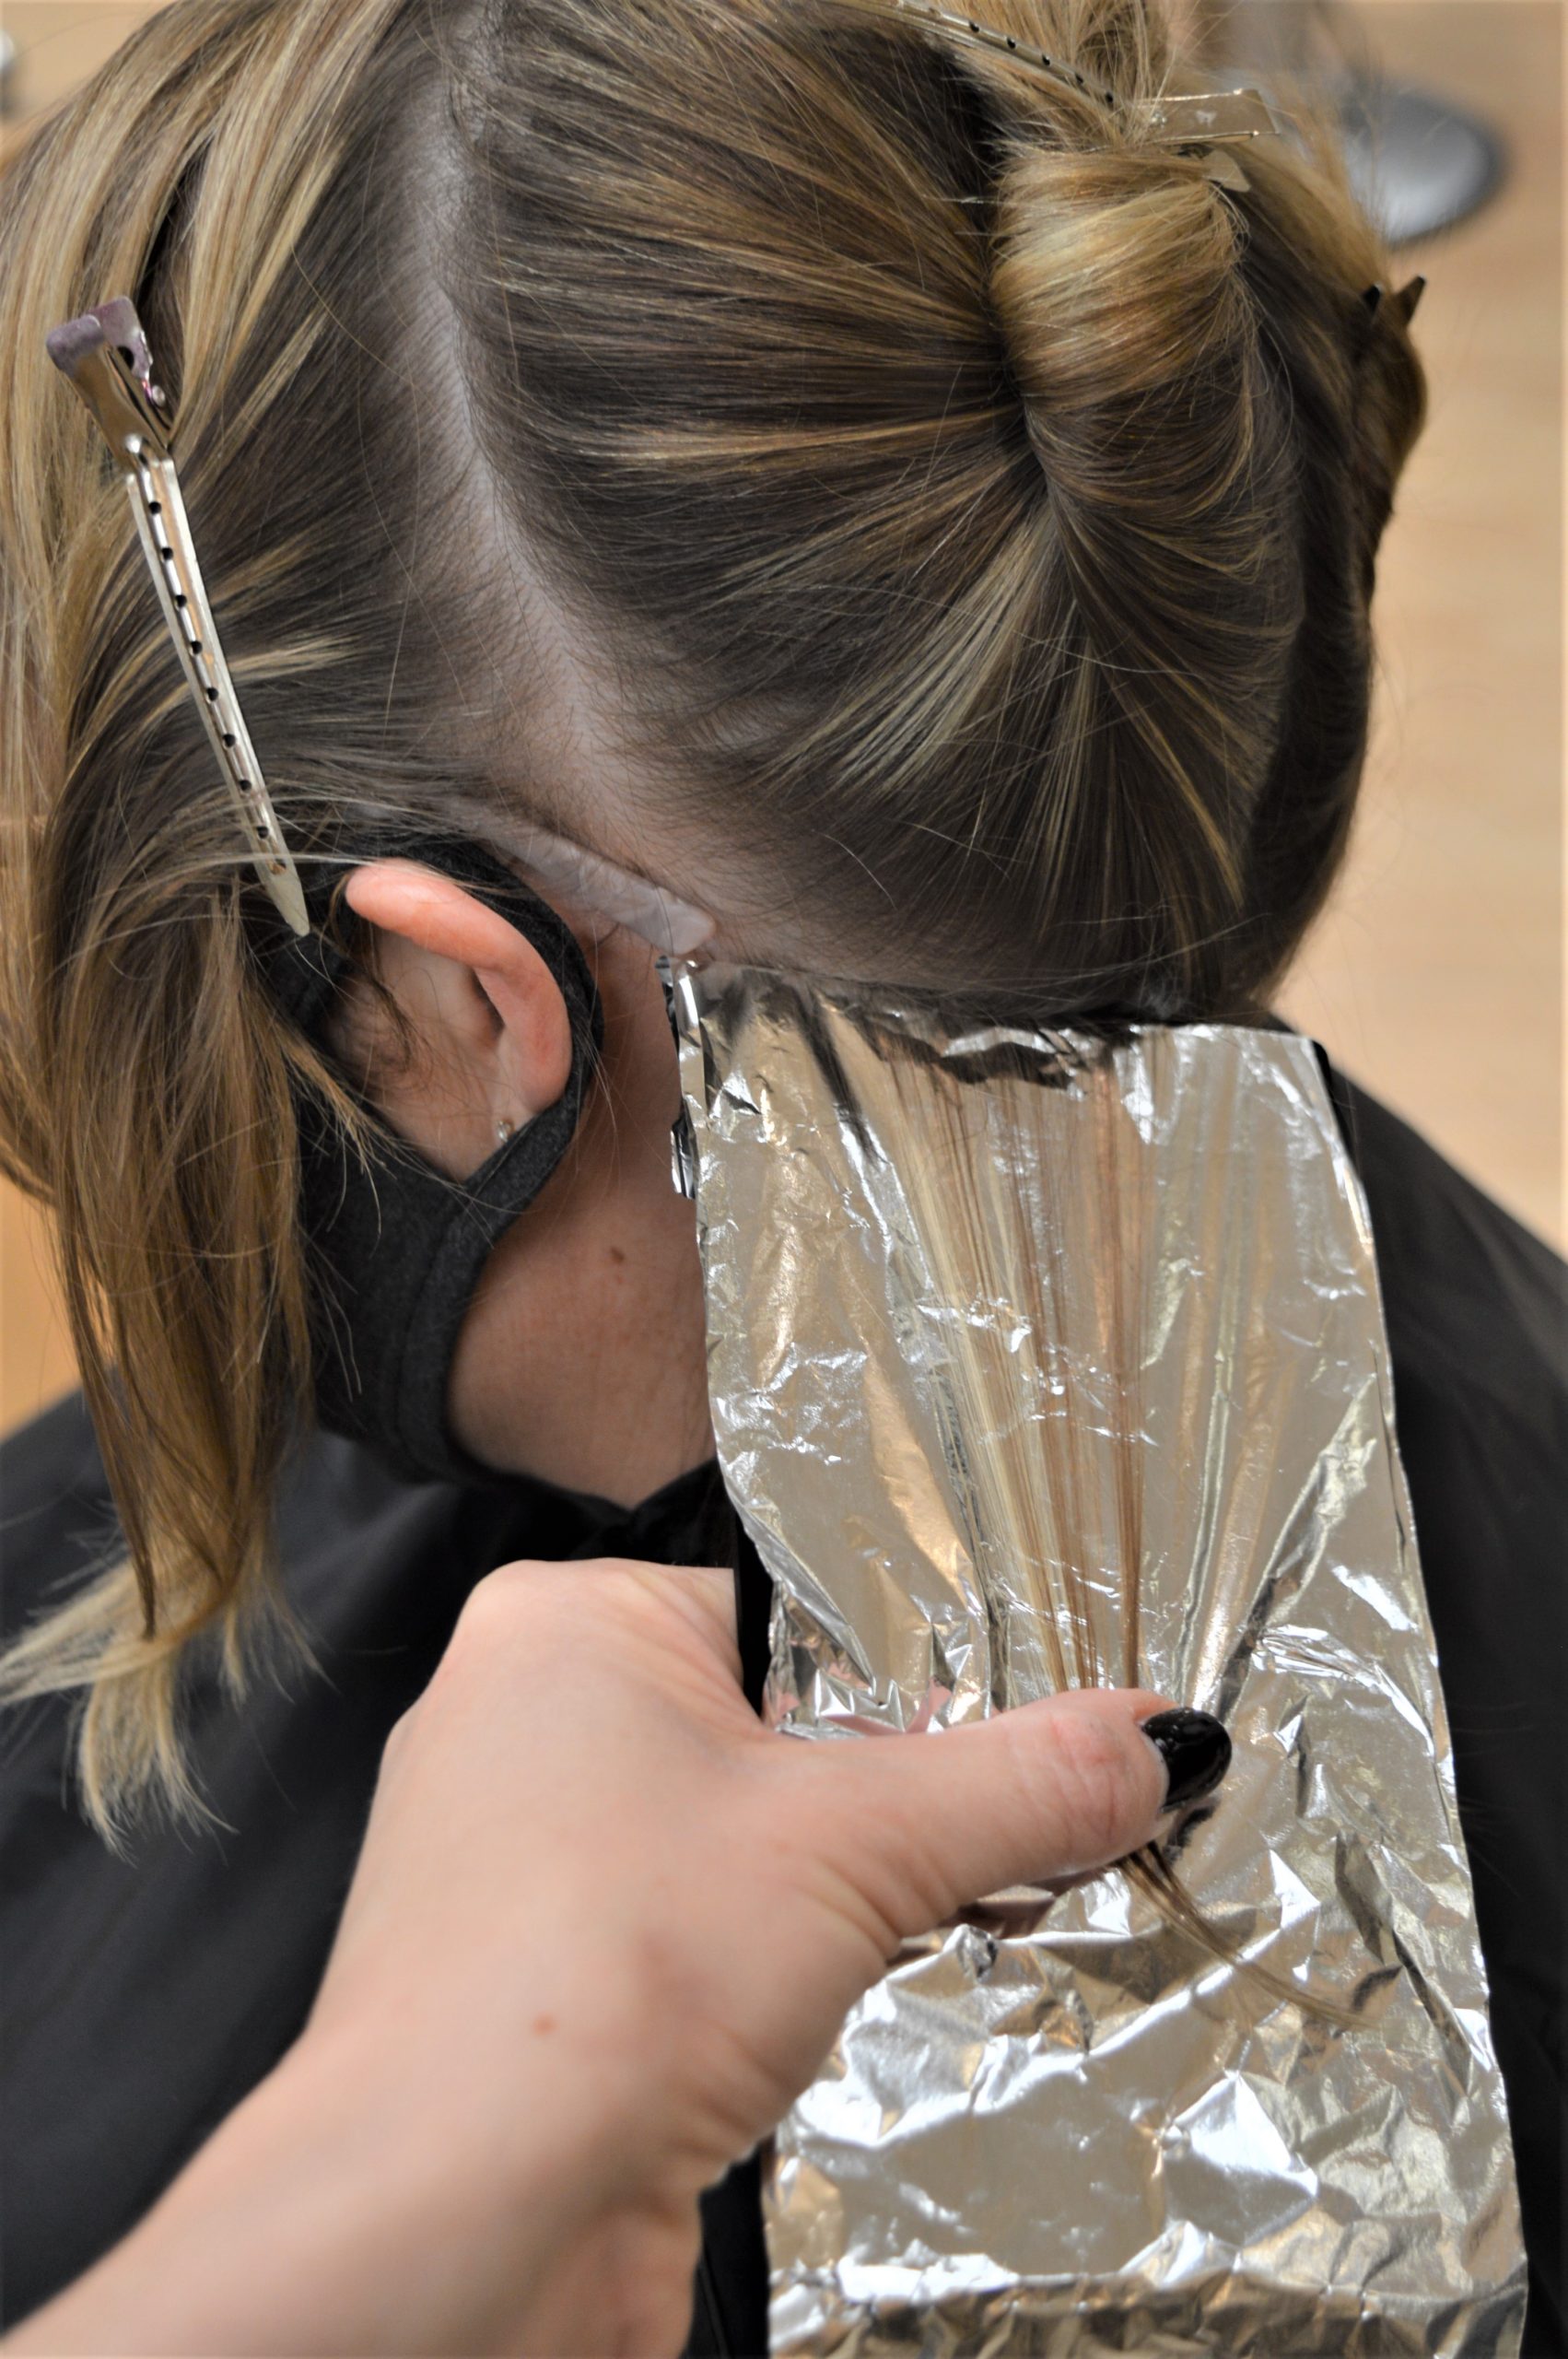
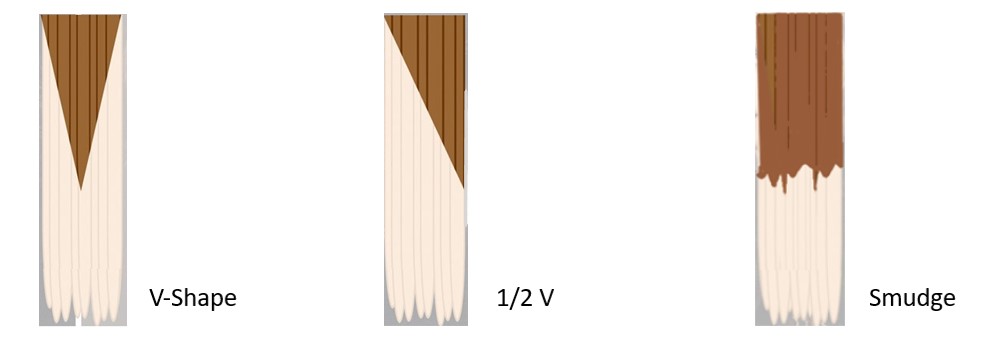
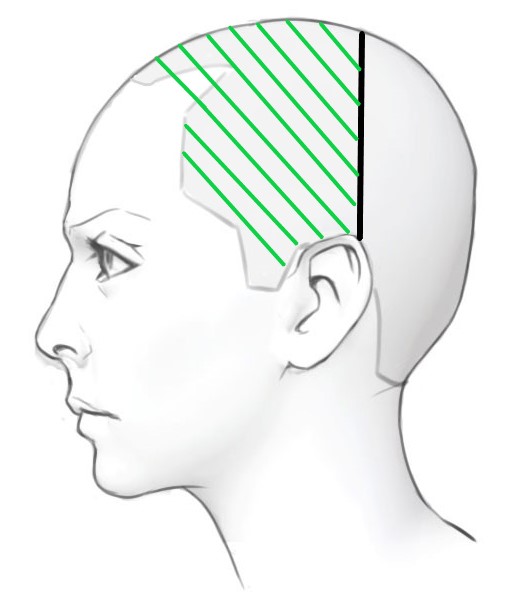
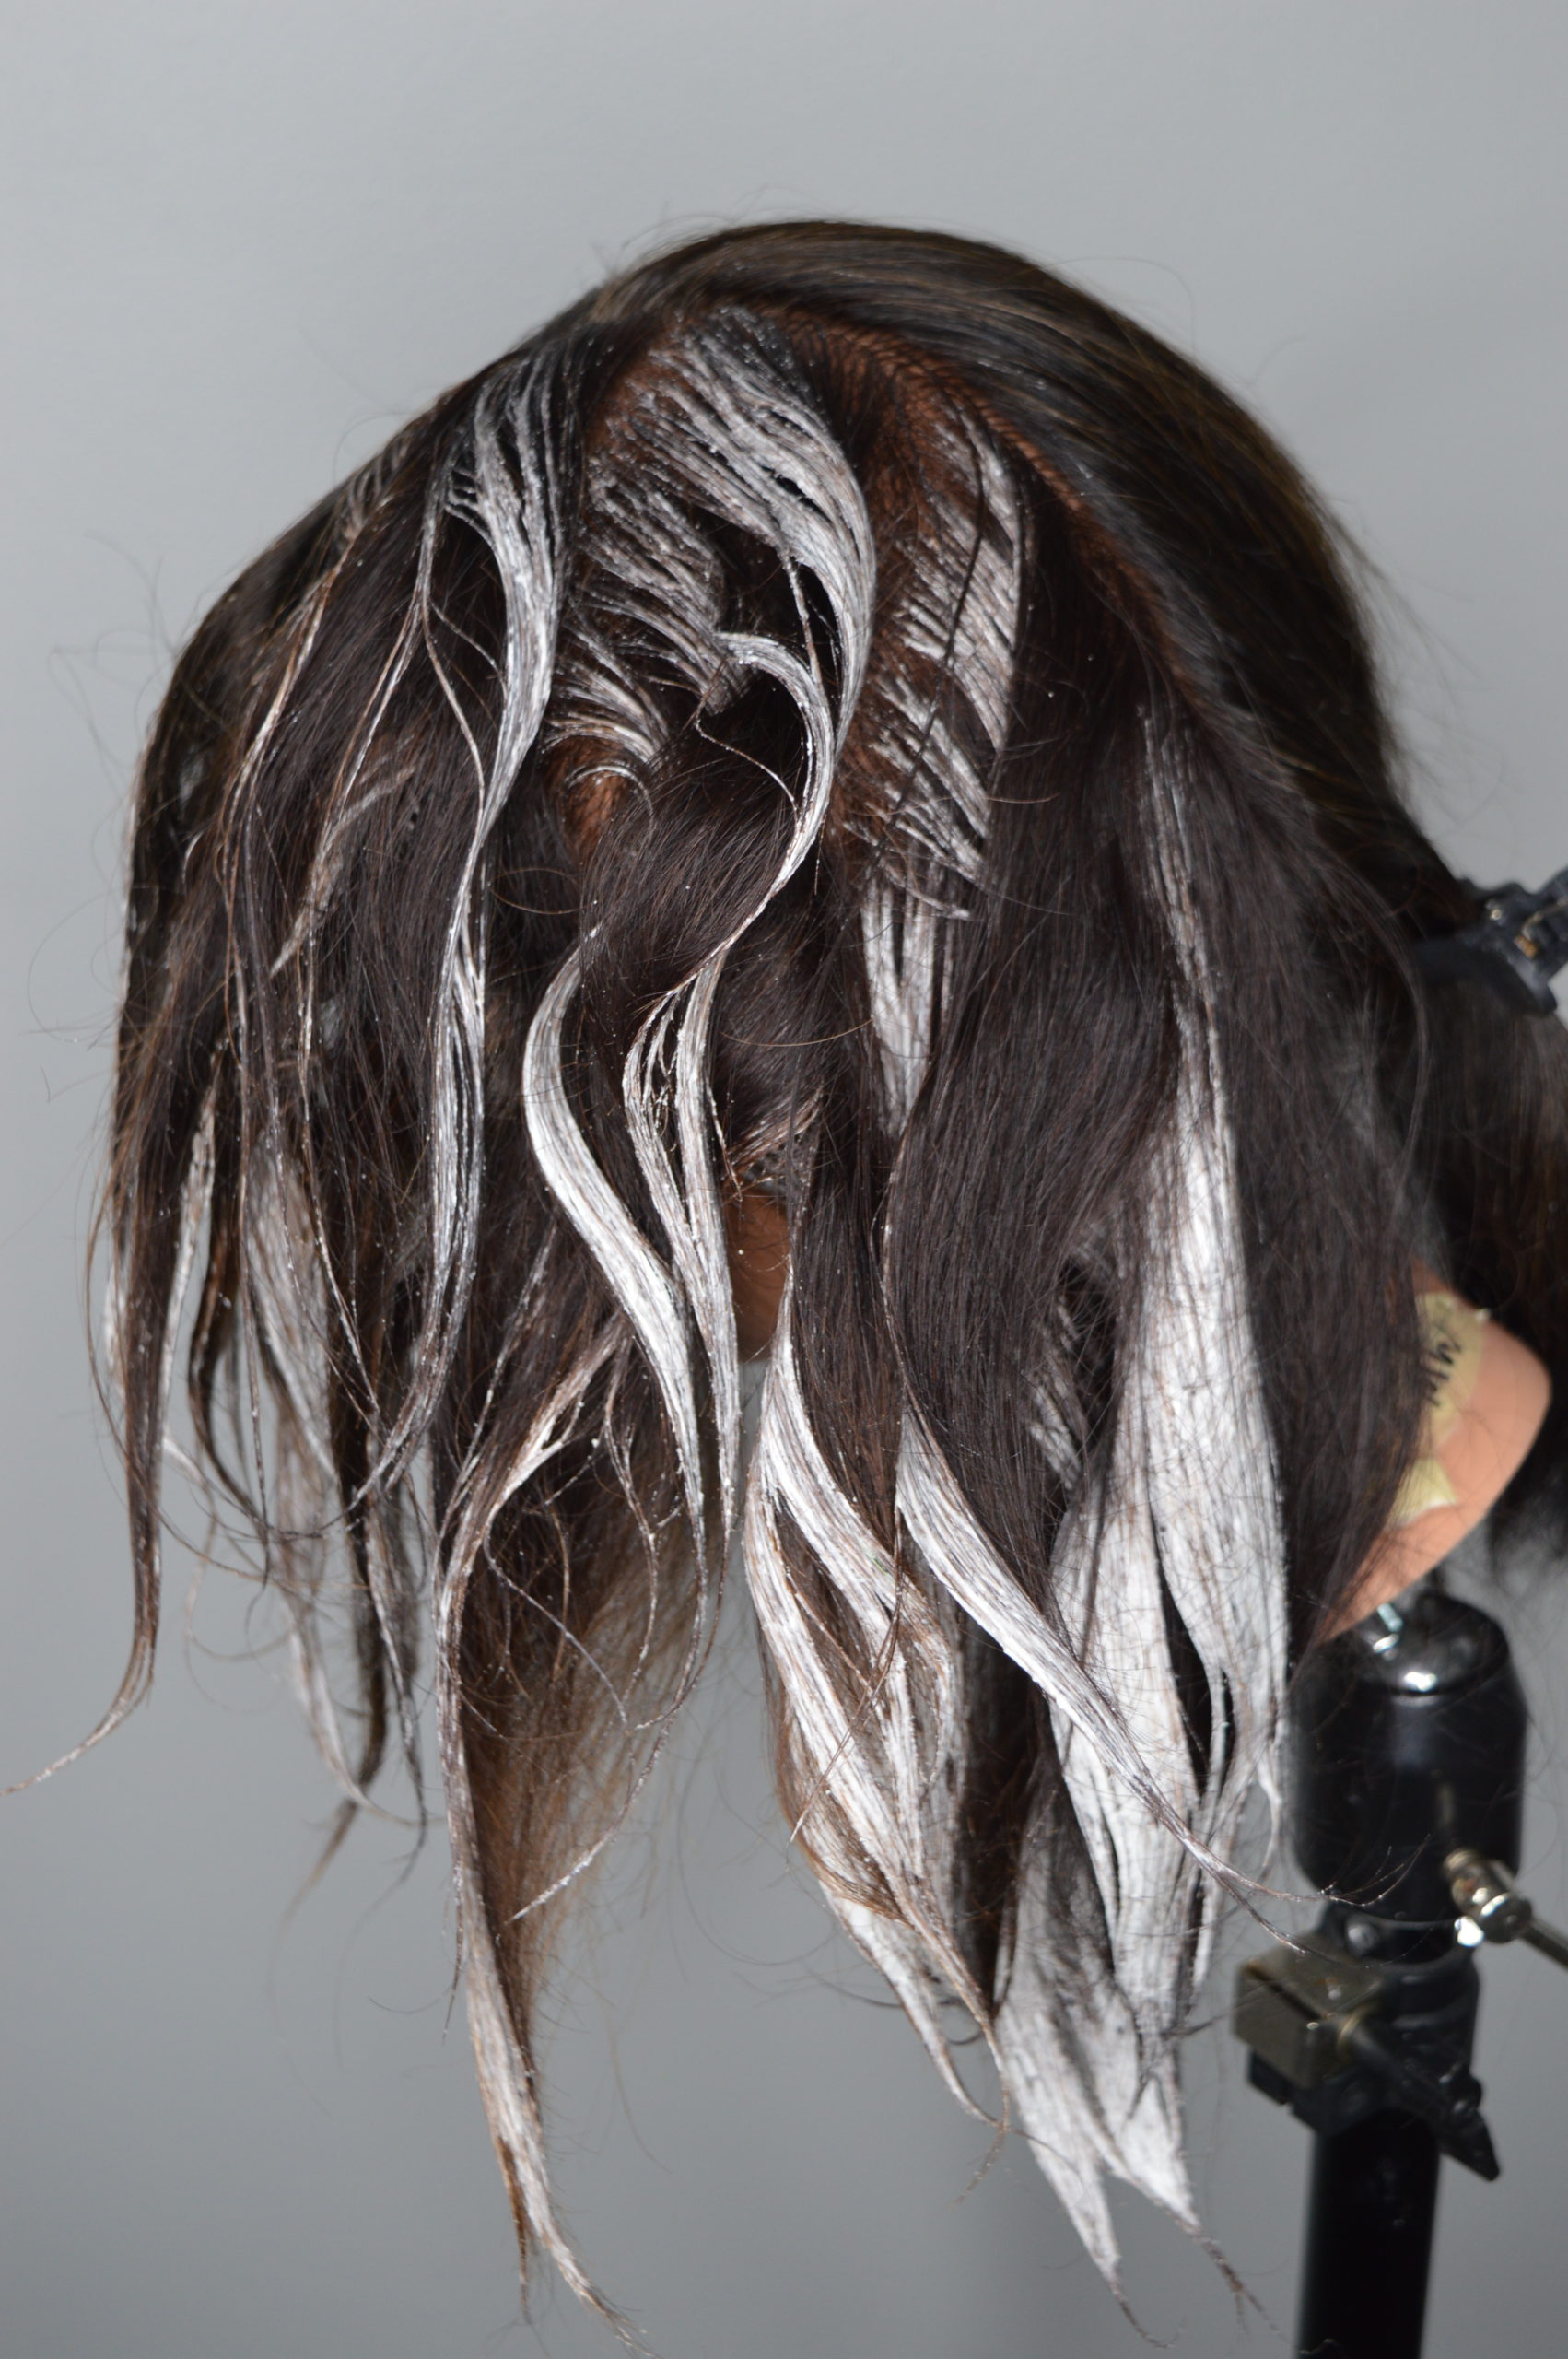
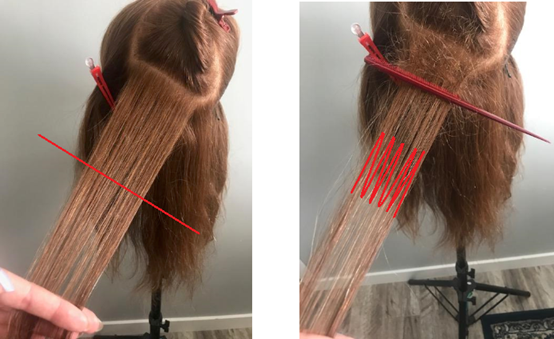
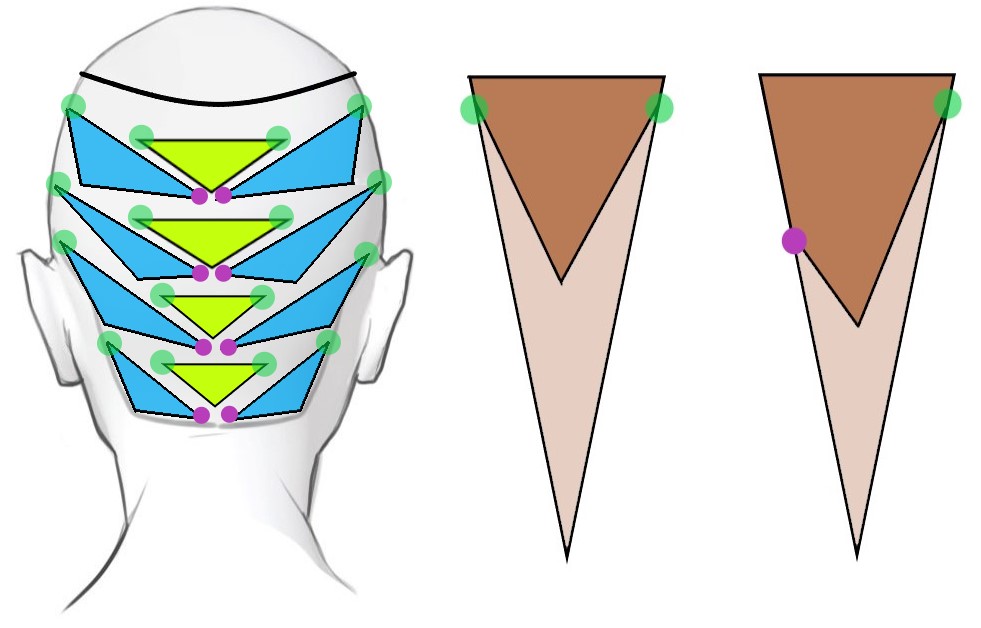
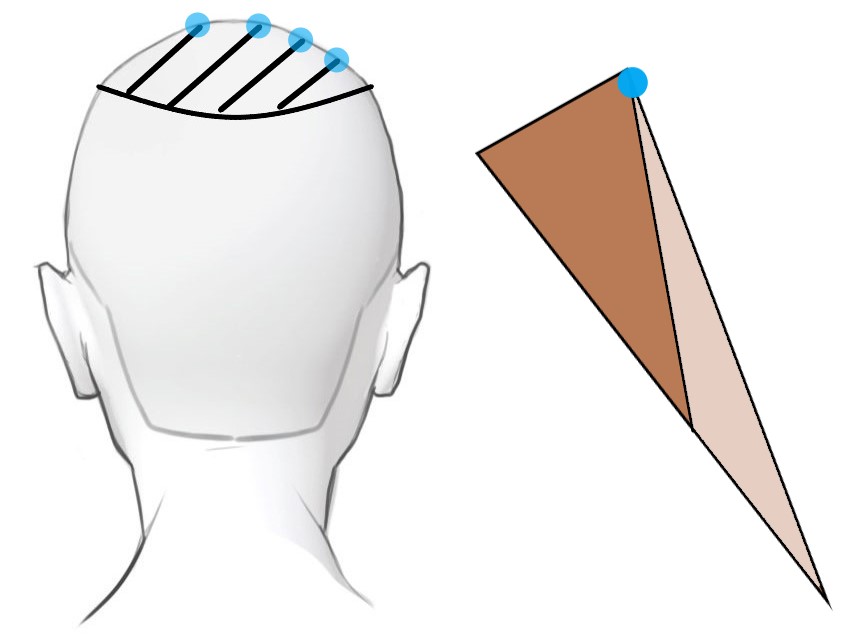
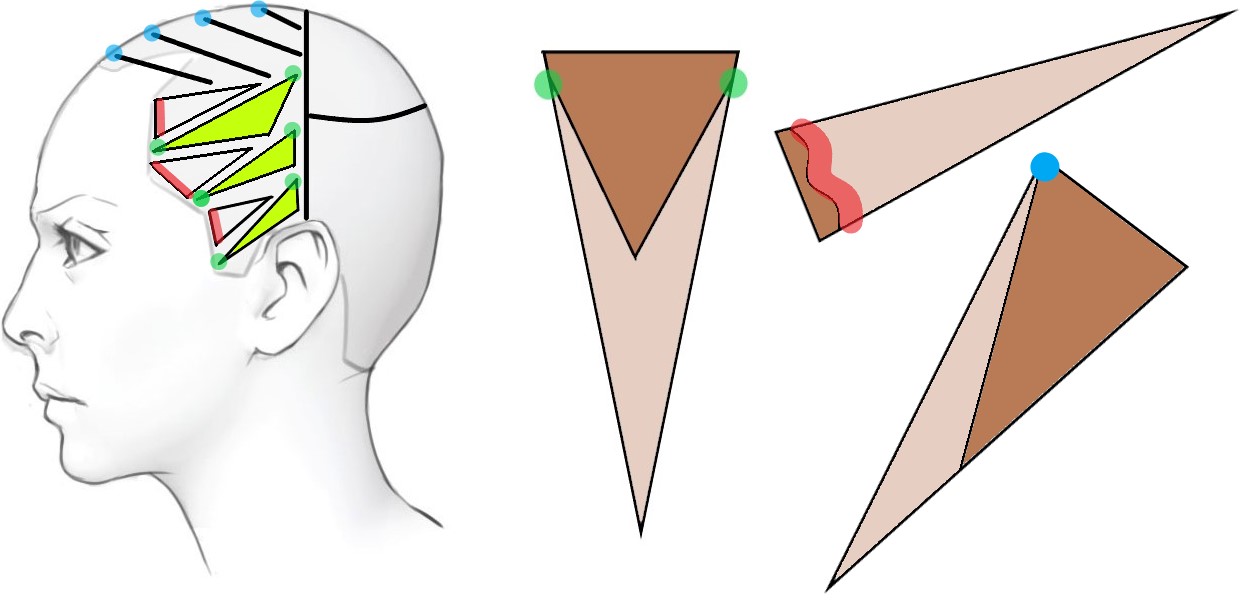
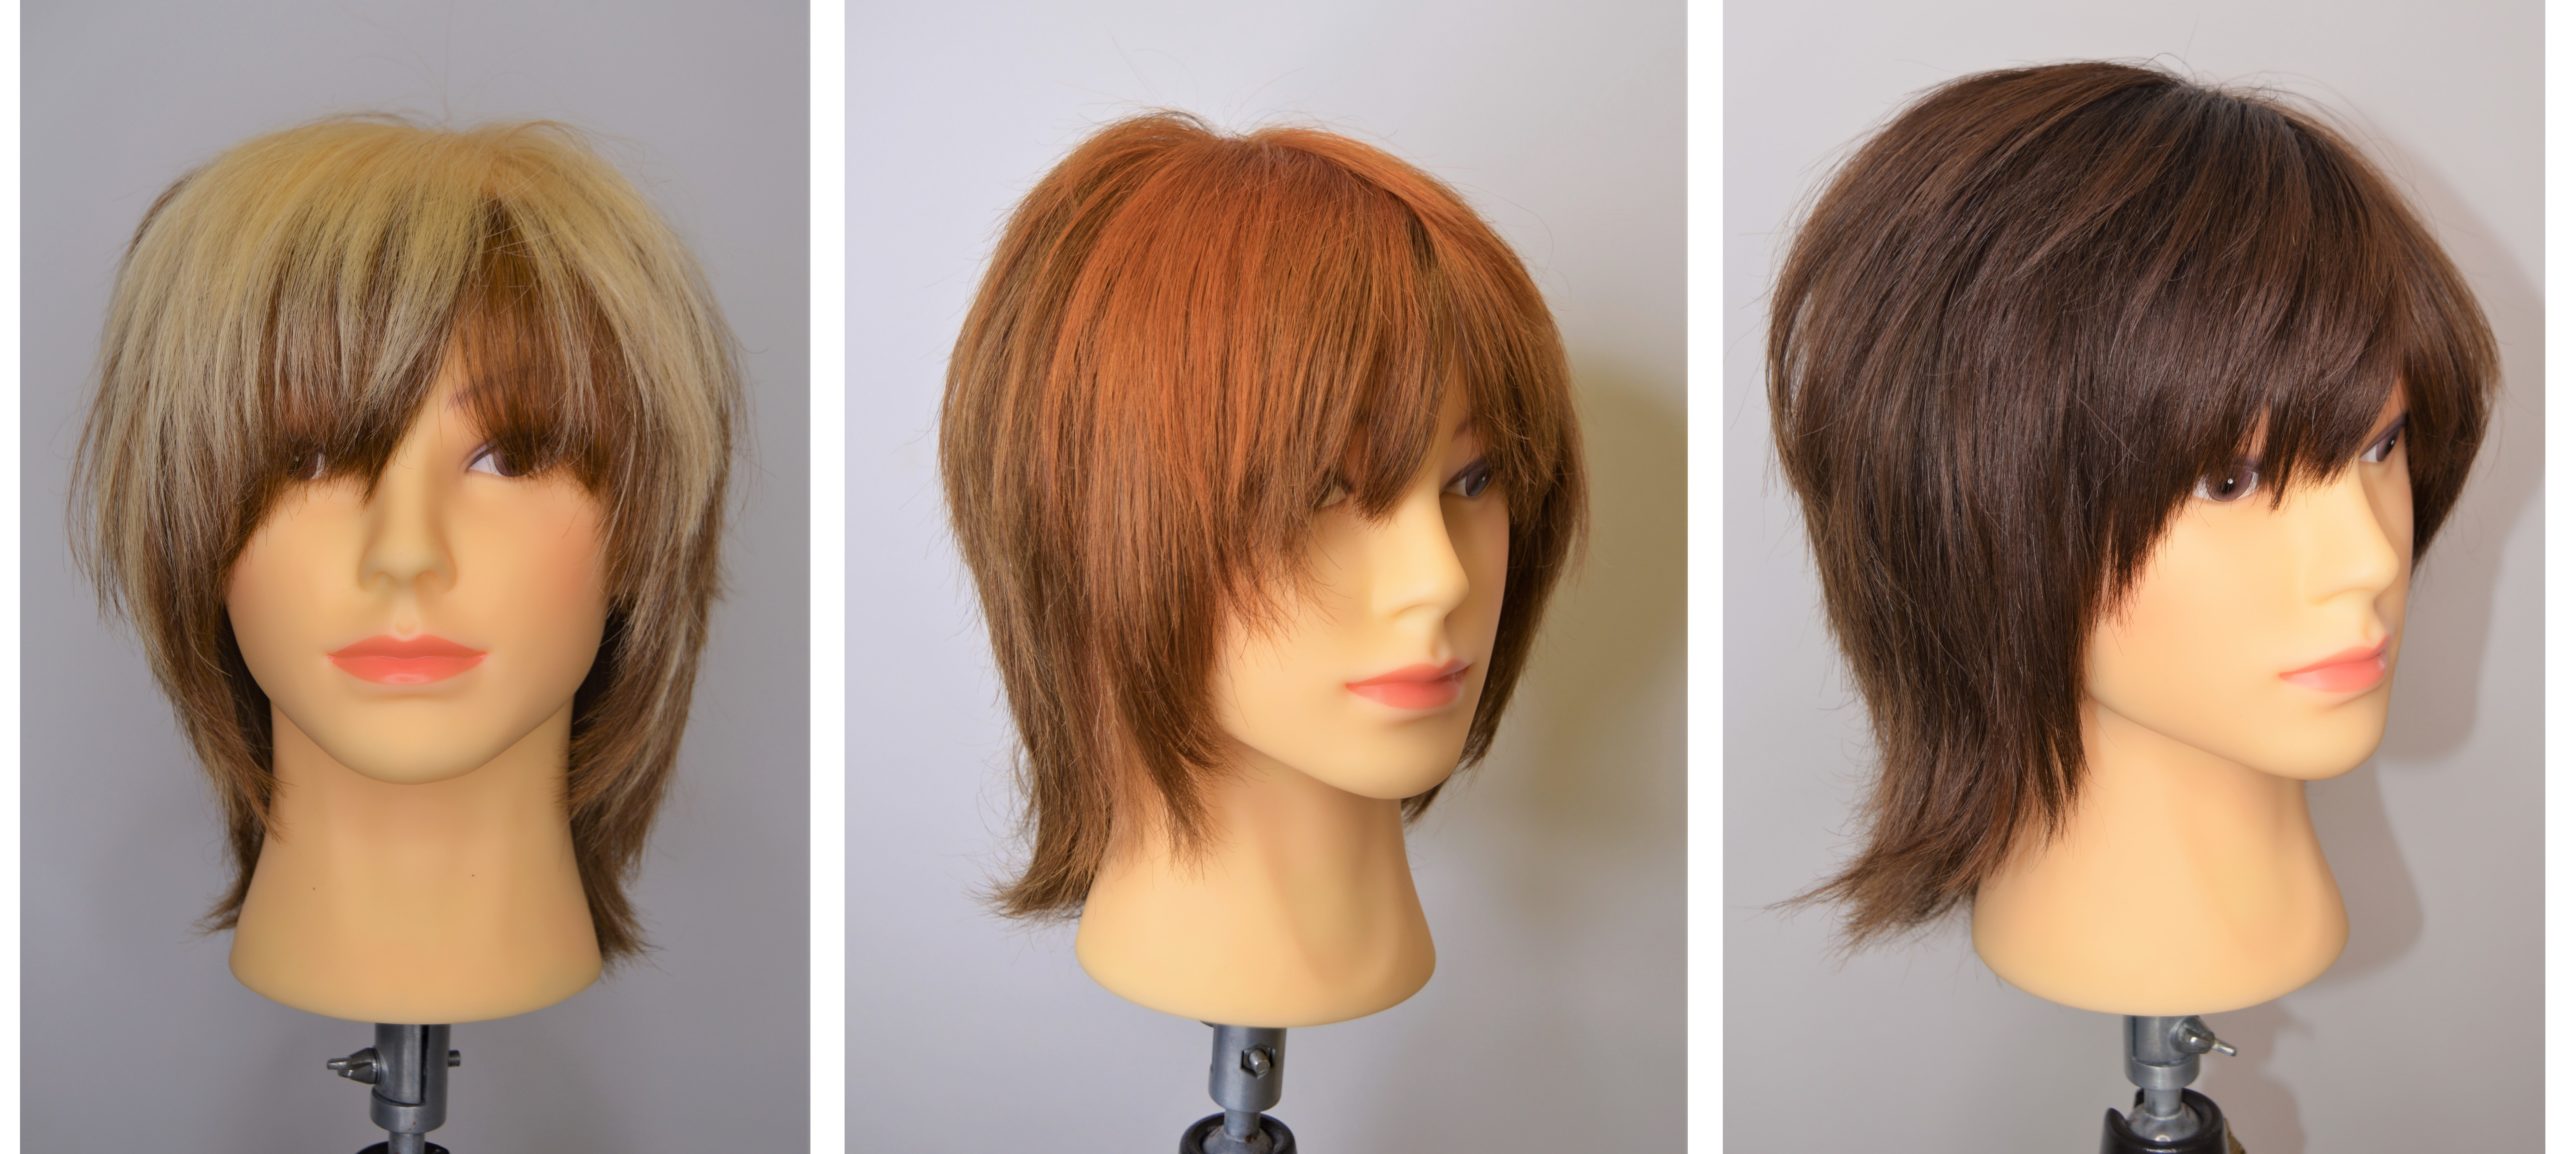
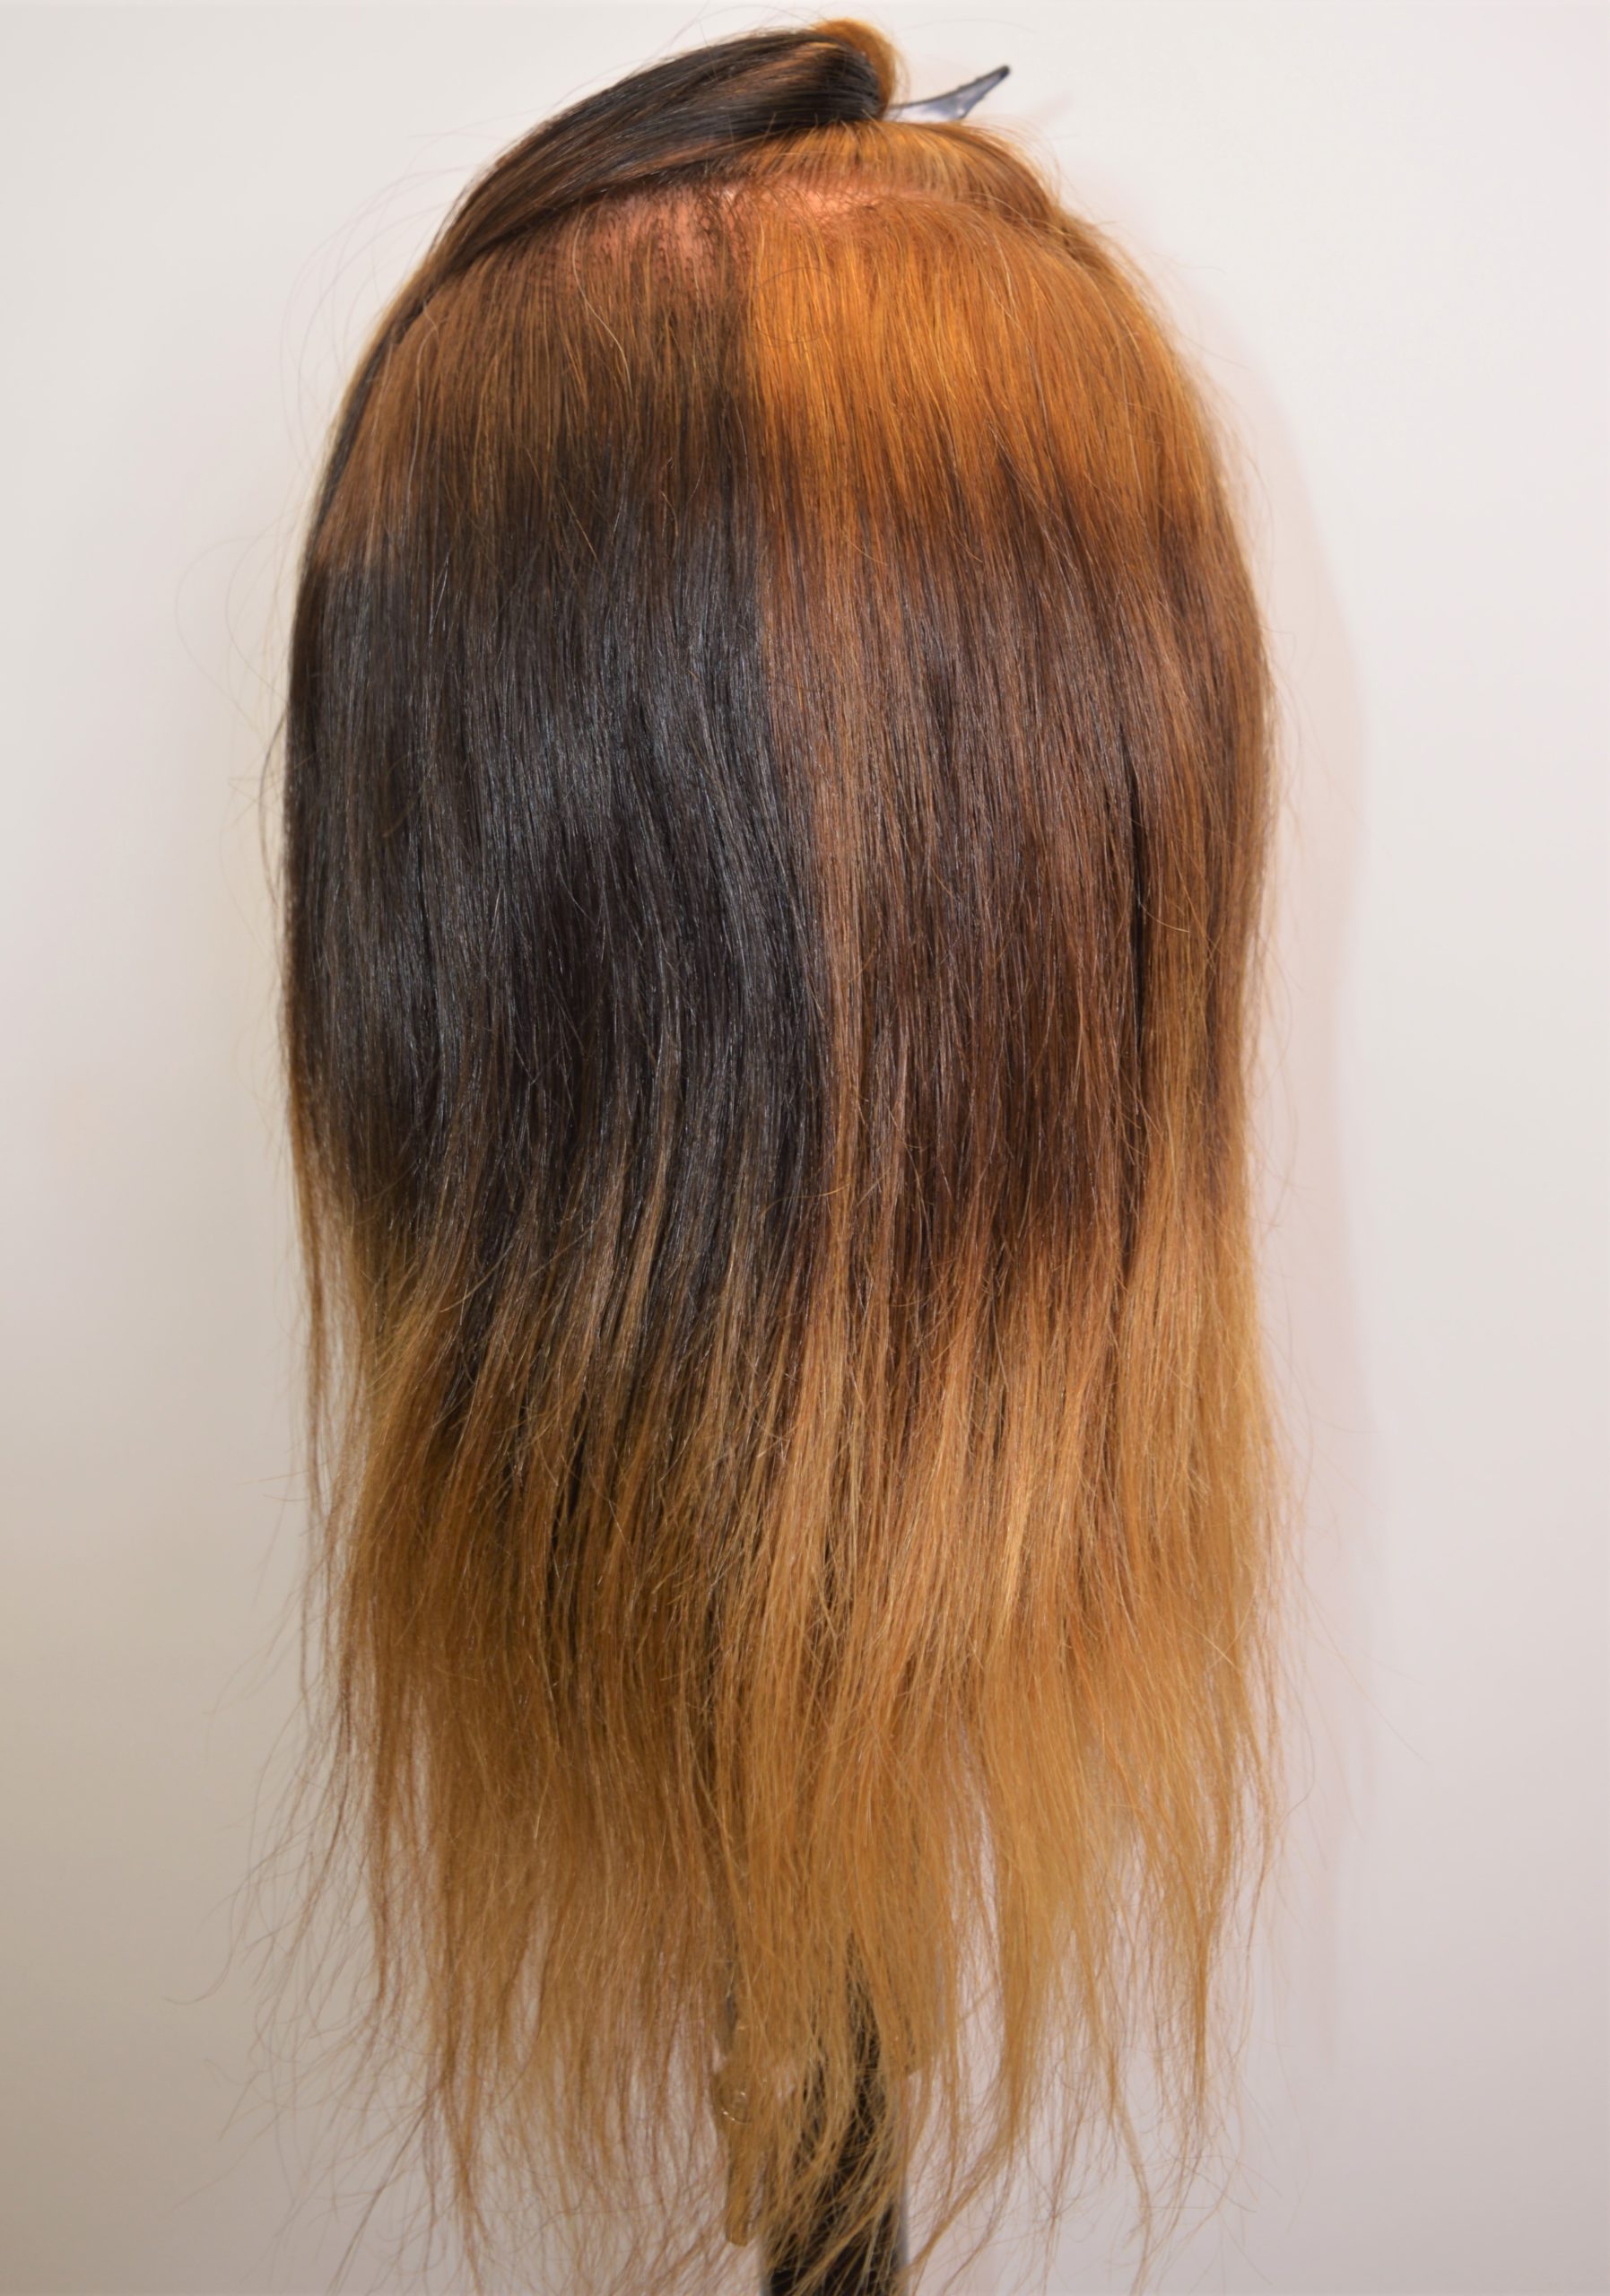
If you have ruled out a colour remover and a shampoo cocktail, your next step is to do a test strand in preparation for a bleach application. A test strand will tell you how the hair will lift and whether the hair can handle it. It will also alert you if you are dealing with multiple zones of various colour, and whether you may end up with multiple shades of underlying pigment, as seen below:
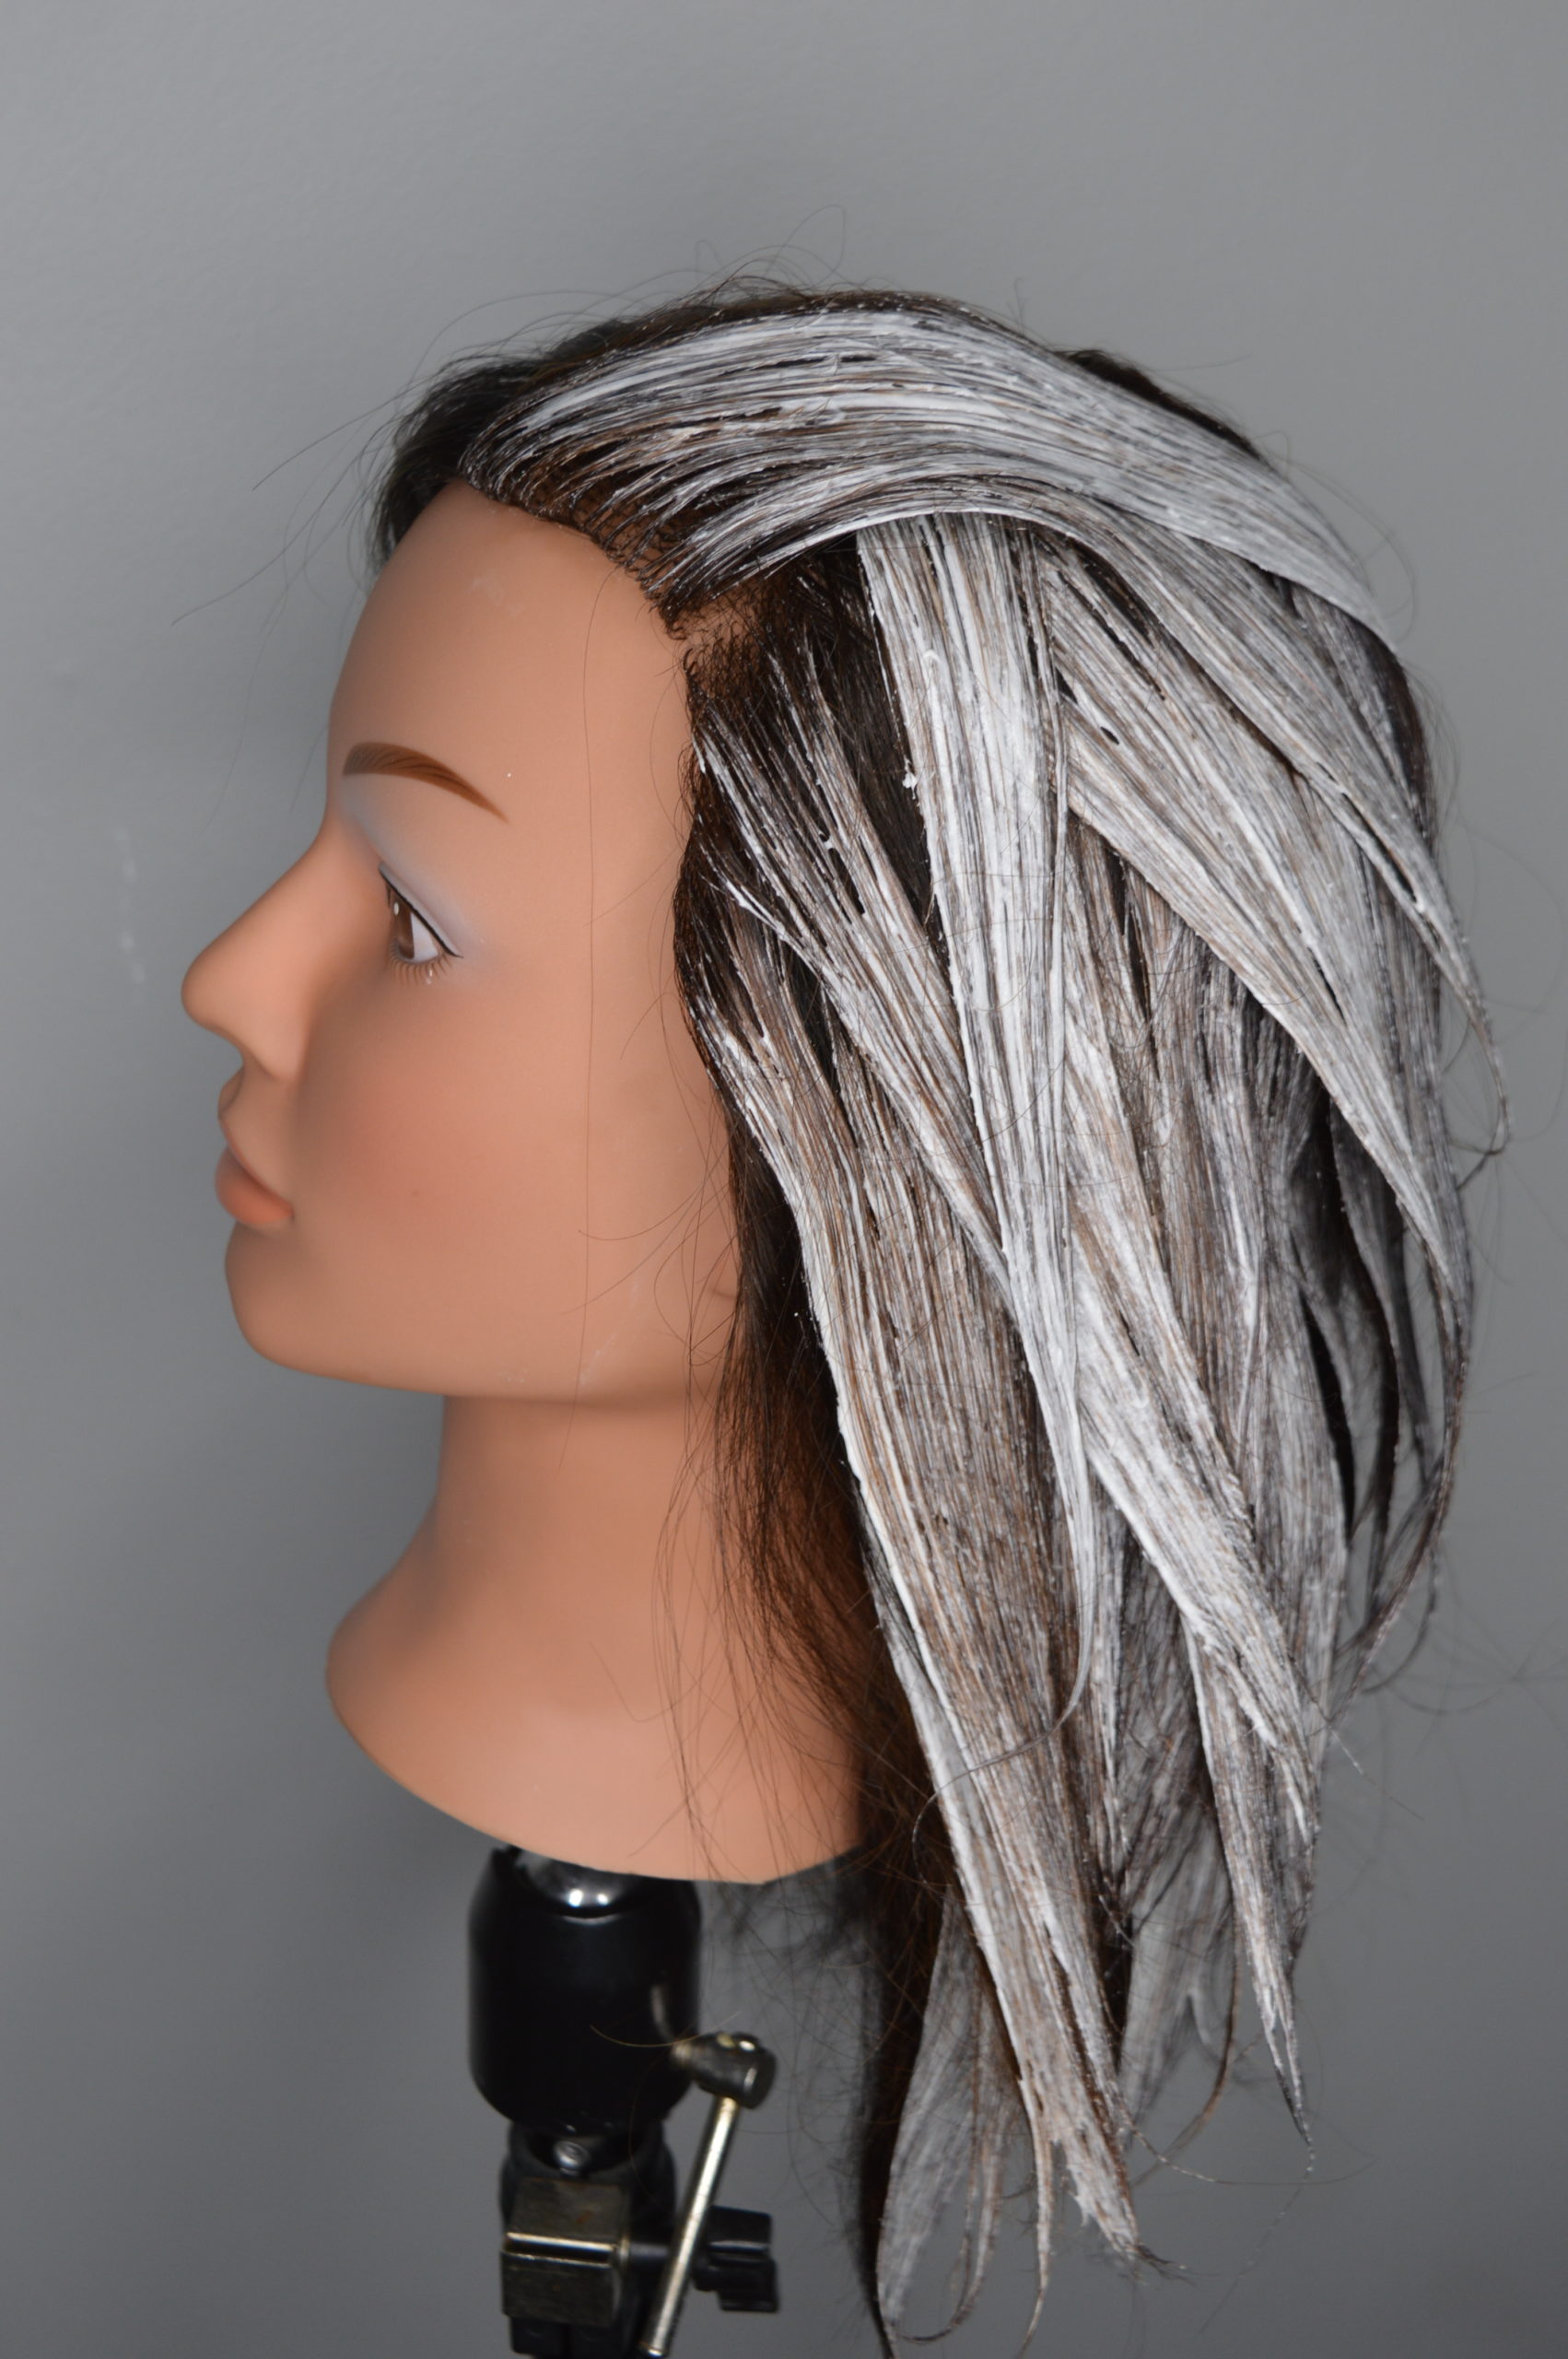
It is much better to know in advance the result from using bleach as a colour remover, so that you can prepare your plan and formulate accordingly. You will likely require multiple formulas of lightener.
Remember that hair texture always plays a part, but it is a much different process to lift through artificial pigment than virgin hair. You will not get predictable lift, and the exposed colour will be a mixture of underlying pigment and artificial pigment, leaving you with a darker, stronger warm tone to deal with.
Step 3: Reassess Hair Colour and Integrity
You’ve completed your first decolourization process, and now you must reassess the hair in front of you.
Is the hair still too dark?
If the hair integrity is good, you may choose to go ahead with a second de-colourization service. This does not mean you will necessarily do the same removal method twice. If your first service consisted of using an oxidative colour remover, you may now opt to use a bleach application to achieve better lift. If you started with a bleach application and did not quite make it to the target level, you may choose to use a lower developer and milder bleach product for your second process to lift the last 1–2 levels more gently. Alternately, perhaps only the mid-strands need more lift to achieve an even result. Always do the minimum necessary to achieve an even result. This includes using the gentlest product necessary, which will vary by hair texture. Keep in mind that every subsequent decolourization service contributes to a weakened hair strand. You must reassess after each decolourization.
If the hair integrity is poor after the first decolorization, you may need to stop here and make a decision with your client. Perhaps you can only achieve a couple of levels of lift this appointment, and decide to tone what you’ve got and set your client up with strengthening treatments to do at home before they come back in a few weeks for their second appointment. Or, they may be happy with the amount of lift achieved and decide to wait the full 4–6 weeks before their next appointment.
Is the hair colour even? Is it at the desired level?
Great! You may now move onto the toner application! But first, be sure to assess hair texture and integrity, as these factors will affect your formulations.
Step 4: Formulate and Apply Toner
Formulating to tone after a decolorization service follows many of the same guidelines as formulating to tone after a virgin lightening service (refer to Chapter 4.7), however there are some unique considerations that you should prepare for.
When lifting through layers of artificial colour, you will likely end up with varying degrees of lightness and tone from root to ends, and the hair may not have the strength and integrity to endure a second decolorization process to even things out. In this instance, you will not only have to consider uneven porosity when formulating, but also variations in underlying pigment.
If you have uneven levels of lift throughout the hair, let’s look at how to determine the next procedure, and formulate the appropriate toners.
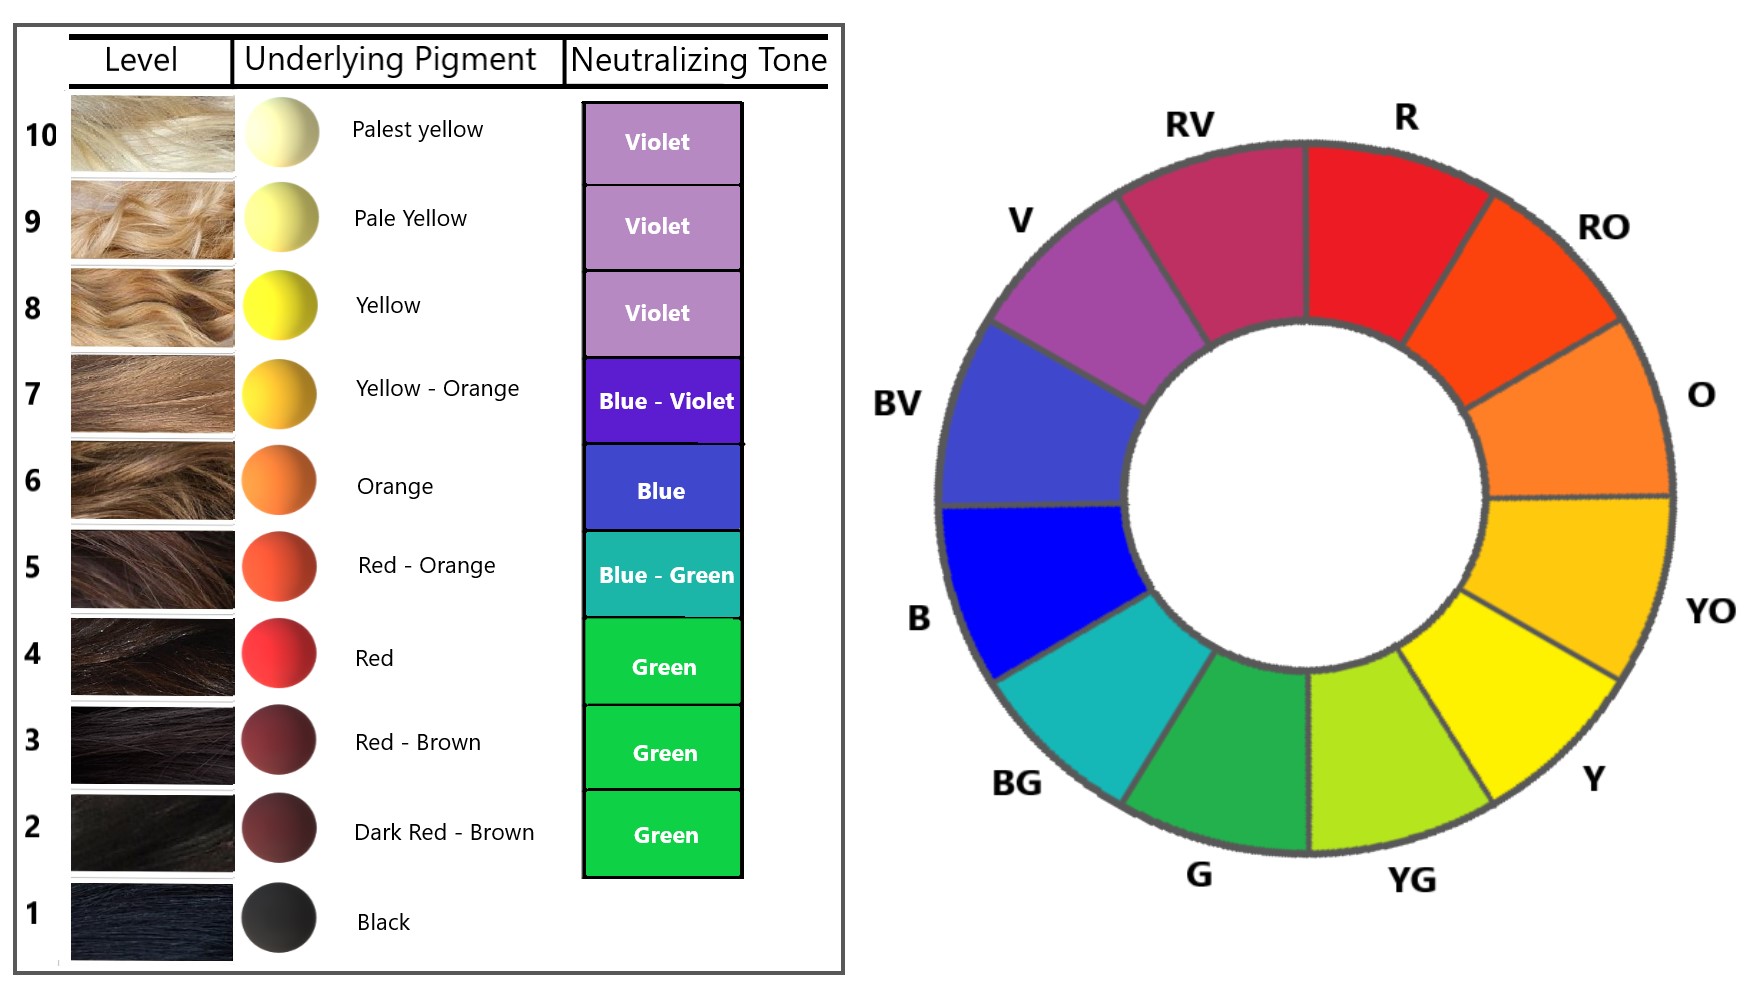
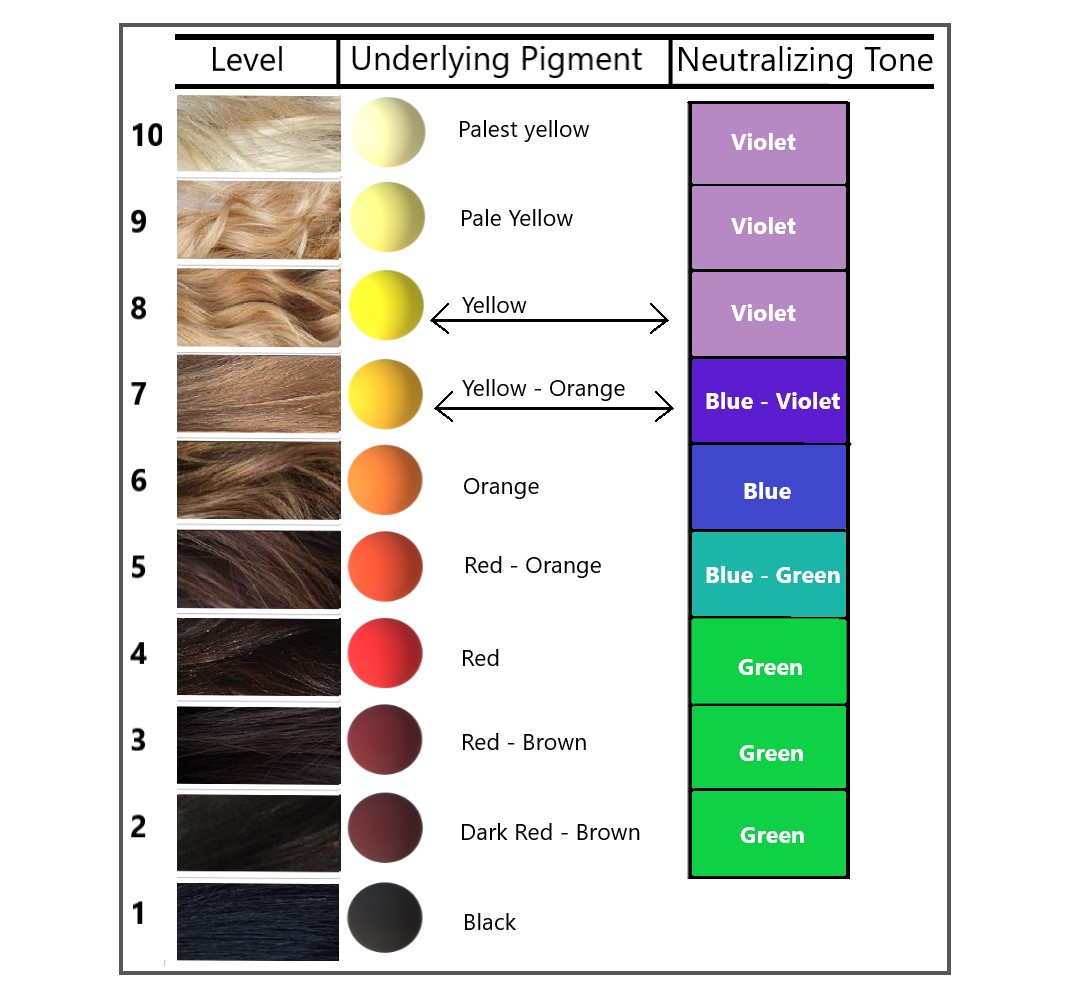
Firstly, you should assess each area and zone individually to record the level, exposed underlying pigment, and levels of porosity. Next, determine which area or zone is the darkest, and decide whether you will enhance or neutralize the existing tone. Formulate accordingly.
In a case where further lightening is not an option, you will need to tone to the darkest level achieved. The darkest area will have the strongest underlying warm pigments and thus will need the most neutralization if a neutral result is desired. Formulating for this area first allows you to more easily determine the tones required to achieve an even colour result throughout the hair.
For optimal results, tone to the darkest level.
While this may feel counterproductive to darken the lighter areas, remember that attempting to tone to the lighter levels of lift will be ineffective on the darker areas, and you will be left with horizontal lines of demarcation. An even level 6 result is great progress if you started with a level 3 or 4, and you can assure your client that further lift may be achieved in future appointments, but only if the hair integrity allows.
If subsequent lifting appointments are planned, consider using a semi-permanent toner for gentler deposit and to allow for fading and easier lift with further decolorization in the future. It is also worth considering that a neutral or warm tone will appear lighter than a cool tone. So, keep this in mind, even if the ultimate end goal is a cool result, because you’re better off to keep the tone on the warmer side at this stage, or your client will likely leave with something that looks closer to a level 5 and will probably feel as though not much progress was made after much time and effort!
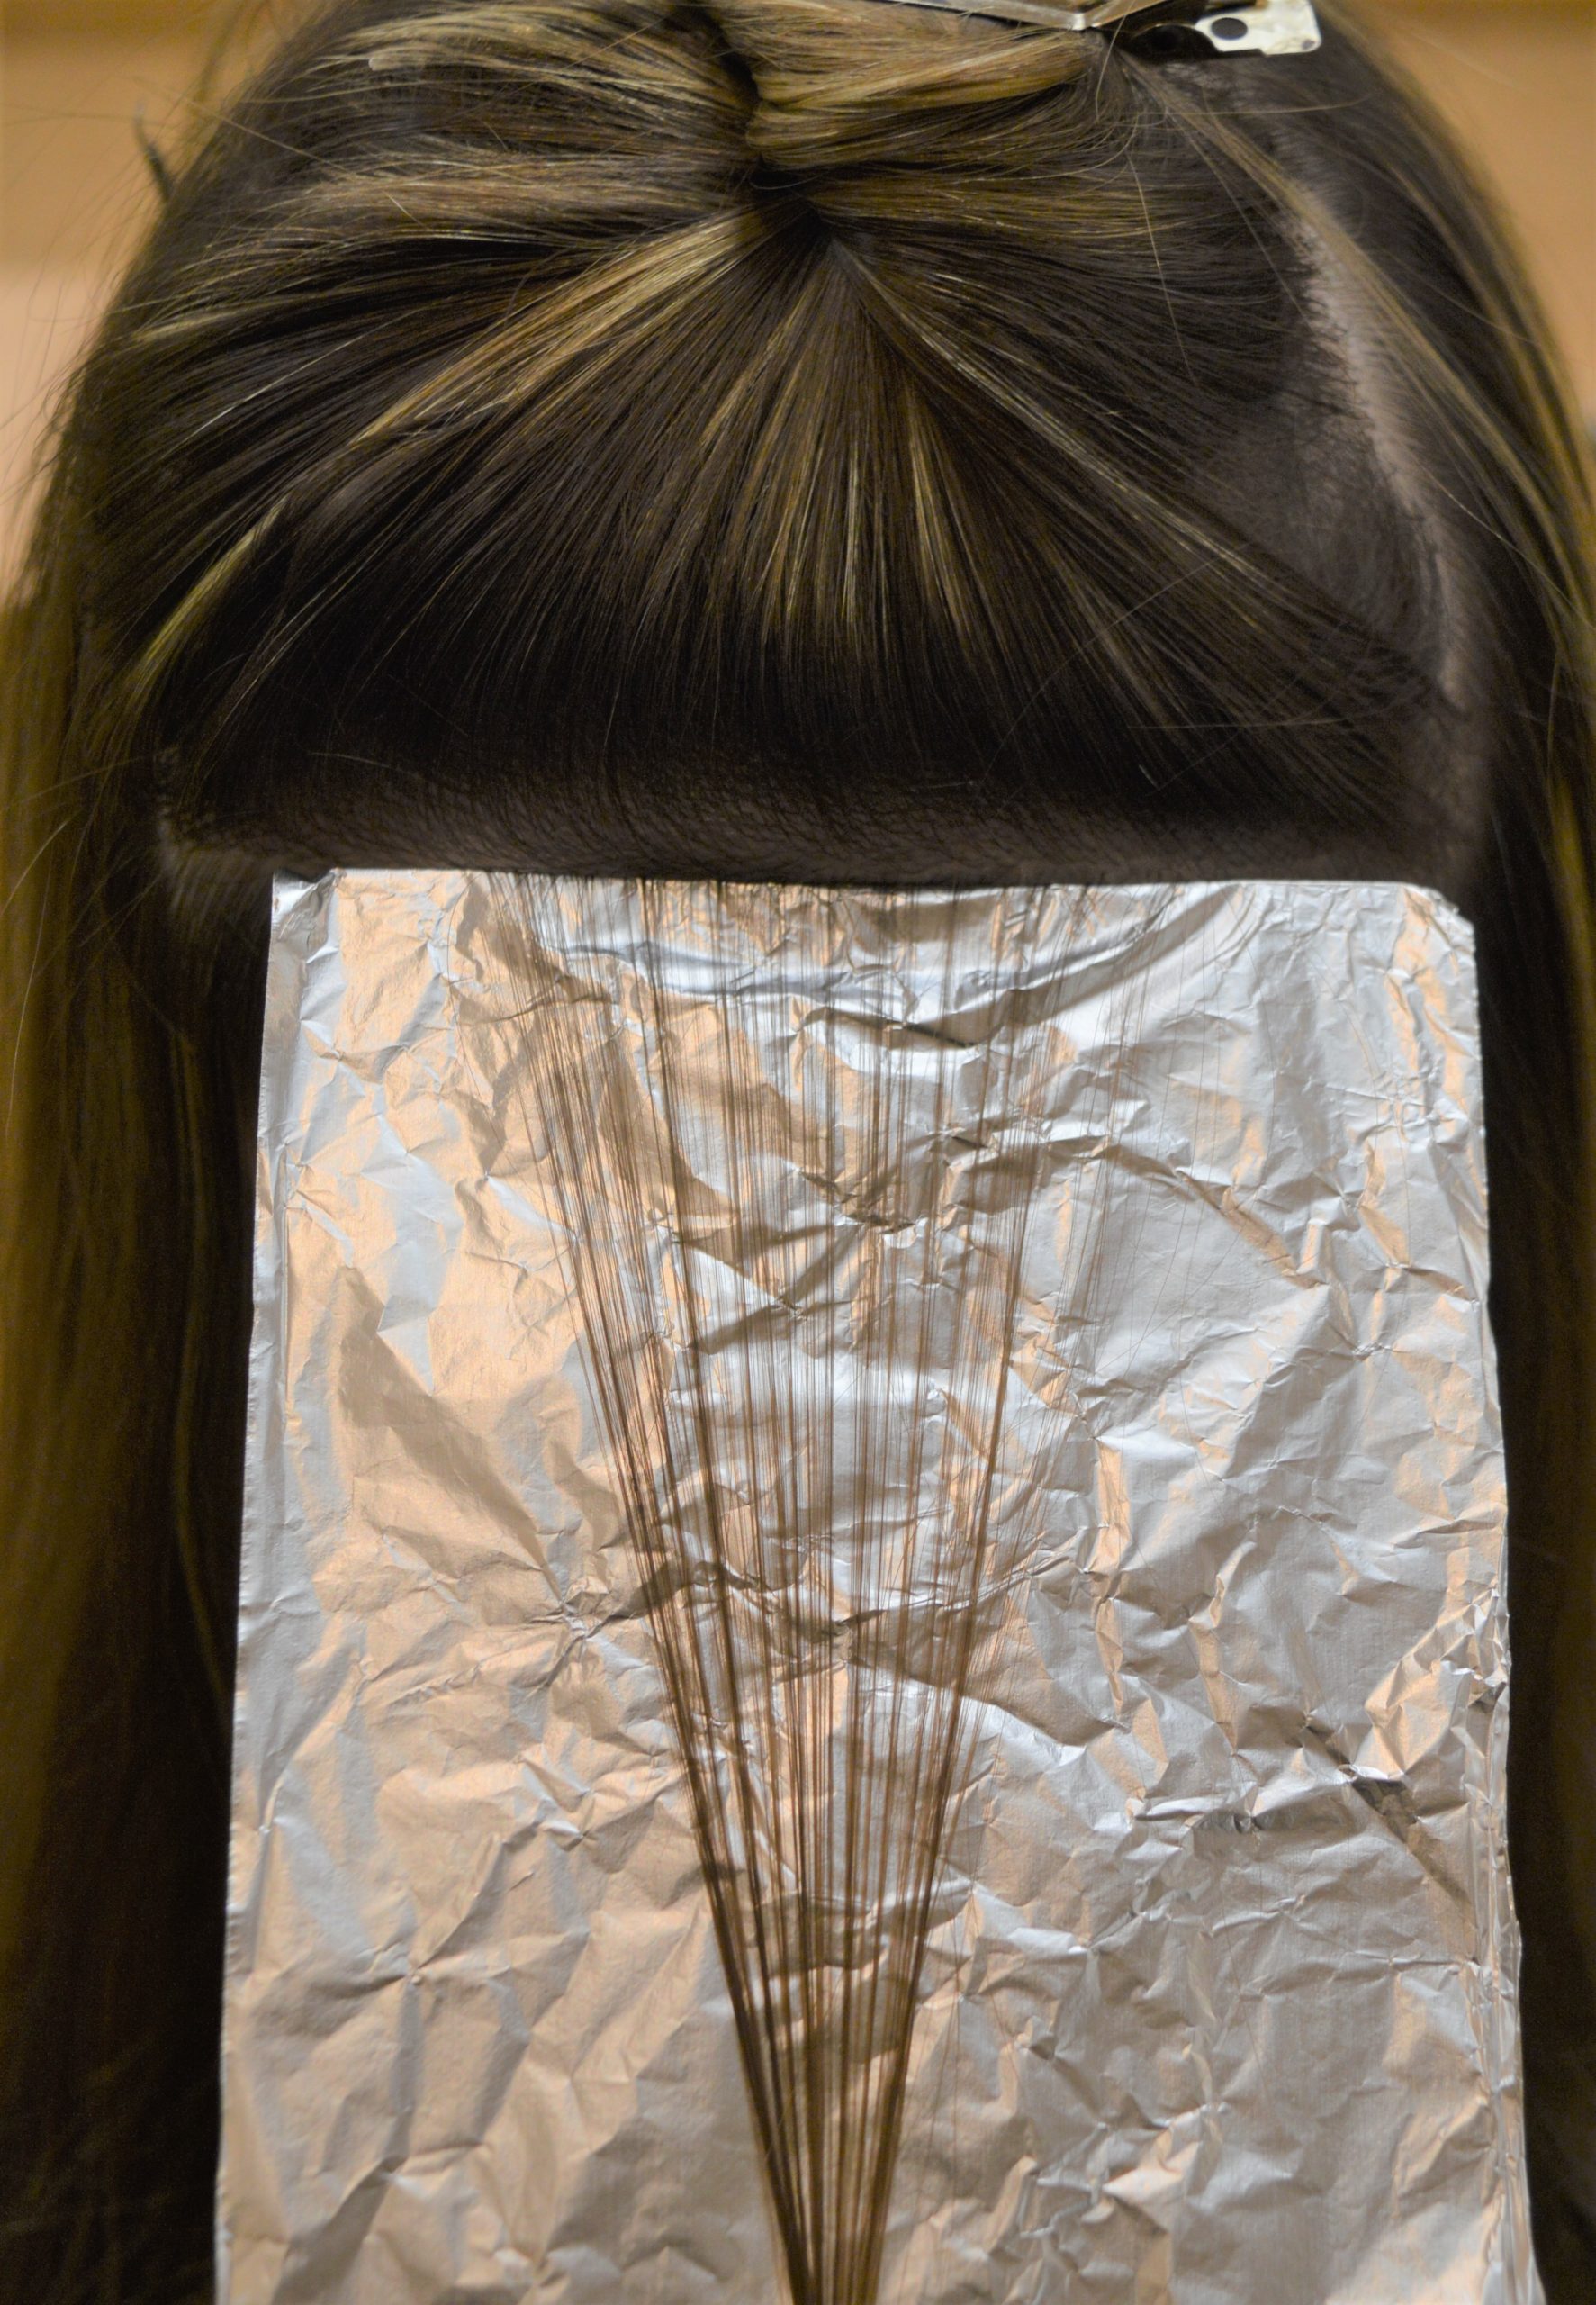
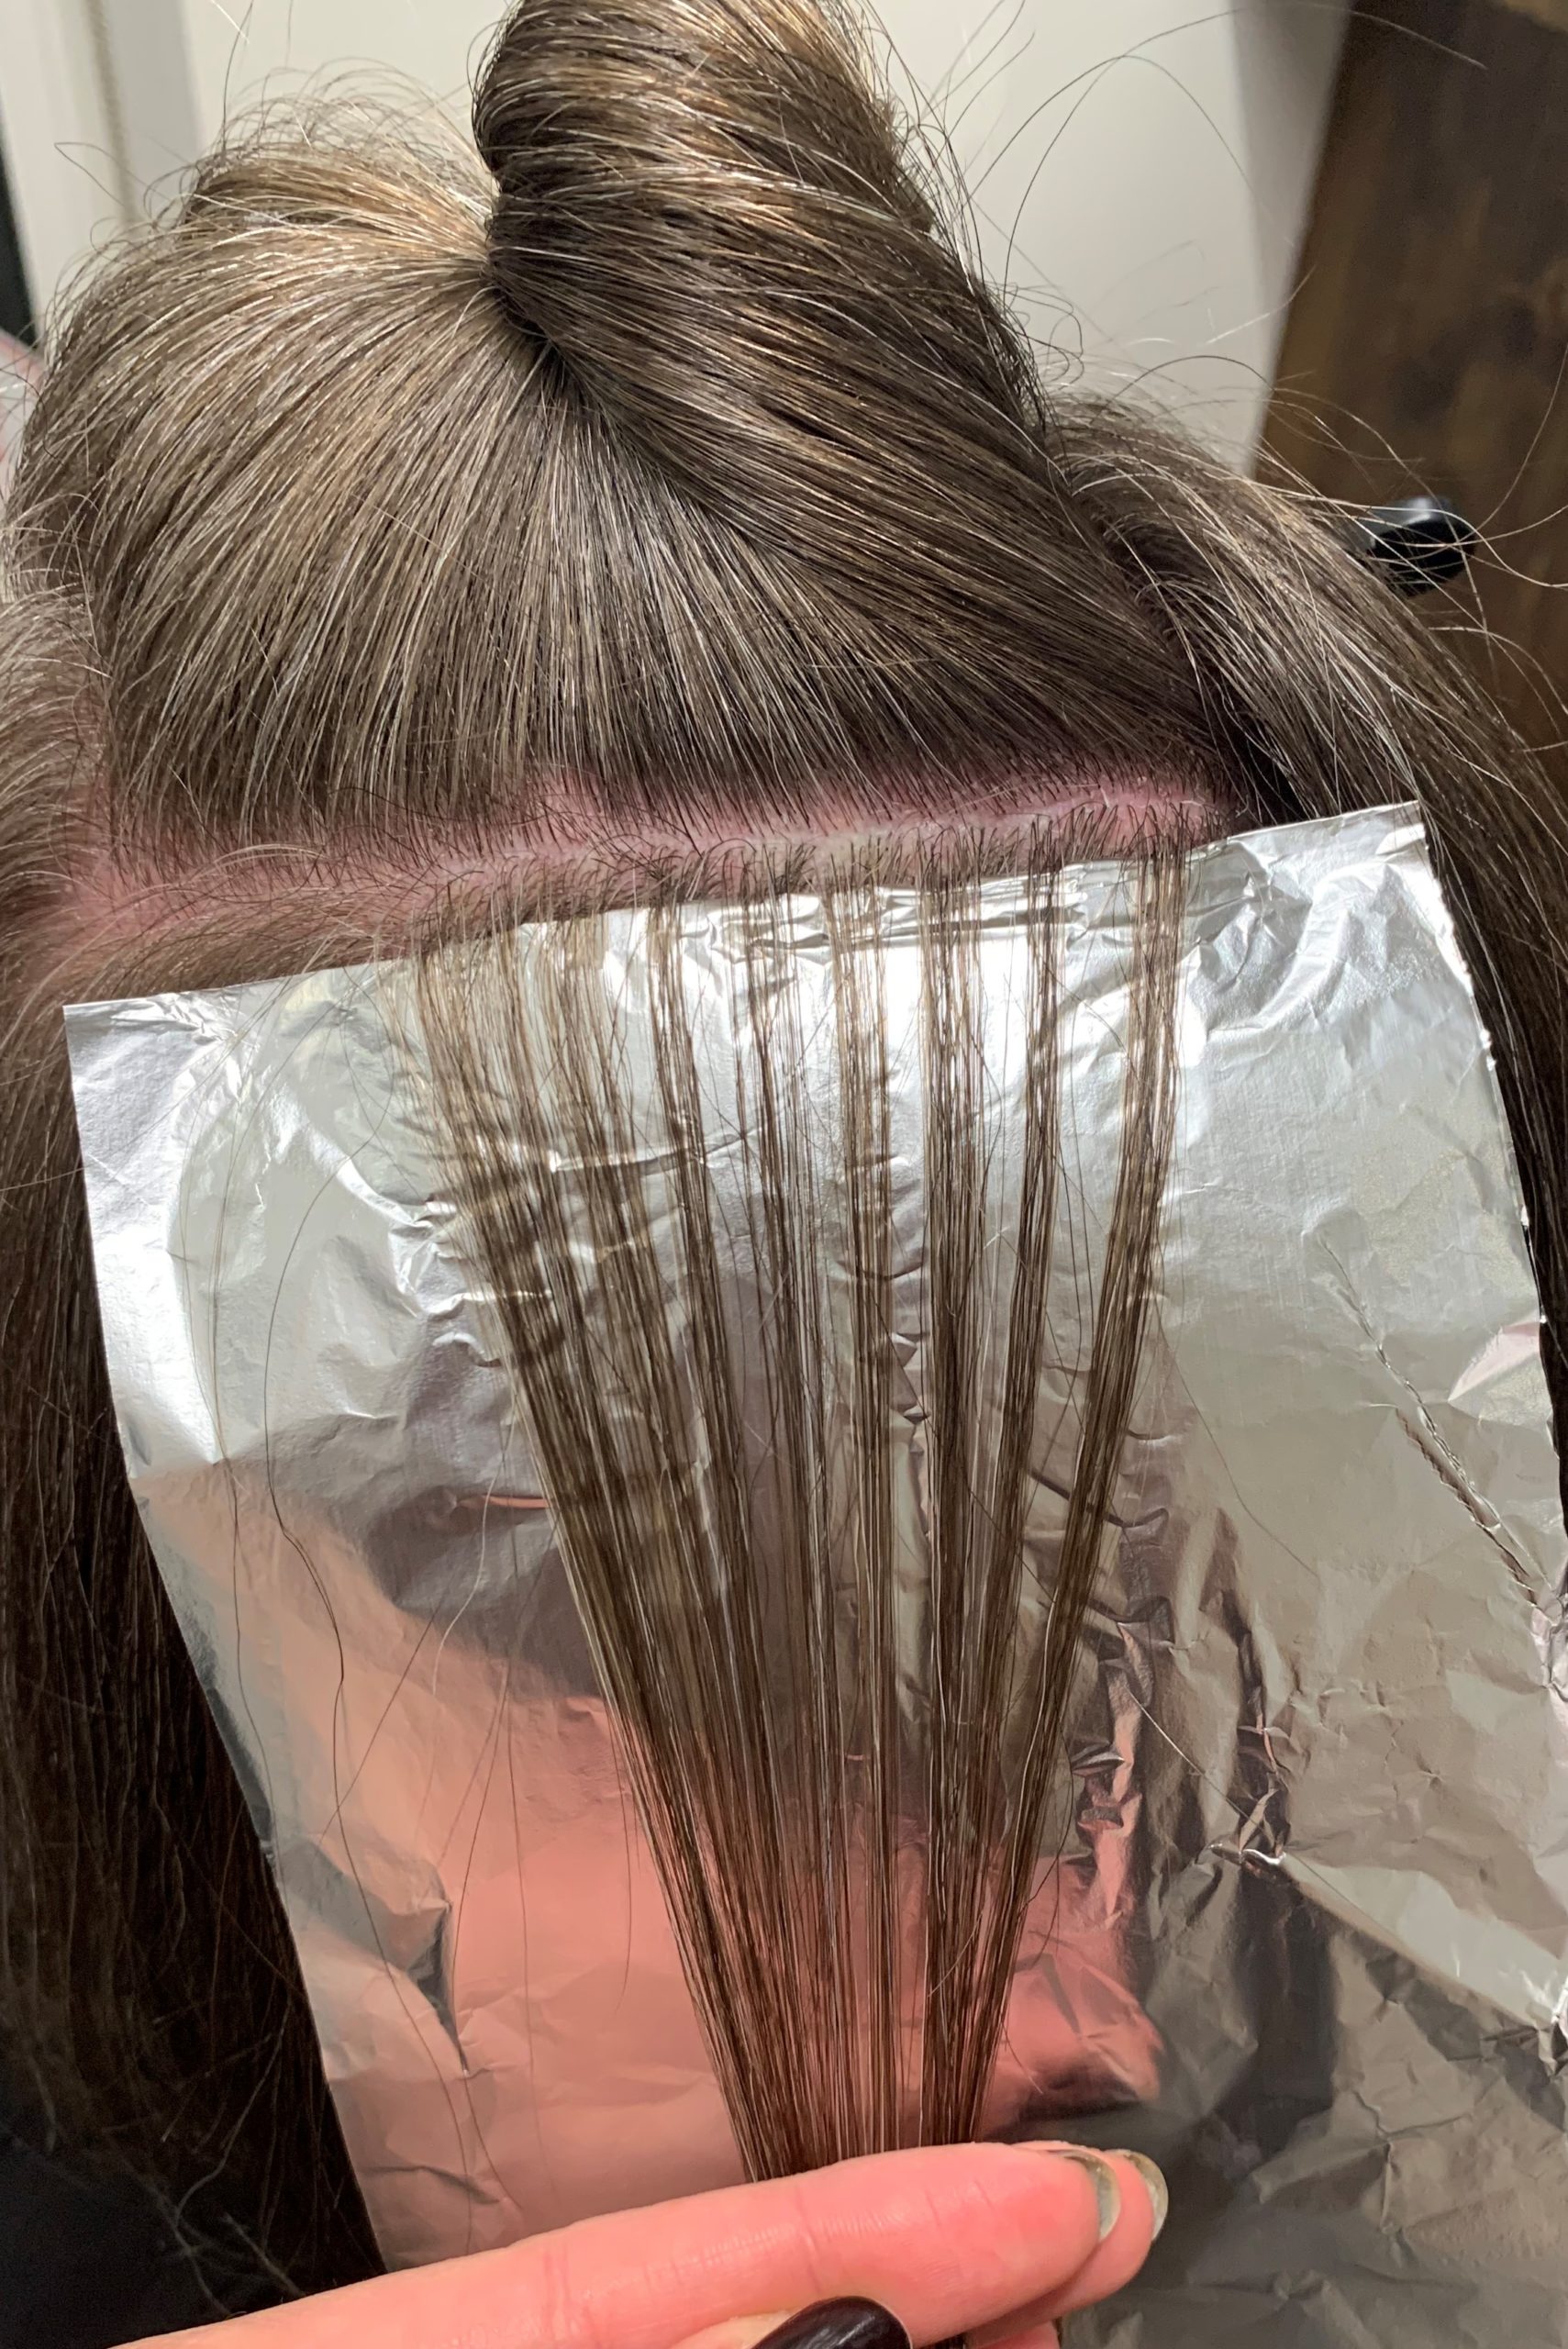
Example
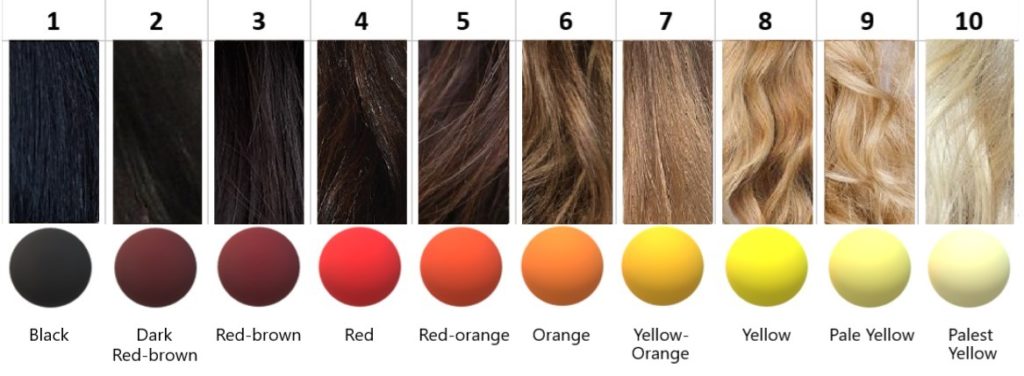
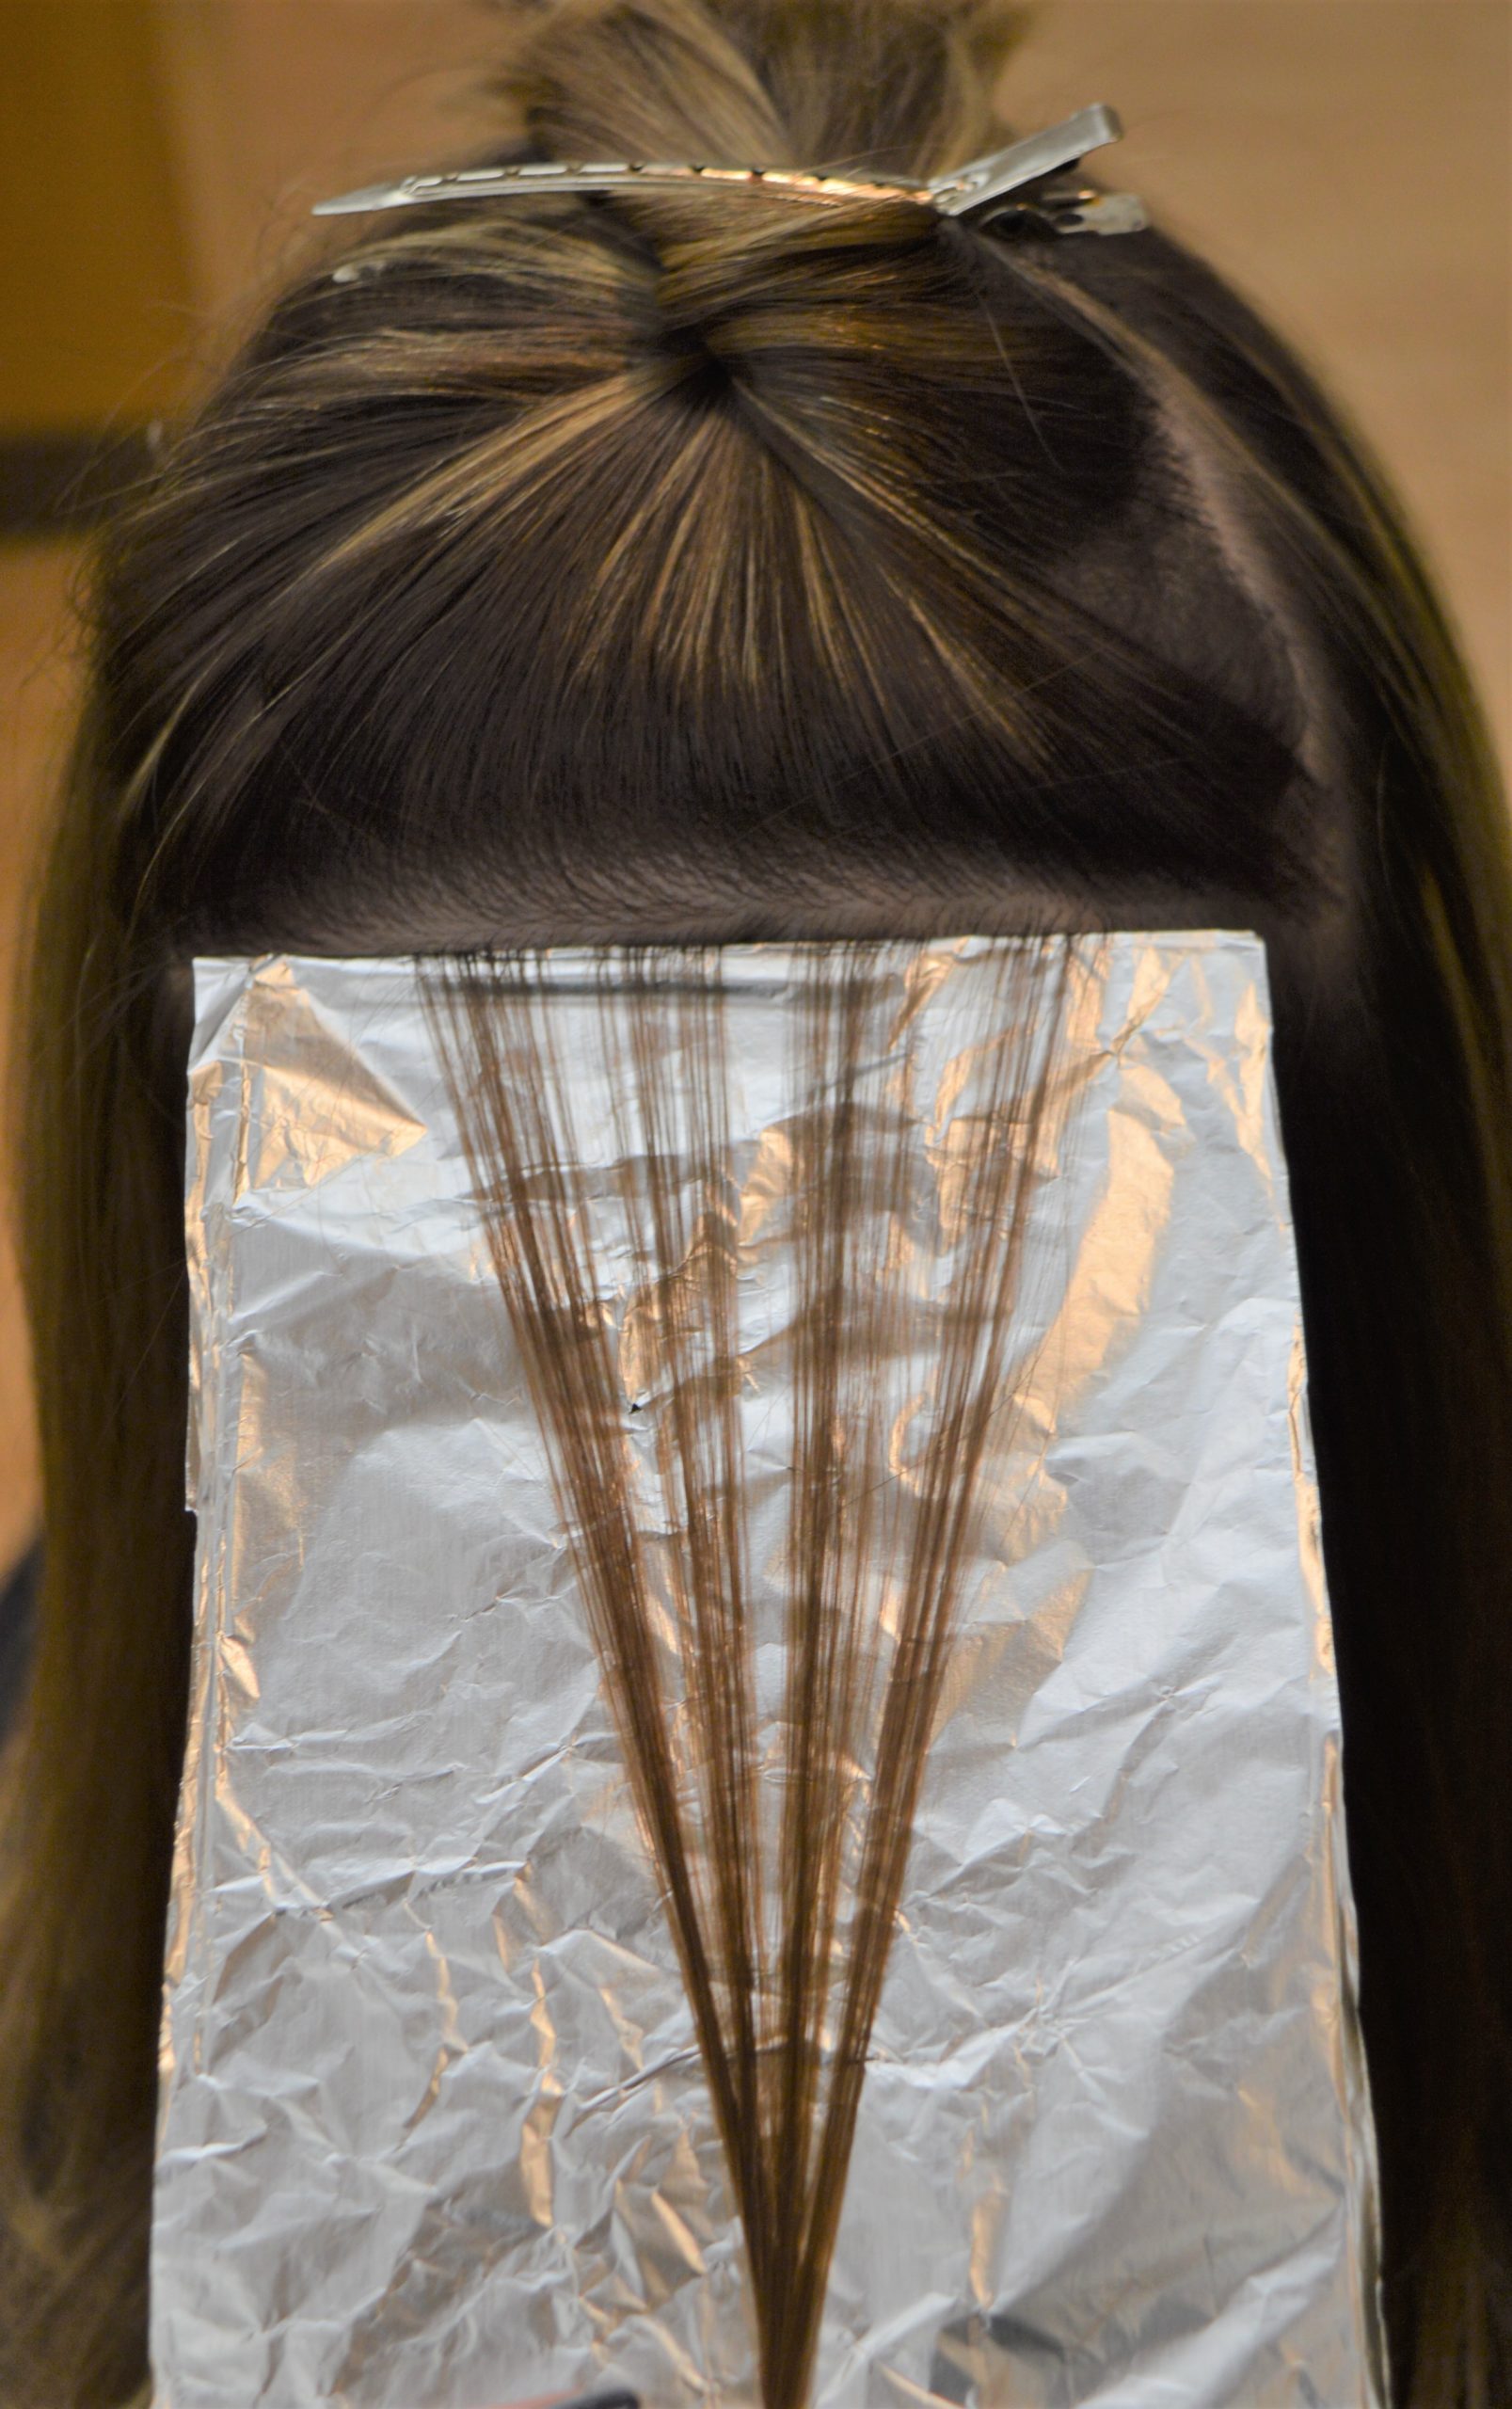
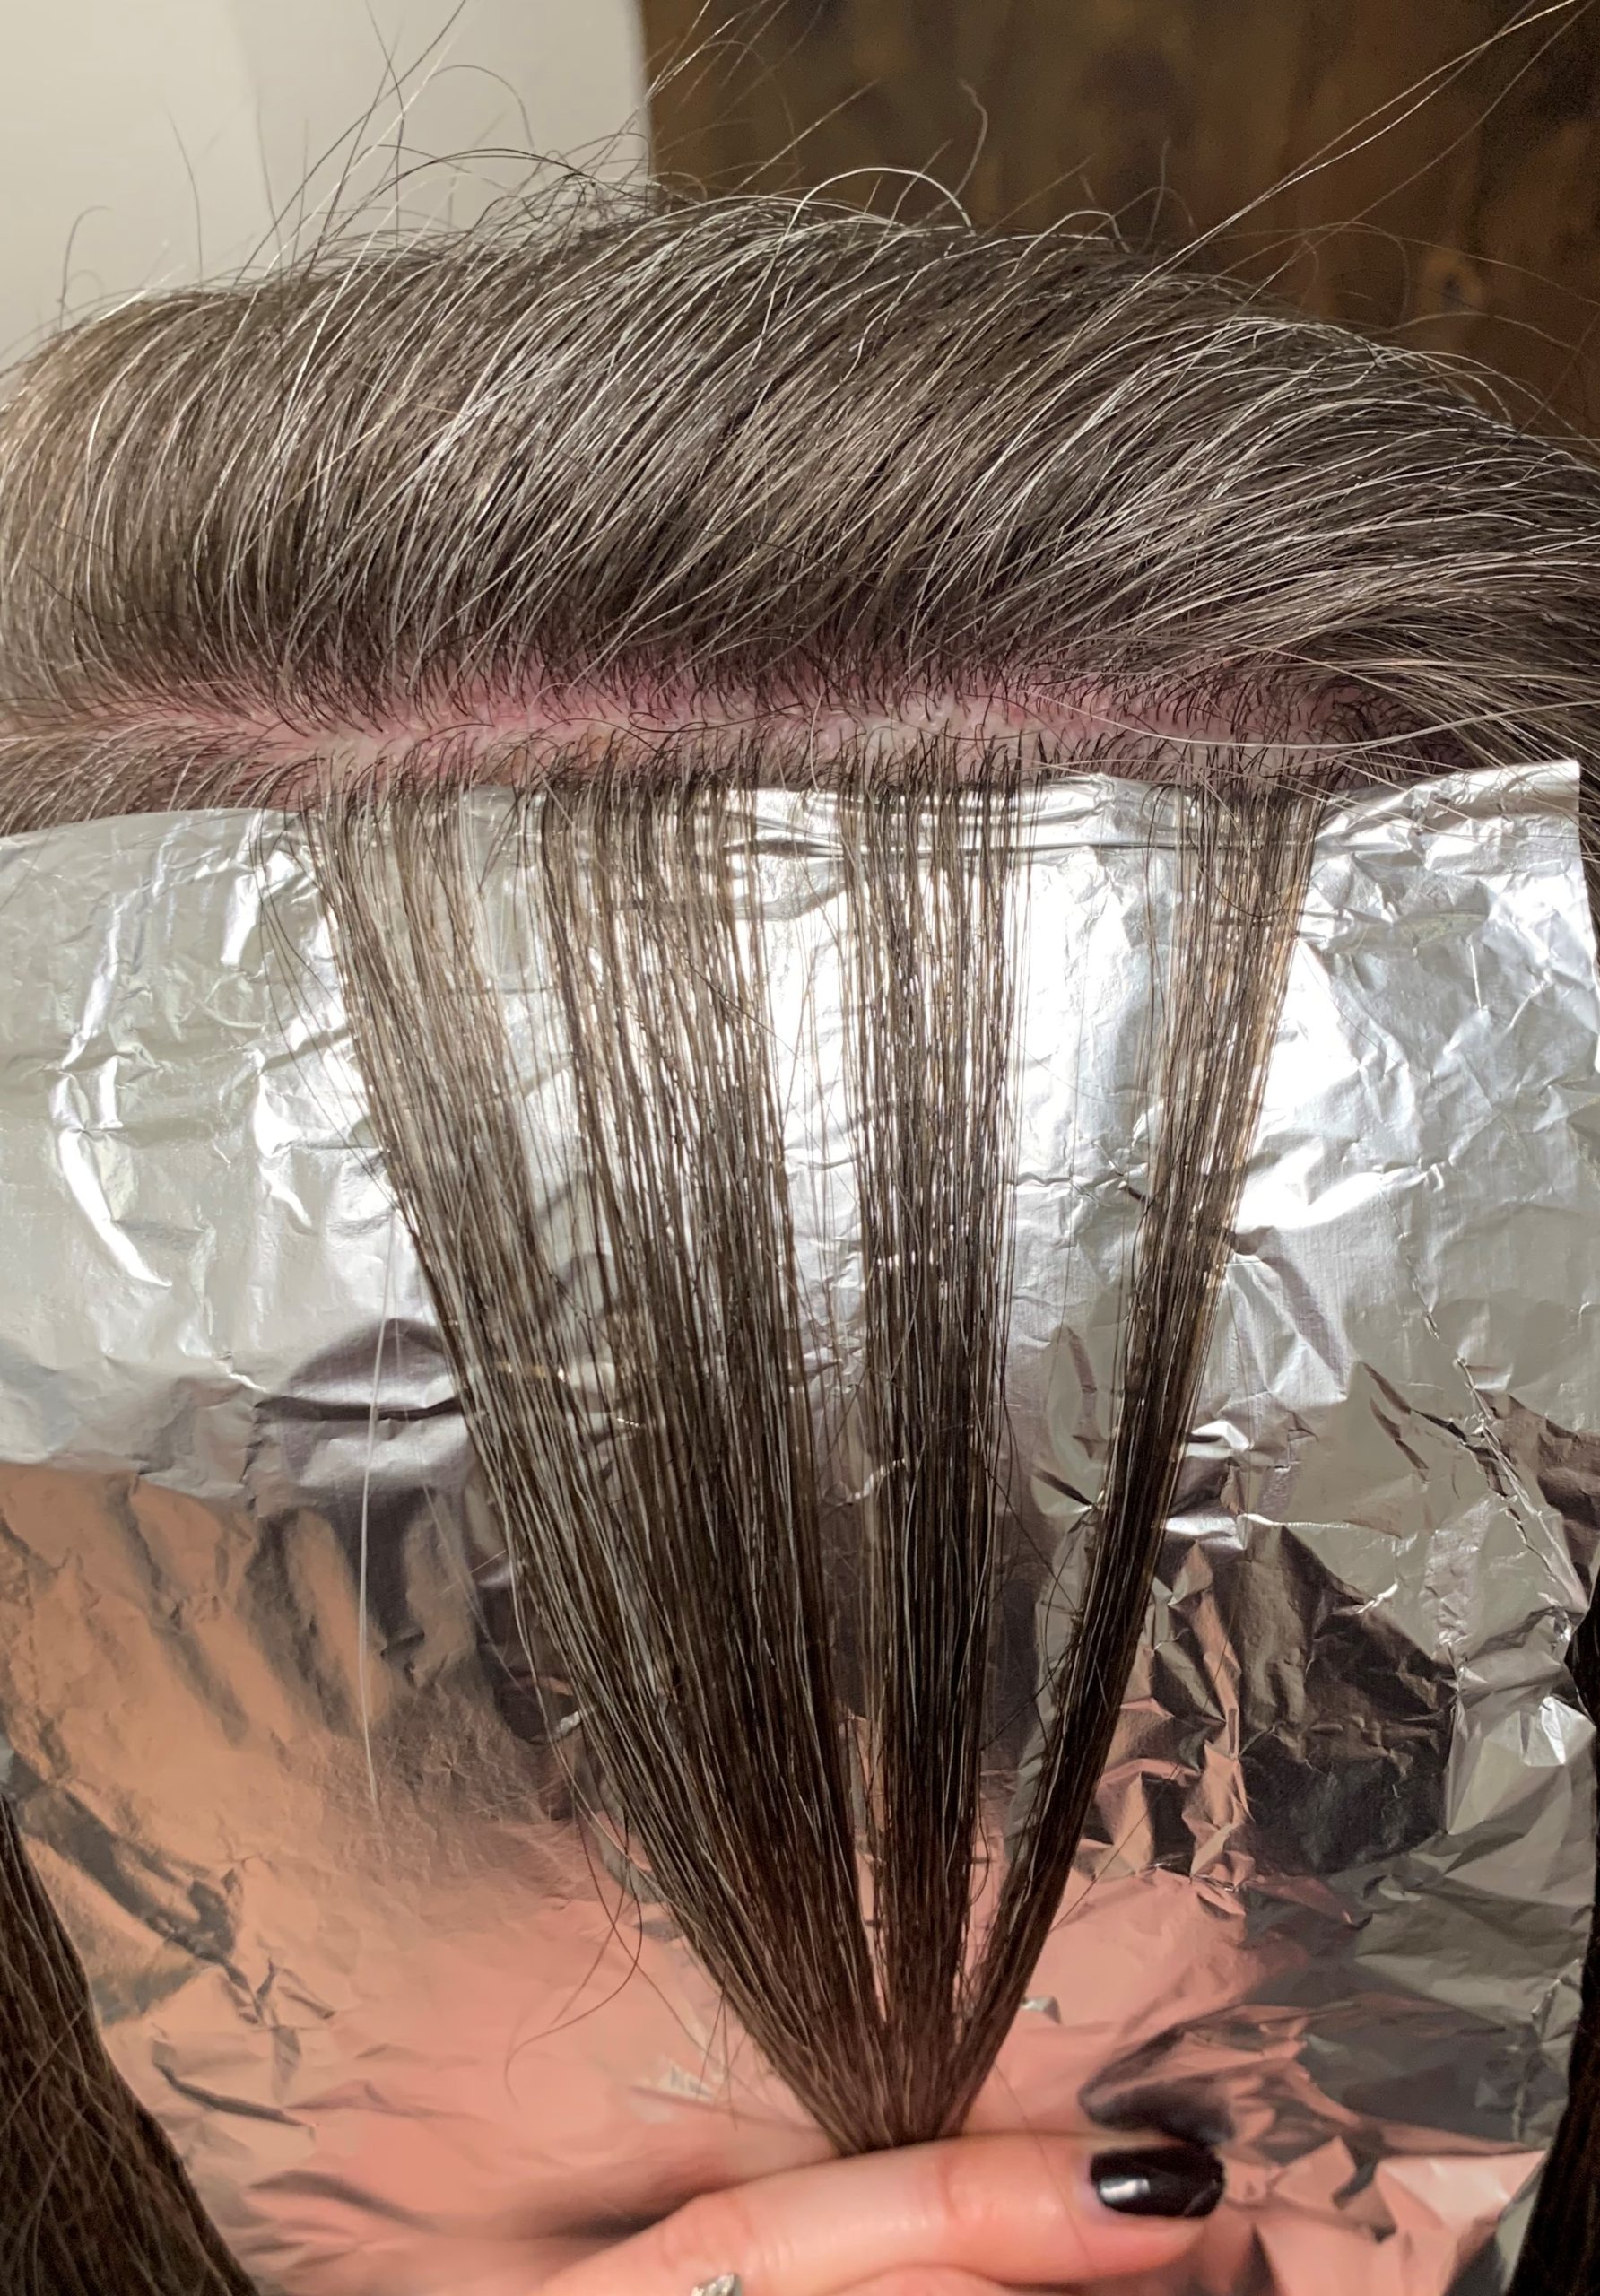
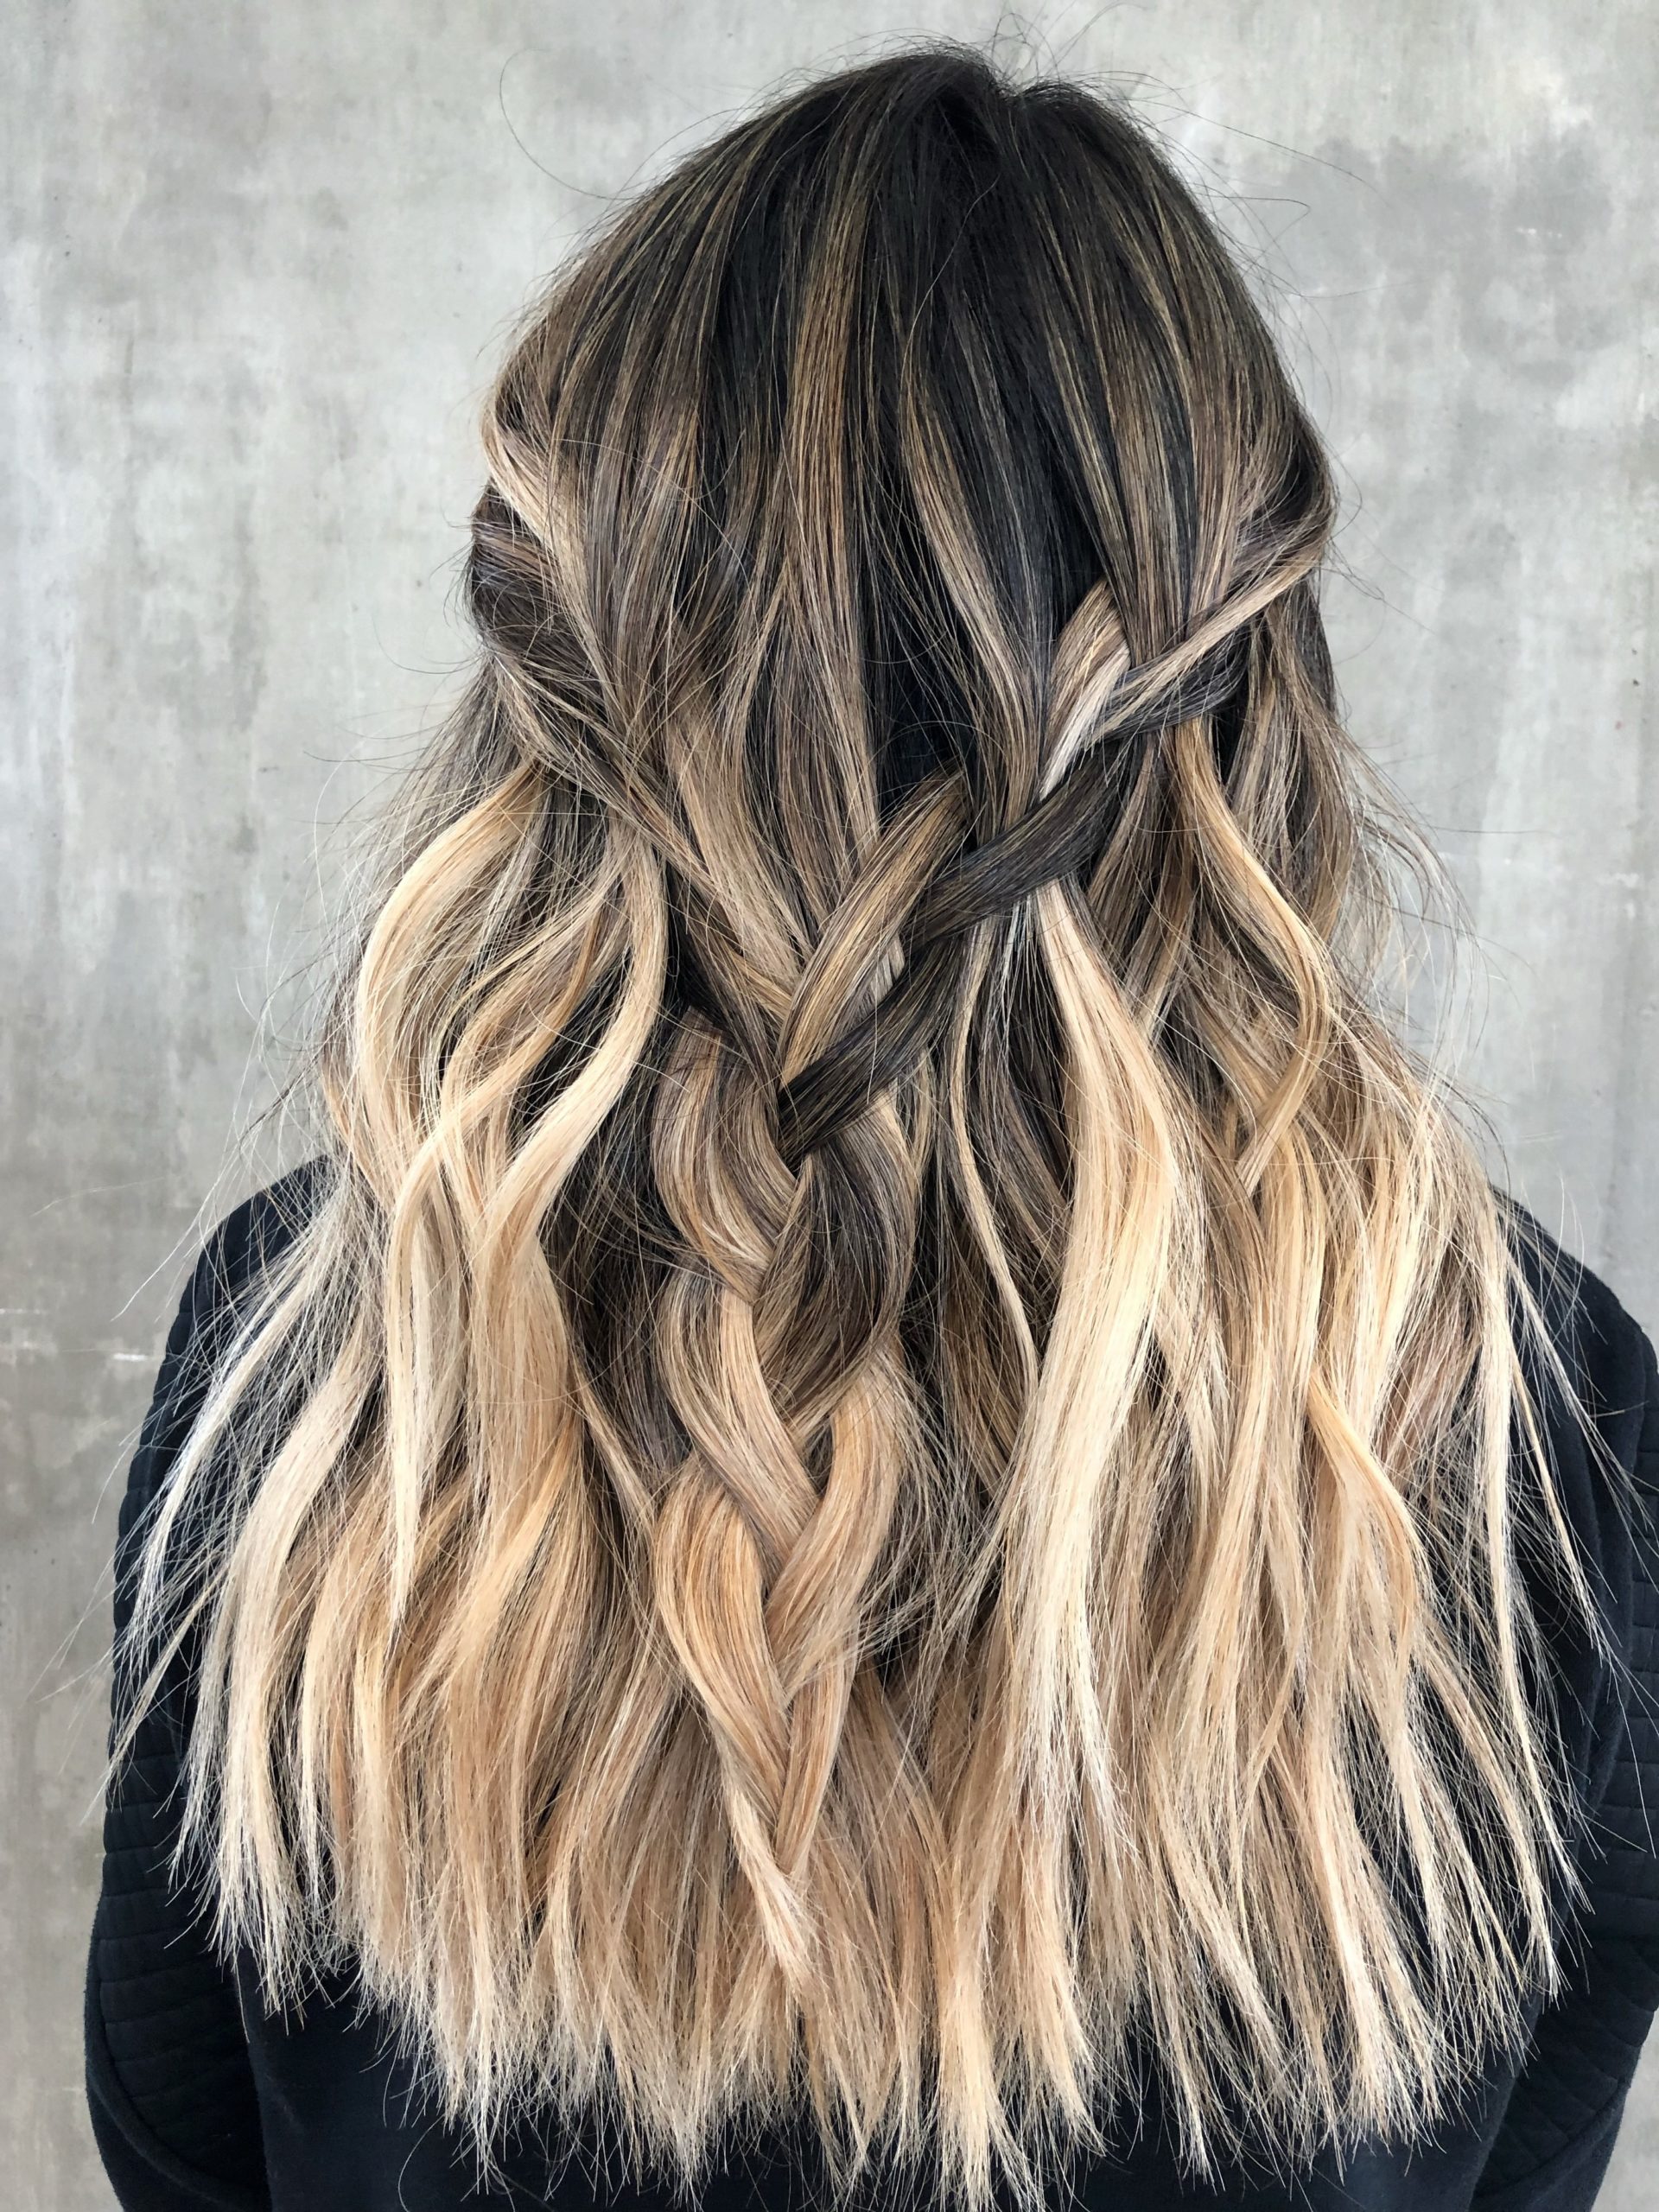
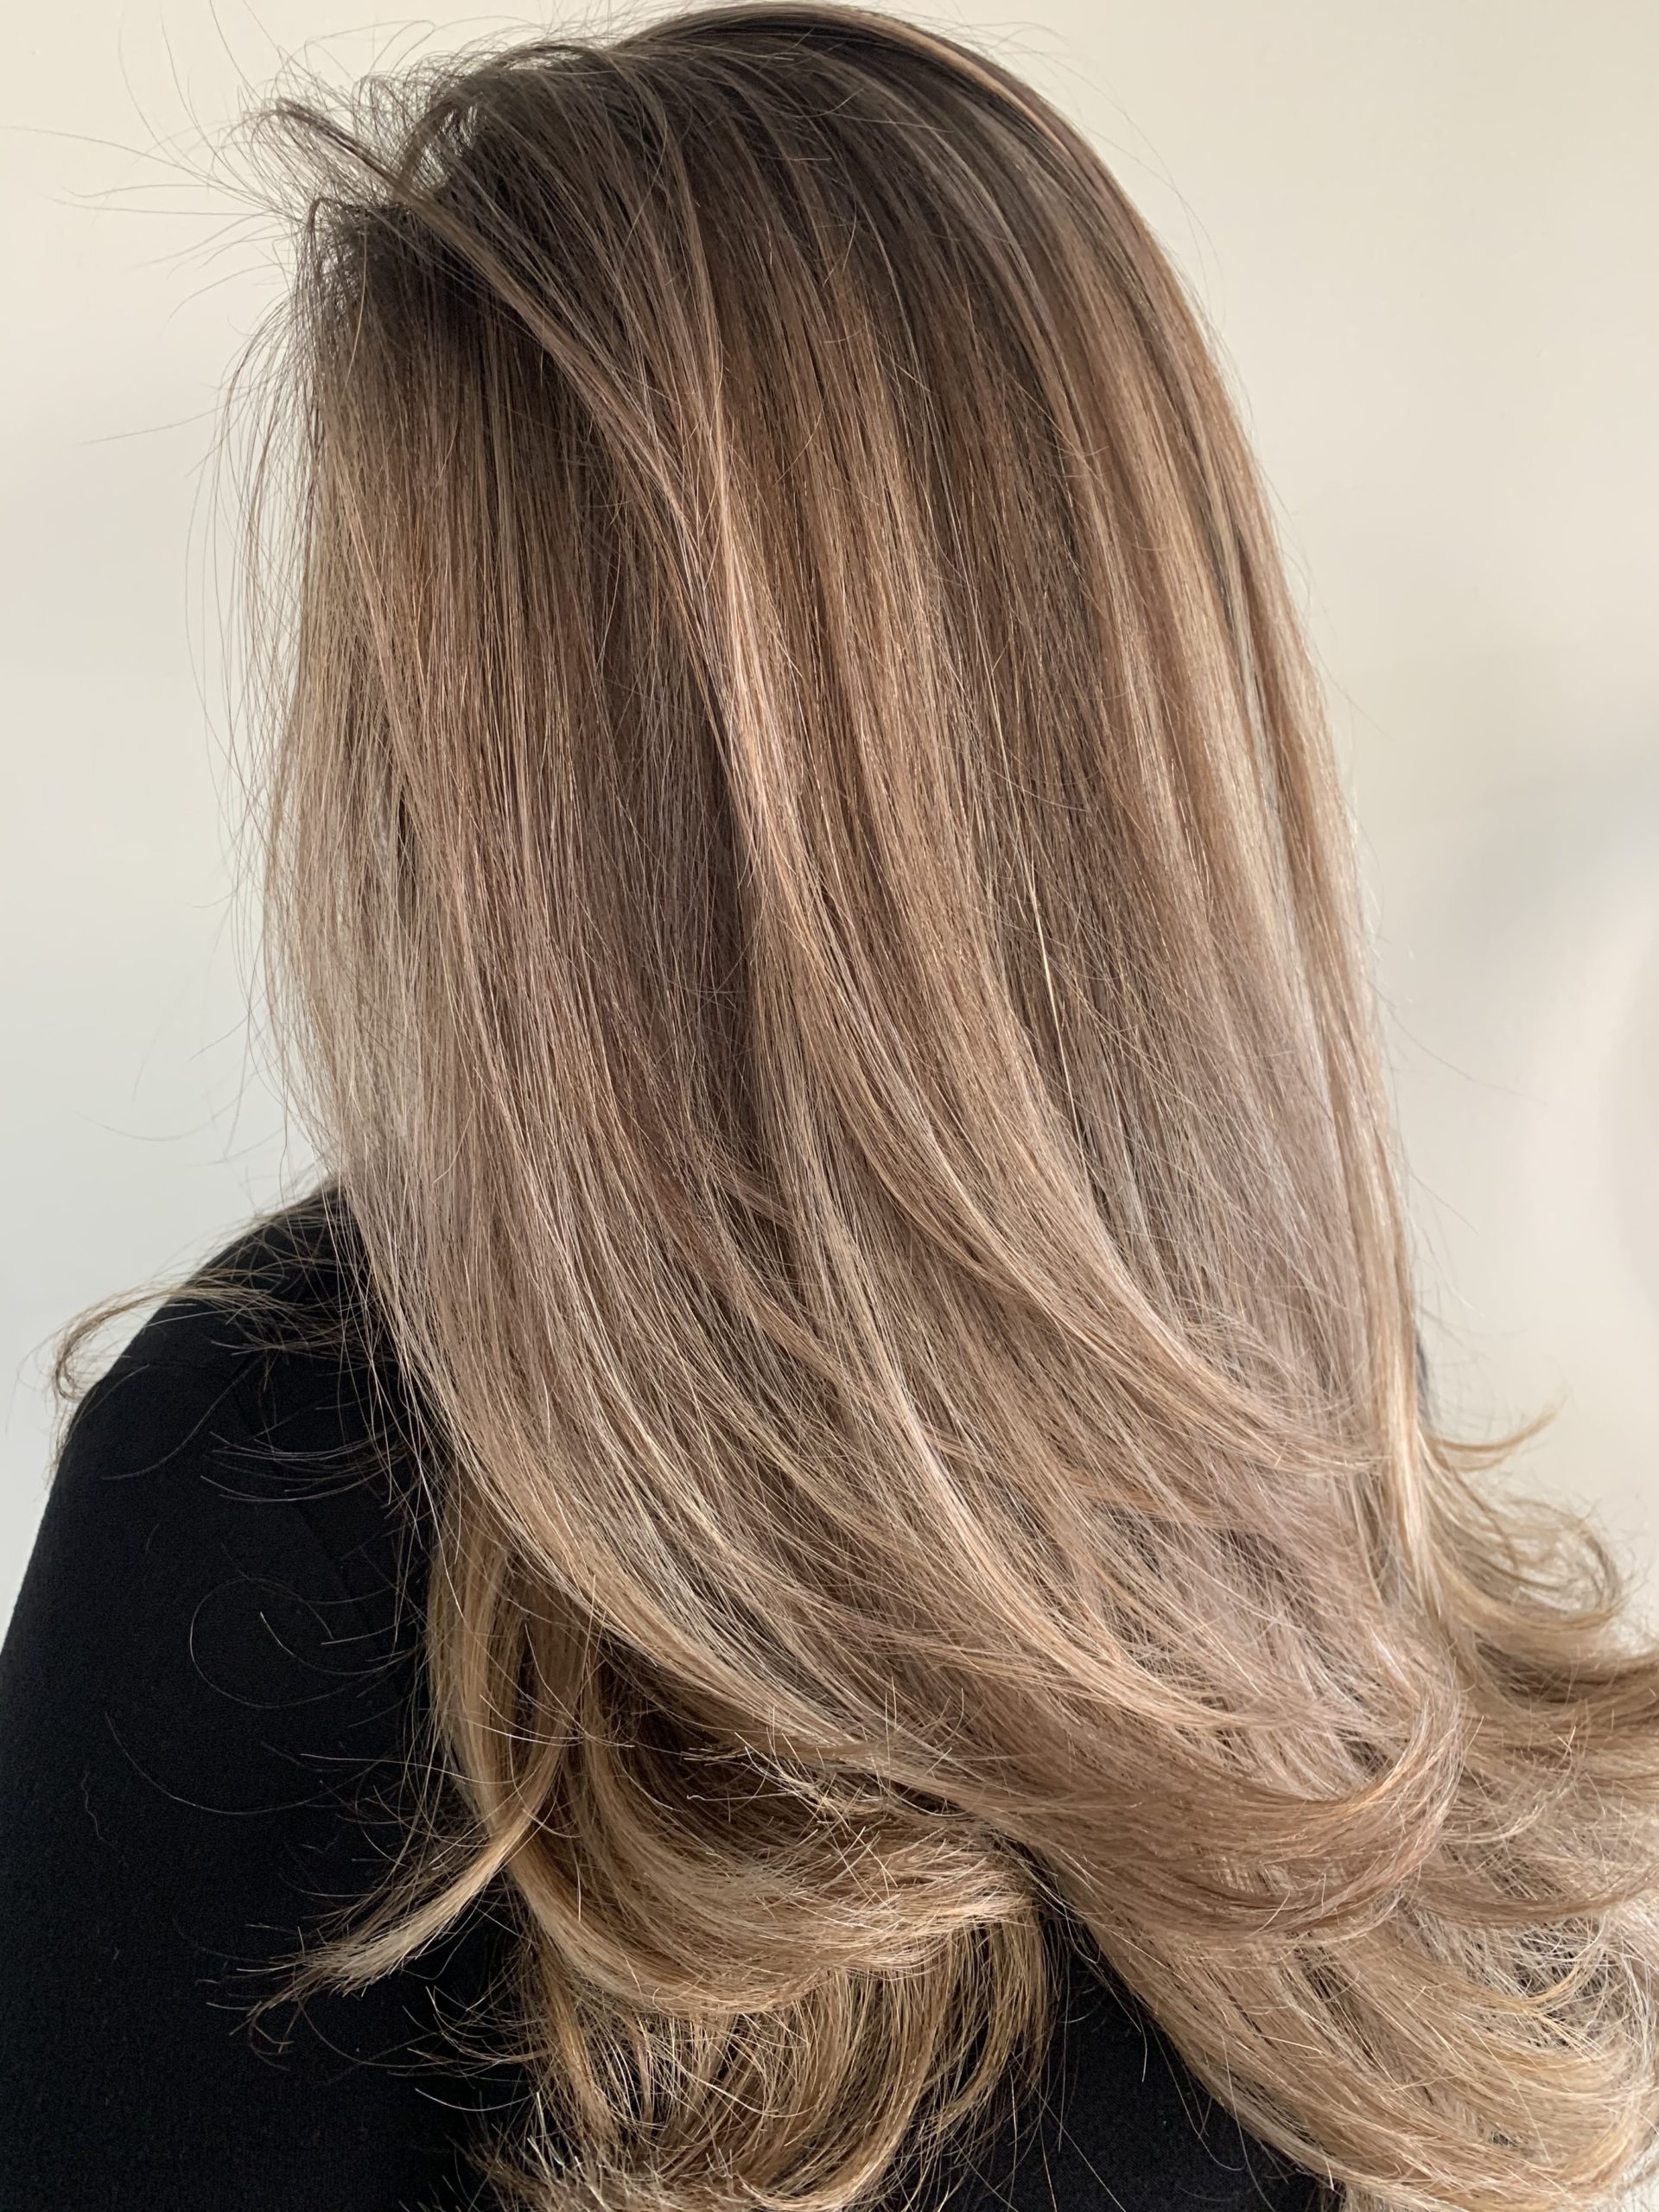
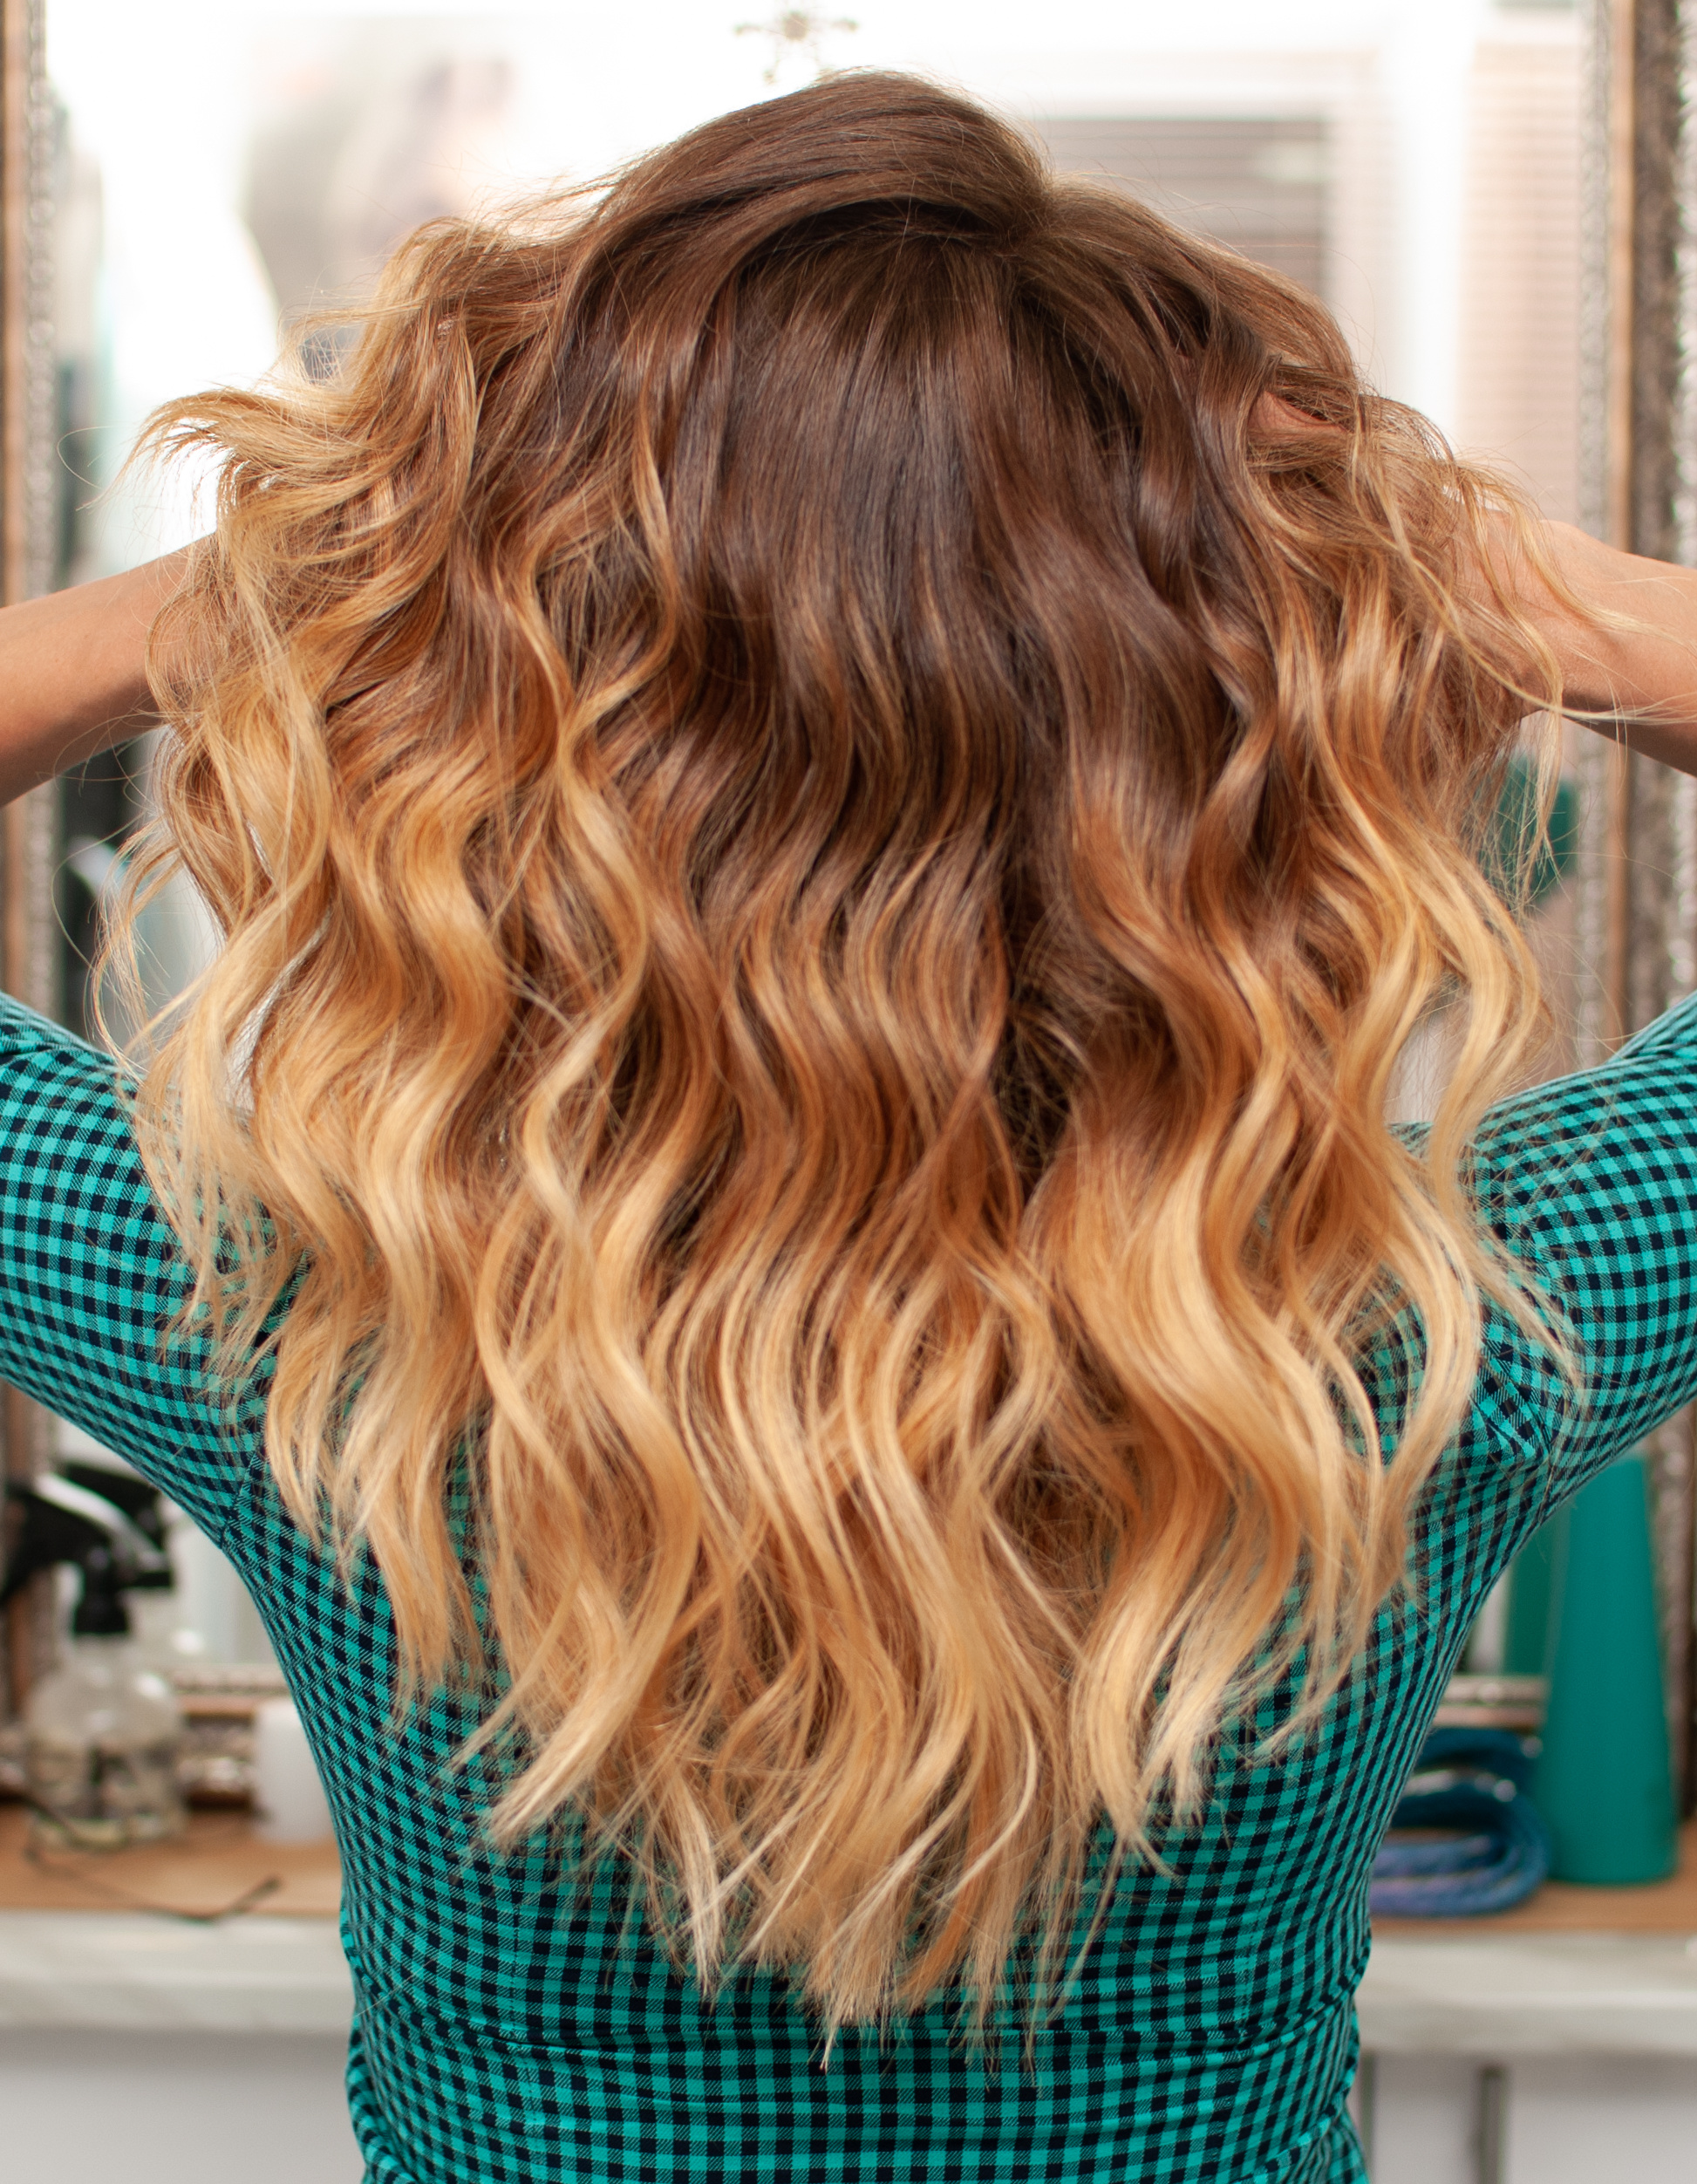
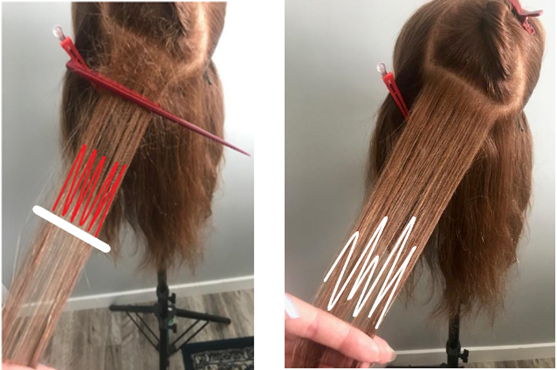
Let’s look at some example formulations for the lightening result above.
Existing level, tone and porosity:
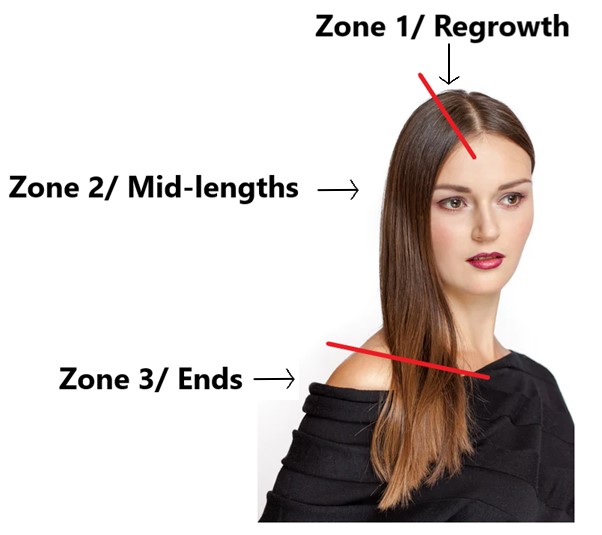
- Area 1, regrowth: 8/9 pale yellow, average porosity
- Area 2/ midstrands: 6/7 yellow orange, average porosity
- Area 3, ends: 9/10 palest yellow, high porosity
Target level and tone, based on darkest area of lift achieved:
Formulate for area 2 first
To neutralize the yellow-orange tones, use a violet-blue toner. Porosity is average, so we do not need to worry about over-toning.

Formulate for area 1 (next darkest area)
In this area, we need to neutralize pale yellow tones, as well as darken the hair by 2 levels.

Example: 40g semi activator + 20g 6 NV
The natural in our formula allows us to darken the level without over-toning.
Formulate for area 3 (lightest area)
For this area, we must account for the high porosity and remember that highly porous hair tends to more readily absorb cool tones. Because we are darkening, there is no need for a neutralizing tone. In fact, we should add some warmth to avoid a dull or muddy result. As well, we should formulate at a level lighter than our target level, based on the porosity.
Example: 40g semi activator + 15g 7N + 5g 7 gold
Note: If subsequent lightening appointments are planned, consider leaving the lightness through the ends, to avoid the need for further lifting on already compromised and porous hair. In this case, you could mix a level 9 toner to achieve a similar tone to the rest of the hair without adding depth.
Apply your three different toners in order of darkest to lightest area of lift, as the darker areas will require more neutralization, and the lighter porous ends will deposit and process the fastest.
With corrective colour, every toning scenario will be different, so remember to assess each area of lift individually, then work towards an even result. As always, a test strand is your best friend! Applying your formulas to one small section to ensure effectiveness will allow you to reformulate as needed for the best final result!
For toner removal guidelines, refer to Chapter 4.7 Application Process: Global Toning Service.
Step 5: Reassess Hair Colour and Integrity
Once the toner has been processed and removed, dry a section of hair and assess once again. You may need to return to step 4 for a subsequent toner application on one or all areas if a satisfactory result has not been achieved. Corrective colour is not a predictable process, so be patient with the process.
If you are satisfied with the result, proceed to step 6.
Step 6: Plan and Schedule Subsequent Appointments
Once the colour correction process is completed, create a subsequent appointment plan.
Include in your plan:
- Number of appointments estimated to reach desired result.
- Hair integrity. Are at-home strengthening treatments required prior to further lightening?
- Time between appointments. Allow time for the hair to regain strength and elasticity if needed.
- Budget. Colour correction can be an expensive process. Clearly communicate future costs to your client.
Creating a clear plan with instructions for at-home care will reassure your client that their wishes have been heard, especially if they are still a few levels away from their goal. As the professional, it is your job to clearly explain the process. Remember, even if you managed to achieve the target level, the client may need subsequent toning appointments and/or treatments for compromised hair!
Media Attributions