1
Textbook Cover


Student Success by Mary Shier is licensed under a Creative Commons Attribution 4.0 International License, except where otherwise noted.
© 2020 Mary Shier
The CC licence permits you to retain, reuse, copy, redistribute, and revise this book—in whole or in part—for free providing the author is attributed as follows:
If you redistribute all or part of this book, it is recommended the following statement be added to the copyright page so readers can access the original book at no cost:
Download for free from the B.C. Open Textbook Collection.
Sample APA-style citation:
This textbook can be referenced. In APA citation style, it would appear as follows:
Lead illustrator: Gordon Shier
Cover image attribution: “Lecture Hall” by Gordon Shier is used under a CC BY 4.0 Licence.
Ebook ISBN: 978-1-77420-079-7
Print ISBN: 978-1-77420-078-0
Visit BCcampus Open Education to learn about open education in British Columbia.
This book is dedicated to my students and educational advising clients from over the years.
My students constantly inspire and amaze me with their dedication and commitment to succeed, their perseverance in overcoming obstacles, and their abilities in juggling work, family, and life as they forge a path for their futures.
Those who came for educational advising asked many great questions, considered numerous options, and in many cases designed unconventional educational plans to suit their individual needs and goals.
It is through the experience of working with many of these students that I have formed a compilation of the factors influencing the many facets of student success.
This book offers study skills and practices for college and university students to help them make a positive transition to post-secondary education, learn how to be a successful student, and make the most of their learning experience.
ABE. Although the book is useful for any post-secondary student, it was specifically created to provide a textbook for the British Columbia Adult Basic Education provincial level (ABE grade 12 equivalent level) course, Student Success for college upgrading students. Student Success is a course under the Education and Career Planning (EDCP) umbrella in the BC ABE Articulation Handbook, and this textbook includes content to cover all of the learning outcomes listed in the Handbook. The Student Success course can be used as one of the three electives required for the BC Adult Graduation Diploma. The first eight chapters cover the required learning outcomes and the remaining five chapters cover the optional learning outcomes. The optional topics are determined by the institutions offering the course and will vary between different institutions.
General Use. Students don’t need to be taking a Student Success course to benefit from this text. Post-secondary students can use this material to help them become better, more successful students. Faculty can use any parts of it to give to their students in any of their courses as applicable. Others can use applicable life skills chapters.
Open. The book can be used as a resource for students and faculty. Because it is an open educational resource (OER) with a Creative Commons licence, anyone can download the book and use all or part of it, modify and share it. People can access it for free online, download it as a PDF or eBook, or print it.
ZTC (formerly Z-Cred). Funding for the development of this book was provided by the Province of British Columbia Ministry of Advanced Education, Skills & Training through BCcampus Open Education. The funding was for an ABE Z-Cred initiative (zero cost credential), recently renamed Zero Textbook Cost (ZTC). The intent is to create pathways to graduation with zero cost. BC does not charge tuition for ABE courses—adults upgrading up to the grade 12 level. This initiative would provide pathways to adult graduation with free access to textbooks as well.
Independent modules. The chapters in this textbook are written as independent modules. They don’t build on each other, so students can complete any of the chapters without having completed prior chapters. Accordingly, instructors can use single chapters, or parts of chapters, and incorporate them into other curriculum.
Some of the chapters are useful even for those who are not post-secondary students, such as the chapters on time management, financial budgeting and planning, communication skills, personal wellness, technology skills, and presentation skills. Other chapters are very specific to student life, such as test-taking, study skills, memory skills, referencing sources, transfer credit between post-secondary institutions, online learning, student funding (student loans, bursaries, and scholarships), learning preferences and strengths, learning differences and challenges, and student support services.
Hopefully you will find numerous uses for the content of this book. This book includes a variety of techniques to help you cope with the demands of college and university. There are many useful life skills and student gems included.
Note. This text is a combination of original content and content “remixed” from parts of several open texts and adapted to meet the needs of the Student Success course. For more information, see the copyright statement.
For more information about open education in British Columbia, please visit the BCcampus Open Education website. If you are an instructor who is using this book for a course, please fill out our Adoption of an Open Textbook form.
In the beginning my motivation in compiling this resource was to create a textbook that matched the learning outcomes of the course that the EDCP articulation committee had recently created. In other words, I needed the textbook for my students and so did many other colleges in the province. Creating the textbook would provide a resource for a course that gave ABE students another course option for adult high school graduation – particularly important for students who aren’t math and science oriented. I loved the idea of creating an open text, as I support the concept of open educational resources (OER) to help keep costs down for students and to provide flexibility and ease for instructors who can reuse, adapt, and remix open materials to meet their needs. The timing was right and the funding was available.
What I started to realize as I became entrenched in the project was that I was putting to paper a compilation of the advice I give to students every day. As an ABE instructor and an education advisor, I see the pitfalls that overwhelm students on a regular basis. I see both the ways they set themselves up for failure and, conversely, the ways they adopt successful habits. I have worked in adult education for over thirty years, and – as I near the end of my career – in a way, writing this book was a cathartic exercise of compiling a tremendous amount of my experience and expertise.
My experience teaching and education advising has made me very aware of the struggles that many students go through. Being a good student does not necessarily come naturally; productive study habits are learned. Unfortunately, student retention rates and graduation rates are adversely affected because many students never learned what it takes to achieve success. Student Success can help develop strong study skills and inform students of campus services that can aid them along the way.
I believe in the value of education. I believe in life-long learning. I personally learned the hard way in my earlier years of education about the many bad habits that students form that only cause barriers to success. I experienced the difference in confidence and quality of learning when I implemented good, strong study habits when I embarked on graduate studies as a very mature (i.e. very old) student. Sharing some of this acquired wisdom regarding the habits that help students experience success just seems to make good sense.
One thing that I found really interesting in the process of writing the book was how many times I needed to take my own advice as I was writing it. It was almost eerie how many times it happened. For example, as I was writing the section on personal wellness, I was writing about the importance of keeping balance in one’s life, making sure to make time for physical exercise and fresh air. At the time of writing I had spent numerous very long days head down, writing content for the book. As I wrote, I realized my back and shoulders were aching, and I desperately needed physical exercise after so many countless hours at the computer. It was in the rereading of what I had written that it struck me how much I needed to heed my own counsel. Similar incidents happened in other chapters. Ultimately, this demonstrates that many of the skills require continual practice. Just when you think you have mastered something is when a new circumstance challenges you to practice the skill in a different way.
It is my hope that by using this text, students will develop skills that will set them up for a positive post-secondary experience that will reduce stress and frustration, and increase successful outcomes and graduation attainments.
A Note About Videos: There are videos throughout the text from external sources. For those reading the online copy, videos can be watched directly in the text. If you are reading a paper copy or a PDF, the text will provide direct URLs to where you can watch the video. You can also find those links in the back matter of the text named List of Links by Chapter.
Intended Audience: This book is useful for all college and university students, whether you are a young student barely out of high school, an older student making a career change, or a parent whose children have grown and gone and who is starting a new chapter of life. It is relevant whether you’ve never gone to college or whether this is your third time round. Regardless of your circumstances, you will likely want to make your educational experience worthwhile, learn the most you can, and do it in an efficient effective manner. My hope is that the concepts in this text will help you along the way.
All the best as you embark on your educational journey.
I would like to thank many people without whom I cannot imagine having been able to complete this project:
I met Mary Shier many years ago in Fernie, BC, where we both ended up seeking a life filled with outdoor adventure and teaching career opportunities. I had moved to Fernie to teach at East Kootenay Community College, now called College of the Rockies, and ended up spending 20 years teaching Adult Basic Education in the community. Part of my duties included being an Educational Advisor assessing adult students who wanted to improve their educational prospects but really didn’t know how to get there. It was an amazing 20 years of my life introducing the joys and frustrations of learning to students, and it gave me the skills and impetus to expand my career into leadership by becoming President of the Federation of Post-Secondary Educators of BC. I spent 16 years at FPSE, advocating for the educators in our system and our students as well. Good learning outcomes happen because all the pieces fit together, and when Mary asked me to write the foreword for her book, I didn’t hesitate.
I truly became a fan of Mary when she started teaching at College of the Rockies and we became colleagues. We were in crisis mode. A large resource industry in the local area had abruptly ceased operations and thousands of workers found themselves unemployed. Some ultimately went on to other jobs in the community, some moved out of the area for work, but many more needed to go “back to school.” The college was tasked with providing various educational opportunities to help the unemployed retrain and reskill.
As Educational Advisor, I conducted assessments on those who were now compelled to seek other work. It became apparent to me that a lot of remedial training was necessary; many did not have the literacy or numeracy skills to enter ABE. I particularly remember feeling rather despondent and wondering what we could do with them and how we could help them. That’s when Mary energetically said in no uncertain terms, “I’ll take them.” She meant it. She had a plan and she was going to help them succeed no matter what it took. She convinced us that her literacy program was the place for these students to learn the basics. She was right. Those students flourished under her tutelage and fairly quickly moved on to ABE. In the end, we experienced a zero attrition rate (previously unheard of) with the students going on to take further studies in everything from welding and small engine repair to X-ray technician and nursing. Mary was a huge part of those success stories.
Student Success is filled with Mary’s experience and knowledge over those 30-plus years. It is filled with practical advice for students who try to navigate all those wondrous moments that learning at the post-secondary level presents. From time management to financial planning to mental health and physical wellness, students and teachers will find advice and step-by-step strategies to smooth over the bumpy spots we all incur along the journey of our educational paths. She explains how to take good notes in class, how to be an active listener (including a check list!), how to mitigate test anxiety, how to follow a plan for success. The links to additional resources and research help to reinforce the strategies and provide students and educators alike with the ability to explore various topics in more depth if needed.
Mary wrote this book for a reason: she wanted to create a resource that would help students manage their own success, to give them agency over their future. In doing that, she also created a resource for educators, one that helps them recognize the value of taking time to truly engage with their students.
If you’re a student, read Student Success. If you’re an educator, read Student Success. I guarantee you will learn something.
Cindy Oliver BA(Hons), M.Ed
BCcampus Open Education believes that education must be available to everyone. This means supporting the creation of free, open, and accessible educational resources. We are actively committed to increasing the accessibility and usability of the textbooks we produce.
The web version of this resource has been designed to meet Web Content Accessibility Guidelines 2.0, level AA. In addition, it follows all guidelines in Appendix A: Checklist for Accessibility of the Accessibility Toolkit – 2nd Edition.
This textbook is available in the following formats:
You can access the online webbook and download any of the formats for free here: Student Success. To download the book in a different format, look for the “Download this book” drop-down menu and select the file type you want.
| Format | Internet required? | Device | Required apps | Features | Screen reader compatible |
|---|---|---|---|---|---|
| Online webbook | Yes | Computer, tablet, phone | An internet browser (Chrome, Firefox, Edge, or Safari) | WCAG 2.0 AA compliant, option to enlarge text, and compatible with browser text-to-speech tools. | Yes |
| No | Computer, print copy | Adobe Reader | Ability to zoom in, highlight, and annotate the text. | Unsure | |
| EPUB and MOBI | No | Computer, tablet, phone | Kindle app (MOBI) or eReader app (EPUB) | Option to enlarge text, change font style, size, and colour. | Unsure |
| HTML | No | Computer, tablet, phone | An internet browser (Chrome, Firefox, Edge, or Safari) | WCAG 2.0 AA compliant and compatible with browser text-to-speech tools. | Yes |
The following videos only provide auto-generated captions that may contain errors:
We are always looking for ways to make our textbooks more accessible. If you have problems accessing this textbook, please contact us to let us know so we can fix the issue.
Please include the following information:
You can contact us one of the following ways:
This statement was last updated on September 11, 2020.

Congratulations on your decision to attend college or university! For the great majority of students, it really was your decision—not just an automatic thing to do. If you happen to be one of the few who just sort of ended up in college or university for want of anything better to do, the benefits will soon become obvious.
The reason for this book is that post-secondary education requires commitment and effort. Like everything else in life that leads to meaningful results, success is not automatic. But when you apply yourself to your studies using the skills you’ll learn in this book, you’ll find that you can succeed.
When asked, most students say they’re in school primarily for the job or career they expect to follow after they get their certificate, diploma, trade, or degree. And they are correct that education pays off enormously in terms of future earnings, job security and stability, and job satisfaction. Every statistic shows that people with a post-secondary education will make much more in their lifetime on average (much, much more than the cost of schooling itself) and be much happier with the work they do.
But job and career issues are only a part of the big picture. An education results in many other personal benefits, and these also should be part of your motivation for doing well and continuing with your educational plans. Here are a few additional, less tangible benefits of a college or university education:
A college or university education is correlated with greater success in all those areas, even though most students are usually more concerned with making it through the next class or test than the rest of their lives. But sometimes it helps to recall what a truly great step forward you are taking!
Sadly, however, it’s important to recognize that some students do not succeed, and drop out within the first year. Sometimes it’s due to an unsolvable financial problem or a personal or family crisis, but the most likely reasons that a student in Canada will drop out include an ineffective social network (not getting involved in extra-curricular and volunteering opportunities), a lack of academic abilities, and poor attitudes and habits towards post-secondary education.Ma, X. & Frempong, G. (2008). Reasons for Non-Completion of Postsecondary Education and Profile of Postsecondary Dropouts. Retrieved from: http://publications.gc.ca/collection_2008/hrsdc-rhdsc/HS28-143-2008E.pdf
A book like this one can help you stay motivated when things get tough, but it can’t necessarily give you motivation to start with. That’s part of what you yourself have to bring to your education. You can be assured that you can learn the skills for succeeding in school.
Special skills are needed because the skills required at college and university aren’t the same as those required in high school. To name a few, there are differences in the study skills needed, in personal skills related to being independent, in social skills for getting along with instructors and others on campus, in financial realities, in matters of personal health, and more.
Remember, you can learn whatever you need in order to succeed. That’s what this book is all about. You’ll learn how to get the most out of going to class. You’ll learn how to study in ways that use your time efficiently and help you pass tests. You’ll even learn how to remember what you read in your textbooks. You’ll learn how to manage your time more effectively than you might have in the past, so that studying is less of a burden and more of a simple routine. You’ll even learn how things like eating well and getting enough sleep and exercise make it easier to do well in your classes.
One warning: you might not at first see an immediate payoff for everything you read in this book. When it comes to certain things, such as tips for how to take good notes in class to help you study later on for a test, you will get specific, practical advice you can put to use immediately to get a better grade. But not everything is as obvious or immediately beneficial. Some of the things you’ll read about here involve ideas you’ll need to think about. Some things will help you get to know yourself better, and understand more clearly what you really want from your education and how to go about attaining it.
However, if you care enough to want to succeed in school, and read these chapters and try to use the information, suggestions, and tips presented here, you will succeed in your educational goals.
Being successful as a student doesn’t happen by accident. It takes strategy. Many people think students get the marks they get like a predestined event. But there are skills and methods to be successful which can be learned and practised. It all starts with taking stock of where you are now.
Exercise: Where Are You Now?
| Where are you now? | Yes | Unsure | No |
|---|---|---|---|
| 1. I understand all the benefits of a post-secondary education for my future life. | |||
| 2. I have clear-cut career interests and have already planned my college or university program to prepare me best for my future work. | |||
| 3. I am aware of how my previous educational background has prepared me for work in post-secondary. | |||
| 4. I have all the personal traits of a successful university or college student. | |||
| 5. I know how the learning process functions and make an effort to maximize my learning at each step in this process. | |||
| 6. I know my personal learning preference and use it to my advantage when learning new things. | |||
| 7. I know how to pay attention to gain the most from my classes. | |||
| 8. I am aware of my educational institution’s policies for academic honesty and behaviour on campus. | |||
| 9. I know where to find all the resources of my school that can help me succeed both academically and personally. | |||
| 10. I am confident I can earn the grades I need to achieve success in my courses. | |||
| 11. I know the first year of college will be the most difficult, but I am fully prepared and take responsibility for my own success. | |||
| 12. I am taking steps every day to ensure I am successful in every aspect of the school experience. |
Exercise: Where Do You Want to Go?
Think about how you answered the questions above. Be honest with yourself. On a scale of 1 to 10, how would you rate your present skills for succeeding in your program, with 1 being “not very strong” and 10 being “very strong”?
In the following list, select the three most important areas in which you think you can improve:
Are there other areas or skills that need more attention in order for you to succeed in school? Write down other things you feel you need to work on.
Learning Objectives: Here is Where We Will Go.
Here’s what we will work on in this book, Student Success. The following topics are covered by the thirteen modules of this text:
Detailed learning outcomes for each topic can be found in the introductions to each module.
Throughout this text you will have the opportunity to work on and develop skills in many of the areas you have identified above that will impact your student success. Some topics are specific to post-secondary while others will be useful in life in general, such as communication skills, financial planning, time management, and presentation skills. Hopefully this resource will give you many valuable skills going forward.
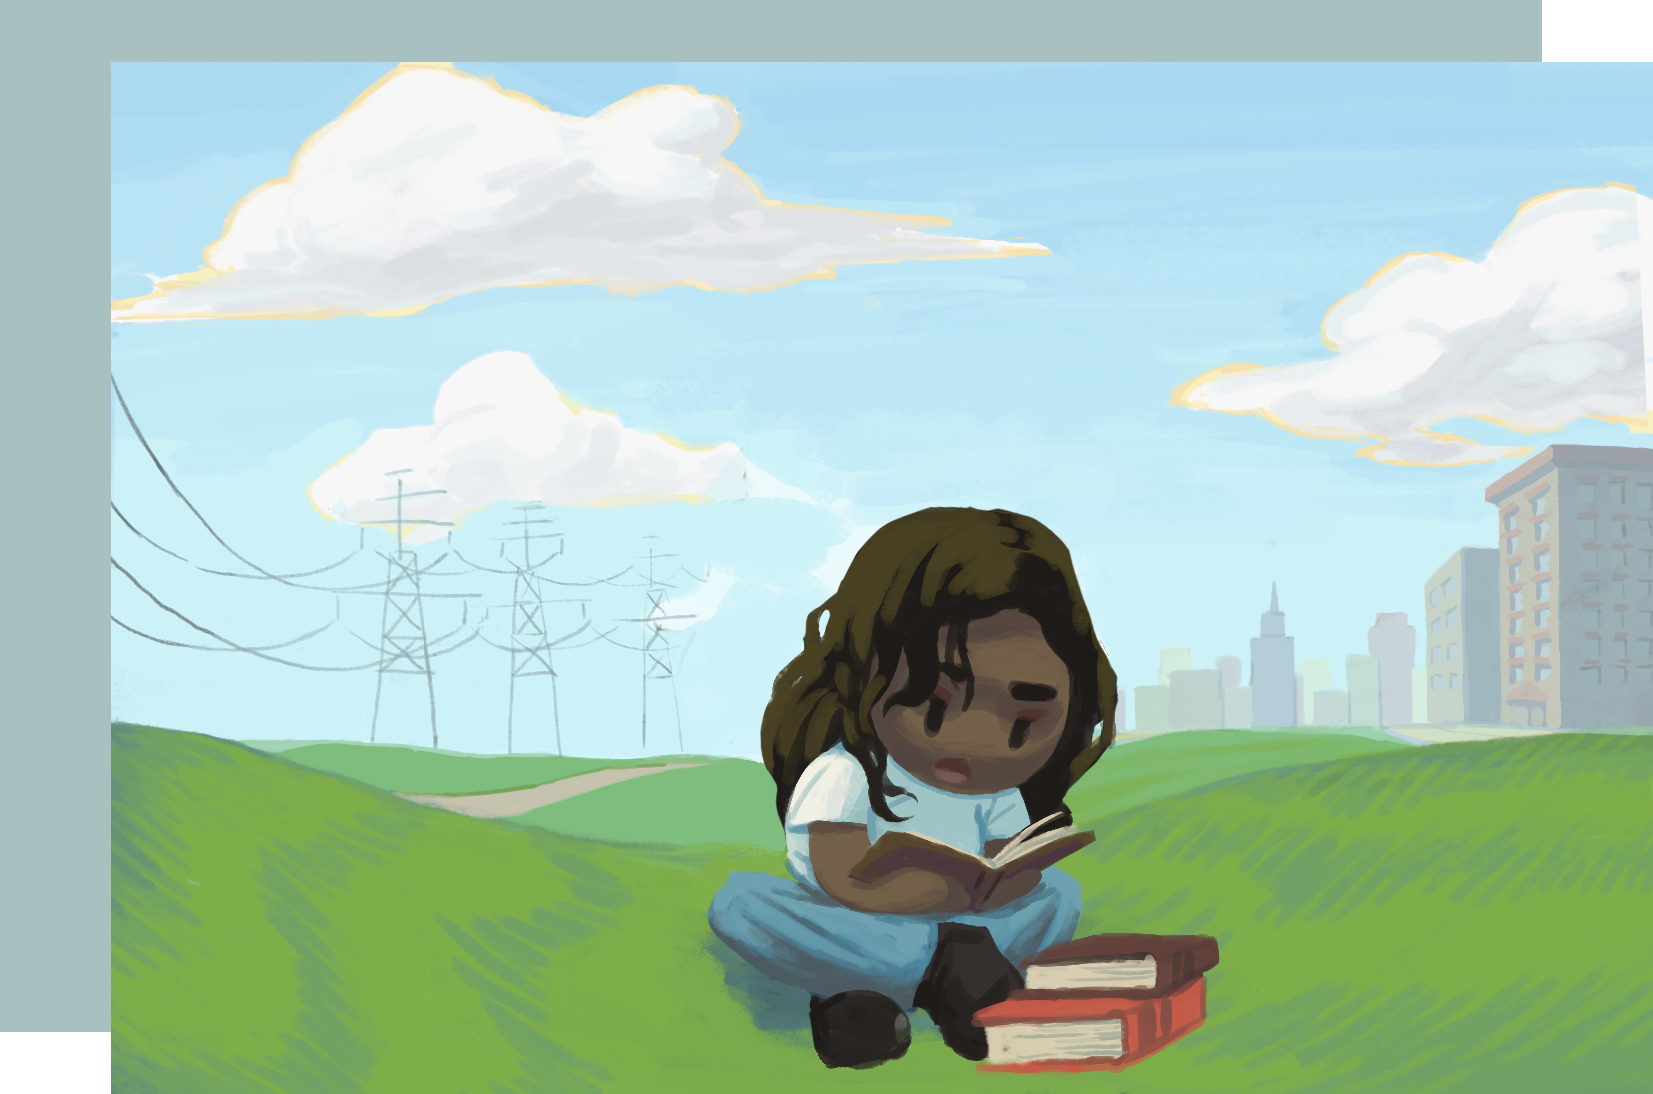
You may notice that there are references to hiking in the mountains throughout the text. That is because embarking on your educational path is much like starting a hike in the mountains. It is a bit daunting. It is natural to have doubts and fears about your ability to complete your goal. But it’s also exciting and thrilling. At many points along the way you’ll have surprising joys, unexpected challenges, and encouraging victories. Enjoy the journey!

This section was adapted from the following chapter:

So glad you’re here!
Congratulations! Whether you are starting a course on Student Success, or just reading a resource on Student Success, you have made an important decision in moving forward in reaching your goals. The goal of this text is to provide ideas, suggestions, and skills that will aid you in being a successful adult learner that will find your studies fruitful and rewarding.
If you’ve decided to move towards your goals through education, you will want to be successful in your studies. You will be investing a great deal of time and resources into your education, so it makes sense to get the most out of it. To be successful not only means achieving good grades, but it means learning useful concepts that will help you in your career and life. This book will help you to learn many things which can contribute to your student success. Take from it the things you feel will be most beneficial to you in your educational journey.
Depending on what kind of student you have been up to this point, achieving student success may mean you may have to do things differently than you have in the past. Some of you have very negative learning experiences which may cause concern over being a student again. Learning as an adult is often a very different experience and many students are surprised at how they can be successful now that they are adults and focused. Everyone has different strengths, different rates of learning, different learning disabilities and abilities, and each learner comes with different levels of education. All these things need to be taken into account to be successful. Learning as an adult is exciting. This module will focus on the many aspects of adult learning that will impact your success.
This module about adult learner awareness helps you identify the specific challenges you may face as an adult learner as well as recognize the advantages of your life experience to enrich your adult learning. It will help you realize the responsibilities of post-secondary education, many of which differ from those of high school. It will also help you evaluate different aspects of yourself in relation to returning to school as well as the impact of your returning to school on those around you that you care about. This module will also discuss many aspects of personal wellness which will help you to stay healthy and keep your life in balance as you do your studies. Finally, you will create a personal action plan to incorporate the many aspects of adult learning and to move forward in your educational goals.
Learning Objectives
In this chapter on “Adult Learner Awareness,” students will:
Learning as an adult is much different than learning as a youth in school. It has many challenges. Many of you will be taking courses at the same time as working, raising children, managing a household, or being involved in many community activities. Success in college will require balancing your obligations; time management will be crucial. It is important to be on top of your schedule and responsibilities and to ensure you are setting realistic goals for completion.
Many adults are very nervous when they first start in college. You may be asking yourself many questions. Will I be able to succeed? Will people think I’m stupid? I’ve been out of school so long- will I be able to learn and remember things? Don’t worry. You are not alone! Many students experience these feelings of anxiety and fear. You need to know that you are already a big step ahead of many people, because you have already made a commitment to move forward. It may have been nerve wracking to first inquire about getting started in post-secondary courses. For each one of you who has actually started taking steps (like reading this chapter), there are many more who have only thought about improving their education and haven’t made that first step and keep putting it off until another day. Congratulations! You are on your way.

It may help you to know that many students who have typically not done well academically in the past are pleasantly surprised at their ability to do well as an adult. This is due to many things. Often in elementary or high school, students have many issues which can prevent them from being successful. These include: undetected learning disabilities, health issues, personal issues, family crises, poor attendance, motivation issues, social pressures, bullying, abuse, dysfunctional families – the list goes on. These kinds of stresses can affect their grades negatively. And often students mistakenly begin to think that they are not capable. They can equate poor grades with being a poor student rather than making the connection that circumstances played a huge role in their ability to get good grades. It is very exciting to see students enjoy success when their circumstances have changed and they are motivated to succeed to reach their goals.
Of course, many adult students are also dealing with some very difficult personal circumstances of their own, and they are advised to access student support services and make an appointment with an education advisor to find out options for support.
You’ll be excited once you get started and realize how much you can enjoy learning.
As well as challenges of being an adult learner, there are also some salient advantages. Some of the most prevalent advantages to learning as an adult include:
It is important to understand how college and university is different from high school and how well your own past educational experiences have prepared you for what you will experience. This is another way in which entering post-secondary education “with your eyes wide open” will prove beneficial.
College is a unique experience for all students—whether you just graduated from high school or are returning to education after years of working or raising a family. You are transitioning from one form of education to another. Some students have difficulty because of the differences between college and high school.
Generally speaking, the university and college experience is usually different from high school in these ways:
What does all this add up to? For some students, the sudden independence and freedom can lead in negative directions: sleeping late, skipping classes, missing deadlines, failing to study adequately for tests, and so on. Other students who are highly motivated and work hard in their classes may also have difficulty transitioning to the higher academic standards of post-secondary. Suddenly, you’re responsible for everything. That can be thrilling but also a challenge to get used to. All the chapters in this book will help you make this transition successfully.
Exercise: Adult Learning
Think about your own educational experiences and answer the following questions.
Taking all of these things into account will help you embrace the idea of learning as an adult, and will help you let go of some of the old patterns and habits you had as a youth. Some people feel bad about going to school as an adult, thinking that it somehow represents failure to do it earlier. But in reality, those who intentionally keep on learning throughout their lives are the ones who continually upgrade their skills, learn new things, and are interesting people. Changing careers throughout life is a reality in this day and age. People go back to school to change careers at many ages. People go back to school to become more specialized at work, feed a new interest, or change their path. People engage in professional development throughout their careers to stay on top of technology, emerging trends, and current issues. People take workshops and go to conferences on issues they are interested and engaged in, just to stay on top of current teachings. People read books and have community groups to challenge each other and learn. Never be ashamed of learning! It keeps us young and informed.
The thing to remember is that life-long learning means that we constantly challenge ourselves, improve ourselves, and keep ourselves growing. Life-long learning is a great thing and continually contributes to our personal growth.
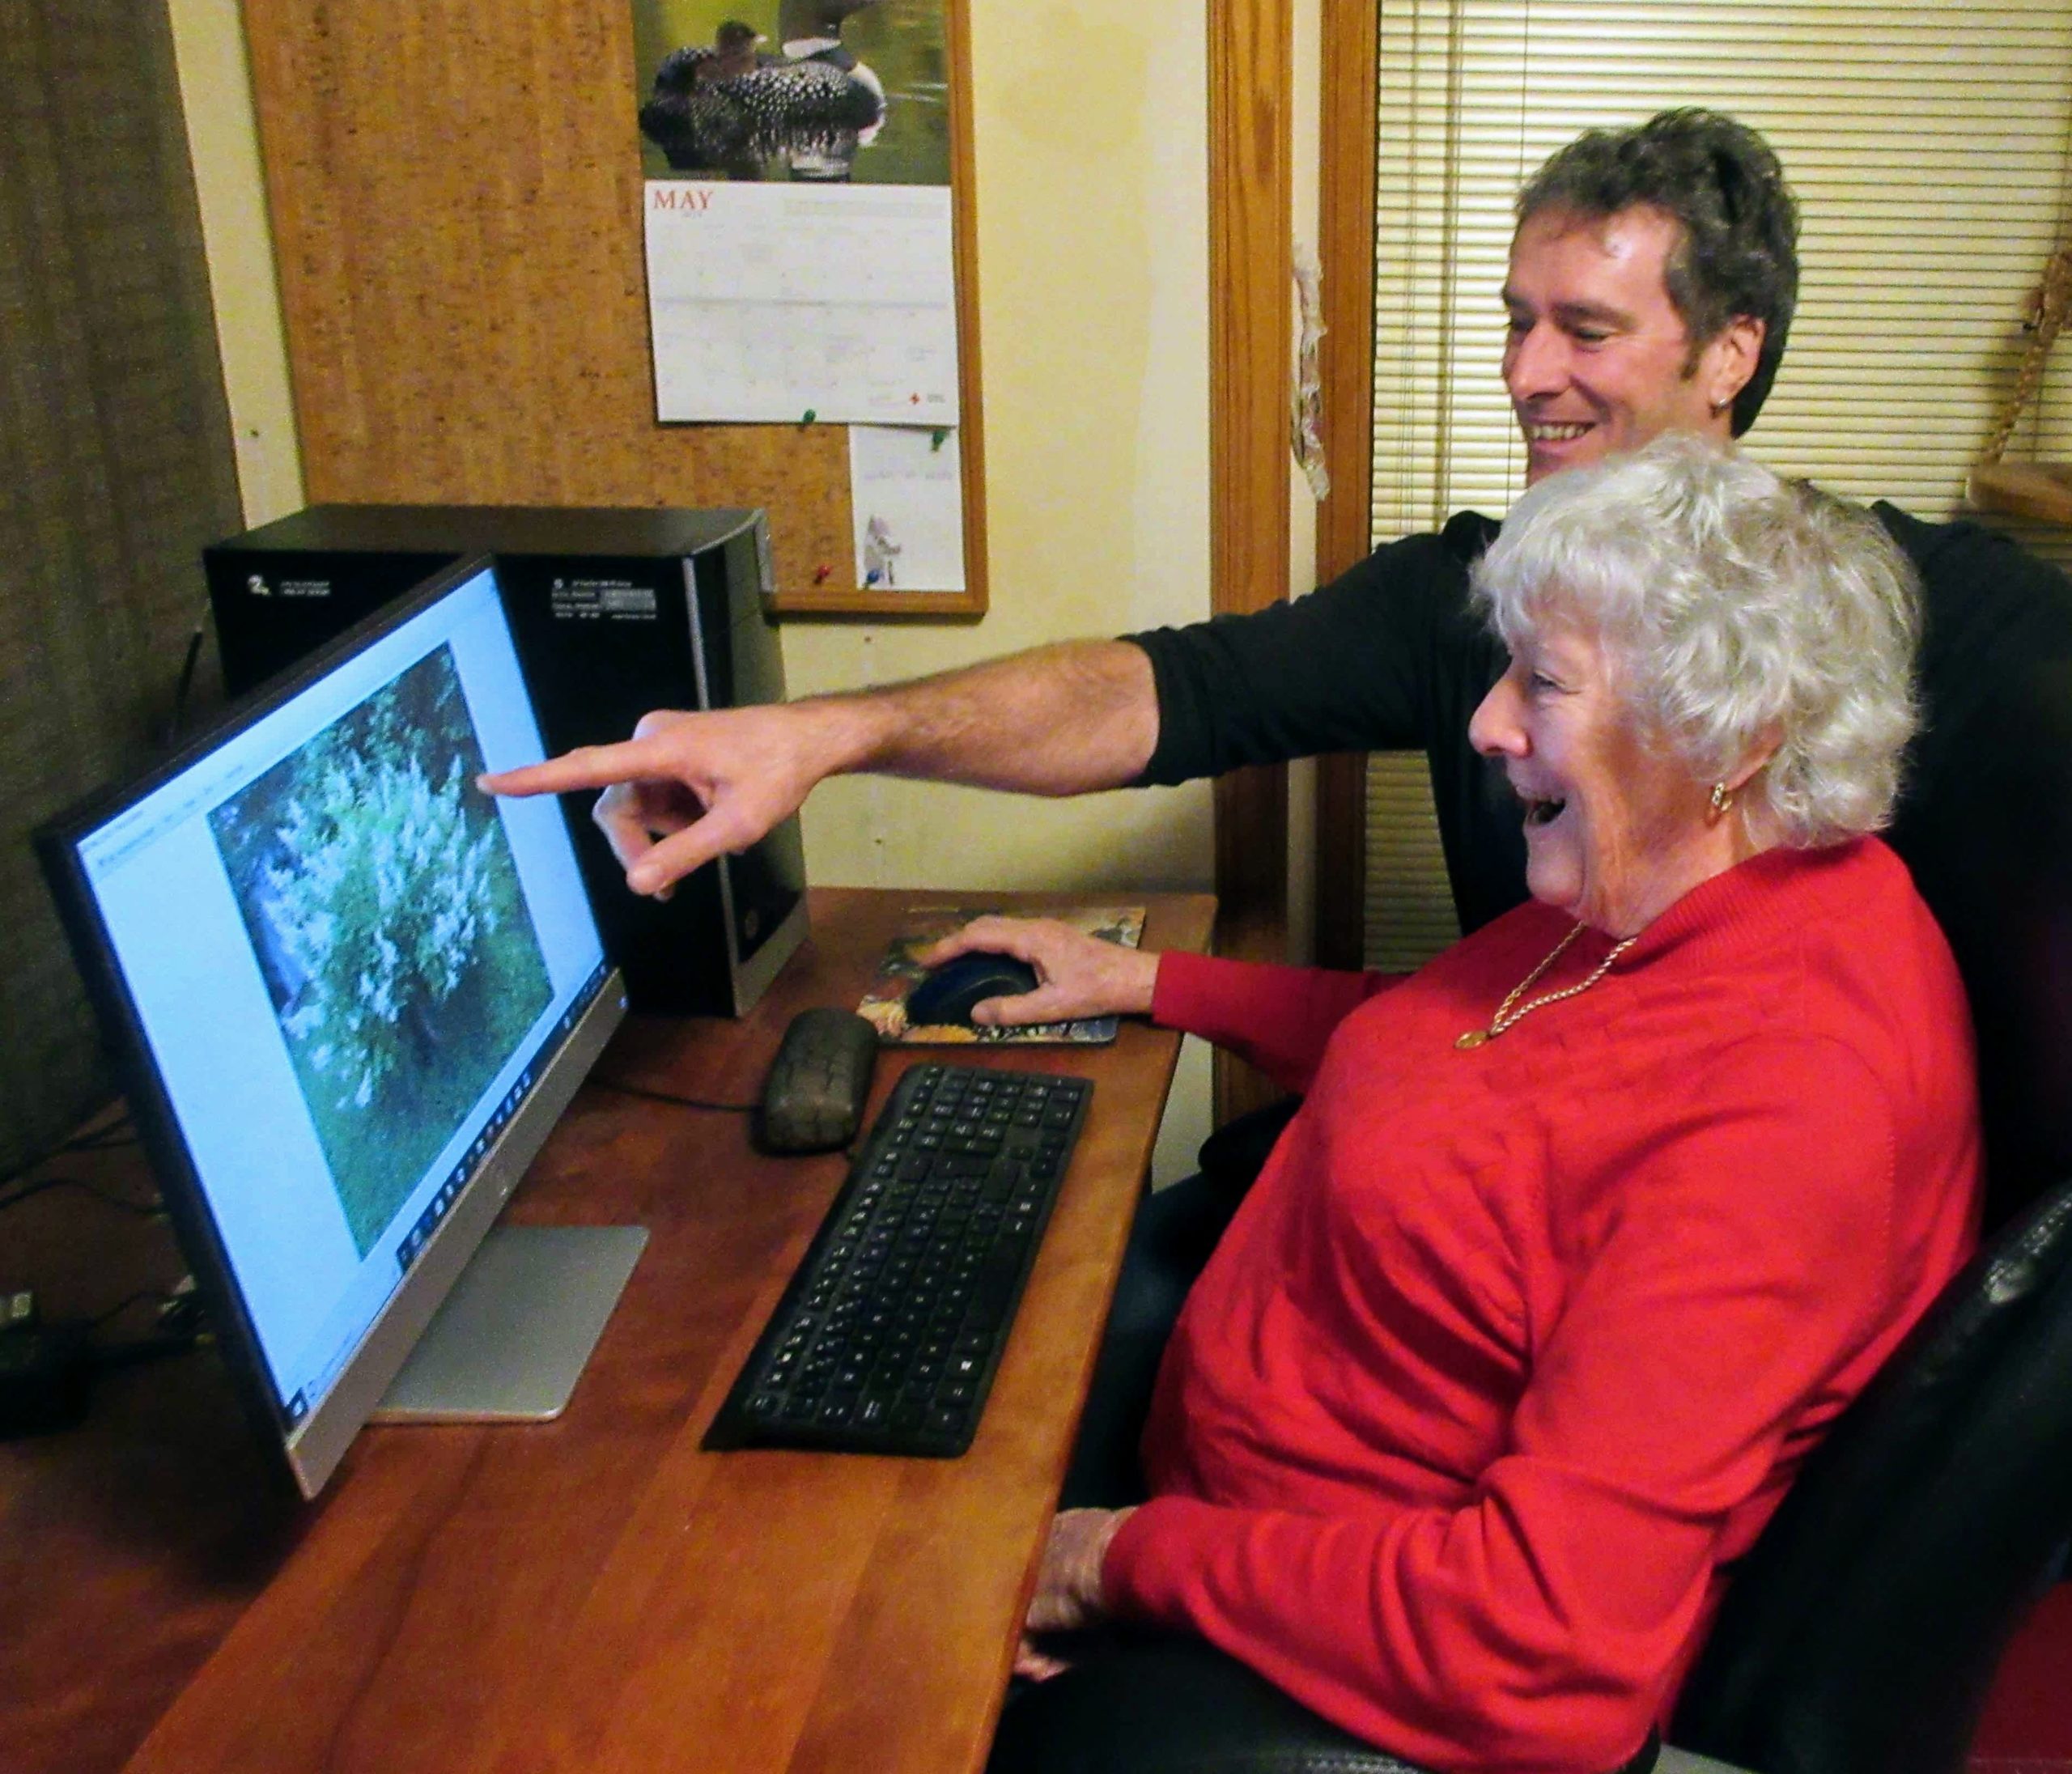
There are often specific classes available for seniors. Learning about computers for many seniors is exciting and challenging.
“Intellectual growth should commence at birth and cease only at death.”
— Albert Einstein.
Students have many responsibilities in a post-secondary environment. Many of them are responsibilities they didn’t need to worry about when they were in high school, or at least to a much lesser extent. When you start college or university, you are responsible for your own learning, and if you recently finished high school that means taking care of business you may never have considered before.
Author’s story
I remember a student who spent her entire student loan the week she received it. I’m sure she felt that she needed the things she bought, but she failed to follow a financial plan that would ensure success. Though she worked hard to get into her program, she “blew it.” Her financial struggles resulted in her failing out of the program in her first semester.
— Mary Shier, College of the Rockies
Exercise: Student Responsibilities
Of the student responsibilities listed above (or of other responsibilities you think of) name the top two you think will be most important for you to focus on to attain student success and state why.
Succeeding in college is rather like succeeding in life. It’s really much more about you than it is about school. So, the most important place to start is to consider why you’re here, what matters to you, and what you expect to get out of it. Even if you have already thought about these questions, it’s good to reaffirm your commitment to your plan as we begin to consider what’s really involved in being a student.
Take a few minutes and write down short answers to the questions below. Be honest with yourself, and write down what you really feel. You are not writing for an instructor here—so don’t answer what you think someone expects to hear—and you are not being graded on your answers! This is for you.
Exercise: Your Post-secondary Plan
Were you able to easily answer the questions? How confident do you feel about your plan?
These are important questions to think about for the simple reason that students who have a clear plan and who are prepared to overcome possible obstacles that may arise along the way are much more likely to succeed. In other words, just thinking in a positive way about your future can help that future come true!
The word values refers to “important and lasting beliefs or ideals shared by the members of a culture about what is good or bad and desirable or undesirable.”What are Values? (2016). Business Dictionary. Retrieved from: http://www.businessdictionary.com/definition/values.html What makes you feel good? What things would you be doing if you had all the time, money, and opportunities in the world? Questions like these help us define our own values.

Author’s story
I am very fortunate to live in the Rocky Mountains. It is absolutely gorgeous, and I never take it for granted: the stunning views, the fresh air, the smells of nature, the sounds of birds singing, the wildlife. I love that I can literally step outside my door and go for a beautiful walk in the woods. I can also go for a hike to a mountain peak with friends and be home for dinner. I value this time immensely, and it is an activity I wouldn’t willingly give up. It contributes to my physical, spiritual, and emotional dimensions of self and helps me be more effective in all areas. Taking time for hiking up mountains pays off enormously. What do you value that is non-negotiable?
— Mary Shier, College of the Rockies
Thinking about your own values can help you know what you want from life and from your education. Take a moment and consider the list of things in the following activity that are valued by some people. For each value, rate how important that thing is to you.
Exercise: Your values
Following is a list of things that different people say they value. For each item on this list, indicate how important it is to you by ranking it as very important (5), not important (0), or somewhere in between.
| Value | Ranking (From 0 to 5) |
|---|---|
| Making a good income | |
| Having good friends | |
| Learning new things about your interests | |
| Having a nice car | |
| Having intelligent conversations | |
| Staying current with the news | |
| Playing sports | |
| Hanging out with friends | |
| Playing computer or video games | |
| Cooking | |
| Online social networking | |
| Sleeping | |
| Reading a good book | |
| Travelling to new places | |
| Shopping | |
| Being liked by others | |
| Studying and reading textbooks | |
| Having nice clothing | |
| Watching television | |
| Enjoying time alone | |
| Getting out in nature | |
| Working your job | |
| Looking good, personal hygiene | |
| Meeting new people | |
| Going to movies or entertainments | |
| Eating nice meals out | |
| Exercising, being physically active | |
| Being your own boss | |
| Having a positive romantic relationship | |
| Engaging in your hobbies | |
| Setting your own schedule | |
| Volunteering your time for a good cause | |
| Cleaning house | |
| Attending classes | |
| Going to religious services | |
| Talking on the telephone, texting, email | |
| Going to parties | |
| Participating in clubs, organized activities | |
| Other: __________________________ | |
| Other: __________________________ |
Look back at the values and activities you rated highly (4 or 5), which probably gave a good indication of how you enjoy spending your time. But now look at these things you value in a different way. Think about how each relates to how you think you need to manage your time effectively while in school. Most students feel they don’t have enough time for everything they like to do. Do some of the activities you value most contribute to your college experience, or will they distract you from being a good student?
Students who enter college or university with their eyes open and who think about their own values and motivations will be more successful. If you have a good idea of what you want from life, the rest of it can be learned. In this book you’ll learn how to stay motivated, manage your time well, study well and many other things that will help lead you to success.
As you consider your values, it can be useful to think of them in terms of the dimensions of self: physical, spiritual, intellectual and emotional. Changes in your goals and routine will impact all these dimensions. Have you considered the impact returning to/continuing in school will have on the different dimensions of your self?
For example, the intellectual side of yourself will likely be stimulated and stretched. However, if you normally tend to spend a lot of time with friends but have to cut down on socializing time in order to implement good study skills, how will that impact your emotional self? Can you incorporate study groups into your study plan to help feed the emotional self’s need for interaction with people? If you need to stimulate the physical self through fitness, can you plan to review and listen to lectures while going for a run or bike ride? It may just take getting into the habit of downloading lectures onto your cell phone and taking them on the go. What are some ways to keep your spiritual self nourished through your demanding load at school?
Exercise: Dimensions of Self
Evaluate the spiritual, physical, intellectual, and emotional dimensions of self in relation to returning to school.
The decision to return to school doesn’t only impact you. It impacts family, friends, and co-workers. It often means that you are no longer as available to people as you normally are. This can impact others in numerous ways. Sometimes people are resentful because they feel they don’t have as much of you as they are accustomed to. Others are incredibly supportive and step up in ways that you never expected. One thing you can count on is that it will change things. You will need to keep the lines of communication open and not just pretend everything is as usual.
Families need to understand why your goals are important not just for you, but for the whole family. Have discussions not only about what you want to accomplish, but why. Identify the outcomes you see from doing this. That will help your loved ones get on board. Families need to discuss how the family will support you in your goals. Often that means a redistribution of chores and responsibilities. For example, teenagers can take responsibility for a regular meal night. It’s important to discuss things in advance so expectations are clear. Having a family that supports you in your goals can be a huge boost to your success.

Look for signs that your schooling is impacting those around you – either positively or negatively. Whether at home, at work, or in important relationships, you may need to reaffirm relationships so that others aren’t hurt by the fact that you have replaced time with them for time investing into your future. Reassure them that it is temporary. Paint a picture of how things will change once you’ve finished your schooling. Thank people for stepping up to the plate for you, whether it’s at work or at home, a little or a lot. Gratitude goes a long way.
Exercise: Impact on Others
Think about the people who are important to you that will be most impacted by you going to school.

Personal wellness means being physically, emotionally, mentally, and spiritually healthy. A healthy lifestyle helps balance all these aspects to achieve wellness. Your decisions and choices will impact both your short-term and long-term wellness. It is important to take into account your overall personal wellness in order to increase the potential for academic success in your educational program and get the greatest benefit out of it. In this section you will learn about some of the various aspects affecting your wellness, such as nutrition, fitness and lifestyle choices. You will assess your personal wellness and identify goals for improvement.

There are many lifestyle choices that we make that impact our personal wellness; negative choices can become vices and cause addictions that can impede wellness for a few hours or lifelong, as well as positive choices which can promote health and help form healthy habits. Some of the most rudimentary lifestyle choices are choosing to nurture and protect your body.

As well as looking after your physical health, it’s also important to look after your emotional health. Emotional health keeps your heart in check, and helps you to keep your emotions reasonable. Here are some ways to stay emotionally healthy.

Your mental health can be impacted by hormonal or chemical imbalances, circumstances, and lifestyle. This is a complicated issue, and in cases of serious depression, anxiety, and other mental health issues, it is important to get medical help through a doctor, counsellor, psychiatrist, or other health professional. But everyone, no matter what level of mental health, needs to keep stock of their mental health. Keeping in a state of wellness can be helped by using these strategies:

As well as looking after your physical, emotional, and mental health, you also need to look after your spiritual health. Your spirit is the deepest part of you – the part that makes you you. Spirituality is different for everyone. It is what provides you with meaning and purpose in your life. Your faith, values, beliefs, principles, and morals define your spirituality. For some, spirituality is nurtured through traditional religions, while for others it comes through relationships or being at peace with nature. Spiritual wellness brings inner peace, strength and hope. There are a number of ways to achieve spiritual wellness depending on your beliefs.


What are some other ways you develop your spiritual health?

Of course, in many of these aspects of personal wellness (physical, emotional, mental, spiritual) everyone will veer from good habits at least every now and then. But it’s good to keep them in check and be conscious of the impact of the lifestyle choices you are making. Too much of anything can become a destructive force in your life. Do you spend too much time on your cell phone, watching TV, on social media, on the internet, or playing video games? Is there something you do in your life that you know you should scale back on?
Reflections of a Former Student: Positive and Negative Influences

Peers
One of the most difficult things to come to terms with regarding your personal well-being is the people you spend time with. Many of us choose our friends based simply on who makes us feel the most comfortable, but being comfortable with a bad situation can be a negative thing in the long term. While close bonds with your friends are extremely important, it’s also vital to evaluate every once in a while: Do the people I spend time with uplift me? Do they reinforce habits, behaviours, and thought patterns that better my well-being, or are they holding me back? This isn’t as simple as spending time with only “positive” people with nice things to say to you. This is about finding people who are willing to challenge your weaknesses and push you to succeed on your own terms, while also being aware of your emotional needs. Finding this balance is incredibly difficult, and letting go of unhealthy relationships can be one of the hardest things we’ll ever have to do in life.
Media
Furthermore, in the modern world, this goes beyond just the people we give our time to, but also extends to our relationships with the various media we consume. Ask yourself, do you have a tendency to always engage with dark and violent movies, or depressing music? These things aren’t inherently bad to enjoy, and can be a healthy emotional outlet during the times when we deal with our own dark emotions, but media consumption can be thought of like a diet, and needs to be balanced as such. The emotional connection we get from media can become addictive, and if you find yourself always coming back to media that puts you in a depressed or angry state of mind, try integrating a little more variety into your media diet. By no means does this mean abandoning your personal taste for horror movies, for example, but once in a while try to throw on a good rom-com, and engage with it emotionally rather than judgmentally. Contrast the experiences you have with different media, and you will have a fuller experience with your engagement as a whole. It may even make you appreciate your old favourites in a whole new light!
— Gordon Shier, illustrator and animator
What you’re doing now in terms of personal health will have a significant influence on your academic performance. Setting healthy habits early on will improve both your academic performance and long-term health.
Considerable research has demonstrated that the basic elements of good health—nutrition, exercise, not abusing substances, stress reduction—are important for preventing cardiovascular diseases, diabetes, cancers, and chronic respiratory diseases, known to be the causes of nearly two thirds of deaths worldwide The National Center for Chronic Disease Prevention and Health Promotion, Center for Disease Control and Prevention, 2014, https://doi.org/10.1016/S0140-6736(14)60648-6. The key risk factors for these non-communicable diseases are high blood pressure, smoking, high BMIs, low physical activity levels, alcohol consumption, and poor diet.
Wellness is more than just avoiding disease, however. Wellness involves feeling good in every respect – in mind and spirit as well as in body. Good health habits also offer the benefits of increased energy; better focus; less stress; more resilience; less lost time due to colds, flu, infections and other illnesses; more restful sleep; and improved mental health.
This video from the Centres for Disease Control and Prevention introduces the positive benefits exercise has on health including disease prevention, longevity, weight control, and better sleep. It also explains aerobic activity and muscle strength training.
Video: “Physical Activity Guidelines” (length 4:42)
https://www.youtube.com/watch?v=lEutFrar1dI
It’s also interesting to note how different dimensions of health affect each other. Physical health can impact emotional health and mental health.
Video: “Exercise and the Brain” (length 4:18)

A YouTube element has been excluded from this version of the text. You can view it online here: https://opentextbc.ca/studentsuccess/?p=54
This neuroscientist, Wendy Suzuki, explains the positive impact exercise has on memory, learning, mood and health. In fact, it highlights the brain-changing effects of exercise in this fascinating Ted Talk.
Video: “The Brain-changing Effects of Exercise | Wendy Suzuki” (length 13:03)

A YouTube element has been excluded from this version of the text. You can view it online here: https://opentextbc.ca/studentsuccess/?p=54
The next video talks about the effects exercise has on mental wellness for students.
Video: “Exercise and Mental Health” (length 3:35)

A YouTube element has been excluded from this version of the text. You can view it online here: https://opentextbc.ca/studentsuccess/?p=54
Exercise: Personal Wellness
Consider the various aspects of personal wellness and health (physical, emotional, mental, spiritual) listed in this unit and take an inventory of your own wellness. In what ways are you doing well? What ways could use improvement? Can you set some short and long term goals for your personal wellness?
Your report should be approximately one page.

One activity can contribute to many aspects of personal wellness. An outing such as hiking incorporates physical exercise, fresh air, social time with friends, and time of contemplation in nature.
To create an action plan, you will take all the information you have gathered in all of the activities in this module, and you’ll put it all together. At the end, you’ll have a realistic plan to help you realize your goal of returning to school. The action plan is the map to the next part of your journey.
What are the benefits of having an action plan?
Creating your action plan is a helpful step towards reaching your goals.
Exercise: Action Plan
When creating your Action Plan you may involve the help of others who may offer helpful suggestions.
Use your word processing program to answer the following three questions. Fill in as much information as you can. You won’t be able to complete the whole thing, but you will have enough information to finalize your plan to incorporate the concepts in this module. Review the exercises you have completed in each section of this module for ideas of things you need to include. Here are the categories to fill out:
Make sure your plan meets your needs. Finalize your plan and set out your next steps. Remember, you can always adjust your plan as needed. You may discover other things that need to be added or adjusted.
Your journey is not over — it has just begun!
In this chapter, you have investigated many aspects impacting adult learning. Keep these factors in mind throughout your education so that you remind yourself to keep things in check. Your action plan should be a summary of things you need to be doing to help you with student success. Add to it as you go through the course and discover other helpful practices. Hopefully this module has inspired you to embrace the idea of adult learning.
Exercise: Adult Learning
Key Takeaways
This module recognizes that all people learn differently. Learners have different learning preferences, strengths, and challenges, and they can utilize different strategies to make their learning most effective. Learning preferences include the mode or combination of modes that learners tend to prefer or respond well to, including aural, visual, verbal, and kinesthetic. Some people learn well by specifically including one or more of: reading, listening, speaking, watching, or practising. Memory is most enhanced when a combination of modes are used. Some types of learning work better with some modes. For example, when it comes to learning to ski, it is much more efficient to practice it than to read about it. Along with the type of learning and the preference of the learner, it is good to note that individual learners have different strengths and abilities. Utilizing these to the fullest makes for better learning.
Along with preferences and strengths, learners have different challenges. These can come in the form of learning challenges or challenging circumstances. Learning challenges can include learning disabilities of varying degrees, or if not diagnosed disabilities, learning struggles that have impeded ability to learn in the past. Challenging circumstances that affect learning can include temporary or long-term circumstances that impact ability to learn such as losing a loved one, medical conditions, or dysfunctional living conditions. These often have a negative impact on learners’ abilities to be successful at school.
Identifying and recognizing all these factors impacting learning will help you to examine different strategies and supports to help you to maximize your learning at post-secondary.
Learning Objectives
In this chapter on “Learning Preferences,” students will:

Different people have different learning preferences. There are many models which are used to describe these preferences. Learning styles is one that accounts for learner differences, which can be useful in understanding the different ways we learn. It can also be useful to know your strengths and use them to enhance learning.
Style refers to a student’s specific learning preferences and actions. One student may learn more effectively from listening to the instructor, while another prefers to take notes. Another learns more effectively from reading the textbook, while another student benefits most from charts, graphs, and images the instructor presents during a lecture. It’s important to note that people don’t necessarily have a single style. Students can use different styles in different situations, but they often tend toward specific preferences.
Learning style is important in college and university. Each different style, described later in more detail, has certain advantages and disadvantages compared with other styles. None is “right” or “wrong.” You can learn to use different styles more effectively.
Instructors also have different teaching styles, which may or may not match up well with your learning preference. Although you may personally prefer a certain style of teaching, you cannot expect that your instructors will use exactly the style that you prefer. Therefore it is important to know how to adapt to teaching styles.
It is important to note that there are many criticisms of the learning styles model. Some researchers purport that there is no evidence that identifying a learner’s learning style and then teaching to it accordingly results in increased student outcomes. Another criticism is that identifying one single learning style or method of learning and focusing on it alone can result in ignoring the other learning modalities, and this could ultimately hamper learning. It is much more useful to think of it like this: if you recognize a learning strength, then use that strength by adding more of it to your learning strategies. But don’t stop using the other modalities. For example, if you discover that listening is a strength for you, then it would be useful for you to add listening activities to your coursework, such as downloading lectures and re-listening to them while you are doing other activities (riding the bus, going for a run, or doing the dishes). But listening to lectures on your phone should not replace attending classes, practising concepts by doing homework questions, or working together in study groups – as these are all things that can enhance your learning as well.
Consider the following theories and see if any of the concepts resonate with you.
Often, we associate learning in university with strengths in reading and writing. Though it is true that reading and writing are important skills used in many courses, you can also apply other learning strengths to contribute to successful learning.
Different systems have been used to describe the different ways in which people learn. Some describe the differences between how extroverts (outgoing, gregarious, social people) and introverts (quiet, private, contemplative people) learn. Some divide people into “thinkers” and “feelers.”
A popular framework is Multiple Intelligences, based on research by Howard Gardner. Gardner proposed that there are eight different ways of learning, creating things, and solving problems. Everyone uses all eight of these intelligences; however, in each individual, some intelligences are areas of strength, while others are weaker, leading to different preferences in learning. The eight multiple intelligences are:
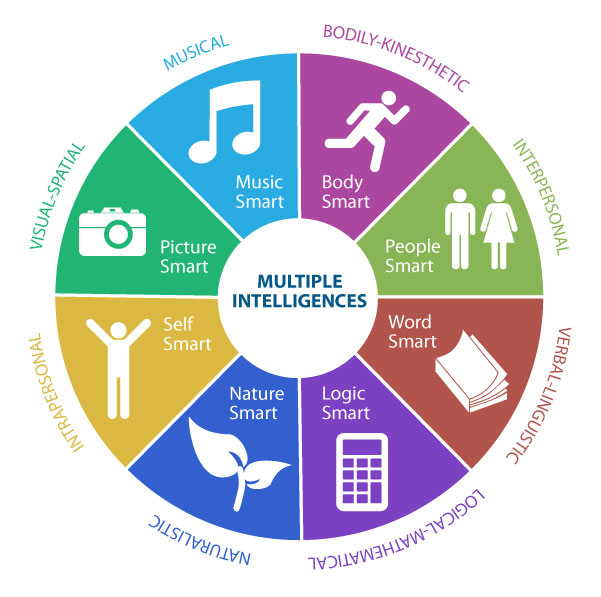
Here is a more detailed description of the different intelligences:
| Intelligence | Description |
|---|---|
| “Word smart” Verbal-Linguistic Intelligence | The capacity to use language to express what’s on your mind and to understand other people. People who are high in this intelligence are sensitive to language, meanings, and the relationship of words. They engage easily with vocabulary activities, grammar, poetry, essays and plays. |
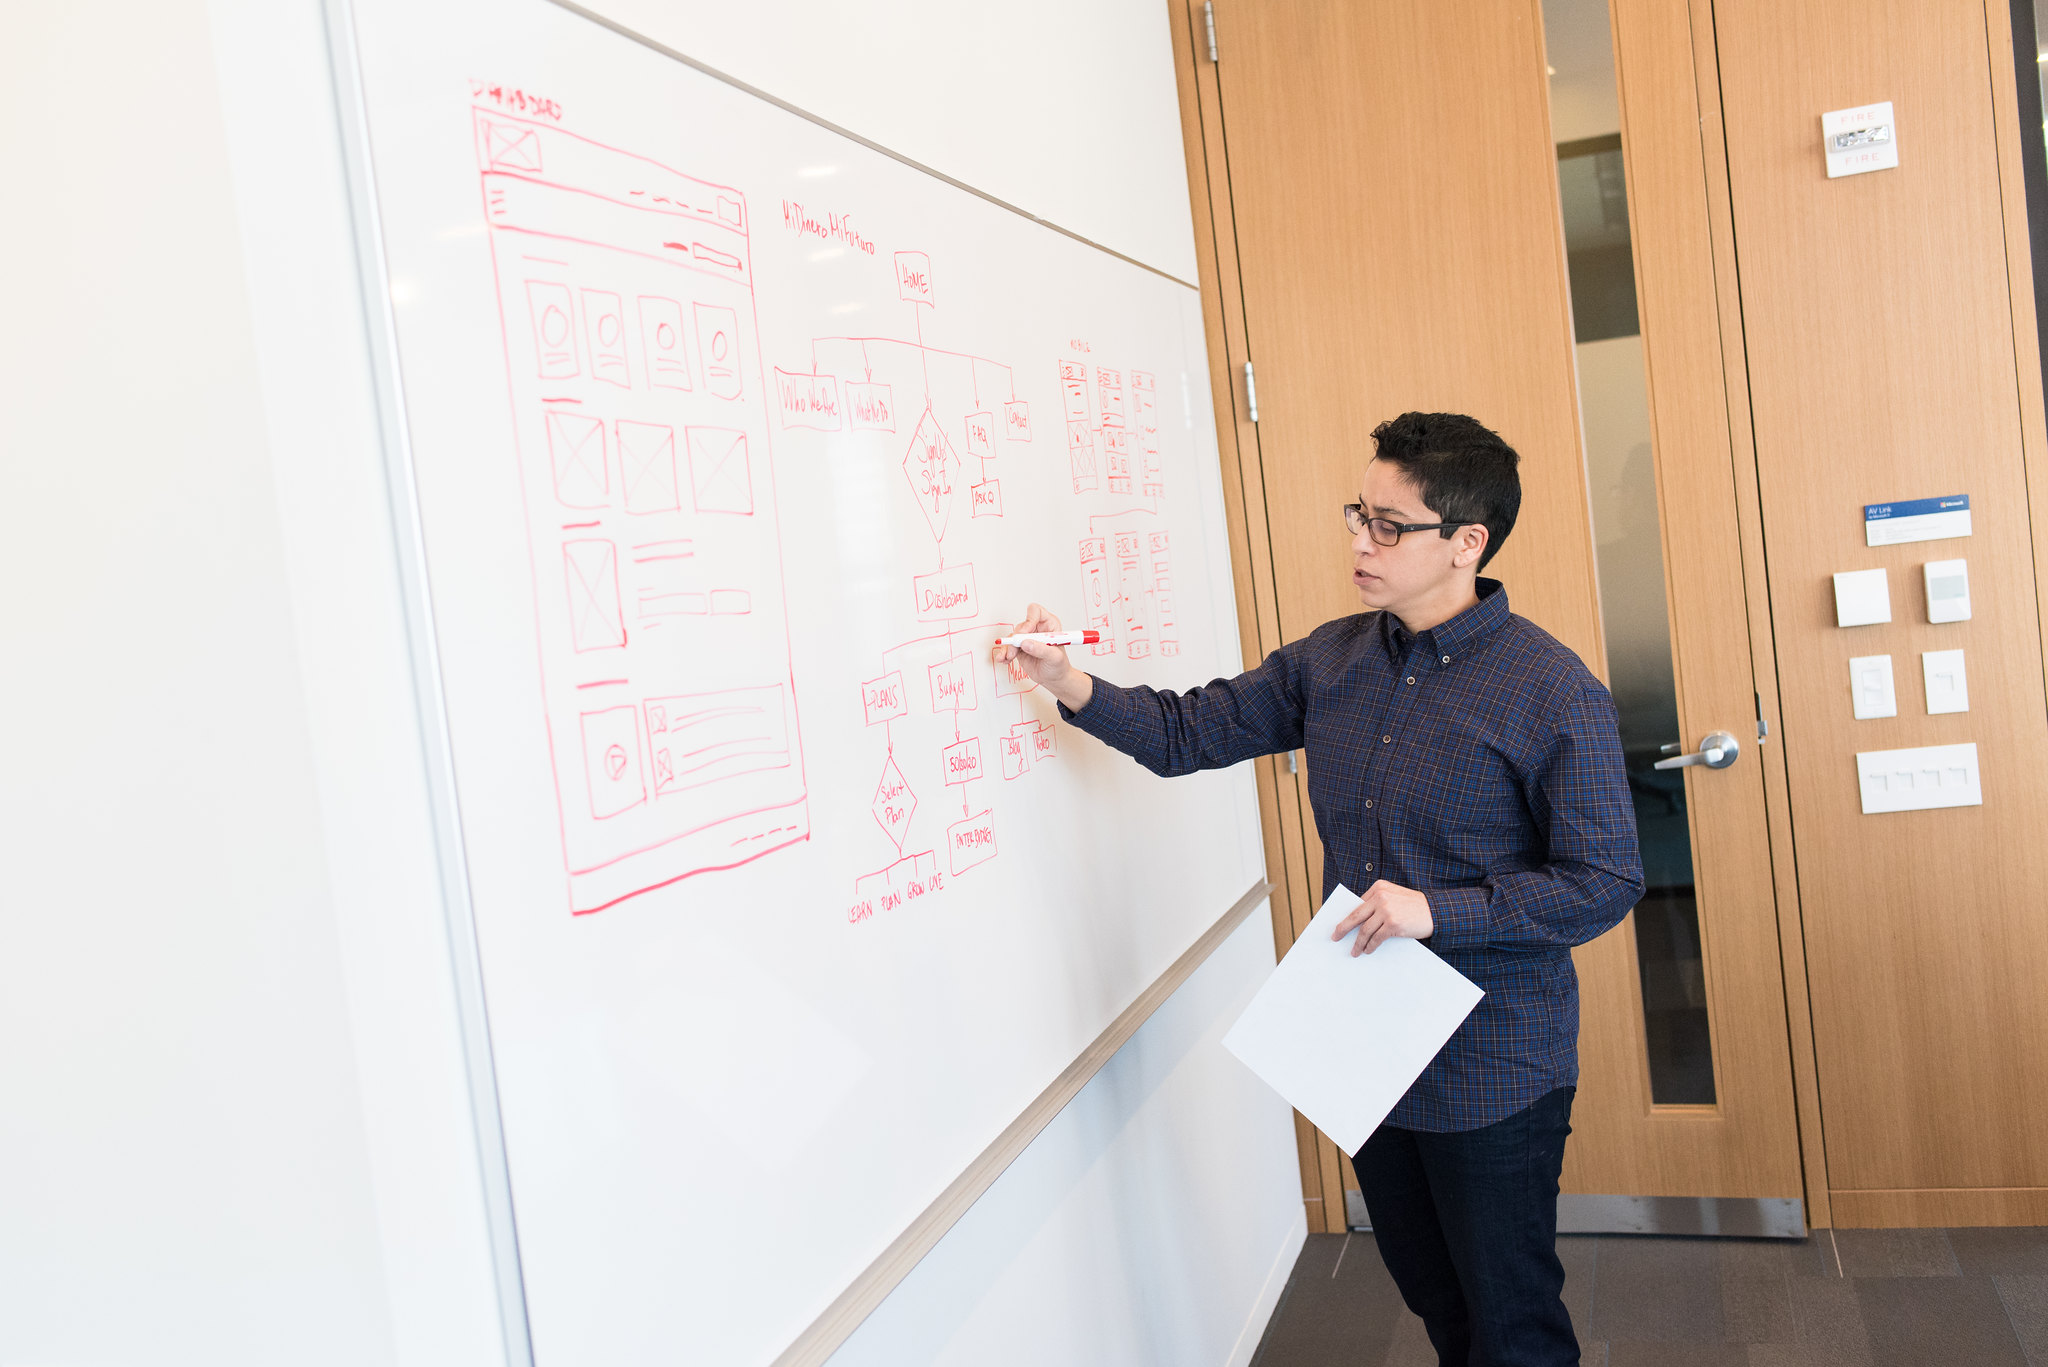
| “Logic smart” Logical-Mathematical Intelligence | People with a highly developed logical-mathematical intelligence understand the underlying principles of some kind of a causal system; or can manipulate numbers, quantities, and operations. Abstract thinking, counting, organizing; and logical structures are preferred by people high in this intelligence. They also like critical thinking activities, breaking words into smaller parts and reassembling them. |
| “Picture smart” Visual-Spatial Intelligence | People strong in this intelligence have the ability to represent the spatial world internally in their minds. Spatial intelligence can be used in the arts or in the trades and sciences. Those who are spatially intelligent and oriented toward the arts, are more likely to become painters or sculptors or architects than, say, musicians or writers. These people tend to be keen observers, able to think in three dimensions, and like to use metaphors. Learning materials that work well for them include: graphs, charts, colour codes, guided imagery, pictures, posters, and mind maps. |
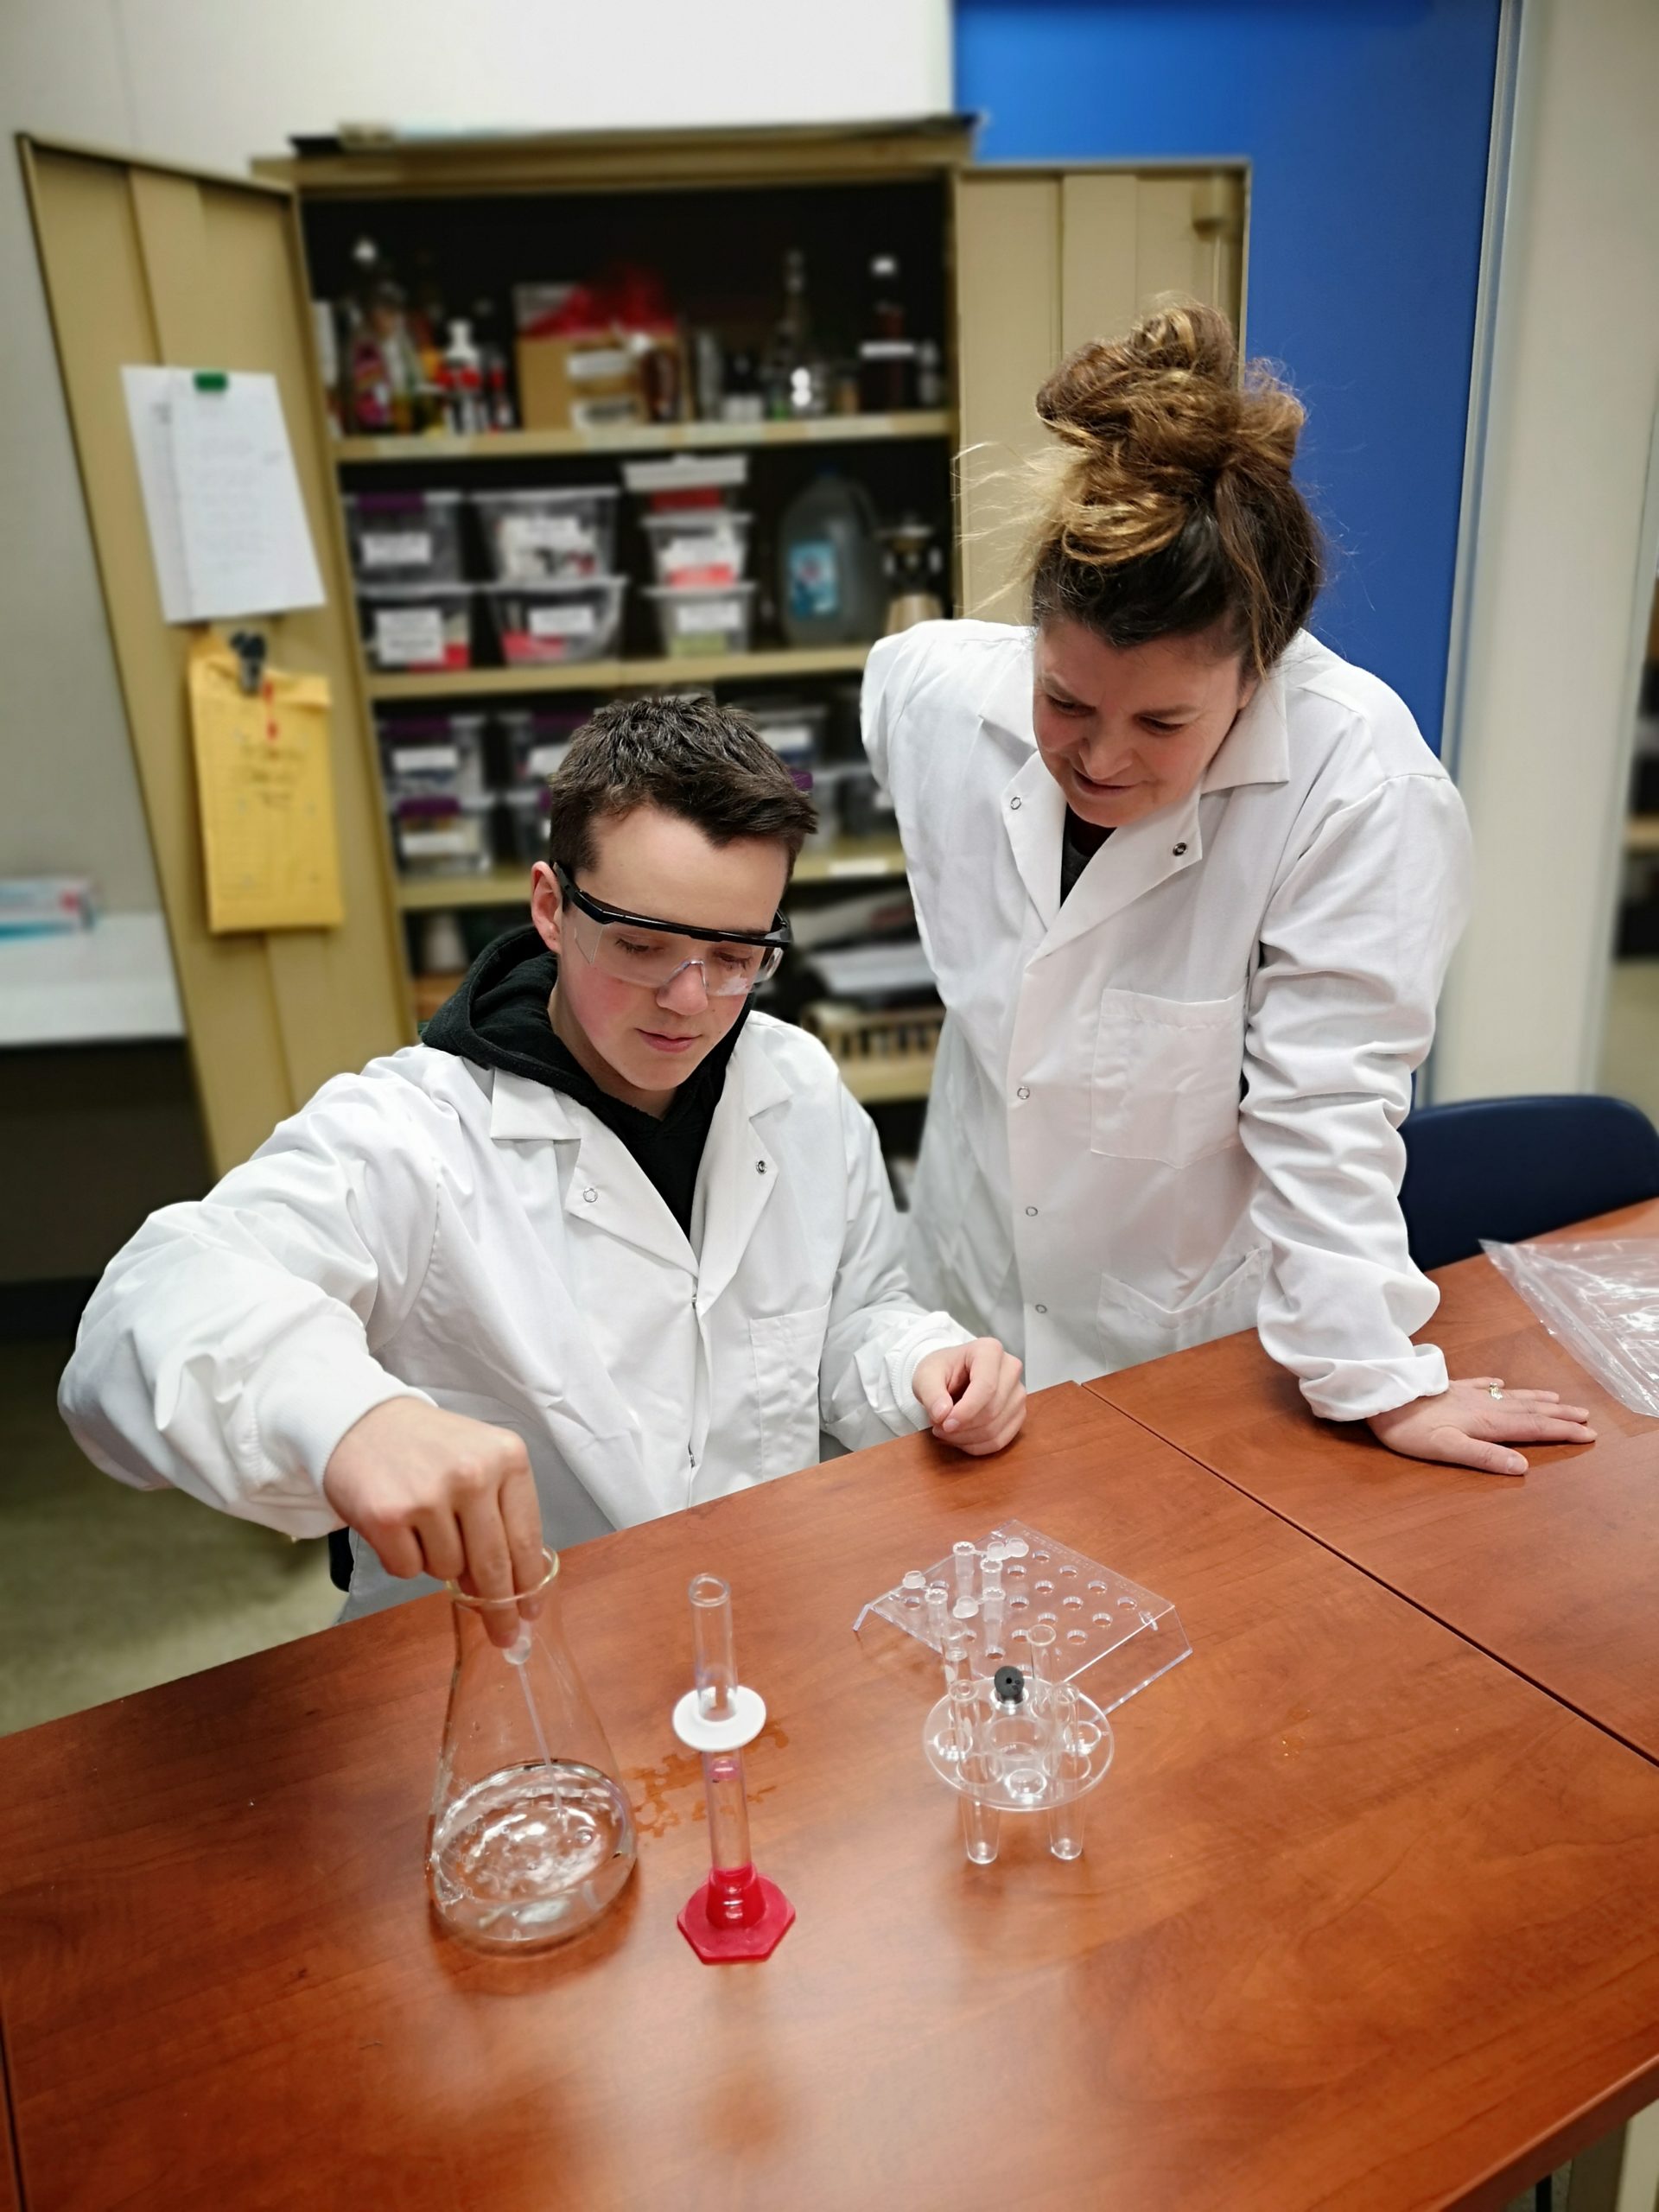
| “Body smart” Bodily-Kinesthetic Intelligence | Body smart people have the capacity to use their whole body or parts of their body –hands, fingers, arms – to solve a problem, make something, or put on some kind of a production. These people have good body control and fine motor skills; and are often active and animated. They need “hands-on” learning opportunities, like shop, labs, games, skits, and plays. |
| “Music smart” Musical Intelligence | Music smart people have the capacity to think in music, to be able to hear patterns, recognize them, remember them, and perhaps manipulate them. People who have a strong musical intelligence don’t just remember music easily – they can’t get it out of their minds, it’s so omnipresent. People will be sensitive to rhythm, pitch, intonation, and can remember tunes and rhythms easily. They tend to like poems, plays, jazz chants, rap music, songs, and musically guided imagery. |
| “People smart” Interpersonal Intelligence | Those who are people smart have an understanding of other people. Anybody who deals with people has to be skilled in the interpersonal sphere. This is a social intelligence and those who are high in this area are outgoing and interactive; sensitive to others’ moods, feelings, and motivations. |
| “Self smart” Intrapersonal Intelligence | Self smart people have an understanding of themselves, of knowing who they are, what they can do, what they want to do, how they react to things, which things to avoid, and which things to gravitate toward. They tend to know what they can do. They tend to know what they can’t do, and they also tend to know where to go if they need help. |
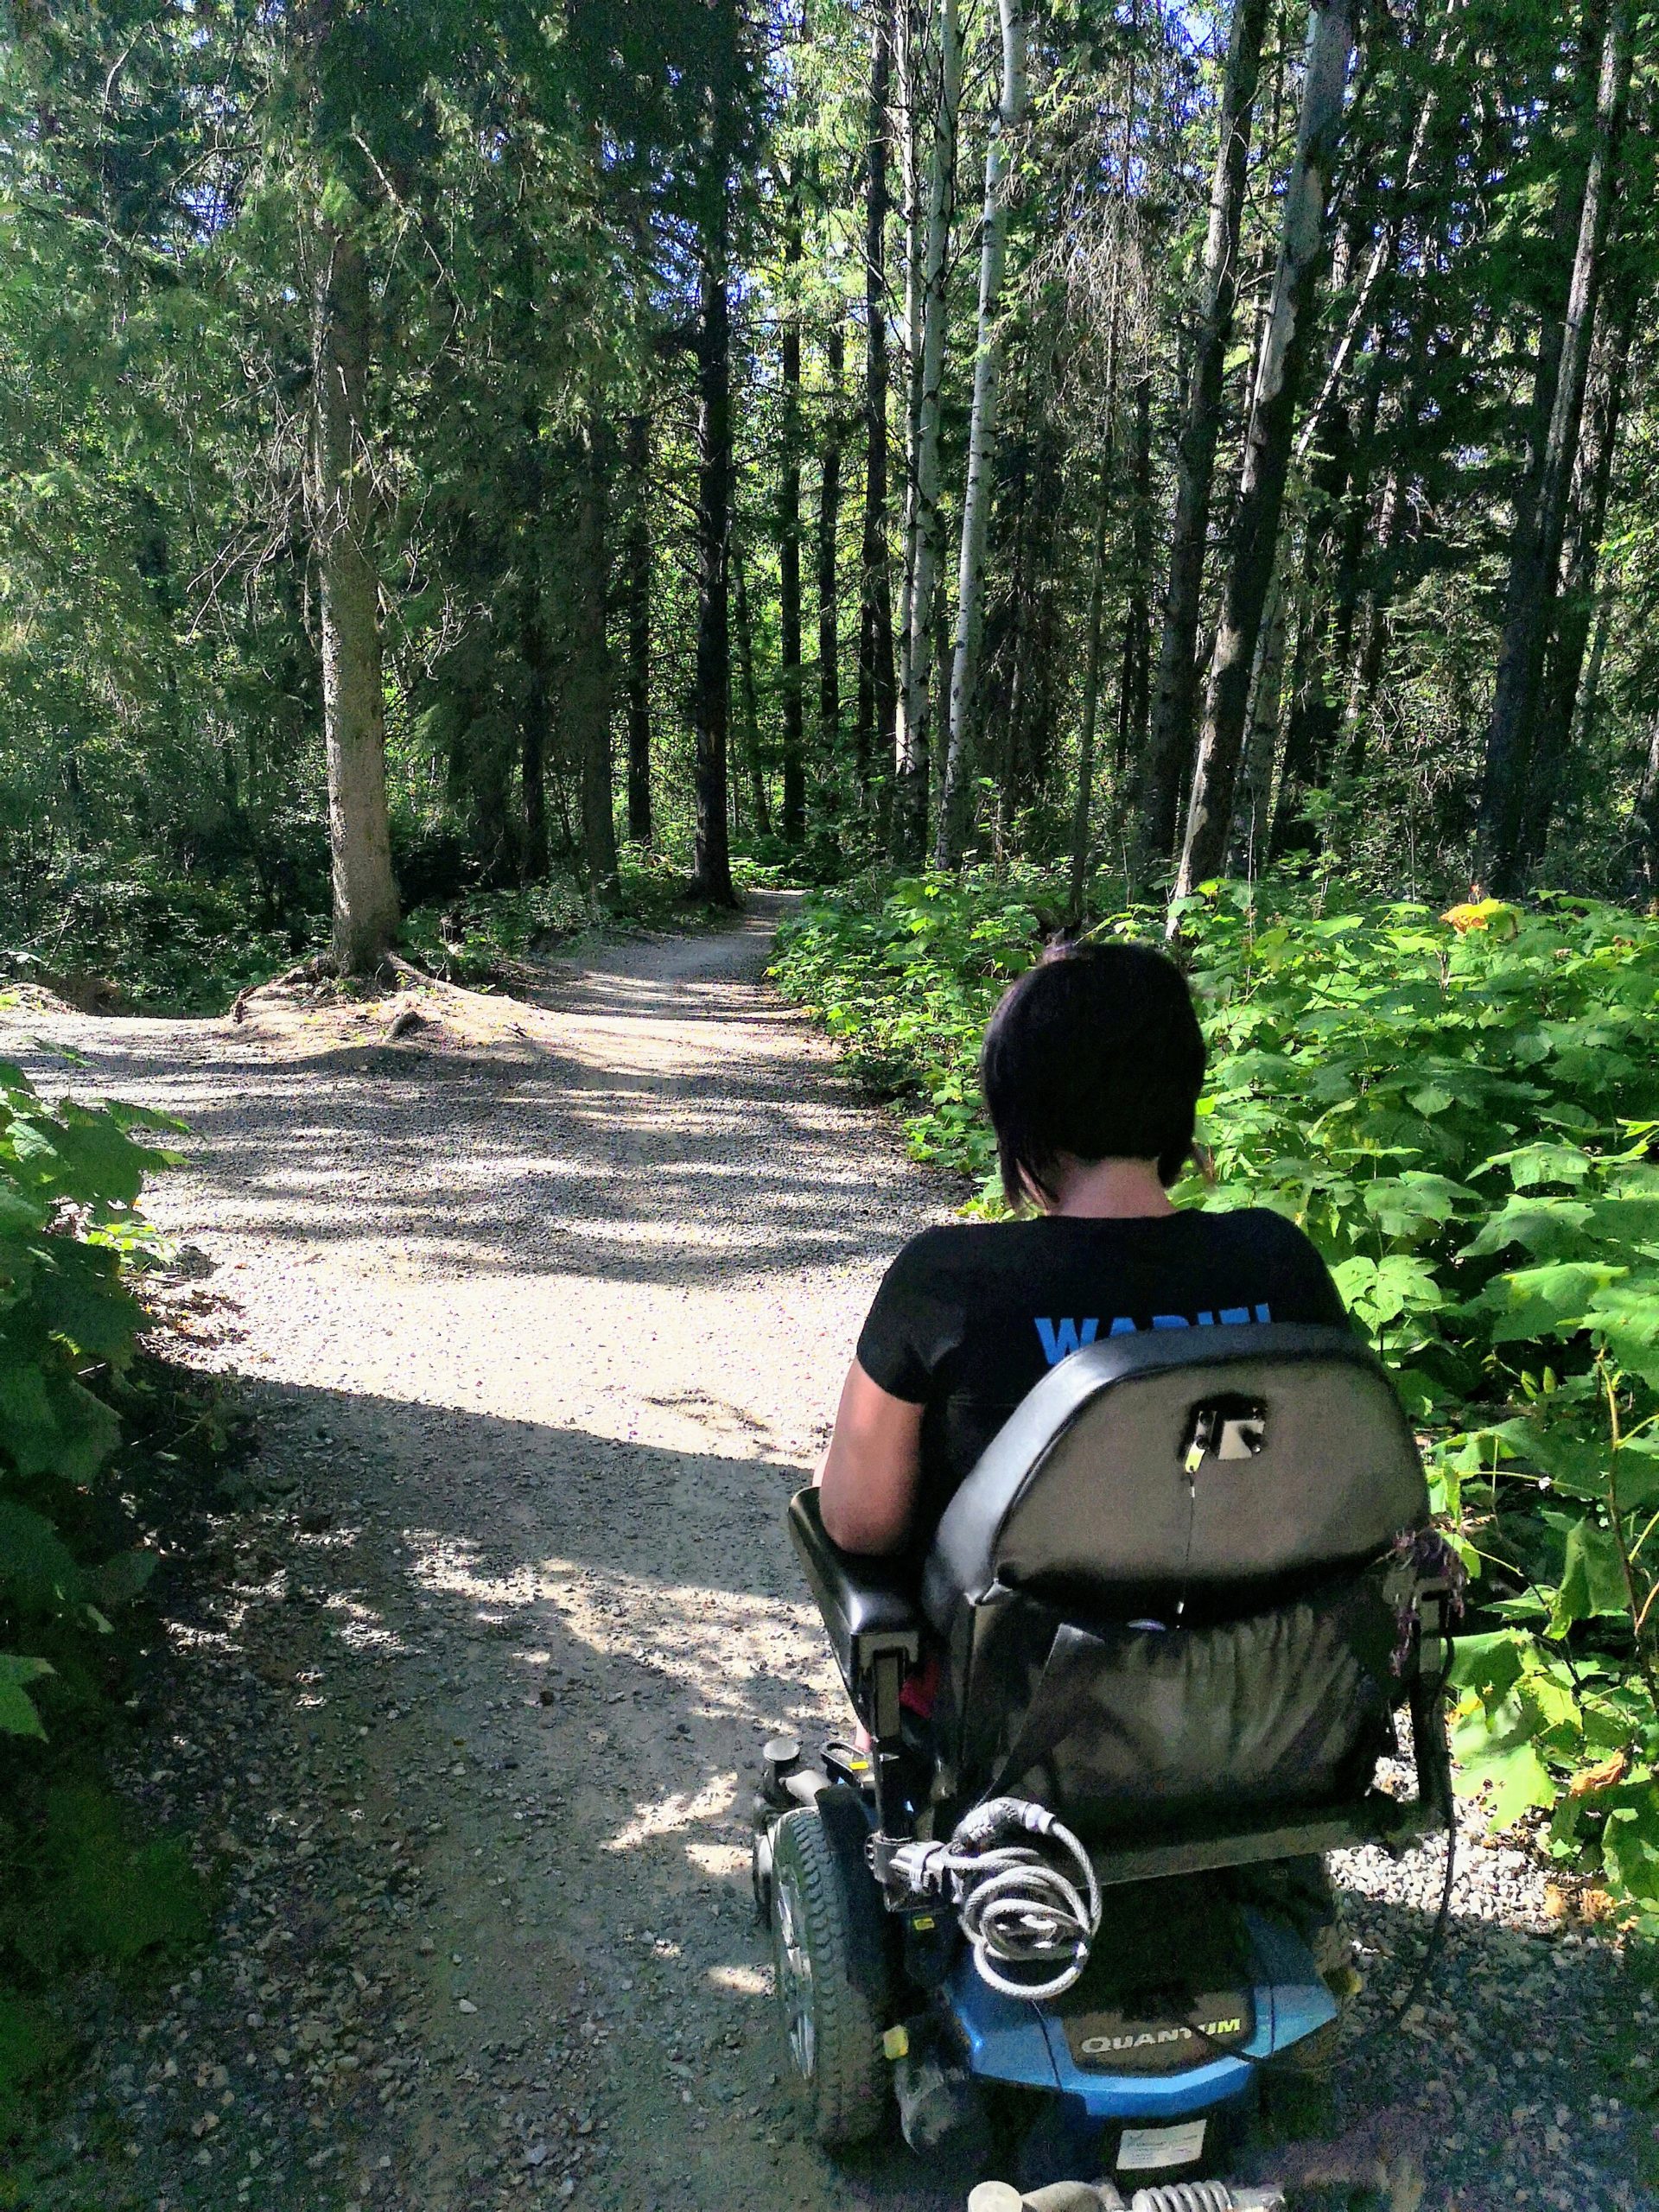
| “Nature smart” Naturalistic Intelligence | Nature smart people have the ability to discriminate among living things (plants, animals), sensitivity to other features of the natural world (clouds, rock configurations) as well as a good sense of their surroundings and environment. They are also sensitive to changes around them, both outdoors and indoors. |
| Gardner later added a 9th intelligence: “Life Smart” Existential Intelligence
| People with existential intelligence have the sensitivity and capacity to tackle deep questions about human existence, such as the meaning of life, the reason for death, and the explanation of how we got here. They tend to be reflective, deep-thinking, and able to design abstract theories. They appreciate multiple perspectives, see connections, challenge assumptions, and push boundaries. They can become scientists, philosophers, and theologians. |
It is also important to note that we can continue to develop our intelligence, and use multiple intelligences to learn content in any course. Our brains continue to grow and develop over time, even into adulthood. Taking full advantage of these opportunities for growth can support learning in any course.
Exercise: Multiple Intelligences
Go to Howard GardnerL Multiple Intelligences Test and scroll down to the link for “free Multiple Intelligences test (based on Howard Gardner’s model)—in Microsoft Excel self-calculating format, and other versions.” You need Microsoft Excel on your computer to take this free online assessment of your preferred multiple intelligences learning styles.
Clicking the link will download an Excel spreadsheet with 74 questions. Answer each as directed on the 1 to 4 scale. Your score totals are then shown for each of the “multiple intelligences” learning styles.
OR
Use this assessment to discover your intelligence strengths:
Multiple Intelligences Self-Assessment Quiz
The multiple intelligences approach recognizes that different people have different ways, or combinations of ways, of relating to the world. Here is an example of visual-spatial intelligence, as an artistic, autistic savant draws the New York City skyline from memory.
Video: “Stephen Wiltshire draws NYC for UBS” (length 3:49)

A YouTube element has been excluded from this version of the text. You can view it online here: https://opentextbc.ca/studentsuccess/?p=68
A popular approach to learning styles is called the VARK approach Fleming, N.D. (1996). Teaching and Learning Styles: VARK Strategies. Hershey, PA: IGI Global., which focuses on learning through different senses (Visual, Aural, Reading/Writing, and Kinesthetic):
You can take a free, self-scored online assessment of your VARK learning style at VARK Learning Styles Questionnaire [PDF].
Once you discover the differences in learning styles and how they pertain to you, it may help you to shed light on your own learning habits and preferences, and give you ideas for incorporating other strategies. You shouldn’t conclude that you are one type of learner or another and that you should just focus your learning on using your preferred learning style as previously thought. It can be hard to break study habits which have formed over many years. However, by incorporating different modalities in your learning, you are more likely to remember and understand. Think of it as having a toolbox of ways to think and learn, and for each task, ask yourself which tool is the best one for the job.
There are many systems used by educators to describe the various ways in which people learn. These systems can help you learn more about how you as an individual person and post-secondary student learn – both in your current study strategies and in how you could enhance your learning by including other less familiar strategies. Feel free to research this further on your own.
Exercise: VARK Learning Styles
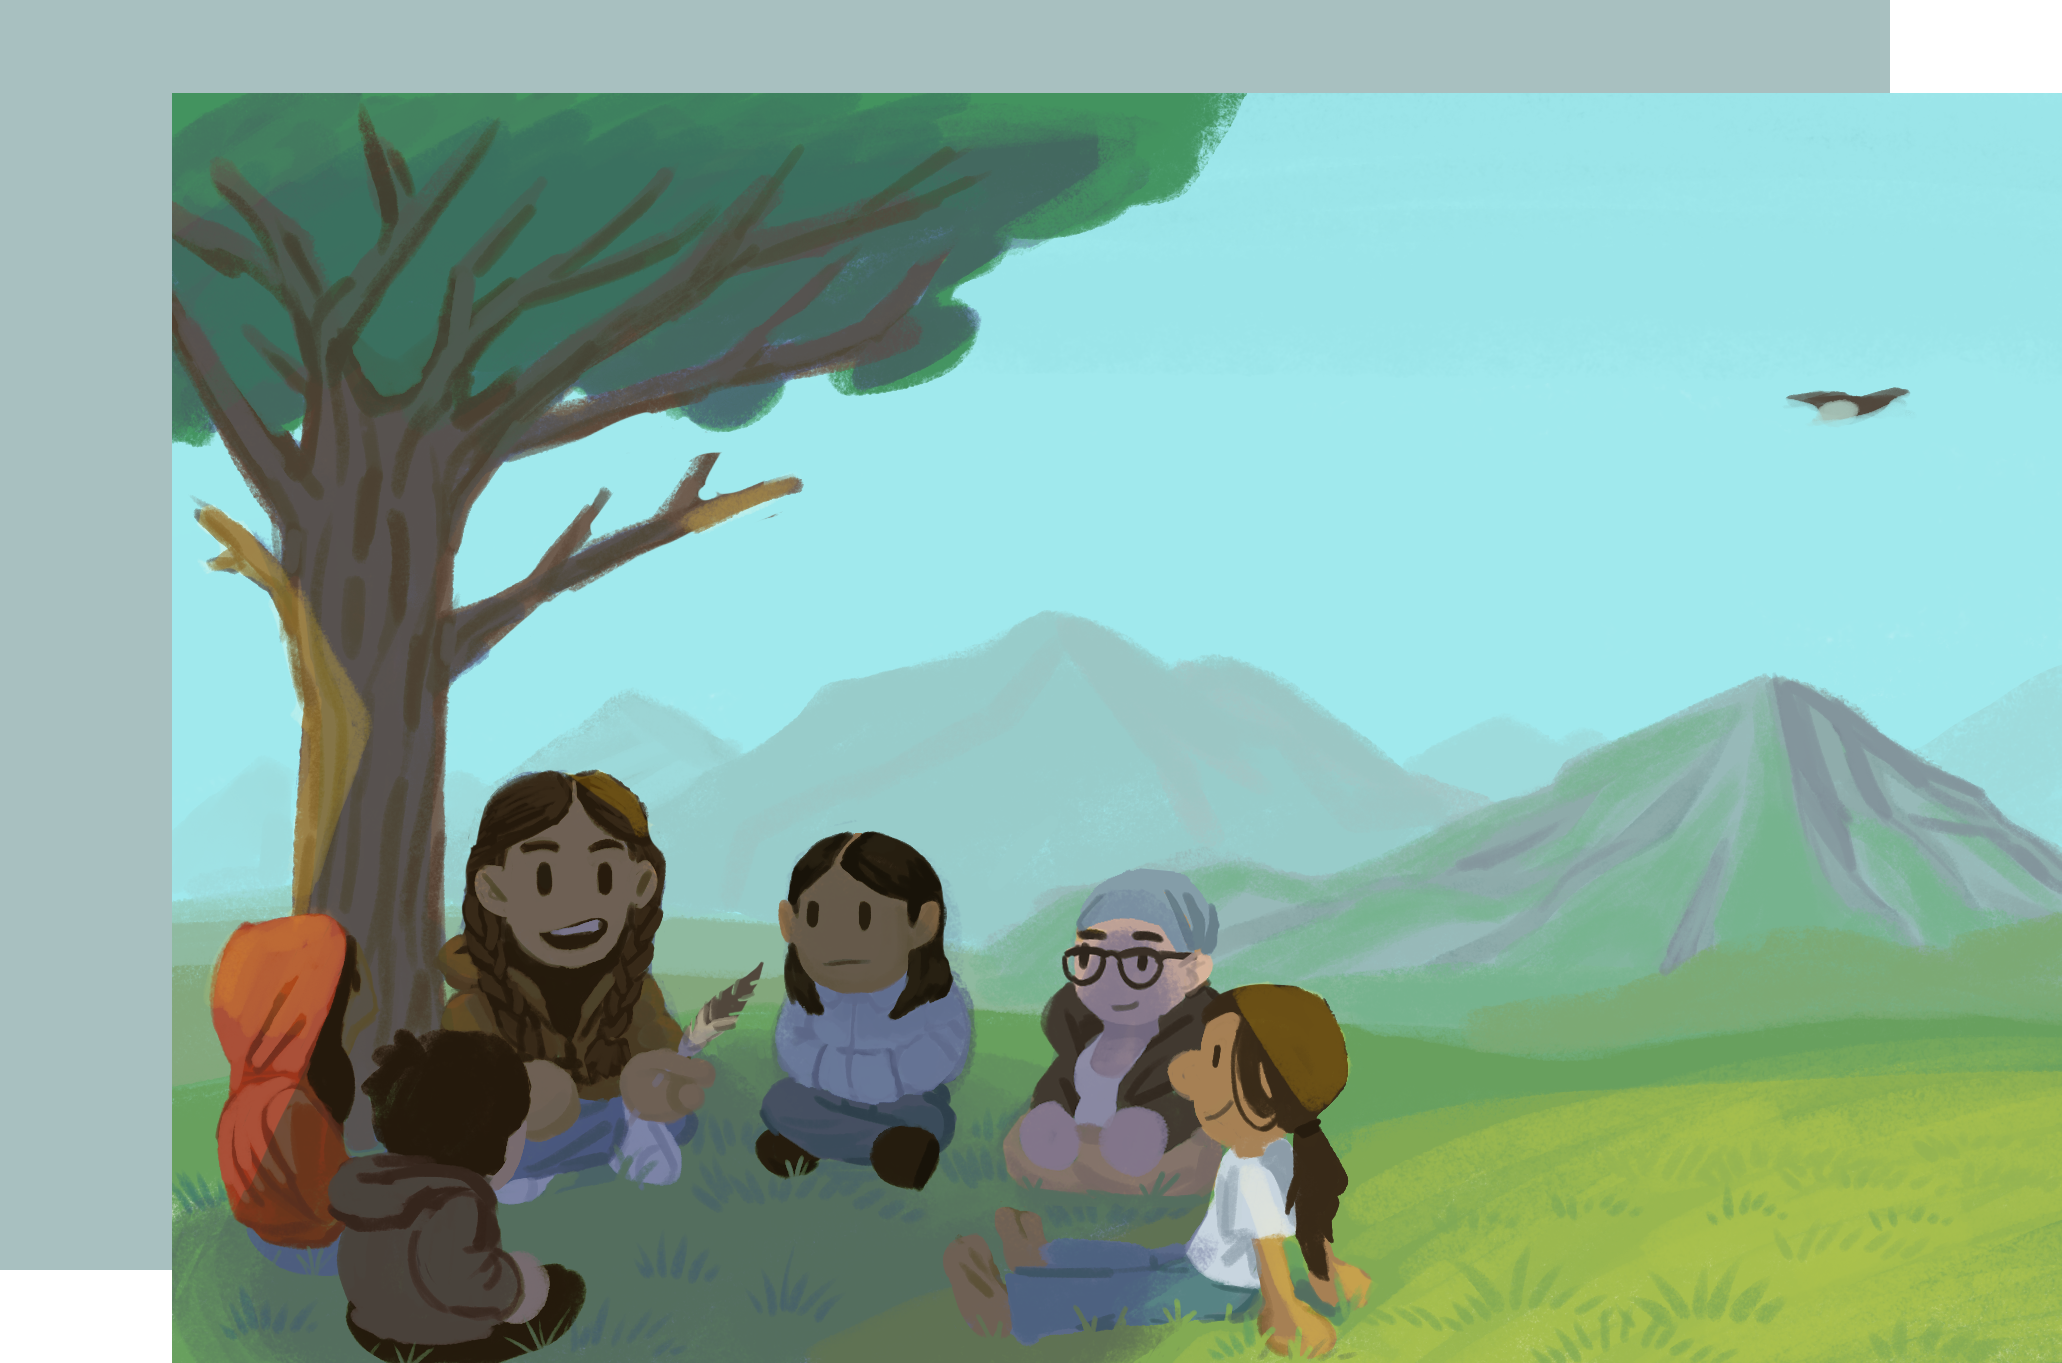
Some learning preferences are determined by culture and practice. Certain cultures or groups have specific ways of learning that differ from traditional Western practices. Indigenous learning, for example, often uses story-telling to demonstrate concepts. Stories are passed down from generation to generation, using elders to teach the younger ones. Learning in this manner incorporates social aspects, feelings of safety, and a familiarity for Indigenous learners.

Exercise: Cultural or Group Learning Preferences
Think about whether there are certain styles of learning, whether it be because of your culture, race, religion, association, or other group, that has influenced your style of learning. What practices are familiar to you? What practices help you learn better?
Learning preferences come in many forms. Whatever learning model you consider, you should pay attention to what works for you (and what doesn’t) and organize your study sessions accordingly.

Everyone faces challenges in learning at different times and to different degrees. There are many factors that will affect people’s ability to learn. Some are circumstantial (e.g. parenting young children) or environmental (e.g. adapting to a new culture) while others are self-inflicted (e.g. consistently staying up too late), and yet others are barriers that are more challenging to deal with (e.g. learning disabilities). Some are perceived (e.g. confidence). Other challenges for students include: fighting addictions, poverty, abuse, unsupportive partners, grief, discrimination, harassment, and chronic health issues. Whatever the challenge, there are strategies to help you through. It’s different for everyone, but you are definitely not the only student who is dealing with significant challenges. It’s important to identify your own personal learning challenges so that you can identify strategies to overcome them.
Challenges can be inherent in institutions. If things like racism, discrimination, harassment, inclusion, sexual violence, or gender bias are impacting students, they may be struggling with emotional or mental health issues. They may be struggling with feeling safe, feeling respected and valued, being understood, or being accepted. Often students are not aware of how systemic challenges can impede their learning. These kinds of repetitive stressors can cause ongoing problems with memory, retention, and focus.
Most colleges and universities have very well defined policies for discrimination, harassment, and sexual violence. Though the policies exist, it doesn’t mean that the practices and procedures line up with the policies. Often people are unaware of how certain practices can enhance discrimination, for example. If you are being impacted by any of these factors, ask about specified contact people in the school to have a private conversation with. You will be able to learn about your rights and options in a confidential setting, and then you can make an informed decision regarding what steps, if any, you choose to take.
The idea of “accessibility” is an important force of change on college campuses today. Accessibility is about making education accessible to all, and it’s particularly focused on providing educational support to a diverse group of students, faculty, and staff with disabilities. Colleges offer support for those with permanent disabilities (and some temporary disabilities) such as:
Those with documented disabilities have special legal rights to certain accommodations. Even those whose disabilities are not diagnosed can receive some accommodations. Accommodations may include, but are not limited to, the following:
Assistive technologies and web-accessibility accommodations are critical in today’s technology-driven economy and society. The following are some examples of assistive technologies:
Students in the following video share some of their experiences with the web accessibility.
Video: “Experiences of Students with Disabilities” (length 1:59)

A YouTube element has been excluded from this version of the text. You can view it online here: https://opentextbc.ca/studentsuccess/?p=72
For more information about web accessibility, visit WebAIM (Web Accessibility In Mind).
See the Supporting Students with Disabilities in B.C. Postsecondary Course website.
Most colleges and universities have accessibility coordinators (formerly called disability coordinators). If you know or suspect that you have a learning disability or if you have had significant learning challenges in the past, it would be a good idea to make an appointment with the accessibility coordinator in your institution. It’s best to do this well ahead of starting your program. Often it takes time to do assessments, apply for funding, apply for adaptive equipment or resources, and to develop an educational strategy that will work for you. Of course, you can make an appointment at any time in your program, but sooner rather than later is always a good plan.
Key Takeaways
Facing learning differences and challenges include:
Exercise: Learning Differences and Challenges
Think about the challenges discussed in this chapter, and brainstorm others that may impact you.
It’s good to understand learning styles, however just knowing your preference, however, doesn’t automatically provide a solution for how to do your best in your courses. For example, although you may be a kinesthetic learner, you’ll likely still have textbook assignments (reading) as well as lecture classes (listening). All students need to adapt to other ways of learning.
The following sections look at the key ways in which learning occurs in college classes and offer some suggestions about how to adapt your strengths for success.
Reading skills are critically important for adult students. Most classes involve reading assignments. Although many instructors may cover some of the textbook’s content in lectures or class discussions, students cannot skip the reading assignments and expect to do well.
If your personal learning preference is linguistic and independent—that is, if you learn well by sitting alone and reading—then you will likely not have difficulty with your university reading. Here are some tips to help maximize your learning:
If you have a different learning style, then you may need to give more attention to your reading skills. Always allow plenty of time for reading assignments—rushing makes it harder to understand what you are reading. Do your reading at times of the day when you are most alert. Find a quiet, comfortable place conducive to reading.
Try also to maximize your learning through your personal preference. If you learn better by listening, for example, sit up front in lecture classes where you can see and hear the instructor better. If needed, ask if you can record an instructor’s lectures and then listen again at a convenient time, such as when commuting to class or work, or while doing the laundry. If you are more of a visual learner, sit in class where you can see PowerPoint slides and other visual presentations most clearly. Use a visual approach in your class notes, as described in Module 5.6 “Study Skills: Note-Taking.” Check out whether video podcasts may be available for reviewing lectures. Try to relate all of these visual images to the textbook’s content when you’re reading an assignment. In addition, pay special attention to illustrations and diagrams in the book, which will further help you understand the written ideas and information. If you are more of an interpersonal learner, form a study group with other students and talk with others about the course topics. Take advantage of your instructors’ office hours to help clarify your understanding after reading assignments.

Listening skills are as important as reading skills. Students are expected to listen to their instructors in class and remember and understand what is said. In discussion classes, listening is important also for participating well in discussions.
If you favour listening, then you may already be good at understanding class lectures. Chapter 5 “Study Skills” provides tips to help you pay close attention, take good notes, and recall the information and ideas you have heard. Here are some more tips:
A “seeing” learner learns more effectively through seeing than through reading or listening. Some courses include demonstrations and physical processes that can be observed. If you are a visual learner, work on developing your reading and listening skills, too, because you will need to learn in these ways as well. Here are some tips to improve learning related to seeing:
People who learn best by doing are often attracted to careers with a strong physical or hands-on component, which can vary from athletics to technologies and trades. But these students may need to use other learning skills as well. Here are some tips to help maximize your learning related to doing:

Feeling learners focus on the emotional side of information and learn through personal connections. Too often they may feel that a textbook or a class is “dry” or “boring” if it focuses exclusively on written information. In addition to improving their reading and listening skills, students with this style can enrich their learning by focusing on what they and others feel about the information and ideas being learned. Here are some tips to help maximize your learning related to feeling:
Many classes tend to be taught using certain learning styles. Instructors in large lecture classes, for example, generally emphasize listening carefully and reading well. Don’t worry, however, if these are not your particular strengths, for much of this book focuses on learning study skills. Take responsibility for your own learning, rather than expecting the instructor to help you through the subject in your own personal way. For example, if your strength is as a visual learner but your instructor simply stands at a podium and lectures, then provide your own visual stimulation by sketching concept maps in your notes or by visualizing how information being presented might look in a pie chart or graph.
As you move further into your curriculum, you will likely have more small classes with class discussions, demonstrations, group presentations, and other learning activities. Once you are in classes closely related to a career path that interests you, you will find your personal style more relevant to the kinds of material you will be learning.
Much learning in college and university also comes from interactions with others, who often have different learning preferences. Be open to interacting with other students and instructors who are different from you, and you will find yourself learning in ways that may be new to you.
Exercise: Learning Preferences
This chapter dealt with the fact that all learners are facing different situations in learning. Some seem to learn easily – immediately grasping new concepts – while others have to work extremely hard to get good grades, and others seem to struggle regardless. This chapter examines the reasons that there are differences in learning, including learner strengths, preferences, challenges, circumstances, or learning disabilities.
Once learners recognize their own strengths and challenges, they can accommodate them by using different strategies.
Key Takeaways
Exercise: Learning Experiences
Summarize what you have learned about your own learning preferences and challenges. In light of these, what are some things you can do to make your learning experience more successful?
Let’s face it: being a student can be stressful! However, there are numerous supports available to students to aid along the way. Some are personal supporters who have been part of your network all along, and some are built in systems at colleges and universities. All too often, students don’t realize the number of supports available to them until things reach crisis conditions. In this chapter, you will identify supports that you may need so that you can utilize them throughout your educational journey.
Learning Objectives
In this chapter on “Support and Resources,” students will:
No one can do it alone. We aren’t meant to. We are designed to be in relationships, and it is these relationships which will give us the courage and strength to forge ahead in our lives. Support can come in many ways. Personal supports come in the personal relationships in our lives through family, friends, and connections.

As well as personal supports, your support network should also include your community. Community is the group of people you associate with. It could be a group of people in the place you live (your neighbourhood) or at work, or a group of people you associate with through an activity. It could be a sports team, a club, a volunteer group, a church, or a parents’ group. It could be an exercise group, or a pottery club, or a music group. We all cherish a sense of belonging. Having a community of support for various aspects of our lives is meaningful. When you make the decision to go to college or university, you may be surprised by those within these communities who step up and show support. Note who they are. They may become invaluable supporters as you go through school.
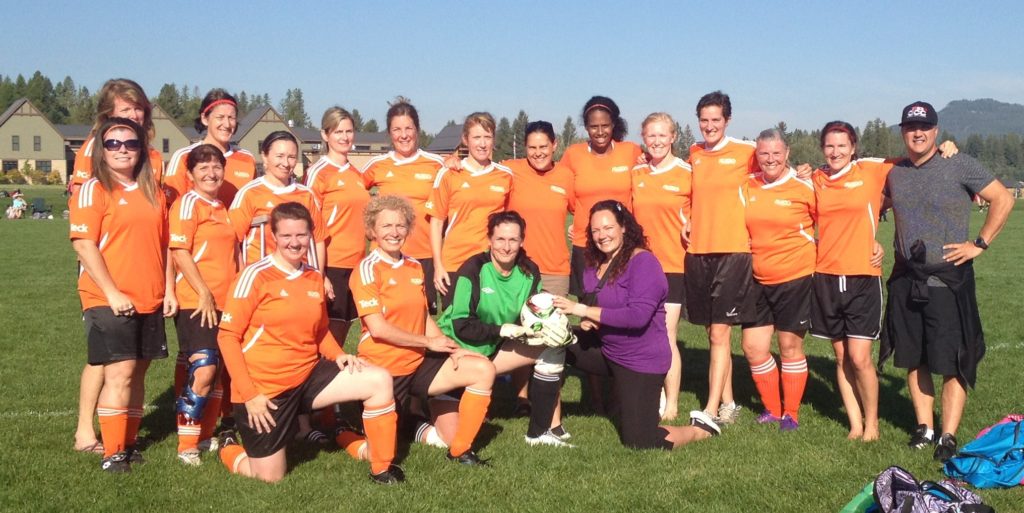
Author’s Story
This women’s soccer team is an incredible group of women. They are competitive and love to work hard on the field. They love the exercise, the outdoors, the travelling, and meeting new players. But above all, this soccer team values the time spent together with each other, people they care about and can relate to. This group of women supports each other and often say they keep playing because of the friendship amongst the team members.
— Mary Shier, author of this textbook
Exercise: Identify Your Personal Support Network

Besides natural communities, there are organized formal support groups which can target issues in our lives. Alcohol and drug counselling, addictions support groups, weight control groups, cancer support groups, or mental health groups all bring together people with similar issues. Some support resources that exist in many communities include: crisis hot lines, counselling, women’s centres, employment centres, food banks, and many more.
Exercise: Community Supports
Research the community supports in your own community and note any resources that might be useful to you. Add these community resources as potential supports to your personal support network list above.
Going to college or university can be an adjustment and a time of transition. Hopefully you have people in your personal life who support you in various ways. Did you know that colleges and universities also support students in many different ways?
Most institutions have student support services that can help with your transition to school and throughout your time there. Each student may require different types of support, depending on their personal situation. The supports are there to help learners succeed. It is important to inquire and ask for support when you need it, and preferably long before it reaches crisis status.
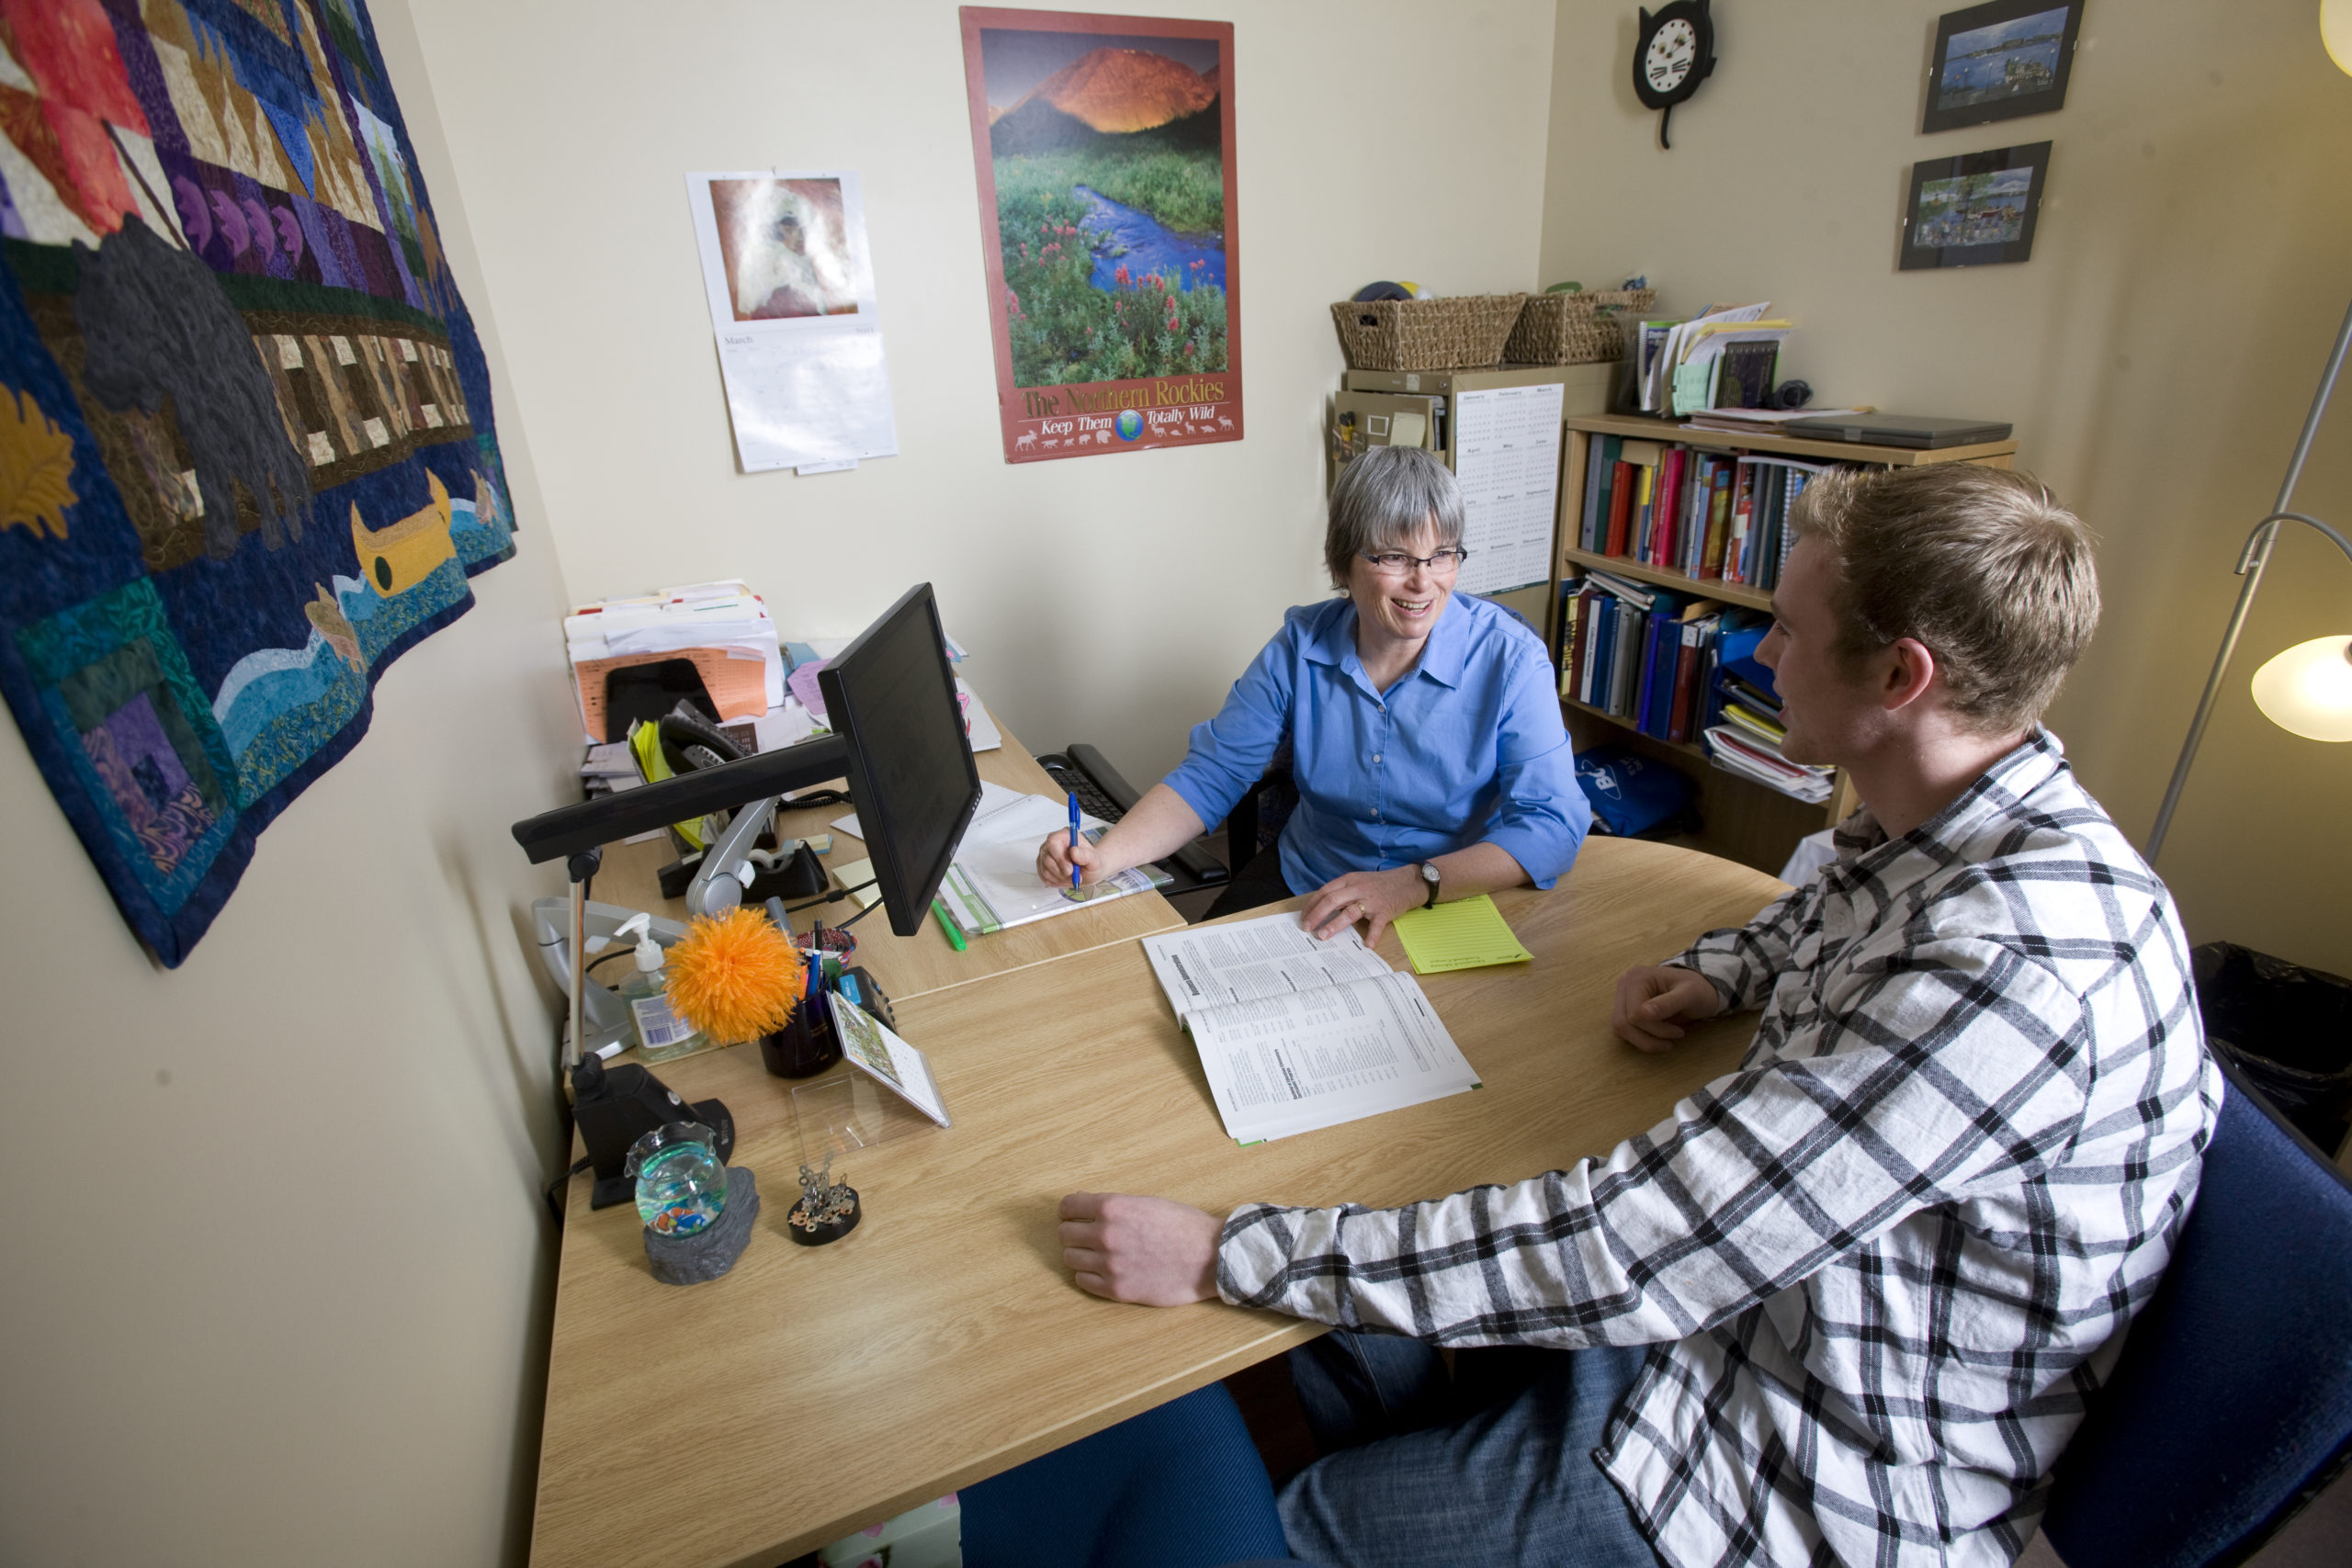
Education advisors are available as a free service to meet with students or potential students privately to discuss any issues which could impact learning. This can include: course planning, career planning, learning issues, academic issues, financial issues, study skills, grade appeals, navigating the post-secondary system, transferring between institutions, personal issues with instructors or fellow students, as well as referrals to other support services.
Counselling services provide a safe, confidential, and supportive environment to discuss personal and educational concerns impacting your life. Counseling services help provide tools to manage your stressors and challenges so that you can become successful and work toward wellness.
Often there is a coordinator who specifically serves the unique needs of Indigenous students. This can include: education advising services, applying for funding, scholarships or bursaries, connections with other Indigenous students, learning supports, personal supports, and increasing Indigenous knowledge in the community.
An international coordinator specifically serves the unique needs of international students. Along with the regular needs of students, international students also need support with issues such as: student visas, housing, adapting to and learning about Canadian culture, culture shock, home-sickness, out of country insurance, learning in a language which is not their first language, and unfamiliarity with the Canadian post-secondary system, to name a few. Studying in another country can be a very exciting adventure. International coordinators help to make the transition as smooth and as pleasant as possible.
Accessibility coordinators support students with a variety of disabilities including physical, psychological, and learning disabilities. Accessibility services aim to maximize success and reduce barriers so that students have equal opportunities and equal access to information. It can provide exam accommodations, access to funding for equipment, adaptive software, and other services. See Chapter 2 Learning Preferences for more information.
Some students learn differently. It doesn’t mean that they are “stupid” or “slow”, but it does mean they may need to discover how they learn best. It can be extremely helpful to have an assessment to determine their areas of strength and weakness in order to enhance learning. Learning specialists do individual assessments on people who suspect they have learning disabilities, or who have a history of struggling with academics. The results of these assessments can aid instructors as well as give strategies to students to maximize success.
Financial aid officers are available to give you the tools to plan and budget your finances while in school, apply for student loans and awards such as bursaries (based on financial need) and scholarships (based on merit). They help students navigate the process and provide viable options to finance students’ education.
The student union or student association is a group made up of students to enrich campus life. They exist to protect the rights of students and to voice the interest of the student body at large. They promote and represent student issues as well as develop a sense of community among students through communication and events.
Flexible assessment is a process to give credit for college level learning through life experience. This experience can be through employment, volunteer work, self-directed study, travel and non-accredited courses. Flexible assessment can give credit for courses required within college programs, so students can be exempt from taking the approved courses.
Transfer credit for courses taken previously can be given through applying for transfer credit for courses from other institutions. Sometimes, courses are already articulated for transfer so the process is very straightforward. See Chapter 13 The BC Transfer Process. For courses that don’t have transfer agreements between the applicable institutions, a review of the courses through examination of course outlines can be used to determine eligibility for credit.
Student Employment services usually offer workshops on employability skills such as resume writing, cover letter writing, and interview skills. They offer a range of services, including practicum placements, individual consultations, and job prep information. They also post internal on-campus job opportunities and also keep both an online and on-campus job board for external postings from employers who are looking for college students and alumni as potential employees.
Exercise: Student Support Services
Check out the student services at the schools you are interested in attending (or the one you’ve decided to attend). You can research these services, which are usually listed on the school website, or contact the school to inquire. Make a list of the different services available at the school you’ve chosen.
Which of these services do you think can help you while in school? Please note the services that you think would be helpful to you personally. You will be including this information in your assignment at the end of this chapter.

In the same way that post-secondary institutions provide student support services, they also have many course and academic supports available. These can include:
Writing labs are often available at regular specified times. Here students can get assistance with written assignments, reports, and essays. Students can get feedback on draft copies receiving suggestions on formatting, structure, backing up and supporting ideas, and citations of sources. Watch for these labs as they are an invaluable tool for increasing the quality of written assignments and subsequently increasing grades. Getting good at writing papers will serve you well throughout your program.
Often post-secondary institutions have learning centres where students can go to work on their courses. They have access to computers and printers. They often have tutors available who can help with basic assignment queries and essay writing. It can also be a place where students can gather for group work on assignments and projects. As well, it can be a place to make connections with other students.
Educational libraries not only have invaluable research material for assignments, but they have helpful librarians who can assist you in many ways. They can help you learn how to access academic journals, discern whether a source is suitable for a research paper, find online journals, assist with research, assist with inter-library loans, do effective online searches, and cite sources correctly using appropriate style guides. Often they even have laptops to borrow. As well, libraries are an effective place to use as a study area. Often, they even have study rooms you can book to use for group work.

Peer tutors are students in your class who have been identified as strong students who are willing to help other students in the class. They are paid through the college and provide classmates with relevant support. The peer tutor program matches students who have identified a need for extra help in specific subjects with students who have a good background in the subject area and an interest in tutoring. It is not only good for the one receiving tutoring, the tutors find that by explaining concepts to others, they solidify their own learning. The tutors make a little bit of extra income while reviewing their own class material.
Watch for scheduled study skills workshops to help with specific tools on test-taking, answering multiple-choice questions, essay writing, note-taking, reading strategies, time management, and memory skills. They are usually short workshops offered over lunch or between classes.
Look on the college or university’s web site for relevant tutorials. There are often video tutorials on things that students often have questions about. These can be very useful on those late night work sessions.
Information Technology (I.T.) support services are available for students who are experiencing technical difficulties. This is especially important for online students who may be struggling to upload an assignment, or access the online course portal. They can help with connection problems, college email accounts, accessing course software, or other annoying computer issues related to your courses.
Exercise: Course Supports
Consider the above list and make note of which course supports would be useful for you on your educational journey. Take a tour (on site or online) around the institutions you are considering attending, or the one you have decided to attend, and see where the student supports and course supports are located.
As exciting and exhilarating as education is, it also comes with its stress and anxiety. There are numerous supports available to help you. Supports and resources include your own personal network, student support services, and academic course supports. Be sure to access these supports throughout the semester to make sure you keep on track. All too often, people wait until they are overwhelmed before seeking support. At that point, stress and anxiety are harder to deal with, so try to reach out early on. There is nothing wrong with needing a little help. In fact, it’s perfectly normal.
Exercise: Support Systems
| Barrier/Need | Support | Contact Info |
|---|---|---|
| When I get discouraged | My friend, Sarah | (Phone number) |
| When my anxiety flares up | My counsellor, Bob Yoga class | (Text or email) Community Centre |
| When I have temptations re: alcohol issues | My Celebrate Recovery (CR) group | (Sponsor’s phone number) |
| When I have financial struggles | Financial aid officer, Lois | (Email address) |
| When I have trouble with essay writing | College writing lab | M W F 9am-2 pm |
| When I have learning issues | Education advisor, John | Student Services (Karen) ext 3243 |
| When I get overwhelmed | Meet up with my walking buddy, Janine, to take a break, get exercise and fresh air, and clear my head. | (Text) |
Make the list as long as it needs to be. Fill in all the expected issues (big or small) that come to mind.
Key Takeaways
Accessing supports and resources is a wise thing to do while in post-secondary.
Personal supports include:
Student support services include:
Course supports include:
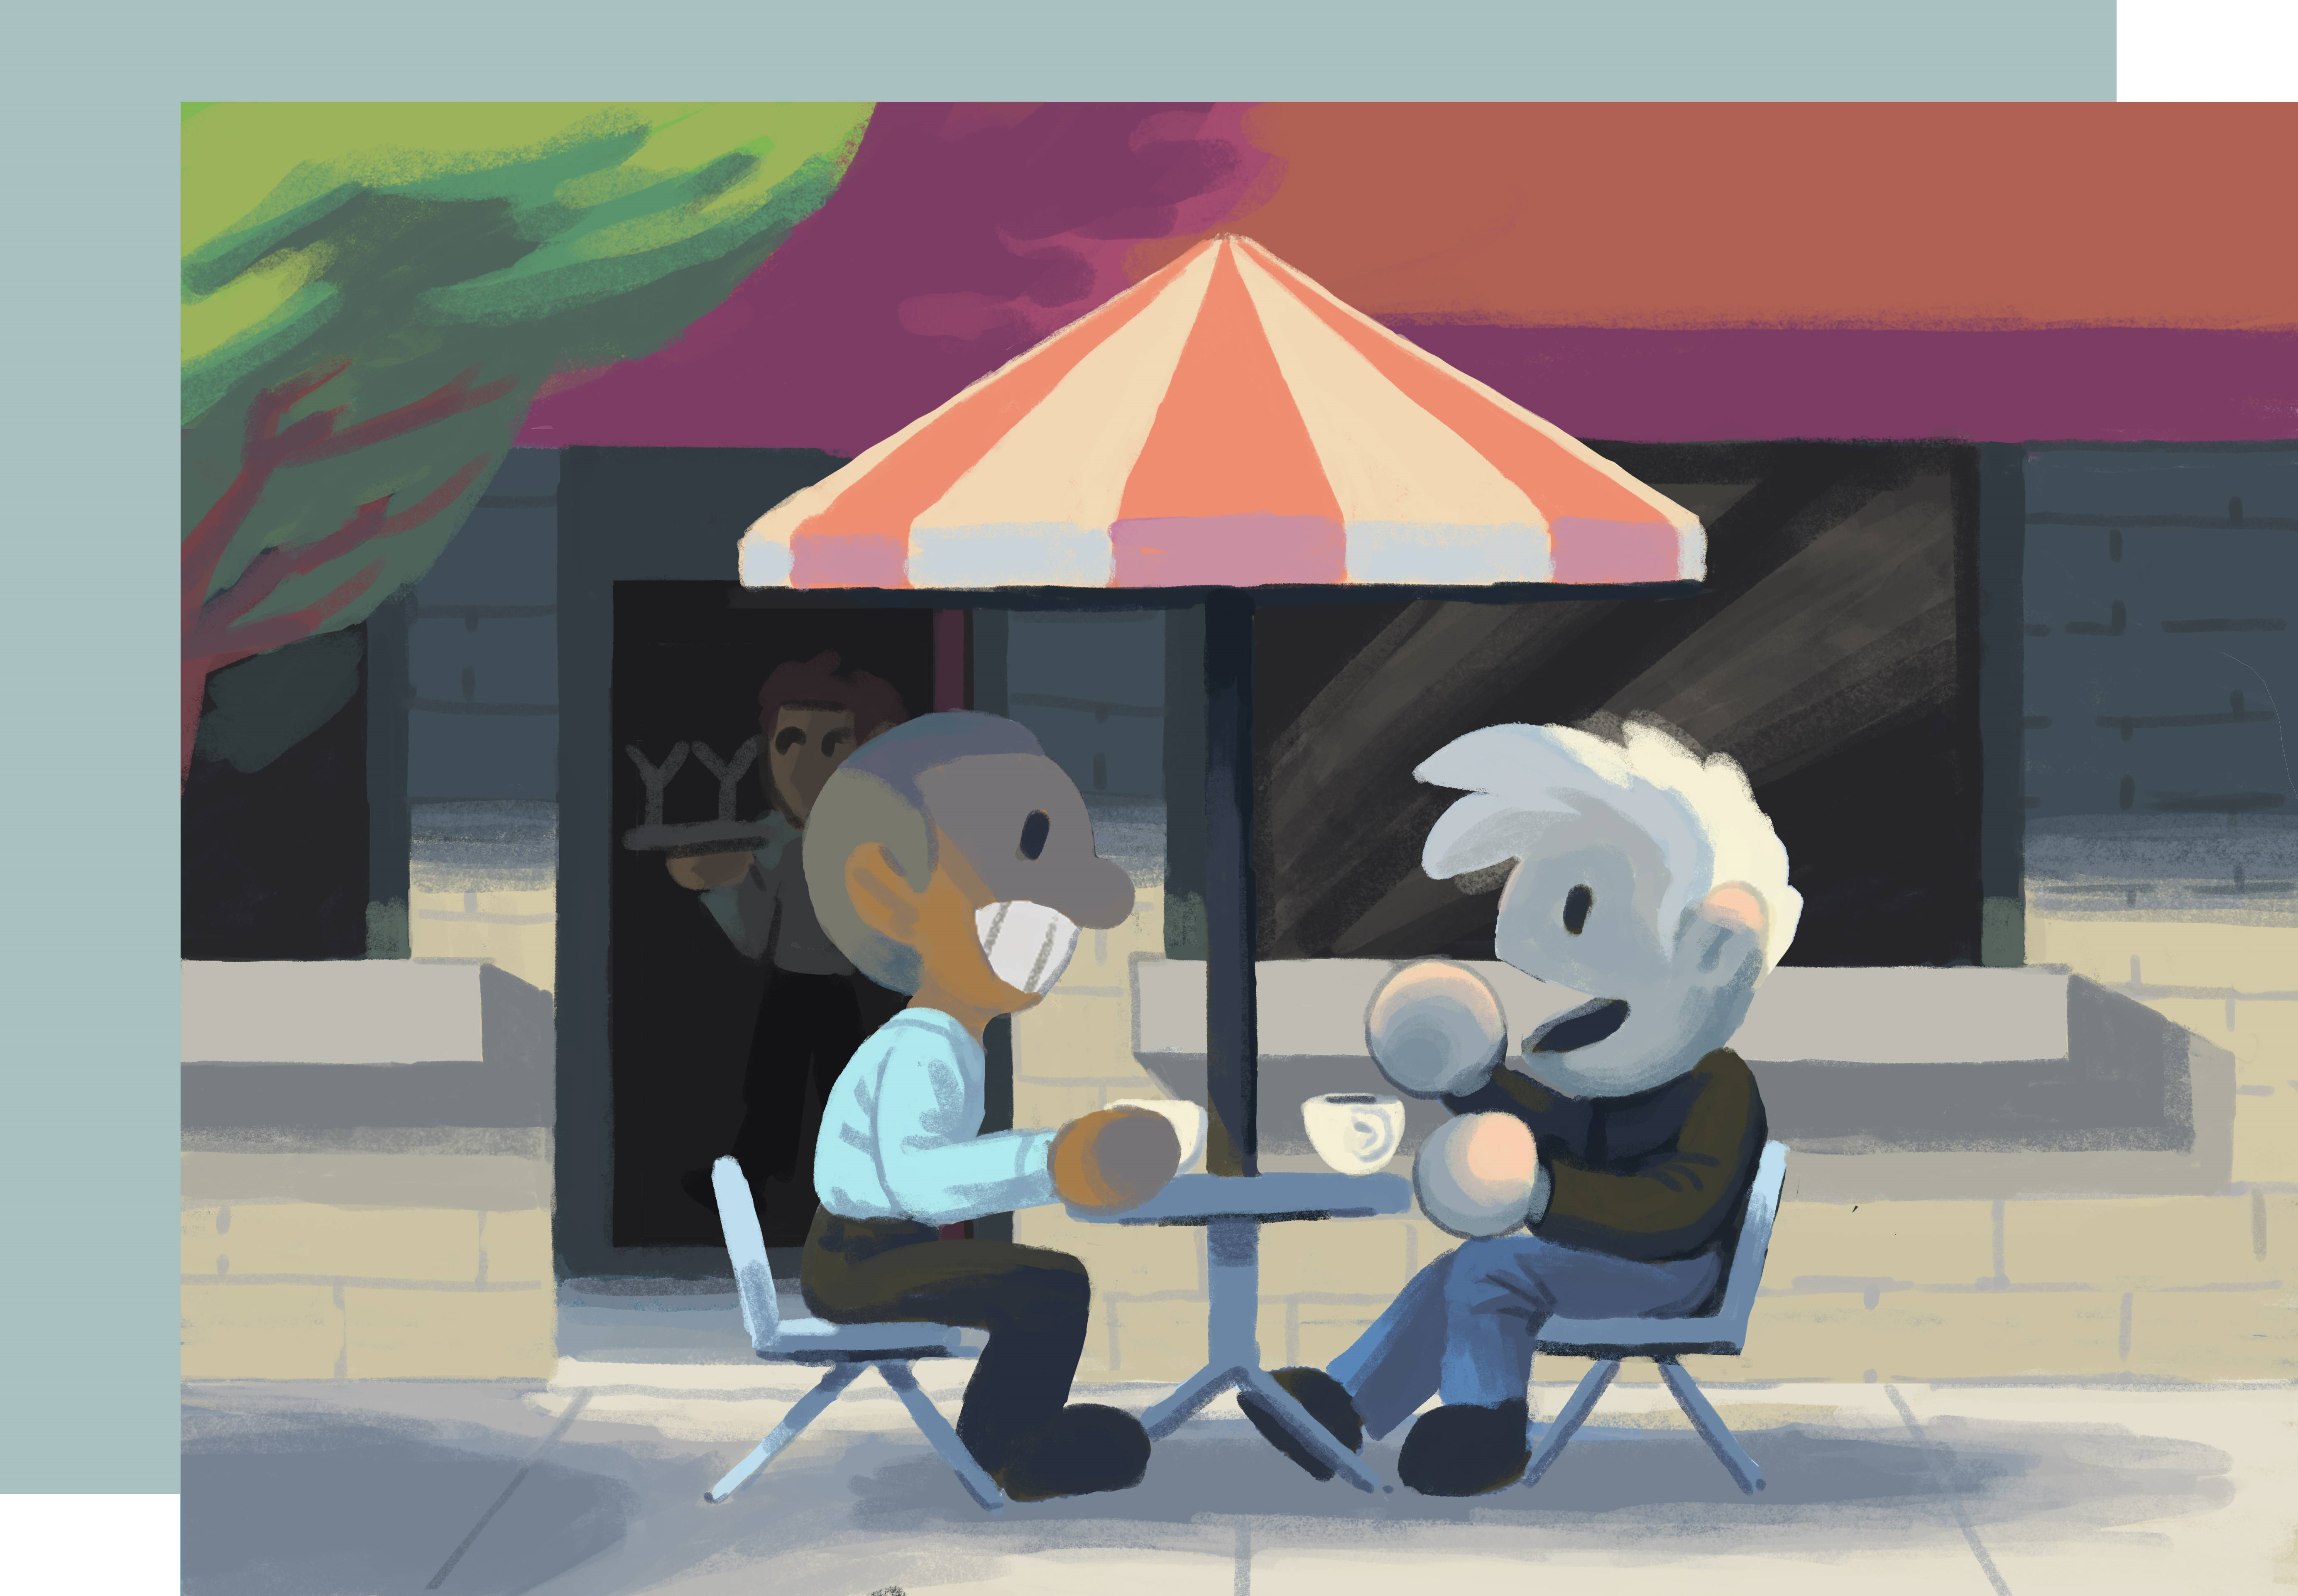
Communication is one of the most basic skills; often we are doing it without even noticing or thinking about it. Yet it also turns out to be one of the most complicated skills – one that requires continual honing. Communication involves both a sender and a receiver. Sometimes the communication is one-way (e.g. the TV) or two-way (e.g. a conversation). Sometimes the receiver is a group (e.g. a lecture) and sometimes the roles of senders and receivers are fluid (e.g. a group conversation where different people become the senders at different times). Any time the message is misinterpreted, there is a breakdown in the communication process, and this serves as the impetus of conflict. Good communication skills may be the most important skills for success in life!
No one is a perfect communicator; even the most skilled communicators can have issues with clarity and struggle in different scenarios. Even areas that are strengths for people in one context may not be in another. Being aware of and strengthening communication skills will be an asset in many areas of your life. It is important that you remember that making small changes in your communication skills can make a big difference in your work, home and school.
In this chapter you will learn about styles of communication, barriers to communication, and several aspects of good communication skills. As you learn about them, try to apply them in your real life circumstances.
Learning Objectives
In this chapter on “Communication Skills,” students will:
Being a good communicator involves not only being good at speaking. Listening is an essential part of communication and is often the weakest link in the communication process. People usually love to be heard but are often not as excited about listening. Active listening is being engaged as a listener, not just hearing the words.
Are you a good listener? Most of us like to think we are, but when we really think about it, we recognize that we are often only half-listening. We’re distracted, thinking about other things, or formulating what we are going to say in reaction to what we are hearing before the speaker has even finished. Effective listening is one of the most important learning tools you can have in college or university. And it is a skill that will benefit you on the job and help your relationships with others. Listening is nothing more than purposefully focusing on what a speaker is saying with the objective of understanding.

This definition is straightforward, but there are some important concepts that deserve a closer look. “Purposefully focusing” implies that you are actively processing what the speaker is saying, not just letting the sounds of their voice register in your senses. “With the objective of understanding” means that you will learn enough about what the speaker is saying to be able to form your own thoughts about the speaker’s message. Listening is an active process, as opposed to hearing, which is passive.
Being an active listener takes concentration and work. The principles of active listening are not hard to understand, but they are hard to implement and require practice to use them effectively.
Principles of Active Listening
Exercise: Listening with Your Whole Body
Make two lists.
Think of a person you consider an excellent listener. Picture that person clearly in your mind. Focus on what they do, not what they are saying. Describe what actions and postures they use to show they are listening. Use these items to create your first list.
Think of a person you consider a poor listener. Picture that person clearly in your mind. Focus on what they do, not what they are saying. Describe what actions and postures they use to show they are not listening. Use these items to create your second list.
Now compare these lists with your own behaviour. How many of the body language signals from each side do you think you exhibit? How can you add more of the attitudes and actions in the first list to your own behaviours? How can you control those behaviours you recognize in yourself from the second list?
Active listening should accomplish two things:
Active listening involves the following:
For example, leaning in toward a speaker shows interest in what the speaker is saying, as opposed to leaning away and crossing arms. Crossing arms can be interpreted as rejection of the message (though this can be confusing as sometimes it may just mean the listener is feeling cold). Smiling and nodding indicates that you are following what the speaker is saying and that you are interested to hear more.
Even if the listener doesn’t agree with the speaker, it is important to acknowledge that the speaker has a right to their point of view, their ideas and their feelings. Be respectful of others’ opinions, and keep in mind that cultural differences can impact beliefs, values, and communication styles. Signs of distraction include looking away, humming, doodling, checking your phone, texting, or surfing the web. This communicates that you are uninterested in what the speaker is saying.
Meaningful conversations can’t happen if one side is not listening effectively. The following are some examples of responses that stimulate meaningful understanding.
Comments like these put the speaker in a defensive mode. They can be insulting and can inhibit further discussion.
In general, you want to encourage speakers to be able to openly share their message. The more strategies that you use for active listening, the more the speaker will be able to freely share the message, and the more likely you are to be able to truly understand the message. After all, isn’t that the making of good communication?
These strategies are not only useful in one-on-one conversations; they are also useful in educational settings such as listening to lectures in class, listening to lab assistants and fellow students in lab activities, and listening in group work projects. Even in a lecture, if you are busy playing with your phone, or checking your email, you not only convey to the speaker that you are not interested, but you are also distracted from clearly hearing the message. People think that they can multi-task, but in reality they are missing a lot of the message when they are busy doing other things. Furthermore, if you try to look interested, you likely will be more interested. If you sit attentively, you likely will be more attentive. Practice active listening skills in your various classes and educational activities.
Listening in a classroom or lecture hall to learn can be challenging because you are limited by how—and how much—you can interact with an instructor during the class. The following strategies help make listening at lectures more effective and learning more fun.
A note about recording lectures: You may want to record a lecture to double-check what you heard in class, but do it with caution. If you know you are recording the lecture, it may lead you to listen less effectively and think less actively. Additionally, some instructors do not allow students to record their lectures. At any rate, if you record lectures, listen actively the first time, and then use the recording for review, further clarification, and deeper understanding.
What to do if…
Exercise: Active Listening Responses
Choose the correct answer for each question.
Exercise: Listening Treasures
Watch this TED Talks video clip and use your active listening skills to truly hear his message. Then answer the following questions.
Video: “5 ways to listen better | Julian Treasure” (length 7:42)

A TED element has been excluded from this version of the text. You can view it online here: https://opentextbc.ca/studentsuccess/?p=105
Exercise: Active Listening Practise and Analysis
Practise your active listening skills this week. Then report on a situation that happened. Briefly describe the situation, and then describe which active listening skills you used and how effective they were. In hindsight, were there any others which maybe should have been used as well? Did you resort to using ineffective communication skills from habit? Note you will be marked on your ability to recognize and analyze the use of active listening skills (not on how well you did in the situation).
Your assignment should be approximately half to a full typed page double-spaced.
This chapter includes content adapted from the following sources:

Part of learning is being an active learner. Learning which only involves being fed information is merely surface learning. To really understand, a learner has to be actively engaged in the learning process. That means reviewing, practising, summarizing, and yes, asking effective questions. Asking questions requires thinking about the information and trying to understand it at a deeper level. By forming questions, you will understand things more fully. When you are learning new information or a new process, imagine that you are having to describe it to someone else. What parts of the information or process aren’t entirely clear to you? These are the things to ask questions about.
Remembering the 5 Ws and H is a good place to start. If you have a handle on these then you’ll be on your way to understanding the important information. If you aren’t familiar with the 5 Ws and H, then it’s time to add it to your repertoire: Who, What, When, Where, Why, and How!
Start using this in your everyday life. Whenever you send out any kind of communication, it’s a great tool to make sure you haven’t left out any information. For example, it’s common that just after the invites for a party are sent out, the host realizes they left off a critical piece of information such as the date. Those who get in the habit of checking the 5 Ws and H rarely make this critical mistake. In the party invitation, if the host makes sure to include them all then the pertinent info is covered:
When you make a habit of using them, you’ll notice you start thinking about them in class as well. You’ll think about them when you’re reading your texts and research articles, and you’ll naturally start to have a questioning mind. Asking effective questions leads to further clarification and greater understanding. Asking effective questions helps you to analyze and think critically. These are important processes in learning.
Exercise: Effective Questioning Using 5 Ws and H
Self-testing is one of the most powerful study strategies. Creating good questions requires you to think critically about what you need to learn (planning). Testing whether you can answer questions without referring to a text or notes, as you would in an exam, allows you to effectively monitor your progress. The trick to effective self-testing is asking the right questions.
One way of picturing these levels of depth in learning is Bloom’s Taxonomy. In high school level courses, you are usually asked questions from near the bottom of Bloom’s Taxonomy scale, while at college or university, you are required to move beyond recalling basic facts and details, and must learn to apply and analyze material in depth moving to the higher levels on Bloom’s scale. The categories in the cognitive taxonomy developed by Bloom (from lowest to highest) include:
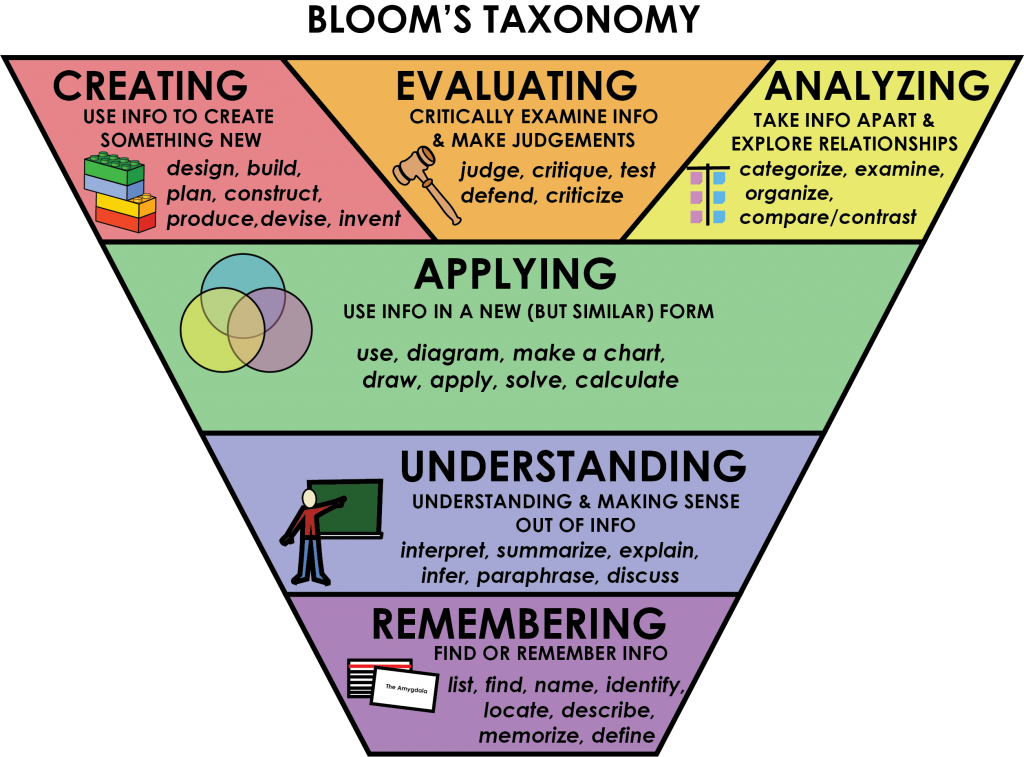
One method for creating study questions or planning active learning activities is to move step-by-step through each level of Bloom’s Taxonomy. Begin with a few questions at the Remembering level. If you don’t yet know the technical language of the subject and what it means, it will be difficult for you to apply, evaluate, analyze, or be creative. Then, go deeper into your subject as you move through the levels.
Exercise: Create Study Questions Using Bloom’s Cognitive Taxonomy
Download the Bloom’s Taxonomy Printable Worksheet [PDF] to complete this activity or use the table below.
Pick a subject area in which you are working. For each level of Bloom’s Taxonomy on this page:
| Level | Question |
|---|---|
| Remembering | Remembering and recalling information My question(s): |
| Understanding | Understanding and explaining ideas or concepts My question(s): |
| Applying | Applying information in a familiar situation My question(s): |
| Analyzing | Analyzing by breaking information into parts to explore relationships My question(s): |
| Evaluating | Justifying a decision or course of action My question(s): |
| Creating | Generating new ideas, products, or ways of viewing things My question(s): |
You will notice that depending on the content and level of the course, the kinds of questions that are relevant and the complexity of the questions will differ. At any rate, it is a mark of an active learner to be questioning material, and to ask questions when needed.
Now that’s a good question…
Are you shy about asking questions? Do you think that others in the class will ridicule you for asking a dumb question? Students sometimes feel this way because they have never been taught how to ask questions. Practise these steps, and soon you will be on your way to customizing each course to meet your needs and letting the instructor know you value the course.
There are numerous instances in educational settings that communication strategies are needed. Some include:
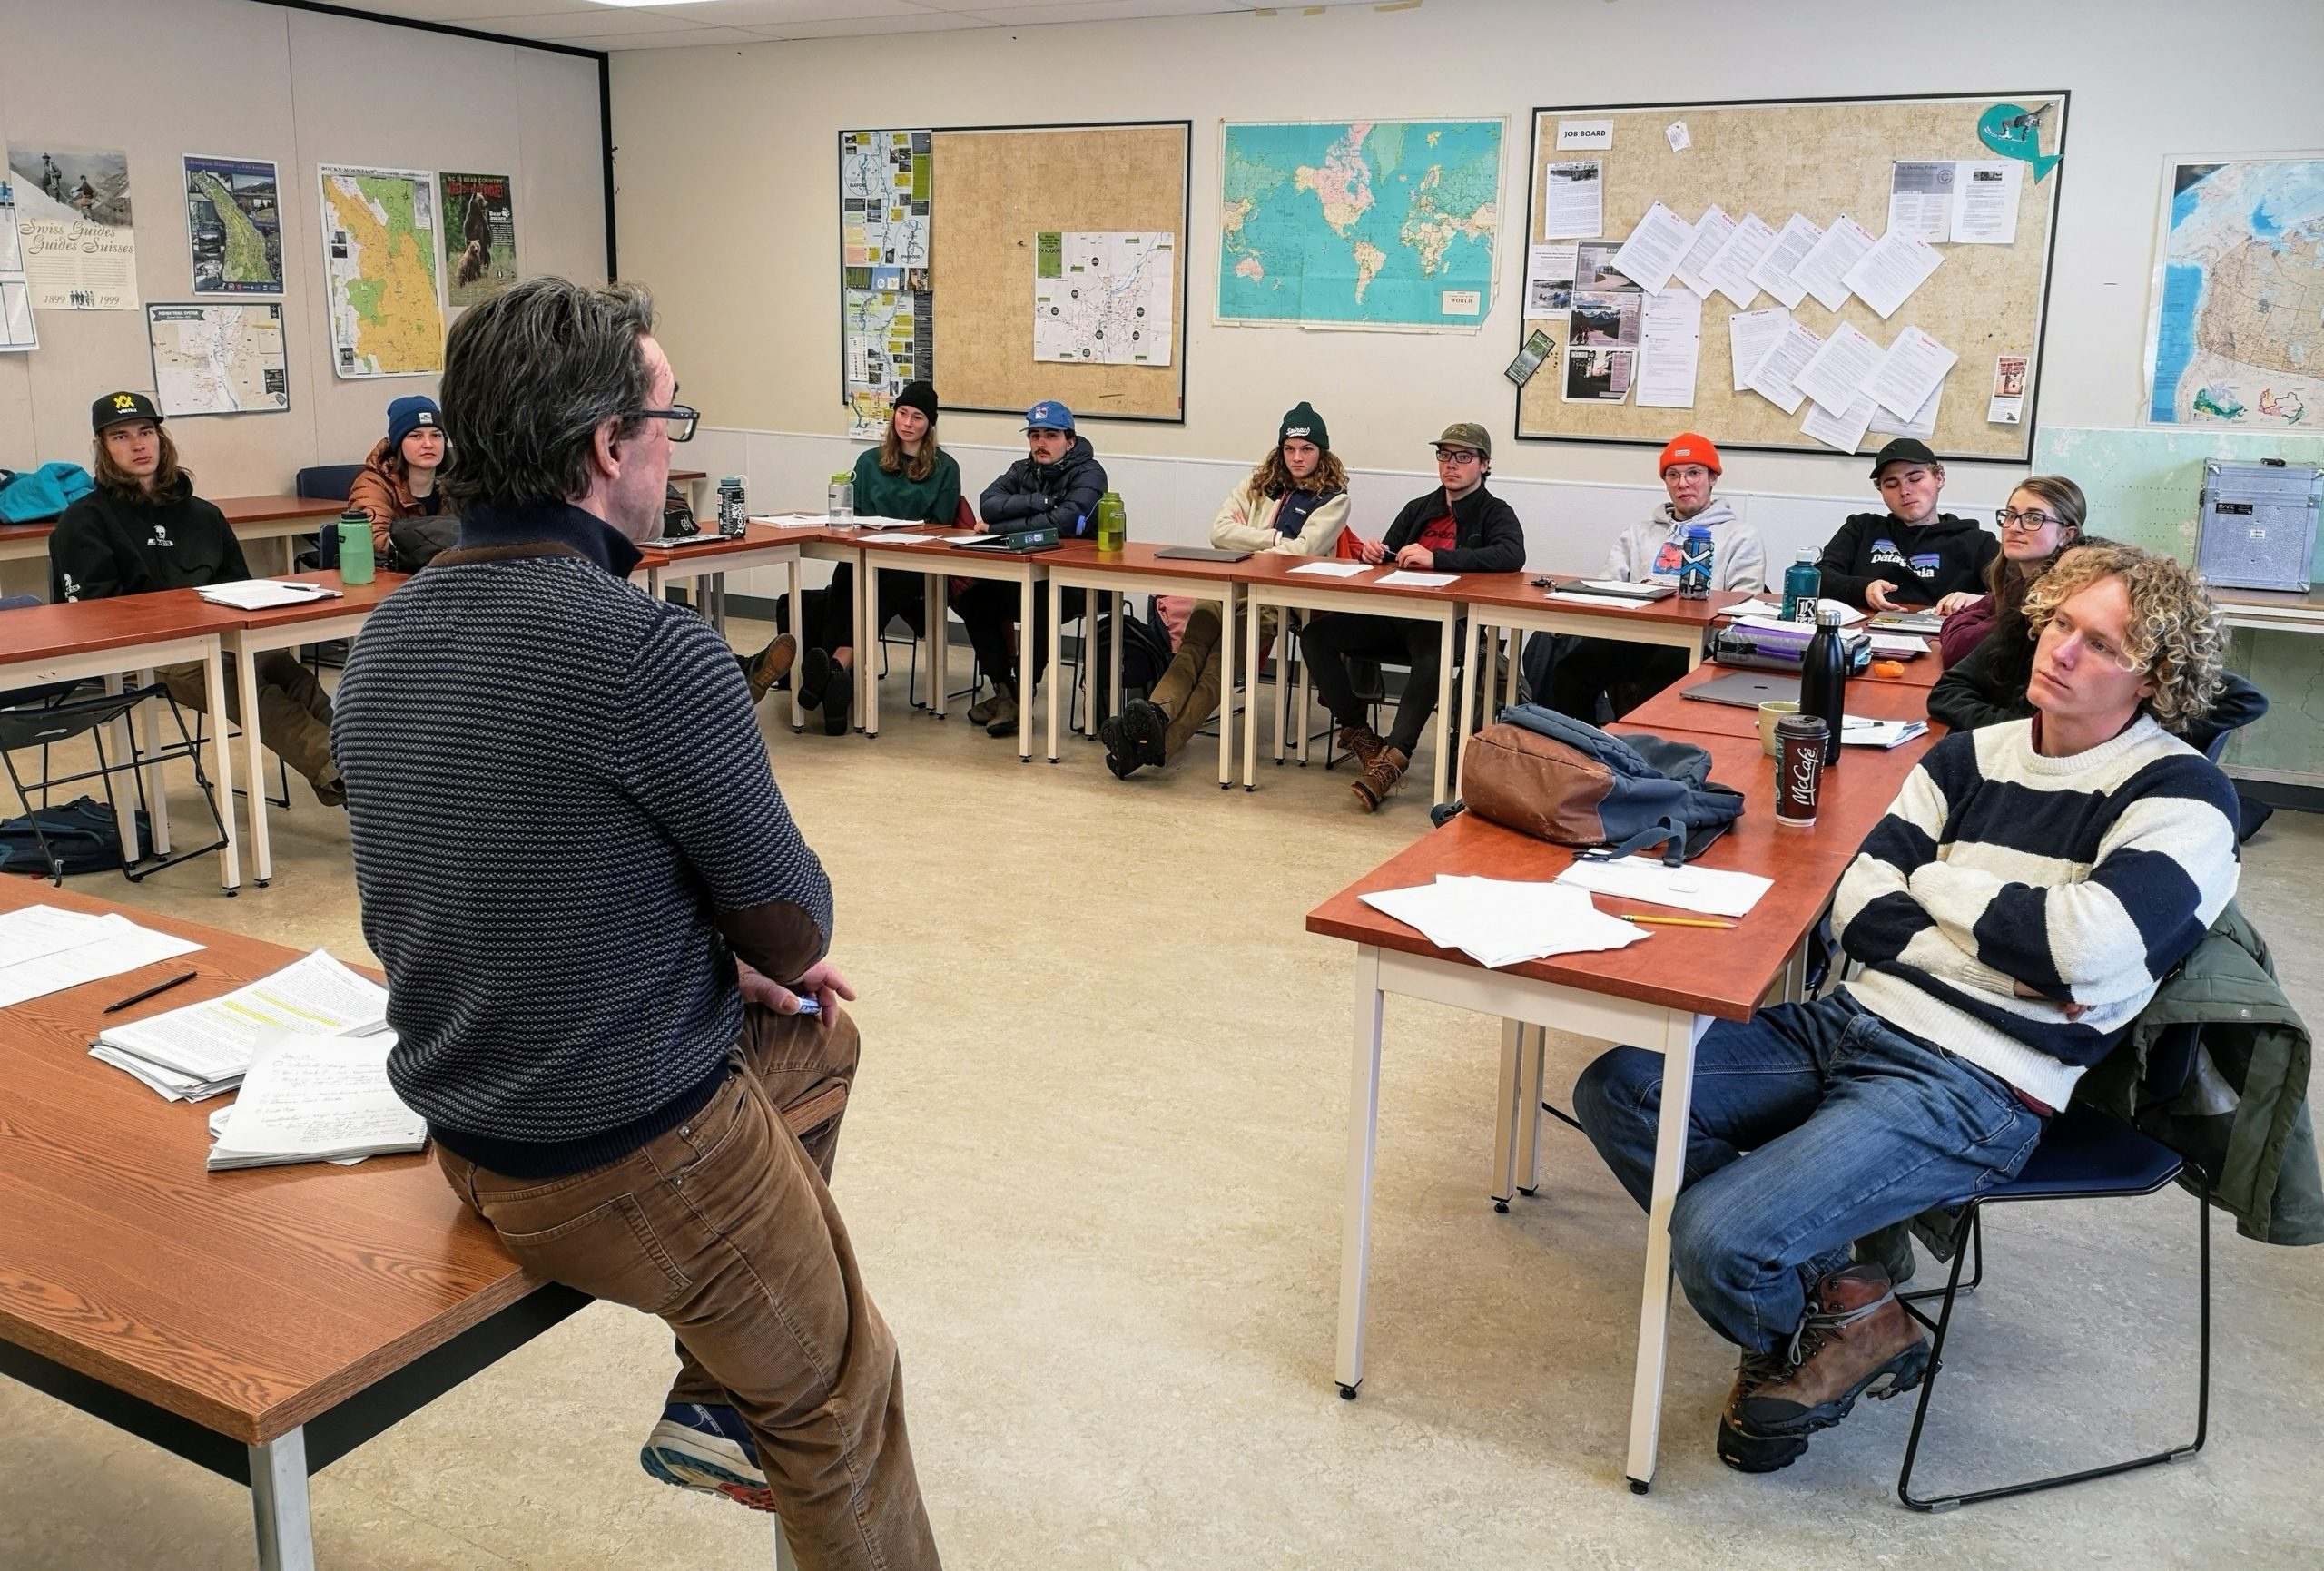
Communicating in educational settings involves both receiving information and conveying information. Receiving information involves skills such as active listening and note-taking. Conveying information involves skills such as academic writing and presentation skills.
Most of the situations listed above are dealt with in detail in other parts of this textbook. For example, listening and learning from lectures is dealt with previously in this chapter in Chapter 4.1 Active Listening, and note-taking is dealt with in Chapter 5.6 Note Taking. Making presentations is dealt with in Chapter 11 Presentation Skills. Strategies for receiving information through reading textbooks, academic journals, and other resource material are described in Chapter 5.3 Navigate Textbooks. Communication strategies are embedded throughout this textbook. Use the Table of Contents to find appropriate strategies for communication strategies in varying educational settings.
Exercise: Communications Strategies in Educational Settings
Working in groups is a necessary and important skill. We will find ourselves having to work in groups in various situations—at home, at work, at play, and at school. When we find ourselves working in groups—whether in a formal or informal situation—certain things tend to happen. Often the natural leaders will emerge to provide guidance and direction, and those who are natural followers will act accordingly. Conflicts will inevitably occur, as people have different visions for the outcome.
Working in groups in educational settings is a common occurrence. Instructors often require group work because it is such an important skill, particularly moving forward into the workplace. Working on labs together, group project work, group assignments, even online group work with classmates who are all over the world, are all standard situations. Getting along is important, but working effectively together can make a better project when each team member contributes according to their strengths, resulting in a better project than each could have done on their own.

Working in groups has advantages and disadvantages and works better in some situations than others. Here are some reasons why you might choose to work alone or in a group:
| Working Alone | Working in Groups |
|---|---|
| Free to make all the decisions | Can collaborate |
| Can use your own methods | Can share responsibility |
| Can be creative | Can share ideas and talents |
| Can do things on own time schedule | Can spread the workload |
| No disagreements | A more sociable way to work |
| No compromising – can do everything your way | Able to do something bigger and better |
| Can take all the credit | Can demonstrate ability to work in teams |

Groups that work effectively have the following characteristics:
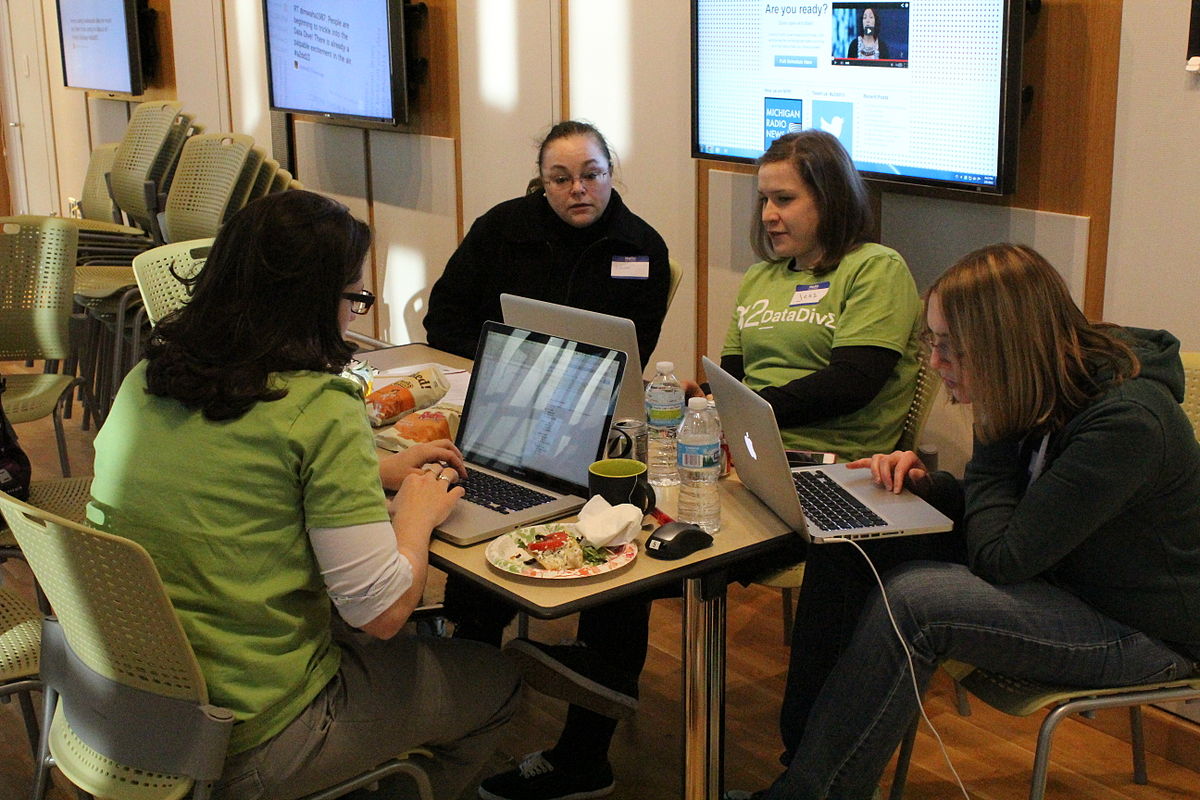
Groups that form to accomplish a certain goal go through stages in getting to that goal. It’s not a bad thing that conflict happens along the way. In fact, it’s almost inevitable. How people handle the conflict will determine whether or not the process is a positive and successful one.
In the video Forming, Storming, Norming and Performing, the narrator describes Bruce Tuckman’s simple model to explain the stages of team formation. Watch the video below to learn about the stages for group process:
Video: “Forming, Storming, Norming, and Performing: Bruce Tuckman’s Team Stages Model Explained” (length 1:58)

A YouTube element has been excluded from this version of the text. You can view it online here: https://opentextbc.ca/studentsuccess/?p=117
Exercise: Groups
Think about some of the groups that you are involved in. What qualities do you have that helps in the group process? Is the group effective? What qualities of an effective team does your group have?
The importance of good communication skills cannot be over-emphasized. They are relevant in all situations whether educational, personal, or work situations. Think about practising good strategies for communication and keep checking yourself. It is not uncommon to start thinking you are finally getting good at it, and then make a huge faux pas. Reviewing strategies for active listening, asking effective questions, and implementing effective teamwork are needed regularly.
Exercise: Communication Skills
Key Takeaways
Good study habits can make all the difference when it comes to student success. Many adult learners struggle to learn and get good grades. They often think they are “bad students”. Often they just need to learn some effective study habits. But instead, students often start their courses using the same old study habits they did in school even when they clearly didn’t work for them back then. Einstein says, “The definition of insanity is doing the same thing over and over and expecting a different result.” If it didn’t work before, why would you think it would work now? Maybe it is time to develop some new learning study habits.
Note: People with learning disabilities may need more than working on study habits (depending on the level of disability). If you think you may have a learning disability and would like to be assessed, contact Student Services at your college to inquire about the assessment process and supports available to you.
Learning Objectives
In this chapter on “Study Skills,” students will:
Now that you’ve worked up an attitude for success and are feeling motivated, it’s time to get organized. You need to organize both your space and your time. This is an essential part of good study skills. It starts with a good studying environment.

Most students more or less take what they can get when it comes to study areas. Schools usually offer a variety of nooks and crannies for students to hunker down and get their assignments done. The school library is a good (and quiet) place. Many common areas elsewhere on campus have tables, chairs, couches, and lounges to accommodate learners. But most students end up doing the majority of their out-of-class work at home.
Home environments may be limited in terms of providing all of the recommended aspects of a good study space, but many of the recommendations can be either implemented or adapted from what a student has on hand or what can be improvised no matter what environment they are living in. Elements conducive to a more effective study/homework experience include such things as good lighting, ample supplies, comfortable seating, adequate space, organization, and personalizing the study area to add a touch of inspiration and motivation.
Space is important for many reasons—some obvious, some less so. People’s moods, attitudes, and levels of work productivity change in different spaces. Learning to use space to your own advantage helps get you off to a good start in your studies. Here are a few of the ways space matters:
Begin by analyzing your needs, preferences, and past problems with places for studying. Where do you usually study? What are the best things about that place for studying? What distractions are most likely to occur there?
The goal is to find, or create, the best place for studying, and then to use it regularly so that studying there becomes a good habit.

Multi-tasking is the term commonly used for being engaged in two or more different activities at the same time, usually referring to activities using devices such as cell phones, smartphones, computers, and so on. Many people claim to be able to do as many as four or five things simultaneously, such as writing an email while responding to an instant message (IM) and reading a tweet, all while watching a video on their computer monitor or talking on the phone. Many people who have grown up with computers consider this kind of multi-tasking a normal way to get things done, including studying. Even people in business sometimes speak of multi-tasking as an essential component of today’s fast-paced world.
Video: “Why the Human Brain Can’t Multitask” (length 2:39)

A YouTube element has been excluded from this version of the text. You can view it online here: https://opentextbc.ca/studentsuccess/?p=128
It is true that some things can be attended to while you’re doing something else, such as checking e-mail while you watch television news—but only when none of those things demands your full attention. You can concentrate 80 percent on the email, for example, while 20 percent of your attention is listening for something on the news that catches your attention. Then you turn to the television for a minute, watch that segment, and go back to the email. But you’re not actually watching the television at the same time that you’re composing the email—you’re rapidly going back and forth. In reality, the mind can focus only on one thing at any given moment. Even things that don’t require much thinking are severely impacted by multi-tasking, such as driving while talking on a cell phone or texting. An astonishing number of people end up in the emergency room from just trying to walk down the sidewalk while texting; it is a common occurrence for people to walk into a pole or parked car while multi-tasking.
“Okay,” you might be thinking, “why should it matter if I write my paper first and then answer emails or do them back and forth at the same time?” It actually takes you longer to do two or more things at the same time than if you do them separately—at least with anything that you actually have to focus on, such as studying. That’s true because each time you go back to studying after looking away to a message or tweet, it takes time for your mind to shift gears to get back to where you were. Every time your attention shifts, add up some more “downtime”—and pretty soon it’s evident that multi-tasking is costing you a lot more time than you think. And that’s assuming that your mind does fully shift back to where you were every time, without losing your train of thought or forgetting an important detail. It doesn’t always.
The other problem with multi-tasking is the effect it can have on the attention span—and even on how the brain works. Research has shown that in people who constantly shift their attention from one thing to another in short bursts, the brain forms patterns that make it more difficult to keep sustained attention on any one thing. So when you really do need to concentrate for a while on one thing, such as when studying for a big test, it becomes more difficult to do even if you’re not multi-tasking at that time. It’s as if your mind makes a habit of wandering from one thing to another and then can’t stop.
So stay away from multi-tasking whenever you have something important to do, like studying. If it’s already a habit for you, don’t let it become worse. Manipulate your study space to prevent the temptations altogether. Turn your computer off—or shut down email and messaging programs if you need the computer for studying. Turn your cell phone off—if you just tell yourself not to answer it but still glance at it each time to see who sent or left a message, you’re still losing your studying momentum and have to start over again. For those who are really addicted to technology (you know who you are!), go to the library and don’t take your laptop or cell phone.
In Chapter 7 Time Management, effective time management strategies are discussed, including scheduling breaks in your study periods, usually for a few minutes every hour. If you’re really hooked on checking for messages, plan to do that at scheduled times.
What about listening to music while studying? Some don’t consider that multi-tasking, and many students say they can listen to music without it affecting their studying. Studies are inconclusive about the positive or negative effects of music on people’s ability to concentrate, probably because so many different factors are involved. But there’s a huge difference between listening to your favourite CD and spontaneously singing along with some of the songs and enjoying soft background music that enhances your study space the same way as good lighting and pleasant decor. Some people can study better with low-volume instrumental music that relaxes them and does not intrude on their thinking, while others can concentrate only in silence. And some are so used to being immersed in music and the sounds of life that they find total silence more distracting—such people can often study well in places where people are moving around. The key thing is to be honest with yourself: if you’re actively listening to music while you’re studying, then you’re likely not studying as well as you could be. It will take you longer and lead to less successful results.

Sometimes going to the library or elsewhere is not practical for studying, and you have to find a way to cope in a shared space.
Part of the solution is time management. Agree with others on certain times that will be reserved for studying; agree to keep the place quiet, not to have guests visiting, and to prevent other distractions. These arrangements can be made with a roommate, spouse, and older children. If there are younger children in your household and you have child-care responsibility, it’s usually more complicated. You may have to schedule your studying during their nap time or find quiet activities for them to enjoy while you study. Try to spend some time with your kids before you study, so they don’t feel like you’re ignoring them.
The key is to plan ahead. You don’t want to find yourself, the night before an exam, in a place that offers no space for studying.
Finally, accept that sometimes you’ll just have to say no. If your roommate or a friend often tries to engage you in conversation or suggests doing something else when you need to study, just say no. Learn to be firm but polite as you explain that you just really have to get your work done first. Students who live at home may also have to learn how to say no to parents or family members—just be sure to explain the importance of the studying you need to do. Remember, you can’t be everything to everyone all the time.
Key Takeaways
Exercise: Learning Environment
| Your bed is usually a good place to study if you can keep the room quiet. | T | F |
| To study well, use the most drab, boring place you can find. | T | F |
| Having a designated study area means you can set up an organized space with all of your resources that provides a consistent place to study. | T | F |
| To maintain a clear focus while studying, limit the time you spend checking for email and text messages to every ten minutes or so. Put your cell phone on vibrate mode and keep it in your pocket where you can more easily ignore it. | T | F |
| It’s OK to have the television or radio on while you study as long as you don’t give it your full attention. | T | F |
| The key to avoiding interruptions and distractions from family members or roommates is to plan ahead for when and where you’ll study. | T | F |
Exercise: Learning Environment – Home Study Area
Levitin, D. (2015, January 18). Why the modern world is bad for your brain. The Guardian. Retrieved from https://www.theguardian.com/science/2015/jan/18/modern-world-bad-for-brain-daniel-j-levitin-organized-mind-information-overload
Doraiswamy, S. (2012, October 8). Does music help you study? Retrieved from http://www.mindthesciencegap.org/2012/10/08/does-music-help-you-study/.

Learning to read critically is an important part of developing good study habits, and ultimately strong reading skills will enhance almost every area of your life.
Most students entering college have not yet dealt with the level of difficulty involved in reading–and comprehending–scholarly textbooks and articles. The challenge may even surprise some who have pretty good reading and comprehension skills so far. Other students for whom reading has mostly consisted of social media, texts, forum chat rooms, and emails, find they are intimidated by the sheer amount of reading there is in college classes.
Reading comprehension is defined as the level of understanding of a message. In other words, how well do you understand what you read? This understanding comes from the interaction between the words that are written and how they trigger knowledge outside the written message. Comprehension is a “creative, multi-faceted process” dependent upon four language skills: phonology, syntax, semantics, and pragmatics. Proficient reading depends on the ability to recognize words quickly and effortlessly. It is also determined by an individual’s cognitive development, which is “the construction of thought processes”. Reading comprehension involves both the ability to decode (figure out) words (i.e. know what the words are) and also the ability to make meaning of the words strung together (comprehension) Some people learn through education or instruction and others through direct experiences.
There are specific traits that determine how successfully an individual will comprehend text, including prior knowledge about the subject, well-developed language, and the ability to make inferences. Having the skill to monitor comprehension is a factor: “Why is this important?” and “Do I need to read the entire text?” are examples. Another trait is the ability to be self-correcting, which allows for solutions to comprehension challenges.
Reading comprehension and vocabulary are inextricably linked. The ability to decode or identify and pronounce words is self-evidently important, but knowing what the words mean has a major and direct effect on knowing what any specific passage means. Students with a smaller vocabulary than other students comprehend less of what they read, and it has been suggested that the most impactful way to improve comprehension is to improve vocabulary.
Most words are learned gradually through a wide variety of environments: television, books, and conversations. Some words are more complex and difficult to learn, such as homonyms, words that have multiple meanings and those with figurative meanings, like idioms, similes, and metaphors.
Reciprocal teaching requires students to predict, summarize, clarify, and ask questions for sections of a text. The use of strategies like summarizing after each paragraph have come to be seen as effective strategies for building students’ comprehension. The idea is that students will develop stronger reading comprehension skills on their own if the teacher gives them explicit mental tools for unpacking text.
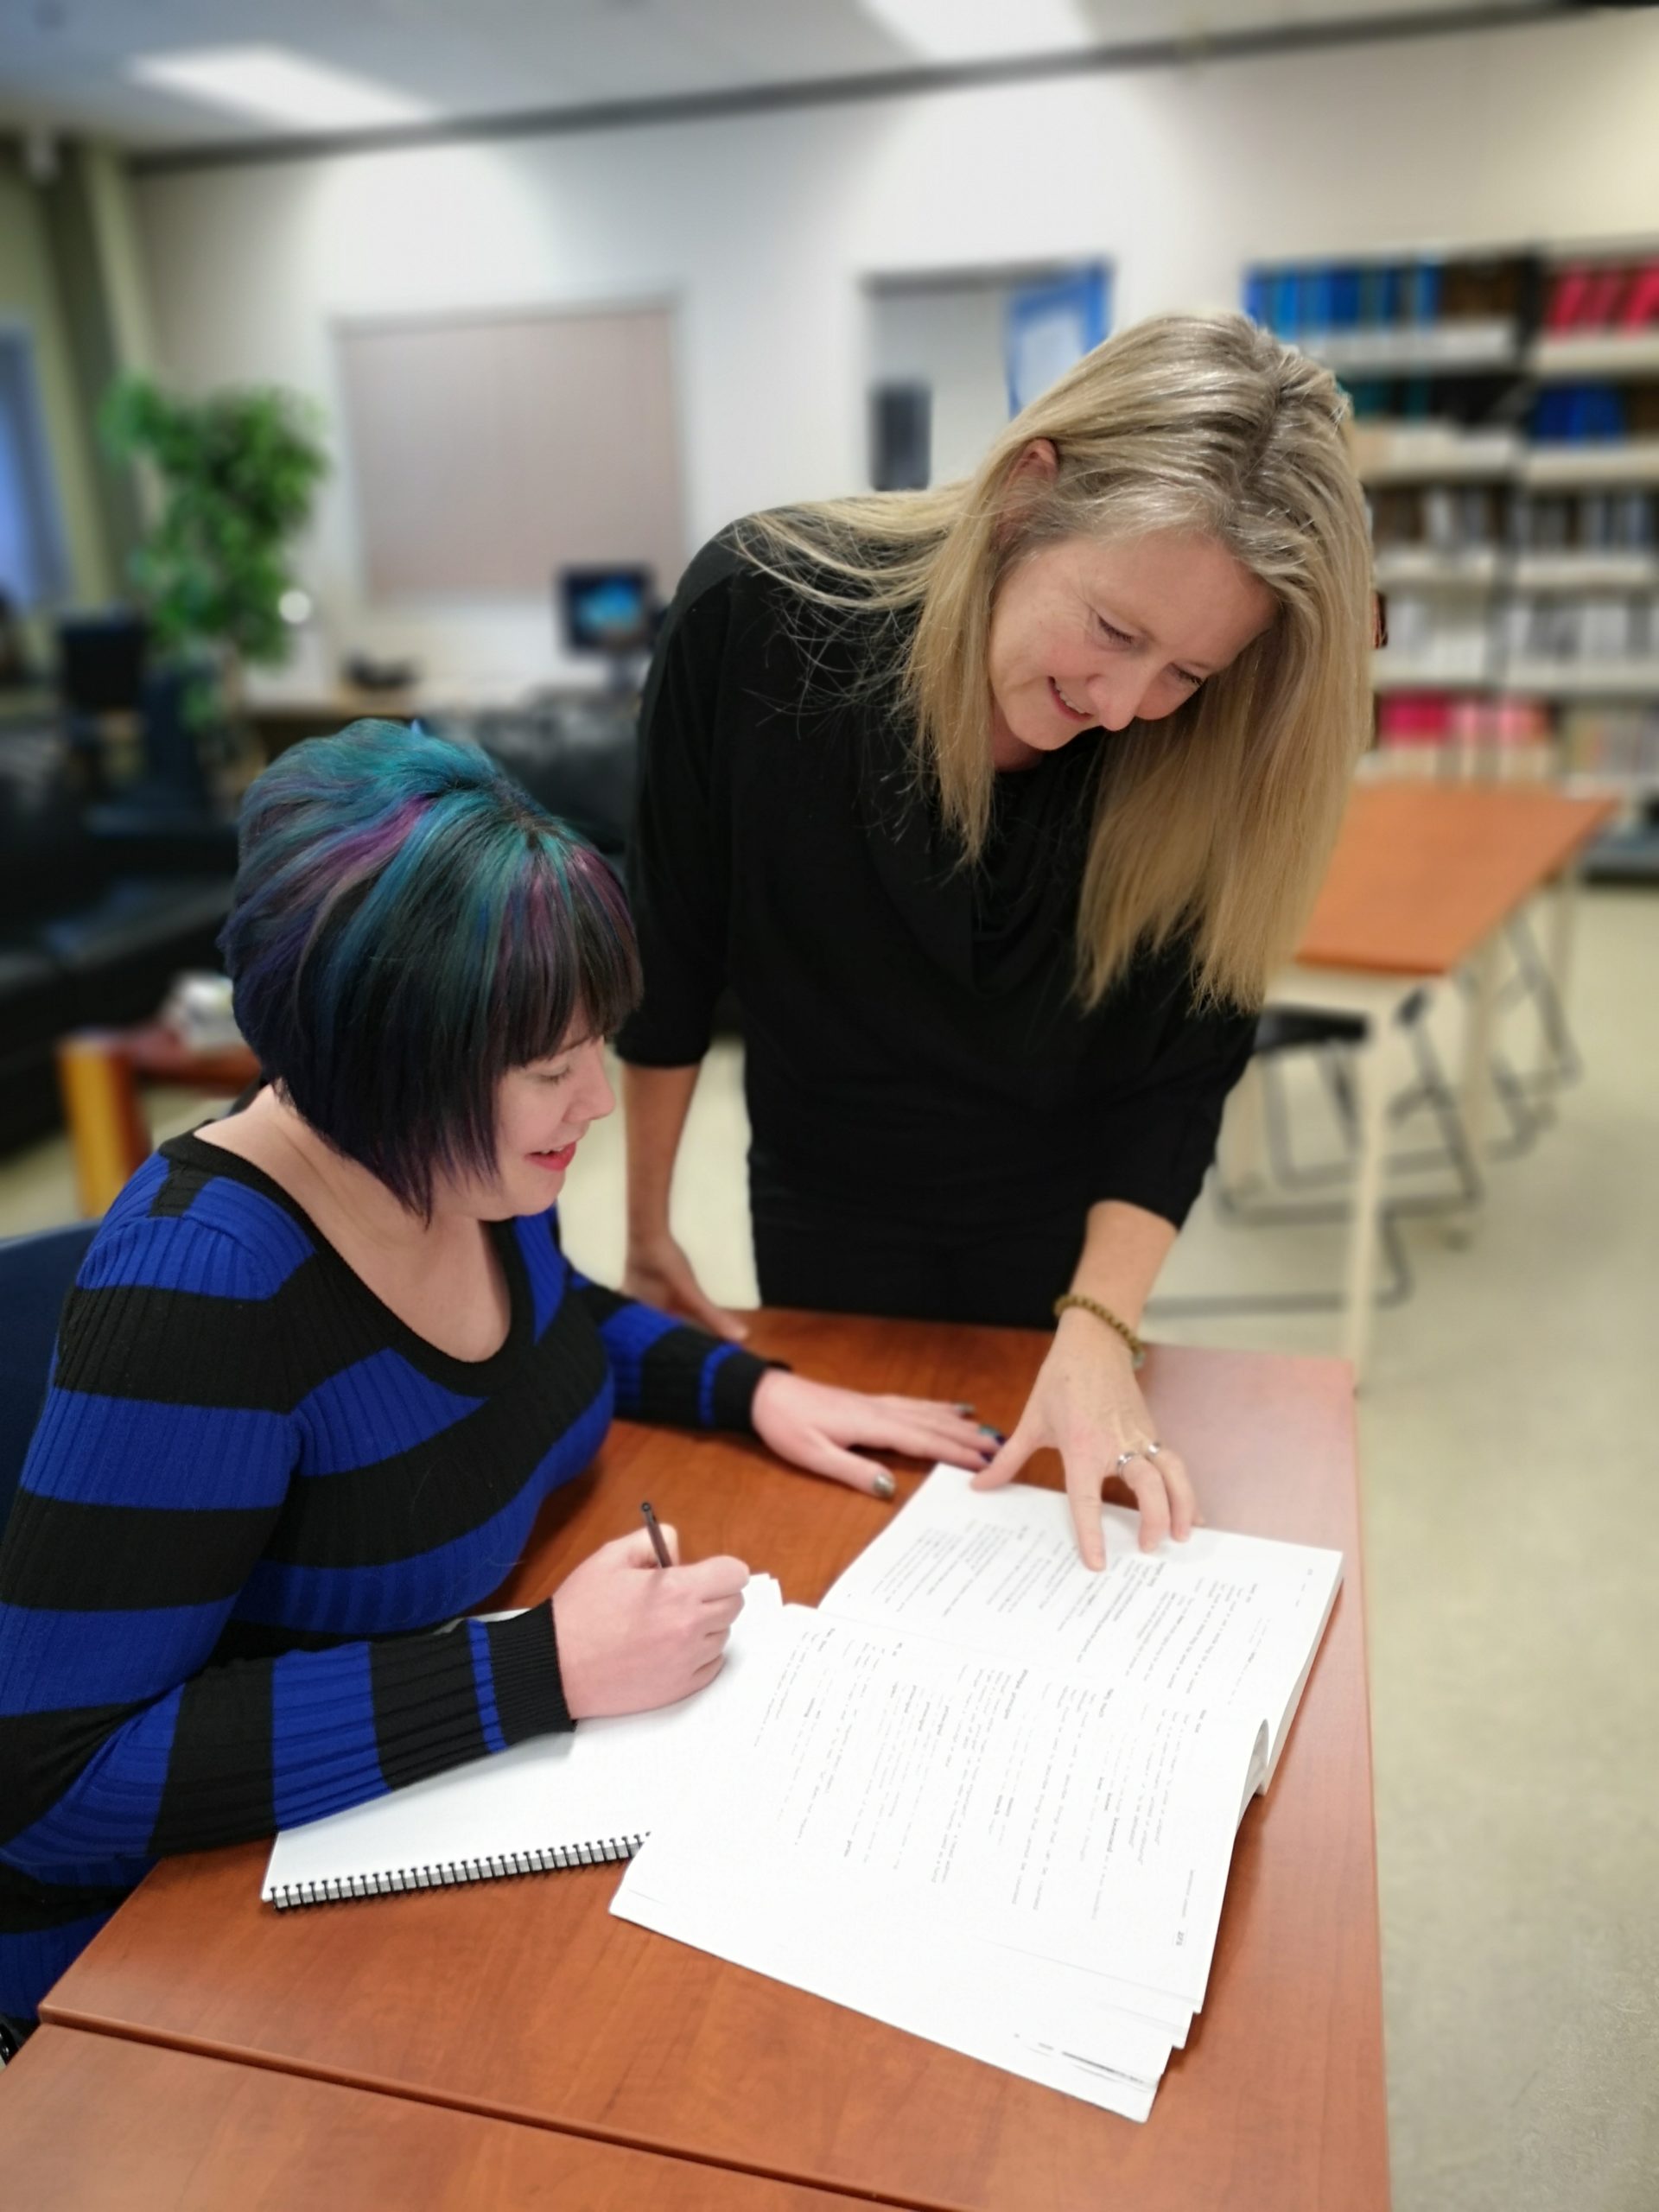
“Instructional conversations”, or comprehension through discussion, creates higher-level thinking opportunities for students by promoting critical and aesthetic thinking about the text. There are several types of questions to focus on: remembering; testing understanding; application or solving; synthesis or creating; and evaluation and judging. It is helpful to use these types of questions through “think-alouds” before, during, and after reading a text. When a student can relate a passage to an experience, another book, or other facts about the world, they are “making a connection”. Making connections helps students understand the author’s purpose in a fiction or non-fiction story.
There are factors that, once discerned, make it easier for the reader to understand the written text. One is the genre, like folktales, historical fiction, biographies or poetry. Each genre has its own characteristics for text structure that, once understood, help the reader comprehend it. A story is composed of a plot, characters, setting, point of view, and theme. Informational books provide real world knowledge for students and have unique features such as: headings, maps, vocabulary, and an index. Poems are written in different forms and the most commonly used are: rhymed verse, haiku, free verse, and narratives. Poetry uses devices such as: alliteration, repetition, rhyme, metaphors, and similes. Students who are familiar with genres, organizational patterns, and text features in books they read are better able to create those text factors in their own writing.
The SQ3R method has been a popular method of reading to learn. Textbooks require different reading methods than you might use for a novel, magazine, or website. When you approach a textbook, you are using it as a tool to learn the material that you need to know for your course. To achieve your aims, you will want to read with a purpose. One method for reading purposefully is called SQ3R. The acronym SQ3R reminds you of the elements of this reading method – Survey, Question, Read, Recite, Review – that will help you become a more effective reader.

Before diving in to read the chapter – look over some of the key aspects.
When you have completed your survey, you will begin reading, focusing especially on items that you identified as important when you survey. Think of questions you would like to see answered in the chapter. Think of the 5 Ws and H questions. Think of “Who, What, Where, When, Why, and How” questions for each subtitle or definition (you can do this as you progress through the reading). These questions will become the headings in your notes.
Read the chapter. Read to answer the questions you have created. Reread captions under pictures, graphs, and visuals. Note all underlined, italicized, and bolded words or phrases. Stop and reread parts that aren’t clear. Once you have found the key information needed, move to the next step.
Recite the answer to your question out loud. Do this as if you are explaining to a study partner. Better yet, actually explain it to a study partner, family member, or friend who is interested in supporting you. Explaining it to someone else helps you understand it better yourself.
Stand back and look at the chapter as a whole.
Exercise: The SQ3R Reading Method
Open your textbook to the chapter you are reading and complete the steps below. Download this SQ3R printable worksheet [PDF] for a template to guide you as you read and take notes.
SURVEY: After surveying the chapter, what do you think it will be about?
QUESTION: Turn the first subtitle into a question.
READ: The section to answer the question.
RECITE: Answer the question in your words. (Repeat for the rest of the chapter.)
REVIEW: After reading the chapter, what new things did you learn?
KWL is a method that can guide you in reading and understanding a text. You can do it working alone, but discussions definitely help. It is composed of only three stages which can be reflected on a worksheet of three columns with the three letters:
| What we Know | what we Want to know | what we Learned |
Think first about what you already know about the topic before reading and jot it down in the first column, marked K. Discuss with others if possible.
In the W column list the things you want to learn about the topic. Record questions, thinking of the 5 Ws and H questions. These questions will help you focus your attention during reading.
The final stage is to answer your questions, as well as to list what new information you have learned. You can do this either while reading or after you have finished.
Exercise: KWL Reading Method
Try it!
Try using the KWL method on a simple task that you would like to know more about. For example, how to make a great cup of coffee, how to make a delicious margarita, information about a medical issue someone you know has been diagnosed with, tips for painting a bedroom… anything you like.
A method called Reading Apprenticeship is based on the premise that people who have become expert readers can assist learners by modeling what they have learned to do. The idea is that a more proficient reader is present to support the beginner, engaging the beginner in the activity and calling attention to often overlooked or hidden strategies.
This strategy takes a metacognitive approach to comprehension, utilizing various strategies readers may already know they know how to do, then adding more. For example, most readers have learned to make predictions, ask questions concerning meanings (“I wonder about…”), visualize a scene being described, associate the material being read to some other material, and, at the end, summarize the material. By reading together, the more experienced reader walks the beginner through the process by leading them through similar processes.
Now review and affirm important comprehension skills you already possess and complete the exercise below.
Exercise: Reading Apprenticeship Approach
Go back through the excerpt above on reading comprehension and this time, write marginal notes where you used any of the comprehension tools listed below:
Key Takeaways
Often when presented with the textbook for a course, you may find it a little overwhelming. The textbook can be large with a lot of information in it. Students can feel a little defeated even before they start. They may have questions like, “Will I need to know everything in this book?” or “Will I be able to understand it?” or even “When will I have time to read all this?” Rest assured, it is likely much better than it might seem at first. Often you are only asked to read and deal with certain parts of the textbook, as opposed to the whole thing, so make sure to read your instructions carefully. Many students have ended up reading chapters that weren’t required for the course.
Furthermore, there are many strategies that are helpful for navigating your textbook. Knowing the layout of your text can help you locate information easily, identify important information, and aid in reviewing and summarizing material. Here are some useful tips.
Before diving into every line of text in a textbook reading assignment, it is helpful (and saves time) to find out first what resources the entire book has to offer you. Then, as those chapter readings are assigned, it helps to first skim read them for the big picture meaning.
The first exercise in this chapter will help you find all the resources in your textbook, and some textbooks have a lot more help in the front matter and back matter of the text than you may realize. One student who, when given this exercise to use on any textbook he had with him, picked his math book. He was at that time re-taking that math class because he had failed it the term before. As he did the exercise, he realized the back matter of the book included an answer key for half of the problems for every exercise. “Had I known this last term,” he said, “I would have passed!” He would have been able to check his answers and see when he didn’t understand a concept. See if you, too, find something useful in your textbook that perhaps you didn’t know was there, either.
The exercises in this chapter cover strategies for skim-reading specific chapters and a strategy for getting the most out of graphics included in textbooks.
Exercise: Front and Back Matter of a Textbook
FRONT MATTER
___Table of Contents
___Preface
___Introduction
___To the Teacher
___To the Student
___Other (list, here): _____________________________________________
BACK MATTER
___Glossary of Terms
___Index of subjects
___Answer Keys
___Additional Exercises
___Additional Readings
___Tables, graphs, charts
___Maps
___Other (list, here): ________________________________________________
Answer the following questions:
Before doing a detailed reading of a textbook chapter, get the big picture by following these steps:
Exercise: Skimming
Using the recommendations on how to skim through textbook chapters, do so with a textbook chapter of your choice. When you are finished, close the book and write down as many of the main ideas of this chapter as you can remember by skim reading it. Try not to look back. When finished, check your work to make sure you have transcribed the information correctly.

Graphics provide a visual way of conveying information. Listed below are various types of data found on most graphics, whether a pie chart, bar graph, line chart, or other type.
The key to comprehending graphics and using them to get more meaning from a textbook chapter or an article, or to answer study questions, is to pay close attention to the typical elements of the graphic. A graphic may include the following elements:
Good textbooks are designed to help you learn, not just to present information. They differ from other types of academic publications intended to present research findings, advance new ideas, or deeply examine a specific subject. Textbooks have many features worth exploring because they can help you understand your reading better and learn more effectively. In your textbooks, look for the elements listed in the table below.
| Textbook Feature | What It Is | Why You Might Find It Helpful |
|---|---|---|
| Preface or Introduction | A section at the beginning of a book in which the author or editor outlines its purpose and scope, acknowledges individuals who helped prepare the book, and perhaps outlines the features of the book. | You will gain perspective on the author’s point of view, what the author considers important. If the preface is written with the student in mind, it will also give you guidance on how to “use” the textbook and its features. |
| Foreword | A section at the beginning of the book, often written by an expert in the subject matter (different from the author) endorsing the author’s work and explaining why the work is significant. | A foreword will give you an idea about what makes this book different from others in the field. It may provide hints as to why your instructor selected the book for your course. |
| Author Profile | A short biography of the author illustrating the author’s credibility in the subject matter. | This will help you understand the author’s perspective and what the author considers important. It will also give you an idea about the author’s credibility on the topic. |
| Table of Contents | A listing of all the chapters in the book and, in most cases, primary sections within chapters. | The table of contents is an outline of the entire book. It will be very helpful in establishing links among the text, the course objectives, and the syllabus. It’s also a quick reference to finding specific chapters. |
| Chapter Preview or Learning Objectives | A section at the beginning of each chapter in which the author outlines what will be covered in the chapter and what the student should expect to know or be able to do at the end of the chapter. | These sections are invaluable for determining what you should pay special attention to. Be sure to compare these outcomes with the objectives stated in the course syllabus. They are also a good reference for review before a test. |
| Introduction | The first paragraph(s) of a chapter, which states the chapter’s objectives and key themes. An introduction is also common at the beginning of primary chapter sections. | Introductions to chapters or sections are “must reads” because they give you a road map to the material you are about to read, pointing you to what is truly important in the chapter or section. |
| Applied Practice Elements | Exercises, activities, or drills designed to let students apply their knowledge gained from the reading. Some of these features may be presented via websites designed to supplement the text. | These features provide you with a great way to confirm your understanding of the material. If you have trouble with them, you should go back and reread the section. They also have the additional benefit of improving your recall of the material. |
| Chapter Summary | A section at the end of a chapter that confirms key ideas presented in the chapter. | It is a good idea to read this section before you read the body of the chapter. It will help you strategize about where you should invest your reading effort. It is also invaluable when reviewing for a test. |
| Review Material | A section at the end of the chapter that includes additional applied practice exercises, review questions, and suggestions for further reading. | The review questions will help you confirm your understanding of the material. |
| Glossary of Terms | Textbooks often highlight or bold new terms. Glossaries are usually at the back of textbooks and give definitions and explanations of important terms in the text. | Many students overlook the usefulness of glossaries. They aid comprehension when you are reading and come across terms you don’t know or don’t remember the meaning of. They are also extremely useful when doing assignments and the question is unclear or you are looking for clues in order to proceed. |
| Index | Located in the back matter of a text, it gives page numbers that content is located in. | This is probably one of the most useful, yet most underused section of a text. Anytime you need to look up a concept in the text, don’t spend wasted time flipping through the text looking for a section you’re sure you’ll recognize. Go straight to the index and it will lead you directly to what you’re looking for. It is especially useful when doing assignments. |
| Answer Keys | Many exercises in the text have answer keys or partial answer keys at the back of the book (or at the back of individual chapters). | Whenever doing exercises or practice problems, make sure you are doing them correctly by continually checking your answers. It’s important to know if you’re on the right track. |
| Additional Exercises | Many texts offer extra practice. | For topics that you don’t feel you have a firm understanding in, extra practice helps solidify concepts. |
| Additional Readings and Resources | Additional resources offer extra information about topics. | These are useful if you want more information for your own interest, or if you are doing an assignment or research paper on one of the topics from your textbook. |
| Endnotes and Bibliographies | Formal citations of sources used to prepare the text. | These will help you infer the author’s biases and are also valuable if doing further research on the subject for a paper. |
You probably already know that you should read your textbooks. However, if you are like many students, reading textbooks might take second place to other priorities, such as attending class and completing assignments. Perhaps it may not seem clear how committing time to weekly reading will support you in achieving your learning goals. But there are strong reasons for committing to regular reading.
Reading textbooks helps you get the most out of your class time. This is especially true if you are able to read your textbook before going to class. Why? Because if you are hearing a lot of material in lecture for the very first time, it can often be difficult to take good notes and understand how all of the concepts fit together. If you are able to read your textbook before you go to class, you will already have a general understanding of the most important topics in that unit. You will already know some of the key words, and you will have a good idea of what you already understand well and what you might not quite understand yet. That way, when you go to class, your instructor’s lecture will support and strengthen the things that you’re already starting to learn. You’ll be equipped to ask good questions and to participate well in class. Overall, you will get more out of the time you spend in class.
You become a better reader by reading. Learning to read textbooks well prepares you to read other complex material that you will encounter throughout your studies and later on in your career. Reading efficiently is a skill that you will use throughout your life – not just in your current classes.
Author’s Story: Using the Index
I can’t count the number of times the following scenario has played out.
A student comes to me exasperated. The student is trying to complete a homework assignment question but can’t find the relevant information in the textbook that would help with the question. The student starts flipping through the pages of the text saying they’ve looked everywhere for the information but can’t find it. They are either convinced it’s not there, or they insist they’ve seen it in there before but now it’s nowhere to be found. They continually flip as they explain how frustrated they are.
I ask them what they are looking for. They explain. I use the key words that they used to explain and look up those key words in the index of the textbook. It gives the page numbers of all the places in the text that are referenced to these key concepts. I choose the one that is in the chapter that they are currently working on. Then there it is. They are so amazed, and yet this is just the simple concept of remembering to use the index – a wonderful feature in the back matter of the textbook!
— Mary Shier, College of the Rockies
When you engage in reading your textbook, think about the following seven reading principles.
Read the assigned material. I know this sounds like a no-brainer, but you might be surprised to learn how many students don’t read the assigned material. Often, it takes longer to read the material than had been anticipated. Sometimes it is not interesting material to us and we procrastinate reading it. Sometimes we’re busy and it is just not a priority. It makes it difficult to learn the information your instructor wants you to learn if you do not read about it before coming to class.
Read it when assigned. This is almost as big a problem for students as the first principle. You will benefit exponentially from reading assignments when they are assigned (which usually means reading them before the instructor lectures on them). If there is a date for a reading on your syllabus, finish reading it before that date. The background knowledge you will attain from reading the information will help you learn and connect information when your instructor lectures on it, and it will leave you better prepared for class discussions. Further, if your instructor assigns you 70 pages to read by next week, don’t wait until the night before to read it all. Break it down into chunks. Try scheduling time each day to read 10 or so pages. It takes discipline and self-control but doing it this way will make understanding and remembering what you read much easier.
Take notes when you read. Hermann Ebbinghaus is a researcher who determined that 42% of information we take in is lost after only 20 minutes without review. For the same reasons that it’s important to take notes during lectures, it’s important to take notes when you are reading. Your notes will help you concentrate, remember and review.
Relate the information to you. We remember information that we deem is important. The strategy then is to make what you are studying important to you. Find a way to directly relate what you are studying to something in your life. Sometimes it is easy and sometimes it is not. But if your attitude is “I will never use this information” and “it’s not important,” chances are good that you will not remember it.
Read with a dictionary or use an online dictionary. Especially with information that is new to us, we may not always recognize all the words in a textbook or their meanings. If you read without a dictionary and you don’t know what a word means, you probably still won’t know what it means when you finish reading. Students who read with a dictionary (or who look the word up online) expand their vocabulary and have a better understanding of the text. Take the time to look up words you do not know. Another strategy is to try to determine definitions of unknown words by context, thus eliminating the interruption to look up words.
Ask a classmate or instructor when you have questions or if there are concepts you do not understand. Visiting instructors during their office hours is one of the most underutilized college resources. Some students may be shy about going, which is understandable, but ultimately, it’s your experience, and it’s up to you if you want to make the most of it. If you go, you will get answers to your questions; at the same time, you’ll demonstrate to your instructor that their course is important to you. Find out when your professor’s office hours are (they are often listed in the syllabus), ask before or after class or email your professor to find out. Be polite and respectful.
Read it again. Some students will benefit from reading the material a second or third time, as it allows them to better understand the material. The students who understand the material the best usually score the highest on exams. It may be especially helpful to reread the chapter just after the instructor has lectured on it.
Reading your textbook and knowing how to navigate your textbook and use it as a useful resource can make a significant difference in your learning. You will discover that textbooks are your friends.
Many students complain that they can’t remember necessary material. They say they understand the content when they read it, but can’t recall it later. There is a difference between understanding and remembering. You may understand all the systems of the human body (they make sense when you read about them), but that doesn’t mean you’ll be able to recall the necessary terms. Fortunately there are memory techniques and strategies for you to use. Some will be more useful for some subjects and content than others.
As you identify the content you are working to learn, you will often discover things that you will need to commit to memory. There are numerous strategies that will help you to remember important information effectively so that you can recall it on tests, apply it to subsequent courses, and use it throughout your life and career.
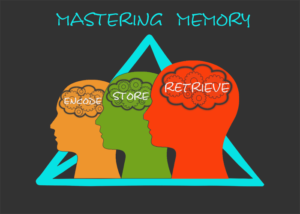
What is memory? Memory is the ability to remember past experiences, and a record of the learning process. The human brain has the ability, known as neuroplasticity, that allows it to form new neural pathways, alter existing connections, and adapt and react in ever-changing ways as we learn. Information must go into our long term memory and then, to retrieve it from our memory, we must have a way of getting it back.
Long-term memory stores all the significant events that mark our lives; it lets us retain the meanings of words and the physical skills that we have learned. There are three steps involved in establishing a long term memory: encoding, storage, and retrieval.
Once information has been encoded, we have to retain it. Our brains take the encoded information and place it in storage. Storage is the creation of a permanent record of information.
In order for a memory to go into storage (i.e. long-term memory), it has to pass through three distinct stages: Sensory Memory, Short-Term Memory, and finally Long-Term Memory. These stages were first proposed by Richard Atkinson and Richard Shiffrin (1968). Their model of human memory is based on the belief that we process memories in the same way that a computer processes information.
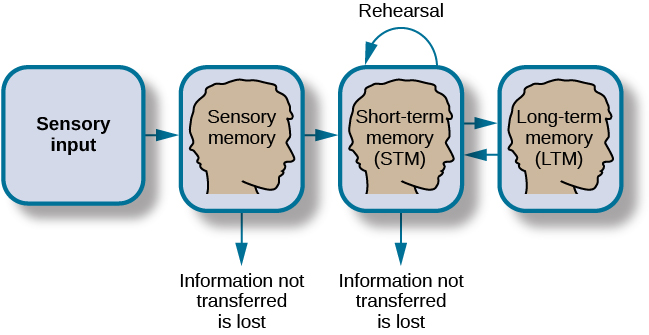
The first thing our brains do is to take in information from our senses (what we see, hear, taste, touch and smell). In many classroom and homework settings, we primarily use hearing for lectures and seeing for reading textbooks. Information we perceive from our senses is stored in what we call the short-term memory.
It is useful to then be able to do multiple things with information in the short-term memory. We want to: 1) decide if that information is important; 2) for the information that is important, be able to save the information in our brain on a longer-term basis—this storage is called the long-term memory; 3) retrieve that information when we need to. Exams often measure how effectively the student can retrieve “important information.”
In some classes and with some textbooks it is easy to determine information important to memorize. In other courses with other textbooks, that process may be more difficult. Your instructor can be a valuable resource to assist with determining the information that needs to be memorized. Once the important information is identified, it is helpful to organize it in a way that will help you best understand.
This is something that takes a lot of time: there is no shortcut for it. Students who skip putting in the time and work often end up cramming at the end.
Once information is memorized, regardless of when the exam is, the last step is to apply the information. Ask yourself: In what real world scenarios could you apply this information? And for mastery, try to teach the information to someone else.
How we save information to our long-term memory has a lot to do with our ability to retrieve it when we need it at a later date. Our mind “saves” information by creating a complex series of links to the data. The stronger the links, the easier it is to recall. You can strengthen these links by using the following strategies. You should note how closely they are tied to good listening and note-taking strategies.
Exercise: Just for Fun
Exercise: Test Your Memory
Read the following list for about twenty seconds. After you have read it, cover it and write down all the items you remember.
How many were you able to recall? Most people can remember only a fraction of the items.
Now read the following list for about twenty seconds, cover it, and see how many you remember.
Did your recall improve? Why do you think you did better? Was it easier? Most people take much less time doing this version of the list and remember almost all the terms. The list is the same as the first list, but the words have now been grouped into categories. Use this grouping method to help you remember lists of mixed words or ideas.
Flash cards are a valuable tool for memorization because they allow students to be able to test themselves. They are convenient to bring with you anywhere, and can be used effectively whether a student has one minute or an hour. Create your own flash cards using index cards, writing the questions on one side and the answers on the other. Creating the flash cards help with memory because you need to decide what is important to put on the cards, summarize key principles, and the act of writing it down helps too. Then you can use them to review and/or test yourself repeatedly. You can use them almost anywhere. For example, you can pull out the flash cards on the bus and test yourself during your commute.
What do the names of the Great Lakes, the makings of a Big Mac, and the number of days in a month have in common? They are easily remembered by using mnemonic devices. Mnemonics (pronounced neh-MA-nicks) are tricks for memorizing lists and data. They create artificial but strong links to the data, making recall easier. The most commonly used mnemonic devices are acronyms, acrostics, rhymes, and jingles.
Acronyms are words or phrases made up by using the first letter of each word in a list or phrase. Need to remember the names of the Great Lakes? Try the acronym HOMES using the first letter of each lake:
To create an acronym, first write down the first letters of each term you need to memorize. Then rearrange the letters to create a word or words. You can find acronym generators online (just search for “acronym generator”) that can help you by offering options. Organizing information in this way can be helpful because it is not as difficult to memorize the acronym, and with practice and repetition, the acronym can trigger the brain to recall the entire piece of information. Acronyms work best when your list of letters includes vowels as well as consonants and when the order of the terms is not important. If no vowels are available, or if the list should be learned in a particular order, try using an acrostic instead.
Acrostics are similar to acronyms in that they work off the first letter of each word in a list. But rather than using them to form a word, the letters are represented by entire words in a sentence or phrase. If you’ve studied music, you may be familiar with “Every Good Boy Deserves Fudge” to learn the names of the notes on the lines of the musical staff: E, G, B, D, F. The ridiculous and therefore memorable line “My Very Educated Mother Just Served Us Nine Pizzas” was used by many of us to remember the names of the planets (at least until Pluto was downgraded):
| My | Mercury |
| Very | Venus |
| Educated | Earth |
| Mother | Mars |
| Just | Jupiter |
| Served | Saturn |
| Us | Uranus |
| Nine | Neptune |
| Pizzas | Pluto |
To create an acrostic, list the first letters of the terms to be memorized in the order in which you want to learn them (like the planet names). Then create a sentence or phrase using words that start with those letters.
Rhymes are short verses used to remember data. A common example is “In fourteen hundred and ninety-two, Columbus sailed the ocean blue.” Need to remember how many days a given month has? “Thirty days hath September, April, June, and November…,” and so forth. Writing rhymes is a talent that can be developed with practice. To start, keep your rhymes short and simple. Define the key information you want to remember and break it down into a series of short phrases. Look at the last words of the phrases: can you rhyme any of them? If they don’t rhyme, can you substitute or add a word to create the rhyme? (For example, in the Columbus rhyme, “ninety-two” does not rhyme with “ocean,” but adding the word “blue” completes the rhyme and creates the mnemonic.)
Jingles are phrases set to music, so that the music helps trigger your memory. Jingles are commonly used by advertisers to get you to remember their product or product features. Remember “Two all-beef patties, special sauce, lettuce, cheese, pickles, onions on a sesame seed bun”—the original Big Mac commercial. Anytime you add rhythm to the terms you want to memorize, you are activating your auditory sense, and the more senses you use for memorization, the stronger the links to the data you are creating in your mind. To create a jingle for your data, start with a familiar tune and try to create alternate lyrics using the terms you want to memorize. Another approach you may want to try is reading your data aloud in a hip-hop or rap music style. The late Velma McKay, a former math instructor at College of the Rockies, was well known for singing to her students. She replaced the lyrics to many familiar songs and sang them in class to help them remember important math formulas. Imagine singing the quadratic formula to the tune of “London Bridge is Falling Down”.
Exercise: Creative Memory Challenge
Create an acrostic to remember the noble gasses: helium (He), neon (Ne), argon (Ar), krypton (Kr), xenon (Xe), and the radioactive radon (Rn).
Create an acronym to remember the names of the G8 group of countries: France, the United States, the United Kingdom, Russia, Germany, Japan, Italy, and Canada. (Hint: Sometimes it helps to substitute terms with synonyms—“America” for the United States or “England” for the United Kingdom—to get additional options.)
Create a jingle to remember the names of the Seven Dwarfs: Bashful, Doc, Dopey, Grumpy, Happy, Sleepy, and Sneezy.
Mnemonics are good memory aids, but they aren’t perfect. They take a lot of effort to develop, and they also take terms out of context because they don’t focus on the meaning of the words. Since they lack meaning, they can also be easily forgotten later on, although you may remember them through the course.
Exercise: Memory Quiz
For each of the following statements, circle T for true or F for false
| Flash cards provide convenient tools to review and test memory. | T | F |
| Multi-tasking enhances your active memory. | T | F |
| If you listen carefully, you will remember most of what was said for three days. | T | F |
| “Use it or lose it” applies to information you want to remember. | T | F |
| Mnemonics should be applied whenever possible. | T | F |
| Type | Sample Method |
|---|---|
| Acronyms | Every discipline has its own language and acronyms are the abbreviations. Acronyms can be used to remember words in sequence or a group of words representing things or concepts. CAD can mean: Control Alt Delete, Canadian Dollar, Computer Aided Design, Coronary Artery Disease, Canadian Association of the Deaf, Crank Angle Degree, etc. |
| Acrostics | Acrostics are phrases where the first letter of each word represents another word. They are relatively easy to make and can be very useful for remembering groups of words. For example: King Philip Can Only Find His Green Slippers. This is the classification system of Kingdom, Phylum, Class, Order, Family, Genus, Species. |
| Chunking | You can capitalize on your short term memory by “chunking” information. If you need to remember this number: 178206781. The task would exhaust your seven units of storage space unless you “chunk” the digits into groups. In this case, you could divide it into three chunks, like a social insurance number: 178 206 781. By chunking the information and repeating it you can stretch the capacity of your short term memory. |
| Flash cards | Flash cards provide a convenient tool to test yourself frequently. You can purchase flash cards for common memory tasks such as learning multiplication tables, or you can create your own for learning facts, systems, and processes. |
| Images | This helps us remember by linking words to meanings through associations based on how a word sounds and creating imagery for specific words. This sort of visualization was found to be more effective when one listened to someone reading a text than when they read the text themselves. |
| Jingle | Jingles or short songs are great tools for memory. Remember the famous song to teach children parts of the body, “Head and shoulders, knees and toes, knees and toes, knees and toes. Head and shoulders, knees and toes. Eyes, ears, mouth and nose.” |
| Locations and Journeys | Traditionally known as the Method of Loci, we associate each word from a list or grouping with a location. Imagine a place with which you are familiar, such as, the rooms in your house. These become the objects of information you need to memorize. Another example is to use the route to your work or school, with landmarks along the way becoming the information you need to memorize. When you do this in order of your journey through the imagined space, it makes it easier to retrieve all of the information in the future. |
| Maps & Diagrams | Graphic organizers help us remember by connecting new information to our existing knowledge and to let us see how concepts relate to each other and fit into a context. Mind and concept maps, Cause and Effect, Fishbone, Cycle, Flow Chart, Ladders, Story Board, Compare and Contrast, Venn Diagrams, and more. |
| Reciting | Saying something out loud activates more areas of our brain and helps to connect information to other activities. |
| Rhymes | Rhyme, rhythm, repetition, and melody make use of our brain’s ability to encode audio information and use patterns to aid memory. They help recall by limiting the possible options to those items that fit the pattern you have created. |
| Summarizing | This traditional element of note taking is a way to physically encode materials that make it easier for our brain to store and retrieve. It can be said that if we cannot summarize, then we have not learned…yet. |
Exercise: Try it
Select one course where memorizing key concepts is a part of your exam preparation. Choose at least one new strategy from the chart above this week. Monitor—is this strategy effective for what you are trying to learn? A good way to monitor is to see if you can recall the information accurately without looking at a text or notes.
Key Takeaways
Atkinson-Shiffrin model of memory: Sensory input leads to sensory memory. Information not transferred is lost. Sensory memory leads to short-term memory. Information not transferred is lost. Information that is rehearsed may remain in short-term memory. Short term memory leads to long-term memory. [Return to image]
Study groups are a great idea—as long as they are thoughtfully managed. A study group can give you new perspectives on course material and help you fill in gaps in your notes. Discussing course content will sharpen your critical thinking related to the subject, and being part of a group to which you are accountable will help you study consistently. In a study group, you will end up “teaching” each other the material, which is the strongest way to retain new material. But remember, being in a group working together doesn’t mean there will be less work for you as an individual; your work will just be much more effective.
Online groups can be incredibly effective. Using video-chat programs such as Skype or Messenger, study groups can work together, fulfilling the same goals as face-to-face groups. This is especially useful in online courses where students may be taking the course from distant locations.
Author’s Story
I did a Master’s in Distance Education and did the whole thing online. The students lived all over the world, and I regularly had classmates from Italy, Greece, Brazil, Ireland, and Australia, to name a few countries. Even the instructors lived all over. Though I never met any of the other students in person, I got to know them quite well and befriended a few. I got to know who I worked well with on projects and who were good study partners. We met regularly by Skype and it truly felt like friends meeting around the table to accomplish a goal.
— Mary Shier, College of the Rockies
Here are some tips for creating and managing effective study groups:

Group work has many advantages and often means that the end product is a much better product than it would have been if done individually. Group work incorporates the strengths and perspectives of a number of people, making the result richer and more balanced. Often the exercise of group work is much more than coming up with the end product (the completed assignment). It invariably is about the journey and the process of getting there and the teamwork skills that are developed along the way.

You’ve got the PowerPoint slides for your lecture, and the information in your textbook. Do you need to take notes as well?
Despite the vast amount of information available in electronic formats, taking notes is an important learning strategy. In addition, the way that you take notes matters, and not all note-taking strategies lead to equal results. By considering your note-taking strategies carefully, you will be able to create a set of notes that will help retain the most important concepts from lectures and tests, and that will assist you in your exam preparation.
People take notes for two main reasons:
The availability of information on the internet may reduce the importance of the external storage function of note-taking. When the information is available online, it may seem logical to stop taking notes. However, by neglecting to take notes, you lose the benefits of note-taking as a learning tool.
Taking notes during class supports your learning in several important ways:
Everybody takes notes, or at least everybody claims to. But if you take a close look, many who are claiming to take notes on their laptops are actually surfing the Web, and paper notebooks are filled with doodles interrupted by a couple of random words with an asterisk next to them reminding you that “This is important!” In college and university, these approaches will not work. Your instructors expect you to make connections between class lectures and reading assignments; they expect you to create an opinion about the material presented; they expect you to make connections between the material and life beyond school. Your notes are your road maps for these thoughts. Do you take good notes? Actively listening and note-taking are key strategies to ensure your student success.
Effective note-taking is important because it
There are various forms of taking notes, and which one you choose depends on both your personal style and the instructor’s approach to the material. Each can be used in a notebook, index cards, or in a digital form on your laptop. No specific type is good for all students and all situations, so we recommend that you develop your own style, but you should also be ready to modify it to fit the needs of a specific class or instructor. To be effective, all of these methods require you to listen actively and to think; merely jotting down words the instructor is saying will be of little use to you.
| Method | Description | When to Use |
|---|---|---|
| Lists | A sequential listing of ideas as they are presented. Lists may be short phrases or complete paragraphs describing ideas in more detail. | This method is what most students use as a fallback if they haven’t learned other methods. This method typically requires a lot of writing, and you may find that you are not keeping up with the professor. It is not easy for students to prioritize ideas in this method. |
| Outlines | The outline method places most important ideas along the left margin, which are numbered with roman numerals. Supporting ideas to these main concepts are indented and are noted with capital letters. Under each of these ideas, further detail can be added, designated with an Arabic number, a lowercase letter, and so forth. | A good method to use when material presented by the instructor is well organized. Easy to use when taking notes on your computer. |
| Concept Maps | When designing a concept map, place a central idea in the centre of the page and then add lines and new circles in the page for new ideas. Use arrows and lines to connect the various ideas. | Great method to show relationships among ideas. Also good if the instructor tends to hop from one idea to another and back. |
| Cornell Method | The Cornell method uses a two-column approach. The left column takes up no more than a third of the page and is often referred to as the “cue” or “recall” column. The right column (about two-thirds of the page) is used for taking notes using any of the methods described above or a combination of them. After class or completing the reading, review your notes and write the key ideas and concepts or questions in the left column. You may also include a summary box at the bottom of the page, in which to write a summary of the class or reading in your own words. | The Cornell method can include any of the methods above and provides a useful format for calling out key concepts, prioritizing ideas, and organizing review work. Most universities recommend using some form of the Cornell method. |
Example: The List Method of Note-taking
Learning Cycle
September 3
Prof. Jones
The learning cycle is an approach to gathering and retaining info that can help students be successful in Col. The cycle consists of 4 steps which should all be app’d. They are preparing, which sets the foundation for learning, absorbing, which exposes us to new knowledge, capturing, which sets the information into our knowledge base and finally reviewing and applying which lets us set the know. into our memory and use it.
Preparing for learning can involve mental preparation, physical prep, and oper. prep. Mental prep includes setting learning goals for self based on what we know the class w/ cover (see syllabus)/ Also it is very important to do any assignments for the class to be able to learn w/ confidence and…. ______________
Physical Prep means having enough rest and eating well. Its hard to study when you are hungry and you won’t listen well in class if you doze off.
Operation Prep means bringing all supplies to class, or having them at hand when studying… this includes pens, paper, computer, textbook, etc. Also means setting to school on time and getting a good seat (near the front).
Absorbing new knowledge is a combination of listening and reading. These are two of the most important learning skills you can have.
The list method is usually not the best choice because it is focused exclusively on capturing as much of what the instructor says as possible, not on processing the information. Most students who have not learned effective study skills use this method, because it’s easy to think that this is what note-taking is all about. Even if you are skilled in some form of shorthand, you should probably also learn one of the other methods described here, because they are all better at helping you process and remember the material. You may want to take notes in class using the list method, but transcribe your notes to an outline or concept map method after class as a part of your review process. It is always important to review your notes as soon as possible after class and write a summary of the class in your own words.
Example: The Outline Method of Note-taking
Learning Cycle
September 3
Prof Jones
Learning is a cycle made up of 4 steps:
The advantage of the outline method is that it allows you to prioritize the material. Key ideas are written to the left of the page, subordinate ideas are then indented, and details of the subordinate ideas can be indented further. To further organize your ideas, you can use the typical outlining numbering scheme (starting with roman numerals for key ideas, moving to capital letters on the first subordinate level, Arabic numbers for the next level, and lowercase letters following.) At first you may have trouble identifying when the instructor moves from one idea to another. This takes practice and experience with each instructor, so don’t give up! In the early stages you should use your syllabus to determine what key ideas the instructor plans to present. Your reading assignments before class can also give you guidance in identifying the key ideas.
If you’re using your laptop computer for taking notes, a basic word processing application (like Microsoft Word or Works) is very effective. Format your document by selecting the outline format from the format bullets menu. Use the increase or decrease indent buttons to navigate the level of importance you want to give each item. The software will take care of the numbering for you!
After class be sure to review your notes and then summarize the class in one or two short paragraphs using your own words. This summary will significantly affect your recall and will help you prepare for the next class.
Example: The Concept Map Method of Note-taking

This is a very graphic method of note-taking that is especially good at capturing the relationships among ideas. Concept maps harness your visual sense to understand complex material “at a glance.” They also give you the flexibility to move from one idea to another and back easily (so they are helpful if your instructor moves freely through the material).
To develop a concept map, start by using your syllabus to rank the ideas you will listen to by level of detail (from high-level or abstract ideas to detailed facts). Select an overriding idea (high level or abstract) from the instructor’s lecture and place it in a circle in the middle of the page. Then create branches off that circle to record the more detailed information, creating additional limbs as you need them. Arrange the branches with others that interrelate closely. When a new high-level idea is presented, create a new circle with its own branches. Link together circles or concepts that are related. Use arrows and symbols to capture the relationship between the ideas. For example, an arrow may be used to illustrate cause or effect, a double-pointed arrow to illustrate dependence, or a dotted arrow to illustrate impact or effect.
As with all note-taking methods, you should summarize the chart in one or two paragraphs of your own words after class.
Example: The Cornell Method of Note-taking

The Cornell method was developed in the 1950s by Professor Walter Pauk at Cornell University Pauk, W. & Owens, R.J.Q. (2013). How to Study in College. Boston, MA: Wadsworth, Cengage Learning.. It is recommended by many universities because of its usefulness and flexibility. This method is simple to use for capturing notes, is helpful for defining priorities, and is a very helpful study tool.
The Cornell method follows a very specific format that consists of four boxes: a header, two columns, and a footer.
The header is a small box across the top of the page. In it you write identification information like the course name and the date of the class. Underneath the header are two columns: a narrow one on the left (no more than one-third of the page) and a wide one on the right. The wide column, called the “notes” column, takes up most of the page and is used to capture your notes using any of the methods outlined earlier. The left column, known as the “cue” or “recall” column, is used to jot down main ideas, keywords, questions, clarifications, and other notes. It should be used both during the class and when reviewing your notes after class. Finally, use the box in the footer to write a summary of the class in your own words. This will help you make sense of your notes in the future and is a valuable tool to aid with recall and studying.
Using Index Cards for the Cornell Method
Some students like to use index cards to take notes. They actually lend themselves quite well to the Cornell method. Use the “back” or lined side of the card to write your notes in class. Use one card per key concept. The “front” unlined side of the card replaces the left hand “cue” column. Use it after class to write keywords, comments, or questions. When you study, the cards become flash cards with questions on one side and answers on the other. Write a summary of the class on a separate card and place it on the top of the deck as an introduction to what was covered in the class.
“I used to tape my lecture classes so I could fill in my sketchy notes afterwards. Now that I’m using the Cornell system, my notes are complete and organized in much less time. And my regular five-minute reviews make learning almost painless. No more taping and listening twice.”
— A student at Southern Methodist University
You will have noticed that all methods end with the same step: reviewing your notes as soon as possible after class. Any review of your notes is helpful (reading them, copying them into your computer, or even recasting them using another note-taking method). But THINK! Make your review of notes a thoughtful activity, not a mindless process. When you review your notes, think about questions you still have and determine how you will get the answers. (From the next class? Studying with a friend? Looking up material in your text or on the net?) Examine how the material applies to the course; make connections with notes from other class sessions, with material in your text, and with concepts covered in class discussions. Finally, it’s fun to think about how the material in your notes applies to real life. Consider this both at the very strategic level (as in “What does this material mean to me in relation to what I want to do with my life?”) as well as at a very mundane level (as in, “Is there anything cool here I can work into a conversation with my friends?”).
Some instructors hand out or post their notes or their PowerPoint slides from their lectures. These handouts should never be considered a substitute for taking notes in class. They are a very useful complement and will help you confirm the accuracy of your notes, but they do not involve you in the process of learning as well as your own notes do. After class, review your notes with highlighter in hand and mark keywords and ideas in your notes. This will help you write a summary of the class in your own words.
Regardless of what note-taking method you choose, there are some note-taking habits you should get into for all circumstances and all courses:
This video provides some great tips for note-taking as well.
Video: “How to Take Great Notes” (length 5:08)

A YouTube element has been excluded from this version of the text. You can view it online here: https://opentextbc.ca/studentsuccess/?p=148
Exercise: Journal Entry
Choose one of your classes where you normally take notes. Make a conscious effort to use the Cornell method with either the outline or concept map method for taking your notes. Follow as many steps listed previously as possible. Now compare these notes with those you took in the previous class. Are your new notes more useful? What did you like about taking notes this way? What are some of the things you need to work on improving? (Remember this will get much easier with more practice.) Write your thoughts down.
Clearly the best way to learn class material is to be at the class and to take your own notes. In university, regular attendance is expected. But life happens. On occasion, you may have to miss a class or lecture. When this happens, here are some strategies you can use to make up for it:
Groups within a class can take notes together using file-sharing software on the Cloud such as Google Docs. The individuals in the group can add to the document in real time as different individuals are adding themselves. This creates a collaborative document that all can use, download, (or adapt). This won’t work for all situations but can be very useful especially in a fast-moving classroom.
Class is over, and you have a beautiful set of notes in your spiral notebook or saved in your laptop. You have written the summary of the class in your own words. Now what?
Start by organizing your notes. We recommend you use a three-ring binder for each of your subjects. Print your notes if you used a computer. If you used note cards, insert them in plastic photo holders for binders. Group all notes from a class or unit together in a section; this includes class notes, reading notes, and instructor handouts. You might also want to copy the instructor’s syllabus for the unit on the first page of the section.
Next, spend some time linking the information across the various notes. Use the recall column in your notes to link to related information in other notes (e.g. “See class notes date/page”).
If you have had a quiz or test on the unit, add it to your binder, too, but be sure to write out the correct answer for any item you missed. Link those corrections to your notes, too.
Use this opportunity to write “notes on your notes.” Review your summary to see if it still is valid in light of your notes on the reading and any handouts you may have added to your notes package.
You don’t need to become a pack rat with your notes. It is fairly safe to toss them after the end of a course except in the following cases:
Key Takeaways
Exercise: Note-taking
“If you study to remember, you will forget, but, if you study to understand, you will remember.”
— Author unknown
Why do some students earn good grades and others do not? Students with poor grades often say students with good grades are born book smart. Students with good grades often answer that studying and hard work got them there. What do you think?
Everyone likes to earn an “A” grade. Despite the stigma of being a “nerd,” it feels good to receive good grades. Take pride in your preparation, take pride in your studying, and take pride in your accomplishments. Students know many things they need to do in order to achieve good grades – they just don’t always do them.
This section is about good study habits. It encompasses much of what is being discussed throughout the text. If you make these practices into habits, it will serve you well throughout your student life.
Complete your assigned reading ahead of the deadline. Follow the syllabus so that you’ll have familiarity with what the instructor is speaking about. Bring your course syllabus, textbook, notebook and any handouts or other important information for each particular class along with a pen and a positive attitude. Become interested in what the instructor has to say. Be eager to learn. Sleep adequately the night before class and ensure you do not arrive to class on an empty stomach. Many courses, both in person and online, use digital platforms called Learning Management Systems (LMS’s). Examples of these are Canvas, Blackboard, and Moodle. Students then have access to course notes, and Power Point slides, and often videos of the class lectures. These are great to access for missed classes, and for review of materials; you can listen to the lecture again while doing dishes or vacuuming. It is important for students to check their email regularly as well as announcements or notifications from their instructor through the LMS.
Attending each and every class requires a lot of self-discipline and motivation. Doing so will help you remain engaged and involved in course topics, provide insight into what your instructor deems most important, allow you to submit work and receive your graded assignments and give you the opportunity to take quizzes or exams that cannot be made up. This applies whether it’s a face-to-face class or whether it’s a synchronous online class.
Missing class is a major factor in students dropping courses or receiving poor grades. In addition, students attempting to make up the work from missing class often find it overwhelming. It’s challenging to catch up if you get behind.
Author’s Story
Full disclosure: I loved to sit in the back of the classroom when I was in college. I felt more comfortable back there. I didn’t want to make eye contact with my instructor. I didn’t want to be called on. But I learned that if I wanted to give myself the best opportunity to see, hear, understand and learn, then I needed to sit in the front and centre. And in order to make sure I sat in the front and centre, I needed to arrive to my classes early.
— Dave Dillon, author of Blueprint for Success in College and Career
Your instructor may say, “Sit wherever you want — sit where you are most comfortable.” But if you were to attend a concert for your favourite artist, where would you like to be? It’s always right in front of the stage, because the best experience is closest to the band. That’s why front-and-centre tickets are the most expensive. There are some reasons sitting in the back works for some students. But you run the risk of sitting behind someone you cannot see over. And if you’re sitting in the back so that you can send text messages without being seen, so that you can work on something else, or so that you can disengage (not pay attention without the instructor noticing), then you’re sitting in the back for the wrong reasons. Rather than hiding, you want to create the best learning environment, from seeing and hearing perspectives.
Hermann Ebbinghaus, a German psychologist, scientifically studied how people forget in the late 1800’s. He is known for his experiments using himself as a subject, and tested his memory by learning nonsense syllables. One of his famous results, known as the forgetting curve, shows how much information is forgotten quickly after it is learned. Without reviewing, we will forget. Since we forget 42% of the information we take in after only 20 minutes (without review), it is imperative to take notes to remember.
For the same reason as above, it is helpful to take notes while you are reading to maximize memorization. Sometimes called Active Reading, the goal is to stay focused on the material and to be able to refer back to notes made while reading to improve retention and study efficiency. Don’t make the mistake of expecting to remember everything you are reading. Taking notes when reading requires effort and energy. Be willing to do it and you’ll reap the benefits later.
Summarize your notes, your class discussions, your text chapters, and your thoughts on a topic. Summarize what you are learning about to people you know. Anytime you get the chance to summarize, you are taking the opportunity to think through what you know about a topic and sort it out in your brain, which helps you understand it better and remember it better.

There are many campus resources at your college or university and often students don’t know they exist, where they are or that most of them are free. Find out what is available to you by checking your school’s website for campus resources or student services, or talk to a counsellor about what resources may be helpful for you. Check to see where your campus has resources for Education Advising, Counselling, Tutoring, Writing assistance, a Library, Admissions and Records (or Registrar’s), Financial Aid, Health Centre, Career Centre, Accessibility Support Services (for people with disabilities), and other support services. If you see a sign in your school marked, Student Services, go and check it out. Talk to someone at the desk about the services that are offered there. It really is what it says…… Student Services!
In addition to acting as a contract between the instructor and you, the syllabus is also often the source of information for faculty contact information, textbook information, classroom behaviour expectations, attendance policy and course objectives. Some students make the mistake of stuffing the syllabus in their backpack when they receive it on the first day of class and never taking a look at it again. Those who clearly read it, keep it for reference and review it frequently find themselves more prepared for class. If there is something in the syllabus you don’t understand, ask your instructor about it before class, after class or during their office hours.
Place all of your assignments for all of your classes with their due dates in your calendar, planner, smart phone or whatever you use for organization. Successful students will also schedule when to start those assignments and have an idea of how long it will take to complete them. They will schedule to complete the assignments several days BEFORE they are actually due. (This eases a lot of stress if unexpected circumstances arise on the last day of the deadline – and they often do!)
There will be things that you are more interested in doing than your assignments and unexpected life happenings that will come up. Students who earn good grades have the motivation and discipline to complete all of their assignments.
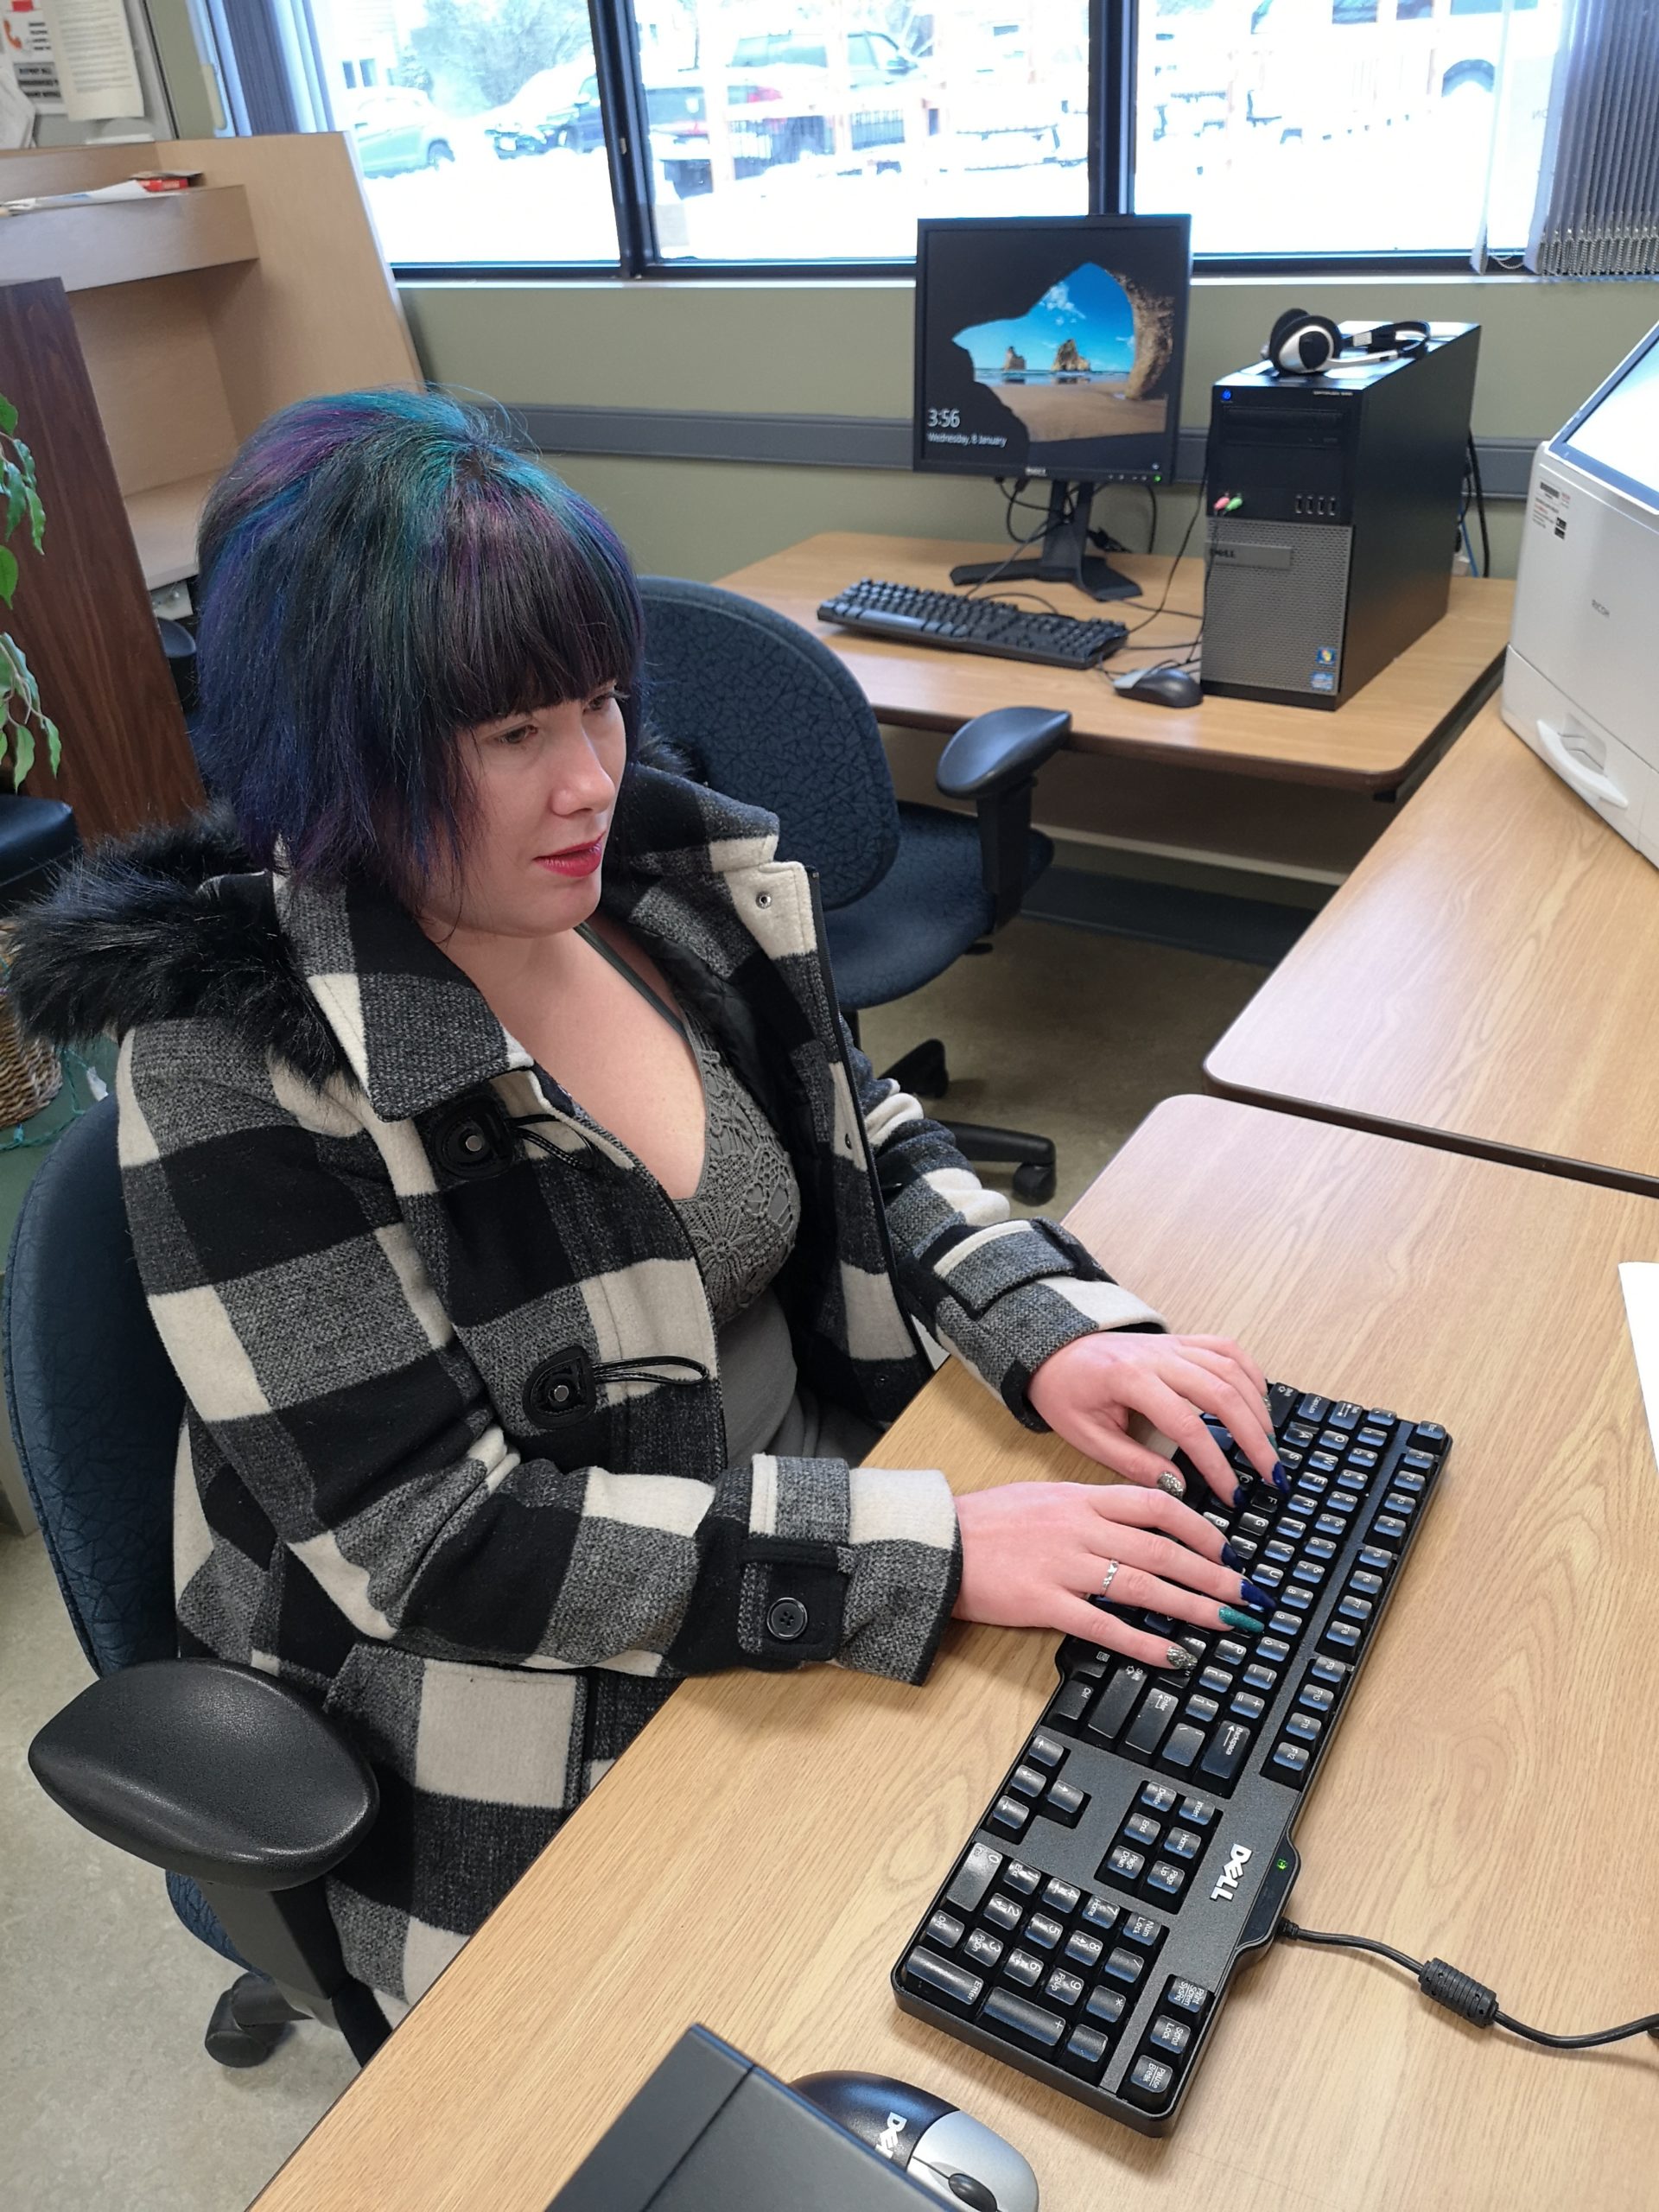
Proof-read your assignments several times before submitting them, preferably with time in between each read. You will catch mistakes, and things that need further clarification when you read it with fresh eyes. You might be surprised to learn how many students turn in papers with spelling, grammar and punctuation errors that could have been corrected easily by using a spellchecker program or extra proof-reading. Many schools offer writing centres or tutors who will read your paper and give feedback, make suggestions, and help shape ideas. Take advantage of these services if they are offered. Another strategy is to read your paper aloud to yourself. You may catch errors when you read aloud that you might not catch when reading your writing. Or get a classmate to proof it. Agree to proof-read each other’s. (This requires having them finished well before the actual deadline.) Remember that it is always the student’s responsibility to have papers proofread, not someone else’s.
Author’s Story
I have been told numerous times that I am a good writer – “a natural”. Several of my Master’s instructors commented about that on my papers. But the truth is that it is not natural. I proof-read my papers at least four times before submitting them, and I make changes every time. When I read them with fresh eyes (the next day, or hours later), I catch mistakes, and more importantly I see when ideas don’t link together smoothly. Often they need a little more information or a better explanation to link them together. Or I notice where I’ve been redundant. The paper gets better every time I go through it. By the end, it is a much more polished product than when I first thought I was finished.
I am a college instructor and I mark other people’s papers all the time. I am accustomed to looking for mistakes and they pop off the page at me. And yet, I find the very same errors in my own writing. I don’t know how these mistakes end up on the page – but they do! Fortunately, I can catch these errors in a proof-read (or two), but I am very well aware that I’m capable of making them in the first place. Assume your paper needs to be checked and polished. If you have the opportunity, have someone else read it. They can let you know if something doesn’t make sense or leaves the reader confused. They will let you know if you need to condense it and be more succinct. Then fix it.
A good paper seems to flow naturally, and though that may be true, it didn’t necessarily start out that way!
— Mary Shier, College of the Rockies
Many students feel like they are the only one that has a question or the only one that doesn’t understand something in class. I encourage you to ask questions during class, especially if your instructor encourages them. Other students who are too intimidated to ask will be thankful you did. If the instructor doesn’t encourage questions during class, make the effort to ask your questions before or after class or during your instructors’ office hours.
If you take a class offered online, it is wise to ask a lot of questions via the preferred method your instructor recommends. Since the delivery method is different to what most students are used to, it is natural for students in online courses to have more questions. Online students may ask questions to understand the material and to be able to successfully navigate through the course content.
College courses have much more assigned reading than what most high school students are accustomed to, and it can take a while to become comfortable with the workload. Some students fall behind early in keeping up with the reading requirements and others fail to read it at all. You will be most prepared for your class and for learning if you complete the reading assigned before your class. Staying on top of your syllabus and class calendar will help you be aware of your reading assignment deadlines. There is a difference in assigned reading between high school and college. In high school, if a teacher gave a handout to read in class, students would often read it during class to prepare to participate in a class discussion. In college, more reading is assigned with the expectation it will be done outside of the classroom. It is a big adjustment students need to make in order to be successful.
Study in the environment that works best for you, but ensure that you try a study group, especially if you are taking a class in a subject in which you are not strong. Study groups can allow for shared resources, new perspectives, answers for questions, faster learning, increased confidence, and increased motivation.

Preparation for an exam should begin on the first day of class, not when the exam is announced nor the night before an exam. Review your notes frequently to keep material fresh in your head. For the days leading up to the exam, test yourself to see if you can generate the answers. Don’t just passively read your notes and textbook.
Effective studying is an ongoing process of reviewing course material. The first and most important thing you should know is that studying is not something you do a few days before an exam. To be effective, studying is something you do as part of an ongoing learning process, throughout the duration of the term. It’s easy to put off studying if it’s not something you schedule. Block specific times and days for studying. Put the times on your calendar. Stick to the schedule.
Half-assed is defined as poorly or incompetently done.
Think of it this way: You’ve made the decision to come to college. You’re investing time, energy and money into your commitment. Why would you want to half-ass it? Students who miss class, turn in work late or wait until the last minute are half-assing it. Make college a priority and do your best in all of your college work and preparation.
Apply these basic principles and you will be giving yourself the best opportunity to achieve success. Here’s a little secret: apply this to all aspects of life, not just academics and you’ll find success in life!
Author’s Story
When I returned to university for graduate studies, I knew I needed to adopt better study skills than what I used in my undergraduate studies many years earlier. For one thing, I never allotted enough time for reading. I am a critical reader, which can be time consuming as I stop, reflect, reread, problem-solve and connect things to previous concepts. Once I realized this about myself, I decided to schedule more time for reading than I usually anticipated. I even started timing myself to have a sense of how long it takes me to read a chapter, so I could effectively allot an appropriate amount of reading time. I divided up readings for each unit and made a study schedule each week which included daily readings, time in forums, and assignments.
It made a huge difference when I started doing this, because not only did I feel like it kept me on task, but just knowing that all required activities were on the schedule relieved anxiety. It became a necessary ritual on Sunday afternoons to lay out all the tasks in detail for the next week. It always felt doable and set me on the right mental course for the week ahead. This was especially important for the heavy load semesters. Before using this method, it was easy to focus on one course more than another, which then needed correction – which caused angst. Being scheduled in my tasks gave me a sense of control. I chose to make my program a priority. Having a study skills strategy that I stuck to worked!
Once committed to these study strategies, it was necessary to make them work in varied situations. Allotting more time to read the readings, sometimes meant having to read while in the passenger seat of a car, or listen to text-to-speech audio on my cell phone while doing housework or exercise, or reading through meals. Applying them in different contexts became natural. Readings and assignments were constantly part of life no matter what I was doing. Being creative and adapting solutions to varying situations is an important competency in adult education. You too will have to find strategies that work for you.
— Mary Shier, College of the Rockies
There have been a lot of study strategies presented in this chapter, so it may seem a little overwhelming to try to incorporate them all. You will want to reflect on which ones seem like they will be most relevant for you. They are all important, of course; however, some will be more appropriate for you personally depending on your strengths, your weaknesses, your circumstances, your previous study habits, and the requirements of the course you are taking.
Look at the chart below to see examples of how these different criteria can help you adapt your study habits to personalize them to your individual needs.
| Criteria | Example(s) | Impact on study habits |
| Strengths | You are already a strong reader and have exceptional reading comprehension. | You may not need to focus on strategies for reading critically. |
| Weaknesses | You have typically been fairly disorganized with your course materials, homework assignments, and resources.
| You may need to focus on learning environment and organizational strategies.
|
| Circumstances | You are very busy in your life with jobs and parenting responsibilities. | You may need to focus on time management skills, or on alternate methods of study such as listening to audio-books while commuting and doing chores. |
| Previous study habits | In the past you always left studying for tests and working on assignments until the last minute. | You may need to focus on the time management skills. |
| Course requirements | Sometimes specific courses require more of a certain skill than others. For example, biology involves a lot of memory work. | You may need to strategically adopt some memory techniques. |
Exercise: Study Skills Summary
Reflect on the various study skills discussed in Chapter 5 and how they relate to your own studying.
Key Takeaways
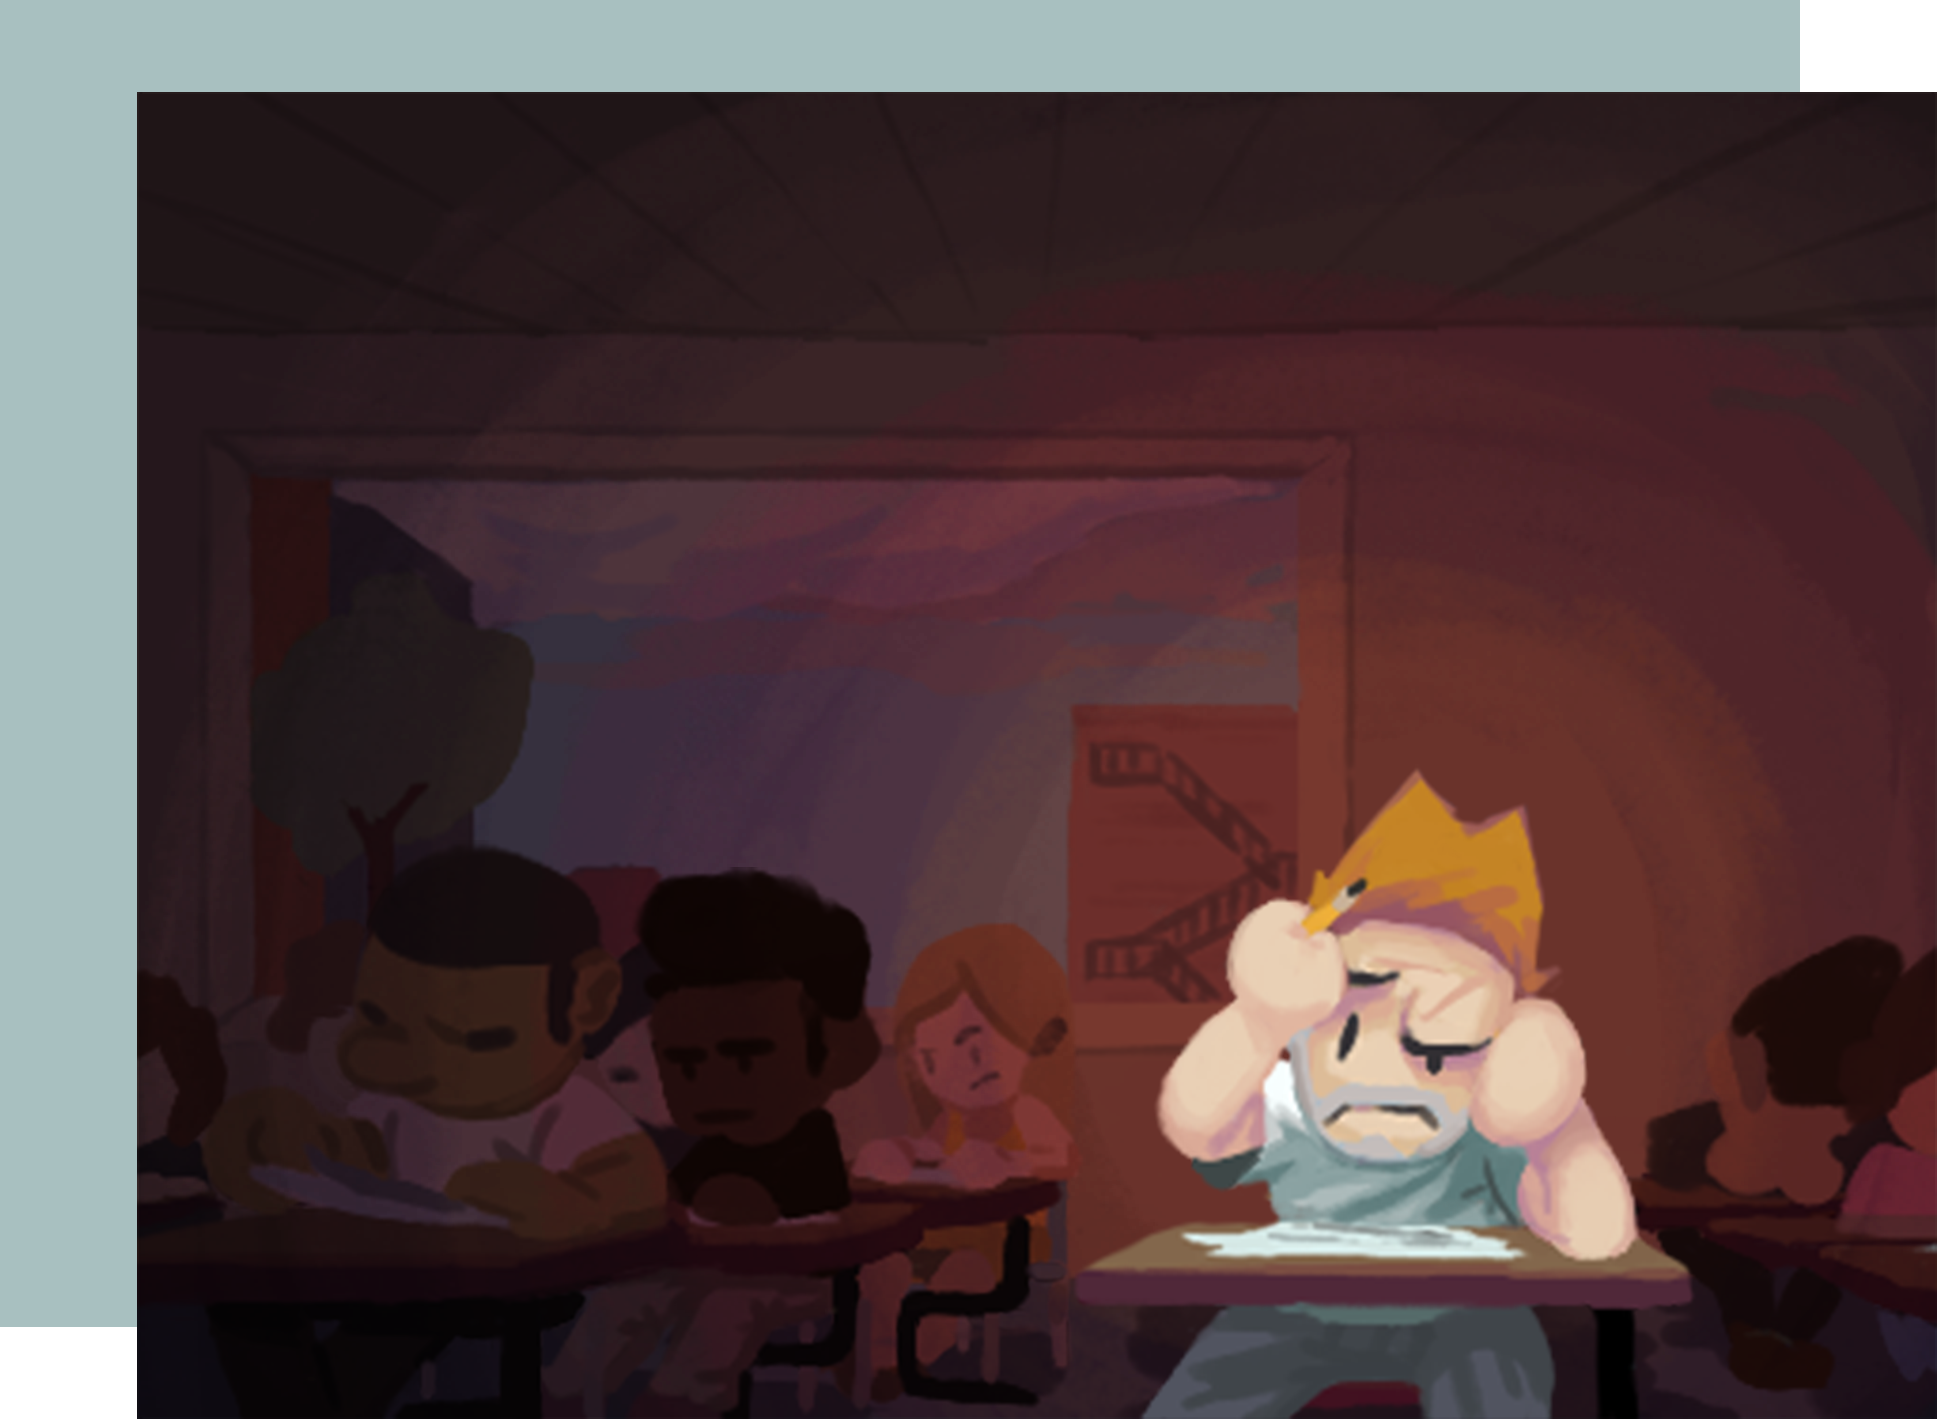
Many students say they are terrible at writing tests. What does it mean to be terrible at writing tests? Does it mean that the student has put effort into studying but has difficulty under pressure? Does it mean that a student studies the wrong material? Is the student prepared but does not execute well? Could the student have a learning disability? Does the student have test anxiety? Is the student missing key strategies for taking tests? It could mean any of these things. But it certainly isn’t something that needs to be permanent. Students willing to work hard and learn can improve their test taking skills and raise their confidence.
Learning Objectives
In this chapter on “Test Taking,” students will:

Taking tests and exams can be stressful. Some people get very anxious before or during a test and it can impact their test results.
Exercise: Testing Your Test Anxiety
Take the true-or-false quiz below (circle T for true or F for false). There are no wrong answers.
| I have a hard time starting to study for a test. | T | F |
| When studying for an exam, I feel desperate or lost. | T | F |
| When studying for an exam, I often feel bored and tired. | T | F |
| I don’t sleep well the night before an exam. | T | F |
| My appetite changes the day of the exam. (I’m not hungry and skip meals or I overeat—especially high-sugar items like candy or ice cream.) | T | F |
| When taking an exam, I am often confused or suffer mental blocks. | T | F |
| When taking an exam, I feel panicky and my palms get sweaty. | T | F |
| I’m usually in a bad mood after taking an exam. | T | F |
| I usually score lower on exams than on papers, assignments, and projects. | T | F |
| After an exam, I can remember things I couldn’t recall during the exam. | T | F |

If you answered true to any of the statements in the table above, you have suffered some of the symptoms of test anxiety. Most people have experienced this. It is normal to feel stress before an exam, and in fact, that may be a good thing. Stress motivates you to study and review, generates adrenaline to help sharpen your reflexes and focus while taking the exam, and may even help you remember some of the material you need. But suffering too many stress symptoms or suffering any of them severely will impede your ability to show what you have learned. Test anxiety can be defined as “a state of uneasiness and distress before and during a test that often lowers performance.” Anxiety during a test interferes with your ability to recall knowledge from memory as well as your ability to use higher-level thinking skills effectively. To learn more about critical thinking and study skills, see Chapter 5 Study Skills.
There are steps you should take if you find that stress is getting in your way:
Video: “Calm Test Anxiety & Relaxation Breathing Technique” (length 3:23)

A YouTube element has been excluded from this version of the text. You can view it online here: https://opentextbc.ca/studentsuccess/?p=163
Exercise: Talking Back to Your Anxious Self
You’ve learned how negative thoughts contribute to test anxiety and keep you from doing as well as you can. Take some time to disarm your most frequent offenders. From the following list, select three negative thoughts that you have experienced (or write your own). Then fill in the second and third columns for each statement, as shown in the example.
Examples of negative thoughts:
| My anxious statement | How rational is this thought? Do you have any evidence that it is true? | Reasonable reinforcing or affirmation statements you can use to replace it. |
|---|---|---|
| Example: I’m drawing a blank.…I’ll never get the answer…I must really be stupid. | I’ve missed questions on things that I studied and knew before (but still passed the test anyway.) OR It’s not reasonable to think I’ll never get the answer. I have forgotten things before that came back to me further along in the test. | I studied this and know it. I’ll visualize where it’s written in my notes to help me trigger my memory. I’ll come back to this at the end and I should think of it by then. I’m not stupid. I will get this. |
Key Takeaways
Exercise: Managing Stress
This chapter has been adapted and remixed from the following sources:
When should you start preparing for the first test? Choose one of the following answers:
If you answered “3. The first day of classes,” you are correct. If you circled all three, you are also correct. Preparing to pass tests is something that begins when learning begins and continues all the way through to the final exam.
Many students, however, don’t start thinking about test taking, whether weekly exams, mid-terms, or finals, until the day before when they engage in an all-nighter. This is an inefficient way to study. Not only is it not enough time to learn a whole unit or chapter, but the brain can only process an average of 5-7 new pieces of information at a time. Additionally, unless memory devices are used to aid memory and to cement information into long term memory (or at least until the test is over tomorrow!) chances are slim that students who cram will effectively learn and remember the information.
Additionally, a lot of students are unaware of the many strategies available to help with the test-taking experience before, during, and after. For starters, take a look at what has helped you so far.
Exercise: Pre-test-taking Strategies
PART A:
Put a check mark next to the pre-test strategies you already employ.
____ Organize your notebook and other class materials the first week of classes.
____ Maintain your organized materials throughout the term.
____ Take notes on key points from lectures and other materials.
____ Make sure you understand the information as you go along.
____ Access your instructor’s help and the help of a study group, as needed.
____ Organize a study group, if desired.
____ Create study tools such as flashcards, graphic organizers, etc. as study aids.
____ Complete all homework assignments on time.
____ Review likely test items several times beforehand.
____ Ask your instructor what items are likely to be covered on the test.
____ Ask your instructor to provide a study guide or practice test.
____ Ask your instructor if part marks will be given.
____ Maintain an active learner attitude.
____ Schedule extra study time in the days just prior to the test.
____ Gather all notes, handouts, and other materials needed before studying.
____ Review all notes, handouts, and other materials regularly.
____ Organize your study area for maximum concentration and efficiency.
____ Create and use mnemonic devices to aid memory.
____ Put key terms, formulas, etc., on a single study sheet that can be quickly reviewed.
____ Schedule study times short enough (1-2 hours) so you do not get burned out.
____ Get plenty of sleep the night before.
____ Set a back-up alarm in case the first alarm doesn’t sound or you sleep through it.
____ Have a good breakfast with complex carbs and protein to see you through.
____ Show up early to get completely settled before the test begins.
____ Use the restroom beforehand to minimize distractions.
PART B
By reviewing the pre-test strategies, above, you have likely discovered new ideas to add to what you already use. Make a list of them and use this list from here forward.
You will notice that many of the strategies listed above have already been mentioned in the Study Skills chapter. This is no co-incidence. Good study habits help lead to good test results!
“By failing to prepare, you are preparing to fail.”
— Benjamin Franklin
Being successful at tests comes down to discipline, preparation and execution. Students wanting to be successful have to have the self-discipline to schedule time to study well in advance of the exam. They have to actually do the work – the preparation needed in order to have the best opportunity for success on the exam. Then they must execute – they have to be able to apply their preparation accordingly and perform well on the exam.
Preparation for an exam is not glamorous. It’s easy to find other things to do that are more interesting and fun. Students need to keep themselves motivated with their “eyes on the prize.” Think of it like this: If the most important event of your life was coming up and you wanted to perform to the best of your ability in that event, you would likely spend some time preparing for it, rehearsing for it, practicing it, etc. A student may argue that an exam would not be the most important event of their life, but if you’re already spending the time, effort, energy and money to attend college, why not do it to the best of your ability?
It would be beneficial to spread this preparation and practice out over time and prepare periodically rather than wait until the last minute and binge study or cram. Your preparation would not be of the same quality and this will likely affect your test score. Binge studying and cramming also are not healthy. Staying up late puts stress on our brain and body, and not getting adequate sleep places our bodies at risk for getting sick.
“One of the most important keys to success is having the discipline to do what you know you should do, even when you don’t feel like doing it.”
— Unknown
“The will to succeed is important, but what’s more important is the will to prepare.”
— Bobby Knight
Everyone wants to be successful. When the exam is passed out, everyone wants to perform well. But what often separates successful students and less successful students is the preparation time put in.
Studying the right thing is a process and a skill. As you gain more experience, you will learn how to become better at knowing what to study. It can be very frustrating to spend a lot of time preparing and studying and then finding out that what you studied was not on the exam. You will see a lot of variance with exams due to different instructors, classes and types of tests. The better you become at predicting what will be on the exam and study accordingly, the better you will perform on your exams. Try placing yourself in your instructor’s shoes and design questions you think your instructor would ask. It’s often an eye-opening experience for students and a great study strategy.
The more information you have about the exam, the better you can prepare for content, allocation of time spent on aspects of the exam, and the more confident you will be in knowing how and when to attempt to answer questions.
Some professors and instructors will tell you how many questions there will be, what format the exam will be in, how much time you will have, etc., and others will not. Students should ask questions about the exam if there is not information given. Students should also ask those questions before class, after class, in professors’ office hours or via email if it doesn’t happen during class.
Ask about the format. Is it open book? Is it timed? What types of questions will be on it? What material will it cover? (e.g. chapters 1-3, or only chapter 3) If you’re lucky an instructor will give you areas to focus your study on. How will it be scored? Knowing these things will make it easier to prepare for the test.
What kind of questions would you include if you were the instructor? What areas did the instructor personally show the most interest in? Brainstorm possible questions with your study group. Look for possible questions in your notes. Review past quizzes and test to see what kinds of questions the instructor likes to ask. Above all, take it seriously whenever your instructor says, “This will be on the test.” or “Make sure you know this for the test.” They are giving you a huge study hint. Make sure to have your highlighter handy for these occasions.

Before the exam, it is important to prepare your brain and body for optimal performance for your exam. Do not cram the night before. Cramming is not a substitute for doing your assignments and studying consistently over time. Get a good night’s sleep. It is far more important to get a good night’s sleep and face your test fresh and well rested so that you can think clearly. Make sure you eat (nutritiously) before the exam to give you energy and concentration to do well on the exam. Include brain foods, such as those rich in omega-3 oils, and avoid heavy foods that are rich in fat and sugar. (After the exam, you can celebrate with a cheeseburger, fries, and milkshake – but not before the exam!) It’s healthy to exercise the day before and if possible a few hours before the exam, even if it’s just going for a walk outside. You can use the time to summarize concepts and recall things in your mind. (e.g. as you are walking you can list the parts of the respiratory system as you visualize the diagram in your mind.) This is a great way of reviewing.
All tests are designed to determine how much you know about a particular subject at a particular point in time. But you should be aware of differences in types of tests because this will help guide how you prepare for them. Tests can be grouped into various categories based on how they are delivered. Each type has its own unique strategies.
Key Takeaways

You’ve done all you can within reason and within your circumstances to prepare for the test. You’ve studied hard, practised questions, and got a good night’s sleep; you ate nutritiously, and arrived to the test early and prepared. Now it’s time to write the test. There are specific strategies you can use in the midst of the test that will help you do the best you can do.
Here is a list of the most common–and useful–strategies for test-taking.
Create a Test Plan
Look for opportunities where some areas of the exam are worth more points than others. For example: An exam consists of 21 questions, with 10 being True/False, 10 being multiple choice, and one essay question. The T/F questions are worth 1 point each (10 points), the multiple-choice questions are worth 2 points each (20 points), and the essay question is worth 30 points. You know that the essay question is the most valuable (it is worth half of the value of the exam). And we should allocate our time for it accordingly. Do a quick analysis of time to be able to spend your time on the exam wisely. You want to spend some time with the essay question since it is so valuable, without sacrificing adequate time to ensure the T/F and multiple-choice questions are answered.
Often, the order of the exam in this scenario will be: T/F first, multiple choice second and essay third. Most students will go in the chronological order of the exam, but you may want to start with the essay, or at least decide on the essay question (if there is a choice between given options) and write the outline (plan) for the essay with key points before diving into the rest of the exam.
If this exam were to last for 40 minutes, a student could make a rough plan to spend 15-20 minutes on the essay question, ten minutes on the multiple choice, three-five minutes on the T/F and 5-10 minutes reviewing answers, checking over the essay, and going back to questions that were skipped.
Video: “Mr. Bean – The Exam” (length 5:56)

A YouTube element has been excluded from this version of the text. You can view it online here: https://opentextbc.ca/studentsuccess/?p=170
Exercise: Test-taking Tips
Write a letter of advice to Chen incorporating 10 test-taking tips and strategies you think will help him.
Chen believes he is good at organization, and he usually is–for about the first two weeks of classes. He then becomes overwhelmed with all of the handouts and materials and tends to start slipping in the organization department. When it comes to tests, he worries that his notes might not cover all of the right topics and that he will not be able to remember all of the key terms and points–especially for his math class. During tests, he sometimes gets stuck on an item and tends to spend too much time there. He also changes answers sometimes but finds out later that his original selection was correct. Chen is also easily distracted by other students and noises which makes it hard for him to concentrate, and, unfortunately, he does admit to occasionally “cramming” the night before.
As well as using the above strategies during the test, it is important to be aware of the five principal types of questions on tests and to know specific strategies for each type to help maximize success.
Look for qualifiers. A qualifier is a word that is absolute. Examples are: all, never, no, always, none, every, only, entirely. They are often seen in false statements. This is because it is more difficult to create a true statement using a qualifier like never, no, always, etc. For example, “All cats chase mice.” Cats may be known for chasing mice, but not all of them do so. The answer here is false and the qualifier “all” gave us a tip. Qualifiers such as: sometimes, many, some, most, often, and usually are commonly found in true statements. For example: “Most cats chase mice.” This is true and the qualifier “most” gave us a tip. Here is another example. “Delia flirts with every man she meets.” Though the statement may seem true because you know Delia, there was a time 5 years ago that she met a man named Bob, and she didn’t flirt with him. Though the temptation is to say, “true”, the one instance that it didn’t happen (when she met Bob) makes the actual answer, “false”. Similarly in a test, if you can think of one exception in a statement with an absolute qualifier (i.e. even one instance that the statement wouldn’t be true), then the answer is false.
Make sure to read the entire statement. All parts of a sentence must be true if the whole statement is to be true. If one part of it is false, the whole sentence is false. Long sentences are often false for this reason.
If students don’t know the answer, they should guess on True or False questions unless there is a penalty for an incorrect answer. There is a fifty percent chance of guessing correctly! And if you have to guess, guess the one that seems to make the most sense to you, and if you still have no idea, guess True, because most tests include more true statements than false.
It is important to read each statement carefully. Think of multiple choice questions as four (or five) true or false statements in one. One of the statements is true (the correct answer) and the others will be false. If you have options such as “all of the above,” or “both A and B,” make sure each item is completely true (no exceptions) before selecting those options. If you know your material well, you will be able to pick out the true statements. If you are unsure of the material, there are some strategies to help you come up with the right answer.
Apply the same strategy toward qualifiers as you did in the True False questions. If you see an absolute qualifier in one of the answer choices, it is probably false. If a statement says something “always” happens and you can think of even one exception, then it is false. Try to identify the true statement, but before you choose it as the right answer, always read the other statements because you may find another statement that sounds true. Eliminate answers you know to be false. Then discern between the two true-sounding statements. While working through a question, it is helpful to x-out the ones you know are false; it will save time if you need to go over the question again.
If there is no penalty for incorrect answers, guess if you are not certain of the answer. If there is a penalty for incorrect answers, common logic is to guess if you can eliminate two of the answers as incorrect (pending what the penalty is). If there’s a penalty and you cannot narrow down the answers, it’s best to leave it blank. You may wish to ask your instructor for clarification.
Answers that are strange and unrelated to the question are usually false. If two answers have a word that looks or sounds similar, one of those is usually correct. For example: abductor/ adductor. If you see these as two of the four or five choices, one of them is usually correct. Also look for answers that are grammatically incorrect. These are usually incorrect answers.
Although less common than the other types of exams, you will likely see some matching exams during your time in college. First, read the instructions and take a look at both lists to determine what the items are and their relationship. It is especially important to determine if both lists have the same number of items and if all items are to be used, and used only once.
Matching exams become much more difficult if one list has more items than the other or if items either might not be used or could be used more than once. If your exam instructions do not discern this, you may wish to ask your instructor for further clarification.
Students should take a look at the whole list before selecting an answer because a more correct answer may be found further into the list. If one column is short phrases and the other column is single words, work from the column with phrases and look for the single words to match (not the other way around). If both columns have single words, group them by parts of speech (nouns with nouns, verbs with verbs etc.). Mark items when you are sure you have a match and cross out these options to eliminate answers for the remainder of the matching. Guessing (if needed) should take place once you have selected answers you are certain about.
Short-answer questions are designed for you to recall and provide very specific information (unlike essay questions that ask you to apply critical thinking to that information.) Read all of the instructions first. Budget your time and then read all of the questions. Answer the ones you know best or feel the most confident with. Then go back to the other ones. If you do not know the answer and there is no penalty for incorrect answers, guess. Use common sense. Sometimes instructors will award partial credit for a logical answer that is related even if it is not the correct answer.
Make sure to look at the marking system. If short answer questions are worth 3-5 marks out of 100, then likely the instructor is looking for about 2-3 relevant sentences, not a full paragraph. If they are out of twenty marks, you’ll want to include more information in more depth.
Author’s Story
I have a tendency to write too much on short-answer test questions. I want to write down everything I know about the topic. It’s great because I’ll usually get full marks on the question, but an instructor once told me that I would have had full marks with my first few sentences. The trouble is that if you spend too long on a short-answer question, you may run out of time for other questions, especially a long-answer essay style question that really does require you to go into depth. Write down a few of the most relevant things on your short-answer question and come back and write more later if there’s time at the end.
— Mary Shier, College of the Rockies
Knowing the format of the exam can help you determine how to study. If you know that you are taking a True-False or Multiple Choice exam, you will need to discern whether a statement is True or False. You will need to know subject content for the course. But if you are studying for short answer and especially for essay questions, you must know a lot more. For essay questions, you must have much greater content knowledge and be able to make a coherent argument that answers the question using information from textbooks, lectures or other course materials. You will have to connect themes with examples. Essay questions evaluate your thinking and reasoning skills applied to the course material. You will have to place a lot more time and thought into studying for an essay exam than for True-False or Multiple Choice exams.
Read the essay question(s) and the instructions first. Underline or circle key words in the question. Plan your time wisely and organize your answer before you start to write. Make a quick outline to organize the essay and include all key points. Address the answer to the question in your first paragraph and reiterate it in your last paragraph (conclusion). You would be surprised how many essays are written that discuss all kinds of things about the topic, but actually never answer the question! It may help to restate the original question. Write clearly and legibly. Instructors have difficulty grading essays that they cannot read. Clearly state what you are trying to say. Don’t expect that the instructor knows what you mean. Write the essay as if you are explaining it to someone who knows nothing about the topic. Please note that essay questions often have multiple acceptable answers, so don’t question whether your answer is correct or not. Just make sure you’ve backed up what you’ve said.
Save some time for review when you have finished writing to check spelling, grammar and coherent thought in your answer. Inevitably you will find things that need to be clarified. Write your essay double-spaced. This leaves room to add in words or phrases in the proof-reading stage without making a mess of your paper. Finally, make sure you have addressed all parts of the essay question.
| Word | What It Means | What the Instructor Is Looking For |
|---|---|---|
| Analyze | Break concept into key parts. | Don’t just list the parts; show how they work together and illustrate any patterns. |
| Compare | Show similarities (and sometimes differences) between two or more concepts or ideas. | Define the similarities and clearly describe how the items or ideas are similar. Do these similarities lead to similar results or effects? Note that this word is often combined with “contrast.” If so, make sure you do both. |
| Contrast | Show differences between two or more concepts or ideas. | Define the differences and clearly describe how the items or ideas are different. How do these differences result in different outcomes? Note that this word is often combined with “compare.” If so, make sure you do both. |
| Critique | Judge and analyze. | Explain what is wrong—and right—about a concept. Include your own judgments, supported by evidence and quotes from experts that support your point of view. |
| Define | Describe the meaning of a word, phrase, or concept. | Define the concept or idea as your instructor did in class—but use your own words. If your definition differs from what the instructor presented, support your difference with evidence. Keep this essay short. Examples can help illustrate a definition, but remember that examples alone are not a definition. |
| Discuss | Explain or review. | Define the key questions around the issue to be discussed and then answer them. Another approach is to define pros and cons on the issue and compare and contrast them. In either case, explore all relevant data and information. |
| Explain | Clarify, give reasons for something. | Clarity is key for these questions. Outline your thoughts carefully. Proofread, edit, proofread, and proofread again! Good explanations are often lost in too many words. |
| Illustrate | Offer examples. | Use examples from class material or reading assignments. Compare and contrast them to other examples you might come up with from additional reading or real life. |
| Prove | Provide evidence and arguments that something is true. | Instructors who include this prompt in an exam question have often proven the hypothesis or other concepts in their class lectures. Think about the kind of evidence the instructor used and apply similar types of processes and data. |
| Summarize | Give a brief, precise description of an idea or concept. | Keep it short, but cover all key points. This is one essay prompt where examples should not be included unless the instructions specifically ask for them. (For example, “Summarize the steps of the learning cycle and give examples of the main strategies you should apply in each one.”) |
Exercise: Test Your Knowledge
| Across | Down |
|---|---|
| 2. “Always,” “never,” and “every” are words that usually indicate the answer is ___________. | 1. It helps to group words in matching columns by ___________________ ___ _______________. |
| 3. A way to organize your thoughts for an essay | 4. Clarify, give reasons for something |
| 6. Short answer questions require a __________ answer. | 5. Essay questions often have more than one ________ answer. |
| 8. Describe the meaning of a word | 7. Show similarities and differences |
| 9. Give a brief, precise description of an idea or concept | 12. Most common answer in true and false questions |
| 10. Type of question used to evaluate thinking and reasoning | |
| 11. Since instructors need to read many essays, it is important to write _________. |
Key Takeaways
Lastly, if you finish the test early, use the remaining time to review your answers and make corrections or additions before submitting your exam.
Make sure you have written your full name on the test. It’s shocking how many students write their first name only and expect the instructor to figure it out. It’s also shocking how many students forget to write their names at all. You don’t want to go through all that preparation and stress and then not get credit for your work. Lastly, make sure to hand your paper in!
Video: “Funny school video of kid taking a test” (length 1:04)

A YouTube element has been excluded from this version of the text. You can view it online here: https://opentextbc.ca/studentsuccess/?p=170
So far, we have focused on how to study for and take tests effectively. This section discusses how to use test results to their greatest benefit. Some of your most important learning begins when your graded test paper is returned to you. Your first reaction, of course, is to see what grade you received and how you did compared with your classmates. This is a natural reaction.
Make sure you listen to the instructor as the papers are returned. What is the instructor saying about the test? Is there a particular point everyone had trouble with? Does the instructor generally think everyone did well? The instructor’s comments at this point may give you important information about what you should study more, about the value of review sessions, and even about possible questions for the next exam.
Although you may be tempted to throw away the exam, don’t. It is a very helpful tool for the next phase of preparing for learning. This is a three-step process, beginning with evaluating your results.
When you receive your test back, sit quietly and take a close look at it. What questions did you get wrong? What kind of mistakes were they? (See Table 6.41 “Exam Errors and How to Correct Them” below.) Do you see a pattern? What questions did you get right? What were your strengths? What can you learn from the instructor’s comments?
Now think of the way in which you prepared for the exam and the extent to which you applied the exam strategies described earlier in this module. Were you prepared for the exam? Did you study the right material? What surprised you? Did you read the entire test before starting? Did your time allocation work well, or were you short of time on certain parts of the exam?
| Examples | Corrective Steps |
|---|---|
| I did not study the material for that question (enough). | Practice predicting possible questions better. |
| I did not prepare enough. | Join a study group. Create a study schedule. Review the study skills chapter. |
| Examples | Corrective Steps |
|---|---|
| I ran out of time. | Read the entire test before starting. Make a plan and allocate your time. Watch the clock. |
| I did not read the directions carefully. | Read carefully and reread to ensure you got it right. |
| I misread or misunderstood the question. | Read carefully and reread to ensure you got it right. |
| I confused terms or concepts that I actually know well. | Read carefully and think before answering a question. Go back and check answers at the end and you will often catch these mistakes. |
| Examples | Corrective Steps |
|---|---|
| I studied the material but couldn’t make it work with the question. | Seek additional help from the instructor. |
| I didn’t understand what the instructor wanted. | Go to all classes, labs, and review sessions. Get caught up on any missed classes. |
| I confused terms or concepts. | Join a study group. Review concepts throughout the term. |
| I didn’t understand why I got the question wrong. | Ask your instructor for clarification. |
| Everything seemed to be a jumble in my mind and I mixed up what connected with what. | Don’t cram. Schedule regular study time for this course. |
| Examples | Corrective Steps |
|---|---|
| The instructor misread my writing. | Slow down! Don’t rush through the exam. Take the time to do things right the first time. |
| I didn’t erase a wrong answer completely. | Cross things out clearly rather than use an eraser. It is more time efficient. |
| I forgot to go back to a question I had skipped over. | Use the last 5 minutes of a test to go over it and check you have answered all the questions. |
| I miscopied some calculations or facts from my worksheet. | Copy things carefully. This is a frustrating way to lose marks. |
Based on your analysis of your test, identify the kind of corrective steps you should take to improve your learning and test performance. Implement those steps as you begin your preparation for your next class. If you don’t learn from your mistakes, you are doomed to repeat them; if you don’t learn from your successes, it will be harder to repeat them.
The second step in making your test work for you is to correct your wrong answers. The last time you wrote the information (when you took the test), you created a link to wrong information in your memory, so that must be corrected.
Your corrected quizzes and midterm exams are an important study tool for final exams. Make sure you file them with your notes for the study unit. Take the time to annotate your notes based on the exam. Pay particular attention to any gaps in your notes on topics that appeared in the quiz or exam. Research those points in your text or online and complete your notes. Review your exams throughout the term (not just before the final) to be sure you cement the course material into your memory.
When you prepare for the final exam, start by reviewing your quizzes and other tests to predict the kinds of questions the instructor may ask on the final. This will help focus your final studying when you have a large amount of coursework to cover.
If your instructor chooses not to return tests to students, make an appointment to see the instructor soon after the test to review it and your performance. Take notes on what you had trouble with and the expected answers. Add these notes into your study guide. Make sure you don’t lose out on the opportunity to learn from your results.
Key Takeaways
Exercise: After the Test
Throughout this book, we have focused on the active process of learning, not just on how to get good grades. The attitude of some students that grades are the be-all and end-all in academics has led many students to resort to academic dishonesty to try to get the best possible grades or handle the pressure of an academic program. Some cultures have a much more relaxed attitude towards cheating, and with the rise of international students in Canadian post-secondary institutions, students must be aware that Canadian institutions take this very seriously. No matter what your reason, it is never OK to cheat.
Although you may be tempted if you’ve heard people say, “Everybody does it,” or “It’s no big deal at my school,” you should be mindful of the consequences of cheating:

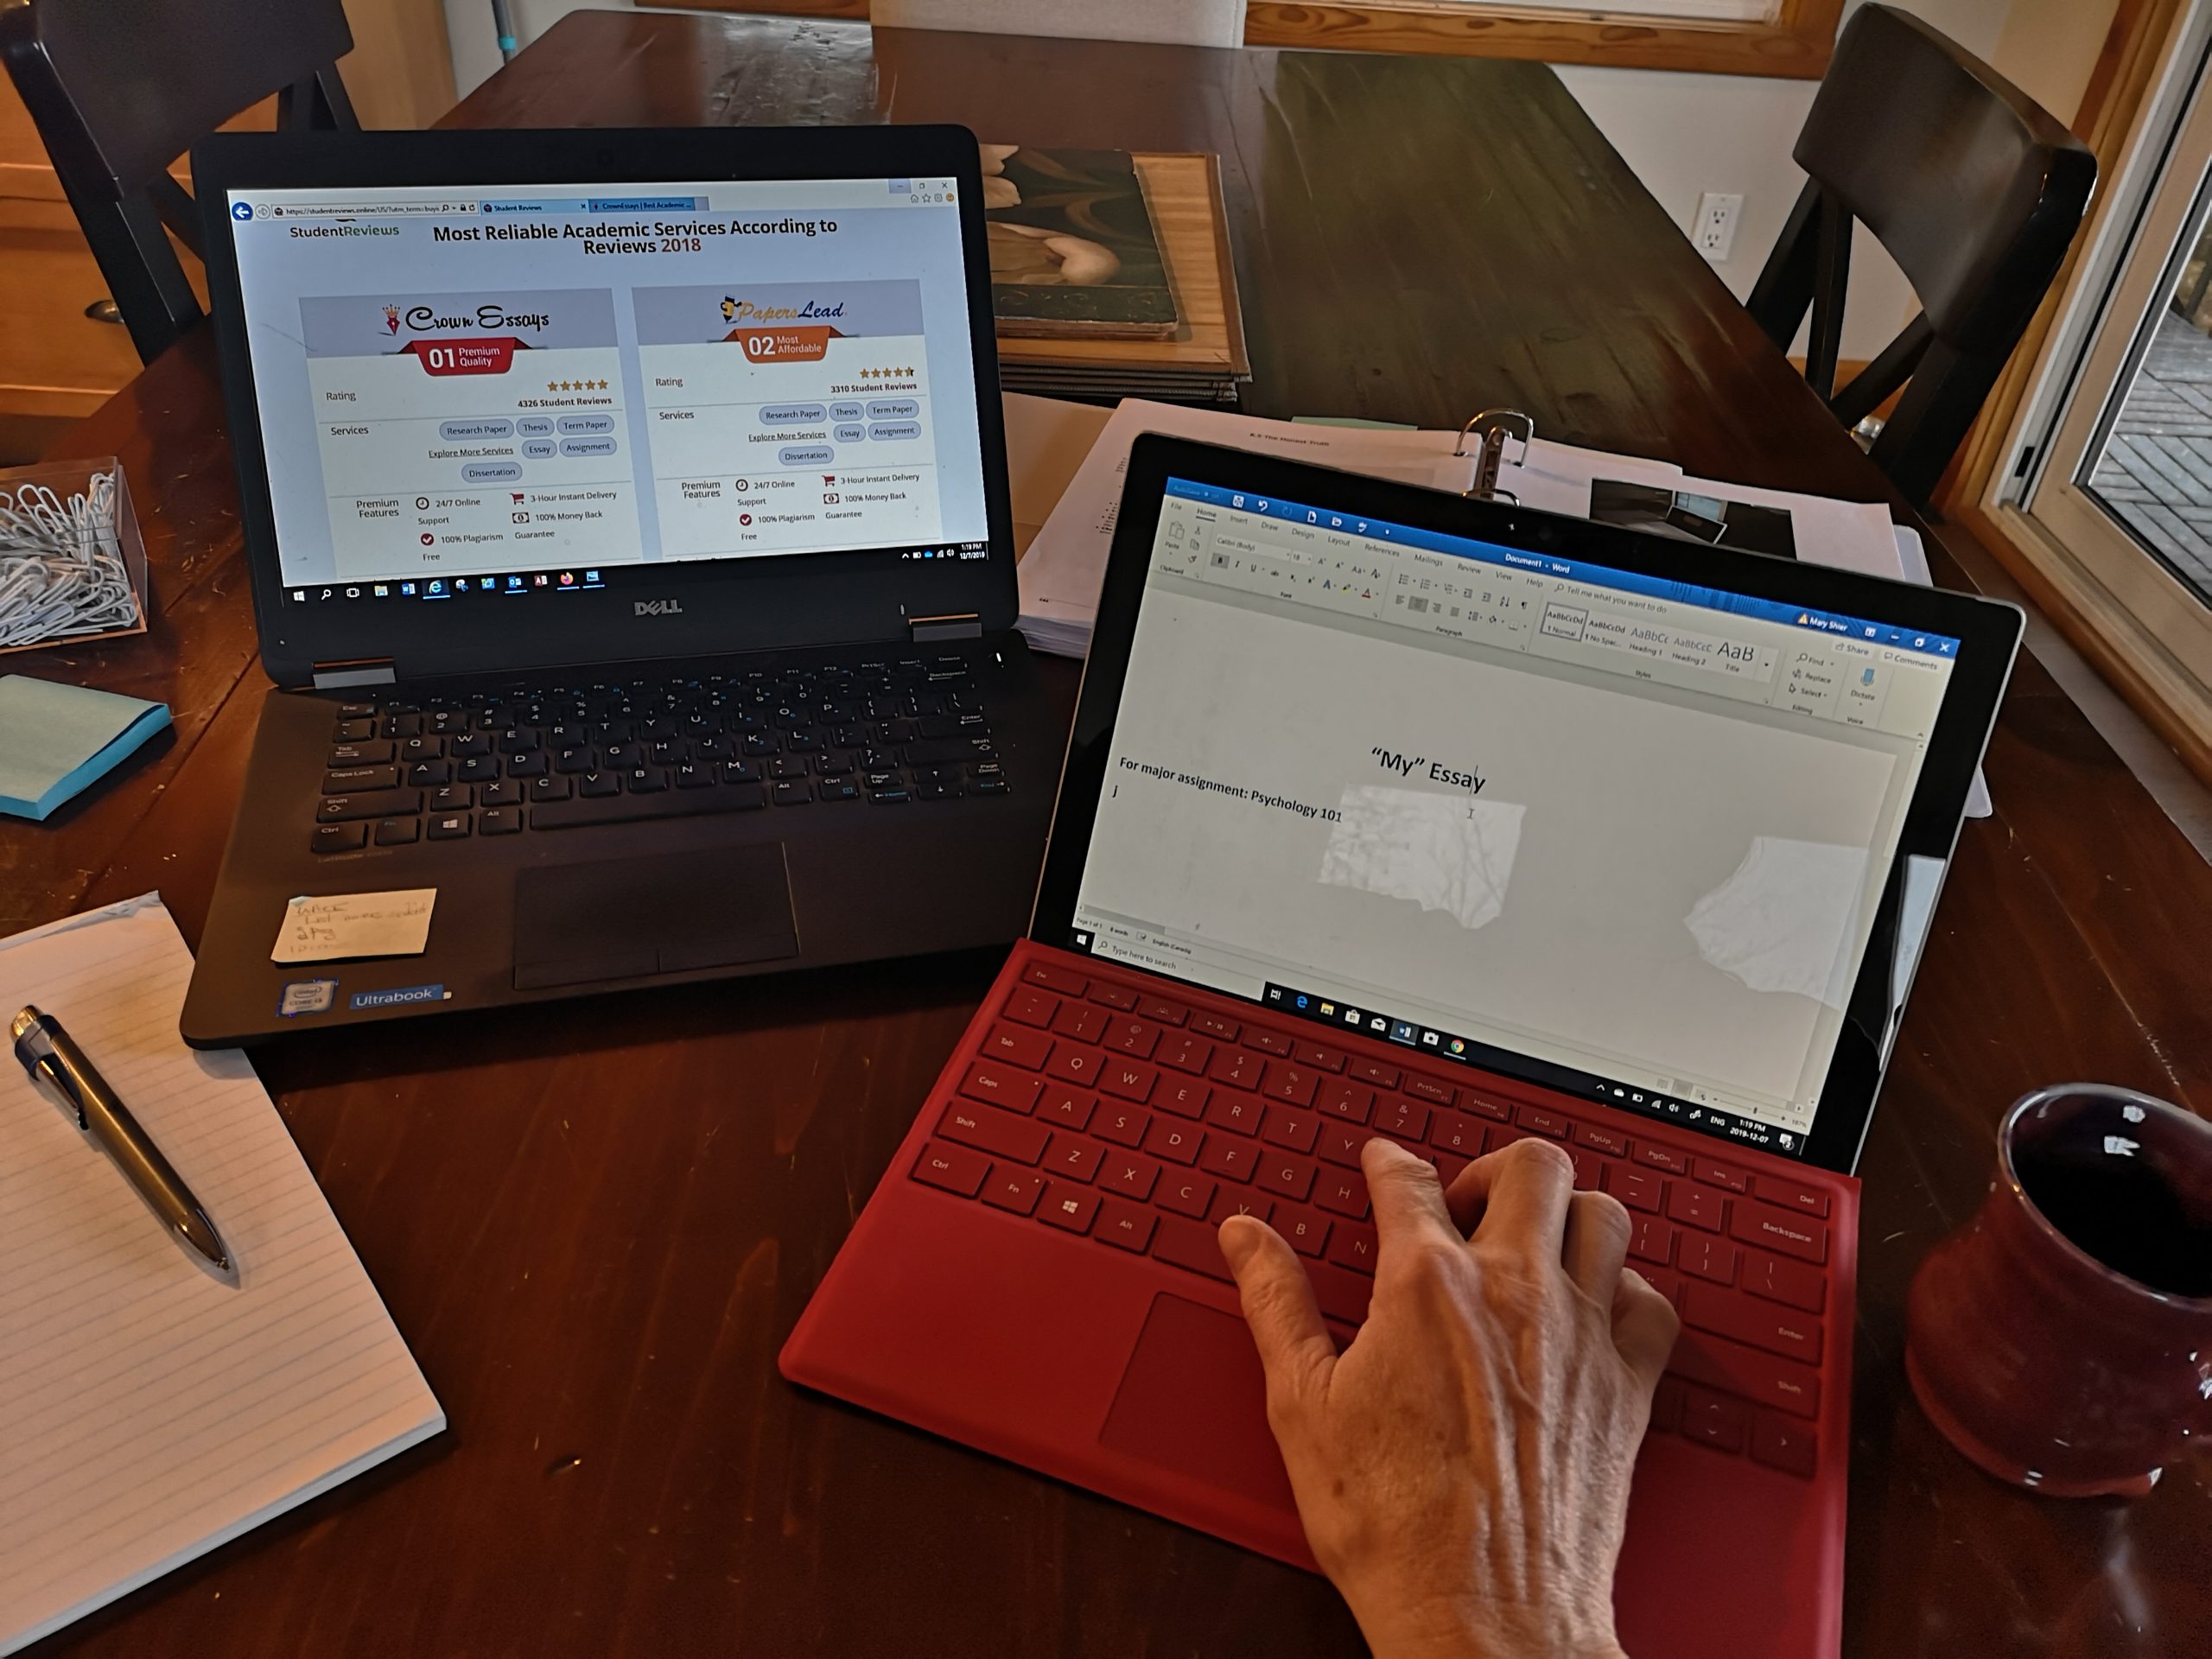
Technology has made it easier to cheat. Your credit card and an internet connection can procure a paper for you on just about any subject and length. You can copy and paste for free from various websites. Students have made creative use of texting and video on their cell phones to gain unauthorized access to material for exams, but be aware that technology has also created ways for instructors to easily detect these forms of academic dishonesty. Most universities make these tools available to their instructors. Instructors are also modifying their testing approaches to reduce potential academic misconduct by using methods that are harder to cheat at (such as in-class essays that evaluate your thinking and oral presentations).
If you feel uneasy about doing something in your university or college work, trust your instincts. Confirm with the instructor that your intended form of research or use of material is acceptable. Cheating just doesn’t pay.
Examples of Academic Dishonesty
Academic dishonesty can take many forms, and you should be careful to avoid them. The following list is a clear and complete compilation of what most institutions will consider unacceptable academic behaviour:
Key Takeaways
Exercise: Academic Dishonesty
Exercise: Chapter Review I
Exercise: Chapter Review II
The following test will allow you to practice the strategies for each question type outlined in Chapter 6:
I. Multiple-choice section (10 points)
a. analyze
b. prove
c. erase
d. illustrate
e. summarize
2. After getting a test back, you should:
a. analyze the types of questions you got wrong
b. correct your wrong answers
c. integrate your test into your study guide
d. identify any possible study and preparation errors
e. all of the above
II. True-or-false section (10 points)
III. Matching column section (10 points)
| ____ 1. Define | A. A test where the student can consult notes and/or textbooks |
| ____ 2. Study group | B. To describe pros and cons and compare them |
| ____ 3. Open-book test | C. To describe the meaning of a word, phrase, or concept |
| ____ 4. Discuss | D. Your own personalized study guide |
| ____ 5. Class and assignment notes | E. Three or four students from a class who meet regularly to review class material and encourage each other |
IV. Short answer section (15 points)
V. Essay section (55 points)
Exercise: Make an Action List
Make an action list to prepare for your next test.
List two things that you will do to…
When making your list, write down the date you expect to take each action and how you will know when you accomplish each action.
| What I will do to… | Description of action | Date I expect to take each action | How I will know I accomplished each action |
|---|---|---|---|
| Reduce my testing anxiety (action 1) | |||
| Reduce my testing anxiety (action 2) | |||
| Improve my study effectiveness (action 1) | |||
| Improve my study effectiveness (action 2) | |||
| Improve my performance on exams (action 1) | |||
| Improve my performance on exams (action 2) |
Key Takeaways
Test taking is stressful, but salient concepts and strategies help make it go smoother. Rather than thinking of it as a stressful source of angst, think of it as an opportunity to demonstrate all that you have learned.
A great aspect of time is its equality. Regardless of race, religion, or age, everyone has the same amount of time in a day, week, month and year. Wealthy people cannot buy more time and poor people do not receive less time. A minute for a tall person is the same amount of time for a short person. An hour for a woman is the same amount of time for a man. Regardless of how many languages someone speaks, their sexual orientation, ethnicity, educational background, income or experience, everyone has 365 days in a year. Granted some people will live longer than others, but everyone has the same amount of time every day as everyone else.
Time is also how we keep track of when we’re supposed to be and where we’re supposed to be (work, home, class, meeting friends and family, etc.). Think about how many measures of time you have in your home (clocks, watches, cell phones, TVs, DVRs, computers, microwaves, ovens, thermostats, etc.). It is obvious time is important to us.
We cannot go back in time. If I used my time poorly last Wednesday, I can do nothing to get it back. Other commodities may allow for accumulating more or starting over, but time does not. We cannot “save” time or earn more time.
“If you had a bank that credited your account each morning with $86,400, but carried no balance from day to day and allowed you to keep no cash in your account, and every evening cancelled whatever part of the amount you had failed to use during the day, what would you do? Draw out every cent, of course! Well, you have such a bank, and its name is time. Every morning it credits you with 86,400 seconds. Every night it writes off as lost whatever of these you have failed to invest to good purpose. It carries no balance; it allows no overdrafts. Each day it opens a new account with you. Each night it burns the record of the day. If you fail to use the day’s deposit, the loss is yours. There is no going back. There is no drawing against the morrow. You must live in the present – on today’s deposit. Invest it so as to get the utmost in health and happiness and success.”
— Anonymous
We often bring up efficiency and effectiveness to describe how people spend their time. What is your relationship with time? Are you usually early, right on time or late? Do you find yourself often saying, “I wish I had more time?” Are you satisfied with your relationship with time or would you like to change it?
One of the challenges many adult students face is being over-committed. Some are working full-time and going to school full-time. Students may be taking care of children, siblings, parents, or be care-givers for loved ones with health needs. Students can have a multitude of other commitments and responsibilities. It can be difficult to take action to complete goals when there are so many areas competing for our time. And sometimes we cannot “do it all.” Sometimes we need to prioritize, let something go, adjust and reevaluate what the most important things are to us.
Other students may struggle because college does not have as much structure as they may have been used to in high school. They may think, “Why should I start a homework assignment now when I don’t have anything I have to do for the next three days?” This mindset usually leads to the student waiting until the last minute to start the assignment and as a result, the quality of work is not high.
Time management for successful university studying involves these factors:
For every hour in the classroom, university students should spend, on average, about two additional hours on that class reading, studying, writing papers, and so on. If you’re a full-time student with fifteen hours a week in class, then you need another thirty hours for the rest of your academic work. That forty-five hours is about the same as a typical full-time job. If you work part time, time management skills are even more essential. These skills are still more important for part-time university students who work full time and commute or have a family. To succeed in university, virtually everyone has to develop effective strategies for dealing with time. In this chapter, you will learn strategies for time management and discover tools to help you implement them.
Learning Objectives
In this chapter on “Time Management,” students will:
This chapter includes content remixed from the following sources:
Following are some strategies you can begin using immediately to make the most of your time:


Procrastination is a way of thinking that lets one put off doing something that should be done now. This can happen to anyone at any time. It’s like a voice inside your head keeps coming up with these brilliant ideas for things to do right now other than studying: “I really ought to get this room cleaned up before I study” or “I can study anytime, but tonight’s the only chance I have to do X.” That voice is also very good at rationalizing: “I really don’t need to read that chapter now; I’ll have plenty of time tomorrow at lunch.…”
Watch this one minute video which demonstrates just how ridiculous procrastination is.
Video: “‘Procrastination’ Tales of Mere Existence” (length 1:21)

A YouTube element has been excluded from this version of the text. You can view it online here: https://opentextbc.ca/studentsuccess/?p=189
Procrastination is very powerful. Some people battle it daily, others only occasionally. Most university students procrastinate often, and about half say they need help avoiding procrastination. Procrastination can threaten one’s ability to do well on an assignment or test.
People procrastinate for different reasons. Some people are too relaxed in their priorities, seldom worry, and easily put off responsibilities. Others worry constantly, and that stress keeps them from focusing on the task at hand. Some procrastinate because they fear failure; others procrastinate because they fear success or are so perfectionistic that they don’t want to let themselves down. Some are dreamers. Many different factors are involved, and there are different styles of procrastinating.
Just as there are different causes, there are different possible solutions for procrastination. Different strategies work for different people. The time management strategies described earlier can help you avoid procrastination. Because this is a psychological issue, some additional psychological strategies can also help:
Video: “Inside the Mind of a Master Procrastinator” (length 14:03)

A TED element has been excluded from this version of the text. You can view it online here: https://opentextbc.ca/studentsuccess/?p=189
If you’re both working and taking classes, you seldom have large blocks of free time. Avoid temptations to stay up very late studying, for losing sleep can lead to a downward spiral in performance at both work and school. Instead, try to follow these guidelines:
Living with family members often introduces additional time stresses. You may have family obligations that require careful time management. Use all the strategies described earlier, including family time in your daily plans the same way that you would include hours spent at work. Don’t assume that you’ll be “free” every hour you’re home, because family events or a family member’s need for your assistance may occur at unexpected times. Schedule your important academic work well ahead and in blocks of time you control. See also the earlier suggestions for controlling your space: you may need to use the library or another space to ensure you are not interrupted or distracted during important study times.
Students with their own families are likely to feel time pressures. After all, you can’t just tell your partner or kids that you’ll see them in a couple of years when you’re not so busy with job and university! In addition to all the planning and study strategies discussed so far, you also need to manage your family relationships and time spent with family. While there’s no magical solution for making more hours in the day, even with this added time pressure there are ways to balance your life well:

Combine activities to get the most out of time. Don’t let your children watch television or play video games off by themselves while you’re cooking dinner, or you may find you have only twenty minutes family time together while eating. Instead, bring the family together in the kitchen and give everyone something to do. You can have a lot of fun together and share the day’s experiences, and you won’t feel so bad then if you have to go off and study by yourself.
Student athletes often face unique time pressures because of the amount of time required for training, practice, and competition. During some parts of the year, athletics may involve as many hours as a full-time job. The athletic schedule can be grueling, involving weekend travel and intensive blocks of time. You can be exhausted after workouts or competitions, affecting how well you can concentrate on studies thereafter. Students on athletic scholarships often feel their sport is their most important reason for being in university, and this priority can affect their attitudes toward studying. For all of these reasons, student athletes face special time management challenges. Here are some tips for succeeding in both your sport and academics:

Laura Vanderkam’s TED Talk helps with perspective on free time.
Video: “How to Gain Control of Your Free Time” (length 11:53)

A TED element has been excluded from this version of the text. You can view it online here: https://opentextbc.ca/studentsuccess/?p=189
You must make time for the things that are most important to you. In order to make time, you may need to decide you will not do something else.
The ability to say “no” cannot be underestimated. It isn’t easy to say “no,” especially to family, friends and people that like you and whom you like. Most of us don’t want to say “no,” especially when we want to help. But if we always do what others want, we give others the power to control our lives, and we won’t accomplish the things that we want—the things that are most important to us.
Ask yourself:
Have you ever ordered an appetizer, salad, beverage or bread, then felt full halfway through your entree? In situations like this many people claim, “my eyes were bigger than my stomach.” This is also true with planning and goal setting. It may be that your plan is bigger than the day. Experiment with what you want to accomplish and what is realistic. The better you can accurately predict what you can and will accomplish and how long it will take, the better you can plan, and the more successful you will be.
Exercise: Time Management Strategies
Key Takeaways
This chapter is remixed from the following sources:
Calendar planners and to-do lists are effective ways to organize your time. Many types of academic planners are commercially available (check your university bookstore), are digitally available, or you can make your own. Some people like a page for each day, and some like a week at a time. Some use computer calendars and planners that they can access on their laptops or cell phones. Almost any system will work well if you use it consistently.
Some students think they don’t need to actually write down their schedule and daily to-do lists. They’ve always kept it in their head before, so why write it down in a planner now? Some first-year students were talking about this in a study group, and one bragged that she never had to write down her calendar because she never forgot dates. Another student reminded her how she’d forgotten a preregistration date and missed taking a course she really wanted because the class was full by the time she went online to register. “Well,” she said, “except for that time, I never forget anything!” Of course, none of us ever forgets anything—until we do.
Calendars and planners help you look ahead and write in important dates and deadlines so you don’t forget. But it’s just as important to use the planner to schedule your own time, not just deadlines. For example, you will want to capitalize on the fact that the most effective way to study for an exam is to study in several short periods over several days or weeks. You can easily do this by choosing time slots in your weekly planner that you will commit to studying for the test. You don’t need to fill every time slot, or to schedule every single thing that you do, but the more carefully and consistently you use your planner, the more successfully will you manage your time.
But a planner cannot contain every single thing that may occur in a day. We’d go crazy if we tried to schedule every telephone call, every email, every bill to pay, every trip to the grocery store. For these items, we use a to-do list, which may be kept on a separate page in the planner, or on your daily calendar in your phone.
Realistically, you will likely need to think of your time management in three categories:
Semester schedules are a way to show all the important dates at a glance. It can be the whole semester on one page, or it can be the whole semester with a month per page. At any rate, you want to take a bird’s eye view of your schedule. You will have all important deadlines listed on this including mid-term and final exams, assignment due dates, and large project due dates. This will help you for quick referral when you need it and will guide your weekly planner. Always refer to your semester schedule when you start filling in your weekly calendar.
This is likely the most important planner to keep you on track and free from nasty surprises (like assignment deadlines that sneak up on you). You should refer to it daily. Check the example of the weekly planner form below. You can copy this page and try it out to see if it works for you. Alternately, you can download weekly planners from the internet. There are numerous styles available. Try one and you will find out whether the time slots are big enough for you or you’d prefer a separate planner page for each day. Different educational programs have different scheduling needs. Some are very consistent (e.g. regular class times and a quiz every Friday.) Others are a collection of courses with varying demands and assignments creating a varying schedule from week to week. Fill in the planner form below for next week or try a few different ones to see which you prefer. First write in all your class meeting times; your work or volunteer schedule; and your usual hours for sleep, family activities, and any other activities at fixed times (like kids’ piano lessons or your soccer games). Don’t forget time needed for transportation, meals, and so on. You don’t need to necessarily write these on your planner, but you do need to consider them as you plan other activities to have enough time in between activities. Your first goal is to find all the blocks of “free time” that are left over. Then you can schedule your study and assignment blocks in these.
Remember that this is an academic planner. Don’t try to schedule in everything in your life (only the fixed non-negotiable things)—this is to plan ahead to use your study time most effectively.
Next, check the syllabus for each of your courses and write important dates in the planner. Use red ink or a highlighter for these key dates. Write them in the hour slot for the class when the test occurs or when the paper is due, for example. You may want to write any deadlines for your second week in the margin to the right. You need to know what’s coming next week to help schedule how you’re studying this week.
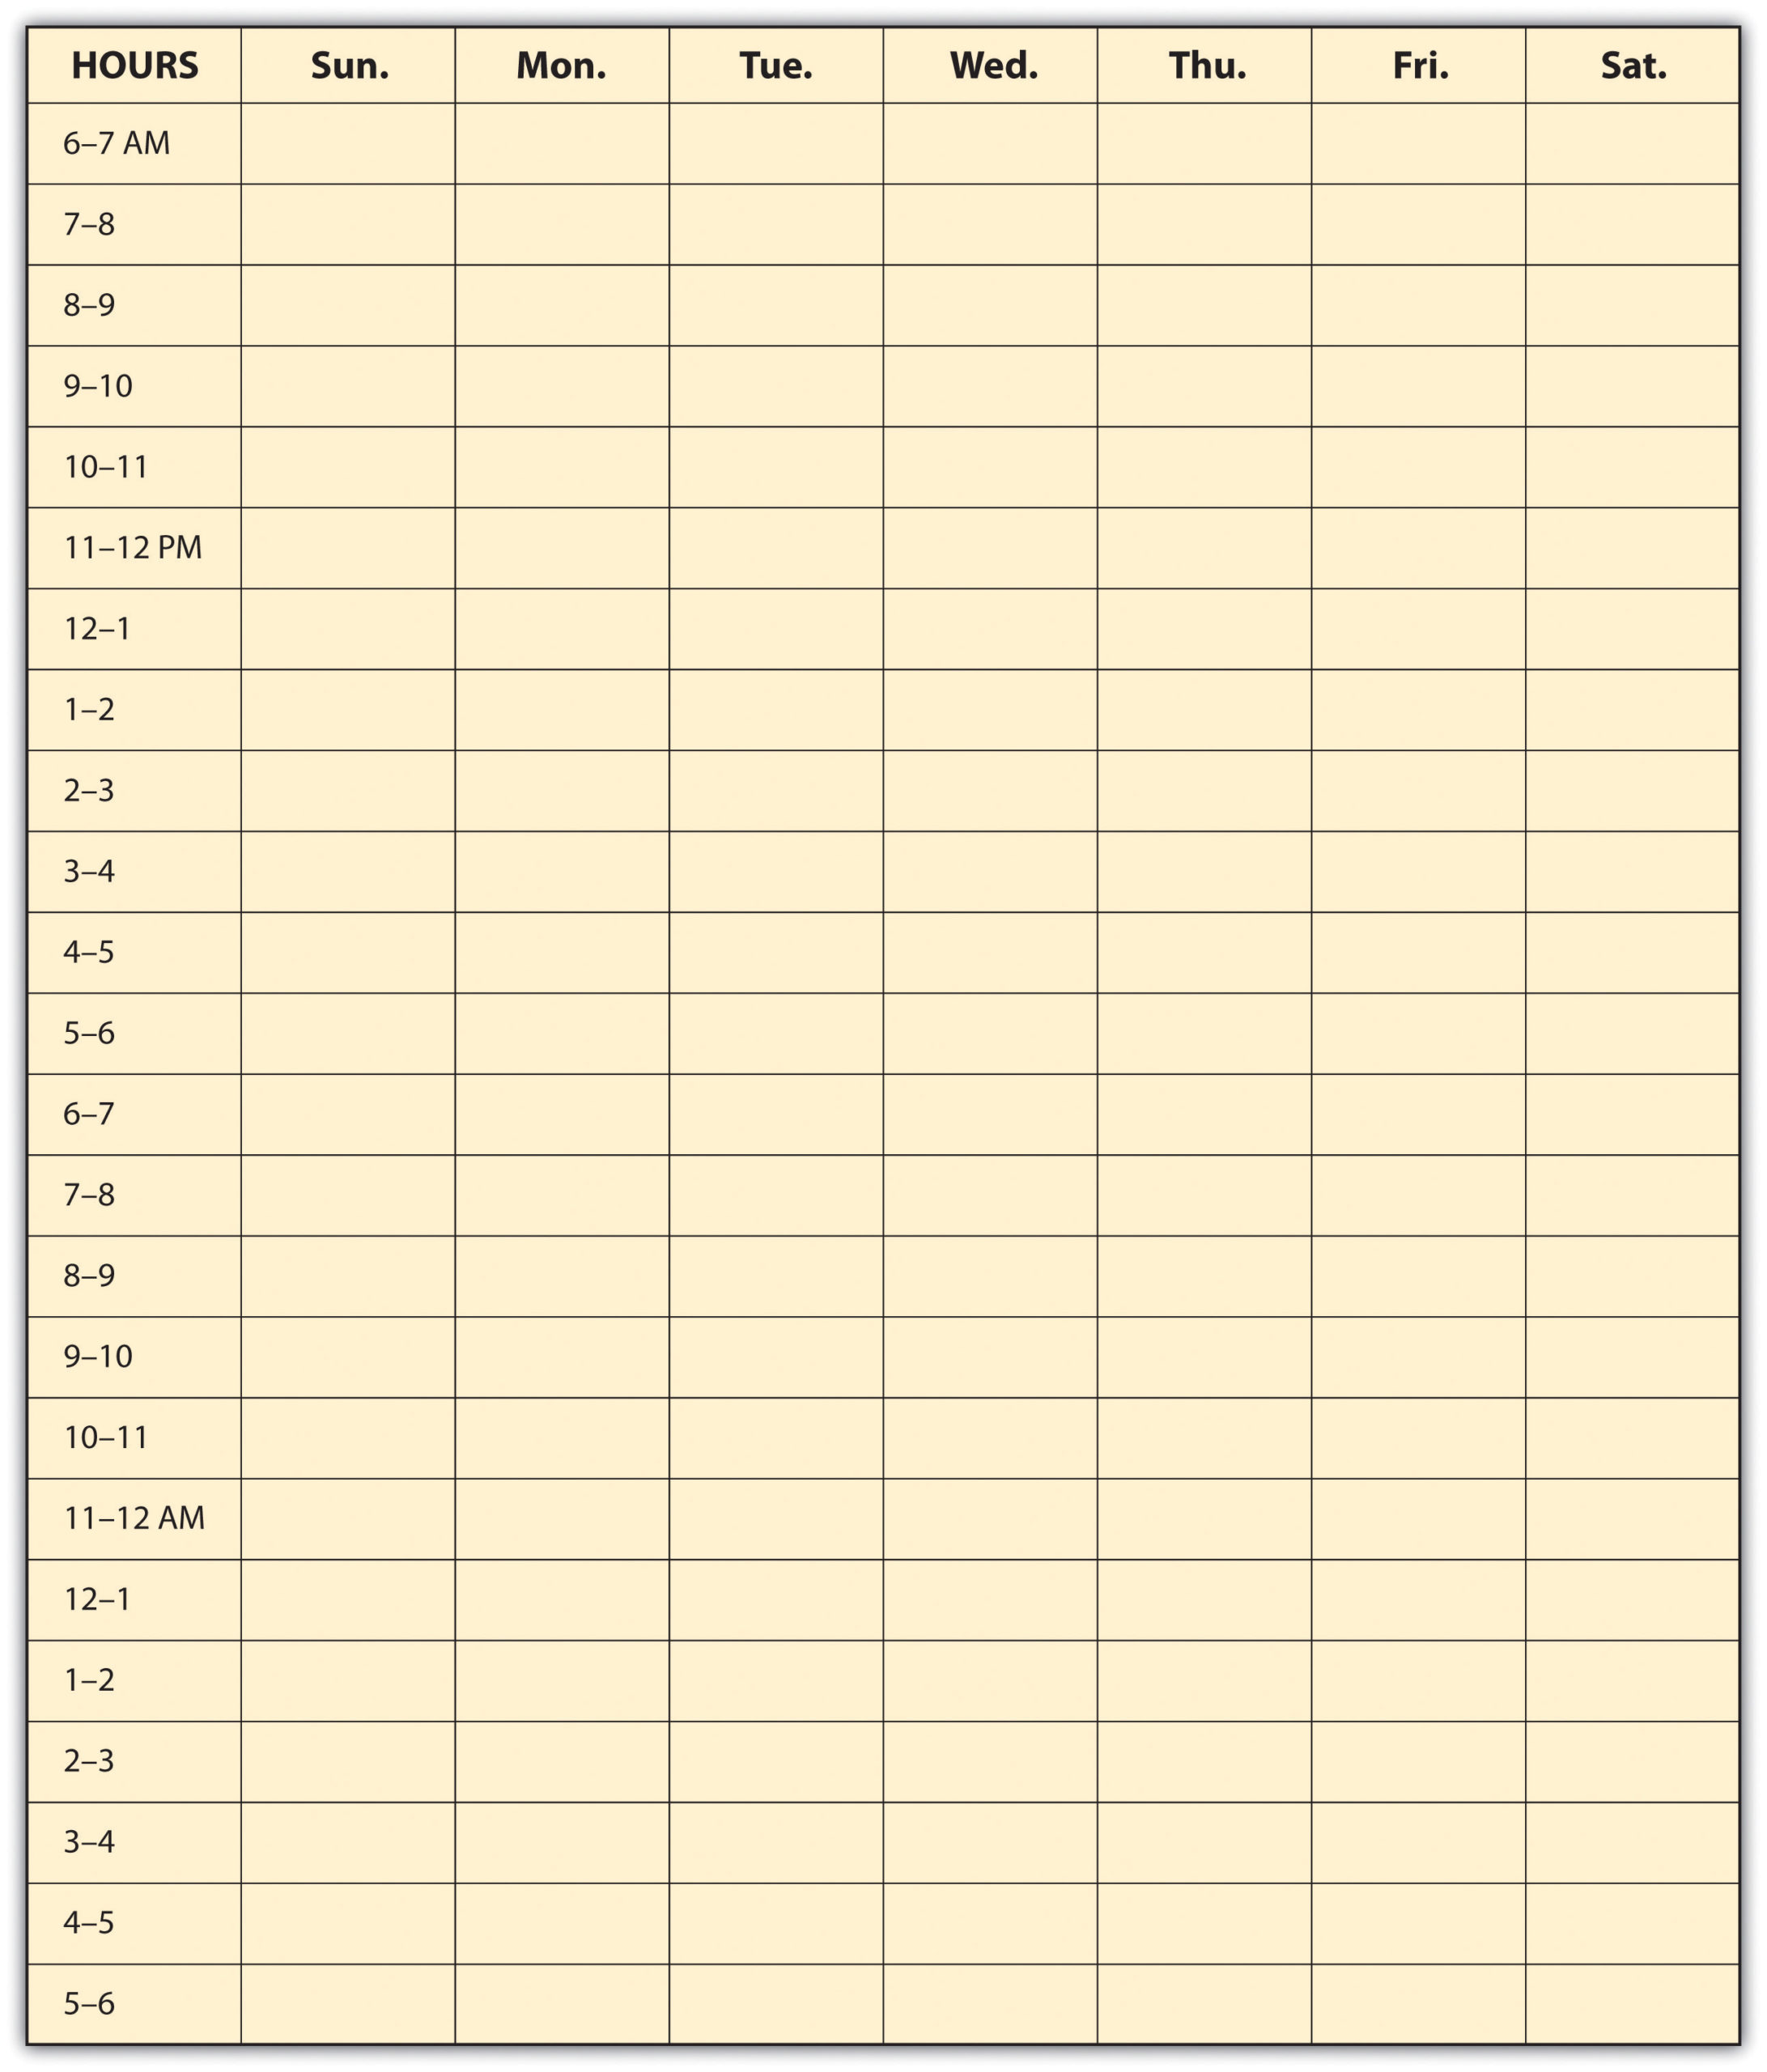
For example,
You have a short paper due on Friday. You determine that you’ll spend ten hours total on it, from initial brainstorming and planning through to drafting and revising. Since you have other things also going on that week, you want to get an early start; you might choose to block an hour a week ahead on Saturday morning, to brainstorm your topic, and jot some preliminary notes. Monday evening is a good time to spend two hours on the next step or pre-writing activities. Since you have a lot of time open Tuesday afternoon, you decide that’s the best time to reserve to write the first draft; you block out three or four hours. You make a note on the schedule to leave time open that afternoon to see your instructor during office hours in case you have any questions on the paper; if not, you’ll finish the draft or start revising. Thursday, you schedule a last block of time to revise and polish the final draft due tomorrow.
If you’re surprised by this amount of planning, you may be the kind of student who used to think, “The paper’s due Friday—I have enough time Thursday afternoon, so I’ll write it then.” What’s wrong with that? First, college and university work is more demanding than many first-year students realize, and the instructor expects higher-quality work than you can churn out quickly without revising. Second, if you are tired on Thursday because you didn’t sleep well Wednesday night, you may be much less productive than you hoped—and without a time buffer, you’re forced to turn in a paper that is not your best work.
Consider a number of options for your weekly planner. In many ways it is a matter of personal choice according to your needs. Some prefer a small book planner which you can pop in your bag and take everywhere. You can purchase new ones every year. Others prefer a large spiral bound paper planner that they keep open on their counter for constant referral. Yet others prefer to have it on a digital scheduler so that can access it from anywhere on their phone or laptop.
You decide.
People use to-do lists in different ways, and you should find what works best for you. As with your planner, consistent use of your to-do list will make it an effective habit.
Some people prefer not to carry their planner everywhere but instead copy the key information for the day onto a to-do list. Using this approach, your daily to-do list starts out with your key scheduled activities and then adds other things you hope to do today.
Some people use their to-do list only for things not on their planner, such as short errands, phone calls, email, pick up highlighter pens, and the like. This still includes important things—but they’re not scheduled out for specific times.
Although we call it a daily list, the to-do list can also include things you may not get to today but don’t want to forget about. Keeping these things on the list, even if they’re a low priority, helps ensure that eventually you’ll get to them.
Start every day with a fresh to-do list written in a special small notebook or on a clean page in your planner. Check your planner for key activities for the day and check yesterday’s list for items remaining.
Some items won’t require much time, but other activities such as assignments will. Include a time estimate for these so that later you can do them when you have enough free time. If you finish lunch and have twenty-five minutes left before your next class, what things on the list can you do now and check off?
Finally, use some system to prioritize things on your list. Some students use a 1, 2, 3 or A, B, C rating system for importance. Others simply highlight or circle items that are critical to get done today. The below figure shows two different to-do lists—each very different but each effective for the student using it.
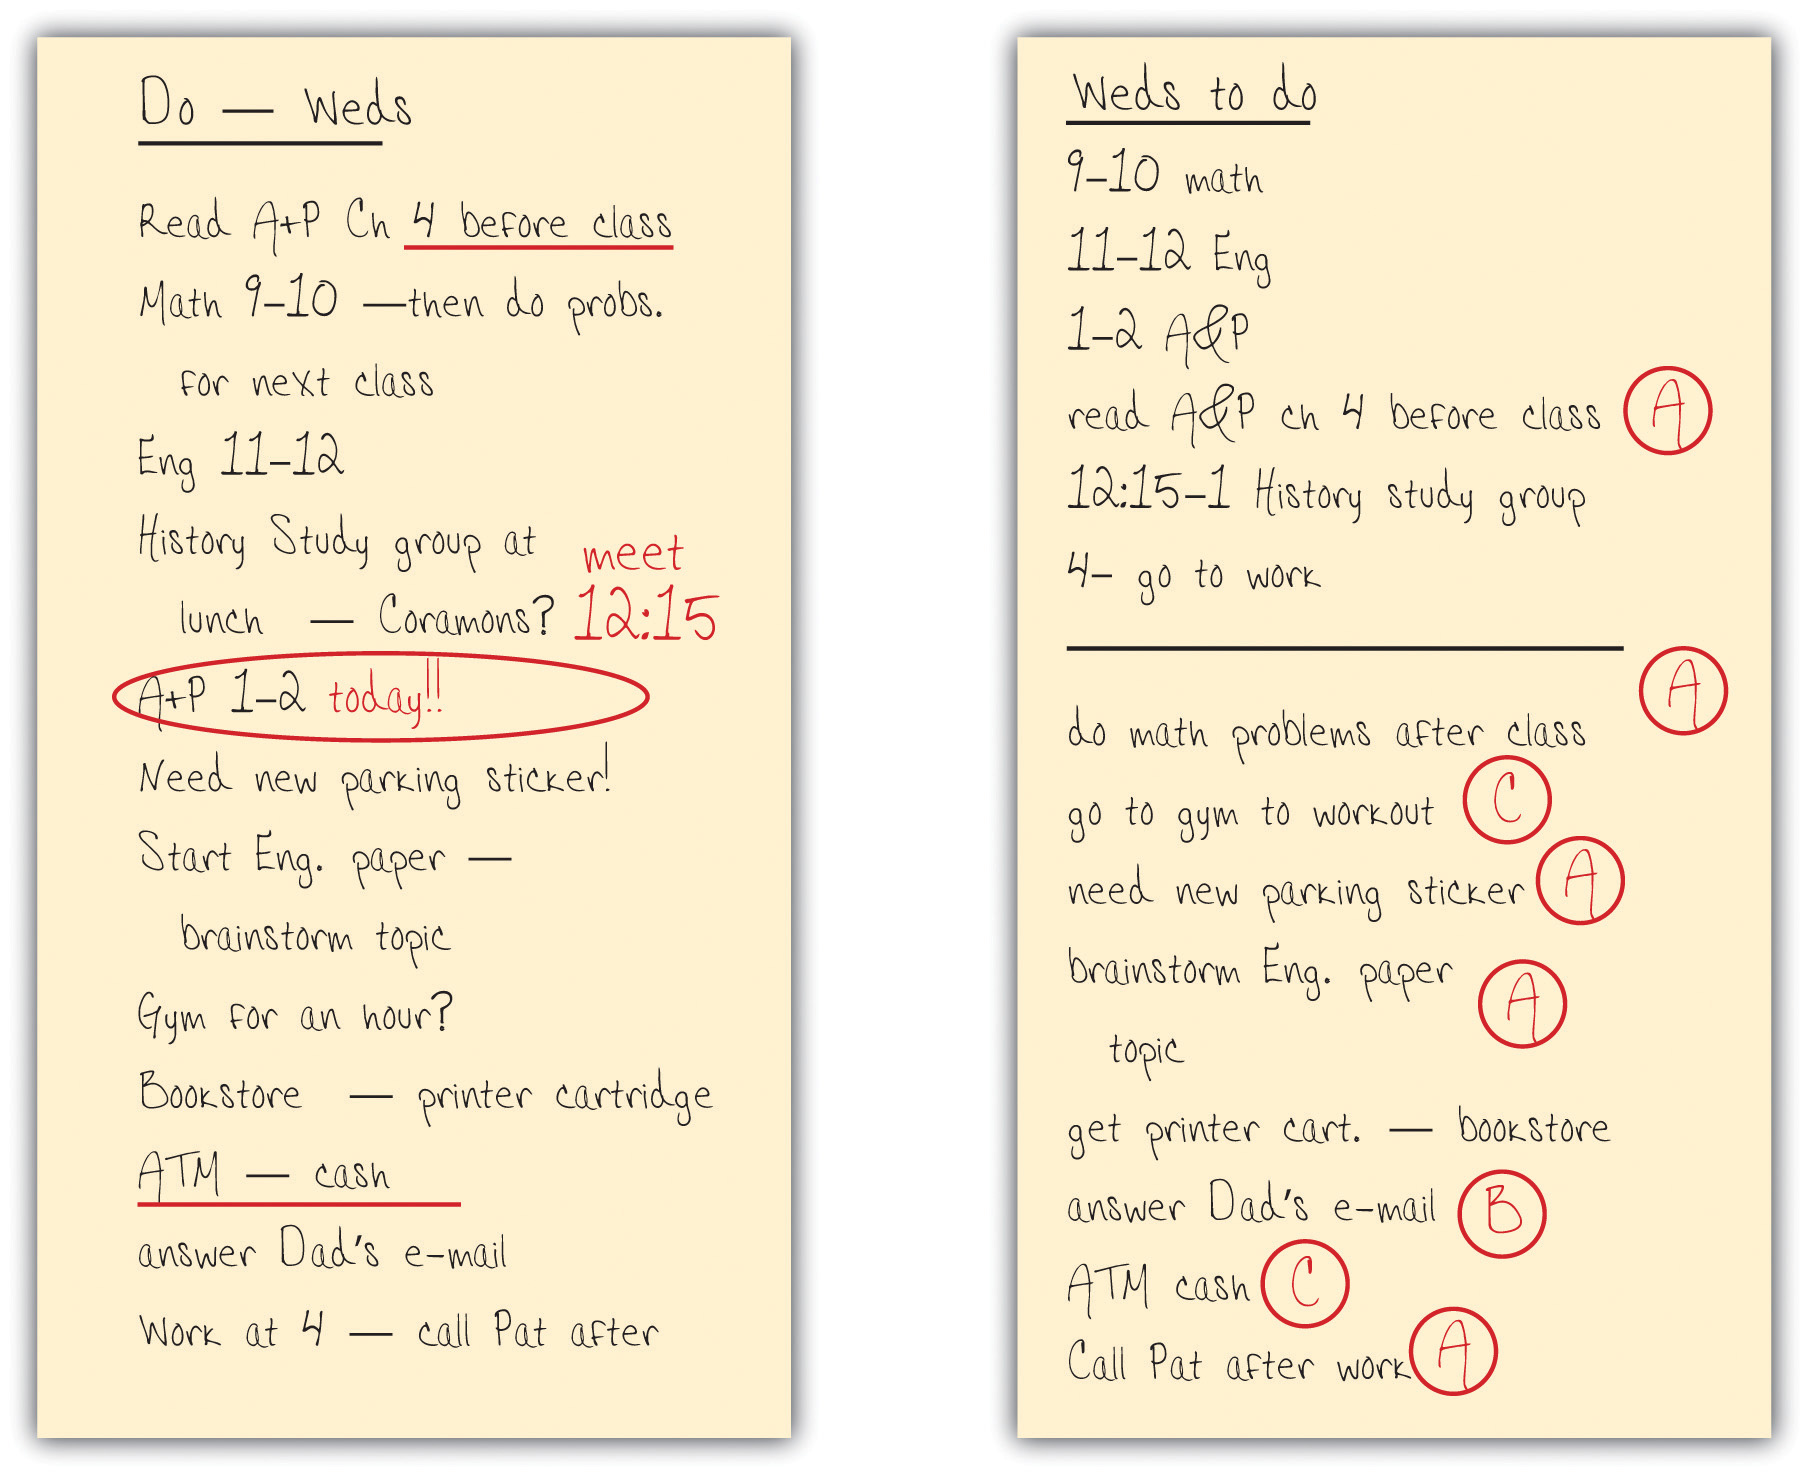
Exercise: Scheduling Tools
Some people are goal-oriented and seem to easily make decisions that lead to achieving their goals, while others seem just to “go with the flow” and accept what life gives them. While the latter may sound pleasantly relaxed, moving through life without goals may not lead anywhere at all. The fact that you’re taking courses now shows you already have the major goal to complete your education.
A goal is a result we intend to reach mostly through our own actions. Things we do may move us closer to or farther away from that result. Studying moves us closer to success in a difficult course, while sleeping through the final examination may completely prevent us from reaching that goal. That may be an extreme case, yet still a lot of students don’t reach their goal of graduating. The problem may be a lack of commitment to the goal, but often students have conflicting goals. One way to prevent problems is to think about all your goals and priorities and to learn ways to manage your time, your studies, and your social life to best reach your goals. Consider these four students:
What do these very different students have in common? Each has goals that conflict in one or more ways. Each needs to develop strategies to meet their other goals without threatening their academic success. And all of them have time management issues to work through: three because they feel they don’t have enough time to do everything they want or need to do, and one because even though he has enough time, he needs to learn how to manage it more effectively. For all four of them, motivation and attitude will be important as they develop strategies to achieve their goals.
It all begins with setting goals and thinking about priorities.
As you think about your own goals, think about more than just being a student. You’re also a person with individual needs and desires, hopes and dreams, plans and schemes. Your long-term goals likely include graduation and a career but may also involve social relationships with others, a romantic relationship, family, hobbies or other activities, where and how you live, and so on. While you are a student you may not be actively pursuing all your goals with the same fervour, but they remain goals and are still important in your life.
Goals also vary in terms of time. Short-term goals focus on today, the next few days and perhaps the next few weeks. Mid-term goals involve plans for this school year and the time you plan to remain in post-secondary. Long-term goals may begin with graduating from your program and everything you want to happen thereafter. Often your long-term goals (e.g. the kind of career you want) guide your midterm goals (getting the right education for that career), and your short-term goals (such as doing well on an exam) become steps for reaching those larger goals. Thinking about your goals in this way helps you realize how even the little things you do every day can keep you moving toward your most important long-term goals.
Author’s Story
A young woman came to me for education advising to discuss her career and educational goals. In her appointment, she was very excited to be talking to me about her goals. She beamed at the thought of establishing goals and taking steps to move towards them. She explained that she recently started dating a man who asked her about her goals. She realized that she didn’t have any. She realized that no-one had ever asked her that before. She said that in her family and among her friends, no one ever discussed goals with her. No one expected anything of her. No one ever talked about long-term planning. She realized that the lack of goal-setting in her life had meant she felt no control of her future. The prospect of taking charge and moving in a direction that she had some influence over was really exciting to her!
— Mary Shier, College of the Rockies
Write out your goals in the next exercise. You should literally write them down, because the act of finding the best words to describe your goals helps you think more clearly about them. Follow these guidelines:
Exercise: Personal Goals
Take out a piece of paper and write down your short-term, mid-term, and long-term goals. Be sure to consider all areas of your life—consider everything important that you want to do between this moment and old age. (While you might aim for three to eight goals in each section, remember that everyone is unique, and you may be just as passionate about just one or two goals or more than eight.)
The question of priority is really a question of what is more important at a specific time. It is important to do well in your classes, but it’s also important to have a social life and enjoy your time off from studying. You shouldn’t have to choose between the two—except at any given time. Priorities always involve time: what is most important to do right now. Time management is mostly a way to juggle priorities so you can meet all your goals.
When you manage your time well, you don’t have to ignore some goals completely in order to meet other goals. In other words, you don’t have to give up your life when you register for college or university—but you may need to work on managing your life more effectively. Time management only works when you are committed to your goals. Keeping your eyes on the prize will help you succeed.
“Obstacles are things a person sees when he takes his eyes off his goal.”
— E. Joseph Crossman
Managing time well comes down to two things. One is identifying (and then prioritizing) goals and the other is having the discipline to be able to work towards accomplishing them. We all have the same amount of time in a day, week, month and year, yet some people are able to accomplish more than others. Why is this? Often, it is because they are able to set goals, prioritize them and then work on them relentlessly and effectively until they are complete.
Key Takeaways
Exercise: Goal Setting
This chapter is a remix of the following chapters:
Now it’s time to create your own personal schedule for the next few months. Consider the courses you’re taking, even if it’s just this one. Consider your personal time commitments that are non-negotiable, and those that are negotiable. It is important to be realistic about the time required from everything from personal hygiene (bathing, shaving, putting on make-up, doing hair, etc.) to eating (including meal preparation), to working on courses. As you work on your time management, you will become much more aware of how much time you actually spend on these things.
Be realistic about the amount of time you’ll need to devote to your studies. Remember that for every hour spent in class, you should plan an average of two additional hours studying outside of class. Make sure to schedule these time periods in your planner! These times change from week to week, with one course requiring more time in one week because of a paper due at the end of the week and a different course requiring more the next week because of a major exam. Make sure you block out enough hours in the week to accomplish what you need to do. As you choose your study times, consider what times of day you are at your best and what times you prefer to use for social or other activities.
Don’t try to micro-manage your schedule. Don’t try to estimate exactly how many minutes you’ll need two weeks from today to read a given chapter in a given textbook. Instead, just choose the blocks of time you will use for your studies. Don’t yet write in the exact study activity—just reserve the block. Next, look at the major deadlines for projects and exams that you wrote in earlier. Estimate how much time you may need for each and work backward on the schedule from the due date.
As you put together your schedule, here are some tips to keep in mind:

Use the tool you chose in Chapter 7.2 Evaluating Scheduling Tools and create a semester schedule if you haven’t already. Remember to include all important dates such as mid-term and final exams, assignment and project deadlines, practicum time periods if applicable, and application and course registration deadlines for next semester. Also include important personal events such as a wedding you are attending, or your mom visiting town. The semester schedule offers a visual picture of how your semester looks overall. You can see your particularly busy times. If you are taking several courses, you can merge all the big course events onto one schedule so you can see when you have two big assignments due on the same week. You may wish to use colour to indicate different classes, or to distinguish between your academic events and personal events.
This semester-at-a-glance schedule should be either one page or a month per page. A single page is useful if there aren’t very many important dates to note, or if you are only doing one course. A single page can be posted on the fridge or permanently displayed on your study work space. A month per page is useful if you have several courses with varying deadlines. The semester schedule is the easiest and quickest to set up.
Put together a weekly schedule for the upcoming week or two using the tool you chose in Chapter 7.2 Evaluating Scheduling Tools. Start by recognizing the difference between fixed-time and flexible-time. Fixed-time includes things that have predetermined schedules such as face-to-face classes, labs, doctor’s appointments, soccer games, and assignment deadlines. Mark these on your weekly schedule first. Next put in your flexible-time commitments. These include things such as outside-of-class study times, pre-reading before class, review time after class, completion of assignments, and working out. Make sure to put in your high priority items first. Once you have these things scheduled in, reasonably put in any other lower priority items that you think you can manage. Remember to leave room for meals, personal hygiene, sleep, and (limited) social time. Once you start using weekly schedules regularly, you’ll notice you can schedule some things well in advance, and others the week prior. This way your weekly schedules are always a work in progress.
Put together your daily to do list for today or tomorrow. Review and use the strategies listed in Chapter 7.2 Evaluating Scheduling Tools as you put it together.
Here are some more tips for effectively using your daily to do list:
Notice that your long-term goals should drive your mid-term goals, and your mid-term goals should drive your short-term goals. Your daily to-do list will have many more things on it that are life necessities, such as bill payment deadlines and grocery shopping, but the daily list will also have those things that will help you achieve your short-term goals; and these will move you closer to achieving your long-term goals. For example, a long-term goal may be to become a registered nurse. Then a mid-term goal could be to complete the prerequisite courses for the program and achieve higher scores than the grade cut-offs from last year’s admissions. Then a short-term goal may be to study for the final exams coming up next week. The daily to do list may schedule in study time for each course you are currently taking. This is essentially breaking up goals into small steps by dividing them among your semester schedule, your weekly planner, and your daily to do lists.
Exercise: Creating Personal Schedules
Create three personal schedules as referred to above using the tools you chose in Section 7.2 They can be handwritten on paper or saved on digital software, or all three can be different formats. Set them up so they will work for you.
Once you have established a system of scheduling, it is a good idea to review how well it is working for you and if any changes need to be made. Try answering these questions after using your weekly planner for a few weeks.
Exercise: Reviewing Schedule Plans
At the end of each day or week, spend a few minutes reviewing your planned schedule and writing answers to the following questions. What do you notice about your study tendencies?
Use your information to help you adapt your scheduling and study times.
Key Takeaways

Exercise: Chapter Review
Randy Pausch was known for his lecture called “The Last Lecture,” now a bestselling book. Diagnosed with terminal pancreatic cancer, Pausch passes along some of his ideas for best strategies for uses of time in his lesser-known lecture on time management. Could there be someone better suited to teach about time management than someone trying to maximize their last year, months, weeks and days of their life?
Note this video is one hour and sixteen minutes. It is optional as it is long. However, it’s full of great strategies, goal-setting ideas, and ways to think about time management.
Video: “Randy Pausch Lecture: Time Management” (length 1:16:21)

A YouTube element has been excluded from this version of the text. You can view it online here: https://opentextbc.ca/studentsuccess/?p=201
The first step to succeeding in your courses is to be committed to your education. You’ve been motivated to start post-secondary education—now you need to keep that motivation going as you target specific goals for success in your classes. Much of this has to do with attitude and managing your time effectively.
In fact, time management skills can make the difference between those who graduate from college and university and those who drop out. Time management is actually all about managing yourself: knowing what you want, deciding how to get what you want, and then efficiently and effectively getting it. That applies to fun things, too. In fact, you may want to think of the goal of this chapter as not just managing your time for studying but ensuring that even as you do well in your studies, you’re still enjoying your life while in university.
This chapter is a remix of the following chapters:

Technology skills are essential skills, whether for going to school, being in the workforce, volunteering for an organization, or just communicating with your loved ones and friends. The use of computers has become the standard for finding information, sharing information, registering for things, ordering things, making appointments, and shopping.
Technology is definitely useful for taking courses. Whether your post-secondary courses are face-to-face or online, you will require computer skills for many tasks, including applying for school, registering in courses, accessing grades, submitting assignments, researching information, and creating word documents for assignments, researching papers, and taking notes. For taking online courses, students will need familiarity with the online learning platform where they will access the course, write tests, watch lectures, and upload assignments. Many textbooks (like this one) are offered and accessed online (like this one.) Computers are a great tool for giving students access and keeping students organized.

Students range in age from young adults to seniors, most of whom are quite comfortable with many of the learning outcomes from this module. However, you may see a few that you haven’t learned or used before. Try to identify and get familiar with any of these. Some seniors and others have very little experience with computers. This is the time to dip your toe in and start using some of the features that will really help you as a student. There are often short introductory computer courses in community colleges that can get you started. It is a good idea to take one prior to starting your educational post-secondary program if you can. The following learning outcomes are covered in this module; you should get comfortable with them for taking courses.
Learning Objectives
In this chapter on “Technology Skills,” students will:
Word processing programs are invaluable tools for doing your assignments and writing essays. If you are someone who still likes to handwrite assignments, consider this: one of the most useful aspects of doing assignments on a computer is the ability to make changes. You can go back and reword things, correct mistakes, add in extra information to clarify issues or give examples, and reorganize your paper moving a paragraph from one place in your assignment to another using cut and paste and not having to retype it. It’s especially useful if your instructor asks you to make changes to your assignment. You can start from your existing document and add to, summarize, or make your writing more concise. Most people are familiar with using at least one word processing program such as Microsoft Word, WordPad, or OpenOffice Writer. Many lap tops come pre-loaded with word processing software.
When choosing software you need to keep a few things in mind. First, you want documents that others can read. If the software you use produces documents that can’t be read by anyone that doesn’t have the same software, then it becomes frustrating. Also, you want to have some nice features with your software. Formatting features such as bolding, indenting, bullets, different font sizes, styles, and colours, underlining, italicizing, shading, inserting captions, and highlighting, to name a few, are great features to make your documents visually appealing and clearer to read. Other features such as being able to insert and size charts and tables, pictures, headers and footers, symbols, subscripts and superscripts – all help to make creating documents easier. Having the ability to add hyperlinks to internet sites and videos enhances your documents as well. Using headings and features such as “find and replace” all add convenience and efficiency. Having the ability to track changes is a really useful tool for a student who is trying to get feedback from others or working on a group assignment.
Author’s Story
While working on my Master’s, I had many group assignments online. We had to share documents all the time, so we used a tool to share the work on the web and we’d track suggested changes from the different group members. On one project, all the members used Microsoft Word except for one student who used an unfamiliar word processing software which didn’t work well with Word. She could never see our tracked changes, and we couldn’t see her changes. It became quite frustrating and ultimately cost us precious time. It’s worth having a discussion at the beginning of a group project about what software everyone is using, and make sure it is all compatible.
— Mary Shier, College of the Rockies
Microsoft Word is a common word processing software. Usually if you are a post-secondary student taking courses from an accredited school, you can have access to a free download of Microsoft Word for a year. You just need an email address from the institution you are attending. Check out your institution’s website or contact their IT department for more information.
Spelling and grammar tools are almost standard in most programs now. They help identify if you’ve spelled a word incorrectly or if your sentence is grammatically incorrect. It’s not perfect and it sometimes doesn’t catch things that need fixing, or sometimes makes suggestions that weren’t what you intended. So you still have to proof-read your work with a critical eye. If your program isn’t set to perform spelling and grammatical checks automatically, you may want to go into settings and set it up for automatic checking, or at least perform a check every now and again as you go along.
The thesaurus and synonym tools are extremely useful when you are trying to think of words while writing assignments. You can enter the word that you want to replace and the software will suggest alternate words. It is very useful when you can’t think of the right word you want to use, when you have used the same word repeatedly and you don’t want to sound repetitive, or when you want to use a more interesting or engaging word. In MS Word and some other programs, when you are writing and use a word you’d like to replace, right click on the word, choose synonyms and a variety of words to choose from will appear. Thesauruses and synonym tools help writers make their writing more descriptive, expressive, and articulate.
Synonym Finder:
On first draft, a student wrote, “My instructor is not only a great teacher and really helpful, but she is really nice.” While proof-reading, the student realized that the word, nice, is fairly nondescript and doesn’t tell the reader much. Not only that, but they had used it already several times earlier in their paper in a different context, so they wanted to use a different word so as not to be too repetitive. They used the synonym tool and it gave them the options of enjoyable, agreeable, pleasant, good, fine, lovely, amusing, wonderful, kind, polite courteous, and gracious. They thought about which, if any, of these words better described what they wanted to say. Some weren’t applicable in this case, such as amusing or courteous, as these weren’t what they intended. They ended up choosing wonderful.
They thought about why they think their instructor is nice or wonderful. It caused them to think more clearly about what they wanted to say. They then realized that it was because their instructor cared about their success and encouraged them. By going through this process using the synonym finder and taking the time to consider what they wanted to say, they improved their writing and made it more descriptive.
Using tools in your word processing programs can aid you in producing better writing.
Thesauruses and synonym finders are also useful for discovering definitions of words, along with online dictionaries and word-web apps. As you are reading text and come across words you don’t know the meanings of, you can use these tools to quickly give you context for and understanding of your reading. Gone are the days when you had to take the time to physically get up, find a dictionary in book form, and look up the word by scanning through the pages to find the meaning of a word. Now it is as quick as right-clicking on your online text, or typing the word into an app on your phone to find the meaning. In seconds you can be back reading your text with new enlightenment.
If you currently use a good word processing program, check to see if you are able to access its many features. You’ll likely never have use for all the features but some are very handy for you as a student. For example, a word processing program with a built in tool for referencing sources in APA or MLA format is extremely useful and time saving when writing research papers.
If you aren’t familiar with these tools, get familiar by using one of these options:
Learning about the features in your word processing program will ultimately save you a lot of time and you will be able to produce documents that are visually appealing and organized.
Author’s Story
During my online Master’s program, it became a signature feature for me to include a chart or graph in all my assignments. At first the reason it was to organize the information, and it was fun to create them. But then I realized the instructors loved them and they always commented on them. Creating charts and graphs went onto my check list for assignments that I always used before handing an assignment in. It was on the list along with proof-reading, editing, checking my references, checking formatting, etc. Try adding a chart to your next assignment. Your instructor will love it!
— Mary Shier, College of the Rockies
Exercise: Explore Word Processing Features
Create a short Word document. You can choose the topic for your document. Some possibilities include writing about your family, your job, a pet, a holiday, a product you just purchased, or how to make a good cup of coffee. The topic is your choice, but only choose one.
Demonstrate three or more word processing features that you haven’t used before or haven’t used much. It can be as simple as changing fonts or using italics. It can be using the synonym tool to find better words for your document. It can be inserting clip art, creating a chart, or inserting a photograph. You can use any of the features listed in this section, or some that you have discovered on your own. Then demonstrate them in your document in a relevant way.
At the end of your document, list the features that you are highlighting. If you used the synonym tool or thesaurus, note the words you started and ended with. Note the features you have never used before, if applicable. What features did you find most useful?
The internet has become an invaluable tool to find out information. We have more information than we can deal with right at our fingertips. It wasn’t always that way.
Author’s Story
I don’t necessarily want to age myself, but when I went to university, outside of our textbooks, the only place we could access accurate information for research was at libraries (physical buildings) and we were limited by the library’s open hours, which didn’t always work with our schedules. We also had to physically go to the libraries which were often a distance to travel. Many of the resources (e.g. encyclopedias) could not be borrowed, so you had to use them in the building. Also, if other students beat you to it, the books you wanted were often unavailable as they had been checked out already and you had to wait until others returned the books, often weeks later. Ir was even more frustrating to be unable to find the desired information at all. That rarely happens anymore, as the internet is a source of information from around the world, not just from your local library.
— Mary Shier, College of the Rockies

You can use search engines such as Google, Bing, or Yahoo to research general topics. This can often lead you to related terms or topics for other searches.
But with all the information available on the internet, you need to know how to discern what information is useful and accurate. The internet is full of information that is based on people’s uneducated opinions. Worse than that, it is full of information intended to further specific agendas, to impact people’s beliefs and ideas with biased trains of thought, or to sway people into investing their money and resources.
There are sources of information that are deemed credible, and these are where you want to focus your energy. Using information which has been scientifically proven or studied using authentic practices is key. Using search engines such as GoogleScholar will help filter information, and identify material that is from credible sources.
Libraries are great sources for online academic journals. These are documents that have been peer-reviewed by academics and experts in the field who verify that accurate and verifiable methods were used to come to their conclusions. Librarians can help you find credible sources for your topics of research. Your college or university library is a great place to start. On their website they likely have links to academic journals that you can search by field, topic, or author. Often librarians will do workshops for internet research to help new students. There are also inter-library loans for resources if you can’t find what you are looking for in your institution’s library. Educational institutions often have subscriptions to allow students to access national online academic databases.
See the library services at College of the Rockies to check out how simple it is to search for and access academic journals and databases online. Check out their research guide to search fields of study. Alternately, check out the online library services at your own institution.
As well as school libraries, public libraries are also a great source of information. Public libraries are often accessible online, so you can do your research for resources from home before going there. You can see if the books you want are available locally or need to be ordered in from another library. You can see how many copies are currently available and can put resources on hold to ensure no-one snags them while you are on your way to pick them up.
Some of the main differences between academic (college and university) libraries and public libraries include:
| Academic libraries | Public libraries |
|---|---|
|
|
Academic libraries are great for accessing the most relevant and up-to-date information on changing fields such as health care and scientific discoveries. Public libraries are useful for accessing information on topics not usually available in academic journals and current research, or information about topics for which the educational institution is not responsible for teaching. It is always a good idea to start with your school library and then move to the public library if you can’t find what you are looking for.
There are bookmarking tools on most web browsers, such as Internet Explorer, FireFox, and Chrome. This is helpful when you find sites on the internet that you want to return to. Similar to putting a bookmark in a book, this keeps a short cut back to the chosen web page. This is useful when you are researching sources for your assignments.
Exercise: Internet Research
Use Google Scholar to find an interesting article on a topic of interest. Then bookmark the site so that you can return to it later. Close the page and use the bookmark to return to the site. You can even start organizing your bookmarks according to topic or category or course.
Electronic communication has almost become more prevalent than speaking and listening. Sending quick messages via text, messaging systems, emails, and social media are fast, convenient, and efficient ways to communicate. Sending group information is a great way to have a multi-way conversation. These methods are useful for communicating with your instructors, your class-mates, your friends and family—even if it’s to quickly explain that you can’t join them for a movie because you’re working on an important assignment.
Unless you don’t use a computer at all, most people are used to using at least one of these modes of communication. They all have pros and cons and specific ways they are more useful for certain situations. For example:

Exercise: Electronic Communication
Choose a method of electronic communication that you haven’t used before. Use it – you may have to download the app onto your phone or computer first. Once you have used it, report on what you used, how easy or hard it was to use, whether or not you had any responses (comments, messages, etc.), and whether you think you would like to continue using it.
Students need to keep their work organized. Once you start working on multiple assignments, you want to be able to find and access your work easily. If you aren’t used to keeping your files organized, then this section will be very important for you. There are two parts to keeping your work organized: saving and backing up.
Some people save everything on their desktop or in their documents file. They just hit save and let it save to the default destination. This results in a huge collection of documents in one place. This can make it hard to see what documents you have, and to find them when you are looking for them. It’s the equivalent of having a huge pile of papers sitting on your desk, and you can’t find anything. This is true for all documents, whether it is for work, volunteer organizations, random household documents, or vacation planning. As a student, it often makes sense to create file folders for each course you are taking. File folders are just like what you would expect in a regular filing cabinet. A filing cabinet contains file folders usually organized in alphabetical order, or possibly by theme. Inside the file folders are all the documents pertaining to that topic. Students should make a file for each course. Then it’s important to name the documents carefully so that they are easy to identify. That way you can pull a document out of a file at any time. Once you have saved a document into a file folder (using the “Save As” function) then it will automatically save it in the same place every time you hit “Save”. You should hit save often to make sure you don’t lose your work if a sudden power outage occurs or your computer fails or shuts down suddenly.
You can have file folders within file folders. For example, you may have a file folder named College Courses. When you open that folder, you could have sub-folders named for each of your courses. Within each folder you can have all the documents which are related to that course – your assignments, labs, saved reference material, etc. Then it’s easy to locate your documents. The more courses you take, the more you will appreciate having your documents saved in an orderly manner.
Whenever you are working on an assignment or research paper, make sure to save regularly. Saving regularly is critical. There is nothing more frustrating than putting your heart and soul into an assignment, only to lose it. It usually happens to every student once, because it is a hard lesson to learn. Once they have suffered the loss of a lot of hard work put into an assignment, students rarely allow that to happen to themselves again. Students need to save their material regularly.
Author’s Story
Backing up your documents is critical. Just as losing unsaved material is frustrating, so is losing entire documents that have been saved. Back-ups provide extra copies of your important documents (which includes your course assignments) in a separate location, just in case. Some insist you should have two back-ups for all your important documents. You can lose your data for various reasons: your computer dies suddenly and you can’t recover any of the documents; your computer gets a virus and the documents are destroyed; your computer has hot coffee accidentally spilled on it, or is thrown in a mud puddle by your helpful toddler; the power goes out after several hours of typing, but you realize you didn’t save the document because you were so focused; the document mysteriously disappears off your computer; maybe someone unknowingly hit “Delete,” or it got saved off into cyberspace somewhere. Sometimes there are no explanations as to why a very important homework assignment goes completely missing days before it is due.
The answer is to back up your material regularly. There are several options to do this.

Memory stick: Use a memory stick to have your assignments saved on an external storage device. At the end of every work session, store your work on your computer (where you should have been hitting saveall along) and on a separate memory device. The advantage is you can carry your stick with you wherever you go and work on it on other computers if needed. If choosing this as an extra back-up, remember – it isn’t useful if it’s still attached to your laptop when you drop the laptop in the lake. Then both the lap top and the memory stick are hooped. A back-up is only a back-up if it is in a separate place than the original copy. If the computer and memory stick are both in your computer bag, and the computer bag goes missing, you’ve lost your back-up too.
Student drives: Educational institutions are often on a network drive. Students then receive their own personal drive which can be accessed with their student number and password. This ensures that students using college computers can save their work on their personal drive. No-one else can access, revise, or delete their work because it’s stored under their own personal drive. The other advantage is that the student drive can be accessed from any computer in the building. Students don’t have to wait for a specific computer to access their documents.

External hard drive: Many people back up their files on an external hard drive. This provides a second copy of their files which is stored in the home or office. The advantage of this method is that all files are stored and backed up in the same place. In the case of an emergency such as a fire, the external hard drive can be grabbed and will have all important files and pictures on it.
The Cloud: Cloud storage is convenient and can be accessed from anywhere there is access to the internet. Cloud storage such as Google Docs, Xdrive, MediaMax, DropBox, OneDrive, and Strongspace are especially handy, because even if your home explodes and takes your electronics and storage devices with it, your documents are still safe.
Email: This is one of the easiest ways to back up your work while you are still working on it. If every now and then (say after you have done a significant enough amount of work that you’d be upset if you lost it) email the document to yourself. You can name it Draft 1, Draft 2, Draft 3 and so on. That way it’s available from anywhere that has connectivity and you have the most recent back-ups of your work.
Regardless of which tool you use, make sure to save and back up your school work! Save every few minutes and back up every work session. You will be glad you did!
Key Takeaways
Technology skills are invaluable for your success as a student.
Exercise: Technology Skills
Choose a topic that interests you. Some suggestions are: student success, technology, the value of education, a career you are interested in, a health topic, a sport or hobby, a political topic, faith, a controversial issue—whatever you like. If you are having trouble choosing a topic, speak to your instructor. Write approximately one page about this topic.
Email or message your assignment to your instructor.
Note for Instructors: For those following the learning outcomes from the British Columbia ABE Articulation Guide, the first eight chapters of this textbook cover core competencies. The following chapters are optional and it is up to individual institutions which of these topics they include in the course outlines for their courses. Though instructors must include all topics listed in their institution’s course outlines, it is up to individual instructors if they want to include additional topics beyond the course outline. Choosing additional topics may depend on the relevancy for the group.


“Information literacy” is a term you’ll hear a lot during your college years. It means that all students (and all people, really) should be able to find and use reliable information and source materials, and that they should be able to find the right material for whatever it is they’re doing or whatever questions they have.
Finding dependable information is especially important in the digital/internet age, where millions of ideas can be discovered in half a second but where much of that information is outdated or worthless.
Handling the materials correctly is important too; this includes giving full credit when using materials created by others. This chapter deals with how to find, evaluate, and use information correctly.
Learning Objectives
In this chapter on “Research,” students will:
This chapter has been adapted from the following chapter:
As a college student, it is important that you can find reliable sources for your class work and assignments. It is also essential that you know how to correctly use and handle the sources when you make them part of your own work.
Outside of school, most of us also feel that it is important to be informed about current issues and ideas. Knowing what is going on in the world is, arguably, a citizen’s responsibility. Plus, it feels good to join in a conversation and know the facts, or to be sure we are sharing a meme, social media post, or news article that’s accurate and trustworthy.
Snopes is a widely respected, non-partisan site dedicated to investigating rumors, memes, social media statements, and news stories, and then issuing decisions about whether the materials are correct or false.
Exercise: Using Snopes
Go to Snopes’ “What’s New” page—a page that updates daily and includes the latest rumours.
Scroll through the list until you find an interesting hot topic. Click and read, then write a quick paragraph that summarizes what you found. What did you learn? Were you surprised?
If this captured your interest, you may want to explore Snopes a little more. It’s a fun place to poke around and a great place to fact-check information. The next time you are forwarded a bit of information and you want to know if it’s true before you become outraged and send it to all your friends, do a search for it on Snopes.
As humans living in the digital age, people should know how to navigate the Web successfully, find the best materials, and evaluate and use them with confidence. Alas: in an age where a quick Google search nets millions of “hits” in half a second, evaluating the sources of the chosen material can be trickier than it sounds. There’s a lot of great material on the Web, but there’s a lot of garbage, too. Being able to tell which is an important life skill in the digital age.
We also need to understand who “owns” information—whether hard copy (printed) or digital—and how and when to give credit to the owner; this keeps us safe from accidentally committing plagiarism. This will be discussed in the next section, Chapter 9.2 Plagiarism.
In the world of academia, our gold standard for texts requires them to be created by people with substantial education, advanced degrees, and life expertise, making them experts in their fields. If I’m reading a cookbook, I want it to be by someone who really knows their way around a kitchen—not someone who’s a mediocre cook but decided it would be fun to collect the family favourites into a self-published book.
You’re a college student. Without a doubt, the best place for you to find quality information is the college library—and you can do this by walking into the library or searching it via the Web. Many college libraries have adopted a new set of guidelines for helping students find good materials. It’s called CRAP. Yes, really! CRAP stands for currency, reliability, authority, and purpose/point of view.
Note: some libraries use CRAAP instead of CRAP, adding a second “A” for “accuracy.” The simple CRAP method, below, incorporates “accuracy” into the “reliable” category. Besides, using CRAP is more fun.
| C: Currency |
|
| R: Reliability |
|
| A: Authority |
|
| P: Purpose and Point of View |
|
Sounds like our gold standard, yes? Keeping the metaphor going, your college library is a gold mine for students.

Wander into your college library (or search the library’s online help) to get started—and if you have problems, ask a librarian! They love to work with students.
Can you also find good material on the World Wide Web?
Of course. But doing so can be tricky. Think for a moment. If you’ve found a website or resource you feel might be useful, how do you convince yourself that it follows the CRAP approach?
Keep in mind that your college work is different from your day-to-day activities. For instance, you may surf the Web for a number of different reasons, perhaps for pleasure, perhaps out of boredom, or maybe chasing links. You can search the Web when you need simple information like what to do for doggy diarrhea or what stores carry light fixtures. We can search and read as we like; nothing is at stake, so to speak.
But in your college work, there’s plenty at stake. Part of doing solid work at the college level has to do with finding strong source materials and using them correctly and effectively.
Finding good materials on the internet takes a bit of detective work. You can use your CRAP detective skills, and rate it using the following system.
Exercise: CRAP Test
Use the CRAP test on your sources and rate them using the following scale:
It also helps to know a little something about how to navigate and use Web materials. Let’s explore!
The domain name ending refers to the letters that follow the period at the end of a Web address (also called a url, or uniform resource locator). For example, .com, .edu, and .org are all domain name endings.
Example of a Web address: www.cnn.com
Example of a domain name ending: .com
Different domain name endings refer to different kinds of websites and can be related to the quality of the site’s material. Therefore, you have to examine them to decide whether they’re reliable. Here are some examples:
.com: a commercial or personal site. These are generally considered to be some of the least reliable sources because anyone can create one and they’re typically used for either private blogs, web pages, and other personal uses or for commercial purposes and sales. So it is often difficult to know if it is reliable. (CRAP+ /−)
.org: these used to belong solely to non-profit sites, such as The American Cancer Society. But these days, anyone can purchase and use a .org site for any purpose. Thus the content on a .org site may vary widely in terms of its authority. (CRAP +/−)
.edu: American educational sites, usually maintained by colleges and universities but sometimes by high schools as well. These sites are considered to be very reliable. (CRAP+)
.gov and .mil: government and military sites, maintained by the governments and the military. These sites are considered to be very reliable. (CRAP+)
Let’s look at a couple of examples and see how they hold up to the CRAP method:
The noted food journalist Michael Pollan uses a .com site, michaelpollan.com, to host many of his writings. He’s a respected writer and resource, and his .com site is a wonderful resource for anyone writing about food.
Result? CRAP+
Let’s try another one. The .org site, cellphonesafety.org may appear, at first glance, to be a reliable site. But not all .org sites are reliable. Let’s look closer:
Result? CRAP−
In many cases, it’s easy to find an author’s name on an online site. Evaluate the author fully—don’t just assume they know what they’re doing. For example,
Sometimes pages will list an author’s bio*, résumé**, or curriculum vitae (CV)*** on the site, allowing you to find out more about their education, work, and publication history. You can always do a Web search to find out more about them.
*A “bio” (biographical sketch) is a short piece of information about the author and their life, often highlighting unique or interesting events—especially those relevant to the piece they’ve just written.
**A résumé is a short listing of a person’s education, qualifications, and relevant job skills. Résumés are typically used when applying for a job. They are usually 1-2 pages long.
***A curriculum vitae (CV) is like a résumé on steroids. Where a résumé tends to be limited in scope, a CV is a comprehensive listing of one person’s lifetime educational accomplishments and honours, professional memberships, employment, and accomplishments (including publications, lectureships, conference participations, and so forth). These may be dozens of pages in length!
Sometimes an online site will look good but won’t show an author’s name. Does that mean you shouldn’t trust the site? Not necessarily.
Many sites employ a staff of writers or freelance writers to create content on the site but don’t list the author’s name. For example, the National Institute of Health’s information page about headaches lists no authors. Scroll to the page bottom, and you’ll see the page was “prepared by: Office of Communications and Public Liaison.” However, the NIH is a highly respected national institution, and their site is full of information that absolutely meets our CRAP criteria. They list no authors, but they point to the information’s origin, and we can be confident that they are relying on strong writers for their material. Is this a useful site? Absolutely.
Periodical* sites may post articles that don’t credit an author. Many of these sites have their own department of journalists**, writers, and freelance writers*** who create their content; these writers are often not credited individually.
*A periodical is anything that is printed on a regular schedule (i.e., periodically). Periodicals include newspapers, magazines, journals, zines, and more.
**A journalist is a skilled writer who has completed a college bachelor’s degree in journalism. Journalistic writing follows a specific style that is fact-based and objective.
***A freelance writer is a professional writer who is hired and assigned to write specific stories or articles. Freelancers may not be experts in subjects they’re assigned to write about, but they are skilled researchers, enabling them to write about varied topics.
You’ll want to check to see if the material you’re looking at has a date. As a general rule, the more current the date on the material, the better—especially if you’re discussing something that undergoes near-constant change, like politics, science, or technology.
But sometimes, information can be dated and still be useful. For instance, if I was writing a paper about organic gardening, I might be interested in some of Dr. Rudolph Steiner’s original lectures on biodynamic farming. These can be found on the Rudolph Steiner Archive and eLibrary. They date back to the 1920s, but their content is still considered useful and informative by many farmers (CRAP+). This example shows how important it is to consider date when evaluating a source.
Sometimes, you won’t find any date on the material. Again, you’ll need to evaluate this in terms of the strength of the rest of the page. Scrolling to the bottom of a web page will often reveal a “last update” date at the bottom, and this can help your decision process. If you can’t locate any dates on the material and the website hasn’t been updated in years, you should probably find a better source.
Consider the visual layout and appeal of the page:
And take a look at the page content:
Video: The CRAP Test for Evaluating Websites (length 5:45)

A YouTube element has been excluded from this version of the text. You can view it online here: https://opentextbc.ca/studentsuccess/?p=231
Start your search in the right place. When looking for a specific piece of evidence, don’t just automatically type a word into Google: instead, ask yourself, “What’s the best place I might find this?” While thinking about the subject, consider the persons or organizations that are considered experts on the topic, and try beginning a search with those names. For instance, if you wanted to answer a question about spaceflight, you might think of starting with NASA.
If you begin in the right place, you’re more likely to find useful information right away, and it’s more likely to be credible. Likewise, try and find the best human sources as well. With a little research on your topic, you can identify the big names in the field.
Don’t always start by turning to the internet and Google. Yes, this may be the easiest way to go, but is it always the best? No—not usually. It is better to start with sites that you know will carry reliable information. Choose Google Scholar over a typical Google search. Google Scholar is a web search engine that focuses on scholarly literature and includes peer-reviewed online academic journals, books, conference papers, dissertations, technical reports, and more. You are far more likely to find a good credible source here than in a general Google search.
Visit your college library, or search it electronically. Read textbooks or periodicals. Seek out human experts. Put your hands on your topic, if you can, by diving into it in a personal way. Try making an observation, conducting a survey, or interviewing a subject. In a recent research writing class, a student writing about Starbucks’s business practices actually drove to company headquarters in Seattle and interviewed a top executive. Another student—this one investigating the Ebola virus—met with two local microbiologists, while a third student researching the geology of Crater Lake went on a weekend outing to experience the national park “up close and personal”.
Practice these strategies when you evaluate sources and websites, and you should be able to find strong materials that will boost your college work.
![]() Whenever you identify a good printed source—book, journal, etc.—go to the end of it and read the bibliography. Voila: a brand new list of potential source materials!
Whenever you identify a good printed source—book, journal, etc.—go to the end of it and read the bibliography. Voila: a brand new list of potential source materials!
Exercise: Evaluating a Website
Part 1: Consider what you’ve just learned about currency, reliability, accuracy, and purpose or point of view to help you evaluate the academic merit of a source.
Keep these qualities in mind as you explore one (or more) of these sites.
Part 2: Answer and consider the following.
Answers
Hopefully you found that none of those sites passed the CRAP test. But likely you had fun reading through them at least. As you evaluate websites in the future, remember these examples and be sure to explore the sites carefully as you decide whether or not they are reliable.
Follow the same guidelines given above for finding strong Web materials. Look at the author, date, and the material itself. Consider the publication itself: a mainstream, respected newspaper or magazine—like The New York Times, Washington Post, or The Atlantic—more or less automatically meets our CRAP test, while smaller or local publications may require a detailed evaluation.
A wiki is a website that functions as a public, open encyclopedia or collection of information. The best known of these is Wikipedia. Wiki sources typically can be created and edited by anyone. The best part of wikis is their openness, along with the fact that people collaborate to create them. The worst part is that wikis can be created and edited by anyone—including people who have no business doing so or, even worse, who intentionally enter false or defamatory information.
As a rule, Wikipedia and other ”wiki” sources are not considered to be acceptable sources for college work.
Why not?
The beauty of Wikipedia is its egalitarianism: it’s billed as a public encyclopedia for everyone. The problem with this is that anyone can create a Wikipedia entry, and likewise, anyone can edit the entries. Unfortunately, “anyone” is usually not an authority in the field. Remember, we’re looking for sources that meet the CRAP criteria and that are written by people with degrees, education, and/or expertise in the field. Wikipedia doesn’t follow this model, and so we don’t rely on it as a reliable source.
But now that I’ve told you not to use Wikipedia, be aware that sometimes a teacher may ask you to use Wikipedia for a specific purpose. In that case, they’ll explain why they’re asking you to use it and how you should proceed.
Also, consider this: studies have shown that the information in Wikipedia is, in most cases, as accurate as that from standard encyclopedias (Taraborelli; Terdimann). Yet despite these findings, two problems remain:
These problems once again point out why we don’t rely on Wikipedia for academic work.
Wikipedia, however, has two great features that you can use right away:
In addition to not using Wikipedia as an academic source, you should also avoid DotDash (formerly About.com), Yahoo! Answers, eHow, and other similar public information sites. If you have questions about using these sources, discuss this with your instructor.
Exercise: Researching Information
You will find and evaluate a few reference sources for a topic of your choice.
This chapter is a remix of the following chapters:
Plagiarism occurs when someone uses another person’s intellectual property and doesn’t give them credit. Intellectual property is defined as material or ideas envisioned and created by another person. There are many kinds of intellectual property, including books, articles, essays, stories, poems, films, photographs, works of art or craft, or even just ideas. For example, if you copy text out of a textbook or article and use it in your homework assignment so it looks like you wrote it – that’s plagiarism. If someone else thought of an idea and brought it into the world, they own it, and if you use their idea in your work, you have to acknowledge them as the actual owner. If you don’t, you’ve committed plagiarism. That’s not a good idea!
Plagiarism is a kind of academic dishonesty—a kind of theft. Colleges and universities take plagiarism seriously; assignments can get a grade of zero, and many institutions discipline or even expel students who are found to be plagiarizing.
Many educators used to believe that students plagiarized either because they were lazy or because they just didn’t care about anything but getting that final piece of paper: the degree or certificate. Both of these reasons are still true sometimes: we’ve all met people who don’t like to work hard (or at all!) or who, in the case of college, just want that piece of paper and don’t care how they get it.
But today, thanks to the work of innovative educators, instructors know that plagiarism and cheating are often motivated by more complicated factors.
As for you: how can you avoid plagiarism? It’s actually quite simple:
There are a number of different practices which could lead to or be defined as plagiarism, so it’s important that you understand what constitutes plagiarism and what doesn’t.
Exercise: Identifying Plagiarism
Which of these would be a kind of plagiarism?
Answers
All of the examples are kinds of plagiarism. Did you get them all correct? Remember, any time you use someone else’s intellectual property—of any kind—you must give them credit by acknowledging their name and giving information about the source.
There is no need to cite common knowledge. Common knowledge does not mean knowledge everyone has. It means knowledge that everyone can easily access. For example, most people do not know the date of George Washington’s death, but everyone can easily find that information. If the information or idea can be found in multiple sources and the information or idea remains constant from source to source, it can be considered common knowledge. This is one reason so much research is usually done for university writing—the more sources you read, the more easily you can sort out what is common knowledge: if you see an uncited idea in multiple sources, then you can feel secure that idea is common knowledge.
In today’s digital age, with information seemingly at our fingertips, it’s important to understand some of the guidelines and restrictions that affect how we use that information. This is another important part of using sources correctly and avoiding plagiarism.
Copyright is a legal term that refers to the person (or people) who own and distribute a piece of information. The copyright holder has rights to that material, and if others use the material without getting permission first, they may be in violation of copyright. This is not good! And it can result in fines.
What is the most important thing you need to know about copyright? Simple: If something is copyrighted, you cannot use it without getting permission; this may involve paying for permission.
Otherwise, the Canadian Guide to Copyright is your go-to location for everything you need to know about copyright in Canada.
Fair dealing is a legal term pertaining to users’ rights in Canada under copyright law. There are provisions that allow people to use parts of copyrighted material for specific purposes. Fair dealing applies to common law jurisdictions in the Commonwealth such as Britain, Australia, and New Zealand. The United States has a similar provision called fair use (see below). The six factors defining fair dealings include purpose, character, amount, effect of the dealing, nature of the work, and alternatives to the dealing. Canada’s provisions have become more flexible particularly after an amendment process that took several years with extensive public consultation. In July 2012, the Federal Government of Canada amended fair dealing (Section 29) as follows: Fair dealing for the purpose of research, private study, education, parody or satire does not infringe copyright.
Fair dealing provides ways for people to use others’ copyrighted work without infringing on the author’s copyright. This is especially important for students and educators when using and sharing information in research assignments and projects.
The concept of fair use allows students and teachers to use small amounts of copyrighted materials for a short-term, limited purpose—particularly for study, teaching, or research. The rules of fair use apply to the United States. The four factors determining fairness include purpose and character of the use; nature of the copyrighted work; amount and substantiality of the portion of the work used; and the effect of the use on the potential market or value of the work.
In general, the following should be true if you claim fair use to work with copyrighted materials:
Creative Commons (creativecommons.org) is a not-for-profit organization that collects all sorts of materials and makes them available to the public for free use.
When a user creates a piece of content (writing, art, photography, or just about anything), they may choose to put a Creative Commons licence on the material. The licence explains how people share, remix, re-purpose, or in other ways use the material.
As a student, the Creative Commons has made a world of materials available to you. If you use any of the materials in your work, you should include the Creative Commons in your source citation.
Open Educational Resources (OERs) are teaching and learning materials that are available for free use by students and teachers everywhere because they are under an open licence, such as a Creative Commons licence. The move toward OERs has really taken off recently—both to take advantage of the internet and digital publishing and also to help control the skyrocketing cost of textbooks. Open resources are easy to access and use and are continually updated and revised. You’re reading one right now!
A BitTorrent site is a website that encourages peer-to-peer (P2P) file sharing. Files can consist of books, periodicals, music, film, data (many scientists use Torrent files to distribute large data packages) or virtually anything.
A major problem with these sites is that many of them engage in illegal file-sharing— particularly of music and film and lately of graphic novels. Notwithstanding the ethics involved, most of the sites are not secure, which raises the risk of users being implicated in illegal file-sharing activities. Most BitTorrent sites do not provide user anonymity and most can track (or at least record) IP addresses.
The best advice with BitTorrents: stay away from them unless you’re really good with technology and know exactly what you’re getting into.
Why is this worth mentioning? You’ll often be asked to watch film or access other resources as part of your classes. And, you’ll be asked to buy textbooks. You may be tempted to download a free book or movie through a Torrent site. Beware, and consider the implications first.
What if you have an image that you found somewhere on the internet and you want to use it in an assignment or some sort of publication, but you don’t remember where you found it. How will you credit the source? You can now do a reverse image search to try and find the owner or creator of images on the Web.
One of the best of these is TinEye (www.tineye.com). Upload a copy of the image in question, and the TinEye engine will search for the original or oldest-known occurrence of the image. Google also has a reverse image search, and others are appearing on the Web all the time.
Exercise: Reverse Image Search
Not only is it correct and ethical to avoid plagiarism and give credit to authors and sources, but it also adds credibility to your paper. When your paper cites reliable sources, it looks good on you that you have done good research and backed up your information.
This chapter is a remix of the following chapters:

Once you have researched good sources of information and summarized or paraphrased or directly quoted a source, you will have to correctly reference your sources (also called citing your sources). There are some standard ways of using sources that let your readers know this material is from other texts rather than original ideas from your own brain. Following these specific guidelines also allows your readers to locate those sources if they are interested in the topic and would like to know more about what they say.
Giving credit to the sources you used while creating a text is important (and useful) for several reasons.
For college-level work, this generally means two things: in-text or parenthetical citation (throughout the body of your work) and a “Works Cited” or “References” page (at the end of your work). What these two things look like will be a little different for different types of classes.
You should generally check with your instructors about their preferred form of citation when you write papers for courses. No one standard is used in all academic papers. You can learn about the three major forms or styles used in most university writing handbooks and on many Web sites such as Purdue OWL:
MLA and APA are the two most commonly used styles for referencing sources. The specific details required and the order in which they appear changes a little between different formats, but practising one of them will give you a general idea of what most of them are looking for. All of the information shown here is specific to MLA, which is the format you will use for your writing classes (and some other humanities classes). Note that the format for each style is very particular and should be followed exactly. Instructors can be very fussy about making sure the referencing formats are followed to a “t”.
Once you have brought source material into your writing (via quotation, summary, or paraphrase), your next task is to cite or identify it. This is essential because giving credit to the creator of the source material helps you avoid plagiarism. Identifying your sources also helps your reader understand which written content is from a source and which represents your ideas.
When you cite or identify source materials, you make it absolutely clear that the material was taken from a source. Note that if you don’t do that, your reader is left to assume the words are yours—and since that isn’t true, you will have committed plagiarism.
Every time you use an idea or language from a source in your text (so every time you summarize, paraphrase, or directly quote material from a source), you will want to add an in-text citation. In-text citations are exactly like it sounds – in the text. In other words, they are references which are placed right in the body of the paper (not at the bottom of the page or at the back of the paper). Sometimes you can accomplish giving credit to the author in an in-text citation simply by mentioning the author or title of a source in the body of your writing, but other times you’ll handle in-text citation differently, with a parenthetical citation. Parenthetical means that the citation appears in parentheses (brackets) in the text of your essay.
A starting point for parenthetical citations is that they include the author’s last name and the page number where the borrowed information came from. For example, let’s say I’m using material from an article written by Lisa Smith. It’s in a physical magazine and spans pages 38-42. If, on page 41, she says something like, “While most studies have shown that Expo dry erase markers have superior lasting power, erasability, and colour saturation to than other brands on the market, their higher cost is a concern for some consumers,” I might incorporate that into a paper like this:
By most measurable standards, Expo markers are clearly the favoured option (Smith 41).
However, you don’t always need both components (last name and page number) in the parenthetical citation. If I introduced the source material in the sentence above a little differently, introducing the author before delivering the material, I wouldn’t need to repeat the author’s name in that same sentence in the parenthetical citation. In that case, my sentence would look something like this: According to Lisa Smith, Expo markers are clearly the favoured option by most measurable standards (41).
In this section, we’ll discuss three ways to cite or identify written source materials in your own writing.
By introducing the author or the material, you make it clear to the reader that what you’re talking about is from a source. Here’s an example of a quotation that is identified by introducing the author and the title of source:
In the article, “Grooming Poodles for Fun and Profit,” Jonas Fogbottom explains, “Poodle grooming is a labour of love. It takes years of practice to be good at it, but once learned, it’s a fun and worthwhile career.”
Here’s an example of a paraphrase that is identified in the same way:
In the article, “Grooming Poodles for Fun and Profit,” Jonas Fogbottom says that although it takes a long time to become a skilled poodle groomer, it’s well worth the effort and leads to a good career.
Note that, in the example above, (1) if there are no page numbers to cite and (2) if the name of the author is signaled in the phrase that introduces the bit of source material, then there is no need for the parenthetical citation. This is an example of a situation where mentioning the author by name is the only in-text citation you’ll need. And sometimes, if the name of the author is unknown, then you might just mention the title of the article instead. It will be up to you, as a writer, to choose which method works best for your given situation.
The first time that you mention a source in your writing, you should always introduce the speaker and, if possible, the title of the source as well. Note that the speaker is the person responsible for stating the information that you’re citing and that this is not always the author of the text. For example, an author of an article might quote someone else, and you might quote or paraphrase that person.
Use the speaker’s full name (e.g., “According to Jonas Fogbottom . . .”) the first time you introduce them; if you mention them again in the paper, use their last name only (e.g., “Fogbottom goes on to discuss . . .”).
Using linking language (sometimes called attributive language or signal phrases) simply means using words that show the reader you are still talking about a source that you just mentioned.
For example, you might use linking language that looks something like this:
By using this kind of language, you make it clear to the reader that you’re still talking about a source. And while you’ll use this type of language throughout any researched essay whether you’re also using parenthetical citations or not, as mentioned above, sometimes this linking language will be all you need for in-text citation.
Let’s look back at the last Fogbottom example from above, and imagine you wanted to add two more sentences from the same source. The linking language is highlighted:
In the article, “Grooming Poodles for Fun and Profit,” Jonas Fogbottom says that although it takes a long time to become a skilled poodle groomer, it’s well worth the effort and leads to a good career. Fogbottom goes on to explain how one is trained in the art of dog and poodle grooming. The article also gives a set of resources for people who want to know more about a dog grooming career.
In this example, the phrases “Fogbottom goes on to explain…” and “The article also gives…” are linking language. Using the linking language makes it absolutely clear to your reader that you are still talking about a source.
A parenthetical citation is a citation enclosed within parentheses.
![]() Whatever comes first in the Works Cited citation is what will go into the parentheses in a parenthetical citation. Most often that item is an author’s last name, but sometimes it’s a title or abbreviated title of an article or other type of text. This is another good reason for starting by creating a Works Cited entry the moment you begin working with a source.
Whatever comes first in the Works Cited citation is what will go into the parentheses in a parenthetical citation. Most often that item is an author’s last name, but sometimes it’s a title or abbreviated title of an article or other type of text. This is another good reason for starting by creating a Works Cited entry the moment you begin working with a source.
The classic parenthetical citation includes the author’s name and, if there is one, a page number. To learn more about parenthetical citation and see some examples, see the Purdue OWL article on “MLA In-Text Citations: The Basics” (available from owl.english.purdue.edu).
Here’s an example:
(Fogbottom 16)
If there are two authors, list both (with a page number, if available):
(Smith and Jones 24)
If there are three or more authors, list the first author only and add “et al.”* (with a page number, if available):
(Smith et al. 62)
*et al means “and others.” If a text or source has three or more authors, MLA style has us just list the first one with et al.
But my source doesn’t have page numbers!
If you are using an electronic source or another kind of source with no page numbers, just leave the page number out: (Fogbottom)
If you’re quoting or paraphrasing someone who was cited by the author of one of your sources, then that’s handled a bit differently. For example, what if you quote Smith, but you found that quote in the article by Fogbottom. In this case, you should introduce the speaker (Smith) as described above, and then cite the source for the quote, like this:
(qtd. in Fogbottom)
But my source doesn’t have an author!
This happens sometimes. Many useful documents, like government publications, organizational reports, and surveys, don’t list their authors. On the other hand, sometimes no clearly listed author can be a red flag that a source is not entirely trustworthy or is not researched well enough to be a reliable source for you.
If you encounter a source with no author, do look for other indicators that it is a good (or poor) source—who published it, does it have an appropriate list of references, is it current information, is it unbiased?
If you determine that this source is an appropriate source to use, then, when you create your in-text citation for it, you will simply use the title of the source (article, chapter, graph, film, etc.) in the place where you would have used the author’s name. If the title is long, you should abbreviate by listing the first one or two words of it (with a page number, if available).
Let’s imagine you’re working with a newspaper article entitled, “What’s New in Technology,” enclosed in quotation marks to indicate that this is an article title, and with no known author. Here’s what that would look like in a parenthetical citation:
(“What’s New” B6)
If there is no author and you’re working with an electronic article, use the first one or two words in your parenthetical citation, again, enclosed in quotation marks. Let’s imagine you’re working with a web article entitled, “Pie Baking for Fun and Profit” and with no author. Here’s what that would look in a parenthetical citation:
(“Pie Baking”)
The parenthetical citation should be added at the end of the sentence that contains the source material. Let’s go back to the Fogbottom example and see how a parenthetical citation would work:
“Poodle grooming is a labour of love. It takes years of practice to be good at it, but once learned, it’s a fun and worthwhile career” (Fogbottom).
Here’s what it would look like if we used it with a paraphrase instead of a quotation:
Although it takes a long time to become a skilled poodle groomer, it’s well worth the effort and leads to a good career (Fogbottom).
Note that the citation is placed at the end of the sentence; the period comes after the parentheses. Misplacing the period is one of the most common formatting errors made by students.
Using parenthetical citation makes it crystal clear that a sentence comes from source material. This is, by far, the easiest way to cite or identify your source materials, too.
If using parenthetical citations is easy, why would we bother with using introduction or linking language to identify sources?
Good question! There would be nothing wrong with only using parenthetical citations all the way through your writing—it would absolutely do the job of citing the material. But, it wouldn’t read smoothly and would feel somewhat rough because every time a parenthetical citation popped up, the reader would be “stopped” in place for a moment. Using a combination of introduction, linking language, and parenthetical citation, as needed, makes the writing smoother and easier to read. It also integrates the source material with the writer’s ideas. We call this synthesis, and it’s part of the craft of writing.

Increasingly, teachers allow and even encourage students to use images—photographs, maps, sketches, graphs, and so forth—in their writing. Before you do this, check with your teacher to make sure they approve. And then remember that if the image was created by someone else, you must give them credit.
We don’t list images on the Works Cited page. But we do identify them in one of two ways:
Ideally, include the author(s), title of source, title of container, publisher, date, and location.
Here’s an example of how you might cite a sketch taken from a hard copy book, where “The Perfect Poodle Hairdo” is the name of the sketch and Styling Poodles for Fun and Profit is the book title:
Groomer, Ima. “The Perfect Poodle Coif.” Styling Poodles for Fun and Profit, Poodle Publishing, 2015.
Here are a few basic rules for formatting titles:
Exercise: Formatting Titles
You’ll probably be working with all kinds of texts as you write essays and assignments for various college classes. Properly formatting the titles of your sources signals to your readers the type of source you’re discussing (a book, an article, a short work, etc.). See if you can correctly capitalize and format the following titles:
Check your answers at the end of this section.
At the end of texts that have drawn from existing sources, you will often find a Works Cited page. This page gives more information than the parenthetical citations do about what kinds of sources were referenced in this work and where they can be found if the reader would like to know more about them. These entries all follow a specific and consistent format so that it is easy for readers to find the information they are looking for, and so the shape and type of that information is consistent no matter who is writing the entries.
Until recently, the MLA required a slightly different format for every type of source—an entry for a Youtube video required certain information that was different from an entry for a book that was different from an entry for an online article. The most recent version of MLA, though—MLA 8—has simplified this so there is just one format rather than many.
You can learn how to create works cited entries in MLA 8 format and see an example in the “Creating a Works Cited Page” appendix to the text, The Word on College Reading and Writing. This clearly explains the process to create a proper Works Cited Page. You can also refer to Purdue Owl, MLA Sample Works Cited Page. Purdue Owl is a great website to use as a reference whenever you have questions about citing or referencing material.
A citation generator is a piece of software that creates a Works Cited list for the writer. The writer types in the details about the source, and the citation generator creates the in-text citations and the Works Cited list. For each new document, you can choose which style you require (MLA, APA, Chicago style, etc.) Every time you use a new source, you enter the info into the citation generator. It will have blank fields for you to fill out, which is helpful. For example, if the source is a website, as soon as you choose website as one of the options, it will bring up fields asking for the URL and all the fields associated with a website. Then it takes the information and sorts it for the Works Cited page and the in-texts citations. It’s handy because once the information for the source is entered, every time you use information from the source, you can click in-text citation and it will insert the parenthetical citation correctly into your paper. This is a convenient way to keep track of sources as you go along.
There are websites such as www.bibme.org that can manage your references (free version will do citations) or some word processing software has it built in. For example, Microsoft Word has a Reference tab. Click on Manage Sources to enter each new source. Regardless which software you use, once your references are entered, you can add in-text citations easily, and generate your Works Cited page at the end. It will automatically alphabetize your sources and format the page correctly. Sometimes you need to make a few adjustments at the end as none of the software seems to be perfect, but the citation generator can be a very useful tool to keep your references organized, and to cite correctly according to required style. Another feature is that the software keeps a history of your references so if you use some of your sources in future papers, you will already have the source entered and you can easily add it to the new paper.

Once you have completed your Works Cited page and all your in-text citations, here is a checklist for your referencing of sources.
Check carefully to be sure each of these is correct and complete:
The descriptions above demonstrate how to use MLA style. APA style has slightly different rules but is just as specific in its formatting. For a detailed description of APA with examples, tips, and practice exercises see the open textbook: Writing for Success – 1st Canadian Edition – Chapter 9. Citations and Referencing
An incredibly valuable resource for helping students cite sources correctly for various styles is The Purdue Online Writing Lab, more commonly referred to as Purdue OWL. It is a very handy resource to continually refer to as you learn how to cite sources correctly.
Answers to Exercise: Formatting Titles
Here are the correctly capitalized titles:
How did you do?
This chapter is a remix of the following chapters:
Finding good accurate information is an important skill for doing research papers as a college student. Knowing how to find credible sources and then to evaluate whether the information from these sources is useful for your topic is paramount. Knowing how to properly reference the sources that you end up using will prevent plagiarism and will give proper credit to the applicable authors and researchers.
Key Takeaways
To find credible sources:
To evaluate resources that you find:
Avoiding plagiarism:
Referencing sources:
Exercises: Research
Use your search skills to find the following two resources.
For each resource:

Online learning has become increasingly more popular over the last decade. Students are looking to take courses online at an ever-increasing rate. With the increase in part-time studies and students juggling many things including classes, jobs, families and hobbies, taking traditional scheduled classes becomes increasingly harder. There are many advantages to online learning as well as many potential disadvantages. It is important to consider whether online learning is a good option for you. There are several misconceptions about online learning. Many people think that online means it will be easy. Or they believe that since it’s online they won’t have time management issues. This is usually not the case.
In this chapter you will learn about common assumptions, discover the pros and cons of online
learning, and decide if it is a good option for you. You will learn some strategies for successful online learning. Lastly, you will try out an online platform, to give you an experience of how online
courses are often set up.
Learning Objectives
In this chapter on “Online Learning,” students will:
If you have taken an online course before, you may know if it is right for you. If you haven’t, it is a good idea to consider the pros and cons of learning online, before signing up.
One of the mistakes that people often make when deciding to take an online course is to make assumptions about learning online. They may have taken or heard of an online course and assumed that all online courses work the same way.
Common assumptions about online learning:
Although these assumptions are sometimes true, often they are not. Online courses can be structured very differently from each other. You will need to find out about the structure of the course you want to take when deciding if it is right for you. Here are some things you will want to consider.
Completion time: Most courses have a completion deadline. If it is six months to a year, you should have plenty of time to complete the course. Some courses give only four to sixteen weeks, and these are usually more demanding to keep up with coursework every week. For some courses the deadline only entails a date by which the whole course must be completed by. It doesn’t matter if you spread it out evenly or cram it all in at the end (though not a recommended study skills strategy) as long as it is completed before the deadline. However, other online courses have strict deadlines throughout the course. For example, the course might have a regular schedule where assignments are due every Friday, forum posts need to be made throughout the week, and specific tests are scheduled throughout the term. Don’t get caught making assumptions, and check out the schedule for the course you want to take. Make sure it is doable for you.
Busy schedules: Many people think that just because there are no scheduled classes that they will be able to fit in their studies in all their free time. Many students overestimate how much free time they have and are panicked when they realize that only a few weeks into the course they are already very behind. Many post-secondary courses require between nine to twelve hours per week per course. Look at a typical week’s schedule and mark in your commitments such as your job, volunteer commitments, and family responsibilities. Schedule where you will work on your course. If you can’t carve out nine to twelve hours per week regularly, you may not have the time to do the course, or you may have to give things up to make the time.
Class caps: For some, their experience with online courses includes short certification courses such as Serving it Right or FoodSafe. These courses can be taken online, and the tests are multiple choice so people can get their results instantly. The whole test is automated. People mistakenly assume that all online courses are like that and, as a result, think they can sign up anytime and that unlimited numbers of people can take the course at a time. Post-secondary courses offered online are rarely like that. They have instructors who mark your assignments, give individual feedback, and are available for help. Courses include class discussions and forum posts, and they have many of the components of a face-to-face class. As a result, instructors cannot have limitless people in their online classes, and institutions have class caps (maximum class sizes) for online courses just as they do for face-to-face courses. Online courses fill up and have wait lists just like traditional classes. Don’t assume you can sign up for your course anytime. Register early to ensure a “seat” in the class.
Start dates: Another common misunderstanding about online courses is that people assume they can start anytime. Some post-secondary institutions, such as Open Learning-Thompson Rivers University, are generally structured that way and have continuous intake, however many are not. They have semester start dates just like face-to-face classes. These are usually at the start of September for the fall semester and the start of January for the winter semester. Others may have start dates at the beginning of every month. Do your research and see what start dates are available to you as you do your planning.
Synchronous or asynchronous: Synchronous online courses have a class cohort that meets at regular times. They have lectures or class forums requiring everyone to be online at the same time. It is somewhat like having scheduled class times in the face-to-face classroom, but in this case everyone has to be at their computer at the same time. If this is the case in the course you are considering, you’ll need to see if the course schedule works with your personal schedule. Some classes have some parts of the course as synchronous. For example, a class may need to meet to do labs in person. These are often referred to as hybrid courses. Some courses are completely asynchronous (self-paced) but they require an on-site seminar every few months. Know what the requirements of the course are before spending your money on something you are unable to commit to.
Portability: Often online learning conjures up the image of traveling around with a laptop, light and easy, knowing that all your learning material is digital. This is often not the case. Just because the course is online doesn’t mean that everything you’ll need is online. There are often a stack of textbooks, lab equipment, journal articles, and manipulatives that accompany an online course. Sometimes online courses are not as portable as you would expect.
Author’s Story: Online Portability
While I was on an educational leave working on my Master’s of Distance Education, I expected online learning to be very portable. I planned on moving to a new place every month for variety and adventure. I soon learned that was very impractical. In each place I set up my studying environment, I filled the desk with textbooks and materials. I usually used two laptops so that I could use one for research and the other for working on my assignments (essentially creating a double-screen). This, of course, wasn’t necessary but it was convenient and I appreciated the ease of having more than one screen open in front of me. I also found that I liked to print off many of the journal articles that I was using in my research essays. It helped to physically have them to mark up, highlight, and organize in piles. In the end, my studying environment was very efficient, but certainly not portable, so I didn’t travel nearly as much as I thought I would.
— Mary Shier, College of the Rockies
Nice and easy: Another assumption is that an online class will be easy. This also is rarely true. In fact, it can pose challenges for some learners. Instead of being able to listen to a lecture, students may have much more reading to do. This can be more time consuming for some learners. If students are working in isolation, it can take more time just figuring out what is required rather than having classmates to discuss things with. (However, many online courses have chat rooms for classmates to discuss these kinds of issues.) Thoughtfully crafting forum posts (the online version of a class discussion) to add to online discussions can be far more time-consuming than just adding to a verbal discussion in class. Online courses are rarely easier than their face-to-face counterparts, however, they do often save time in other ways, such as travelling to and from class, so it can work itself out.
Here are some typical questions to research answers for when considering an online course.
Asking these questions will help you avoid falling into the trap of making typical assumptions.
As you evaluate whether or not online learning is a good fit for you, it helps to consider the pros and cons. Some of these pros and cons will be more important to you than others, depending on your situation, so it’s important to consider your own specific circumstances and your learning strengths and weaknesses. Here are a few things to consider:
Schedule flexibility. Increasingly, students have complicated schedules, often juggling several part-time jobs, family responsibilities, and other commitments. For many, education has been out of reach when traditional scheduled classes did not mesh with their busy schedules and obligations. Online learning means students can learn when it suits them. Students can do their readings throughout the day in between other commitments. They can work on and submit assignments in the middle of the night if that suits them. The time flexibility literally means that students who just couldn’t take classes on a traditional schedule can now further their education on a flexible schedule according to their needs.
Location flexibility. Online learning also opens up education for people who live in areas that do not have post-secondary institutions, especially remote communities. People can study at home or in local libraries or in convenient locations that eliminate the need to commute to physical institutions. This can save students hours of daily commuting time. It can also save students substantial amounts of money if it means they do not have to relocate to attend school. This is a significant factor for many who have financial concerns, housing concerns, or have a family member who cannot relocate due to employment or other obligations. Even people in big cities that do have post-secondary institutions welcome the opportunity to forgo a long commute to and from a college or university numerous times a week.
Multi-media. Learning happens more efficiently when several modalities are engaged. It helps to see (read or watch), hear (lecture or demonstration), do (labs, practice a skill, or write), as well as practice. Often people think that learning online will restrict learning because they’ll have to read everything. The opposite is actually true. With so many options for multi-media, modalities can be fully engaged through online learning. Courses can include video clips, lab demonstrations, and virtual labs where students can dissect something over and over until they’ve got it (as opposed to having one crack at it for an actual dissection). Courses can include hyperactive web links which can conveniently direct you to websites, web articles, and web demonstrations that add fascinating content. Courses can include high quality diagrams, graphs, interactive demonstrations, video podcasts, animations, Ted-Talks, YouTube clips, interactive digital learning games, blogs, wikis, learning objects, virtual worlds, and much more. Edutainment is a term describing applications that incorporate multimedia entertainment with educational objectives. Quality online courses have an array of possibilities that can keep the curriculum current and engaging.
Classmates. Online learning offers a diversity in classmates that often exceeds that of a face-to-face class. As you get to know your classmates through class discussions, online forums, group work, and class presentations, you will often meet people from all over the world. This allows for some interesting perspectives and a more global way of thinking and interpreting information.
Course selection. Making the decision to learn online means that there are seemingly limitless options in course selection. You have the option of enrolling in a different college than the one you would have chosen if you had to move there. It doesn’t matter how far away it is if you are learning online. You can choose courses according to price, convenience, and interesting topics. Often you do not necessarily have to take all your courses from one institution if there are courses elsewhere that interest you. If you are taking courses from more than one institution, just be sure to check out transferability into the program you are enrolled in or want to graduate from, prior to taking a course from elsewhere so you do not lose credit for the course. See Chapter 13 The BC Transfer Process for more information.
Financial. Tuition and books are often priced the same for online and face-to-face courses, however, there are financial considerations that can make online learning more affordable. Firstly, the flexibility of online means you may not need to quit your job, since you can work on coursework around work hours. (Be cautious that you don’t work so much that you don’t have time for your courses, though.) Having an income while going to school can relieve a great amount of financial burden and reduce accumulation of student loans. Secondly, you will not have extra accommodation fees or relocation costs taking online courses since you will not have to move to go to school. Even if the college or university is local, you won’t have transportation costs including public transit costs or gas and parking fees to travel to and from the institution. If you are a parent, you will likely have less child-care costs. You can also save money, since students are likely to eat out more when traveling to a campus.
Combination of online and face-to-face. It can be an option to do some of your courses face-to-face and some online. This can cut down on commutes if you choose to do online courses on certain days and work your schedule accordingly. This strategy can take advantage of the pros of both. It can also allow you to get to know instructors from a program in person during your face-to-face classes, giving you a personal connection with them for your online classes. Another use for combining formats is to take missing prerequisites online so that you don’t miss an opportunity to take a course according to your education plan. This can often save you from having to add an extra year to your education. Another pro of combining formats is that you can choose to take electives for your program online in the summer months, to get ahead on your education plan, or to lighten the load in the regular school year. There can be many advantages of taking a combination of online and face-to-face courses.
Author’s Story: Pros of Online Learning

I did a Master’s in online learning. I had an education leave from the college where I work, so I was free to travel and could have chosen to attend any one of several institutions. However, I chose to take my program online. I did this for several reasons. Since I was learning about online learning, it made sense to experience it firsthand while I was studying about it. It gave me many examples to draw from to demonstrate different learning theories. It also gave me the freedom to travel around while I was working on it.
My program was a lot of work – to which I was committed. Even still, I took advantage of some of the fringe benefits of online learning. I spent the fall in my hometown, where I saw lots of family and old friends. Though my course load was heavy and I was working on my schooling 10-12 hours a day, it still meant that I had tea breaks with my mom, lunches and dinners with different family members and friends, and had the ability to just be around them even though I was busy a lot of the time. I look back at that time as incredibly precious. I otherwise could never have spent so much time with my mother in my adult years as I did that fall, and it was wonderful. Online learning made that possible.

I was fortunate in that I went to the Dominican Republic for the winter semester. I rented out my home which more than paid for the rent on my beautiful villa by the ocean. I kept a rigorous schedule for my program. I woke up to the sounds of roosters crowing each morning at 6 a.m. I made coffee and went out onto the deck overlooking the ocean. I did my computer work in the morning, contributing to forum discussions and other course work. I did a work out, made breakfast, and continued on the computer. After lunch, I went down to the beach, got settled into my lounge chair, did my readings, and took notes. I went for a long swim in the ocean every afternoon. I dried off in the sun on my lounge chair while I continued my readings. In the evenings, I went back to the villa and worked on my assignments. This was my schedule all winter. I had the odd excursion and time out with people I met there, but my time included a lot of studying and writing papers. I had an amazing winter in the Dominican and met some incredible people. I had the opportunity to volunteer at a school there, which I thoroughly enjoyed. I learned a lot about their culture. The experience was life-enhancing, and I am so glad that I did my studies that way.
— Mary Shier, College of the Rockies
Time management. You have to be very organized when you take courses online. It is entirely up to you to stay on-track. Although this is true in a face-to-face class as well, students often feel more pressure when they have scheduled classes. They don’t want to miss class or get behind. They have classmates around them talking about upcoming assignments and tests, who inadvertently pressure them into getting things done. When they know they have class Monday morning, for example, they make sure they complete the course work that is required before that class. These scheduled things are more conducive to keeping on track. Online students are notorious for procrastinating and getting behind. It is vital to keep a schedule as if you were attending face-to-face classes. Once your study times are in your schedule, don’t divert from the schedule unless it is critically important. (That doesn’t include that your friend called you up and asked you to go to the show!) You have to get used to telling people you are busy with your school work and that you are not available. Review Chapter 7: Time Management for further time management strategies.
Motivation. Motivation is another key factor for success in online learning. If you are constantly talking yourself out of doing assignments, doubting your abilities, or not willing to give it your all, this can seriously impede your ability to be successful. Some people know themselves and are aware that they don’t have the motivation, self-drive, and determination to be consistent in their online studies. They will make the sacrifices required to commit to face-to-face courses. In other words, they are willing to commute and change their schedules to accommodate their scheduled classes, because they know that, for them personally, they are likely to be more successful in their courses.
Weak readers. Online learning most often involves a lot of reading. Some learners are strong readers and find they learn more by reading than listening in a class. Others find reading tedious and lose focus. If reading is a struggle, you may want to find out the differences in the amount of reading between the specific face-to-face classes and the online classes you are interested in taking. This may have a bearing on which format you choose.
Limited computer skills. Those who have very little experience with computers will find it more challenging doing online courses. As well as learning the course material and expectations of the instructor, these people will have to deal with learning computer skills concurrently. This is not necessarily a con as they will benefit greatly, however, it would be important to allow extra time needed for dealing with the learning curve of gaining the necessary computer skills. Of course, taking a face-to-face course likely will require computer skills as well, so it is wise to gain them regardless. Likely, it will initially be a little more challenging with an online course. Prior to starting online courses, it would be beneficial to take a computer skills course at a local community college, if possible.
The social aspect. Some learners enjoy the dynamics of being in a physical classroom. They get to form a personal relationship with the instructor. They meet classmates in person and can form study groups. They can benefit from the answers to questions that others ask or from the class discussions that arise. After class, they can easily discuss issues that they didn’t understand or they can go deeper into an issue, furthering understanding. Even moral support is a beneficial perk of having face-to-face classes. Other classmates can detect whether or not you are struggling and can offer support, lend materials, and offer a much needed smile. Many people really appreciate the social aspect of attending classes and being part of a college or university where they can join teams and clubs, have a drink at the campus pub, live in residence, and develop a healthy social life. This is particularly important for young students who have recently left home after completing high school. Older students who already have children and jobs, may not necessarily be looking to expand their social lives.
The format of some online courses are specifically designed to include a social aspect to learning. The course incorporates group assignments and forum discussions. Students get to know each other even though they may all be in different locales. Other courses don’t have any social component to them. Often in these online courses, students can feel very alone as they do their courses. If the social aspect is important to you, find out how the courses are structured at the institution where you are considering taking your program.
Author’s Story: Social Interaction Online
I wouldn’t have believed that social interaction online could match social interaction in a face-to-face classroom, but I experienced it. Of course, it depends on the structure of the course because some courses don’t facilitate it in their set-up.
During my Master’s online, the courses were designed using a constructivist philosophy. We regularly had to do group work and participate in online discussions. I got to know many of the people in my cohort. As a result, I got to know those I worked well with, and those I didn’t necessarily want to work with again. As group work assignments were assigned, we had the option of choosing our groups. I went through the forum discussions to see people who I would likely work well with, and eventually I had specific people that I knew I worked well with, so we planned to work together in future assignments.
In order to do our assignments, we emailed, messaged, and Skyped often. We contributed to group documents, and commented regularly on each other’s contributions. It became quite natural to be working together with folks who were all over the world. I got to know them, we asked each other about things going on in our lives, and encouraged each other through challenging times. I celebrated with a class mate in Greece, who got engaged. I knew throughout the term that she was hoping for a proposal, and I was genuinely excited when it finally happened. I learned about others’ children and their struggles. I discovered others’ tips and tricks for fitting the program into their busy lives. We regularly had class discussions about different concepts, and I learned a lot from my classmates.
When I went to the graduation ceremony, I met many fellow classmates and instructors for the first time in person, and yet it felt like I already really knew them. I did. It was a time of celebration. Even long after graduation, I am still in touch with a few classmates. We have contacted each other to catch up, get professional advice, and even to network for jobs. The social interaction in my online courses contributed richly to my educational experience.
— Mary Shier, College of the Rockies
Exercise: Evaluate if Online Learning is a Good Personal Option
Consider the several factors above and any others that apply. Relate them to your own personal circumstance, and evaluate whether online learning is a good personal option for you. As you evaluate consider the following:
Write an answer that includes the above factors and explains why you came to the conclusion you reached.

Many of the strategies for online learning success are the same strategies for success in traditional courses. Using all the principles described in this text to this point will contribute to your learning achievement. These include: enhancing personal wellness, utilizing your support networks, maximizing your learning strengths, using effective study skills, implementing effective test-taking strategies, using time management strategies, and accessing student support services as needed.
As well as these, there are a few strategies and tips that are particularly useful in online learning.

Key Takeaways
Many colleges or universities have free short courses to familiarize yourself with an online platform. Check with your local institution or another institution to research this option. For example, College of the Rockies has a free Sample Course available to familiarize students with online courses. It can be accessed on the learning platform, Moodle, and gives a little tour through the sample course so people can see how things are set up and organized. Anyone can access the free course and in the course, there is a video link which shows how to navigate the course.
Exercise: Try a Moodle Platform
Familiarize yourself with a Moodle Platform to view how an online course can be navigated.
Exercise: Use an Online Learning Platform
The purpose of this exercise is to get experience using a learning management system such as Blackboard, Moodle, Canvas, or Brightspace. Find a short (possibly free) online course, and take the course to familiarize yourself with using an online platform. If you can’t find a short course to use, feel free to use the Sample Course above. Write a short report about your experience. It should include:
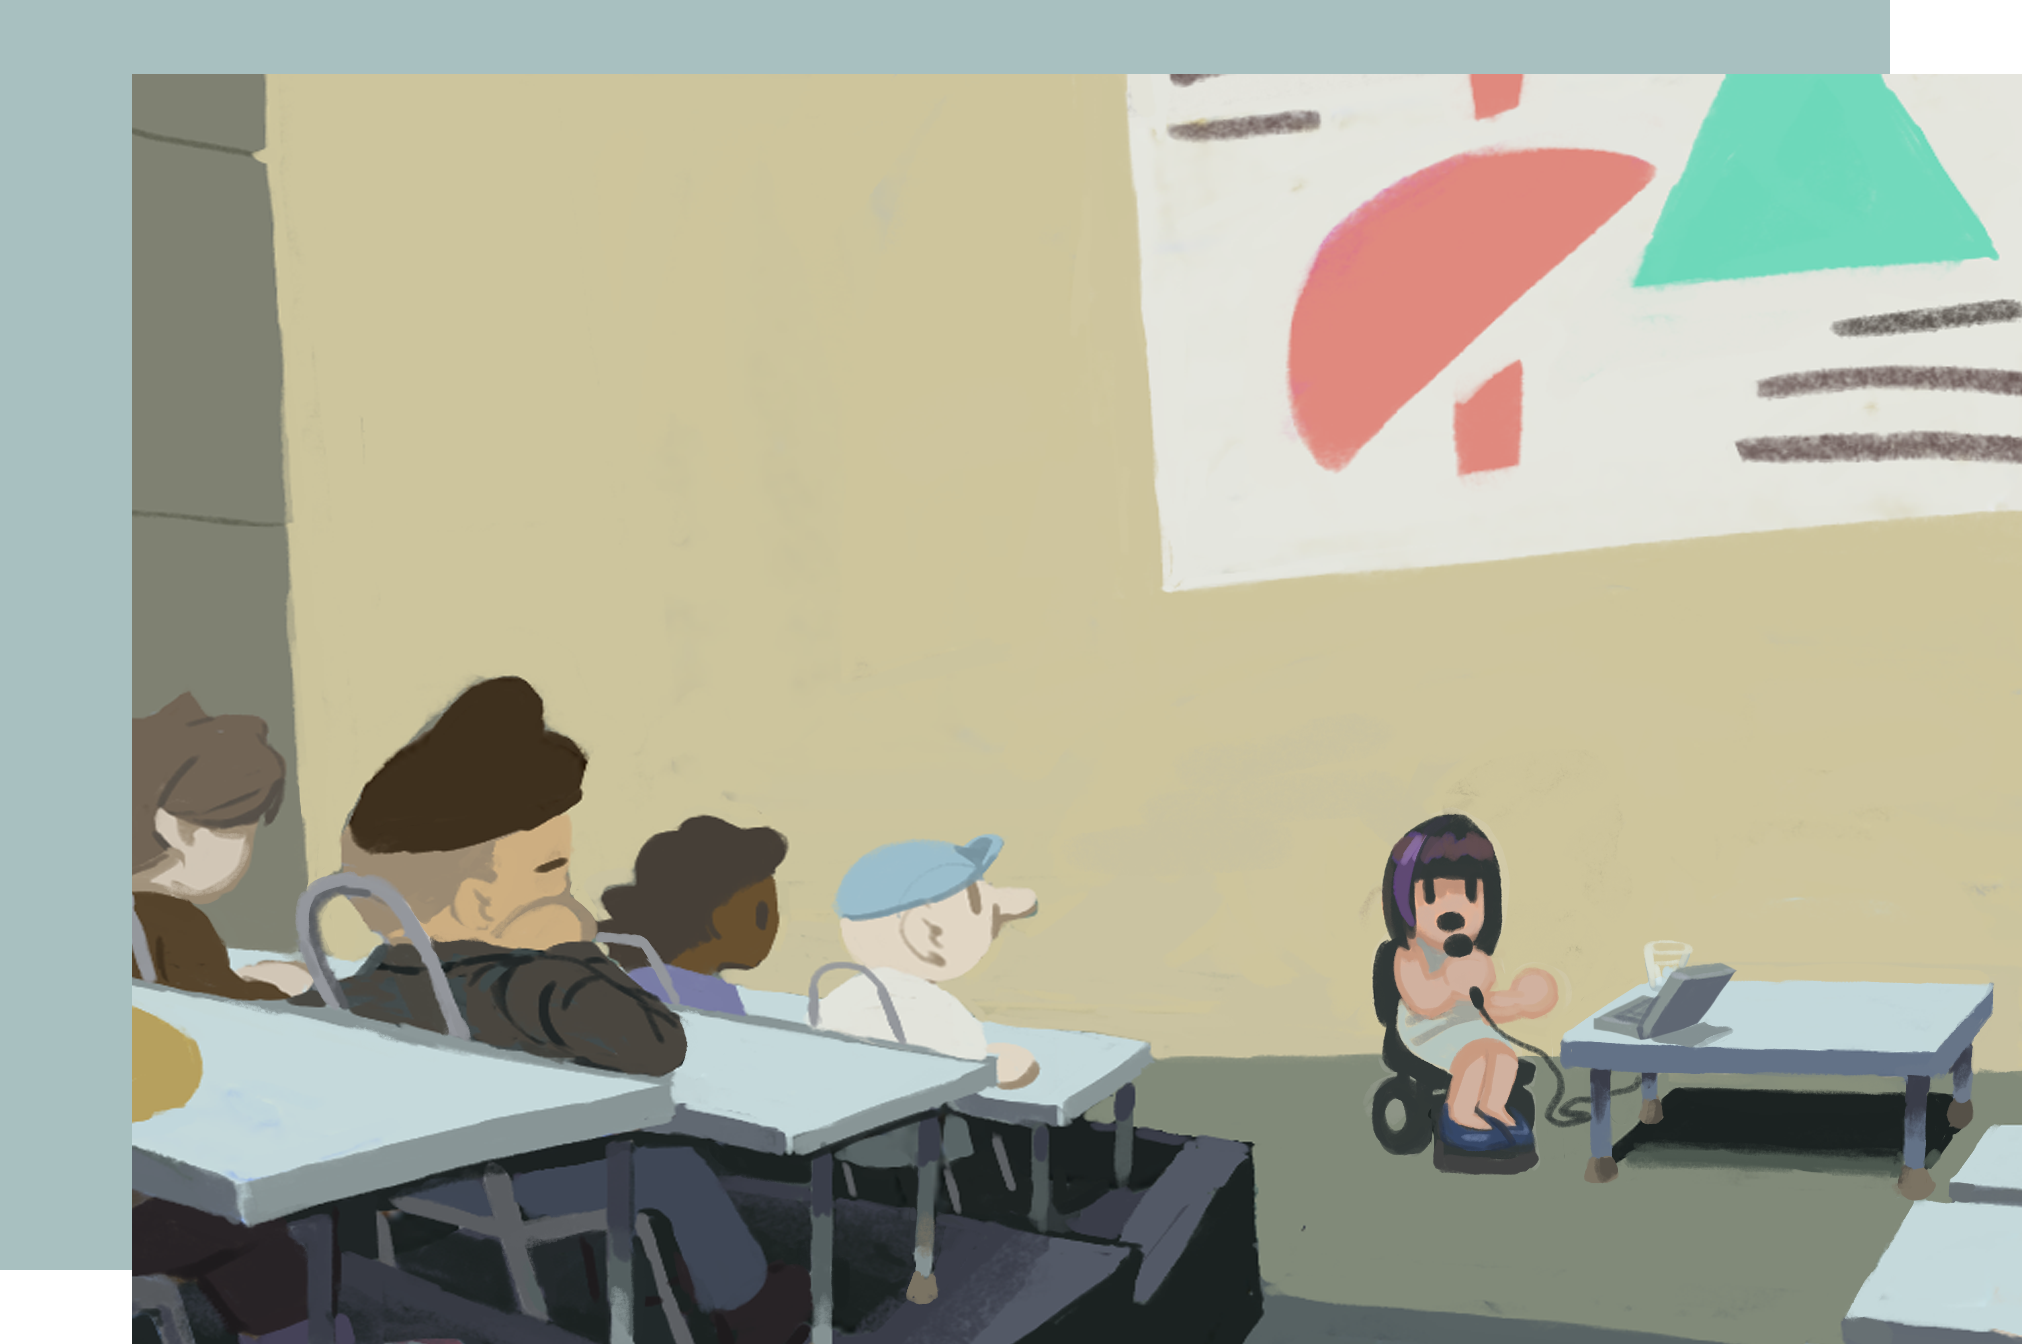
Learning Objectives
In this chapter on “Presentation Skills,” the following topics will be covered:
Interpersonal Skills – Students will:
Planning the Presentation – Students will:
Presentation Aids – Students will:
Delivering the Presentation – Students will:
You may be taking a course that requires you to make a presentation. You may have already had exposure to public speaking and giving presentations, or perhaps you shudder at the thought. This module introduces you to the art and science of putting together an impressive presentation. You will utilize key strategies needed to prepare and deliver presentations. Doing so requires a range of skills. Foremost is the ability to communicate well. Whether for business, school, or in everyday life, the ability to communicate effectively and with confidence is a core skill. But not everyone is a gifted communicator.
The art of communication involves the effective transmission of facts, ideas, thoughts, feelings, and values. Speech is a key skill in communicating. Conversational speech may come easily to some, but communicating verbally in a professional context may not. Public speaking can be thought of as a rhetorical skill. To be effective, you need to understand not only what to say but also how to say it. You will learn about rhetoric as a function of communication, its key elements, and how it can be applied to professional presentations.
Casual conversation is usually spontaneous and informal. What is communicated may be unplanned and without consequence. Presentations, on the other hand, need to be planned and well-structured. They often occur in formal and sometimes stressful environments. Unlike in casual conversation, personal traits used in formal presentations may not come to you naturally. As a presenter, you need to know how to use elements of verbal and non-verbal communication effectively. For example, eye contact, body language, speaking style, active listening, and being concise are all important elements of a quality presentation. You will learn ways to hone these traits in order to effectively apply them as you develop your personal communication style.
In this module you will learn about proven techniques for planning a presentation for different purposes such as informing, persuading, or entertaining your audience. Each of these requires attention to detail and a clear strategy. Delivery includes what you say in words and what you say using props or presentation aids. You need to ensure these work in harmony to convey your message clearly. You will also learn about design considerations for creating visual aids to enhance your presentation.
Anxiety is a common barrier many presenters experience, and can result from being nervous or uncomfortable facing groups of people. It can also be caused by things like the presentation venue, familiarity with equipment that will be used, or other environmental factors. You will examine techniques to cope with and offset the impact of presentation anxiety.
As you work through the sections in this module, you will learn that giving good presentations does not just happen; rather, it is the result of a deliberate and well-planned process that combines both art and science.
Interpersonal skills are perhaps the most important for a successful presentation. They are key to getting your message across and to the way your audience reacts to you and interacts with you during your presentation. You will discover how verbal and non-verbal skills can be harmonized to deliver a presentation that an audience will not soon forget, both in its content and in presentation.

The next phase of the process is about planning. Here you will learn about factors to consider when preparing for an effective presentation and how to develop an execution strategy based on these factors. We will cover planning activities such as knowing your audience, researching supporting evidence for your topic, and organizing the flow of your presentation.
The final phase focuses on delivering a presentation. This is the culmination of your hard work in preparation and planning. It is where you showcase your communication skills and planning strategy. This is also the time when your audience is eager to get what they came for. In other words, this is the time when you sell yourself based on the quality of information you will convey and on how well it resonates with the audience.
Regardless of its substance or how well planned it may be, a poorly delivered presentation can be a significant disappointment to you and the audience. Very few presentations can be done well by winging it. You will learn several delivery techniques that improve the likelihood of a successful presentation including how to skillfully use body movements without causing distraction, how and when to vary voice characteristics to add emphasis, and the subtleties of eye contact to draw your audience into the presentation. You will also discover the pros and cons of using props and how to integrate them effectively to support your presentation.
Since your presentation is as much about you as is the topic, you will learn tips and techniques for rehearsing, interacting with your audience, conducting effective Q&As, and improving your persona.
Many people have very limiting beliefs about presentations and their own abilities to give one. Examining your skills, fears, and preferences is your first step in opening yourself up to reaching your full potential as a presenter.
Your voice is a powerful communication tool, and how you use it can make or break your presentation. In this chapter you will learn about how you use verbal elements of presentation by examining techniques like pitch, volume, and pronunciation, among others.
Your non-verbal cues like gestures, facial expressions, and posture can punctuate and strengthen your message or do the opposite. You will learn about these non-verbal elements and have a chance to see how you use them in conjunction with your verbal cues by recording and examining a practice presentation.
After combining all of these elements, you will have a better understanding of who you are as a presenter and what you can bring to the table to develop your presentation strategy in the next chapter.
It’s important to remember that a successful speech or presentation depends on a number of factors. For our purposes we can boil them down to three main factors: the environment, the presenter, and the audience. The presenter is key to a successful presentation. The speaker must have planned the presentation to be engaging and easy to follow, and then must deliver it well to be clearly understood. Often people forget about the other two aspects. The audience is important to consider as well. How much do they already know? What is their interest in the subject? Do you want them to ask questions and be involved in the presentation? Finally, the environment is the third aspect to consider when planning a presentation. Speeches and presentations usually take place in controlled environments, so the environment aspect is often overlooked. But everything from technology failure to a room being too hot or too cold can thwart a presentation’s success. Using a room next to a noisy construction site can ruin even the most beautifully planned presentation. The environment affects both the speaker and the audience. You can’t have a successful speech or presentation without considering all three aspects: the presenter or speaker, the audience, and the environment.
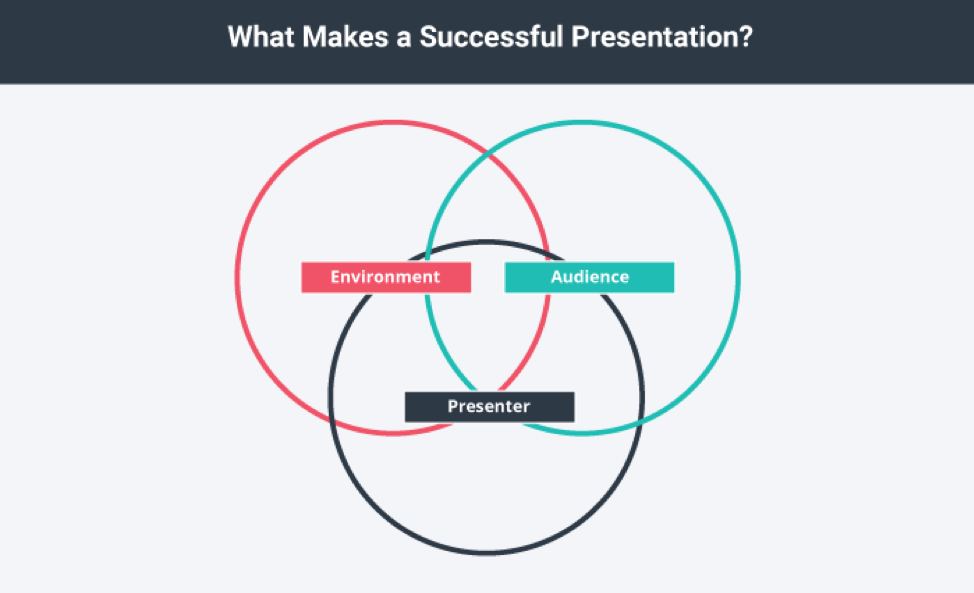
According to longtime Toastmasters member Bob Kienzle, there are a few key elements that tend to make a successful speaker:
A successful speaker can be inspired by other speeches or speakers but may fall flat if they try to copy someone else. Authenticity and passion can resonate so much with an audience that it can outweigh elements otherwise considered pitfalls. The techniques, tools, and best practices are a guideline, and it’s important to note there is no such thing as perfection in public speaking. Failure can happen in a myriad of ways, but it’s more helpful to see them as learning opportunities, or opportunities to make a stronger connection to your audience.
The biggest failure, according to Kienzle, is to pass up opportunities to practise your skills in presenting or public speaking.
One of the most anxiety-inducing areas of presenting or speech-making is being in front of the audience. Some people may feel more at ease with relatively small audiences of up to about 10 people. Others feel that 10 people is too intimate and actually feel more comfortable with impersonal numbers in the hundreds or thousands.
People often think of hostile audiences throwing tomatoes and yelling boos if the presenter makes the slightest mistake or slip of the tongue. But the truth is that most audiences desperately want you to succeed. They are overwhelmingly on your side. This means that in most situations they are very forgiving; they know being up there can be tough. If you make a mistake, you can apologize or laugh it off and keep going.
The audience is at least as involved in your presentation as you are. Awareness of yourself and awareness of them is key. If you are so preoccupied with your fear of the audience that you hide your head behind the podium while reading a boring list of facts your audience could read themselves, you will lose them. If you’re not interested, they’re not interested. If you are so frightened of your audience that you never look at them, you will not be able to get cues about their involvement in your presentation.
What you bring to the audience affects what they get from your presentation or speech. For that reason, it is tremendously important to develop enough self-awareness so that you can be present for your audience and have the confidence to make adjustments to keep them on your side and involved in your presentation.
Sometimes you have no control over your environment. When you are asked to make a presentation for a class, you are likely confined to the course classroom. But there are usually some factors you will have control over. Regardless, it is a good idea to check out the space where you will be presenting to decide where things will happen.
Some things to check out if possible:
Remember to consider all three aspects when planning your presentation: the presenter, the audience, and the environment. Let’s first concentrate on the presenter and the interpersonal skills required.
Are you aware of your strengths and weaknesses as a presenter? You may have some ideas already. For example, if you are very soft-spoken, you may consider that to be a weakness if you’re on a stage, especially without a microphone. Soft-spoken people also sometimes keep low-key in other ways; maybe they’re more plain in the way they dress or have less expressive mannerisms. Many people think that to be effective on stage you must be a rip-roaring extrovert. This is not true. No matter who you are, if you are aware of the qualities that make you a unique individual and you spend time getting to know your audience, you can convert perceived weaknesses into potential strengths. Conversely, if you are so overconfident about your abilities that it shows itself in poor preparation and lack of concern for your audience or environment, your strengths can quite quickly become weaknesses.
Your first step in helping define what makes you youself is to look at what you’re good at and what you enjoy doing. At the same time, this helps you distinguish what you’re not so good at and what you don’t enjoy. Make a list as you go through the next sections on your verbal and non-verbal communication techniques to get a reasonable prediction about how to focus your strategy as a presenter.
Do you have a deep, low voice, or a high-pitched one? We all have a normal speaking pitch where we are most comfortable, but we can move our pitch up or down. Use pitch inflections to make your delivery more interesting and emphatic. If you don’t change pitch at all, your delivery will be monotone, which gets boring for the audience very quickly. Some people pitch their voices up at the end of sentences, making every statement sound like a question—avoid this common but distracting habit.
Do you speak softly or loudly? Adjust the volume of your voice to your environment and audience. If you’re in a large auditorium, speak up so that people in the back row can hear you. But if you’re in a small room with only a few people, you don’t want to alarm them by shouting! You may need to use volume to compensate for ambient noise like traffic or an air conditioner. You can use volume strategically to emphasize the most important points in your speech.
Stress certain words in your speech to add emphasis to them, that is, to indicate that they are particularly important. You may also use a visual aid to emphasize key points by using photographs or charts.
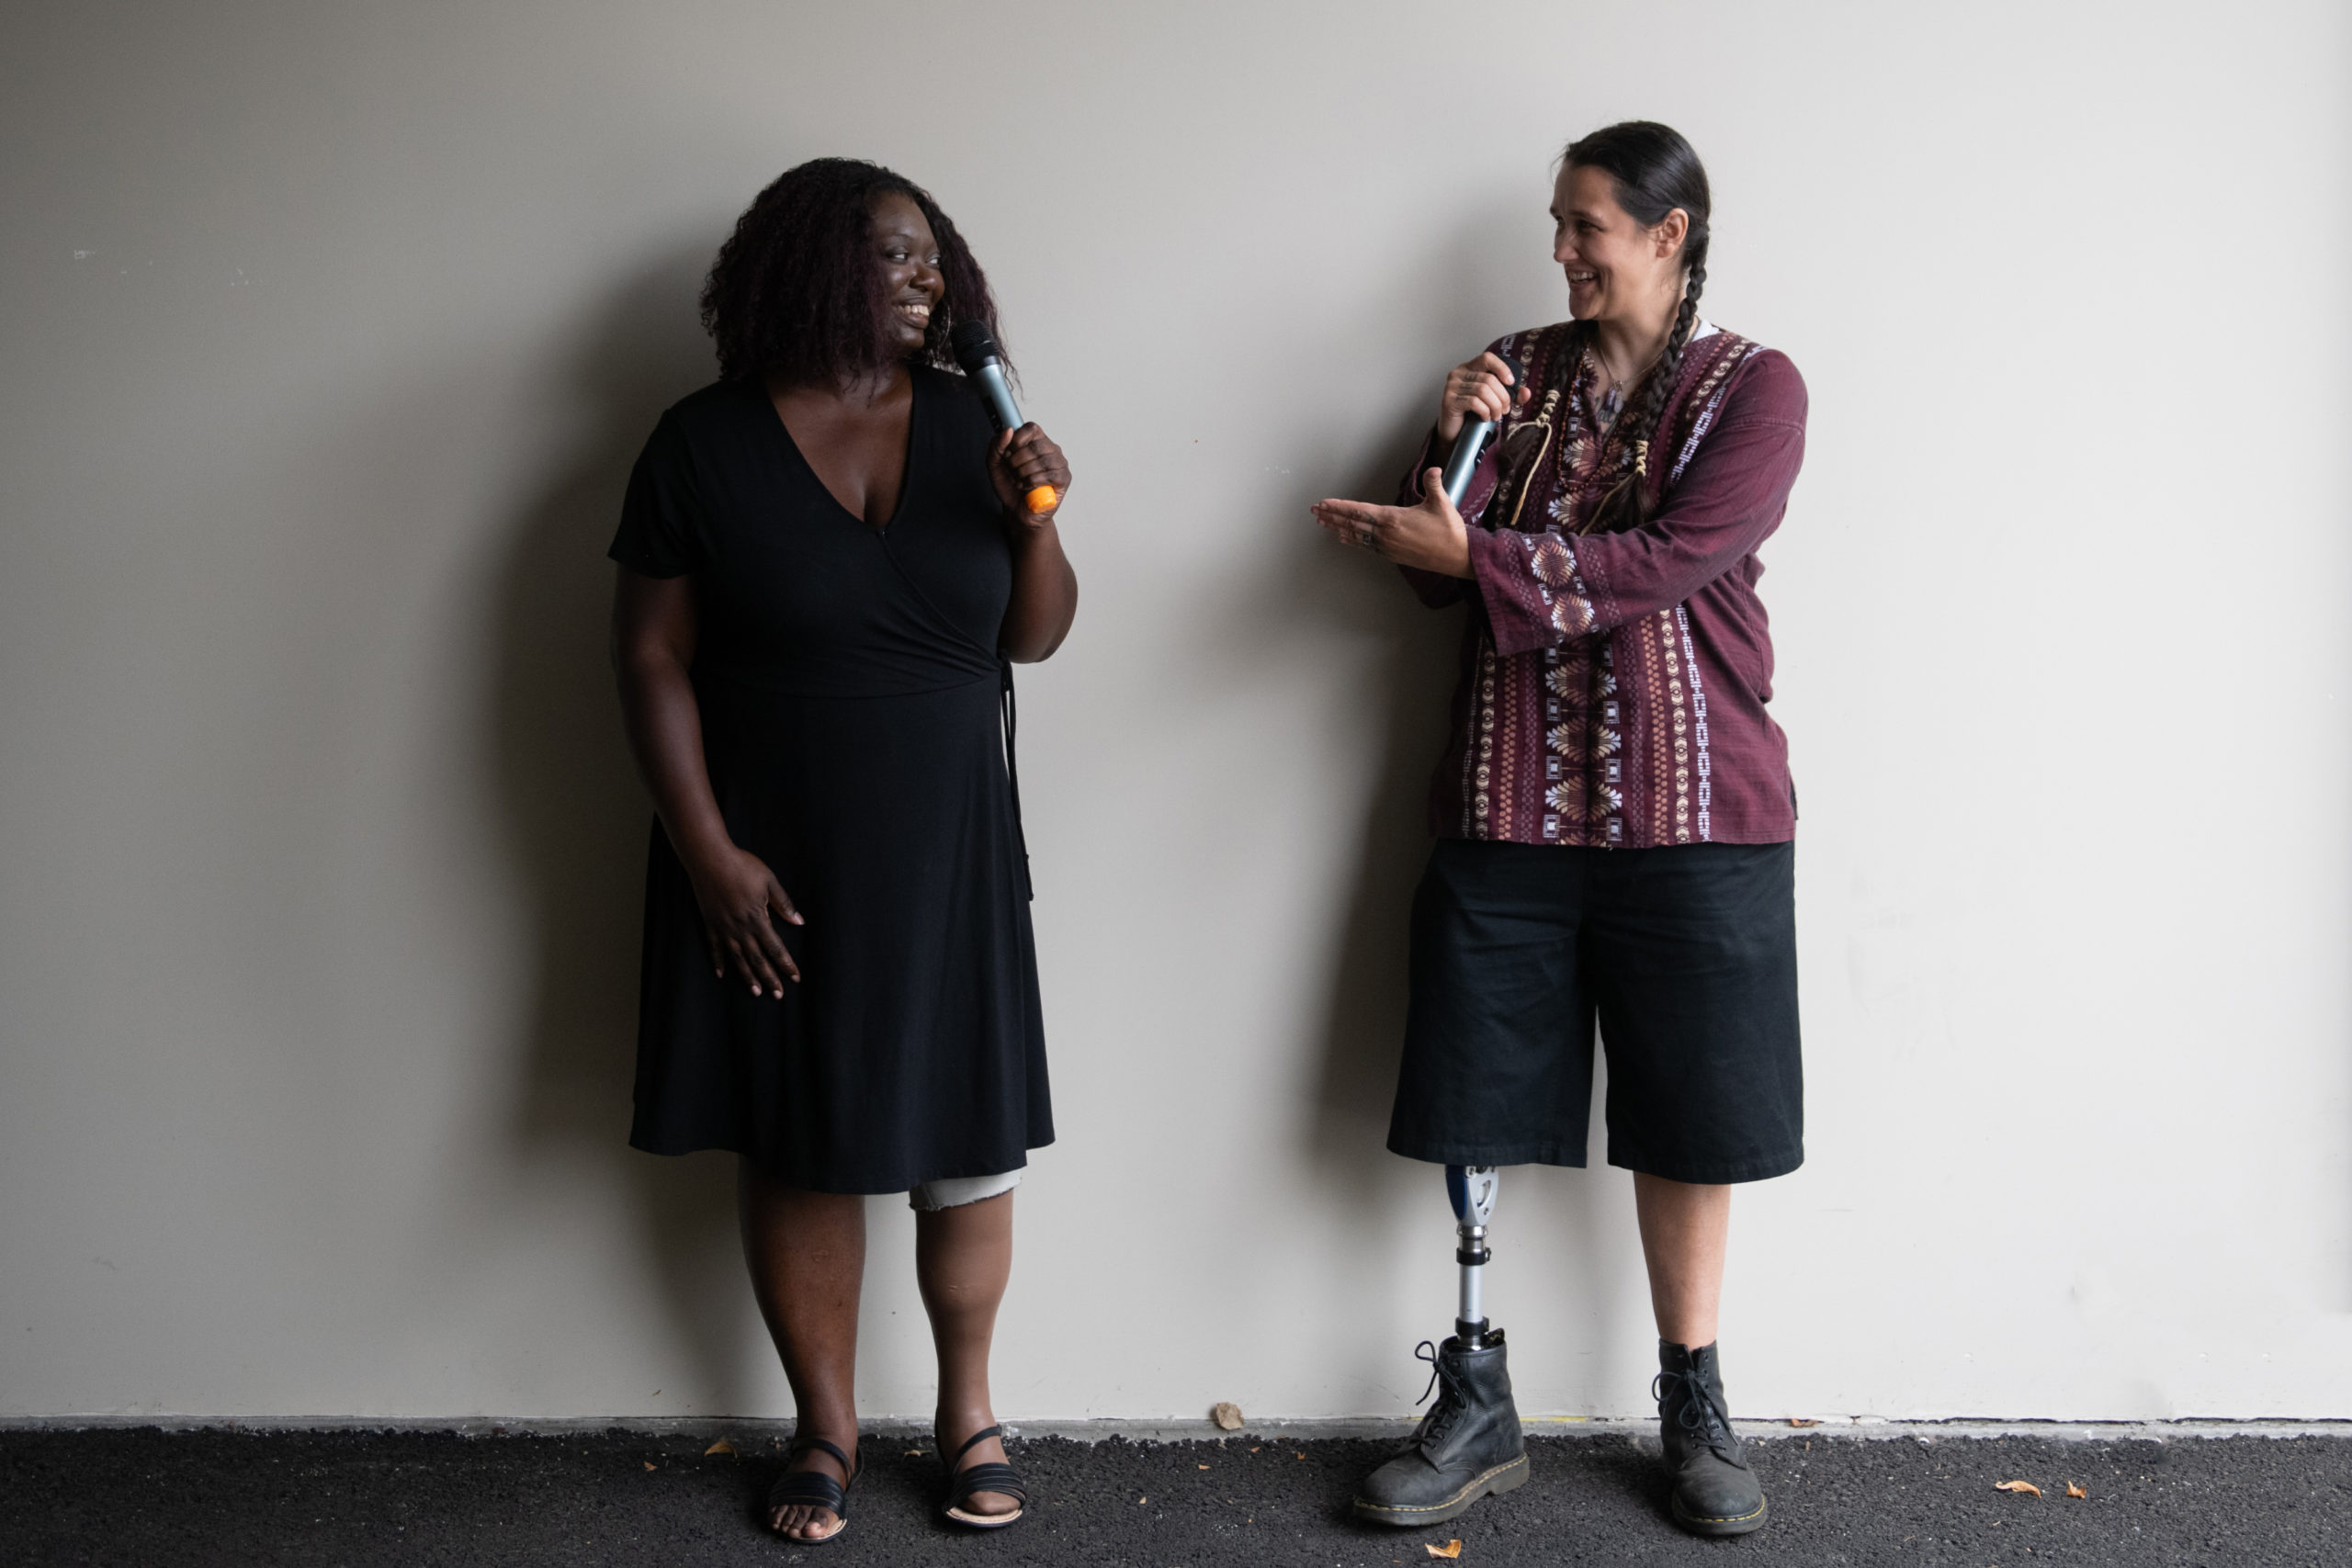
Make sure that you know the appropriate pronunciation of the words you choose. If you mispronounce a word, it could hurt your credibility or confuse your audience. Websites such as Wiktionary contain audio files that you can play to hear standard pronunciation of many words. Your pronunciation is also influenced by your accent. If your accent is quite different from the accent you expect most members of your audience to have, practise your speech in front of someone with the same accent that your audience members will have, to ensure you are pronouncing words in a clear, understandable way.
Avoid the use of “fillers” as placeholders for actual words (like, er, um, uh, etc.). You might get away with saying “um” two or three times in your speech before it becomes distracting, but the same cannot be said of “like”—a particularly troubling filler for many North American speakers. If you have a habit of using fillers, practise your speech thoroughly so that you remember what you want to say. This way, you are less likely to lose your place and let a filler word slip out.
Are you a fast or slow speaker? The pace that you speak at will influence how well the audience can understand you. Many people speak quickly when they are nervous. If this is a habit of yours, practice will help you here, too. Pause for breath naturally during your speech. Your speaking rate should be appropriate for your topic. A rapid, lively rate communicates enthusiasm, urgency, or humour. A slower, moderated rate conveys respect and seriousness. By varying your rate within a speech, you can emphasize your main points and keep your audience engaged.
A gesture is “a movement of part of the body, especially a hand or the head, to express an idea or meaning” (OxfordDictionaries.com, 2015). You can use these to channel nervous energy into an enhancement of your speech, reinforcing important points, but they can be distracting if overused. If the audience is busy watching your hands fly around, they will not be able to concentrate on your words.
Take a look at this article, titled “What to Do with Your Hands When Speaking in Public” (The Washington Post, 2015) for dos and don’ts of gesturing when you are speaking.
You might be unaware of how much your facial expressions say when you are speaking. Facial expression comes so naturally that we are not always in control of the story our face is telling. Rehearse your speech in front of a mirror to see what facial expressions come across. You might find that your face is saying something entirely different about your topic than your words are! Practise using facial expressions consciously. If you are speaking about an upbeat topic, smile! Conversely, if your topic is serious or solemn, avoid facial expressions that are overtly cheerful, because the audience will be confused by the mixed message.
In North American culture, the most important facial expression you can use is eye contact. Briefly catch the eye of audience members as you move through your speech. If you can’t look your audience members in the eye, they may view you as untrustworthy. Remember, though, that eye contact is a culturally sensitive gesture. In some cultures, there are certain accepted behaviours for males looking females in the eye, and vice-versa. You’ll want to avoid holding eye contact for too long with any one person, as too much can be unnerving.
It’s easy to let your posture slip when you’ve been talking for a while, but try to stay conscious of this and stand up straight. This gives the audience the perception that you are authoritative and take your position seriously. If you are slouching, hunched over, or leaning on something, this gives the impression that you are anxious, lacking in credibility, or not serious about your message. Speakers often assume a more casual posture as a presentation continues, but you only get one shot at making a first impression, so make sure you begin with a strong stance.
Silence is a powerful technique if used well, but it is often overlooked. Perhaps you had a teacher in high school who would stand sternly and silently at the front of the room, expectantly waiting for the chatter to die down. His silence and stance were unnerving, so students soon became quiet, didn’t they? And some of the best comedians use the well-timed pause for a powerful and hilarious—rather than serious—effect. Either way, pauses are useful for emphasis and dramatic effect when you are speaking.
Some speakers are reluctant to pause or use silence because they become uncomfortable with the dead air, but sometimes your audience needs a moment to process information and respond to you.
You can use your body movements to communicate positively with the audience. Leaning in or moving closer to the audience helps to bridge the space of separation. Moving from one side of the room to the other in a purposeful way that supports your content is a useful way to keep your audience engaged; their eyes will track your movements. Pacing rapidly with no purpose and no support to your message may quickly distract from your message, however. Standing still without movement when you are listening or responding to a question can show interest. However, standing still without any movement for the duration of your presentation could leave the audience bored. Balance is key, as is using your body as an extension of your content that suits the context of the environment and the audience.
Exercise: Interpersonal Presentation Skills
Consider the factors presented in this section.
This section helped you focus on getting to know your presentation style by understanding yourself better. You learned that elements of the environment, the audience, and the presenter have an impact on what makes for a good speech. You examined several issues related to self-awareness, including dealing with strengths and weaknesses. Finally, you learned about verbal and non-verbal elements of your presentation style. You should now be able to take what you have learned from this section into the next section as a foundation to build your presentation strategy.
Key Takeaways
This chapter has been adapted from the following chapter:
To think about a strategy for your presentation, you must move from thinking only about your self to how you will engage with the world outside of you, which, of course, includes your audience and environment.
This section focuses on helping you prepare a presentation strategy by selecting an appropriate format, prepare an audience analysis, ensure your style reflects your authentic personality and strengths, and that the tone is appropriate for the occasion.
Then, after you’ve selected the appropriate channel, you will begin drafting your presentation, first by considering the general and specific purposes of your presentation and using an outline to map your ideas and strategy.
You’ll also learn to consider whether to incorporate backchannels or other technology into your presentation, and, finally, you will begin to think about how to develop presentation aids that will support your topic and approach.
At the end of this chapter you should be armed with a solid strategy for approaching your presentation in a way that is authentically you, balanced with knowing what’s in it for your audience while making the most of the environment.
You can use the acronym FAST to develop your message according to the elements of format, audience, style, and tone. When you are working on a presentation, much like in your writing, you will rely on FAST to help you make choices.
FAST Form
There is a FAST Form template to fill out.
First, you’ll need to think about the format of your presentation. This is a choice between presentation types. In your professional life you’ll encounter the verbal communication channels in the following table. The purpose column labels each channel with a purpose (I=Inform, P=Persuade, or E=Entertain) depending on that channel’s most likely purpose.
| Channel | Direction | Level of Formality | Interaction | Purpose |
|---|---|---|---|---|
| Speech | One to many | Formal | Low One-sided | I, P, E |
| Presentation | One or few to many | Formal | Variable Often includes Q&A | I, P, E |
| Panel | Few to many | Formal | High Q&A-based | I, P |
| Meeting | Group | Informal | High | I, P |
| Teleconference | Group | Informal | High | I, P |
| Workshop | One to many | Informal | High Collaborative | I (Educate) |
| Webinar | One to many | Formal | Low | I |
| Podcast | One to many | Formal | Low Recorded | I, P, E |
There are some other considerations to make when you are selecting a format. For example, the number of speakers may influence the format you choose. Panels and presentations may have more than one speaker. In meetings and teleconferences, multiple people will converse. In a workshop setting, one person will usually lead the event, but there is often a high level of collaboration between participants.
The location of participants will also influence your decision. For example, if participants cannot all be in the same room, you might choose a teleconference or webinar. If asynchronous delivery (participants access the presentation at different times) is important, you might record a podcast. When choosing a technology-reliant channel, such as a teleconference or webinar, be sure to test your equipment and make sure each participant has access to any materials they need before you begin.
When your presentation is for a course assignment, often these issues are specified for you in the assignment. But if they aren’t, you can consider the best format for your topic, content, and audience. Once you have chosen a format, make sure your message is right for your audience. You’ll need to think about issues such as the following:
AUDIENCE Analysis Form
Here is an Audience Analysis Form template to fill out.
Next, you’ll consider the style of your presentation. Some of the things you discovered about yourself as a speaker in the self-awareness exercises earlier will influence your presentation style. Perhaps you prefer to present formally, limiting your interaction with the audience, or perhaps you prefer a more conversational, informal style, where discussion is a key element. You may prefer to cover serious subjects, or perhaps you enjoy delivering humorous speeches. Style is all about your personality!
Finally, you’ll select a tone for your presentation. Your voice, body language, level of self-confidence, dress, and use of space all contribute to the mood that your message takes on. Consider how you want your audience to feel when they leave your presentation, and approach it with that mood in mind.
Your presentation will have a general and specific purpose. Your general purpose may be to inform, persuade, or entertain. It’s likely that any speech you develop will have a combination of these goals. Most presentations have a little bit of entertainment value, even if they are primarily attempting to inform or persuade. For example, the speaker might begin with a joke or dramatic opening, even though their speech is primarily informational.
Your specific purpose addresses what you are going to inform, persuade, or entertain your audience with—the main topic of your speech. Each example below includes two pieces of information: first, the general purpose; second, the specific purpose.
Examples
To inform the audience about my favourite car, the Ford Mustang.
To persuade the audience that global warming is a threat to the environment.
Aim to speak for 90 percent of your allotted time so that you have time to answer audience questions at the end (assuming you have allowed for this). If audience questions are not expected, aim for 95 percent. Do not go overtime—audience members may need to be somewhere else immediately following your presentation, and you will feel uncomfortable if they begin to pack up and leave while you are still speaking. Conversely, you don’t want to finish too early, as they may feel as if they didn’t get their “money’s worth.”
To assess the timing of your speech as you prepare, you can
You can improve your chances of hitting your time target when you deliver your speech, by marking your notes with an estimated time at certain points. For example, if your speech starts at 2 p.m., you might mark 2:05 at the start of your notes for the body section, so that you can quickly glance at the clock and make sure you are on target. If you get there more quickly, consciously try to pause more often or speak more slowly, or speed up a little if you are pressed for time. If you have to adjust your timing as you are delivering the speech, do so gradually. It will be jarring to the audience if you start out speaking at a moderate pace, then suddenly realize you are going to run out of time and switch to rapid-fire delivery!
Have you ever been to a conference where speakers asked for audience questions via social media? Perhaps one of your teachers at school has used Twitter for student comments and questions, or has asked you to vote on an issue through an online poll. Technology has given speakers new ways to engage with an audience in real time, and these can be particularly useful when it isn’t practical for the audience to share their thoughts verbally—for example, when the audience is very large, or when they are not all in the same location.
These secondary or additional means of interacting with your audience are called backchannels, and you might decide to incorporate one into your presentation, depending on your aims. They can be helpful for engaging more introverted members of the audience who may not be comfortable speaking out verbally in a large group. Using publicly accessible social networks, such as a Facebook Page or Twitter feed, can also help to spread your message to a wider audience, as audience members share posts related to your speech with their networks. Because of this, backchannels are often incorporated into conferences; they are helpful in marketing the conference and its speakers both during and after the event.
There are some caveats involved in using these backchannels, though. If, for example, you ask your audience to submit their questions via Twitter, you’ll need to choose a hashtag for them to append to the messages so that you can easily find them. You’ll also need to have an assistant who will sort and choose the audience questions for you to answer. It is much too distracting for the speaker to do this on their own during the presentation. You could, however, respond to audience questions and comments after the presentation via social media, gaining the benefits of both written and verbal channels to spread your message.
As with any type of messaging, it helps if you create an outline of your speech or presentation before you create it fully. This ensures that each element is in the right place and gives you a place to start to avoid the dreaded blank page. Here is an outline template that you can adapt for your purpose. Replace the placeholders in the content column with your ideas or points, then make some notes in the verbal and visual delivery column about how you will support or emphasize these points using the techniques we’ve discussed. This outline is appropriate for a presentation meant to inform or persuade. You’ll note this is similar to an outline for a research paper.
| Section | Content | Verbal and Visual Delivery |
|---|---|---|
| Introduction |
| |
| Body |
| |
| Conclusion |
|
The beginning of your speech needs an attention-grabber to get your audience interested right away. Choose your attention-grabbing device based on what works best for your topic. Your entire introduction should be only around 10 to 15 percent of your total speech, so be sure to keep this section short. Here are some devices that you could try for attention-grabbers:
| Attention Grabber | Purpose | Examples |
|---|---|---|
| Subject statement | A subject statement is to the point, but not the most interesting choice. | We are surrounded by statistical information in today’s world, so understanding statistics is becoming paramount to citizenship in the twenty-first century. |
| Audience reference | An audience reference highlights something common to the audience that will make them interested in the topic. | As human resource professionals, you and I know the importance of talent management. In today’s competitive world, we need to invest in getting and keeping the best talent for our organizations to succeed. |
| Quotation | Share wise words of another person. You can find quotations online that cover just about any topic. | Oliver Goldsmith, a sixteenth-century writer, poet, and physician, once noted that “the true use of speech is not so much to express our wants as to conceal them.” |
| Current event | Refer to a current event in the news that demonstrates the relevance of your topic to the audience. | On January 10, 2007, Scott Anthony Gomez Jr. and a fellow inmate escaped from a Pueblo, Colorado, jail. During their escape the duo attempted to rappel from the roof of the jail using a makeshift ladder of bed sheets. During Gomez’s attempt to scale the building, he slipped, fell 40 feet, and injured his back. After being quickly apprehended, Gomez filed a lawsuit against the jail for making it too easy for him to escape. |
| Historical event | Compare or contrast your topic with an occasion in history. | During the 1960s and ’70s, the United States intervened in the civil strife between North and South Vietnam. The result was a long-running war of attrition in which many American lives were lost and the country of Vietnam suffered tremendous damage and destruction. We saw a similar war waged in Iraq. American lives were lost, and stability has not yet returned to the region. |
| Anecdote, parable, or fable | An anecdote is a brief account or story of an interesting or humorous event, while a parable or fable is a symbolic tale designed to teach a life lesson. | In July 2009, a high school girl named Alexa Longueira was walking along a main boulevard near her home on Staten Island, New York, typing in a message on her cell phone. Not paying attention to the world around her, she took a step and fell right into an open manhole (Witney, 2009). The ancient Greek writer Aesop told a fable about a boy who put his hand into a pitcher of filberts. The boy grabbed as many of the delicious nuts as he possibly could. But when he tried to pull them out, his hand wouldn’t fit through the neck of the pitcher because he was grasping so many filberts. Instead of dropping some of them so that his hand would fit, he burst into tears and cried about his predicament. The moral of the story? “Don’t try to do too much at once” (Aesop, 1881). |
| Surprising statement | A strange fact or statistic related to your topic that startles your audience. |
|
| Question | You could ask either a question that asks for a response from your audience, or a rhetorical question, which does not need a response but is designed to get them thinking about the topic. |
|
| Humour | A joke or humorous quotation can work well, but to use humour you need to be sure that your audience will find the comment funny. You run the risk of insulting members of the audience, or leaving them puzzled if they don’t get the joke, so test it out on someone else first! | “The only thing that stops God from sending another flood is that the first one was useless.” —Nicolas Chamfort, sixteenth-century French author |
| Personal reference | Refer to a story about yourself that is relevant to the topic. | In the fall of 2008, I decided that it was time that I took my life into my own hands. After suffering for years with the disease of obesity, I decided to take a leap of faith and get a gastric bypass in an attempt to finally beat the disease. |
| Occasion reference | This device is only relevant if your speech is occasion-specific, for example, a toast at a wedding, a ceremonial speech, or a graduation commencement. | Today we are here to celebrate the wedding of two wonderful people. |
The above provides several options for attention-grabbers, but remember you likely only need one. After the attention-getter comes the rest of your introduction. It needs to do the following:
For post-secondary students, your class presentation is likely to fulfill an assignment such as presenting the findings of a research paper or summarizing a class unit. It is important to realize that your presentation does not need to include all of your information. In fact, it is unwise (and very boring) to read your whole research paper in your presentation. Choose the important and interesting things to highlight in your presentation.
Your audience will think to themselves, Why should I listen to this speech? What’s in it for me? One of the best things you can do as a speaker is to answer these questions early in your body, if you haven’t already done so in your introduction. This will serve to gain their support early and will fill in the blanks of who, what, when, where, why, and how in their minds.
You can use the outline to organize your topics. Gather the general ideas you want to convey. There is often more than one way to organize a speech. Some of your points could be left out, and others developed more fully, depending on the purpose and audience. You will refine this information until you have the number of main points you need. Ensure that they are distinct, and balance the content of your speech so that you spend roughly the same amount of time addressing each. Make sure to use parallel structure to make sure each of your main points is phrased in the same way. The last thing to do when working on your body is to make sure your points are in a logical order, so that your ideas flow naturally from one to the next.
Depending on the topic, it is often useful to use practical examples to demonstrate your point. If your presentation is about the impacts of global warming, for example, it would be wise to mention some familiar natural disasters that are linked to global warming. If your presentation is about how to do a good presentation, you could mention several specific examples of things that could go wrong if the presenter isn’t organized. These practical examples help the audience relate the content to real life and understand it better.
If appropriate, using humour in the presentation is often a welcome diversion from a serious topic. It lightens the mood, often helps relieve anxiety, and creates engagement with the audience. It needs to be used sparingly and tastefully. Humour is often an area that can offend, so run your ideas past others before incorporating it into your presentation.
You will want to conclude your presentation on a high note. You’ll need to keep your energy up until the very end of your speech. In your conclusion, you will want to reiterate the main points of your presentation. This will help to tie together the concepts for your audience. It will also help them realize you are wrapping it up. It is often a good idea to leave them with a final thought or call to action, depending on the general purpose of your message. Lastly, remember to be clear that it is the end of your presentation. Don’t end it by throwing one last piece of information or it will seem like you’ve left it hanging. End with a general statement about the topic or a thought to ponder. Ending with “thank you” also lets them know it’s the end. Once you have completed your question, you can invite questions and comments from the audience if appropriate.
Key Takeaways
In this section you considered the importance of FAST and AUDIENCE tools in helping to lay out a strategy that incorporates your own understanding with the needs of the audience. You learned about how to use an outline to stay organized and keep track of your ideas, as well as general and specific purposes. You learned the importance of sustaining your audience’s attention throughout the presentation with key approaches you can take as you write your introduction, body, and conclusion. You should now be prepared to take your strategy to the next level by ensuring you next consider whether and how to incorporate high-quality presentation aids.
Exercise: Check Your Understanding – Presentation Planning
Aesop (1881). Aesop’s fables. New York, NY: Wm. L. Allison. Retrieved from http://www.litscape.com/author/Aesop/The_Boy_and_the_Filberts.html
Ebbinghaus, H. (1885). Memory: A contribution to experimental psychology [Online version]. Retrieved from http://psychclassics.yorku.ca/Ebbinghaus/index.htm
Whitney, L. (2009, July 13). Don’t text while walking? Girl learns the hard way. CNET News Wireless. Retrieved from http://news.cnet.com/8301-1035_3-10285466-94.html
This chapter is an adaptation of the following chapter:
Presentations can be enhanced by the effective use of visual aids. These include handouts, drawings on the whiteboard, PowerPoint slides, memes, short video clips, and many other types of props. Once you have chosen a topic, consider how you are going to show your audience what you are talking about. Visuals can provide a reference, illustration, or image to help the audience to understand and remember your point.
Visual aids accomplish several goals:
The purpose for each visual aid should be clear and speak for itself. If you can’t quickly link the purpose of a visual aid to the verbal message, consider whether it should be used. Visual aids can be distracting or confusing if they are not clearly connected to what you are saying.
Perhaps you want to highlight a trend between two related issues, such as socioeconomic status and educational attainment. You might show a line graph that compares the two, showing that as socioeconomic status rises, educational attainment also rises. People learn in different ways. Some of us learn best using visual stimuli; others learn by taking notes or by using tactile objects. So, by using visuals to support your presentation and, if possible, tactile aids or demos, you can help a more significant proportion of the audience learn about your topic.
Clarity is key in the use of visual aids. Limit the number of words on your slides. Some people even state their rule of thumb is no more than 10 words per slide, with a font large enough to be read at the back of the room or auditorium. Generally you should include no more than five to seven lines of text per slide. People often make the mistake of trying to cram too much information on a slide, which causes the audience to zone out. Test that your slides are readable in the environment you will be using.
The most common visual aid used in presentations, slide decks, may be developed using software such as PowerPoint, Keynote, Prezi, or Google Slides. These tools allow you to show text, images, and charts and even to play audio or video files. They are an excellent enhancement to your presentation, but they do sometimes encounter a glitch. Computers sometimes fail to work as planned, so make sure you have a whiteboard or handout as a backup in case of any technical issues. Minimize the risk by testing out equipment ahead of time.
Also, remember that these are an aid to your central, verbal message. Resist the urge to read directly from them with your back to the audience, or to pack slides full of text in lieu of speaking all of the information you want to get across.
Flip charts and whiteboards are a good choice when you don’t have access to a computer and projector. Alternatively, you can print some visual aids like charts and graphs in large sizes and show them during your presentation. If you plan to get a lot of audience input and want to write or draw things out, then a whiteboard is an ideal choice. But make sure your writing is large enough to be seen at the back of the room and that it is easy to read.
If it will be helpful for your audience to refer to the information you’re sharing at a later date, they’ll appreciate it if you leave them with a handout. Decide whether it is better to give handouts to the audience at the beginning or end of your speech. If your handout is comprehensive and they have detailed notes in front of them, they can be distracted by reading and tune you out, so it’s better to wait until the end to distribute them. Let the audience know at the beginning of the speech that you’ll provide it at the end. This will relieve them from having to capture all your content by taking notes, and keep their attention focused on you while you speak. If your handouts are the presentation slides with just the main points, it may be better to hand them out at the beginning so that your audience can use them to add in additional points.

If your presentation is about how to do something, for example, how to cook a particular dish or how to use a tool, you will want to show the audience a demonstration. Sometimes it is helpful to pass around a tactile aid, for example, a model. These can be very helpful if you want your audience to learn by doing. Make sure to pass items around during pauses in your presentation so that you don’t lose the audience’s attention. If audience members need to move around to use a tactile aid, make sure the location has enough space to make this possible.
Using PowerPoint or a similar program, you’ll be able to import, or cut and paste, words from text files, images, or video clips to represent your ideas. You can even incorporate web links.
At first, you might be overwhelmed by the possibilities, and you might be tempted to use all the bells, whistles, and sounds, not to mention the flying and animated graphics. If used wisely, a simple transition can be effective, but if used indiscriminately, it can annoy the audience to the point where they cringe in anticipation of, e.g. the sound effect at the start of each slide.
Stick to one main idea per slide. The presentation is for the audience’s benefit, not yours. Pictures and images can be understood more quickly and easily than text, so you can use this to your advantage as you present.
If you develop a slide deck for your presentation, test these out in the location beforehand, not just on your own computer screen, as different computers and software versions can make your slides look different than you expected. Allow time for revision based on what you learn.
Your visual aids should meet the following criteria:
Another consideration that you’ll need to make when designing your slide decks is font. As previously mentioned, think about the people at the back of the room when choosing the size of your text, to make sure it can be read by everyone.
A common mistake that presenters make is to use decorative fonts, or to incorporate many different fonts in their slides. This not only creates a mixed message for the audience but also makes your message difficult to read. Choose legible, common fonts that do not have thin elements that may be difficult to see.
When considering your choice of colours to use, legibility must be your priority. Contrast can help the audience read your key terms more easily. Make sure the background colour and the images you plan to use complement each other. Repeat colours, from your graphics to your text, to help unify each slide. To reduce visual noise, try not to use more than two or three colours.
Blue-green colour blindness, and red-green colour blindness are fairly common, so avoid using these colour combinations if it is important for the audience to differentiate between them. If you are using a pie chart, for example, avoid putting a blue segment next to a green one. Use labelling, so that even if someone is colour blind, they will be able to tell the relative sizes of the pie segments and what they signify.
Visual aids can be a powerful tool when used effectively but can run the risk of dominating your presentation. Consider your audience and how the portrayal of images, text, graphic, animated sequences, or sound files will contribute or detract from your presentation. Here are some hints to keep in mind as you prepare yours.
Using visual aids takes time and practice. The more you practise before your speech, the more comfortable you will be with your visual aids and the role they serve. Know your material well enough that you refer to your visual aids, not rely on them.
Key Takeaways
Exercise: Check Your Understanding – Presentation Aids
This chapter is an adaptation of the following chapter:
This section focuses on what to do when presentation day finally arrives. You should be well-prepared and well-poised to communicate interpersonally with a live audience.
You will first learn about how to prepare to present by taking a deeper look at what you should be doing during rehearsals, and considering how you’ll dress comfortably and professionally and how your setup will keep you prepared for what is ahead.
You will learn effective approaches to managing anxiety, such as how to cope with your body’s reaction as well as how to cope with mistakes or surprises that may pop up in the speech, with the technology or through some other external distraction.
Having an understanding of how to read your audience for positive or negative cues is important during and after the presentation. You will learn about interpreting these cues by scanning the audience’s body language during the presentation and during the Q&A.
Finally, you will have a chance to critically reflect on the delivery of a presentation by learning about how to do a self-analysis, as well as give and receive constructive verbal and non-verbal feedback.
To deliver your presentation to the best of your ability, and to reduce your nerves once you take the stage, you need to practise by rehearsing. As you do, try to identify the weaknesses in your delivery to improve on them. For example, do you often mis-speak the same words (e.g. pacific for specific; ax for ask) or do your hands or feet fidget? Use your practice time to focus on correcting these issues. These sessions should help you get comfortable and help you remember what you want to say without having to constantly refer to notes.
Try practising in front of a mirror, or even recording yourself speaking to a camera and playing it back. It’s also helpful to get feedback from a supportive audience at this stage. Perhaps a few family members or friends could watch you give your presentation and provide some feedback.
If at all possible, access the room where you will be presenting. This way you can get a feel for its setup and decide how you will stand or move during your presentation.
While there are no definitive guidelines for how you should dress for your presentation, your appearance is an important part of your audience’s first impression. If you want them to take you seriously, you’ll need to look the part. While you don’t have to wear a suit each time you present, there are some scenarios where this would be expected; for example, if you are presenting to a corporate audience who wear suits to work, you should do the same. You should dress one step above your audience. If your audience is going to be dressed casually in shorts and jeans, then wear nice casual clothing such as a pair of pressed slacks and a collared shirt or blouse. If your audience is going to be wearing business casual attire, then you should wear a dress or a suit. If you are presenting to your instructor and classmates, dress better than you normally would in class, to demonstrate you are taking this seriously and you are adding a level of formality.
Another general rule is to avoid distractions in your appearance. Clothing with loud colours and bold patterns, overly tight or revealing garments, or big jangling jewellery can distract your audience’s attention from your message.
Depending on the circumstances of your speech or presentation, you may have some choices to make about the environment. Perhaps you have a choice of meeting rooms that you can use, or perhaps you have only one option.
If you have some flexibility, it is helpful to think about what sort of environment would best help you get your message across. For example, if you are running a workshop, you might want to assemble participants in a circle to encourage collaboration and discussion. If you are holding a webinar, you’ll need a quiet location with a strong internet connection and a computer system. It is imperative that you think about what facilities you need well before the day of your presentation arrives. You may have to book equipment or classrooms. Arriving to find that the equipment you expected isn’t available is not a nice surprise for even the most experienced speaker!
If you have access to the location beforehand, you may need to move tables or chairs around to get things just the way you want them. You might choose to have a podium brought in, if you are aiming for a formal feel, for example, or you may need to position your flip chart. Double check that you have all the equipment you need, from whiteboard markers to speakers. It is far better if you can get comfortable with the room before your audience arrives, as this will make you feel more prepared and less nervous.
If you are using technology to support your presentation (i.e. PowerPoint slides or a projector), test everything before you begin. Do a microphone check and test its volume, view your slides on the computer you will be using, check any web links, play videos to test their sound, or make a call to test the phone connection prior to your teleconference. Your audience will get restless quickly if they arrive and are expected to wait while you fix a technical problem. This will also make you seem disorganized and hurt your credibility as an authoritative speaker.
Well before the day of your presentation, ask yourself, What could go wrong? This might sound like a way for a novice presenter to stress oneself out, but it can actually be very helpful. If you anticipate the worst-case scenario and are prepared for it, problems on the day of your presentation are less likely to bother you.
Many of the possible problems can be avoided with preparation. Make sure you have notes with you in case you need them. Dress professionally so that you feel good about how you are presenting yourself. Getting there early to set up and test the equipment will prevent many technical issues, but having a handout with you will make you feel even more comfortable in case you have problems with your slides. Bring a bottle of water in case your throat becomes dry or you need a moment to pause.
Most other problems can be prevented with practice. Rehearse so that you are not reliant on your notes. This way, if a note card goes missing, it’s no big deal. During your rehearsals you’ll get used to pacing yourself, pausing for breath, and monitoring the timing of your speech so that this comes more naturally once you get onstage.

Studies show that presenters’ nervousness usually peaks at the anticipation stage that occurs one minute before the presentation. They further found that as the speech progresses, nervousness tends to go down. Here are some things you can do to help you manage your anxiety before the presentation:
During the presentation itself, there are four main areas where you can focus attention in order to manage your anxiety:
Physical movement helps to channel some of the excess energy that your body produces in response to anxiety. If at all possible, move around the front of the room rather than remaining imprisoned behind the lectern or gripping it for dear life (avoid pacing nervously from side to side, however). Move closer to the audience and then stop for a moment. If you are afraid that moving away from the lectern will reveal your shaking hands, use note cards rather than a sheet of paper for your outline. Note cards do not quiver like paper, and they provide you with something to do with your hands. Other options include vocal warm-ups right before your speech, having water (preferably in a non-spillable bottle with a spout) nearby for a dry mouth, and doing a few stretches before going on stage.
Deep breathing will help to counteract the effects of excess adrenaline. You can place cues or symbols in your notes, such as “slow down” or ☺, that remind you to pause and breathe during points in your speech. It is also a good idea to pause a moment before you get started, to set an appropriate pace from the onset. Look at your audience and smile. It is a reflex for some of your audience members to smile back. Those smiles will reassure you that your audience members are friendly.
During your speech, make a point of establishing direct eye contact with your audience members. By looking at individuals, you establish a series of one-to-one contacts similar to interpersonal communication. An audience becomes much less threatening when you think of them not as an anonymous mass but as a collection of individuals.
A gentleman once shared his worst speaking experience: Right before the start of his speech, he reached the front of the room and forgot everything he was supposed to say. When asked what he saw when he was in the front of the room, he gave a quizzical look and responded, “I didn’t see anything. All I remember is a mental image of me up there in the front of the room blowing it.” Speaking anxiety becomes more intense if you focus on yourself rather than concentrate on your audience and your material.
No matter how well we plan, unexpected things happen. That fact is what makes the public speaking situation so interesting. When the unexpected happens to you, do not let it rattle you. At the end of a class period late in the afternoon of a long day, a student raised her hand and asked the professor if he knew that he was wearing two different-coloured shoes, one black and one blue. He looked down and saw that she was right; his shoes did not match. He laughed at himself, complimented the student on her observational abilities, and moved on with the important thing, the material he had to deliver. People who can laugh at themselves often endear themselves to their audience.
Even when we use positive thinking and are well prepared, some of us still feel a great deal of anxiety about public speaking. When that is the case, it can be more helpful to use stress management than to try to make the anxiety go away.
Here are two main tools that can help:
Conditions such as the size of the room and how far away your audience will be sitting should determine whether or not you need a microphone. Many people make the mistake of thinking they don’t need a mic because they can talk loud enough for everyone to hear. They are usually wrong. Unless the crowd is very small, it benefits you to use a microphone. If is very frustrating for people to be watching a presentation that they can’t hear.
If you are using a microphone during your speech, there are a few cautions to be aware of. First, make sure you do a sound check and that you know how the microphone works—how to turn it on and off, how to mute it, and how to raise or lower it. If possible, have it positioned to the height you need before you go onstage. Make sure the microphone does not block your face.
Make sure to find the optimum distance from the microphone to your mouth. This will vary with different sound equipment. For some, the mic needs to be right up against the mouth to get good sound quality. For others, this will cause screeching feedback or will pick up your breathing noises. If you will be using a clip-on microphone (called a lavaliere mic), you’ll need to wear something with a lapel or collar that it can be clipped to. Make sure your hair and jewelery are out of the way to avoid rustling noises, and place the lavaliere microphone 8 to 10 inches below your chin.
If the microphone is on a stand, make sure it is set to the appropriate height. If it is set too high, it is distracting to the audience and if it’s too short, it will cause you to hunch over it, creating bad posture and an uncomfortable position. Often you can take the mic off the stand and use it as a handheld model, which allows you to move around a little more. Doing a sound check and getting comfortable with the equipment before you go onstage will prevent the majority of errors when using a microphone.
Even the most prepared speaker will encounter unexpected challenges from time to time. Here are a few strategies for combating the unexpected in your own presentations.
What if a note card goes missing or you skip important information from the beginning of your speech? While situations like these might seem like the worst nightmare of a novice public speaker, they can be overcome easily. Pause for a moment to think about what to do. Is it important to include the missing information, or can it be omitted without hindering the audience’s ability to understand your speech? If it needs to be included, does the information fit better now or in a later segment? If you can move on without the missing element, that is often the best choice, but pausing for a few seconds to decide will be less distracting to the audience than sputtering through a few “ums” and “uhs.” Situations like these demonstrate why it’s a good idea to have a glass of water with you when you speak. Pausing for a moment to take a sip of water is a perfectly natural movement, so the audience may not even notice that anything is amiss.
Technology has become a very useful aid in public speaking, allowing us to use audio or video clips, presentation software, or direct links to websites. But it does break down occasionally! Web servers go offline, files will not download, or media contents are incompatible with the computer in the presentation room. Always have a backup plan in case of technical difficulties. As you develop your speech and visual aids, think through what you will do if you cannot show a particular graph or if your presentation slides are garbled. Your beautifully prepared chart may be superior to the verbal description you can provide; however, your ability to provide a succinct verbal description when technology fails will give your audience the information they need and keep your speech moving forward.
Unfortunately, one thing that you can’t control during your speech is audience etiquette, but you can decide how to react to it. Inevitably, an audience member will walk in late, a cell phone will ring, or a car alarm will go off outside. If you are interrupted by external events like these, it is often useful and sometimes necessary to pause and wait so that you can regain the audience’s attention.
Whatever the event, maintain your composure. Do not get upset or angry about these glitches. If you keep your cool and quickly implement a “plan B” for moving forward, your audience will be impressed.
Recognizing your audience’s mood by observing their body language can help you adjust your message and see who agrees with you, who doesn’t, and who is still deciding. With this information, you can direct your attention—including eye contact and questions—to the areas of the room where they can have the most impact.
As the speaker, you are conscious that you are being observed. But your audience members probably don’t think of themselves as being observed, so their body language will be easy to read.
As a presenter, it’s a good idea to allow a little time at the end of your presentation to invite questions from the audience and to facilitate a little discussion about the topic. If possible and applicable you can include a bit of interactivity with the audience during the presentation. This goes a long way to getting the audience engaged and interested in the topic.
There are three important elements to think about when incorporating Q&A’s as part of your presentation:
At the beginning of your speech, give the audience a little bit of information about who you are and what your expertise on the subject is. Once they know what you do (and what you know), it will be easier for the audience to align their questions with your area of expertise—and for you to bow out of answering questions that are outside of your area.
Questions are easier to manage when you are expecting them. Unless you are part of a panel, meeting, or teleconference, it is probably easier to let the audience know that you will take questions at the end of your presentation. This way you can avoid interruptions to your speech that can distract you and cause you to lose time. If audience members interrupt during your talk, you can then ask them politely to hold on to their question until the Q&A session at the end.
Never pretend that you know the answer to a question if you don’t. The audience will pick up on it! Instead, calmly apologize and say that the question is outside of the scope of your knowledge but that you’d be happy to find out after the presentation (or, suggest some resources where the person could find out for themselves).
If you are uncertain about how to answer a question, say something like “That’s really interesting. Could you elaborate on that?” This will make the audience member feel good because they have asked an interesting question, and it will give you a moment to comprehend what they are asking.
Sometimes presenters rush to answer a question because they are nervous or want to impress. Pause for a moment, before you begin your answer, to think about what you want to say. This will help you to avoid misinterpreting the question, or taking offense to a question that is not intended that way.
A final tip is to be cautious about how you answer, so that you don’t offend your audience. You are presenting on a topic because you are knowledgeable about it, but your audience is not. It is important not to make the audience feel inferior because there are things that they don’t know. Avoid comments such as “Oh, yes, it’s really easy to do that…” Instead, say something like “Yes, that can be tricky. I would recommend…” Also, avoid a bossy tone. For example, phrase your response with “What I find helpful is…” rather than “What you should do is…”
It is often said that we are our own worst critic. Many people are hard on themselves and may exaggerate how poorly a speech or presentation went. Other times, there’s not much exaggeration. In both cases it helps to examine your performance as presenter after the presentation.
You may want to ask yourself:
Honestly asking yourself these questions with the intention of uncovering your strengths and weaknesses should help you to become a better presenter. While it is important to review other kinds of feedback, whether from the audience, your peers, or an instructor, it is also useful to have a realistic understanding of your own performance. This understanding is part of gaining experience and improving as a presenter.
As well as doing some self-analysis, it is a good idea to get feedback from others. If your presentation was for your class, you will likely get feedback from your instructor who is marking you. You may also get some feedback from classmates. It would also be wise to ask someone that you trust, who was in the audience, to give you feedback. You can learn a lot from what others tell you. They may have noticed a distracting habit such as twirling your hair, or putting your hands in your pockets, or a lot of ummms. They may also have noticed some real strengths of your presentation that you may not have considered. Whether the comments are positive or constructive criticism, they can be helpful for focusing on, in your next presentation.
Being open to receiving feedback is the only way to have a better picture of your performance as a presenter or speaker. Combining self-analysis with the feedback of your audience or peers is your opportunity to better understand your strengths as a presenter and what resonated well with your audience.
When receiving and making sense of feedback, it is very important to be self-aware and honest with yourself. This honesty will help you distinguish between an environmental situation, a situation that lies with the audience member, or a situation with the presenter.
In this section you learned about useful tools, such as rehearsing, dressing appropriately, and having a contingency plan, that helps you prepare to present to a live audience. You examined approaches that would be useful during the presentation itself, such as keeping a good sense of humour and focusing your attention on your audience to manage anxiety, and what steps to take for a critical review afterwards to close the feedback loop.
Key Takeaways
Exercise: Check Your Understanding – Presentation Delivery
If you would like to read more tips for great presentations see:
This module on how to prepare for and deliver well-executed presentations examined the aspects of interpersonal presentation skills, such as your own verbal and non-verbal presentation behaviours. This knowledge allowed you to move on to planning the presentation strategy. You did this by using tools such as FAST and AUDIENCE, respectively. With these frameworks in place, you began to brainstorm and keep track of your ideas using an outline to write your presentation. This included writing an attention-grabbing intro, a body to develop your main point or theme, and a conclusion that ended on a high note.
Presentation Aids were introduced by focusing on visuals or other tools that can aid your presentation by lending emphasis, clarity, and support. You learned about several tools and techniques, such as how to to use slide decks (e.g., PowerPoint) and colours effectively to support your presentation. Lastly, you read the section on delivering the presentation, which included learning how to prepare to present, how to manage anxiety, and how to cope with mistakes.
What you’ve learned in this module will serve as good preparation for future presentations, whether they be at college, university, work, church, or in many other circumstances.
Exercise: Presentation
In this assignment, you will need to prepare and deliver a presentation following methods you have learned in this module.
Your first step will be to choose one of the scenarios listed below for your presentation, or you can choose one with your instructor’s approval, or perhaps your instructor will assign one to you. These scenarios form the basis or purpose of your presentation, so please read them carefully.
Once you have analyzed your scenario, determine the main function or purpose for the presentation and then begin the process of developing it. You may want to review the module sections on developing a presentation strategy for guidance. Start thinking about the main point in the scenario and identify key factors that you need to address. Plan the information you will need to include into each section of the presentation as you do this.
Research and compile the necessary details, evidence, statistics, etc. that will support your message. Your presentation cannot simply be what “you” believe is a good response. The information you present needs to be accurate and credible based on your inclusion of valid and reliable details. This also speaks to your credibility as a presenter.
Develop a clear plan and delivery strategy. Rehearse and rehearse again so that you are comfortable and commanding in your delivery. Your goal here is not on memorizing but rather developing an intuitiveness with your presentation so that it comes off as being natural and authentic.
Your instructor may provide a grading rubric to help guide you in this assignment.
Your instructor will indicate when and where you will deliver your presentation. This is a timed presentation. To be successful, you need to present well and cover all of the expected points indicated in the scenario.
Keep the plan, outline, handouts, and visuals you created as part of your preparation work. Your instructor may want you to submit them as part of the assignment.
The Student Association has asked you to make a short presentation at Student Orientation for new students. They want you to present about options for online learning and increase awareness. They have asked you to deal with some key questions to be included in your presentation.
They would like you to allow time for a question period at the end to get students actively engaged. You will be given a total of 15 minutes to make your presentation including a Q&A session. You will have access to a classroom which has a large selection of presentation devices, including a computer and digital projector, whiteboards, teleconference equipment, and high-speed internet access.
There is a long history of student complaints about the price of books at university and college bookstores. Many students have mentioned web-based booksellers as possible alternatives. As a representative of your student government, you have been asked to make a presentation on the issue of book prices, including using alternative sources of supply.
Your presentation needs to answer the following: What are some alternative supply sources? What about book rental programs or using open educational resources? Which is the best alternative for students at your school? You decide to compare these alternatives by considering price, availability, book buyback programs, and students’ thoughts about purchasing books. You are not asked to provide a recommendation, but a good conclusion should be included in your presentation.
Your audience will consist of invited students representing each of the academic program areas, the institution’s bookstore manager, and members of student government and student services. The total number of attendees is expected to be up to 50.
You will be given a total of 15 minutes to make your presentation including a Q&A session. Your presentation will take place in a large room. Equipment, such as computers and digital projectors, can be made available; however there is no internet or cable TV access in this room.
This scoring guide can be used to provide constructive feedback to speakers on their presentations. It can also be used as a checklist as you prepare for and practice your own presentation. The criteria included align with major elements already discussed in this module. It can be used to provide feedback based on your impression of how well speakers have addressed the criteria (Presence, Language, Organization, Subject Mastery, Visual Aids), as outlined in the scoring criteria table. There is also a section in the table to indicate your overall impression of the presentation.
Much of the feedback provided will be subjective; however, if different peers participate, the aggregate of the feedback should become a reliable indicator of the performance quality related to each criterion. Presenters can then use this valuable feedback to hone their skills and improve their performance as they prepare for the course presentations that will be assessed formally.
If you are using this chart to evaluate others, you are encouraged to be honest and professional with your feedback. Also, you should not identify yourself if several people are evaluating. There is no need to include your name or other identifying markers. It is the feedback that is important here, not who provides it. If you are practising your presentations to others, have them use this to get useful feedback. If you are practising your presentation in front of a video camera, use this chart to evaluate yourself in your practice runs to improve your performance.
| Scoring Criteria | 1 | 2 | 3 | 4 | 5 | Comments/Feedback |
|---|---|---|---|---|---|---|
Presence
| ||||||
Language
| ||||||
Organization
| ||||||
Subject Mastery
| ||||||
Visual Aids
| ||||||
Overall Impression
|
All the best to you as you practice and improve your presentation delivery. Hopefully, your marks on the above chart will go up each time you practice.
Finally, never give up the opportunity to make a presentation. It’s natural that your first instinct is to say no, but the more you make presentations, the more comfortable with it you’ll become making them. It is actually a pretty nice skill to develop.
Key Takeaways
Delivering a good presentation involves many factors.
This chapter was adapted from the following chapter:

Managing money is a necessary life skill, and one of the hardest because it is a constant issue that never stops. Living life requires money coming and going on a regular basis. Learning the skills to being a good money manager will reduce a lot of stress in your life, and will enable you to plan and save for the future. It will help you to make wise decisions rather than impulse decisions when it comes to spending your money. Having a good handle on what you can afford will help you to take control of your finances and prevent you from getting into unmanageable debt.
Learning Objectives
In this chapter on “Financial Aid and Funding Options,” students will:
Planning for post-secondary education can seem daunting and may feel out of reach. It can feel like you cannot afford it. However, without post-secondary education, many people will never be able to afford many of the things they desire. There is a direct correlation between the number of years of education people have and the amount of money they make. The data is very clear. The higher your education, the more money you will likely earn. Therefore saying you can’t afford to go to school is more likely to keep you in the situation of not being able to afford the things you want from life.
StatsCan did a study called “Does education pay? A comparison of earnings by level of education in Canada and its provinces and territories.” It is clear that the higher the level of education, the higher the average pay.
If you want to enrich your education and skills, you should look into different avenues of funding. There are often several sources of income that can help you get through school.
Student loans are designed to help eligible students who otherwise may not be able to afford to access post-secondary education. If you decide to borrow money to go to college or university, government student loans are a good way to do it. Note that government student loans are different than student lines of credit from your bank. Student lines of credit usually end up costing you more because they charge interest from the day you take the money. This results in four years of interest payment for a typical university degree! There are several advantages to government student loans.
If you would like to apply for a student loan, speak to the Financial Assistance and Awards Advisor at your college or university. They can assist you with the process. For BC student loans, see www.studentaidbc.ca. If you do not meet the Student Aid BC residency requirement guidelines, apply for other provincial loan programs from the province where you last resided for twelve consecutive months.
Government student loans are better for students than bank loans and lines of credit for all the reasons listed above.
Beware of loans that seem too good to be true. They usually are! Several loan suppliers purposely target those with bad credit and lure them into borrowing money. They tempt people with offers, saying they get the money easily and instantly. The problem is that usually the interest rates are very high (to cover their risk) and the consumer ends up paying far more in the end by the time they have paid back all the principal and interest. Storefront money lenders (e.g. MoneyMart and CashMoney) and more recently (and alarmingly) online money lenders (e.g. iCash) provide instant money for those who may spontaneously choose to spend money they don’t have. If someone has bad credit and doesn’t qualify for a bank loan, it is usually a good indicator that they shouldn’t be borrowing more money! Spend within your means and you will be a lot more financially healthy.
If you have family or friends who have offered to loan you the money, this is often a great opportunity to pay for school. Often loans from family and friends come with special perks.
Sometimes family or friends offer contributing to your education through a financial gift rather than a loan. This is a unique opportunity that is all too often turned down.
Author’s Story
As an education advisor, I have often heard students tell me that someone has offered to pay for their education. People often turn down the offer for many reasons:
As an education advisor, I have also had many parents, friends, and employers tell me they want to help fund someone’s education. They offer for many reasons:
There are several reasons to accept or deny the gift. Consider them carefully. I hate to see students deny gifts hastily. Accepting a gift of education may end up being a win-win and something that brings great joy to them both.
If you have someone who has offered you funding to help pay for school and is offering it as a gift, consider yourself very fortunate; this is truly a special gift. Consider that denying the gift could be an insult to them. They may interpret that you don’t want them to be part of your life’s journey to future success. Keep in mind that someone likely invested in their future and they may want to pay it forward. At any rate, they have thought it through and decided that you are someone they want to help and invest in. Consider yourself special and worthy of their trust in you. The only thing you owe them is to use their money wisely. Work hard in school. Achieve the goals you set out for yourself. This will be your thanks to them.
Another word of caution. There are some exceptions. In rare circumstances you should not accept a gift for schooling. In some dysfunctional relationships, there may be strings attached to the gift that you are unwilling to abide by. If the giver of the gift has unreasonable expectations attached to the gift (particularly if the expectations involve something that makes you uncomfortable, is unsafe, or you are unwilling to do) then it makes sense to deny the gift.
Student financial awards are monies granted to students for varying reasons. Some are entrance awards intended for students entering post-secondary for the first time. Other awards are for students who are currently enrolled in a full-time program. Awards include two main types of grants: scholarships and bursaries.
There are numerous student awards to improve Aboriginal access and achievement and to support getting post-secondary education and reduce financial barriers. Funding can come in the way of internal school awards or from supportive native bands. There are Aboriginal Coordinators in most colleges and universities that can assist students and potential students in accessing funding and supports.
The Canadian government has an initiative that incentivizes parents to invest and save for their children’s future post-secondary education. Parents open an RESP for their children, preferably when they are young so they can save for more years. They contribute money into the account on a yearly basis. The government matches twenty percent of the contributions up to $500 per year. That means that over eighteen years of savings each of a parent’s children can get up to $9 000 in free government grants in addition to the money that was contributed. Additionally, the government can contribute more for lower-income families. As well, all the money deposited is tax-free and can be invested to earn interest and dividends. These savings can add up and provide a nice nest egg for post-secondary education. Check with your parents to see if they contributed to an RESP for you. If they did, you may have access to more money than you thought.
It is great if you can access free funds and low-interest loans. But that still may not be enough to pay for your education. Most students need to work hard during their summers to save up for the next year of school. Some students can fit in a part-time job during the school year to help with the finances. Even a short shift a week can help with providing some spending money throughout the school term.
Exercise: Identifying Sources of Funding
There are many different ways of paying for educational expenses. When creating your own financial plan for school, you may wish to consider:
Exercise: Financial Aid
Talk to someone from the financial aid office at your school of choice. The people in this office may suggest other options for funding that you are not aware of.
Jot down some notes after talking with the financial aid people. You may need these notes for your Budget assignment (coming soon!).
A budget is a document that tracks the money you have coming in including sources of income, and the money you have going out to pay for your expenses. For students, a budget helps them plan for future school expenses, keeping in mind all sources of income, including student loans, grants and earnings from part-time work or full-time summer jobs.
When returning to school, most people have to really think about their needs versus their wants:
| Needs | Wants |
|---|---|
|
|
You may have to let go of some wants when you return to school. Can you think of some wants you could eliminate from your budget while you are a student? How about making coffee instead of buying coffee? Buying less clothing? Going out to movies less often and staying home to watch one instead? You may find it is easier to eliminate some expenses that are wants rather than needs.
Exercise: Saving Money
List as many ways as you can that you can cut back on expenses in your own personal life. Make sure they are practical and doable. For example, it may not be practical to save money on a bus pass if the alternative is walking to school one and a half hours each way. This will help your fitness level but may seriously cut into your study time, so it is likely not worth the savings. Likely you will think of many practical areas you can save money though.
Also remember that budgets get adjusted regularly, so you’ll have to review your budget often. Add income that may come in, such as bursaries or income tax returns, to keep your budget accurate.
Exercise: Prepare a Simple Budget
Using your word processor program, prepare a simple budget showing how you would pay for 1 year of your program at a post-secondary institution. The easiest way to start is to break down your monthly expenses and add the costs associated with school. You will have to estimate expenses for many items (e.g. food, hydro)
Be sure to include your costs for:
Also include a detailed list of where your funding might come from. Be sure to include:

Personal budgeting sounds like a boring and constricting thing to do. In reality, it is enlightening and empowering. The truth is that most people don’t know where their money goes every month. They seem surprised when it runs out. But it should never be a surprise. The amount of money coming in needs to be greater than the amount of money going out. Otherwise, you’ll end up running out, or going into debt. It’s particularly frustrating when you can’t afford to do something which was really important to you, because you inadvertently spent money on something that really wasn’t that important to you.
Creating a personal budget means being intentional and proactive about where you spend your money. Budgeting is creating a plan to make sure it goes where you want it to go – no surprises. Tracking your spending will help you be aware of the realities of what you spend your money on. This is particularly important for a couple. Money is the biggest thing that causes conflict in a marital relationship. Often couples tend to think it’s the other person who is out of control on their spending. It can be eye-opening to track spending and see where you yourself are spending more than you thought. A personal budget is a finance plan which allocates future income towards expenses, savings and debt repayment. Personal budgeting requires both creating a doable plan and following it.
There are several ways to create a personal budget, and you need to choose a way that works for you. Some divide up their cash into marked envelopes designated for different categories (rent, food, cell phone, car, entertainment, etc.) and some track it digitally using a spreadsheet. What most people find is that if they do it for a good length of time (such as a year), they change their spending habits enough that they don’t have to track so carefully anymore.
Of course, as income changes, habits change, and money issues creep in again. It’s a funny thing. You’d think that when you start making more money, it would be much easier to balance your budget every month, but in reality, as wages increase so do expectations and expenses. It’s a good idea to redo your personal budget as required.
Once you get started with a personal budget, first building it, and then sticking to it, you will realize it’s easier than you think.
Exercise: Compare Budget Templates
Explore a couple of different ways to create a budget. Here are some examples:
For both of these examples: Make sure to click on enable editing once you have downloaded the file. Then you will be able to insert your own figures into the chart. The nice thing about these online tools is that they do all the math for you.
You may explore a different budget template that you are familiar with or that someone recommended to you. Some people prefer to use good ol’ pencil and paper and make their own charts. Think about which templates or models will work well for you. You will use one in the assignment below.
Once you work out your budget, you will be able to see how much discretionary money (the money left over after all the necessary payments come out) you should have at the end of the month. Then you can decide how much of it will be for savings, for charity, for a special purchase, or for a special holiday.
However you decide to do it, your budget should reflect your spending. Notice that most pre-made charts have a place for other. It’s important to identify the other items that are unique to you. Think of your habits (good and bad). If you buy a case of beer every week, or a pack of cigarettes every day, or go skiing every Saturday, make sure you put these in your budget as well. You may need to adjust the amount once you evaluate whether or not you can afford these.
Assignment: Develop a Detailed Monthly Budget
Use the simple budget you developed above. You should be able to use the information you gathered there to complete this more detailed budget exercise. For this exercise:
Your assignment will consist of the monthly budget sheet along with a short paragraph discussing changes required. If you are using an online tool to create your budget sheet, print it to have a hard copy and save it one your own computer. If you are using pen and paper, make copies of your budget to use as working copies each month.
Making a budget and following it is the first step. Budgeting will help you get control of your spending and be more aware of where your money is going. As well as using a budget to manage your current finances and short-term goals, it is important to plan for future needs.
For example: do you plan to have a family and purchase a home? Do you plan to attend post-secondary full time? Do you want to save for your children’s post-secondary education? Will you need a new car in a few years, or have to do a major renovation to your home? If you don’t plan ahead, these things likely won’t happen. Financial planning for the future often just involves identifying those things that are important to you, and then building it into the plan. Putting a little bit every month into a savings plan can add up quickly, and it will be there for the things that matter to you. Once you determine a reasonable amount to set aside each month, it’s good to make sure it’s done automatically. You can set up your finances so that payments automatically go into:
Depending on your circumstances, this may seem impossible. Sometimes there just isn’t enough at the end of the month to have anything extra. After analyzing your income and expenses, it may cause you to realize more changes need to be made. Do you need to get a different job that pays more? Do you need to get an additional part-time job to supplement your income? Can you find ways to do things more inexpensively (spend less, find cost savings, change habits?) Do you need to sell something that is draining your finances? You will need to come up with a plan that will at least allow you to balance your budget each month. Whether your budget is to prepare for post-secondary school (save money so that you can go in the future) or to attend now (budget so that you can stretch your money throughout the school year), using these principles will help you achieve your goals.
This chapter is a remix of the following resources:
In Chapter 12.2 Personal Budget you learned about the numerous options for funding your education. In this section you will research some awards and apply for some that you are eligible for.
There are generally three kinds of awards: internal, external, and outgoing awards.
Exercise: Identify Personal Accomplishments and Attributes
In preparation for applying for student awards, it is important to identify your personal accomplishments and attributes. Often people forget about the many things they have done, or they underestimate their value. Start by making a list of the following.
Listing these out might feel strange, as though you are bragging. But you will need to brag a bit when you apply for student awards. Remember the people reading these applications don’t know you. The only information they will have to help them make their decisions is the information you give them. So the more you can tell them, the better informed they will be in knowing who you are. Don’t be afraid to list your accomplishments and attributes.
Exercise: Apply for Funding
Choose one or more of the following options for funding and submit an application.
In this exercise you will apply for at least one thing. If you want to apply for an internal award, you will need to check if award applications at your institution are open at this time. If you apply for an external award, you can apply for one of the many awards open to you. Report back on the award you applied to and the process. How hard or easy was it to apply for the award?
Key Takeaways
Exercise: Financial Practice
Being savvy with your finances takes practice.
1. Follow the budget you created in Chapter 12.2 Personal Budget for a week and report back.
2. Apply for another award. When you applied for the award in Chapter 12.3 Applying for Student Awards you likely saw numerous other awards you could apply for. Just do it!
Make a schedule for applying for awards. There are awards due throughout the year. If you make time each week to apply for a few awards, you increase your chances of receiving awards by the sheer volume of awards you apply for. If you spent two hours applying for seven awards, and you received one award for $500, that is the equivalent of making $250/hour. Not bad for putting together a few applications.
If you still aren’t sure if you will go to school, or you still haven’t been accepted yet, you can still apply for a student loan. You won’t receive any money until you are accepted, registered, and the school has accepted your tuition. By applying early, you will receive a statement telling you how much you are eligible to receive. This is incredibly helpful as you put together your budget. This helps with planning and even decision making.
Keeping your finances in order is one of the most helpful things you can do for yourself as you embark on student life. School comes with enough stress as it is without worrying about your bills at the same time as you are trying to study for a final exam. Make a budget. Stick to your budget. And if things get tight or unexpected expenses arise, apply for more awards, get a student loan, or schedule an appointment with the financial advisor at the school for more ideas.
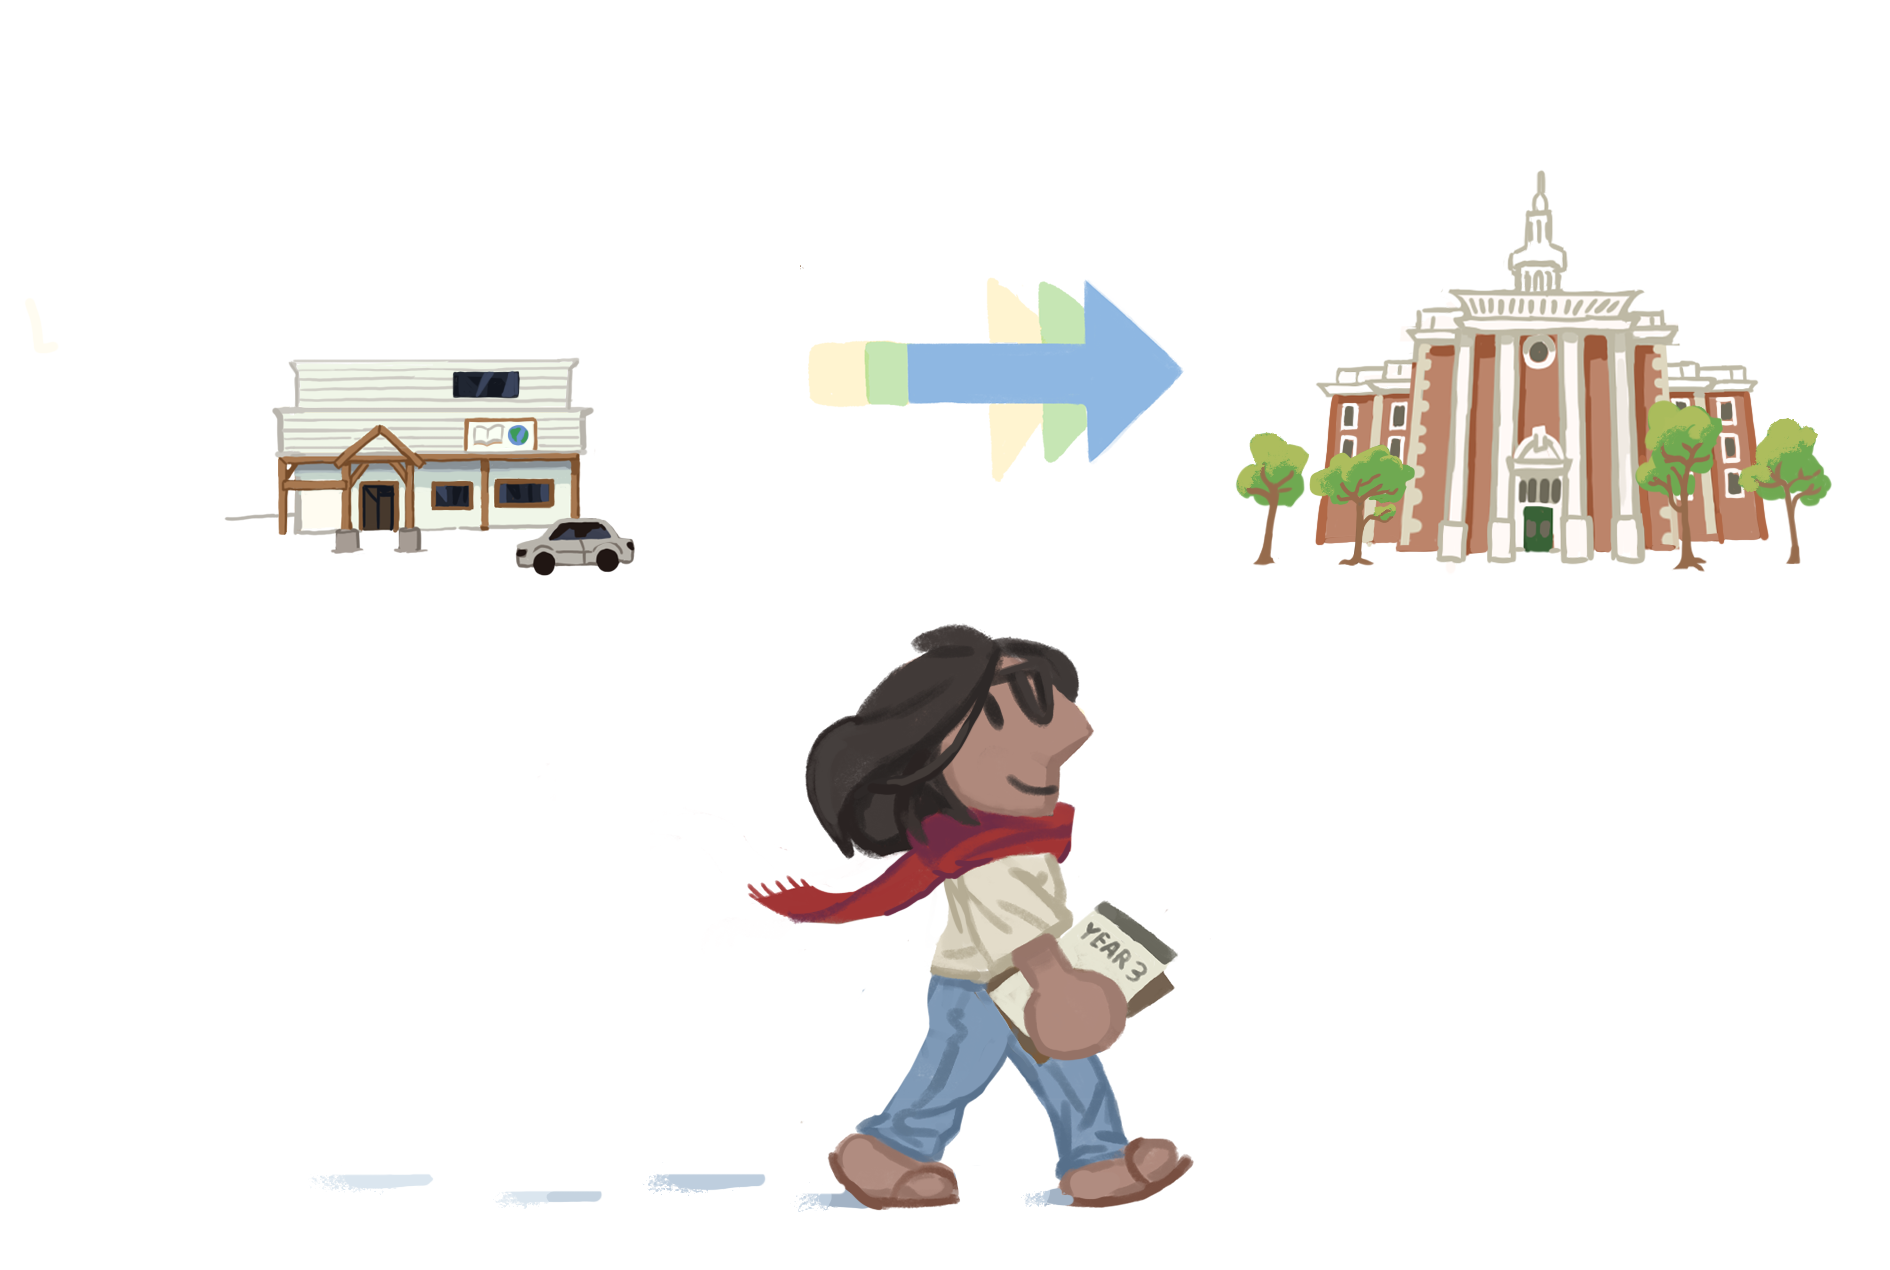
Have you ever thought about transferring from one post-secondary institution to another? Or maybe you’ve thought about returning to school after many years, and you wonder if any of your old courses from your first (or second or third) attempt at college might still work towards something after all these years. Maybe you’re considering starting a program at a college to be close to home for a couple of years and then transfer to a university farther away to finish your program. Or possibly you attained a certificate at one institution and later you want to continue to do a diploma at another institution, and you want to see if your certificate can be used for entry into the diploma program. If you’ve been wondering about any of these things, you will be happy to know that BC has an amazing transfer system. You will love the BC Transfer Guide! Transfer credit is when one institution recognizes education completed at another institution. The BC Transfer Guide shows all the courses which have already been evaluated and approved for transfer. It shows which institutions have agreed to accept the courses on it. If it is in the Guide, you know that it is transferable. You can find the BC Transfer Guide at BCTransferGuide.ca.
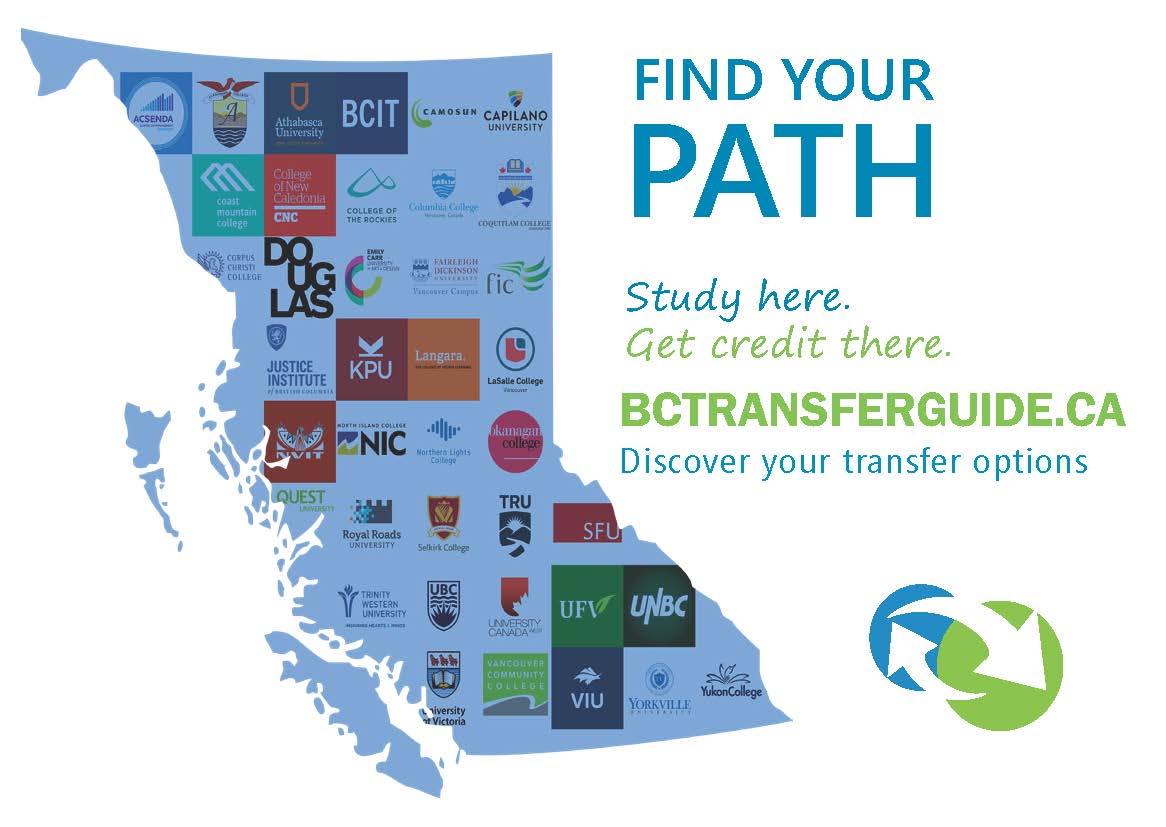
Learning Objectives
In this chapter on the “BC Transfer Process,” students will:
British Columbia has an amazing transfer process. In fact, it is said to be the envy of the world, and many Canadian provinces and other countries are now trying to emulate it. A strong transfer process makes it much more convenient and flexible for students. This is not to be taken for granted.
Author’s Story: A Transfer Nightmare
My transfer experience many years ago was a nightmare. I did my first year of engineering at one university and transferred into engineering at a different university in the same province (not BC) for my second year.
Transferring from one university to another was a job in itself. There were no transfer agreements and the receiving university didn’t want to accept many of the courses from the sending university even though the courses and the course outlines were virtually identical. I had to go to the dean and argue my case for every single course. In some circumstances, I had to go to the professors and convince them that the courses I took were of a high enough quality. One professor wanted to see my lab notebook. Another asked to see my final project from a course; I had to request it from the sending university which didn’t want to comply. Still another gave me a very challenging test on the spot and insisted I pass it or I wouldn’t get credit. (I did!) It was hard work getting credit for my courses and a very intimidating process that took an incredible amount of perseverance. However, I still didn’t get credit for all my courses and had to repeat some.
When I came to BC and became an education advisor, I had an amazing respect and appreciation for the beautiful thing it was to have the BC Transfer Guide. I knew it was a good fit for me to be involved in the articulation process for post-secondary transfer. I regularly show students how to use the guide to do their education planning.
— Mary Shier, College of the Rockies
The British Columbia Council on Admissions and Transfer (BCCAT) oversees the BC Transfer System, enabling links between the BC colleges and universities, the government education ministries, and the public and private education sectors.
Articulation committees play a critical role in facilitating smooth student mobility between educational institutions in BC. British Columbia has articulation committees for 66 subjects that are offered in BC colleges and universities. They exist for most disciplines or programs that are delivered in more than one BC post-secondary institution. Articulation committees have provincial meetings every year, with representatives from all the BC post-secondary institutions that have courses or programs in the respective subject areas. At meetings, articulation committee members share information and discuss curriculum. They develop shared learning outcomes and discuss important changes in curriculum to ensure relevancy in their fields.
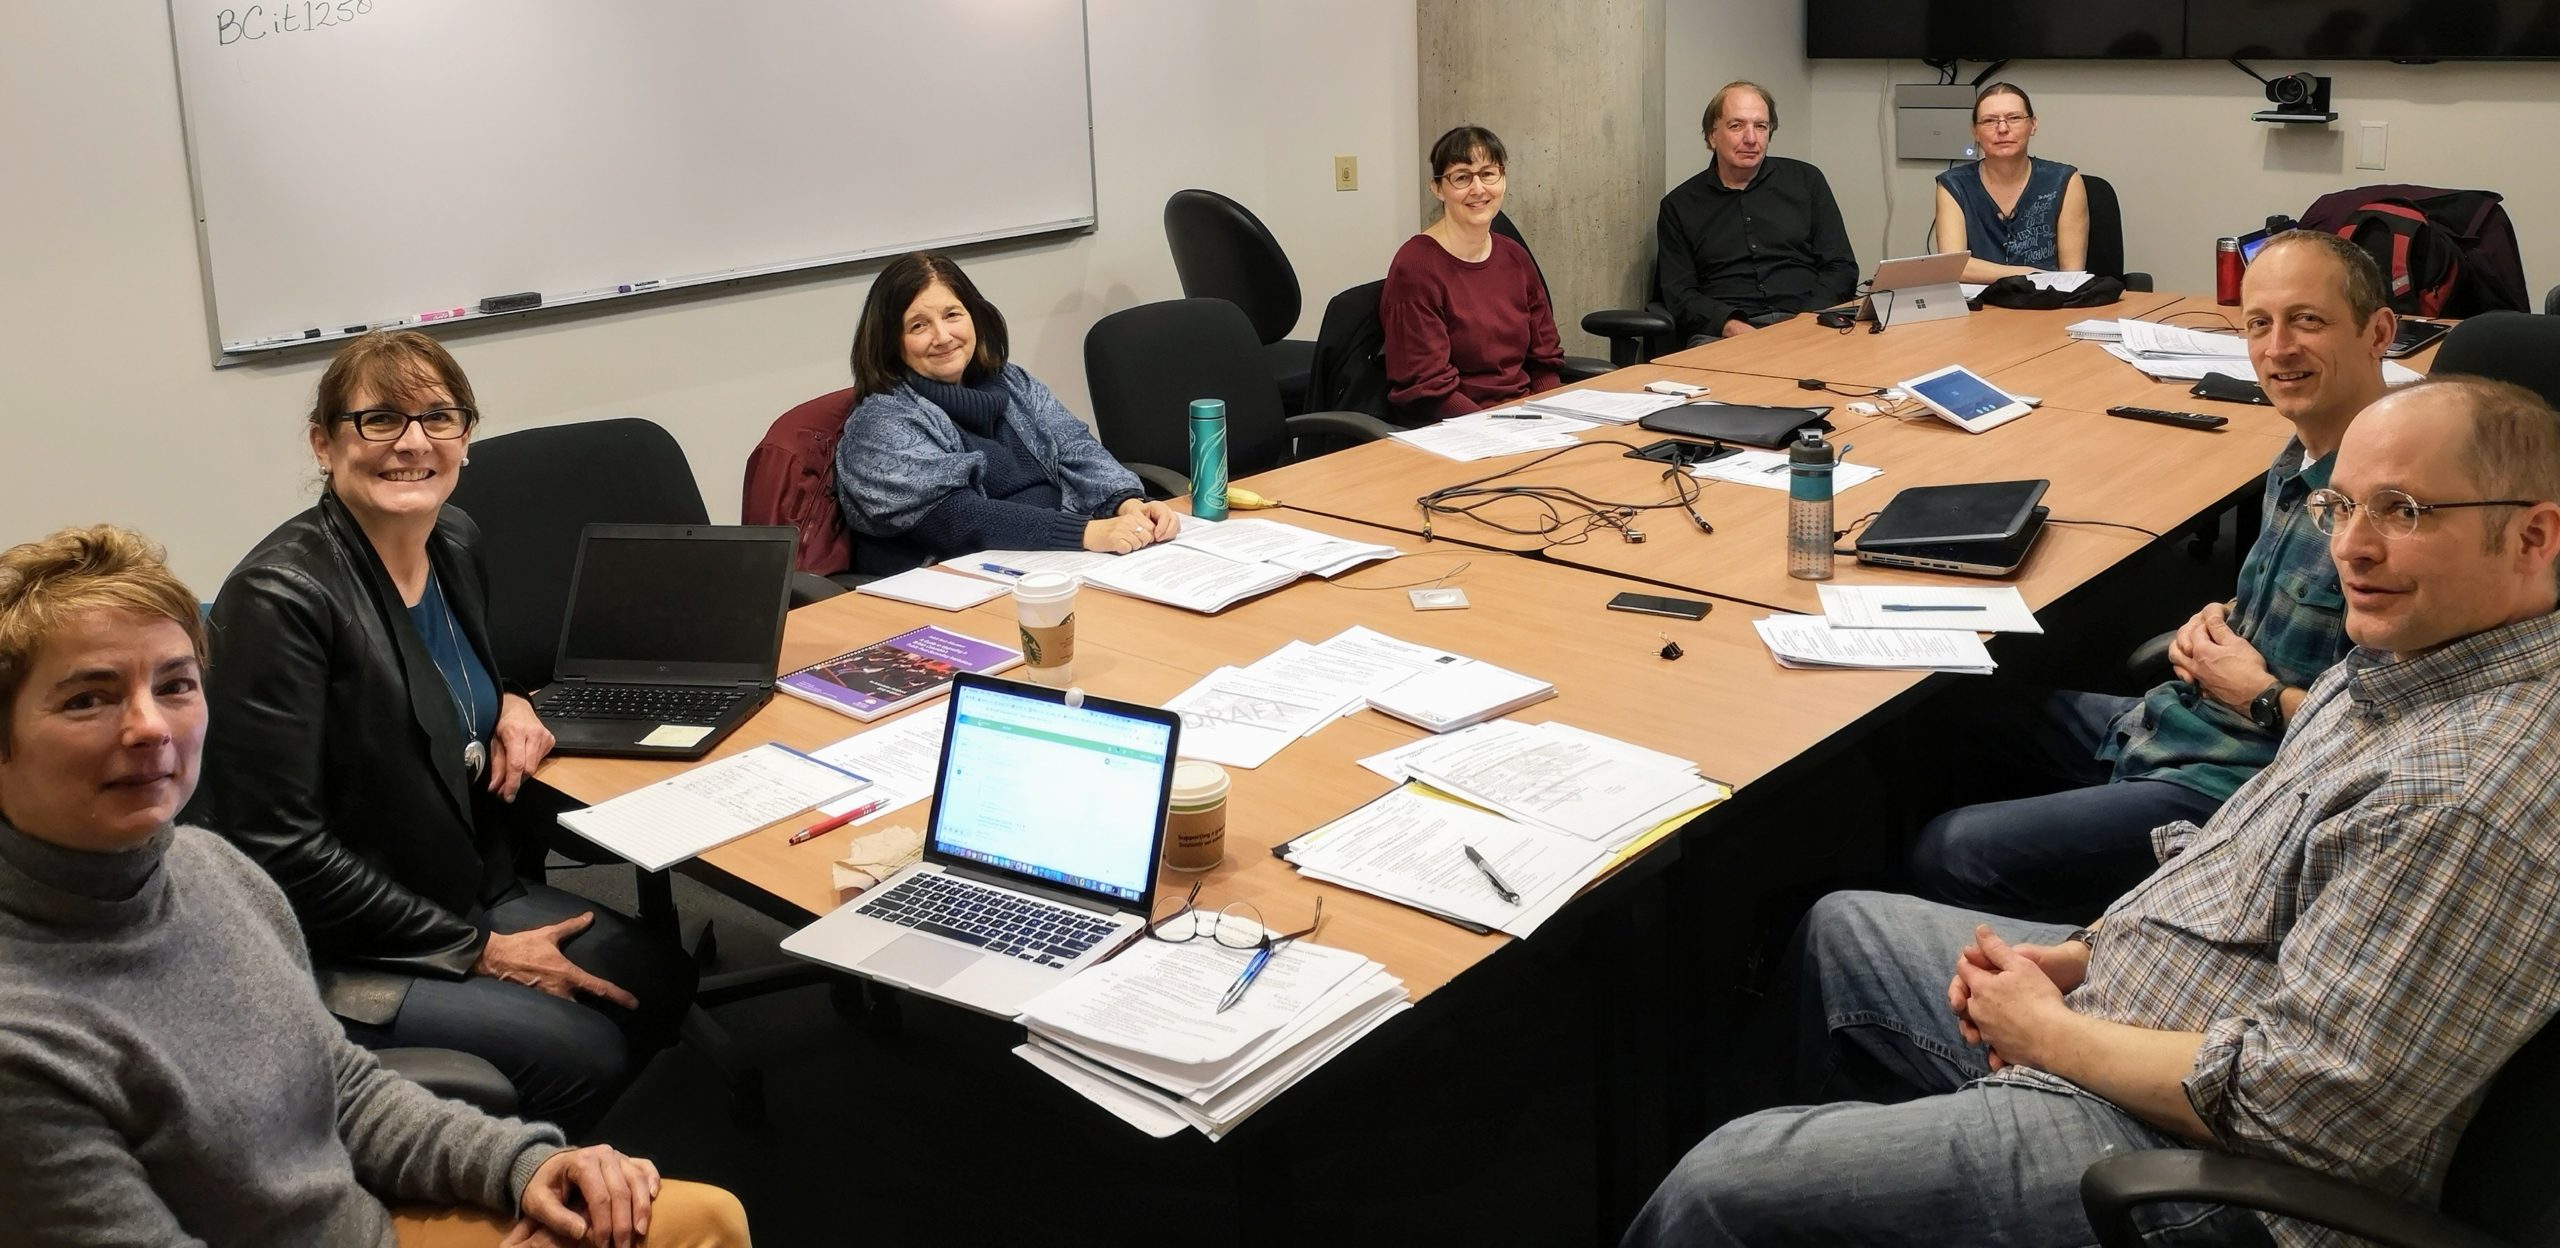
Each university and college has a voice at the table. The representatives discuss and agree on standards that they will use to decide whether courses will transfer from one institution to another. Sometimes whole programs are transferable. If you do a certificate or diploma at a college, it could have a prearranged block transfer allowing you to enter year two or three of a university degree program respectively.
See Articulation Committees for more information.

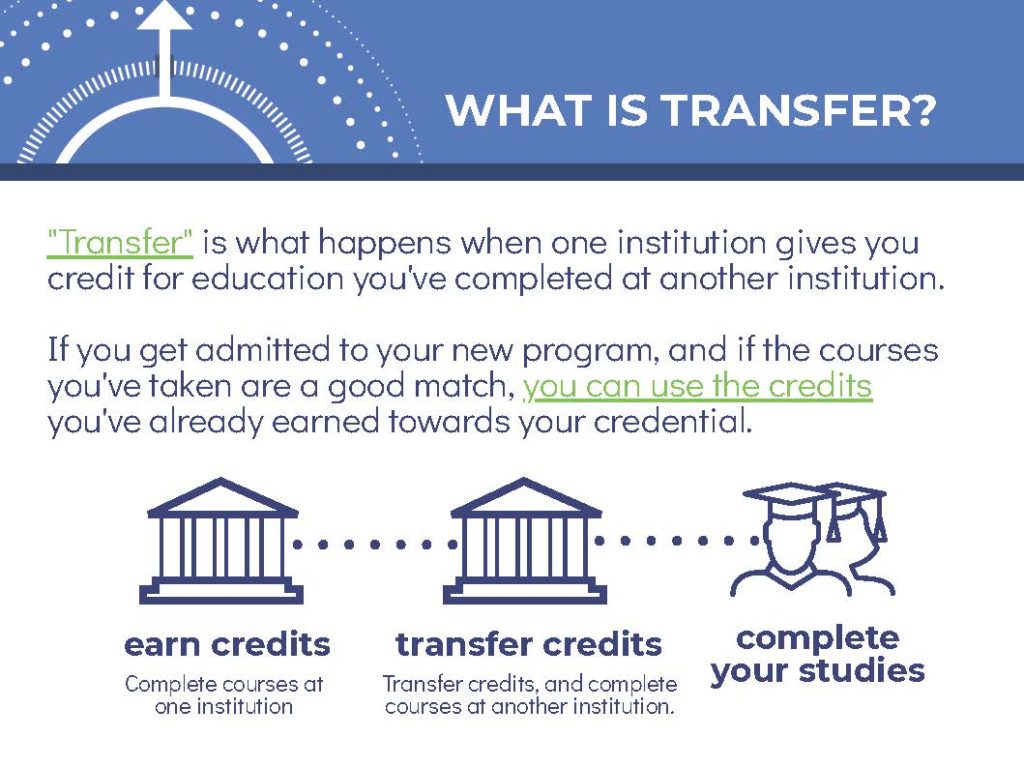
Sometimes transferring institutions wasn’t in the original educational plan. It may have been necessary for many different reasons. Sometimes transferring is in the plan from the start. Some students like the idea of doing their first year or two at a more convenient institution and then move to a bigger institution for their final years. Here are some of the reasons people build it into their original plans.
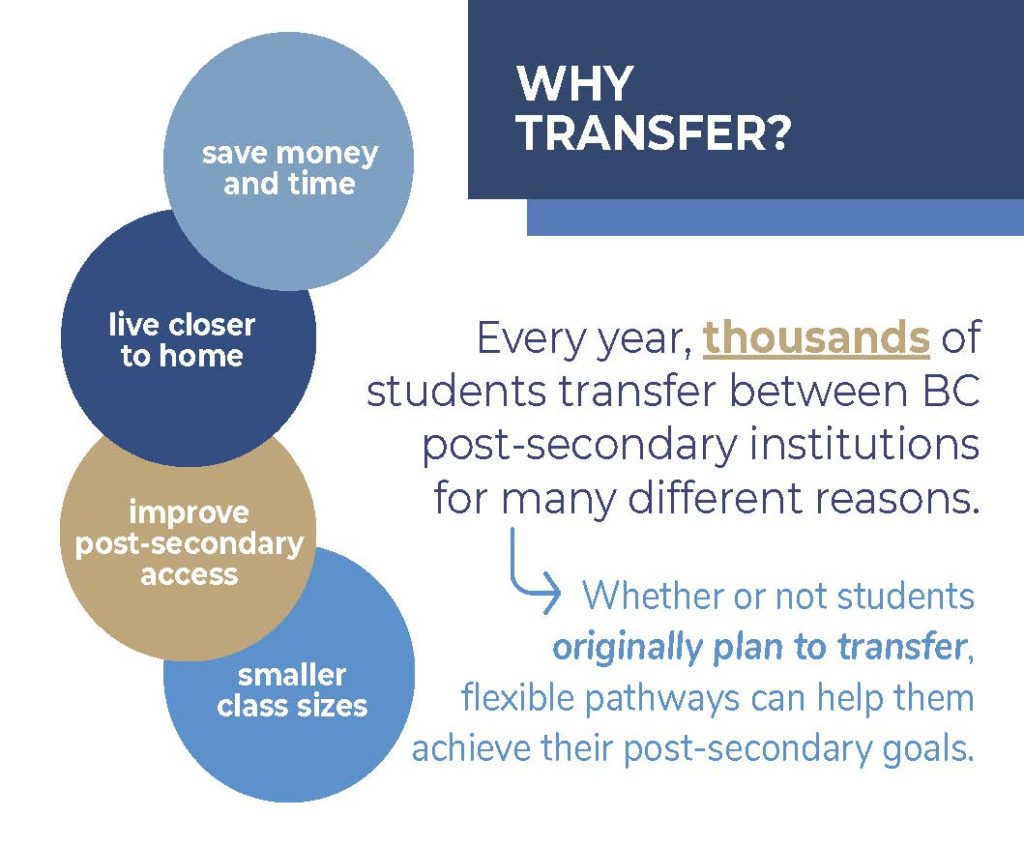
There have been studies done to evaluate the impact of transferring on students. In fact, it has been shown that there are many benefits for students to build transfer into their educational plan. Students who have transferred from one post-secondary institution to another have shown great student outcomes and were just as successful as students who entered university directly from high school. See Transfer Research for more information.
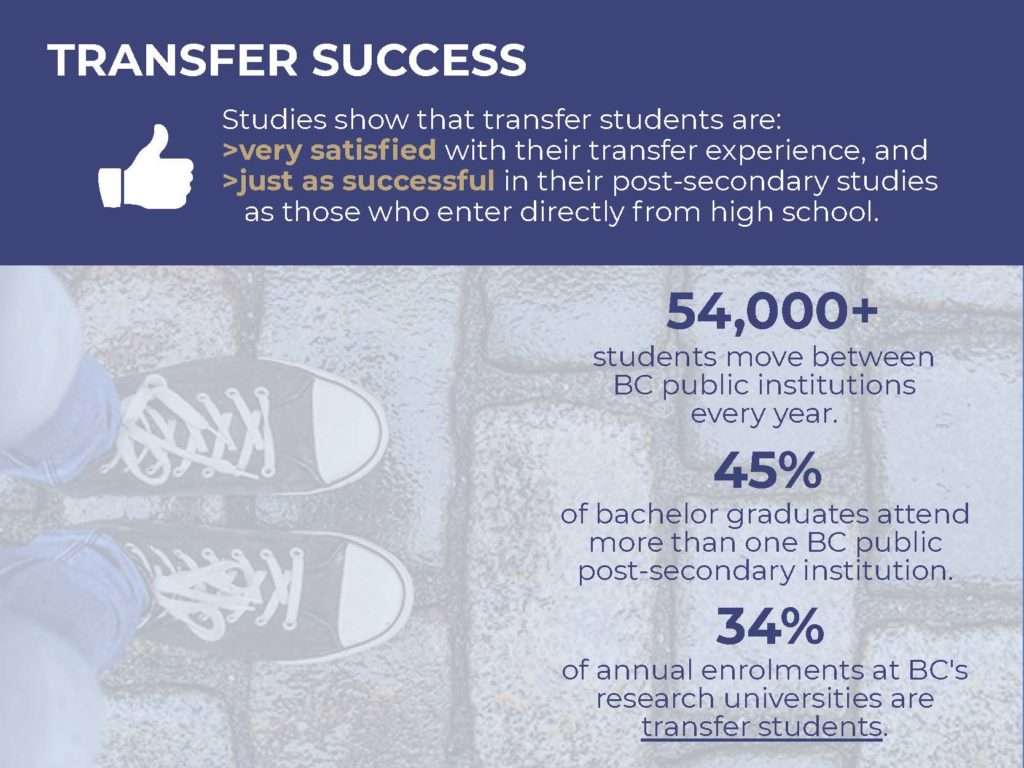
Transferring between institutions and/or using courses from other institutions towards your credential is becoming more and more prevalent. In this age of people moving locations, changing career goals, and juggling more and more circumstances while getting their education, transferring becomes increasingly more practical. No longer does transfer seem like a correction in someone’s educational path, but rather has become a part of people’s educational plan.
What is Transfer?: “Transfer” is what happens when one institution gives you credit for education you’ve completed at another institution.
If you are admitted to your new program, and if the courses you’ve taken are a good match, you can use the credits you’ve already earned towards your credential.
Process: Earn credits by completing courses at one institution. Then transfer credits and complete courses at another institution. Then complete your studies!
[Return to What is Transfer? image]
Transfer Success: Studies show that transfer students are very satisfied with their transfer experience and just as successful in their post-secondary studies as those who enter directly from high school:
[Return to Transfer Success image]
The BC Transfer Guide is available online and students can check to see if a course or program is transferable. Often courses are very similar in several institutions and are deemed transferable. When the content of a course at one institution is the same (or very close) to the content of a course at another institution, the other institution will give a student credit for its own course if the student has completed the course at the first institution. This is called transfer credit. It doesn’t matter how the course is taught (e.g. face to face, distance, or online) and it doesn’t matter if the assignments are the same. However, it does matter that the same content is taught, that the course meets the minimum number of hours, that it is an academic course, and that it is evaluated, to ensure the courses are similar.
Your Transfer Checklist:
If you are thinking about transferring, keep the following things in mind:
Updating the BC Transfer Guide is a continual process. New courses and programs are developed all the time and these can be sent to other institutions to see if they will be accepted for transfer credit at those institutions. Sometimes courses are revised and are added to or removed from the transfer grid. The online guide is regularly updated, so if what you were looking for wasn’t there when you checked previously, don’t assume that it still is not there. New courses and new institutional agreements are being developed and added regularly.
Not that long ago, the BC Transfer Guide was intended for enabling the transfer of post-secondary students throughout BC. But the BC transfer system now includes two post-secondary schools outside of BC (Yukon College and Athabasca University) so transfer agreements with those schools are included in the Guide. In many cases, universities from other provinces accept transfer from BC’s colleges when the courses are listed as transferable to the major BC universities on the BC Transfer Guide. In other words, educational institutions in other provinces respect and accept the rigorous process for determining transferability that BC uses, and thus will accept our transferable courses accordingly.
The Alberta Transfer Guide shows transfer options between Alberta institutions. These guides are being updated continually, and more inter-province agreements are being developed and added to the BC and Alberta Guides regularly.
There are several things you need to check if you plan to apply for transfer credit.
Student Testimonial
“Like so many Aboriginal students, I really struggled in school and was not academically ready for university study. The smaller classes, student community, and my family all supported me while at the college. Were it not for Langara College, I never would have been able to attend UBC, graduate with a Bachelor’s Degree, and begin my career in higher education.”
— Graeme Joseph, a Langara-to-UBC transfer student and member of the Gitxsan Nation (as cited in a September 2016 BC Government news article).
If you can’t find a course or program in the Transfer Guide, it doesn’t necessarily mean you won’t get credit for your courses. If a course doesn’t show up as transferable, it’s possible that it doesn’t meet the criteria. However, it may mean that the course hasn’t been evaluated for transfer yet. The courses may be new or may have been recently amended. Even if it doesn’t transfer, it doesn’t mean that the course isn’t valuable or good quality. It may just mean that other institutions don’t offer a similar course.
Most institutions have Application for Transfer Credit forms which you can often download from their websites. If courses are listed in the BC Transfer Guide, it’s a fairly straight forward process. If you think you should get credit for relevant courses that aren’t in the Guide, compare the courses you took with the courses required for your intended program and, if you think there is a close match, you may be able to get credit for the courses, and save yourself some time and money by not having to repeat the courses in the new institution. Here’s where course outlines come in very handy. If you compare the learning outcomes of the course you took with the course you want to get credit for, and if they are very similar, it may be worth applying for transfer credit. Usually, you will need to apply for admission into the program before applying for transfer credit.
If you haven’t taken the course yet, but you want to take a course from another institution than the program you are in or intend to attend, you will need a Letter of Permission from the institution you are enrolled in. It is important to submit this form before taking the course, so that you get it in writing that you will receive transfer credit. There are several reasons someone might want to take a course from a different institution than the one their program is in.
Student Testimonial
“The complexity of these different pathways completely flipped my thinking: education isn’t a progression from point A to point B. It’s a process that is fluid, complex, dynamic, and individual.”
— Daniel Jacinto, UBC student
Regardless of whether you are filling out an Application for Transfer Credit or a Letter of Permission, you will want to include course outlines of the courses from the outside institution. They will be required in order for the registrar to grant credit. Course outlines are usually provided on the first day of class and are official documents that describe the courses. It is important to keep these. Often when people are applying for transfer credit, they have their transcripts with grades, but this only contains the name of the course, not the course details. Note course outlines are not usually required for courses listed on the BC Transfer Guide, since these courses have already been evaluated for transfer.
Author’s Tip
Keep course outlines! (Even if you aren’t thinking of transferring.) You never know what educational program you may want to take in the future. Course outlines are invaluable for getting transfer credit later on. Even if you love to burn all your notes at the end of a course, save and file those course outlines!
— Mary Shier, College of the Rockies
Ruth Erskine“The BC Transfer System and the BC Transfer Guide are part of one of the most complete and most successful transfer systems anywhere. The BC system is successful because BC’s universities and colleges know how important it is for students to have as many options as possible and to be able to easily move from school to school. Every year it is very exciting to attend the meetings of the articulation committees and to see how excited the representatives are about creating the best opportunities for students.”
— Ruth Erskine, BC Council on Admissions and Transfer (BCCAT)
Students have more opportunities to transfer between institutions than ever before. This means that students can be creative in how they will meet their educational goals. Students can change programs and possibly use some of their credits toward their new program or start a program at one institution and finish at another allowing for personal circumstances to be considered. These can include location, cost, size of classes, proximity to home, and many other factors. Talk to an education advisor about your options.
Exercise: BC Transfer Process
Exercise: Use the BC Transfer Guide
Key Takeaways
Transferring between post-secondary institutions can be a very smooth process.
Students are more mobile than ever. Students moving to new communities may need to do so in the middle of an educational program. Rather than quit, they can transfer to another institution. Rather than starting over, they can try to transfer many of their completed courses into their new program and institution.
Students may also change their program of study, as they change their minds about their career goals. Changing programs may mean changing institutions. You can look at the course requirements of the new program and evaluate which courses you have completed that might fit for courses required for your intended program. Then you can apply for transfer credit for those courses. Courses in the BC Transfer Guide are already transferable, so as long as they’ll work towards your program requirements, you should get credit for them.
Having this ability to transfer courses and, in some cases, certificates and diplomas, means greater flexibility for students. It opens up options for students who may not otherwise be able to complete programs and get their post-secondary credentials.
This book has been a collection of strategies and helpful tips for achieving success as a student. Remember that student success is not just about grades. It’s about reaching goals, keeping healthy in the process, learning life-long skills, making important connections, creating valuable networks, and having rich experiences while you are in school.
You can think of your educational journey like a hike in the mountains. The anticipation of going back to school brings excitement, but can also bring some fear – just like the anticipation of a great hike.
Start by choosing your path. Make an educational plan. Know where you want to go. (Or at least start heading in the right direction.)

Start on your path, even when the end seems a long way off and the details of the route may seem unclear. Starting your educational journey will be the beginning of a great adventure.
Learning is exciting. It brings new challenges and opens up your world. It helps you see things from a different perspective and vantage point.


Don’t forget to enjoy the journey even though the end seems nowhere in sight.

Sometimes you need to take risks. It’s worth it to go places that seem a little scary.


Key Takeaways
Whether you are taking a short certificate or embarking on an educational path that will take years, do it with gusto and be inspired to succeed. When you look back, you will likely find that it was worth more than you ever dreamed.
getting permission ahead of time to take a course from another institution and apply it to the program you are currently in
Forms used by students at colleges and universities to apply for transfer credit for courses taken at another post-secondary institution
Students work through course on their own schedule at times that work for them. They may have deadlines throughout the course, but they can choose times that fit their life to complete tasks.
Biographical sketch (bio) is a short writing about the author and their life, often highlighting unique or interesting events as well as notable accomplishments in their work.
a prearranged transfer agreement between institutions that a set of courses will transfer as a block to another program, rather than having to apply for transfer credit for each individual course.
a digital tool to manage and organize referencing and citing sources
an official document provided for each course which describes the learning outcomes for the course, the evaluation system, the prerequisites, the number of hours and other important information. It is a very useful document to evaluate whether courses are transferable to different institutions.
A lifelong account of a person’s education, awards and honors, conferences and presentations, publications, professional memberships, employment, and so forth. A CV may be dozens of pages long; it doesn’t attempt to be brief—as would a résumé; rather, it is an encyclopedic collect of a person’s accomplishments.
course which is chosen by a student from a number of optional subjects or courses in a curriculum, as opposed to a required course which the student must take as part of a program
a professional writer who is hired and assigned to write specific stories or articles. Freelancers may not be experts in subjects they’re assigned to write about, but they are skilled researchers, enabling them to write about varied topics.
courses done mostly online but have some face-to-face meetings - also called blended courses
refers to skill and competence in locating, examining, understanding, and working with all kinds of information.
a skilled writer who has completed a college bachelor’s degree in journalism. Journalistic writing follows a specific style that is fact-based and objective. Journalists subscribe to codes of ethics and behavior in terms of creating factual, verified, and unbiased writing.
a publication that is printed on a regular schedule (i.e., periodically). Periodicals include newspapers, magazines, journals, and more. Periodical titles should always be italicized in your academic writing.
a brief (often 1-2 pages) account of a person’s education, work experience, and qualifications, typically sent with a job application. A longer version of the résumé is the curriculum vitae, often called the CV.
The whole class works through the course on the same schedule and they meet online at specified times. Students must be "present" online at those specified times to take part in the class.
when one post-secondary institution gives credit for a course taken at another institution and applies it towards the student's program of study.
a website that functions as a public, open encyclopedia or collection of information.
This page contains a list of links to external resources referenced in this book for people. Links are listed by the chapter in which they appear and are listed in the order they appear. Internal links are not included in this list.
Gordon Shier: Lead Illustrator
Gordon has been passionate about drawing since he was a young child. He studied art at Sheridan College in Oakville and studied animation at Seneca College in Toronto. He is a contract freelancer living in Montreal. He strives to create artwork that is evocative, experimental, and emotional. His specialty is the creative aspect of character development in video games. He has been contracted to do illustrations for educational materials with a Creative Commons license and currently has illustrations in three open textbook BCcampus projects.

Mary Shier has been working in adult education in British Columbia for over thirty years. She teaches at College of the Rockies at the Fernie Campus where she is also an education advisor working with students individually on education plans, learning issues, and navigating the post-secondary system. Through her years of experience working with students both in the classroom and one-on-one, she is well-versed in the reasons that students both succeed and struggle. She has supported many students as they get back on the trail to success, and hopes that through the advice and exercises in this book, students will avert many of the pitfalls that regularly impact students.
Mary has been very involved in the provincial articulation process to facilitate transfer among colleges and universities. She co-chairs the Education and Career Planning ABE committee, the teaching area under which Student Success is taught, and has also been a part of the ABE articulation steering committee for many years.
She facilitates personality styles workshops providing professional development in team-building, conflict resolution and communication styles to businesses, community groups, and college classes. As well, she administers assessments for placement, program entry, and apprenticeship readiness for businesses.
She is a public speaker, having delivered presentations in various contexts, including conference keynotes and sessions. She has been a member/chair of numerous committees and boards and loves to be actively engaged in things that matter.
Her interest in student support and instructor resource sharing drew her attention to the concept of open resources. She co-developed an open online Career Planning course for BCcampus which is currently being used in several colleges in BC and openly available to all instructors. She is also part of the ZCT (formerly Z-Cred) ABE steering committee to help develop pathways to graduation using open zero-cost-textbooks.
Teaching has been a mainstay in her life and she has been drawn to it for many years. As well as being a college instructor, she taught high school math, ran a vibrant tutoring business, taught workshops to college teachers abroad, taught skiing – both downhill and telemark, and coached soccer and volleyball. She is a true teacher at heart.
Mary is actively engaged in her church, Mountainside Community Church, and participates in and helps organize events for Freedom Challenge –hiking mountains and running fundraisers to raise awareness and support to help victims of human trafficking. She runs an Airbnb out of her home just for fun. She loves skiing, playing soccer and volleyball, snowshoeing, mountain biking and hiking, and enjoys the mountain culture with her dog, Floxy. She also enjoys reading, travelling, and meeting new people.
She has a math and science degree from Queen’s University, a Provincial Adult Instructor diploma from VCC, and a Masters of Education in Distance Learning from Athabasca University.
Mary lost her incredible husband to cancer in 2005. She has three amazing adult children, all intriguingly different. She immerses herself in her work and still can say, “I love my job. I love to help students push beyond their limitations – supporting and helping them on their journey to reaching their goals.”

