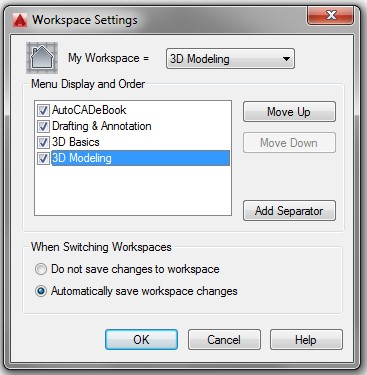
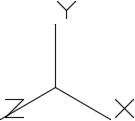
When you have completed this module, you will be able to:
- Describe geometry defined meshes including rule surfaces, revolved surfaces, and tabulated surfaces.
- Apply the RULESURF, REVSURF, and TABSURF commands to apply mesh surfaces to 3D models.
Geometry Defined Surface Meshes
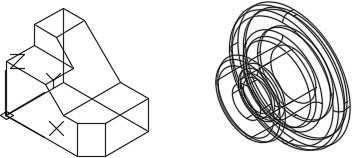
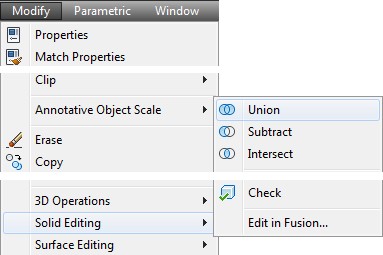
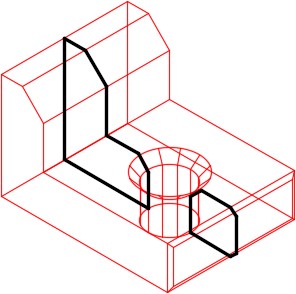
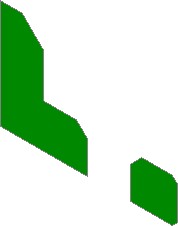
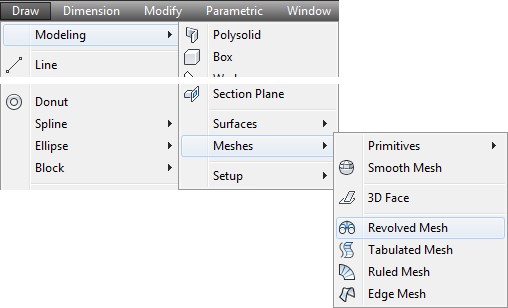
Geometrically defined surface meshes use existing geometry that must be created before the surfaces. In almost all cases, the wireframe of the model is used as the existing geometry. There are four geometrically defined surface meshes that can be created in AutoCAD. They are the ruled surface, revolved surface, tabulated surface, and edge surface. The commands to create these meshes are RULESURF, REVSURF, TABSURF, and EDGESURF. The EDGESURF command is taught in Module 15.
To create a geometry defined surface mesh, start with the wireframe geometry and ensure that it is on its own layer. Surface the wireframe model on all sides, making sure that all exposed sides have a surface covering them. Think of the model as an object that must be made water tight.
Even the inside of a hole going through the model must have a surface applied on it. Place the surface meshes on their own layer. When the surfaced model is complete, freeze the layer containing the wireframe or the geometry leaving only the layer with the surface mesh displayed.
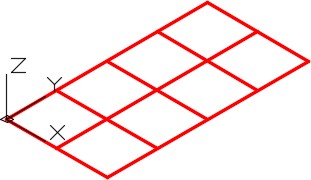
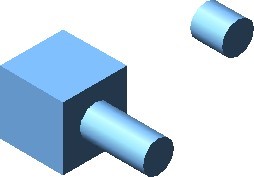
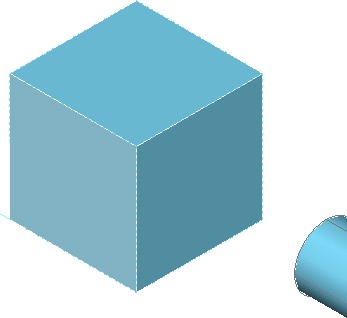
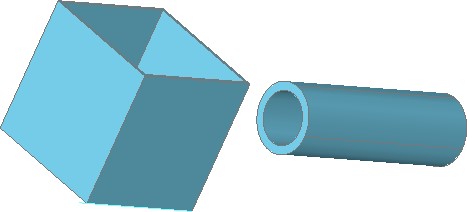
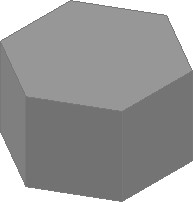
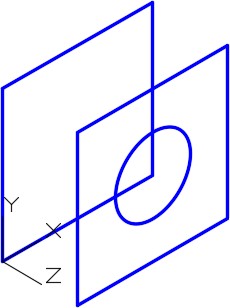
Ruled Surface
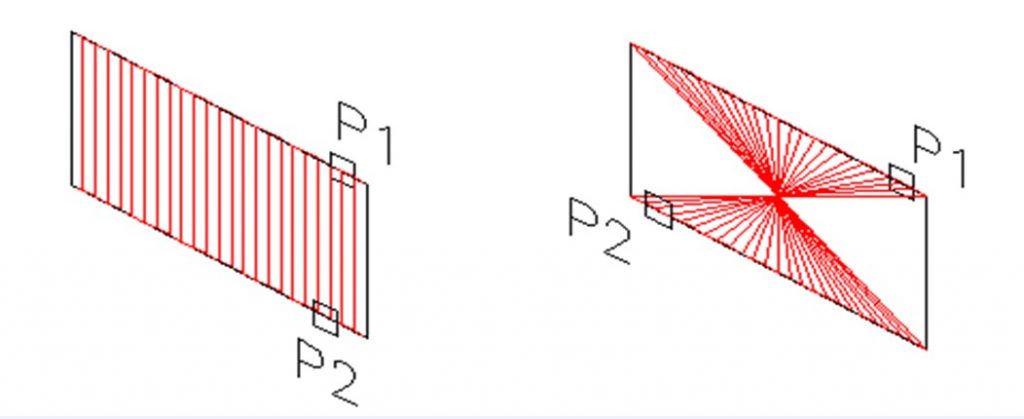
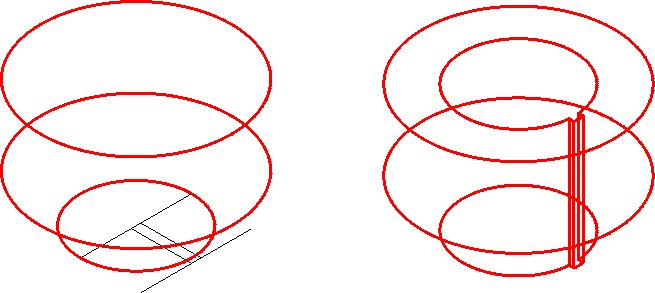
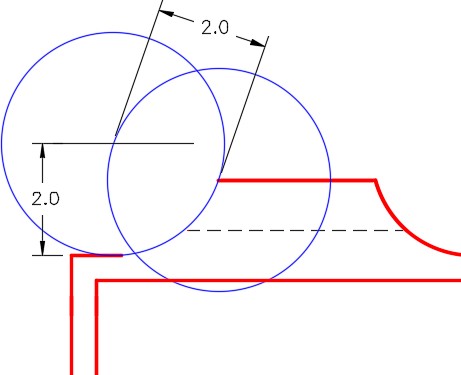
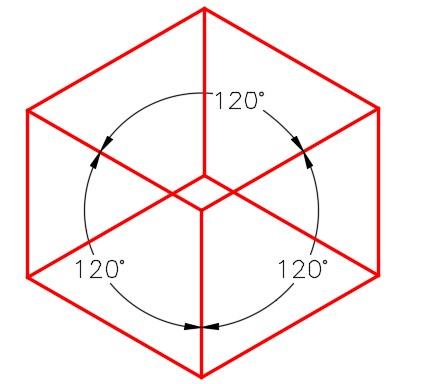
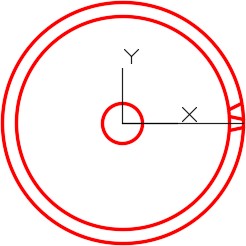
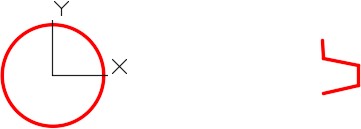
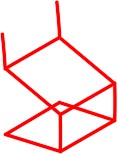
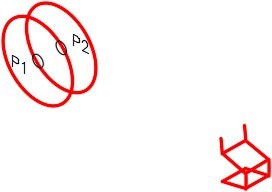
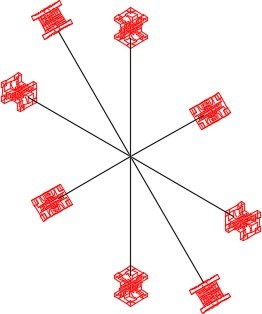
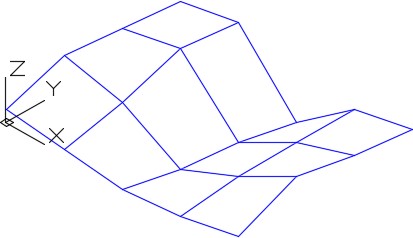
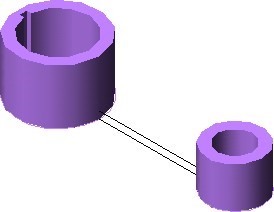
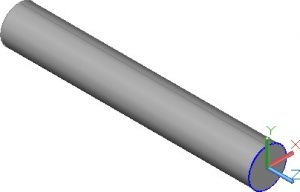
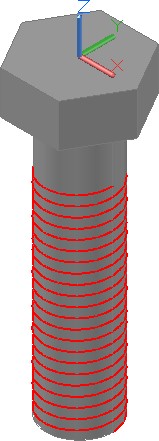
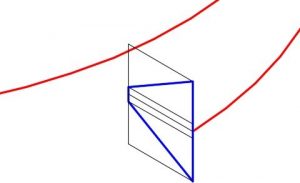
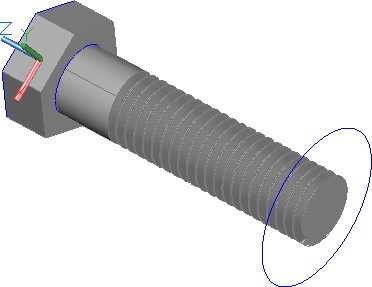
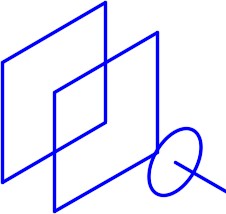
A ruled surface, inserted with the RULESURF command, is the most commonly used method to surface a model. To place a ruled surface, simply select two lines, a line and an arc, two arcs, or two circles to place the surface between. See Figure 13-1.
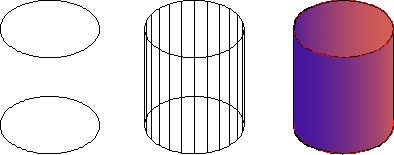
Figure 13-1
Ruled Surface
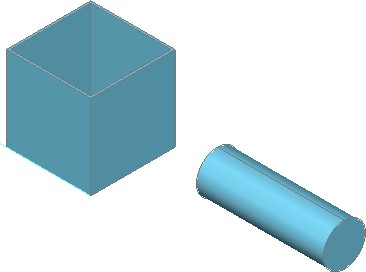
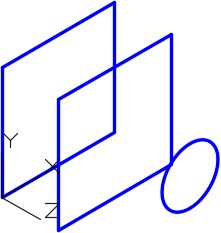
Revolved Surface
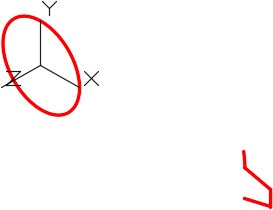
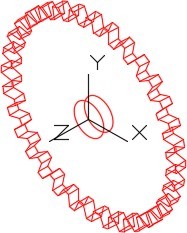
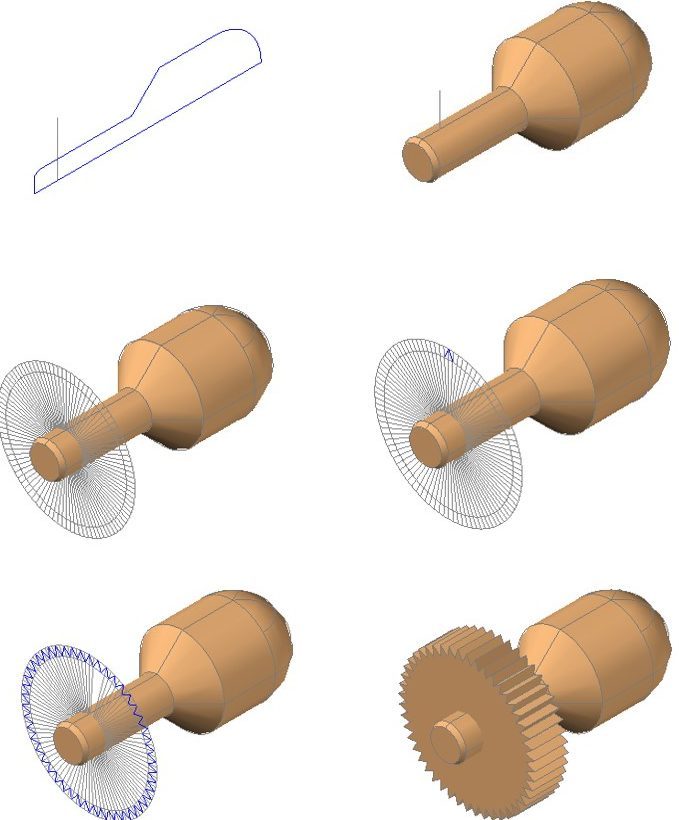
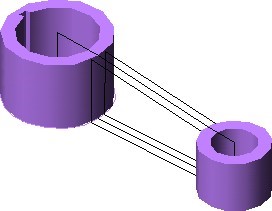
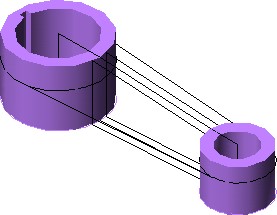
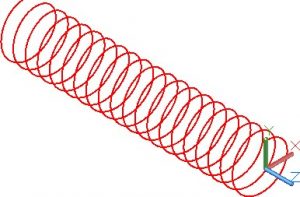
A revolved surface, inserted with the REVSURF command, is a surface created by revolving a profile around an axis. The profile can be a line, arc, circle, or an open or closed 2D polyline or 3D polyline. See Figure 13-2. The axis must be a line or an open 2D or 3D polyline. If a polyline is used as the axis, the REVSURF command will simply use a straight line between the start point and end point of the polyline.
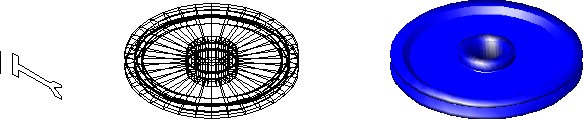
Figure 13-2
Revolved Surface
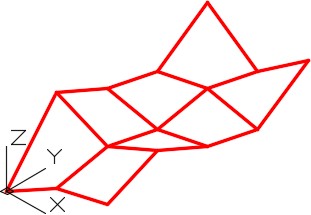
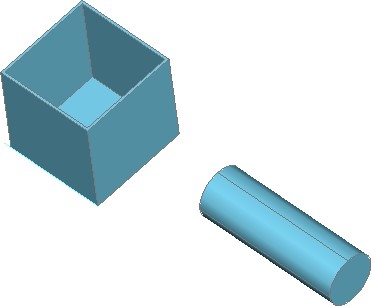
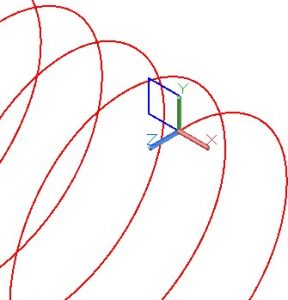
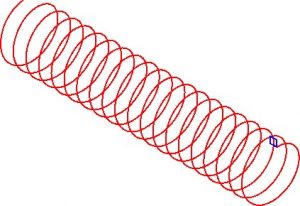
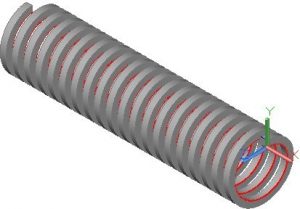
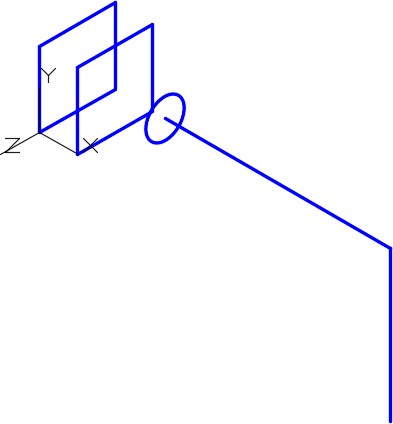
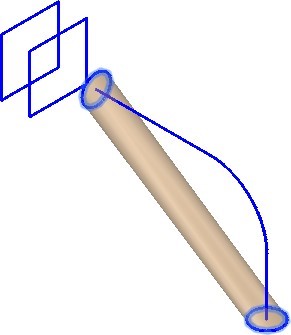
Tabulated Surface
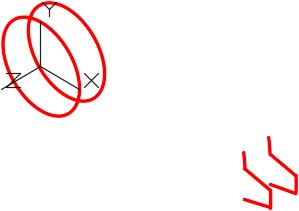
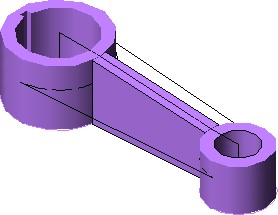
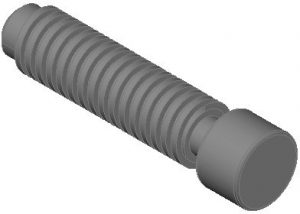
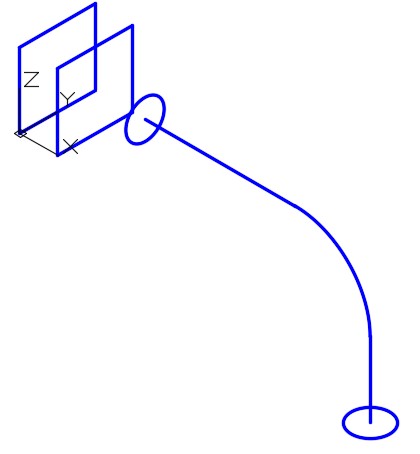
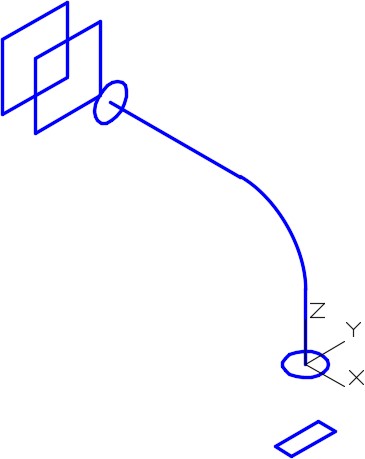
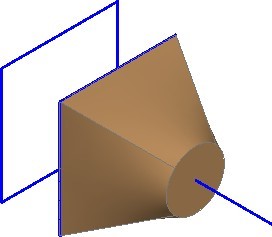
A tabulated surface, inserted with the TABSURF command, is a surface created by projecting a profile along a path. The profile defines the surface of the mesh as it follows the path. See Figure 13-3. The profile can be a line, arc, circle, ellipse, or an open or closed 2D or 3D polyline. The path can be a line or a polyline. If a polyline is used as the axis, the TABSURF command will simply use a straight line between the start point and end point of the polyline. The surface is drawn starting at the point on the profile closest to the point selected in the command.
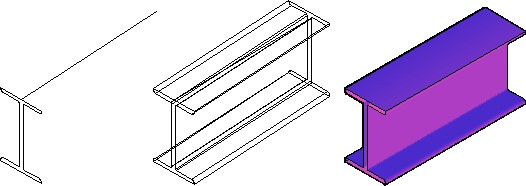
Figure 13-3
Tabulated Surface
Setting the Mesh Density
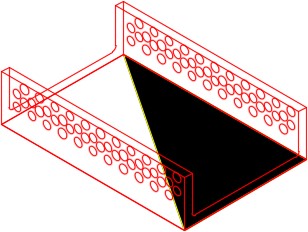
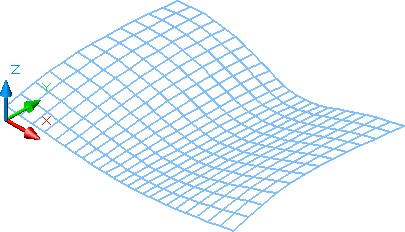
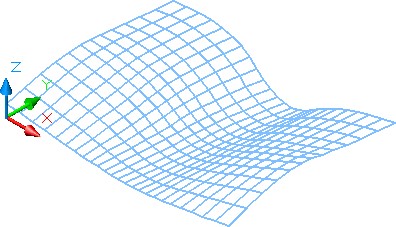
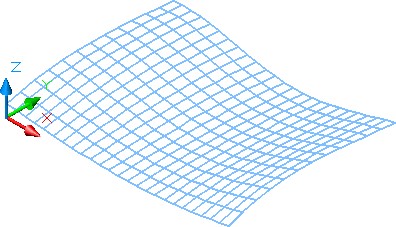
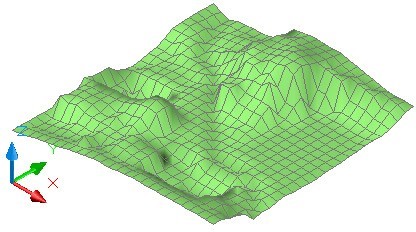
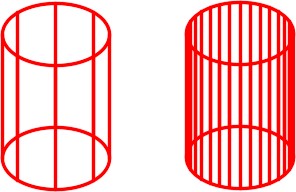
The mesh density represented by the lines, circles, or arcs that make the rows and columns of the surface mesh are controlled with the system variables SURFTAB1 and SURFTAB2. On flat surfaces, the density of the mesh is not that important but with curved or irregular shaped surfaces, the density is very important since the higher the setting, the more segments are used when creating circles and arcs. If the mesh is not dense enough, small gaps will be left where a curved surface meets a flat surface. See Figure 13-4.
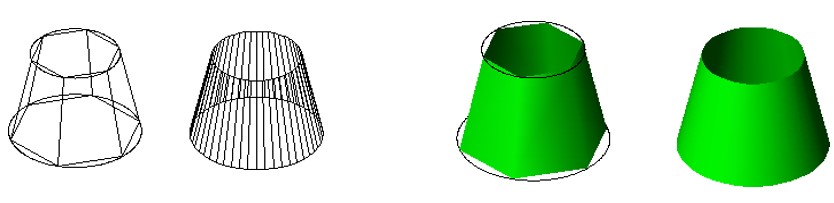
Figure 13-4
SURFTAB Settings
The RULESURF command is used to create a rule surface between two existing edges.
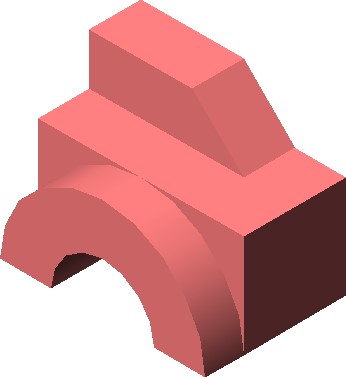
Shortcut: none
SURFTAB1 = YES
SURFTAB2 = No Effect

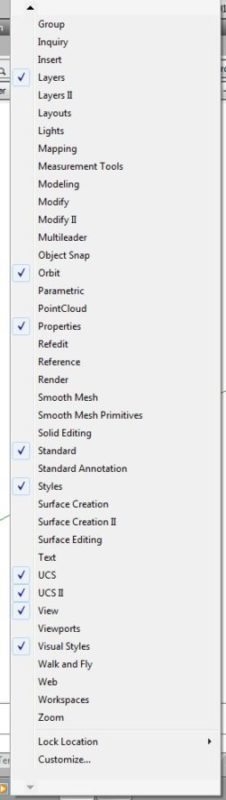
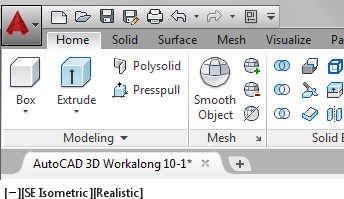
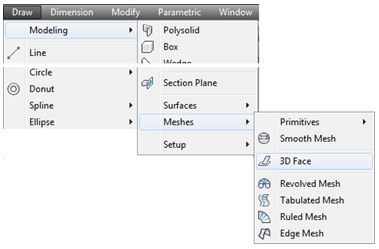
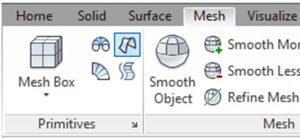
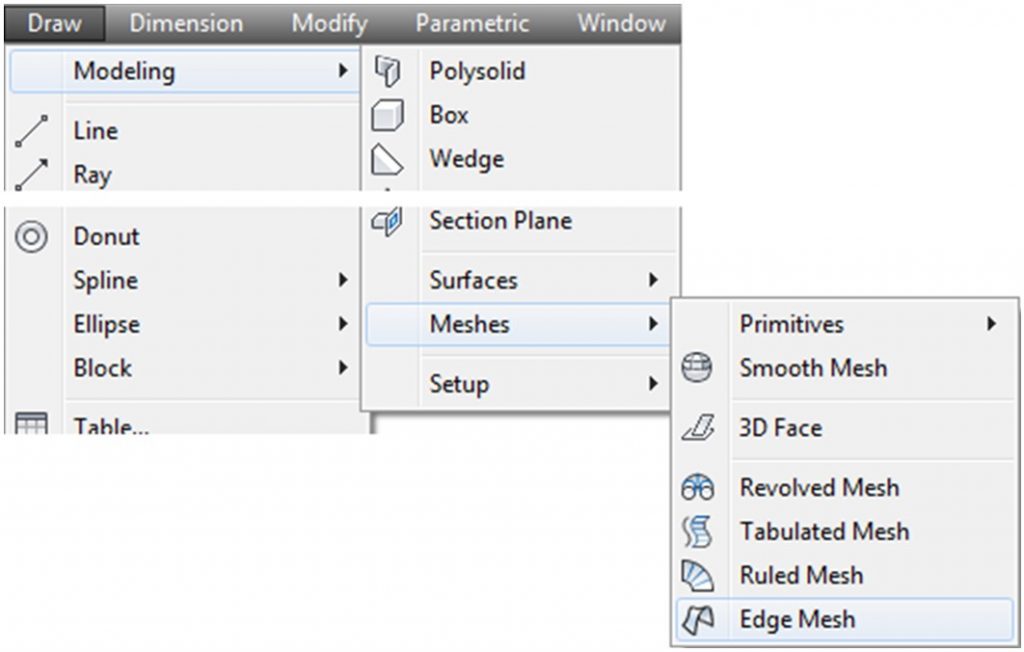
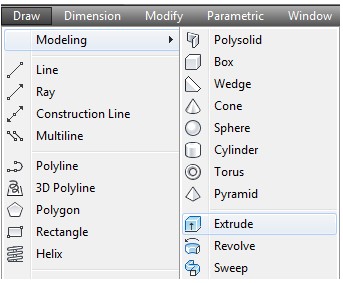
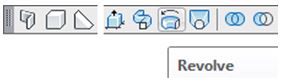
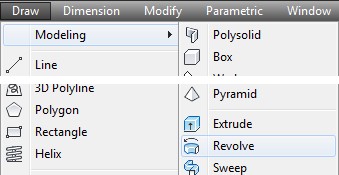
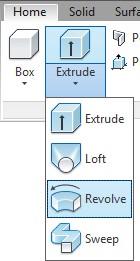
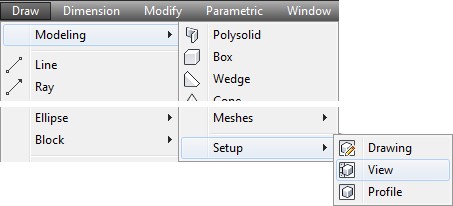
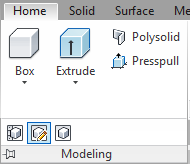
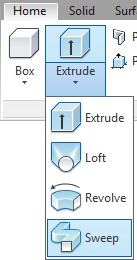
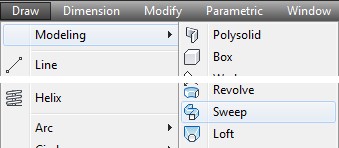
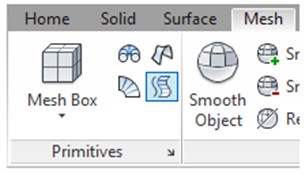
Draw Pull-down
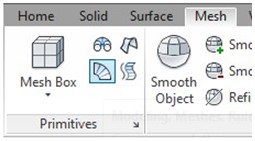
Mesh Ribbon
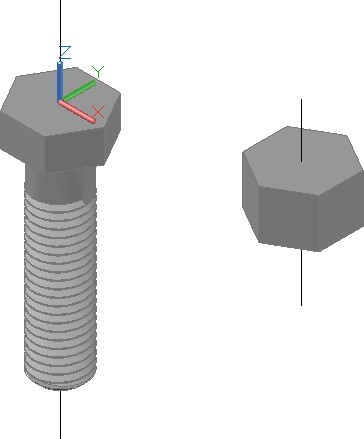
WORK ALONG: Inserting Ruled Surfaces
Step 1
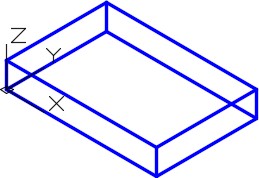
Using the NEW command, start a new drawing using template: 3D Layout Metric.
Step 2
Save and name the drawing: AutoCAD 3D Workalong 13-1.
Step 3
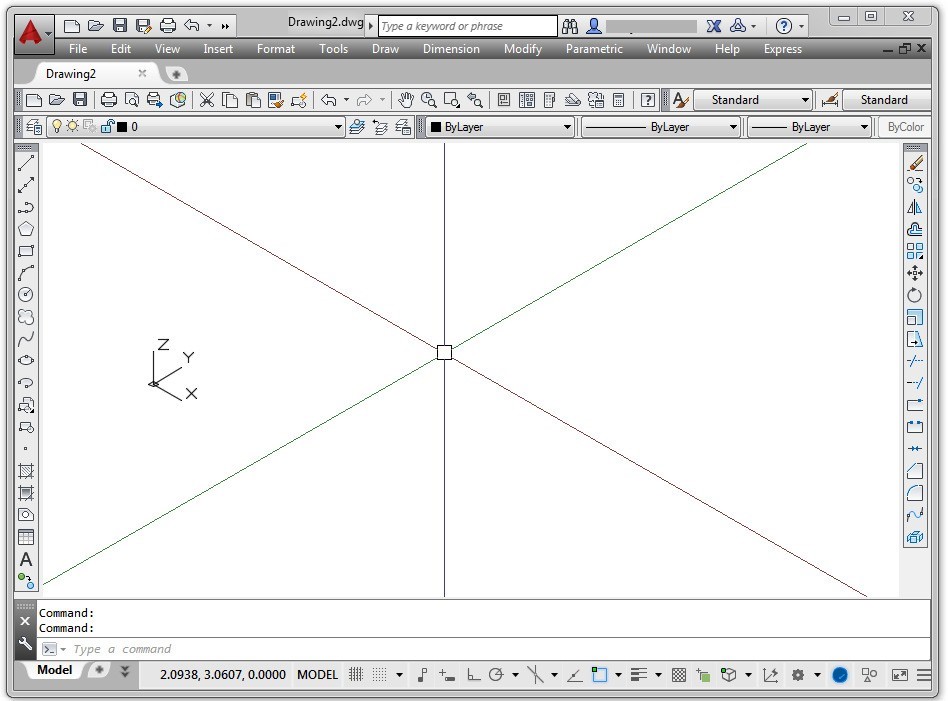
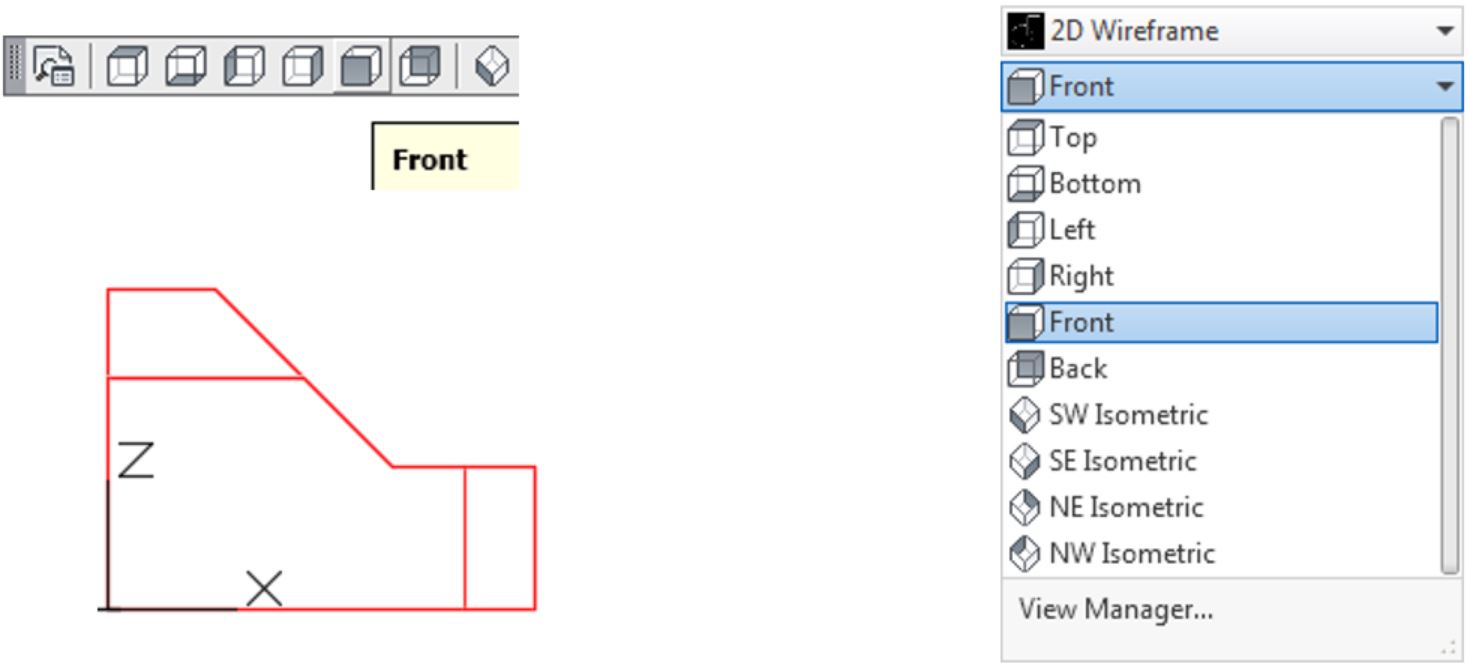
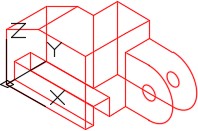
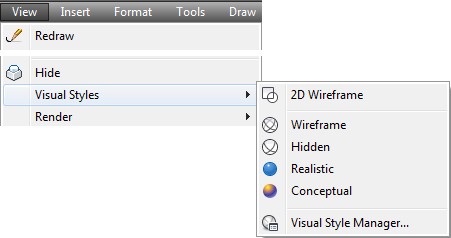
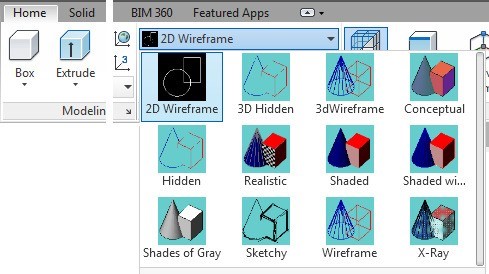
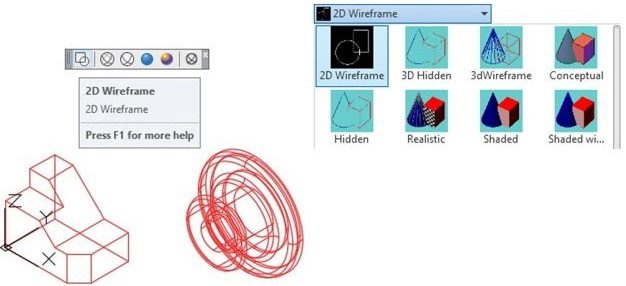
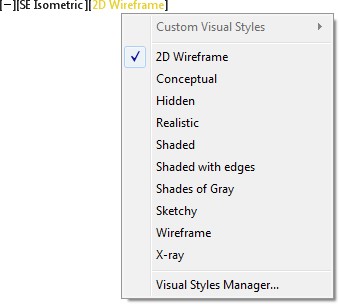
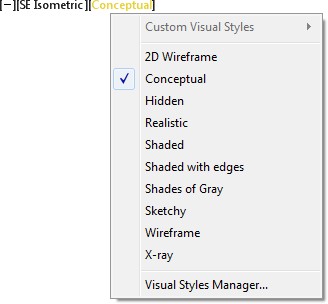
Set the current layer to: Model and the current visual style to 2D Wireframe.
Step 4
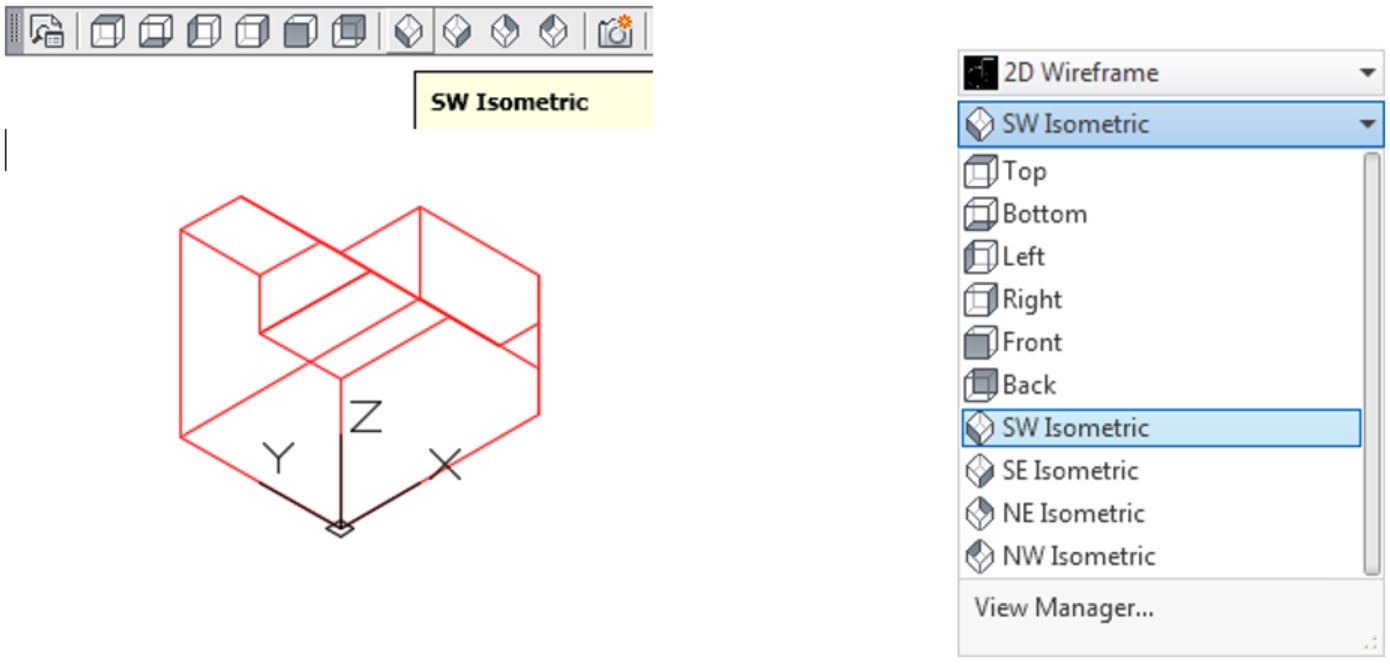
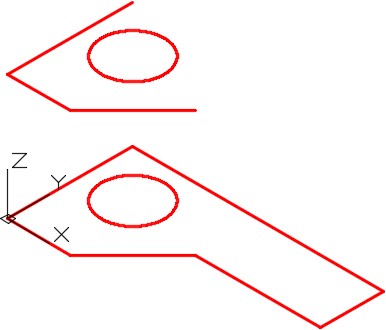
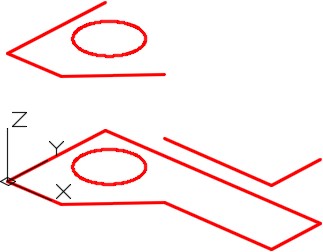
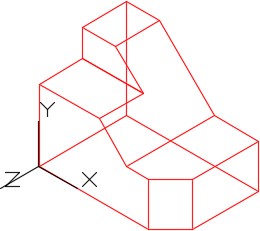
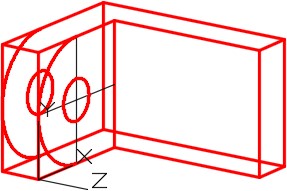
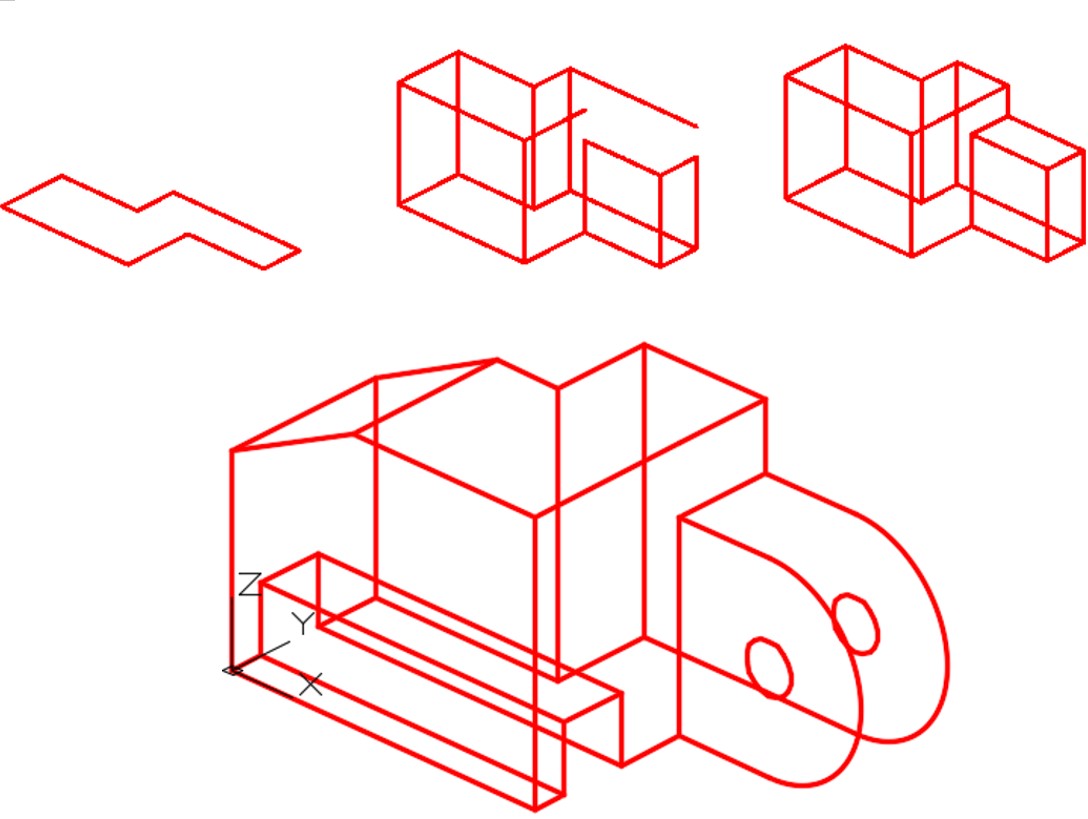
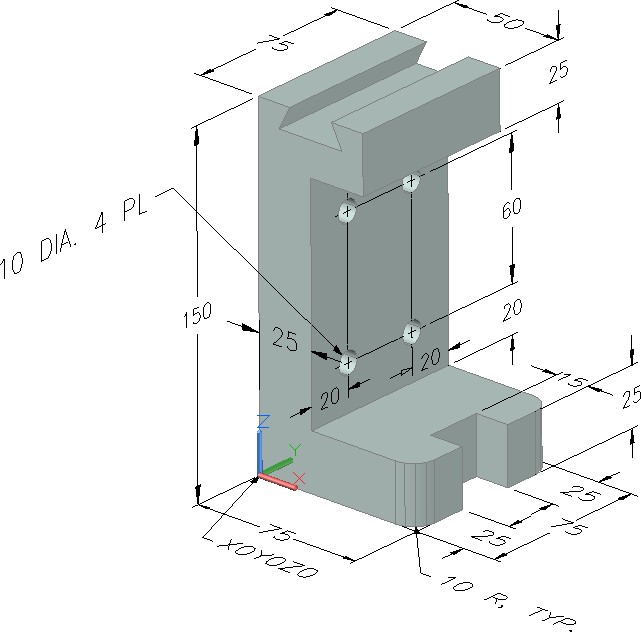
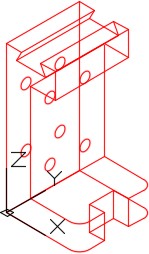
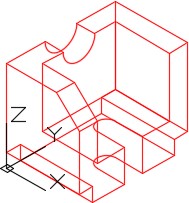
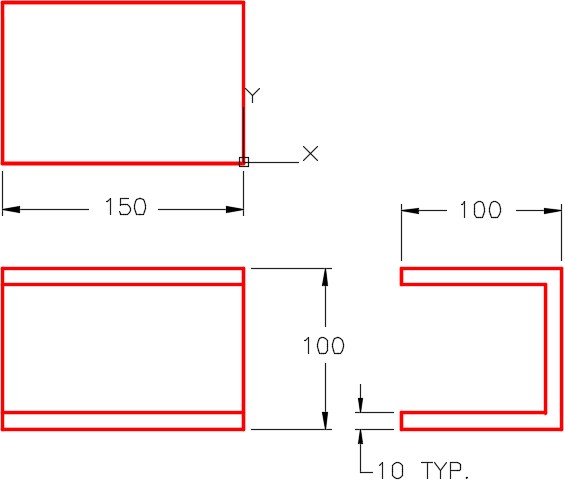
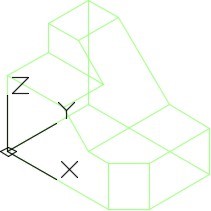
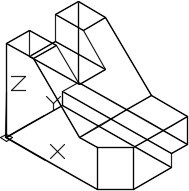
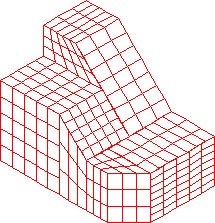
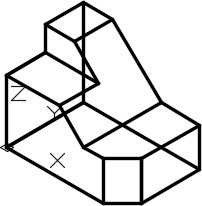
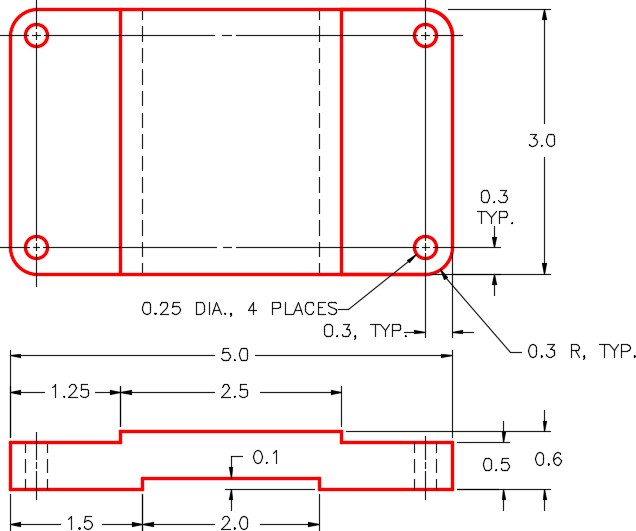
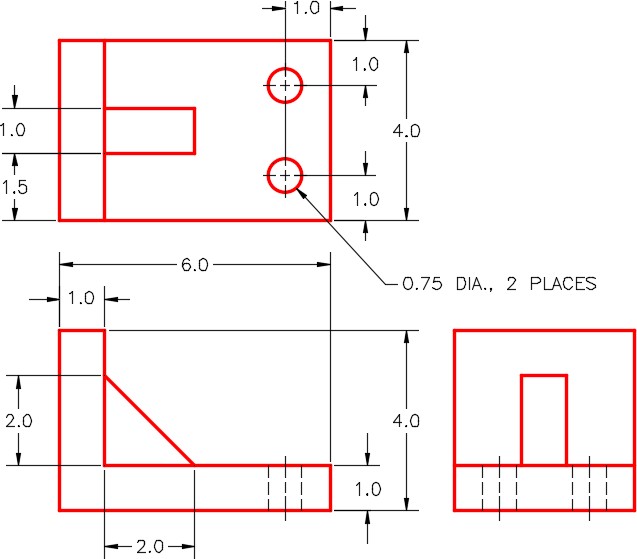
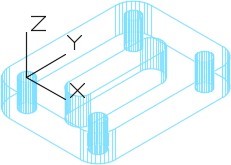
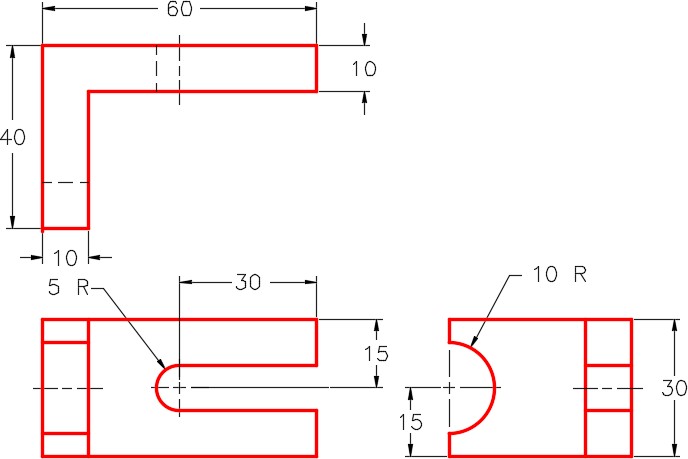
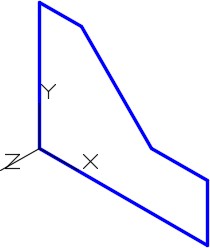
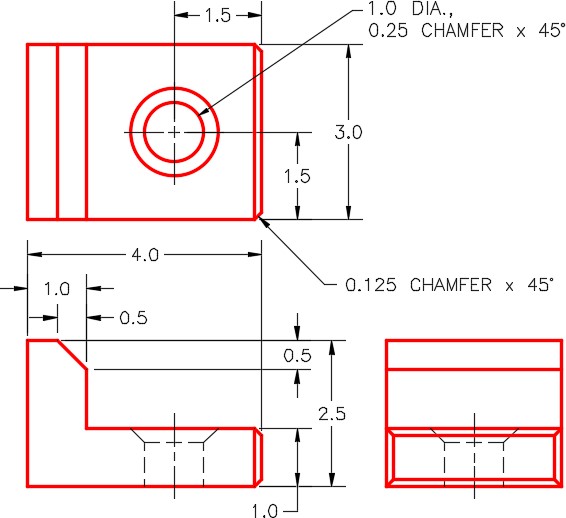
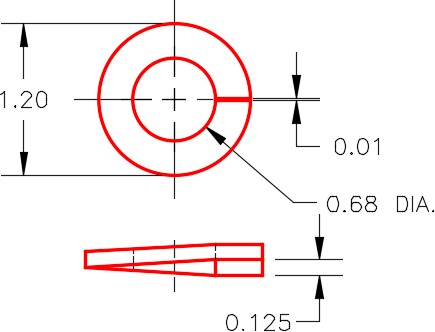
Draw a wireframe model of the multiview drawing. (Figure Step 4A and 4B)
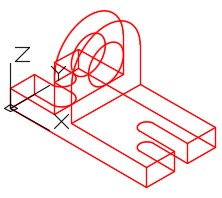
Figure Step 4A
Wireframe Model
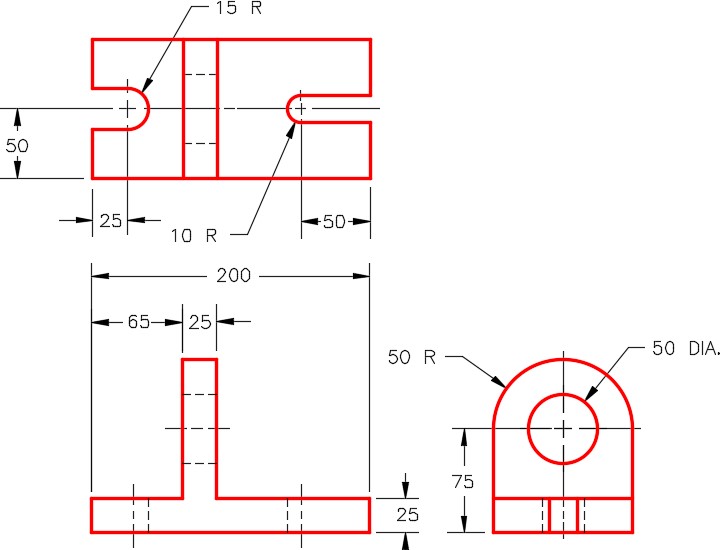
Figure Step 4B
Dimensioned Multiview Drawing
Step 5
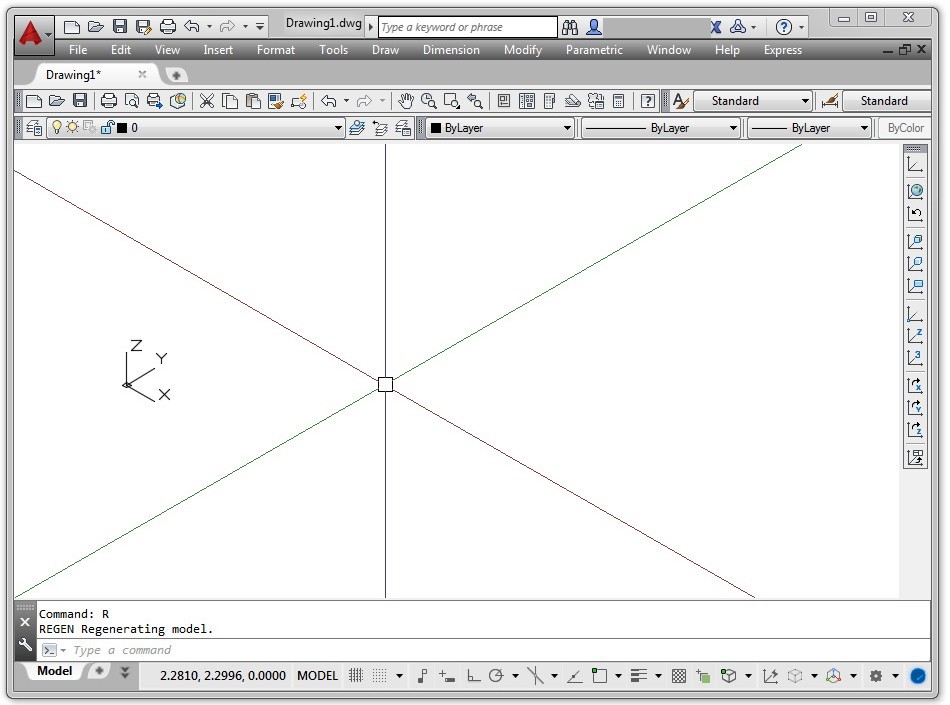
Set the system variable SURFTAB1 to 24 as shown below: Command: SURFTAB1
Enter new value for SURFTAB1 <8>: 24
Command:
AUTHOR’S COMMENTS: Setting SURFTAB1 to 24 sets the mesh density to 24 for the ruled surfaced inserted.
Step 6
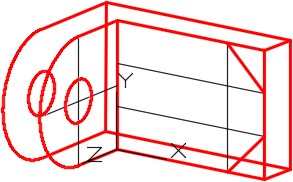
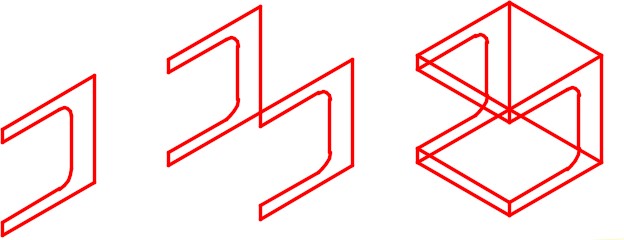
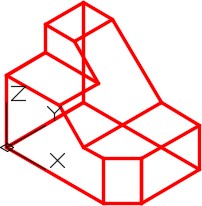
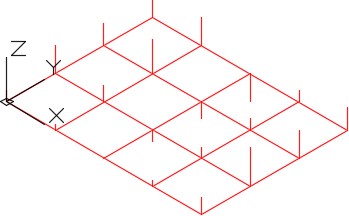
On layer: Construction, draw a line along the top edge of each side of the model. (Figure Step 6)
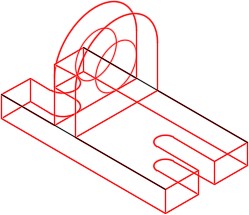
Figure Step 6
AUTHOR’S COMMENTS: On some models, construction lines must be drawn on the wireframe to make it easier to insert surfaces.
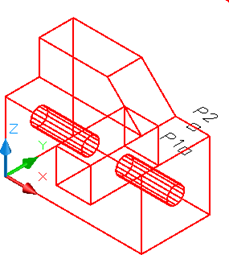
Step 7
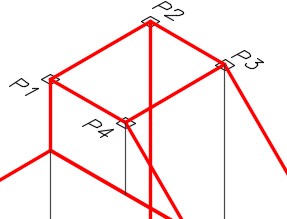
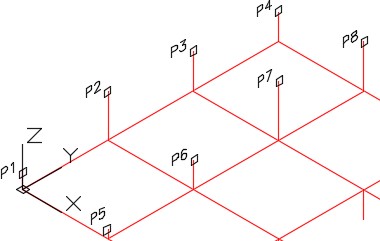
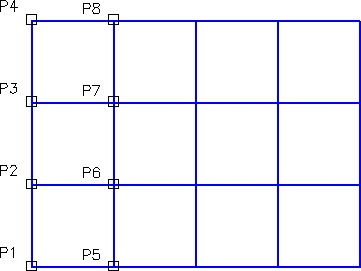
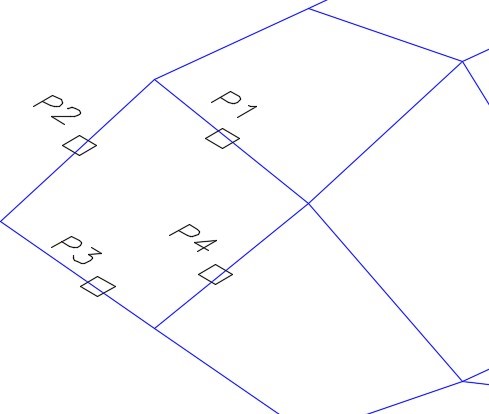
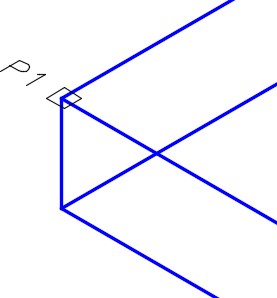
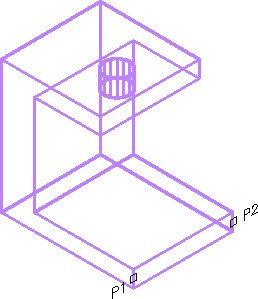
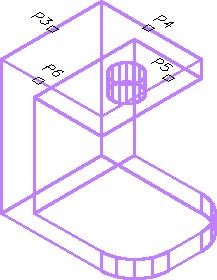
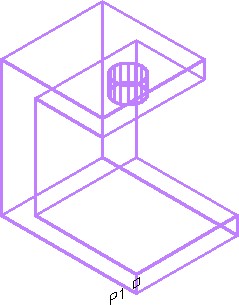
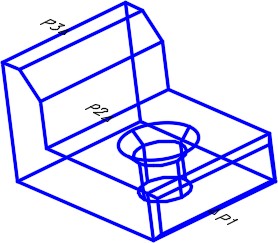
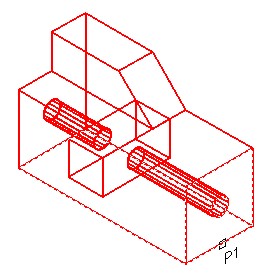
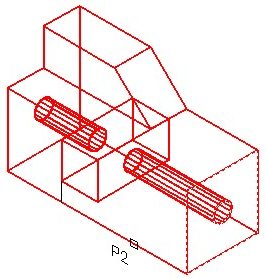
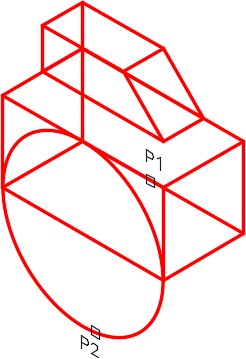
Set layer: Surface 1 as the current layer. Enter the RULESURF command, as shown below, to insert a ruled surface. (Figure Step 7A and 7B)
Command: RULESURF
Current wire frame density: SURFTAB1=24
Select first defining curve: P1
Select second defining curve: P2
Command:
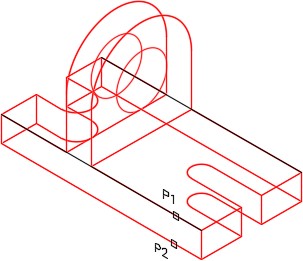
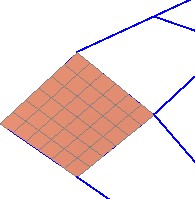
Figure Step 7A

Figure Step 7B
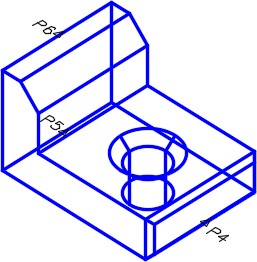
Step 8
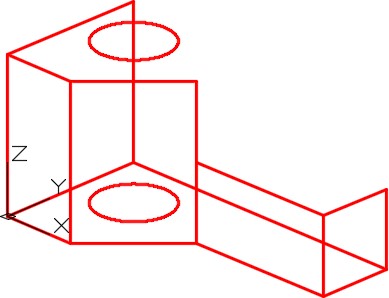
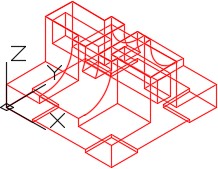
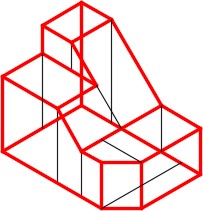
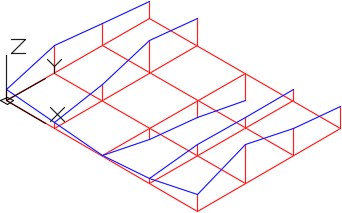
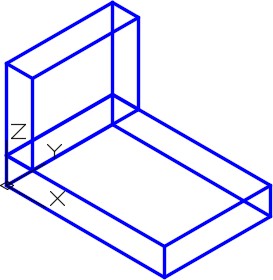
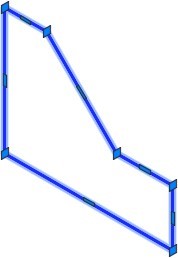
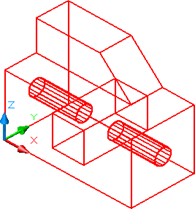
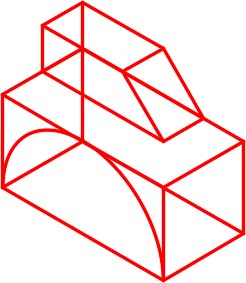
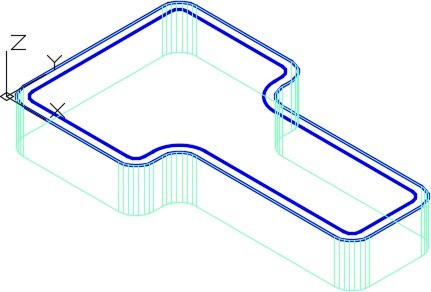
Repeat the RULESURF command and insert surfaces all around the edge of the model. (Figure Step 8)
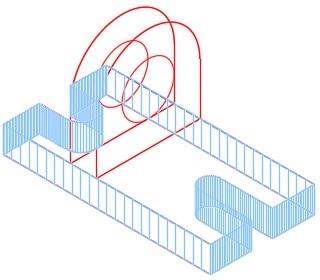
Figure Step 8
Step 9
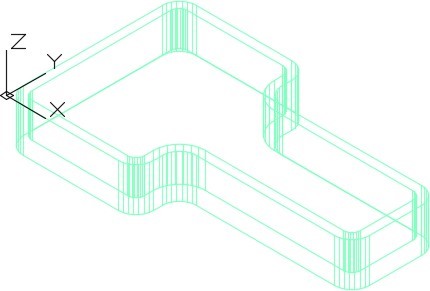
Turn layer: Surface Off off and lock layers: Model and Construction. Select all of the surfaces inserted in Steps 7 and 8 and change their layer to: Surface Off. (Figure Step 9)
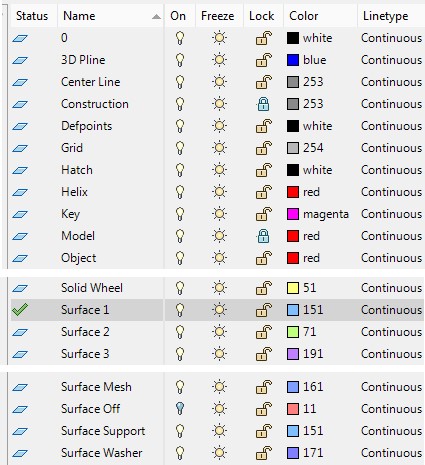
Figure Step 9
AUTHOR’S COMMENTS: I use a little trick in Step 9 to help you when surfacing the model. I temporarily change the layers of newly created surfaces to a layer that is turned off. That way, the surfaces do not display and get in the way while you are inserted additional surfaces on the model. When all of the surfaces are inserted to complete the model, turn layer Surface Off on and change the layer of all surfaces back to layer Surface 1. The reason I locked layers Model and Construction is to make is easier to select only the surfaces using windows when changing their layer property.
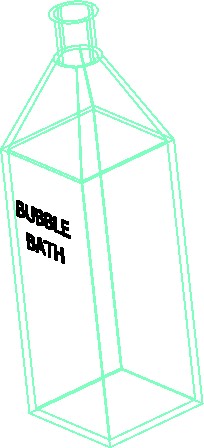
Step 10
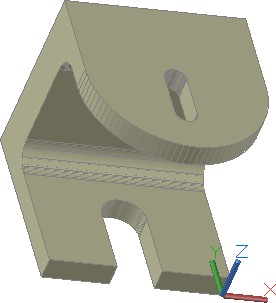
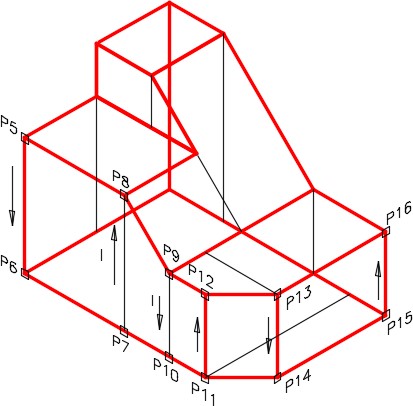
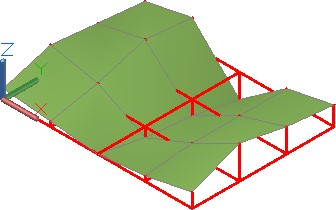
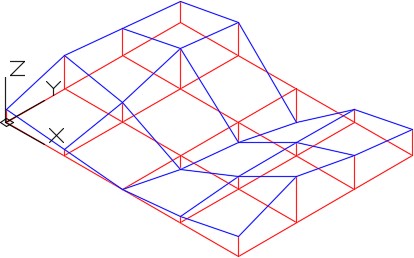
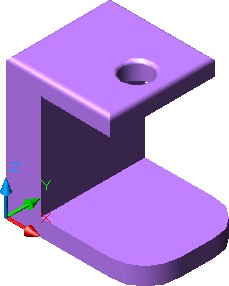
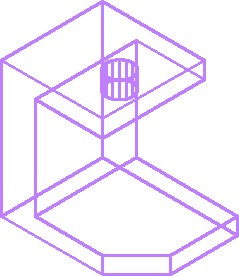
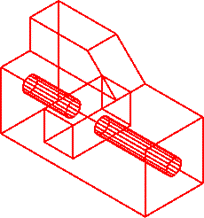
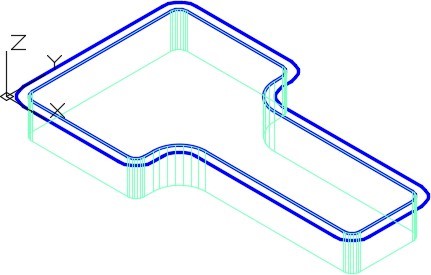
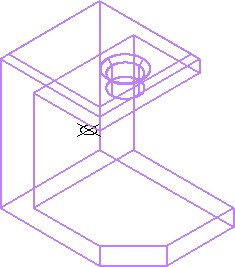
Using what was just taught, insert ruled surfaces around the top of the object and inside of the hole as shown in the figure. (Figure Step 10).
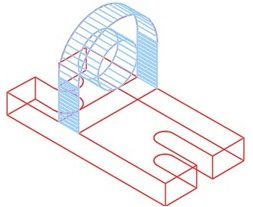
Figure Step 10
Step 11
Change the layer of the surfaces inserted in Step 10 to layer: Surface Off.
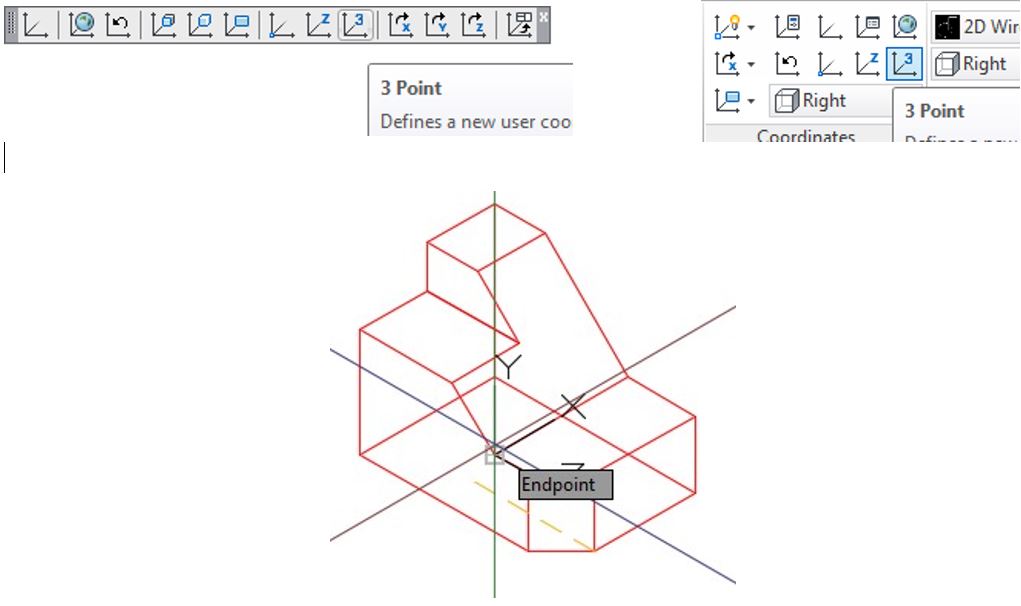
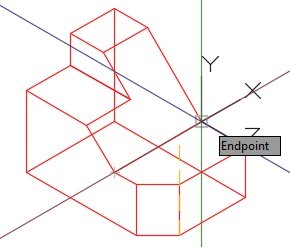
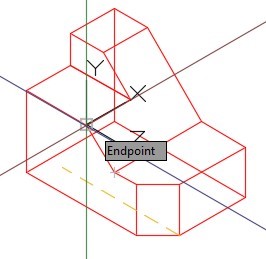
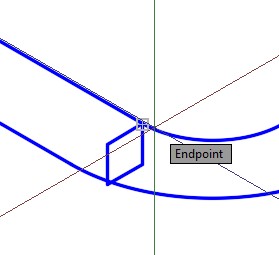
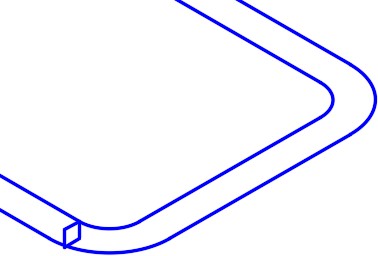
Step 12
On layer: Construction, draw the construction lines on the top surface as shown in the figure. Ensure to snap to the endpoints of the lines and arcs. (Figure Step 12)
Figure Step 12
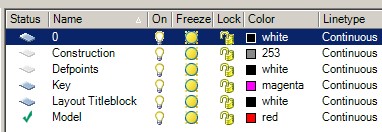
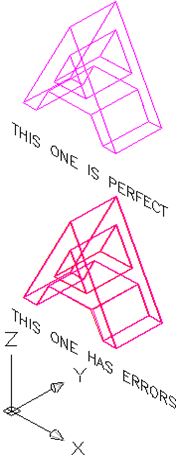
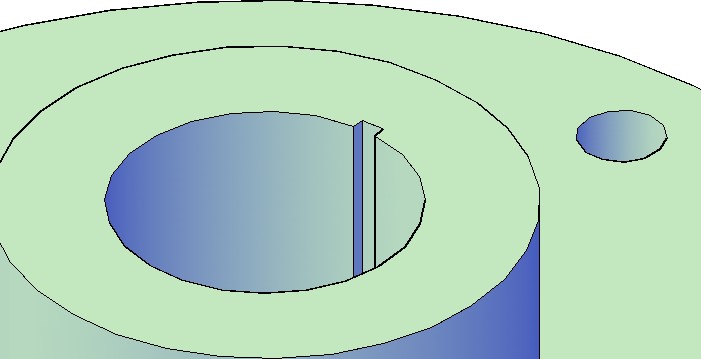
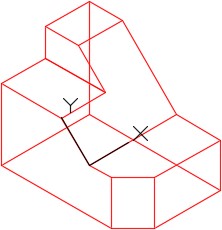
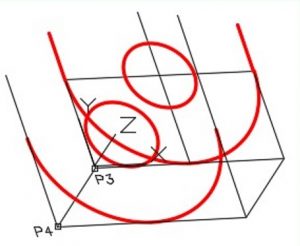
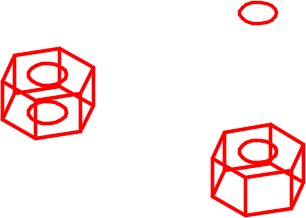
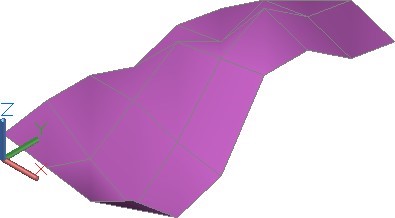
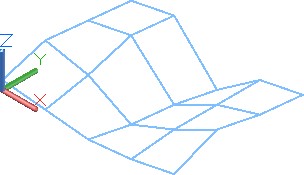
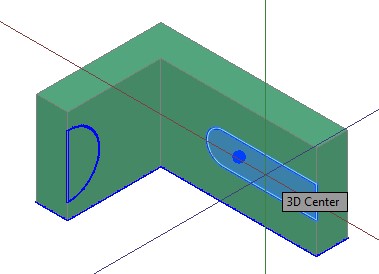
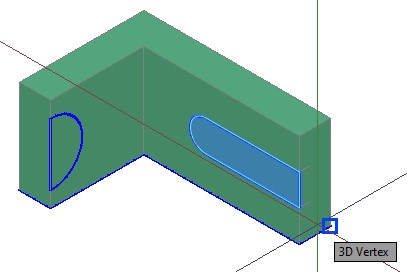
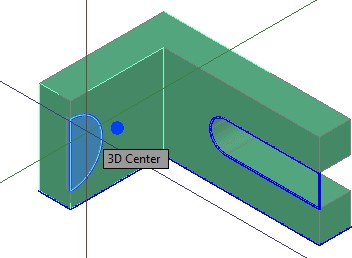
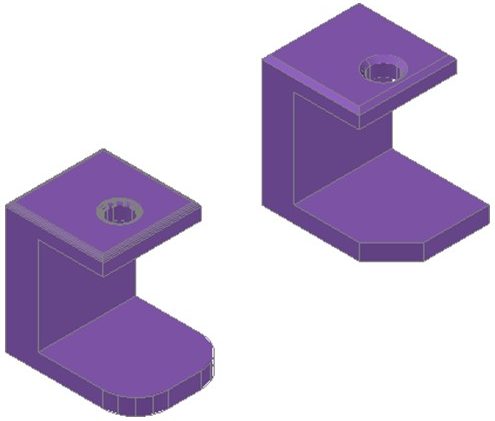
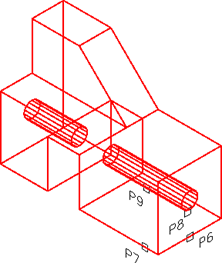
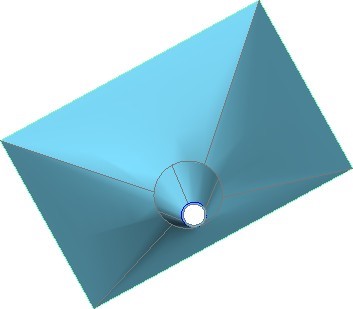
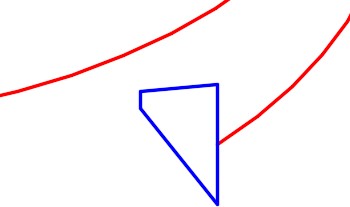
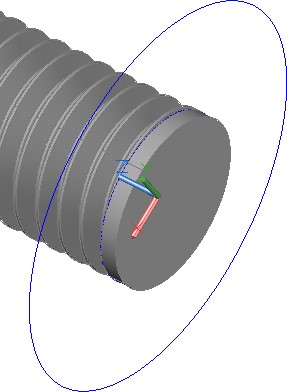
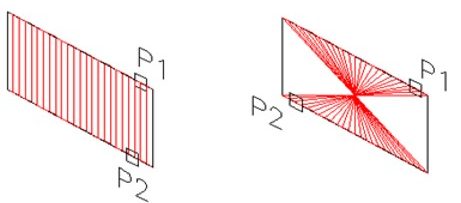
MUST KNOW: When using the RULESURF command, ensure that you select the objects closest to matching ends. If opposite ends are selected, the mesh will twist as shown in the figure.
Step 13
On layer: Surface 1, use the RULESURF command to insert the surfaces as shown in the figure. Change the surfaces the layer: Surface off. (Figure Step 13)
Figure Step 13
Step 14
On layer: Surface 1, use the RULESURF command to draw surfaces as shown in the figure. Change the layer of the surfaces to layer: Surface off. (Figure Step 14)
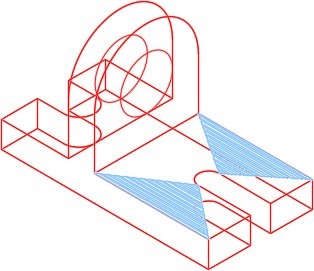
Figure Step 14
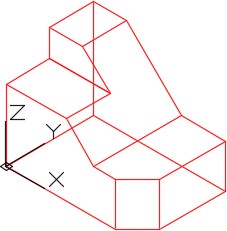
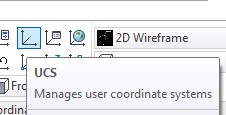
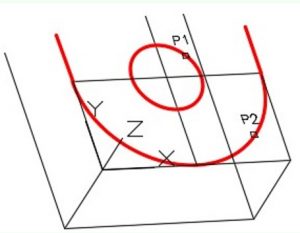
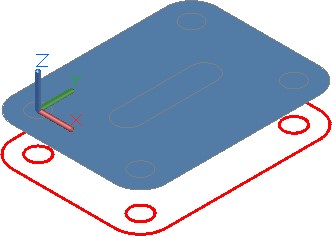
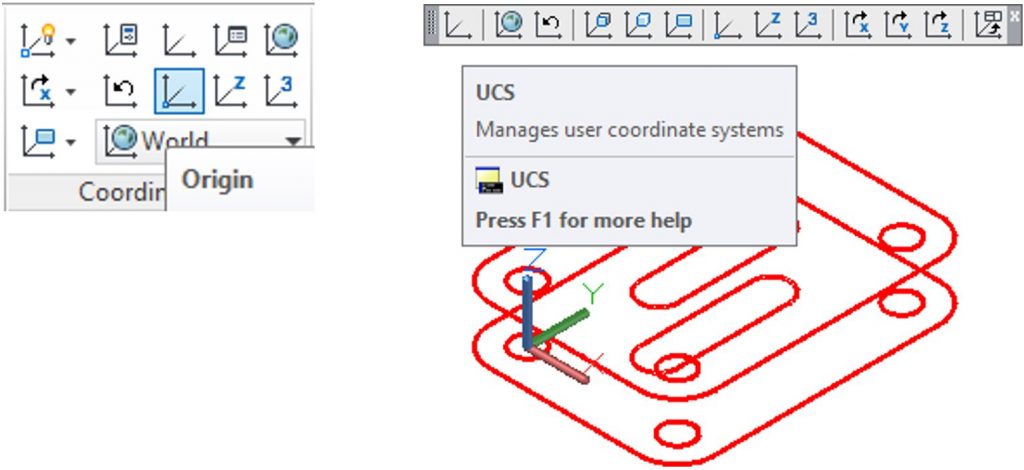
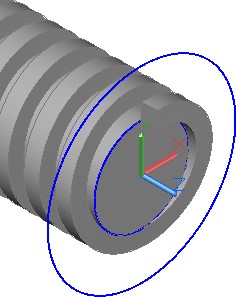
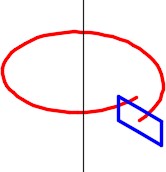
Step 15
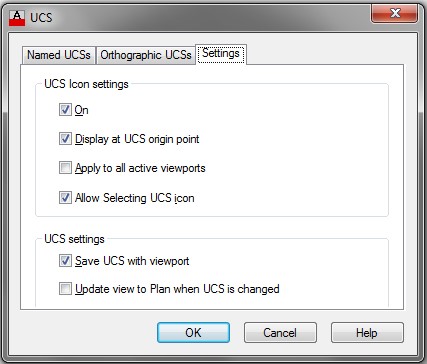
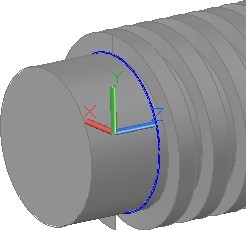
On layer: Construction, draw a 180 degree arc on the top half of the circle. Ensure that you snap to the quads of the circle. To do that, ensure to locate the UCS on the same plane as the circle. (Figure Step 15)

Figure Step 15
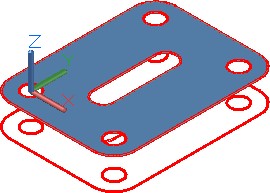
Step 16
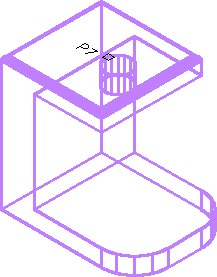
On layer: Surface 1, insert a ruled surface between the arcs. (Figure Step 16)
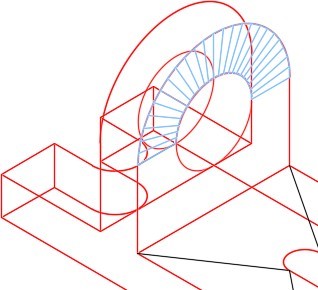
Figure Step 16
AUTHOR’S COMMENTS: Ensure that you select the arc instead of the circle under it. Sometimes, this can be tricky.
Step 17
Change the layer of the surface that you just drew to layer: Surface Off.
Step 18
Draw two construction lines and a construction arc on the bottom half of the circle. (Figure Step 18)
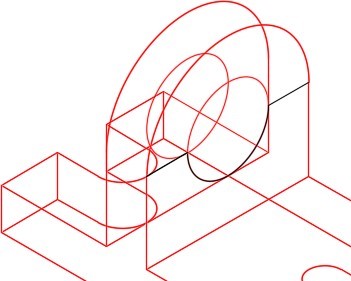
Figure Step 18
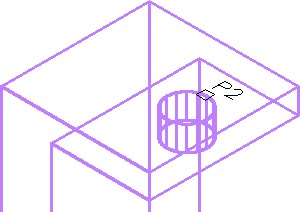
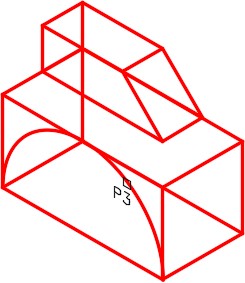
Step 19
On layer: Surface 1, insert a ruled surface. (Figure Step 19)
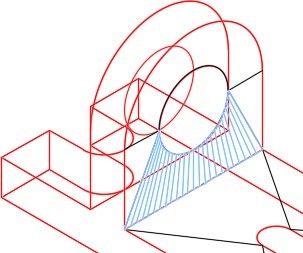
Figure Step 19
Step 20
On layer: Surface 1, insert the ruled surfaces as shown in the figure. (Figure Step 20)
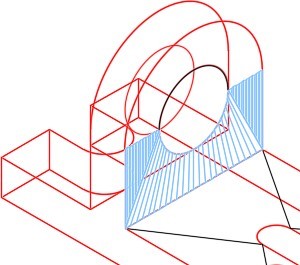
Figure Step 20
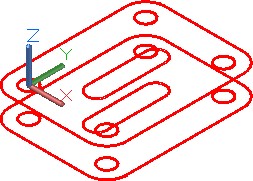
Step 21
Change the layer of the existing surfaces to layer: Surface 1 until your model matches the figure. (Figure Step 21)
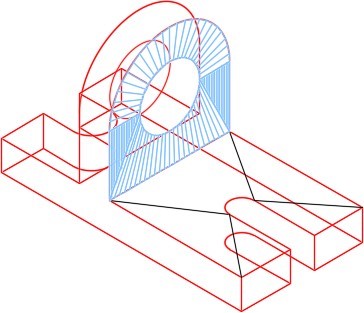
Figure Step 21
Step 22
Copy the surfaces from the front side of the model to back side. (Figure Step 22)
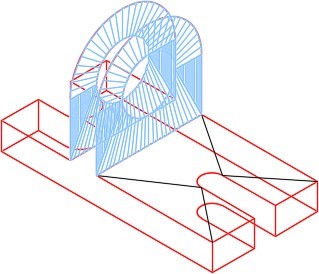
Figure Step 22
AUTHOR’S COMMENTS: To help you surface a model faster, you can copy surfaces from one side of a model to another, if they are identical.
Step 23
Using what was just taught, complete surfacing the model. Ensure to surface the bottom of the model. When complete, change all the surfaces from layers: Surface off to Surface 1.
Step 24
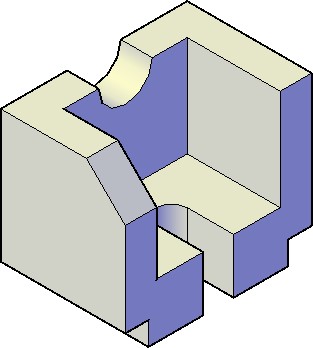
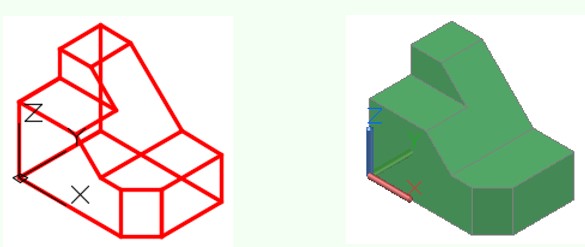
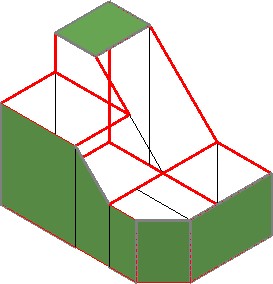
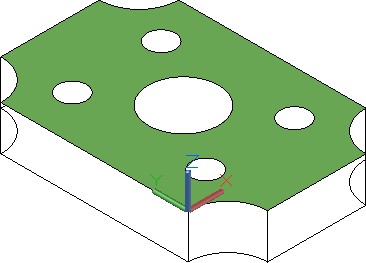
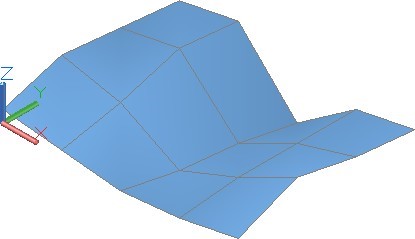
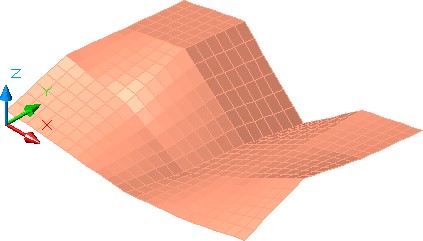
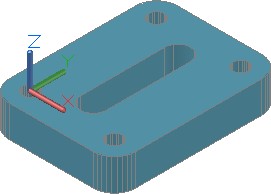
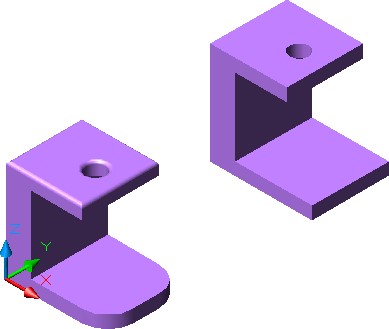
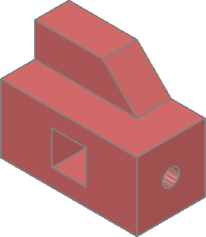
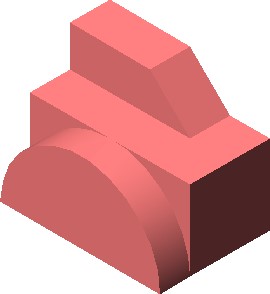
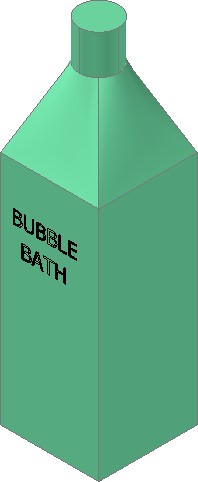
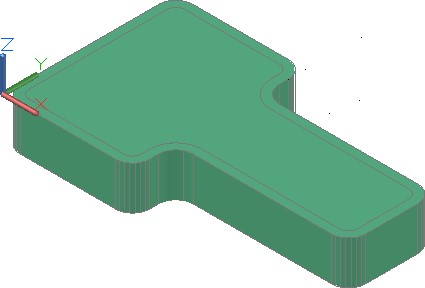
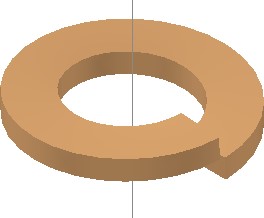
Turn off all the layers except layer: Surface 1 and the model should appear as shown in the figure. (Figure Step 24)
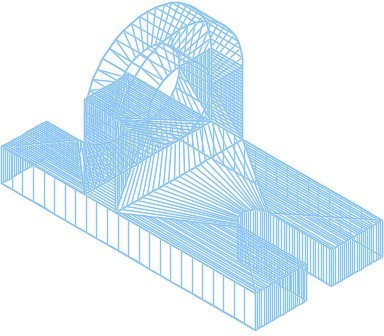
Figure Step 24
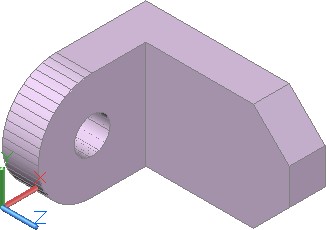
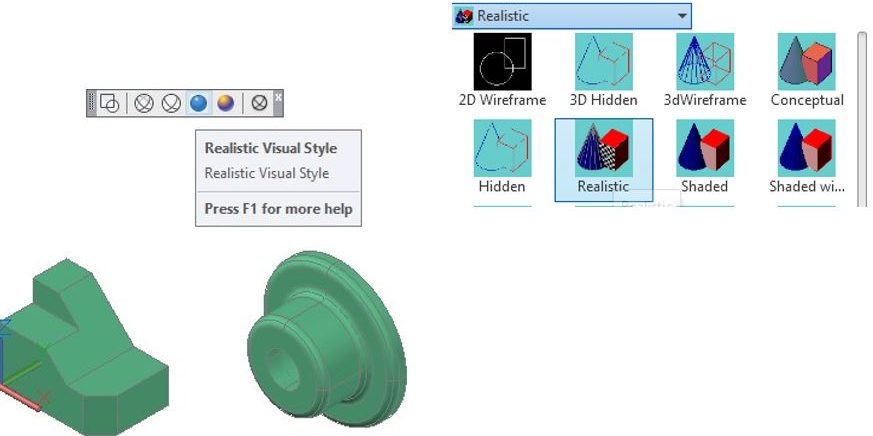
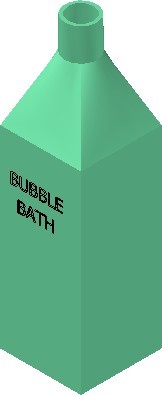
Step 25
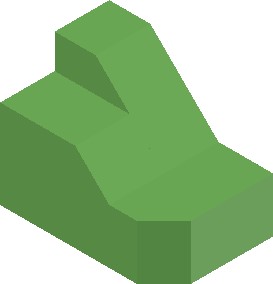
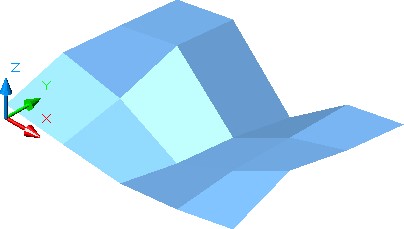
Set the current visual style to Realistic. (Figure Step 25)
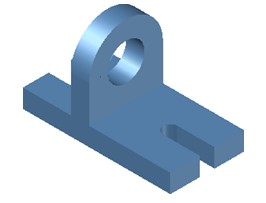
Figure Step 25
Step 26
Save and close the drawing.
AUTHOR’S COMMENTS: Do not be concerned if your shaded model does not match the figures in the module exactly. There are many visual style settings that can be set to change the look of the shaded model. For now, all you should be concerned about is being able to surface the model.
The advanced features of customizing visual styles are taught in the AutoCAD 3D Advanced book.
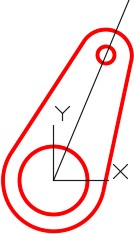
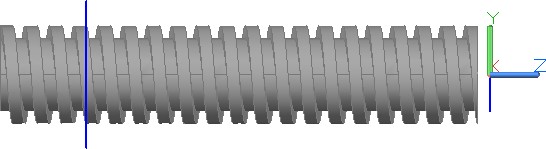
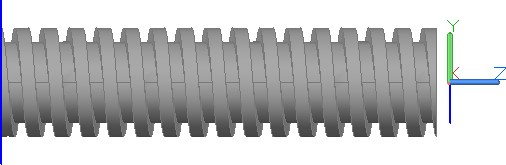
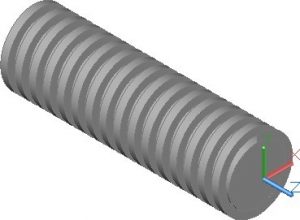
The REVSURF command is used to create a surface of revolution by revolving an existing profile around an axis.
Shortcut: none
SURFTAB1 = YES
SURFTAB2 = YES
Draw Pull-down
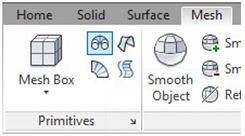
Mesh Ribbon
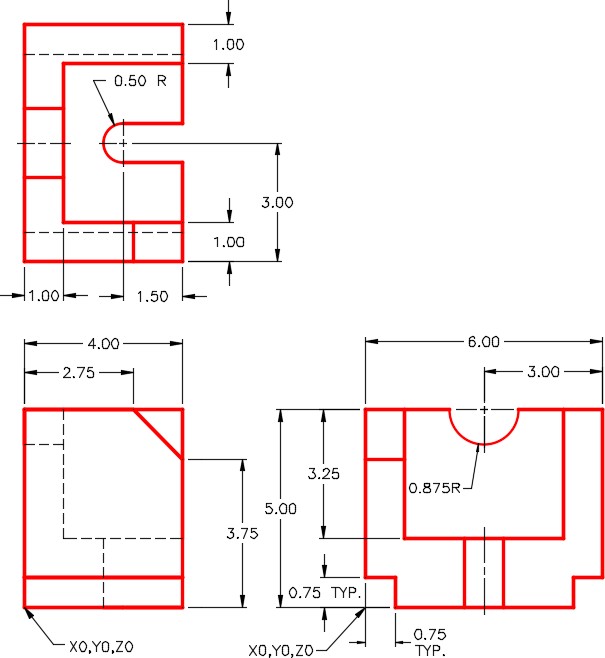
WORK ALONG: Inserting Revolved Surfaces
Step 1
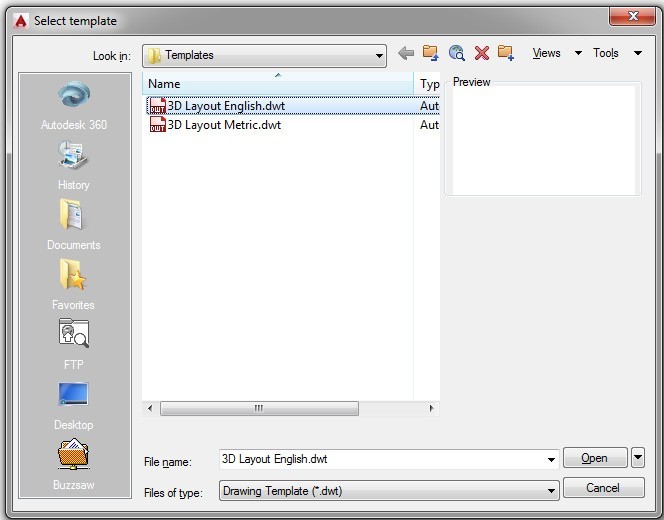
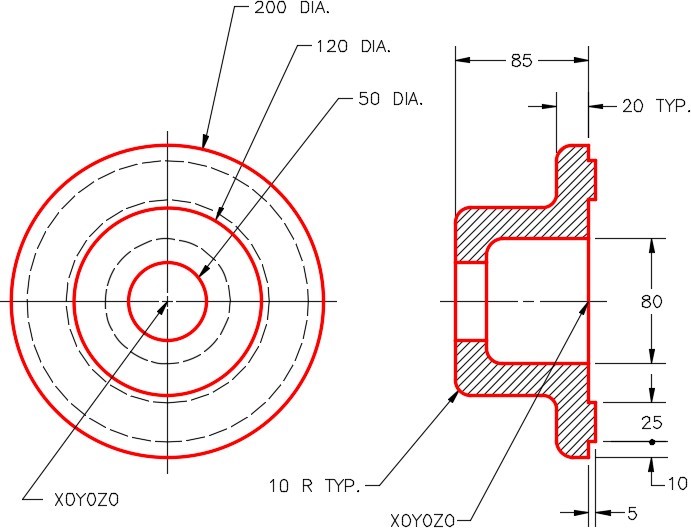
Using the NEW command, start a new drawing using template: 3D Layout English.
Step 2
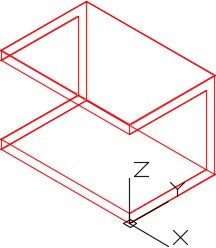
Save and name the drawing: AutoCAD 3D Workalong 13-2. (Figure Step 2)
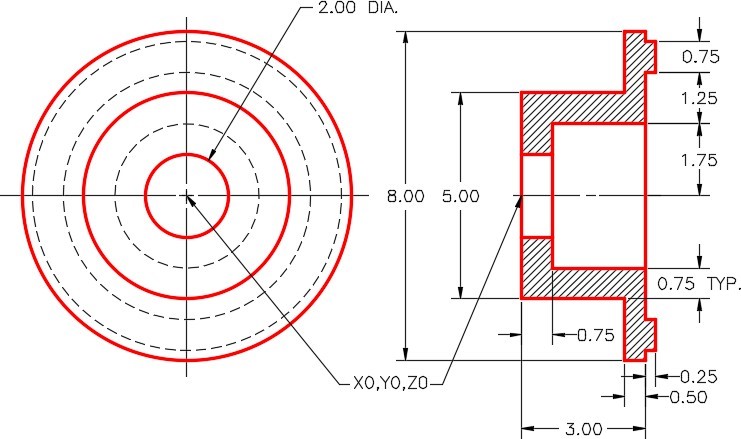
Figure Step 2
Dimensioned Multiview Drawing
Step 3
Set the current layer to: Pline and the current visual style to 2D Wireframe.
Step 4
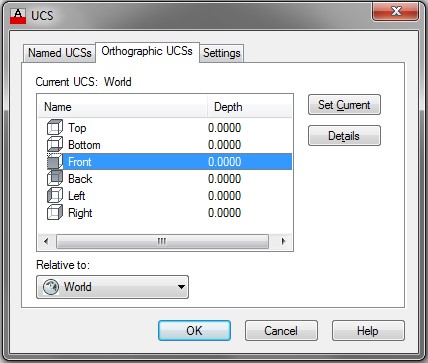
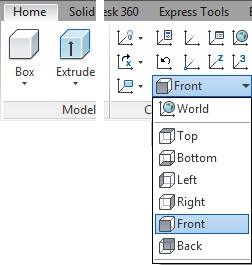
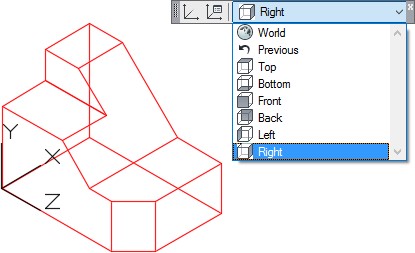
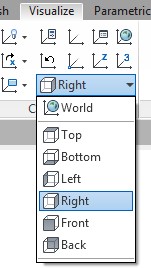
Change the current view to SE Isometric and the current UCS to Right.
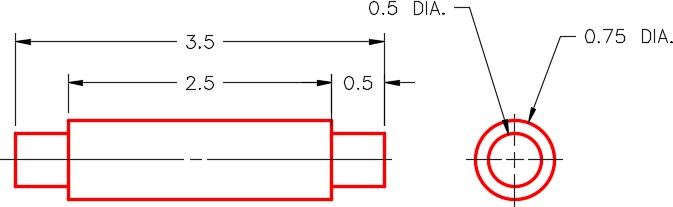
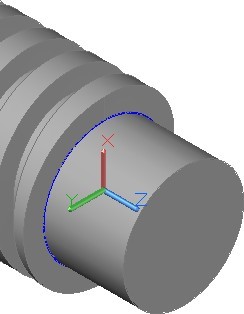
Step 5
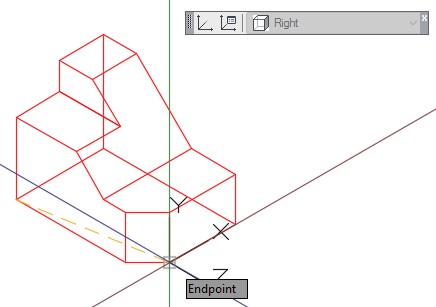
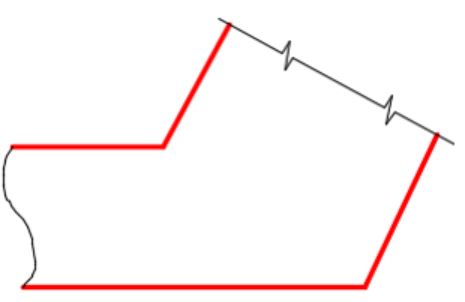
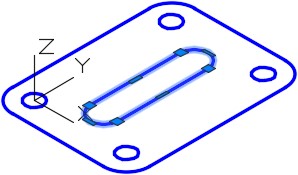
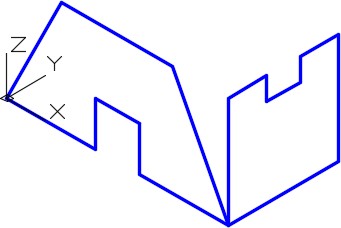
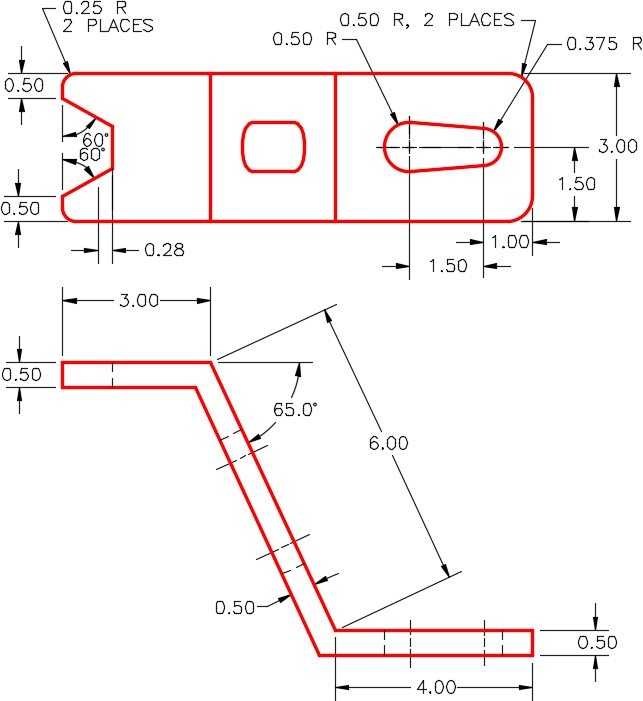
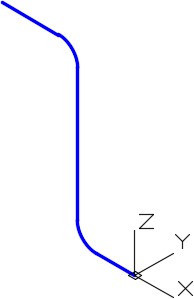
Using the multiview drawing as a reference, draw the right side cross section of the solid part of the object. (Figure Step 5)

Figure Step 5
AUTHOR’S COMMENTS: You will be revolving this cross section 360 degrees to create a surface as it revolves. Therefore, only one-half of the section view is drawn.
Step 6
On layer: Construction, draw a line, of any length, from 0,0,0 along the X axis. Enable ortho mode to draw it faster. This is the centre of the model and will be used as the axis for the revolution. (Figure Step 6)

Figure Step 6
AUTHOR’S COMMENTS: To convert the model objects to a closed polyline, the drawing must be perfectly drawn with the endpoints joining exactly. If you have problems using the PEDIT command to create a closed polygon, correct the drawing or redraw the objects from scratch.
Step 7
Using the PEDIT command, as shown below, convert the lines of the model to a closed polyline.
Command: PE
Select polyline or [Multiple]:
(Select one line of the model.)
Object selected is not a polyline
Do you want to turn it into one? <Y>
(Press Enter to accept the default.)
Enter an option [Close/Join/Width/Edit vertex/Fit/Spline/Decurve/Ltype gen/Undo]: J
(J for Join.)
Select objects: ALL
13 found
Select objects:
11 segments added to polyline
Enter an option [Open/Join/Width/Edit vertex/Fit/Spline/Decurve/Ltype gen/Undo]:
Command:
Step 8
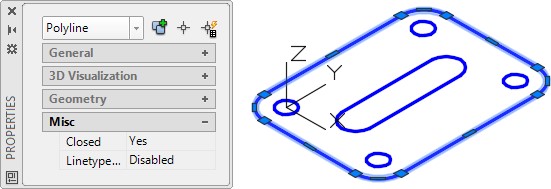
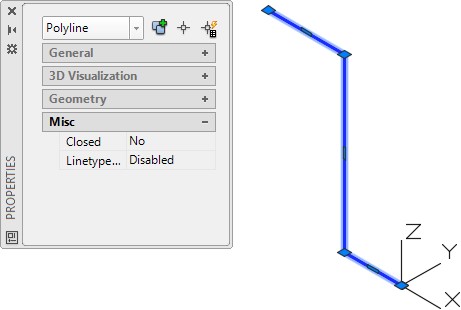
To ensure that you have successfully created a closed polyline, open the Properties window and select the polyline. The object type should read Polyline, all the objects should show as part of the polyline and the Closed property should indicate Yes. (Figure Step 8)
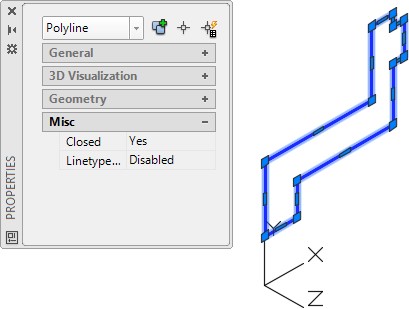
Figure Step 8
Step 9
Set the system variable SURFTAB1 to 64 and SURFTAB2 to 24 as shown below.
Command: SURFTAB1
Enter new value for SURFTAB1 <6>: 64
Command: SURFTAB2
Enter new value for SURFTAB2 <6>: 24
Command:
Step 10
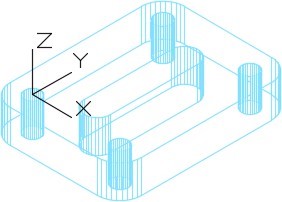
Change the current layer to layer: Surface 1 and enter the REVSURF command as shown below. After you complete the command, your model should appear as shown in the figure. (Figure Step 10)
Command: REVSURF
Current wire frame density: SURFTAB1=64 SURFTAB2=24
Select object to revolve
(Select the closed polyline.)
Select object that defines the axis of revolution:
(Select the axis line.)
Specify start angle <0>:
(Accept the default of 0.)
Specify included angle (+=ccw, -=cw) <360>:
(Accept the default of 360.)
Command:
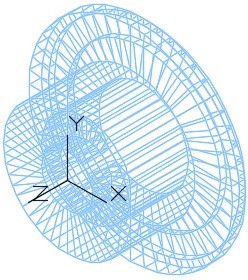
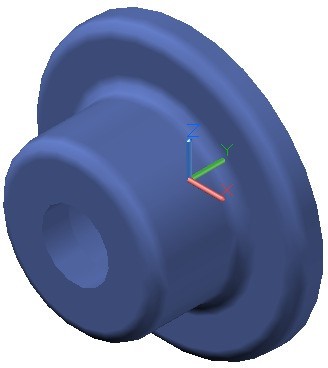
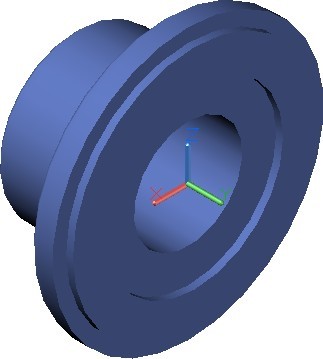
Figure Step 10
Step 11
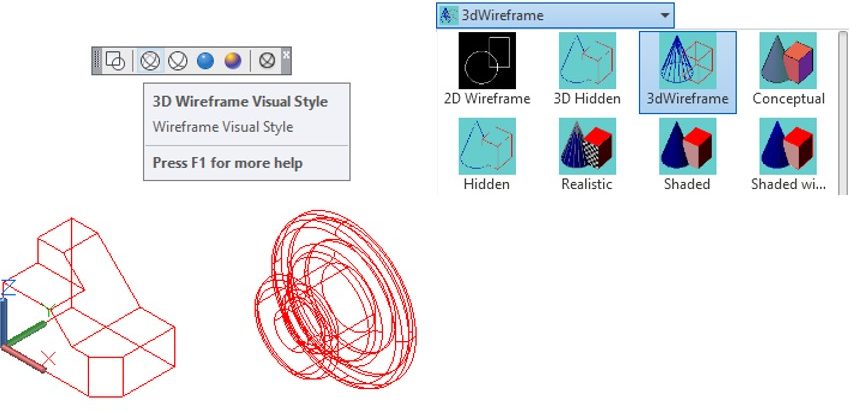
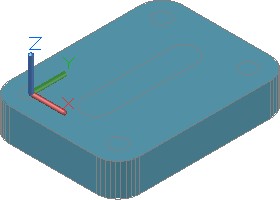
Turn layers: Construction and Pline off and set the current visual style to Realistic.
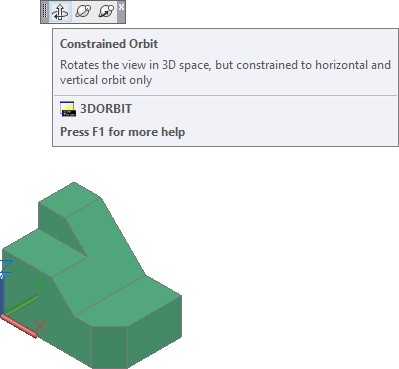
Step 12
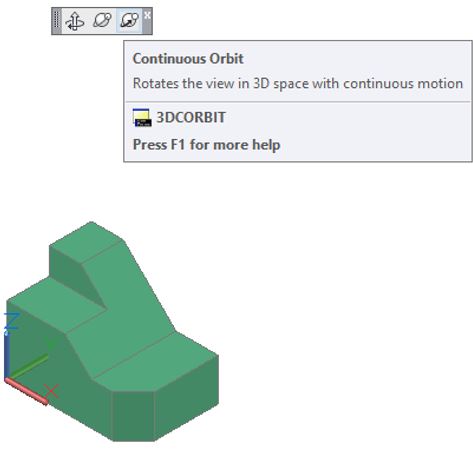
Using the 3DFORBIT command, orbit the model and look at all sides. (Figure 12A and 12B)

Figure Step 12A
SE Isometric View
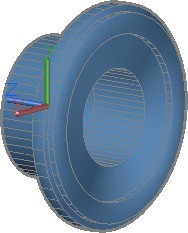
Figure Step 12B
SE Isometric View
Step 13
Save and close the drawing.
The TABSURF command is used to create a surface mesh moving a profile along a path. Shortcut: none
SURFTAB1 = YES
SURFTAB2 = No Effect
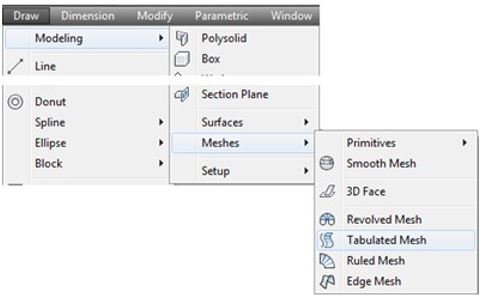
Draw Pull-down
Mesh Ribbon
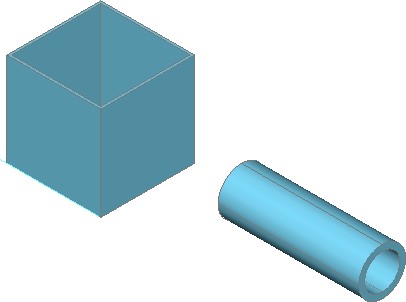
WORK ALONG: Inserting Tabulated Surfaces
Step 1
Using the NEW command, start a new drawing using template: 3D Layout English.
Step 2
Save and name the drawing: AutoCAD 3D Workalong 13-3.
Step 3
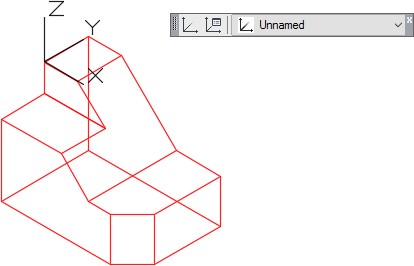
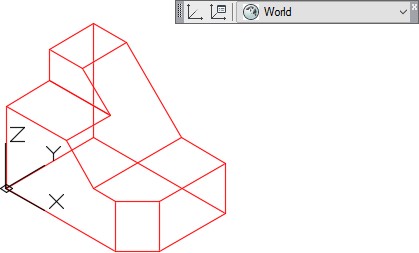
Set the current visual style to 2D Wireframe, the current view to SE Isometric, and the current UCS to World.
Step 4
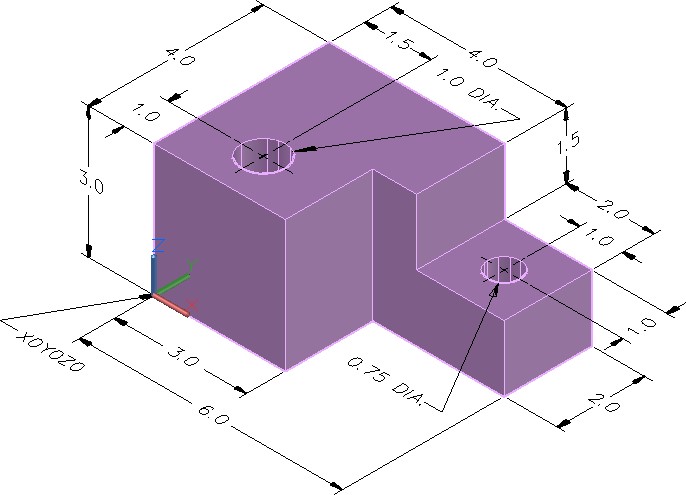
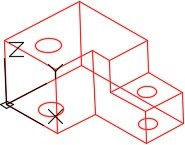
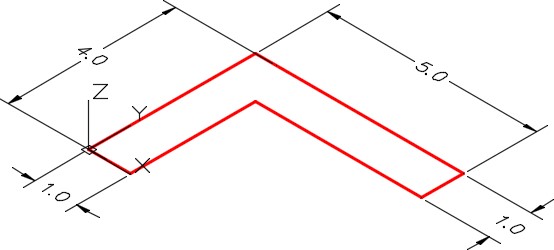
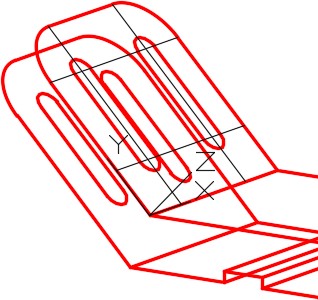
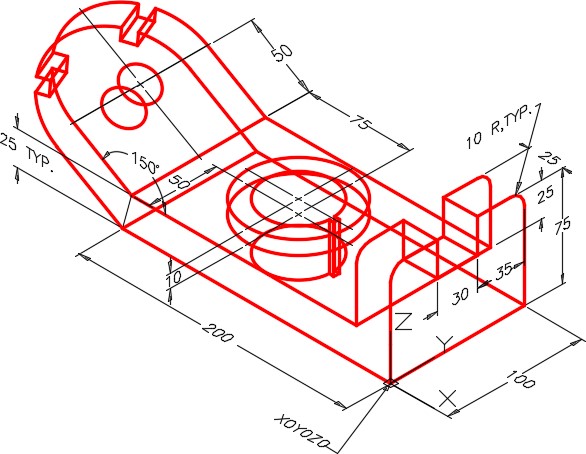
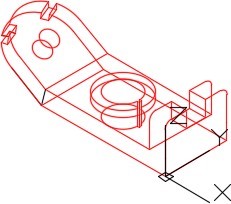
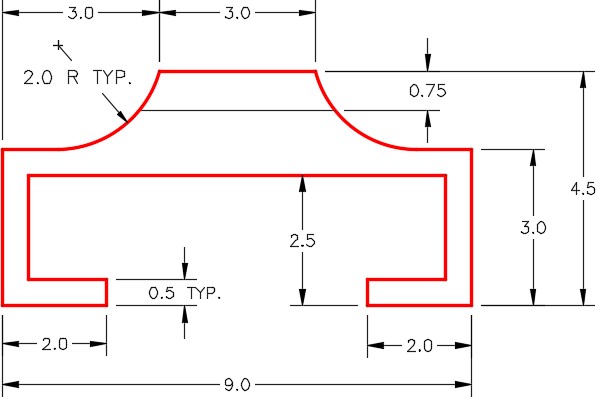
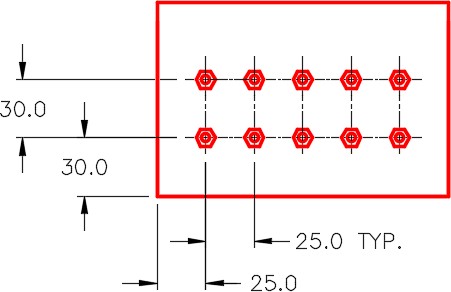
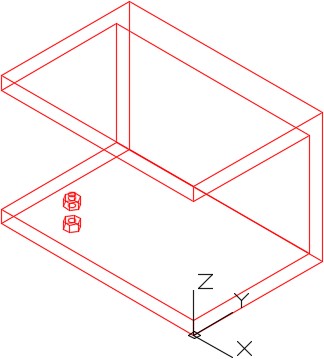
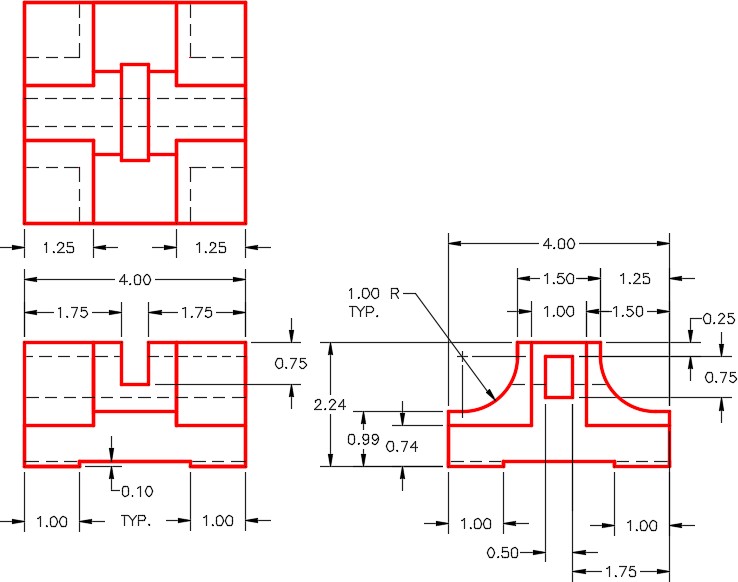
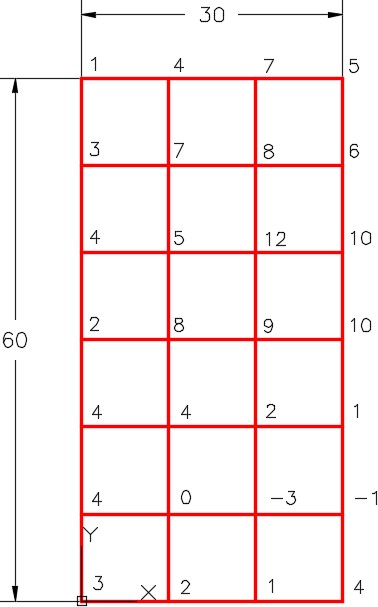
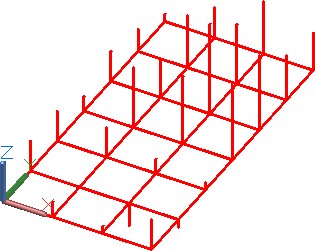
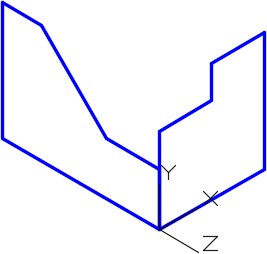
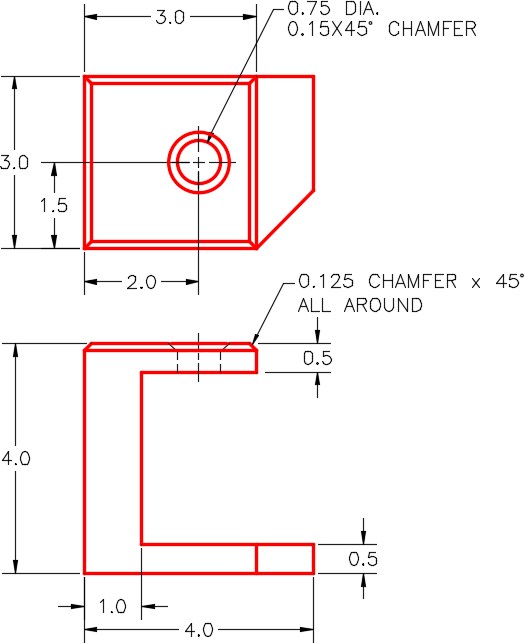
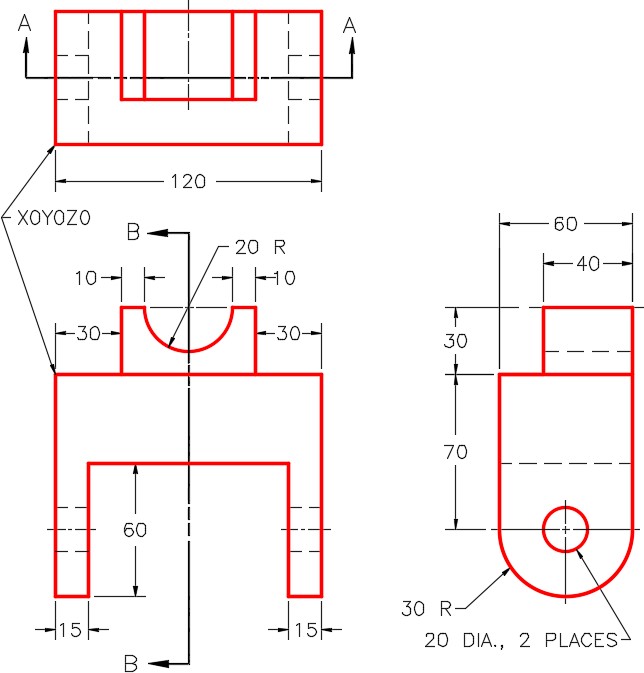
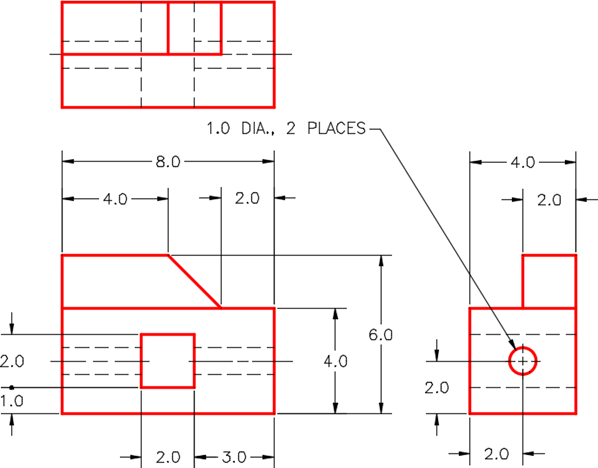
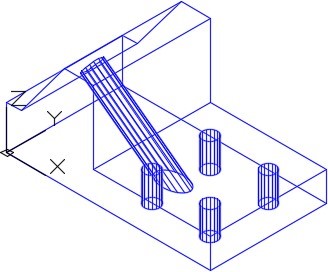
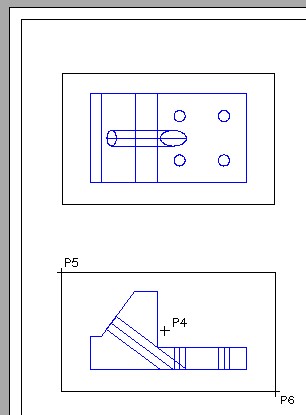
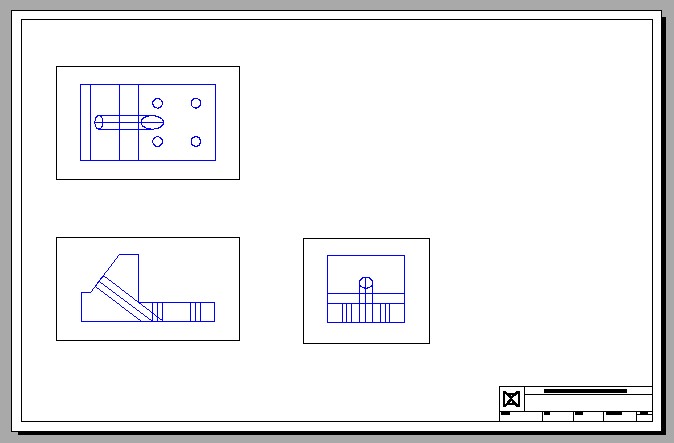
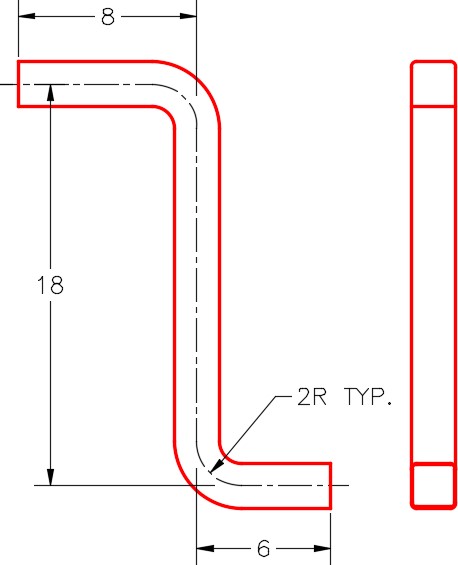
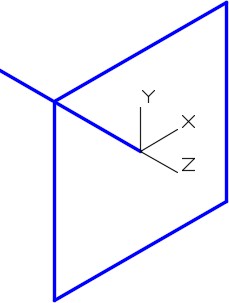
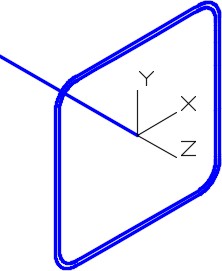
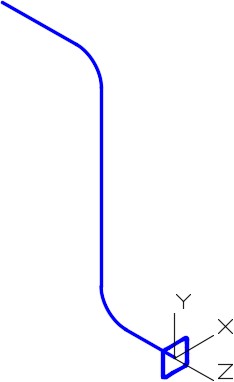
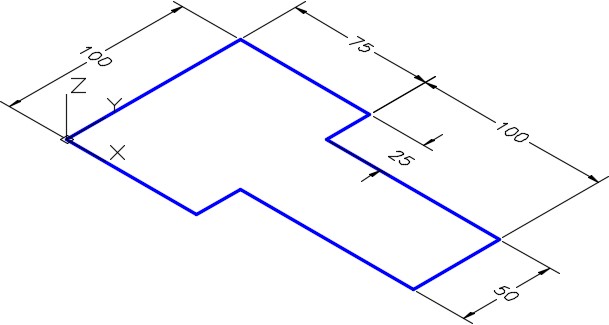
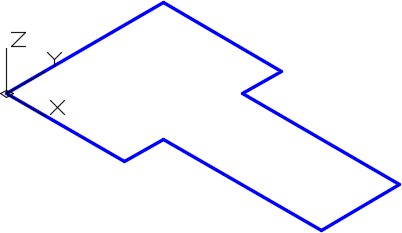
Set layer: Construction as the current layer. Draw the model shown in the dimensioned model. These are the construction lines and arcs to be used to construct the model. When complete, your model will appear as shown in the figure. The length of the lines that appear dashed in the dimensioned model are not important since they are axis lines only. They are always drawn in the Z direction of the current UCS. They can be drawn any length as continuous linetype. (Figure Step 4A, 4B, and 4C)
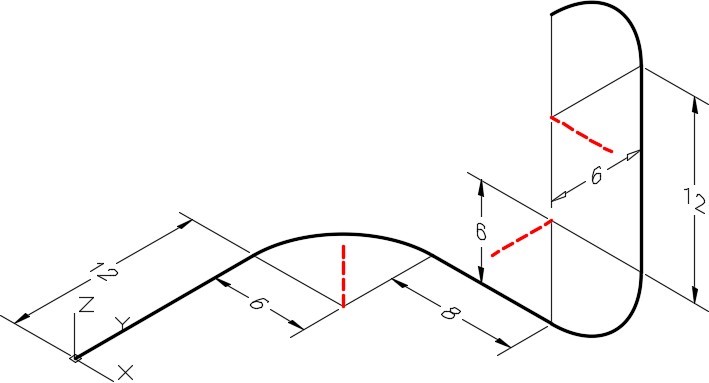
Figure Step 4A Dimensioned Model SE Isometric View
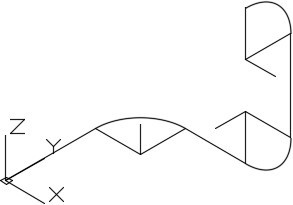
Figure Step 4B
SE Isometric View
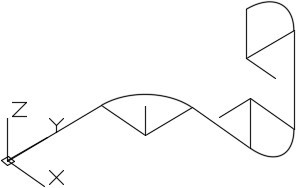
Figure Step 4C
Orbited View
AUTHOR’S COMMENTS: You will have to change the current UCS as you draw the construction lines to ensure that you are drawing on the correct plane.
Step 5
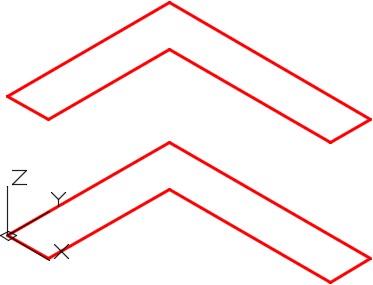
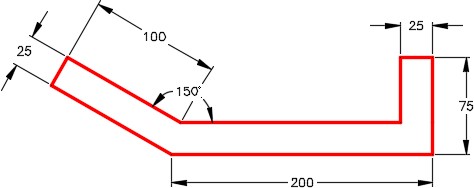
Set the current UCS to Front and then draw a model of the object shown in the dimensioned drawing. The drawing should appear as shown in the figure. Draw the model anywhere in model space. Its location is not important. (Figure Step 5A and 5B)
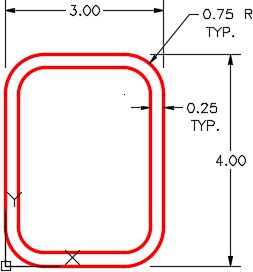
Figure Step 5A
Figure Step 5B
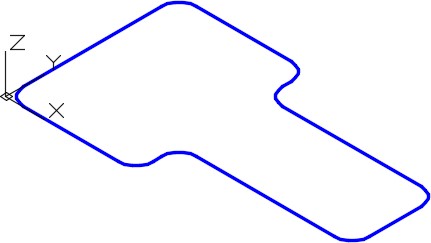
Step 6
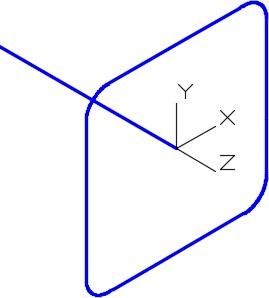
Change the lines and arcs into two closed polylines using the PEDIT command. Check them using the Properties window. (Figure Step 6)
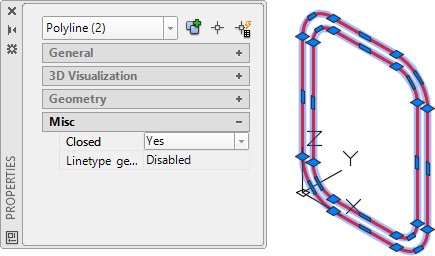
Figure Step 6
Step 7
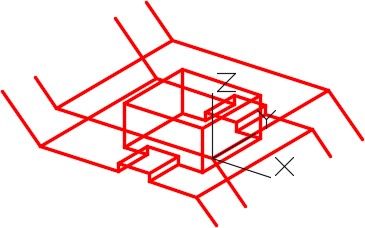
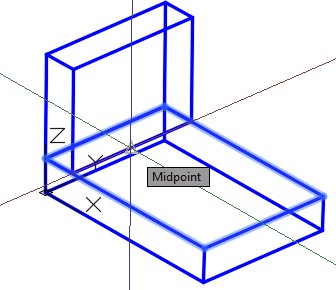
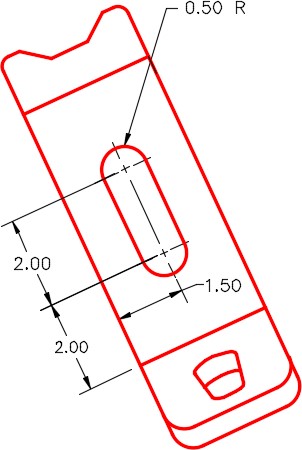
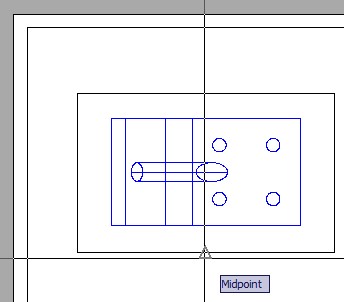
On layer: Construction, draw in two construction lines from midpoint of the lines to find the exact centre of the object. (Figure Step 7)
Figure Step 7
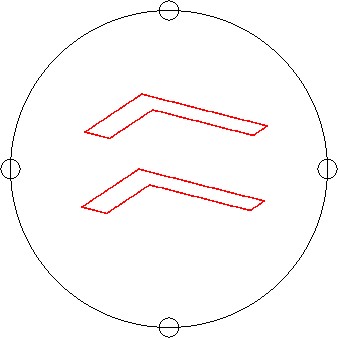
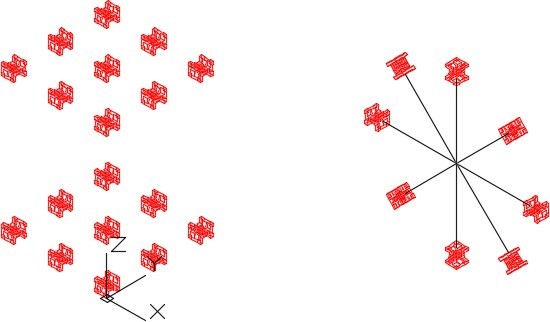
Step 8
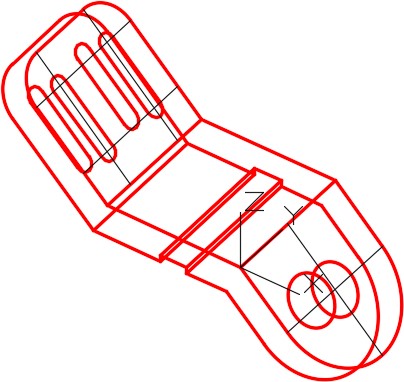
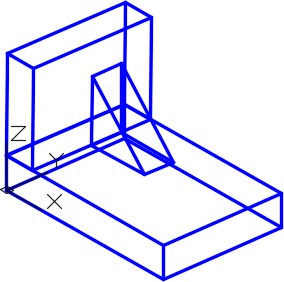
Make three additional copies of the model and rotate them to lay on different UCS planes. Their location in 3D space is not important. (Figure Step 8)
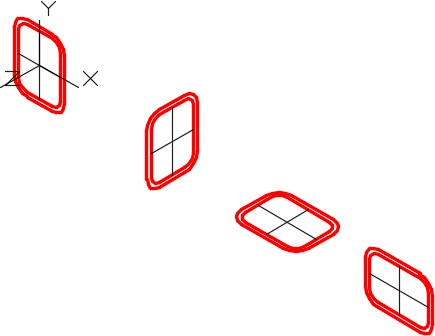
Figure Step 8
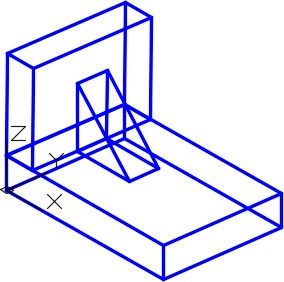
Step 9
Your drawing should appear similar to the figure. (Figure Step 9)
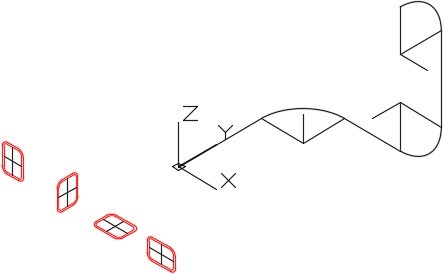
Figure Step 9
Step 10
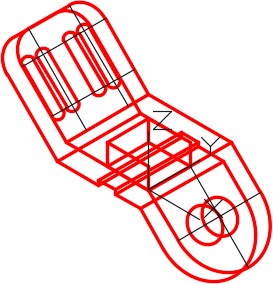
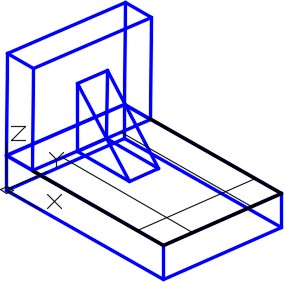
Copy the objects onto the construction lines. Ensure that the midpoint of the object (the intersections of the construction lines) aligns to the endpoints of the lines and arcs. (Figure Step 10)
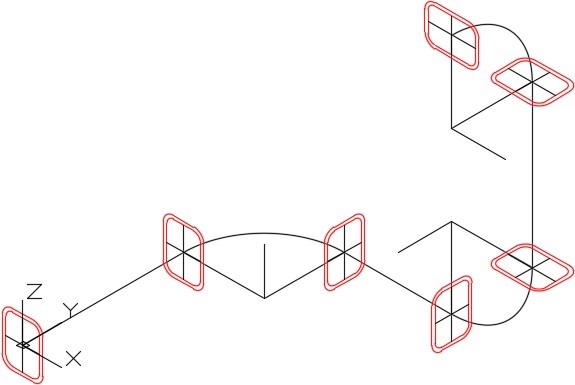
Figure Step 10
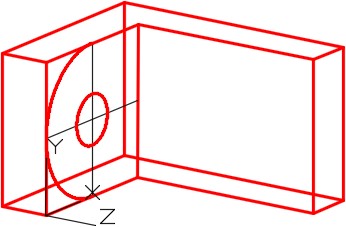
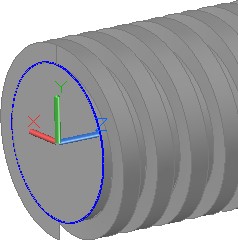
Step 11
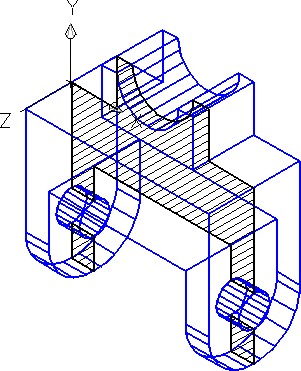
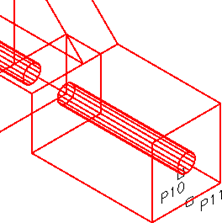
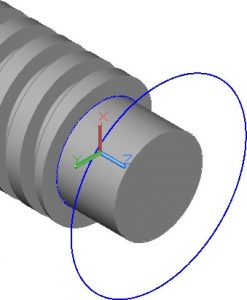
With the UCS located on the Front, SURFTAB1 set to 48 and layer: Surface 1 as the current layer, enter the TABSURF command, as shown below, to create the surface for the inside of the tube. (Figure Step 11)
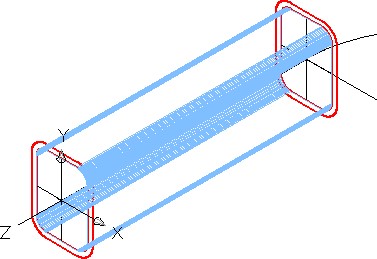
Figure Step 11
Command: TABSURF
Current wire frame density: SURFTAB1=48
Select object for path curve:
(Select the inside polyline.)
Select object for direction vector:
(Select the construction axis line. Ensure you select it closer to the end where the object your are tabulating is located.)
Command:
Step 12
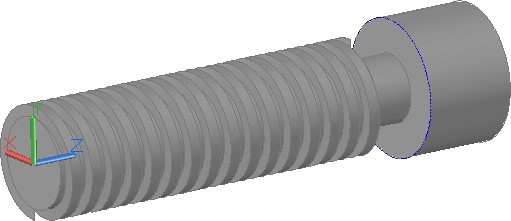
Set the current visual style to Realistic. (Figure Step 12)

Figure Step 12
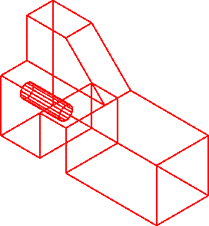
Step 13
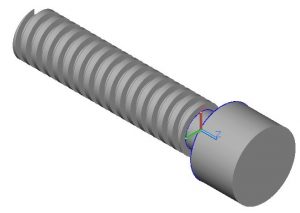
Using the TABSURF command, create the surface for the outside of the tube. (Figure Step 13)
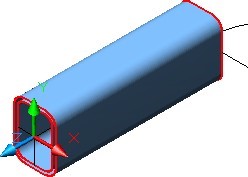
Figure Step 13
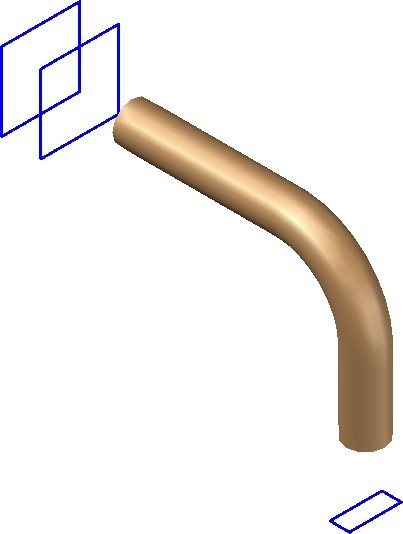
Step 14
Enter the REVSURF command, as shown below, to construct the inside of the tube around the first corner. First change the layer of the straight tube surfaces constructed in Steps 11 to 13 to layer: Surface Off. (Figure Step 14)
Command: REVSURF
Current wire frame density: SURFTAB1=48 SURFTAB2=6
Select object to revolve:
(Select the inside polyline.)
Select object that defines the axis of revolution
(Select the axis line.)
Specify start angle <0>:
(Accept the default.)
Specify included angle (+=ccw, -=cw) <360>: -90
Command:
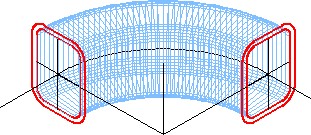
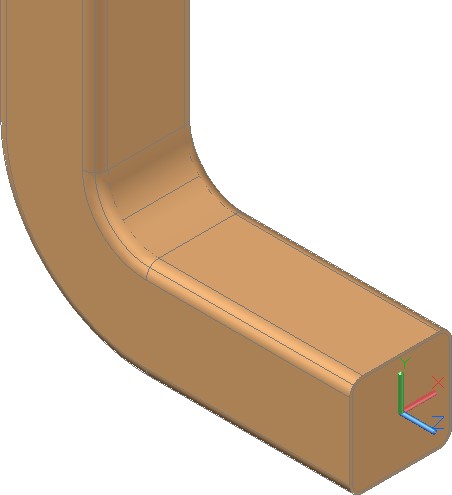
Figure Step 14
Step 15
Using what was just taught, construct the outside of the tube and change the layers of the surfaces until the model appear as shown in the figure. (Figure Step 15)

Figure Step 15
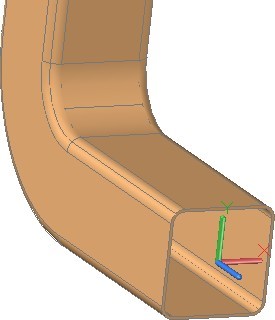
Step 16
Using what was just taught, complete the model. (Figure Step 16)

Figure Step 16
Step 17
Turn off layers: Model and Construction and your completed model will appear as shown in the figure. (Figure Step 17)

Figure Step 17
Step 18
Save and close the drawing.
AUTHOR’S COMMENTS: Do not be concerned if your shaded model does not match the figures in the module exactly. There are many visual style settings that can be set to change the look of the shaded model. For now, all you should be concerned about is being able to surface the model. The advanced features of customizing visual styles are taught in the AutoCAD 3D Advanced book.
USER TIP: Although any surfacing command can be used to create the surfaces, the RULESURF command is the easiest and fastest to use for most surfaces. To shorten the modeling time, use it whenever possible.
Key Principles
- Geometrically defined surface meshes use existing geometry that must be created before the surfaces. In almost all cases, you will use the wireframe of the model as the existing geometry.
- Although any surfacing command can be used to create a surface, the RULESURF command is the easiest and fastest to use for most surfaces.
- When using the RULESURF command, ensure that you select the objects closest to matching If opposite ends are selected, the mesh will twist.
- The mesh density represented by the lines, circles or arcs that make the rows and columns of the surface mesh are controlled with the system variables SURFTAB1 and SURFTAB2.
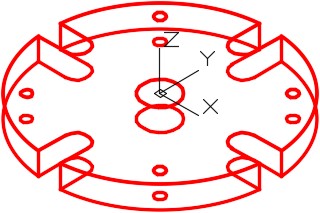
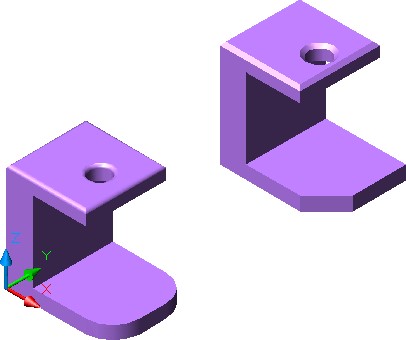
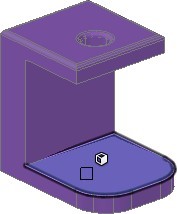
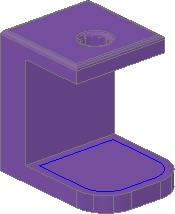
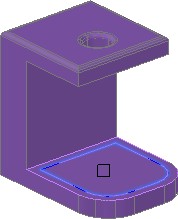
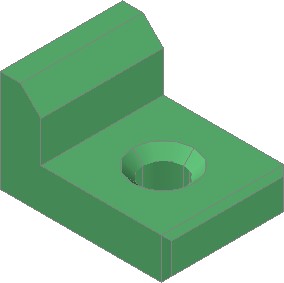
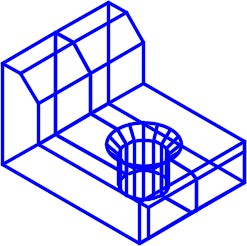
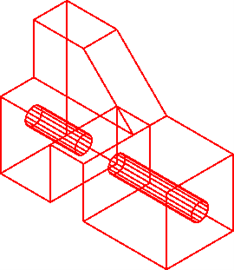
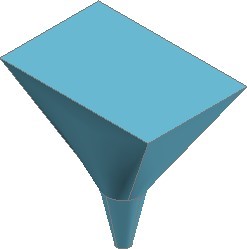
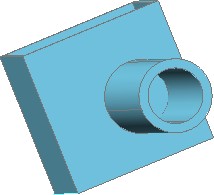
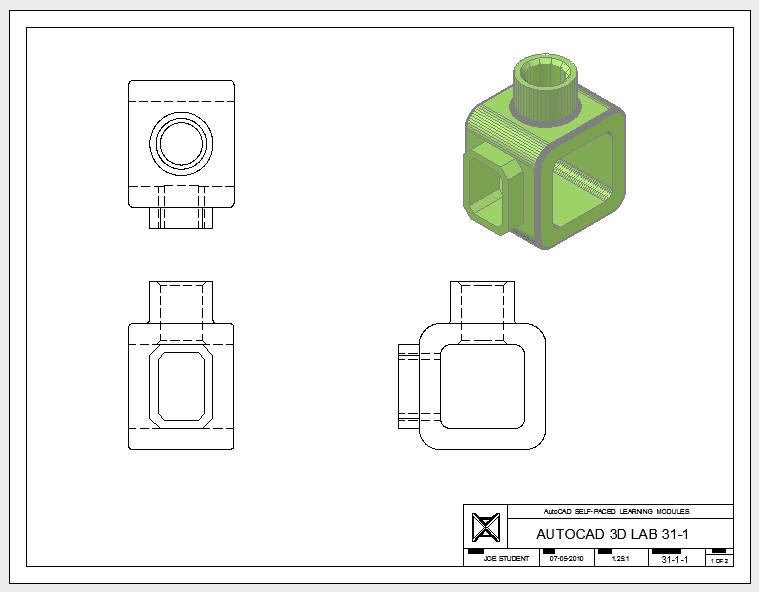
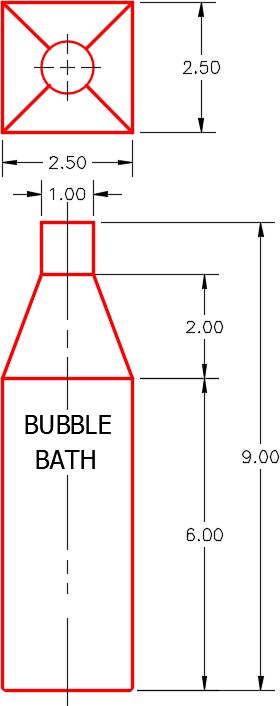
Lab Exercise 13-1
Time allowed: 45 minutes.
| Drawing Name | Template | Units |
|---|
| AutoCAD 3D Lab 13-1 | 3D English | Inches |
Step 1
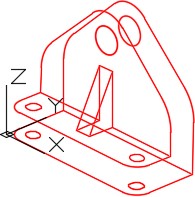
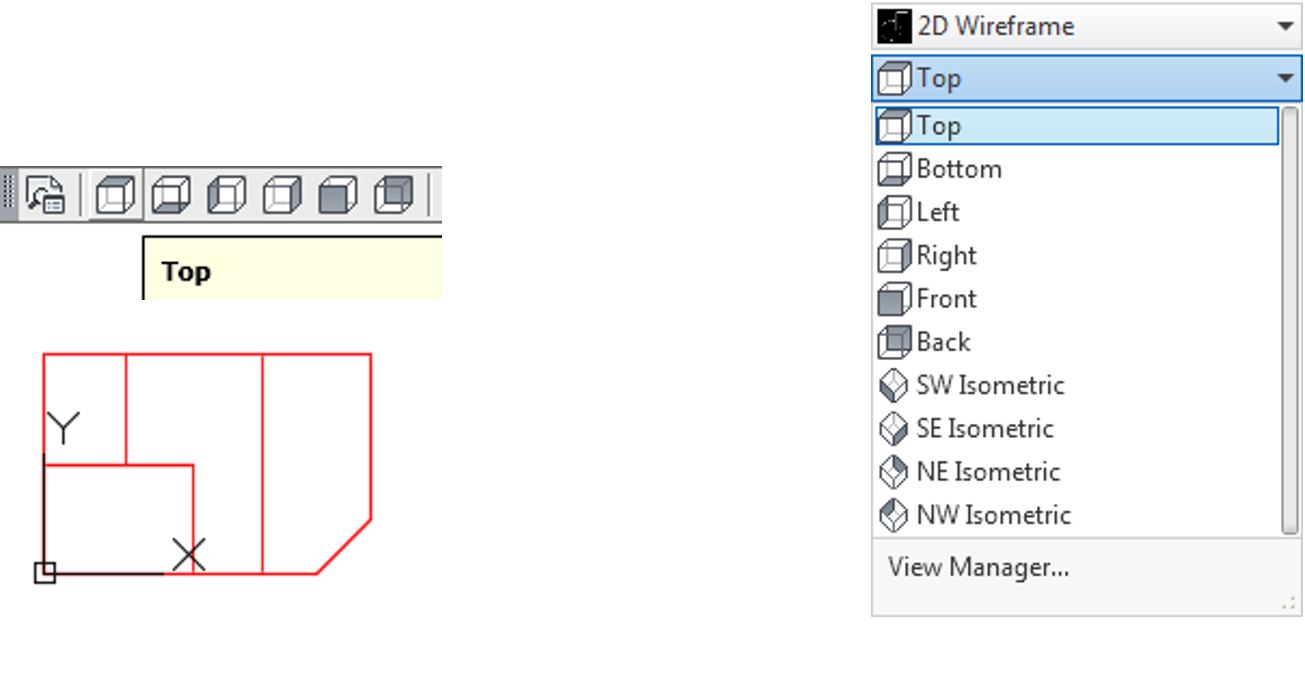
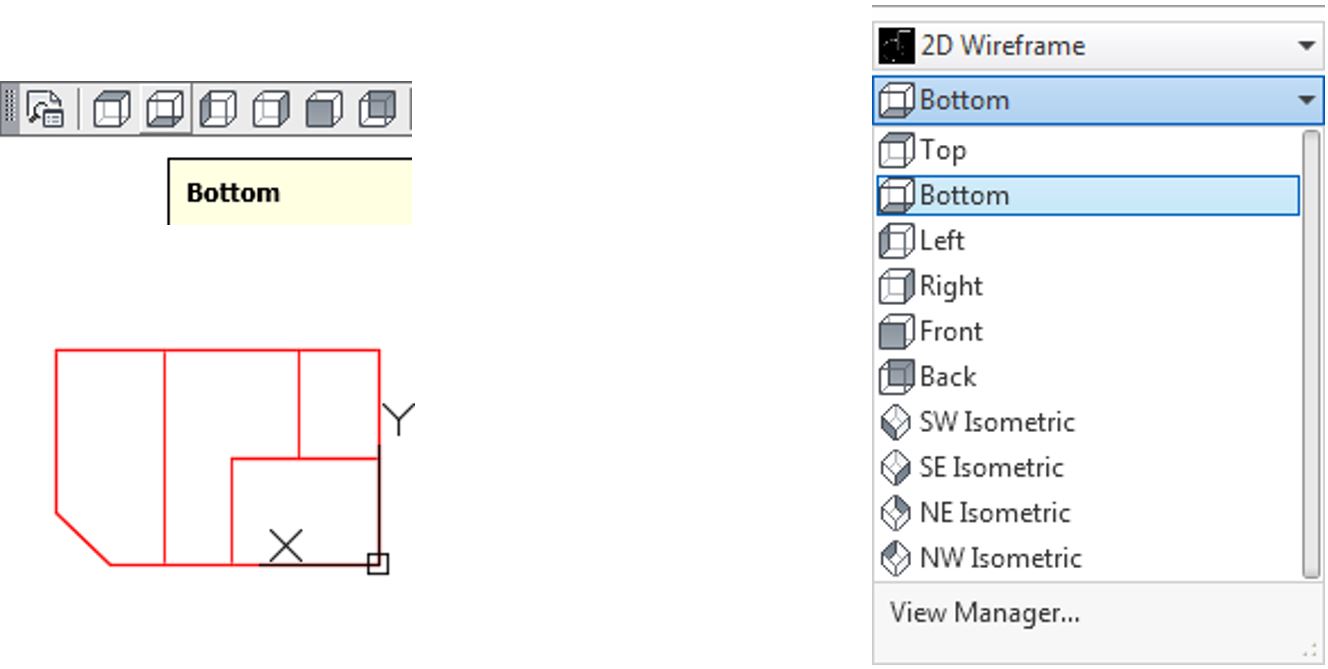
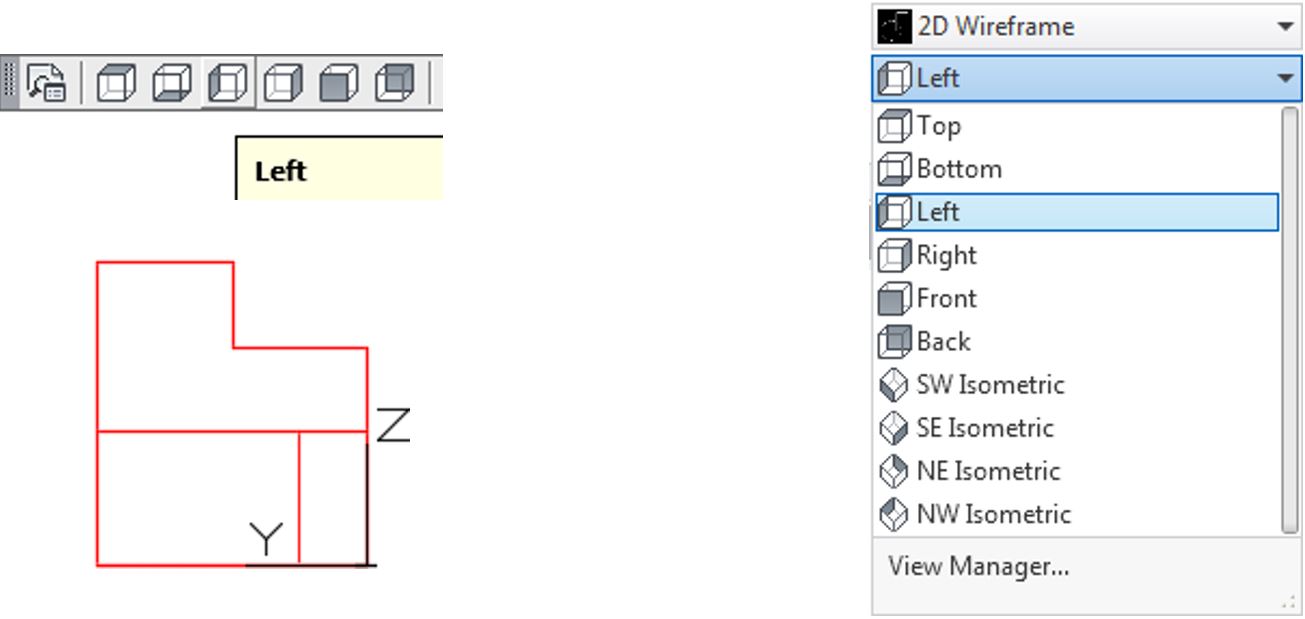
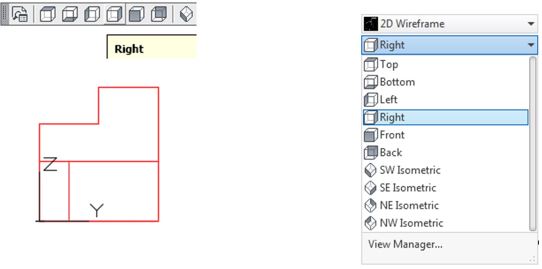
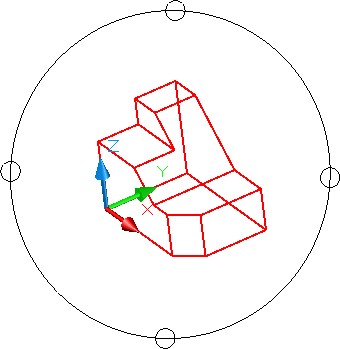
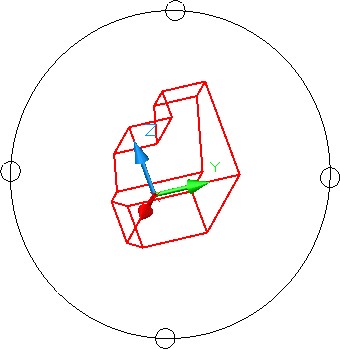
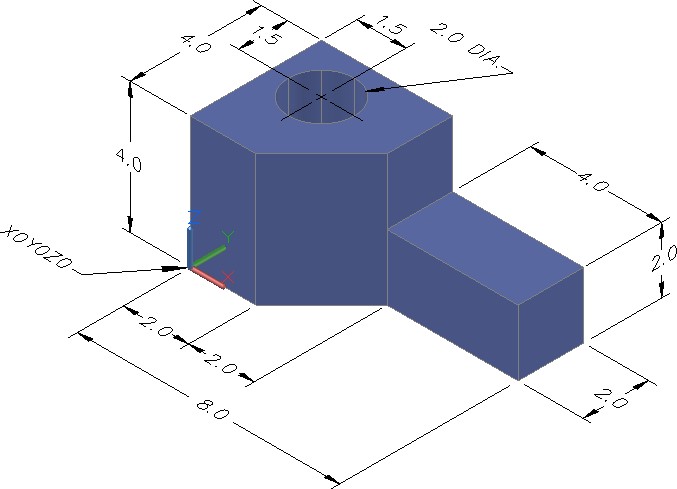
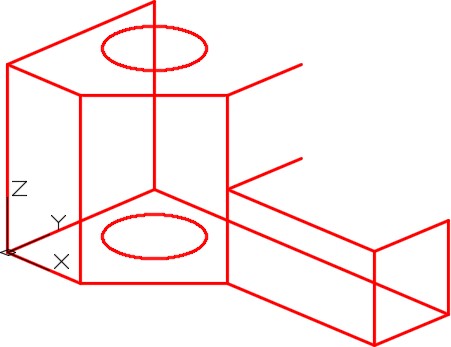
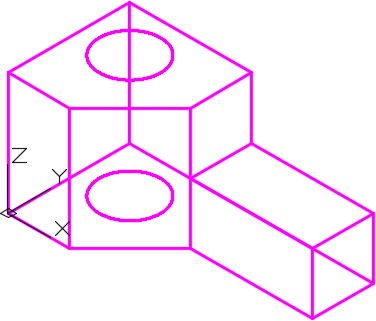
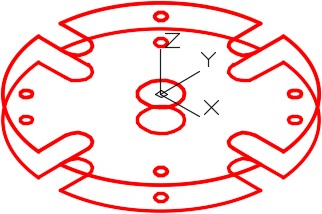
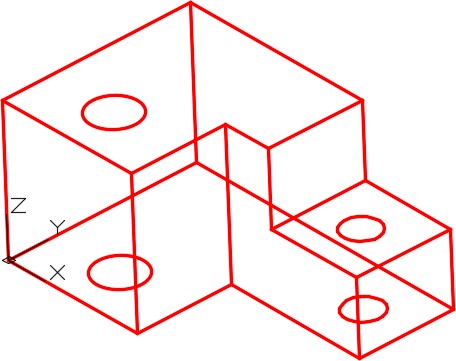
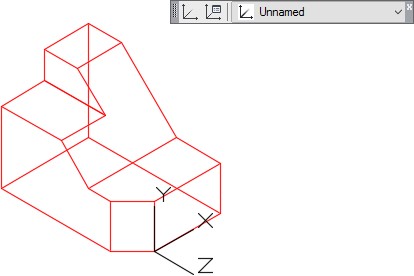
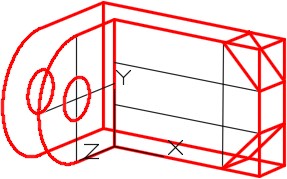
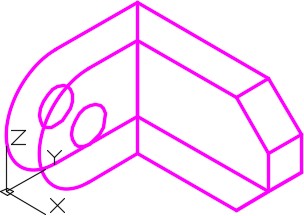
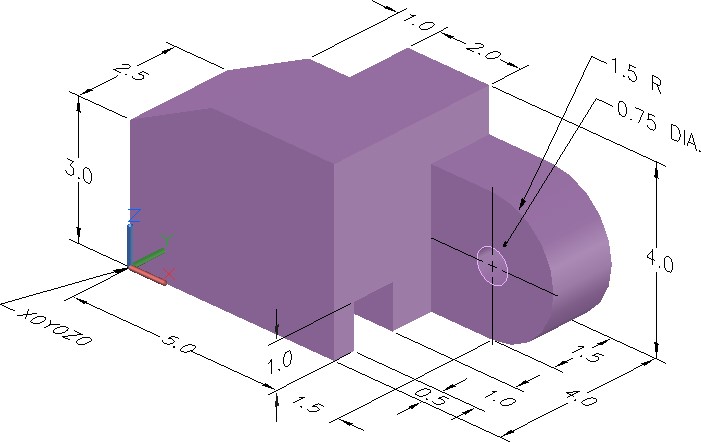
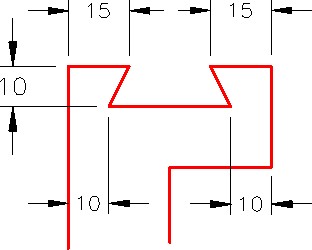
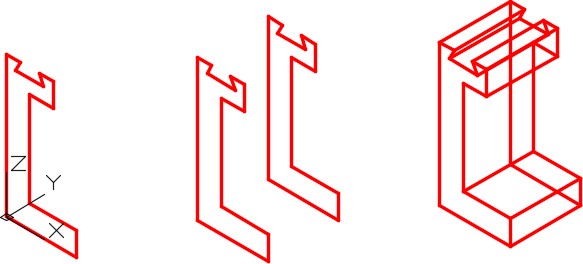
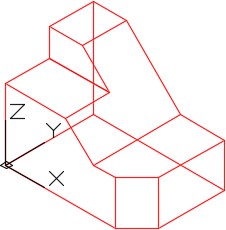
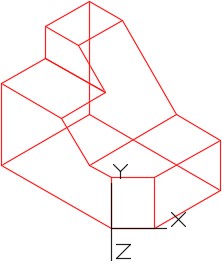
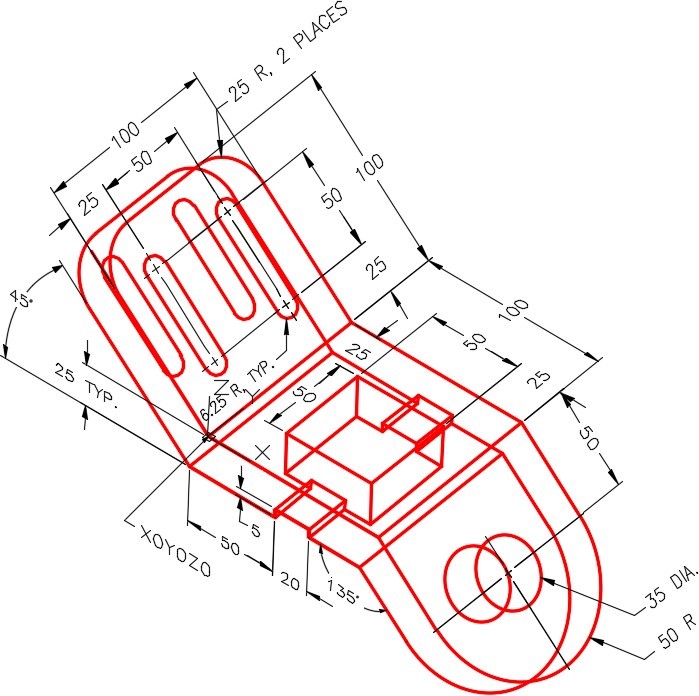
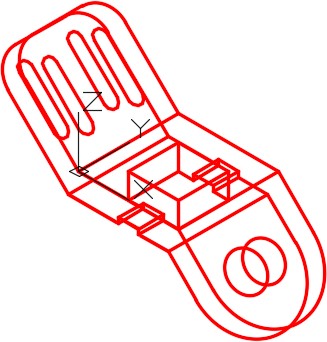
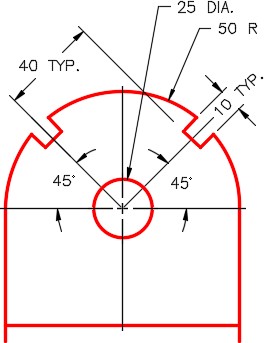
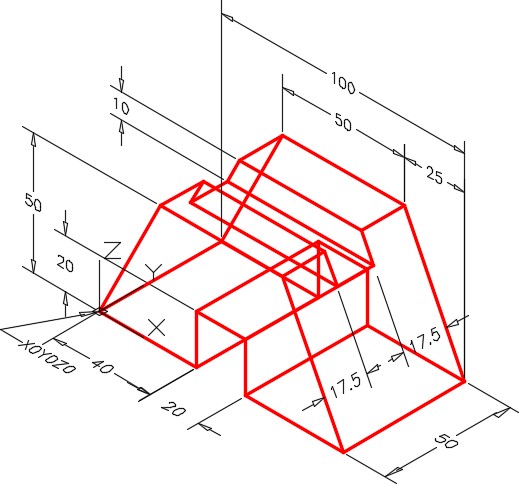
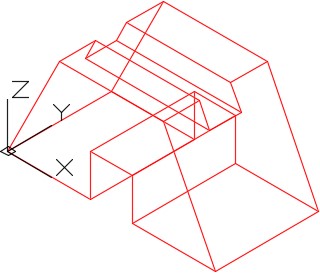
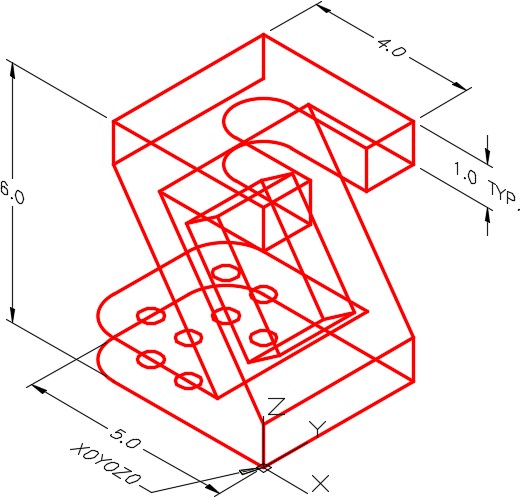
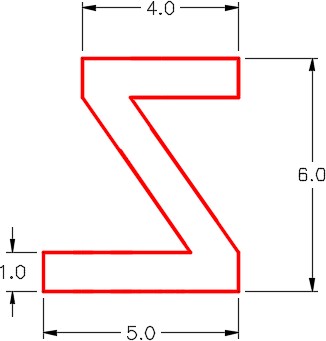
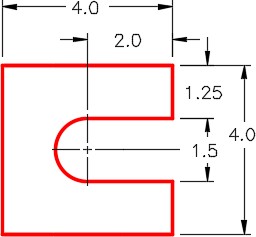
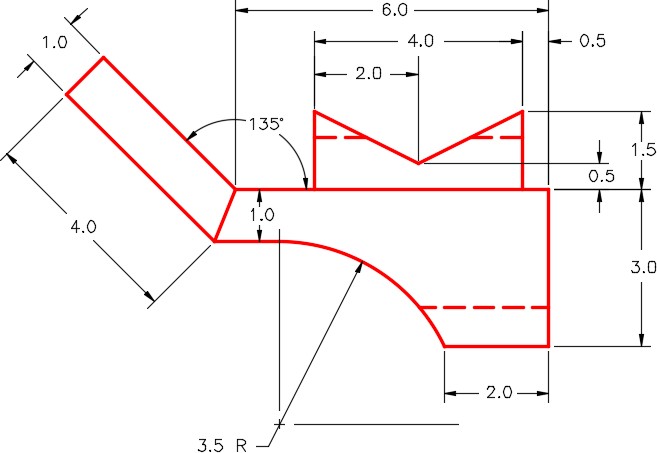
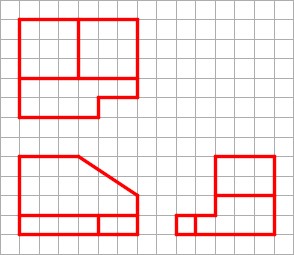
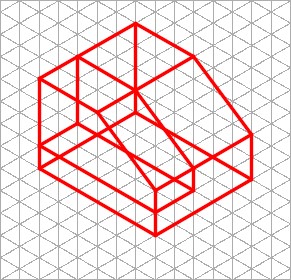
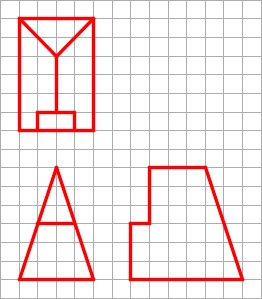
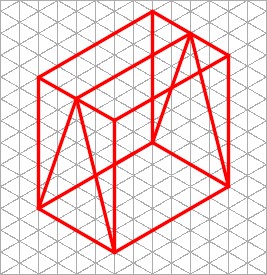
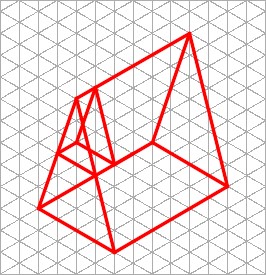
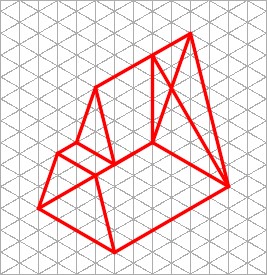
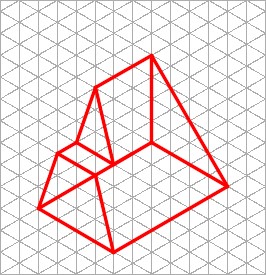
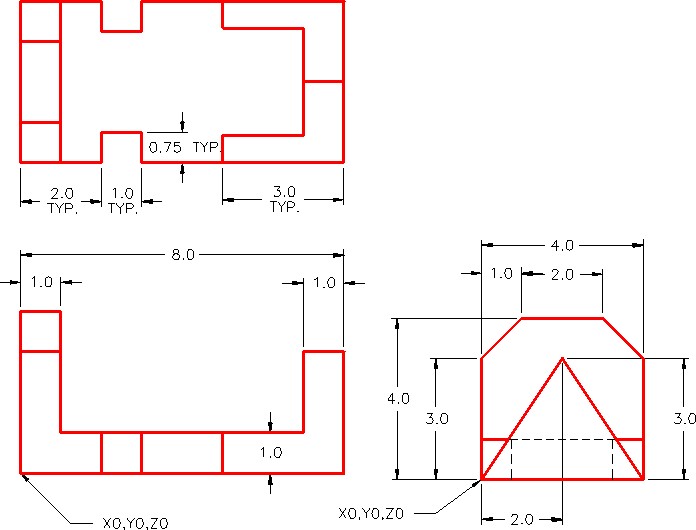
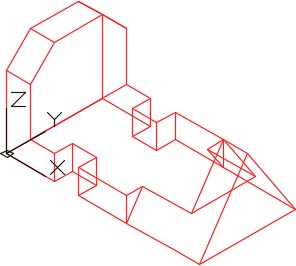
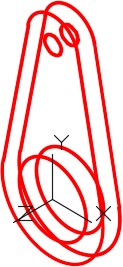
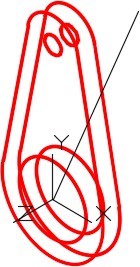
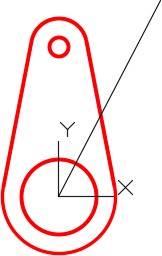
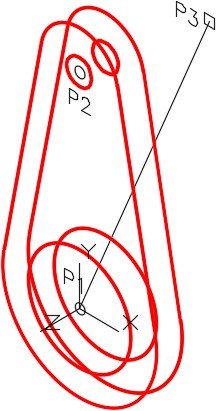
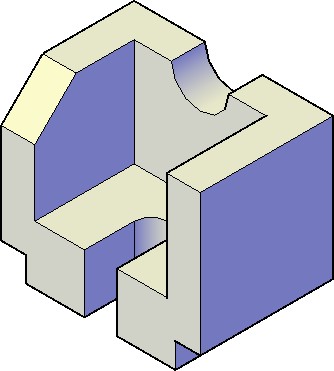
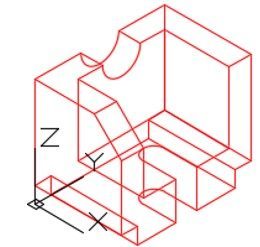
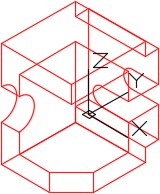
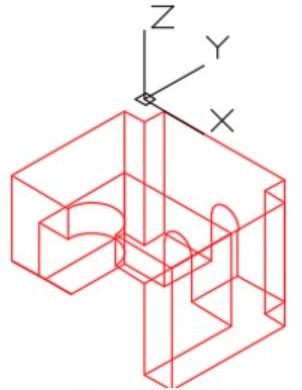
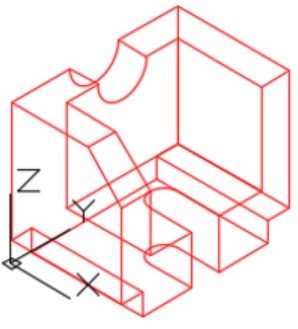
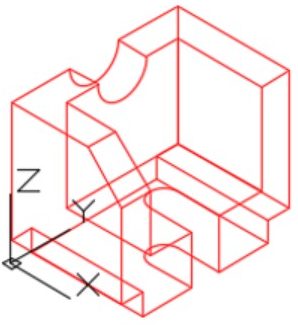
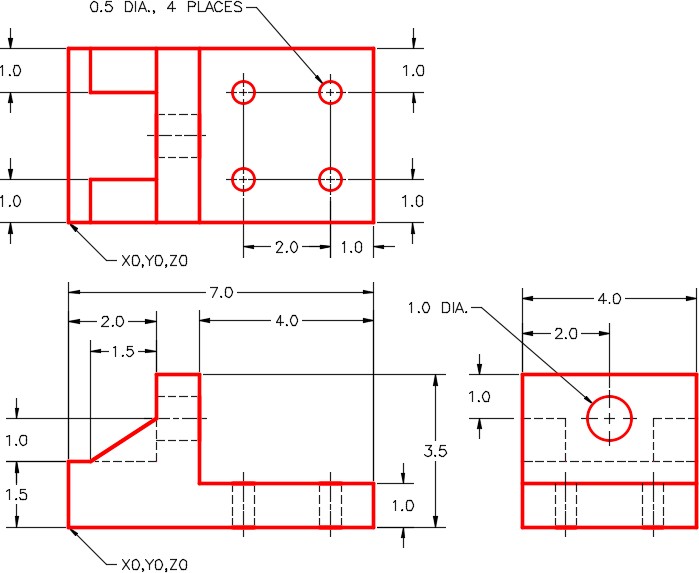
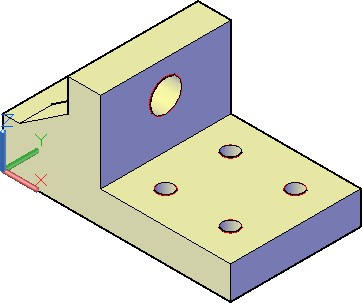
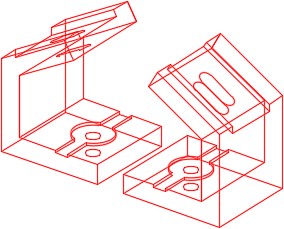
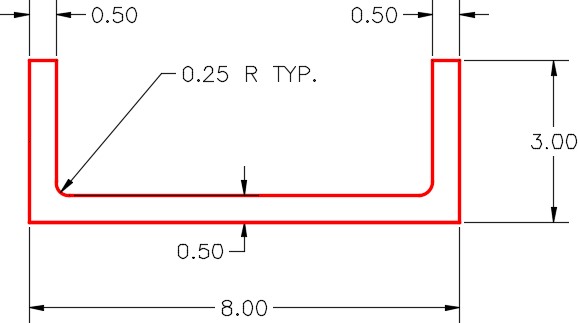
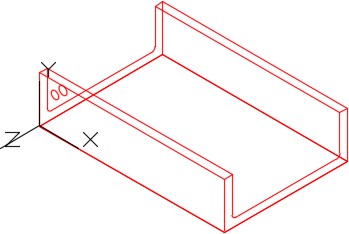
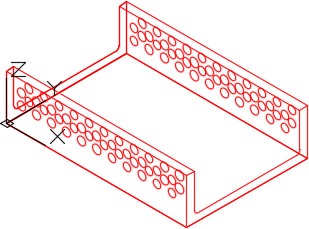
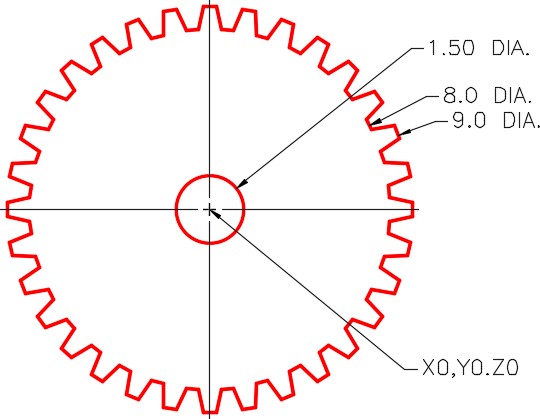
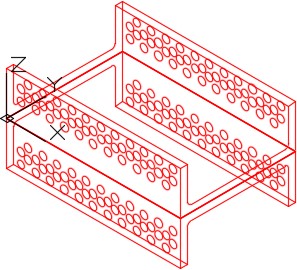
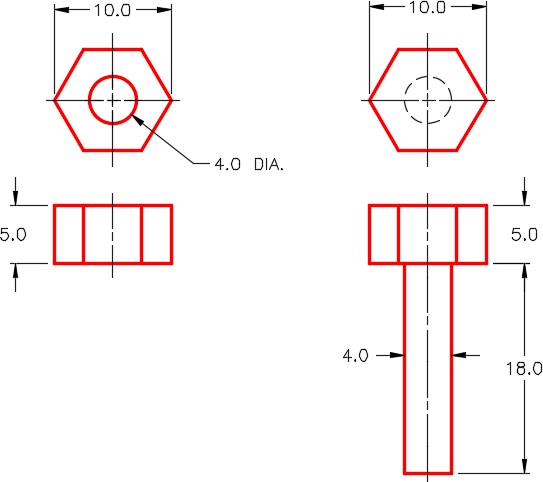
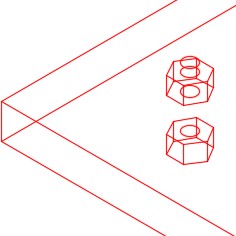
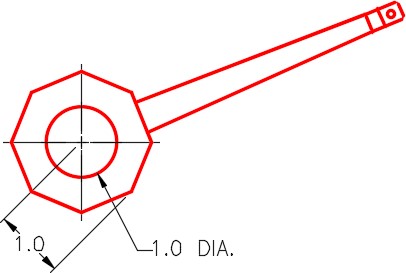
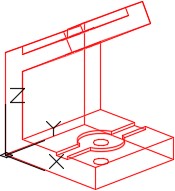
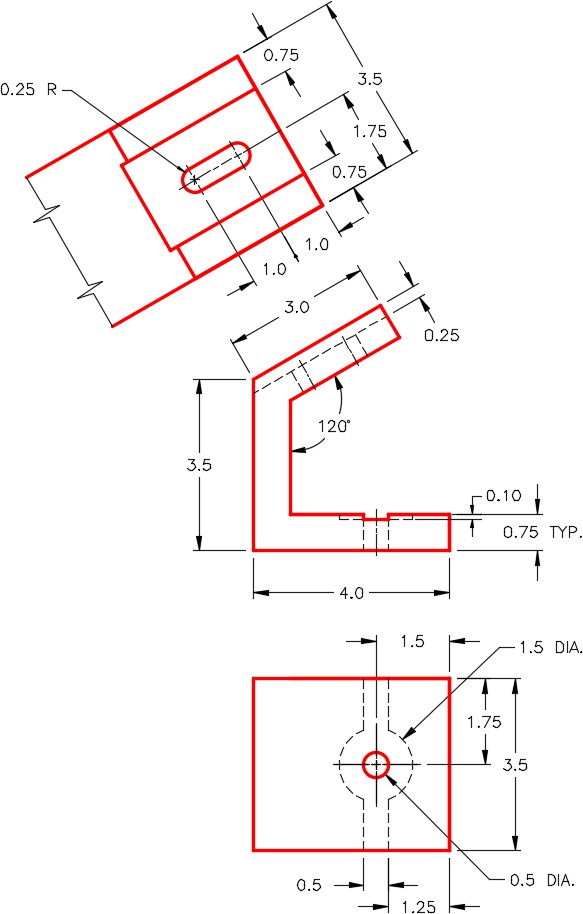
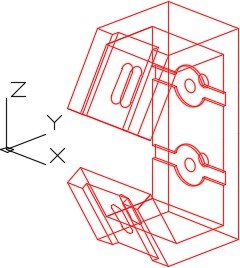
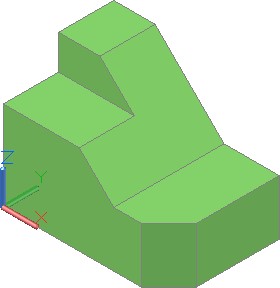
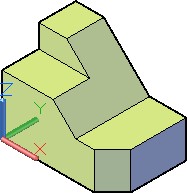
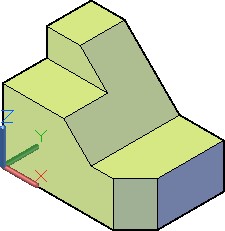
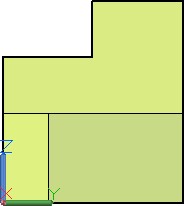
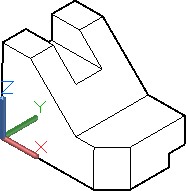
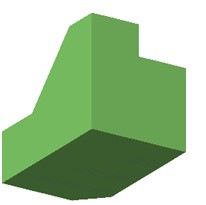
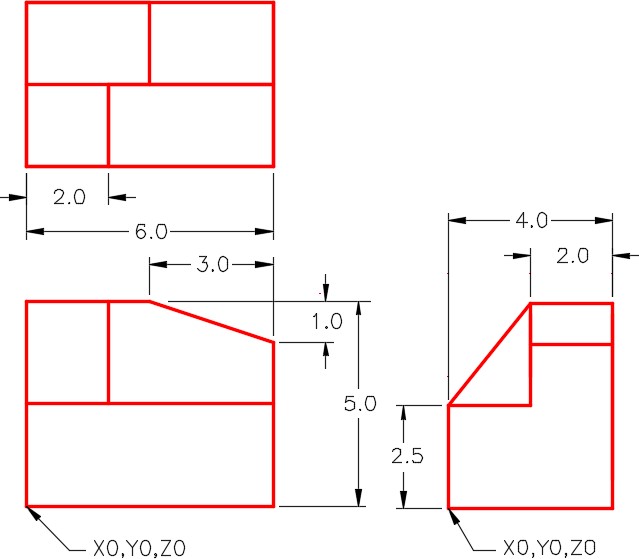
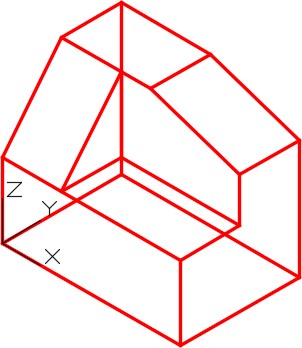
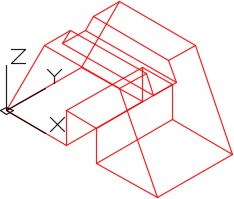
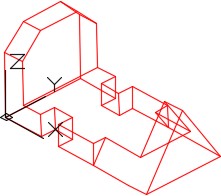
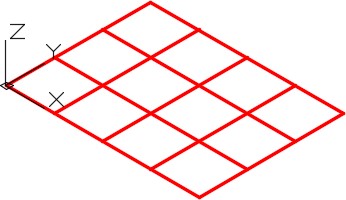
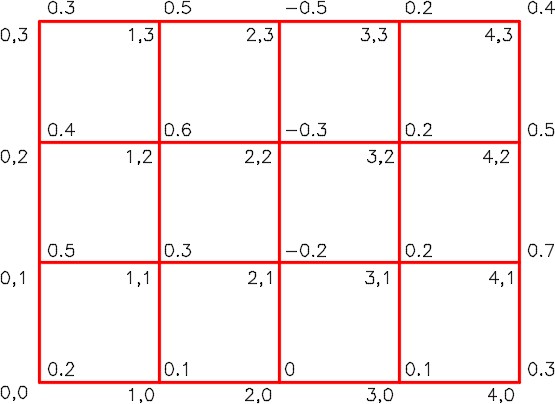
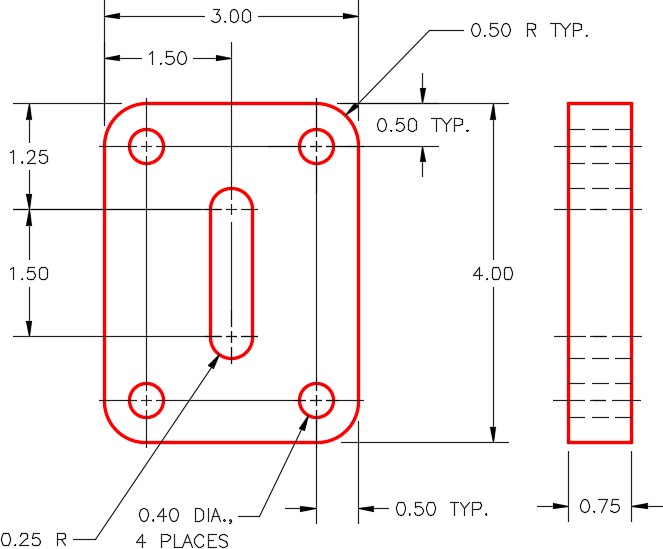
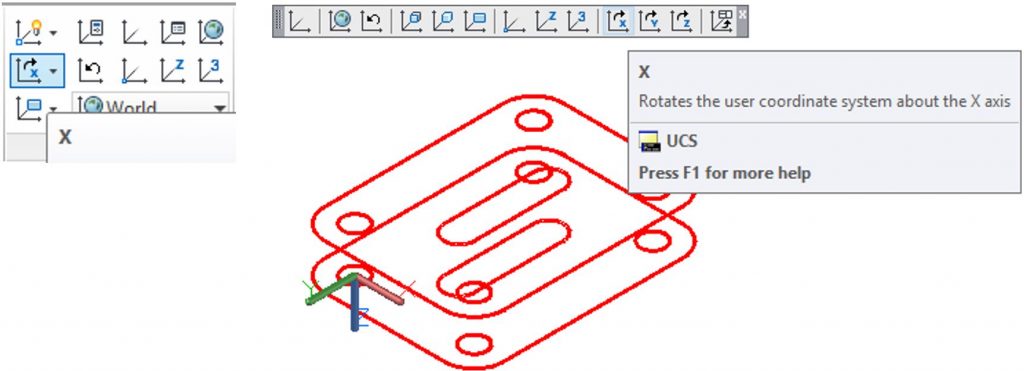
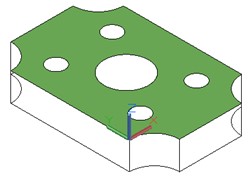
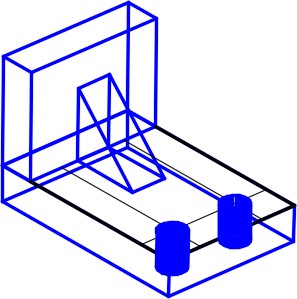
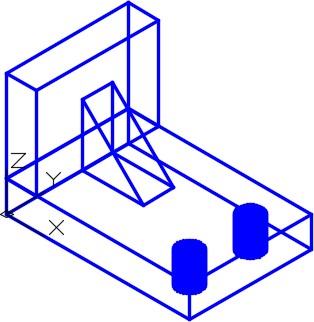
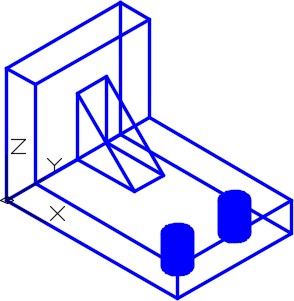
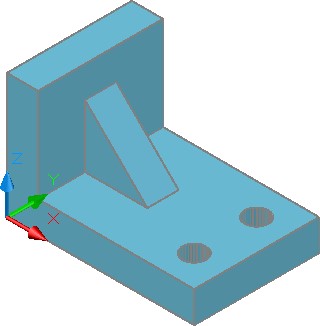
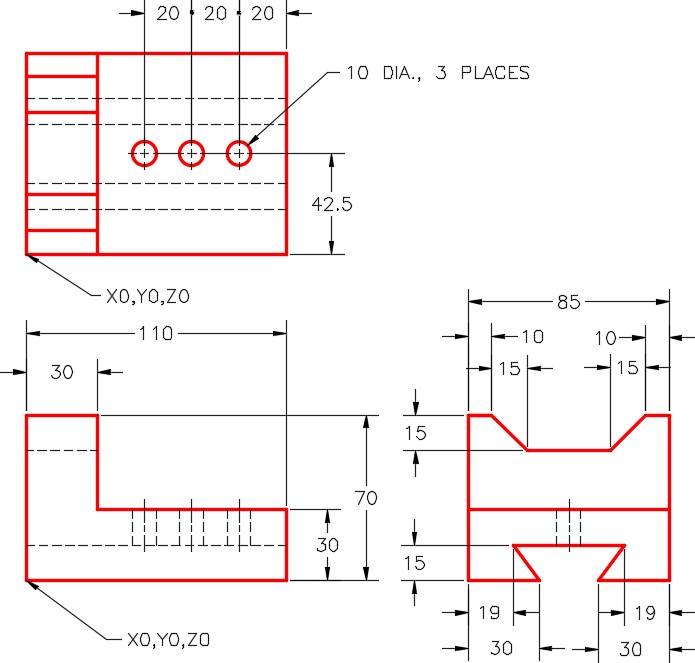
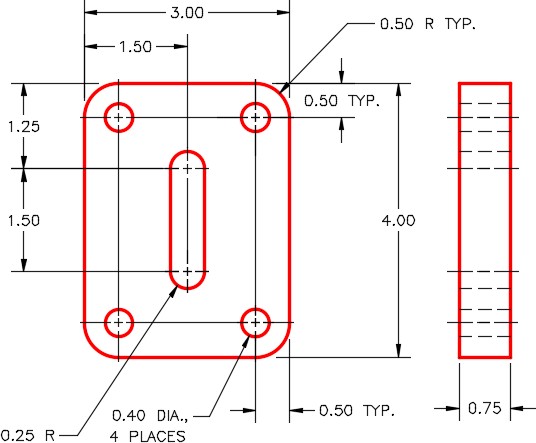
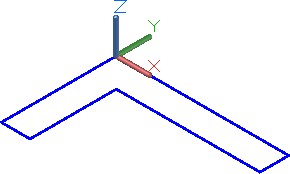
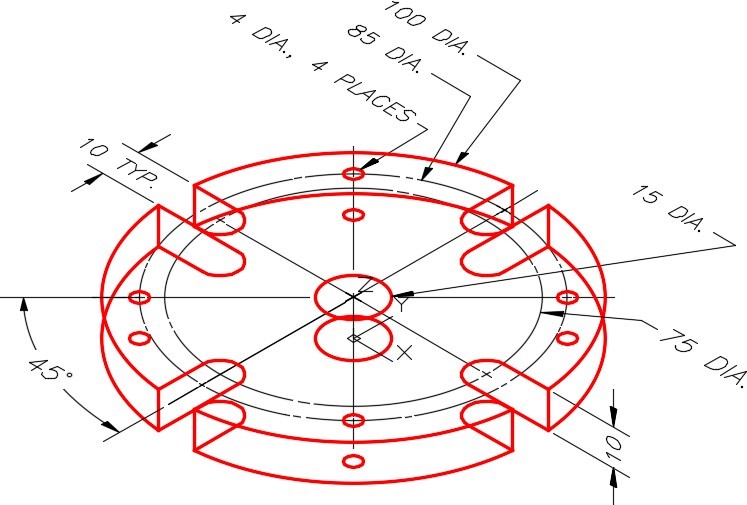
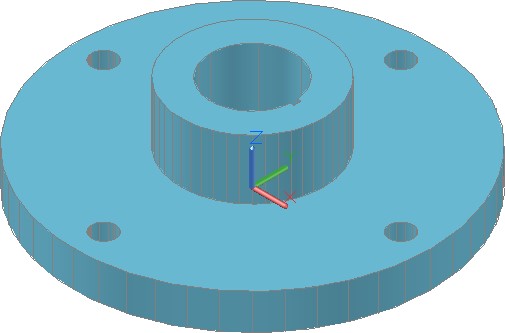
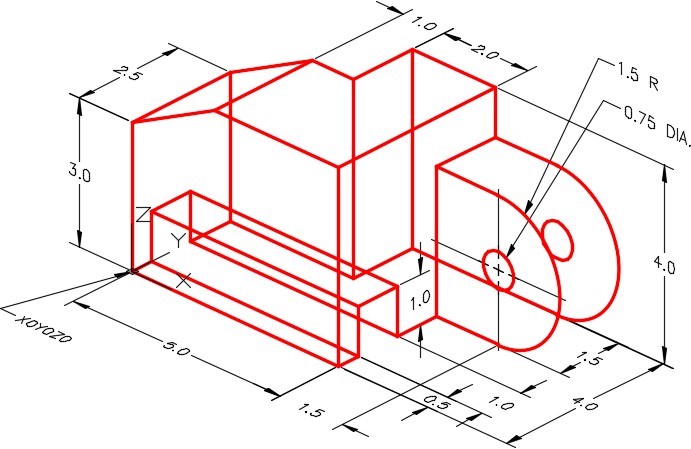
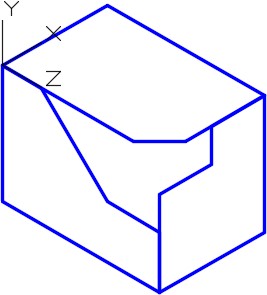
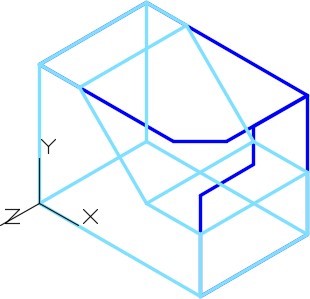
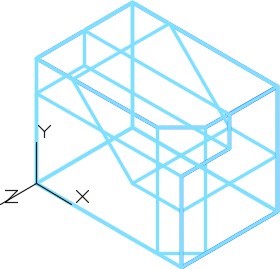
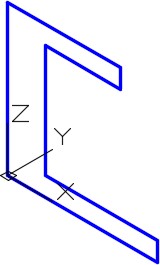
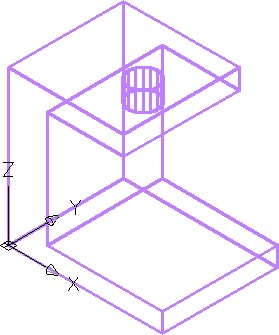
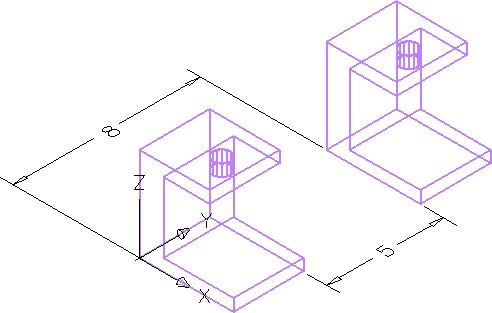
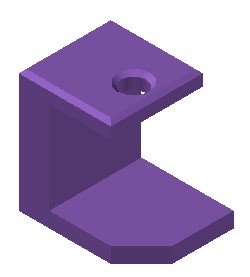
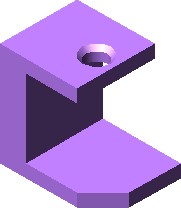
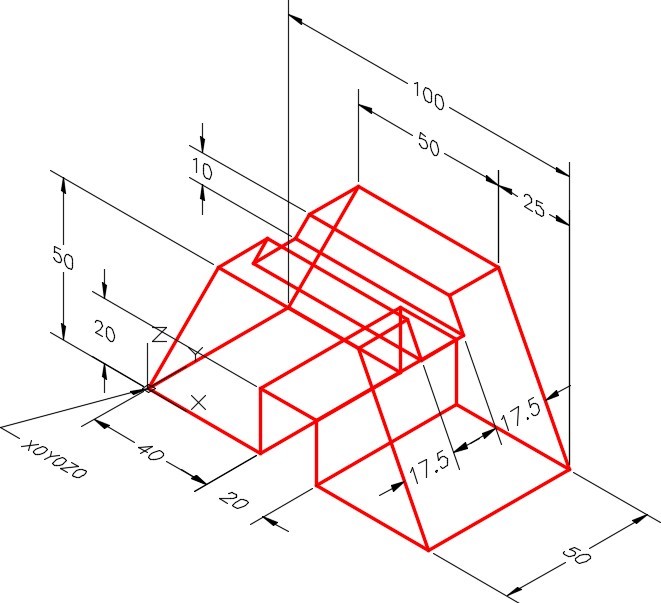
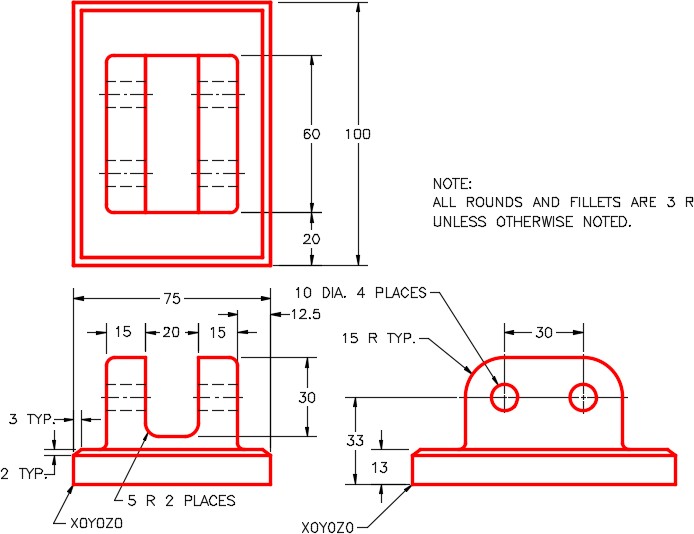
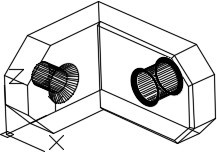
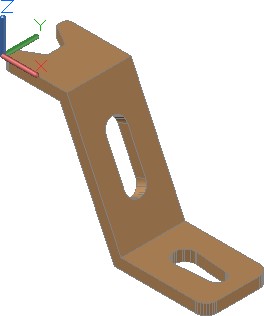
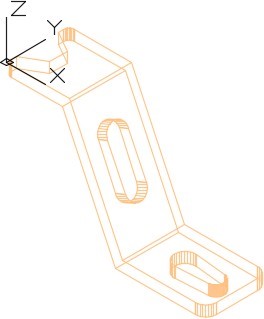
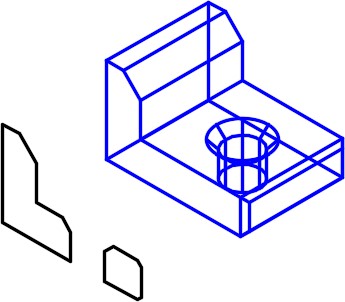
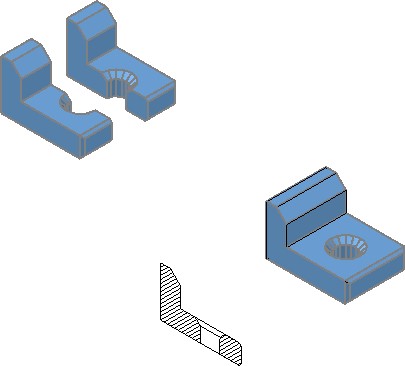
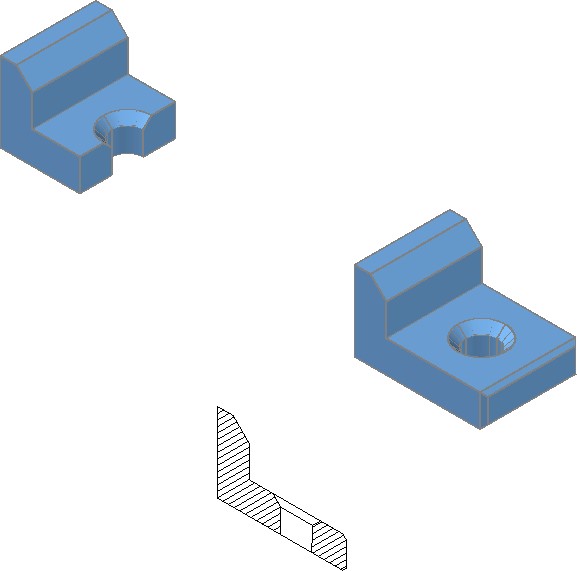
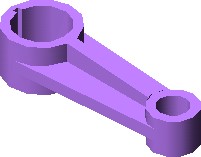
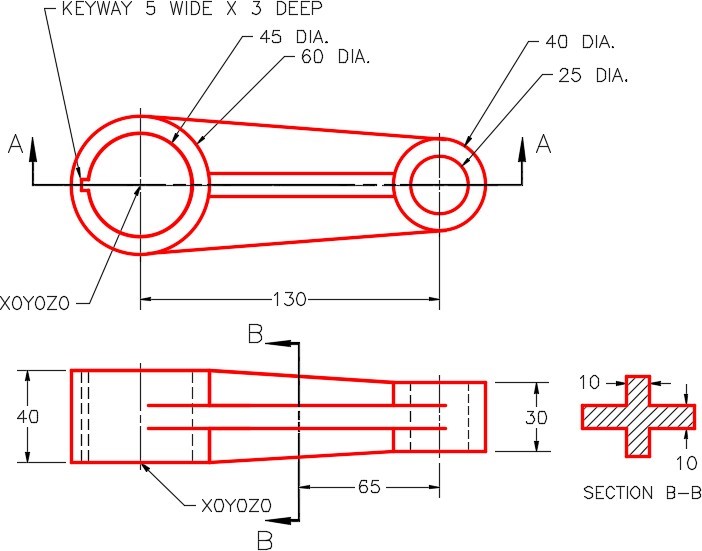
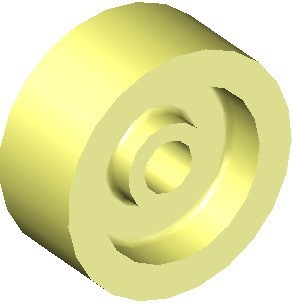
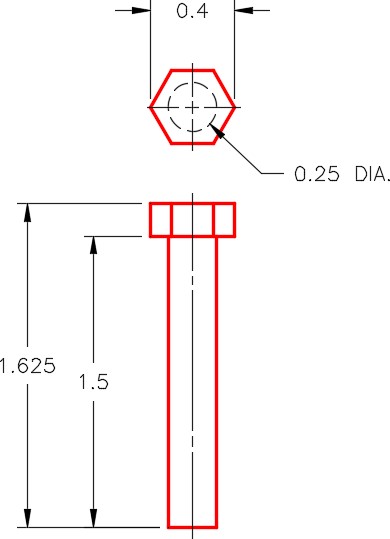
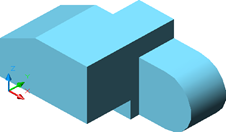
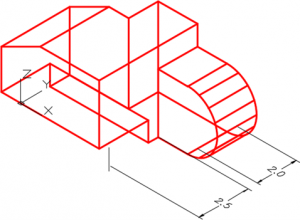
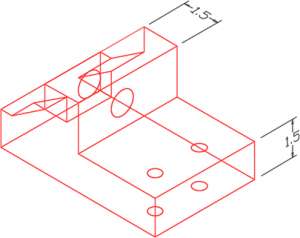
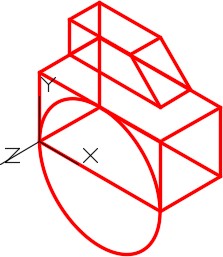
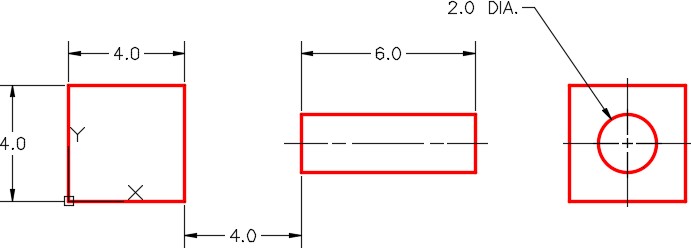
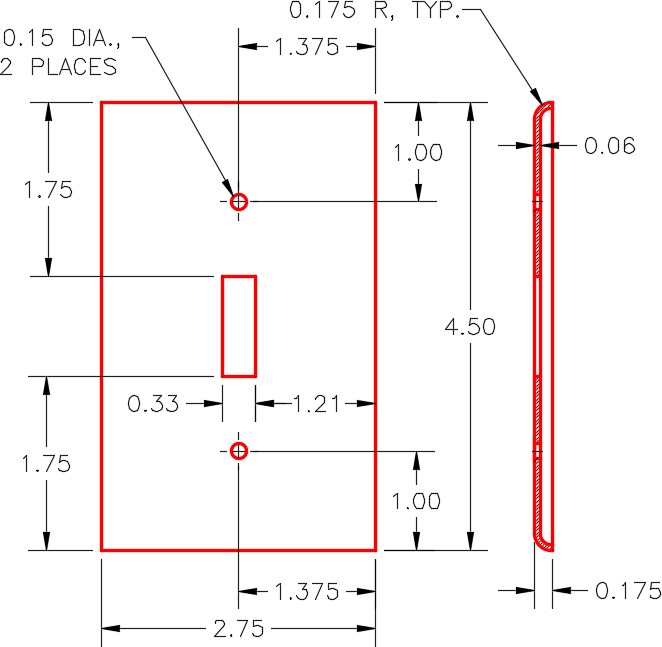
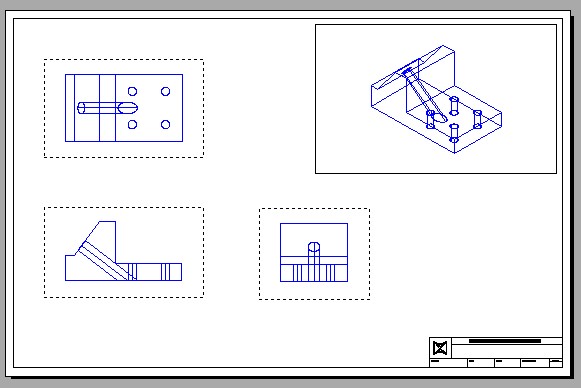
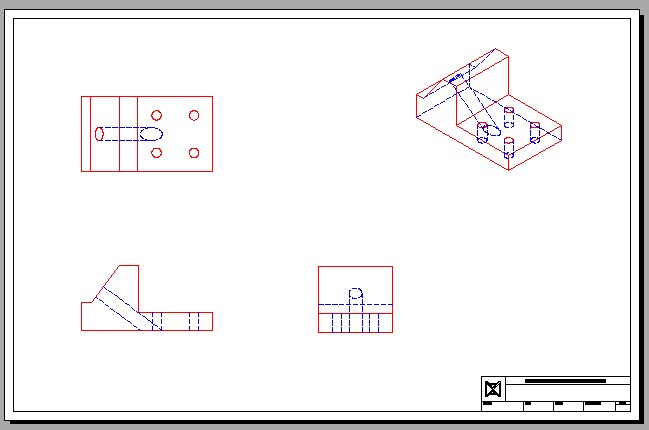
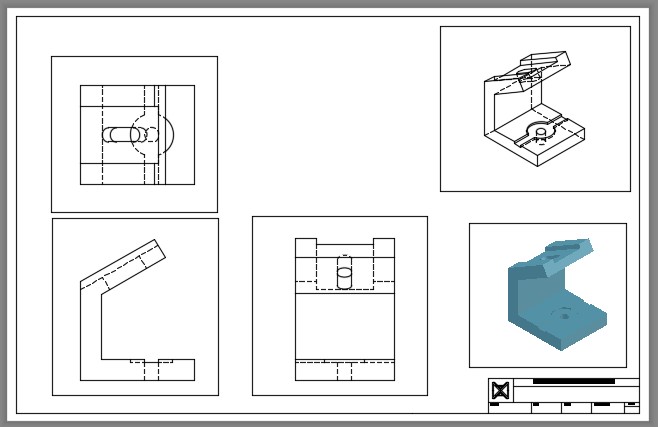
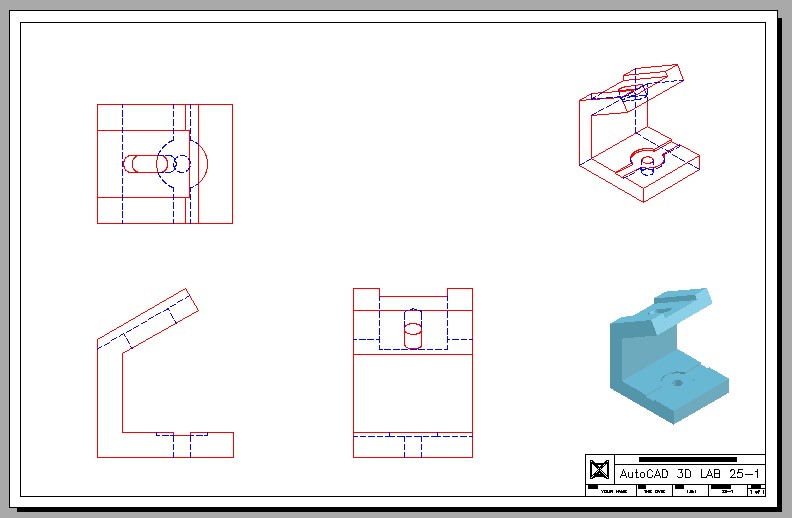
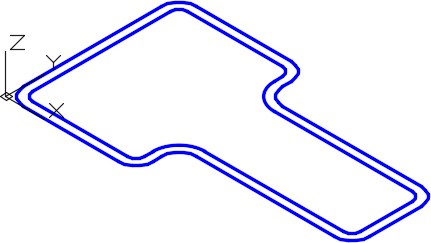
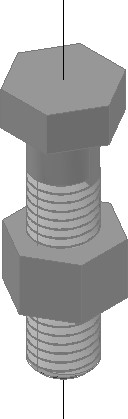
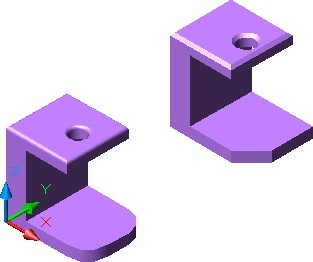
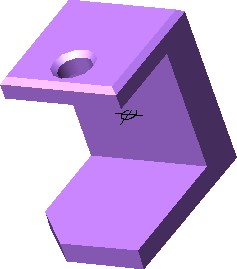
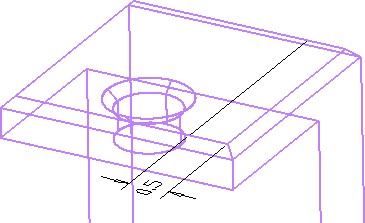
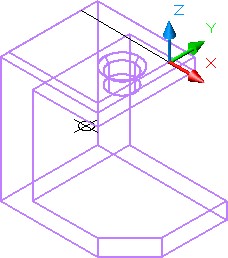
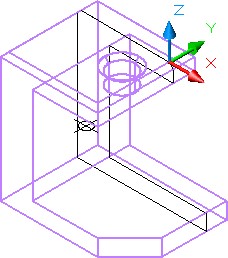
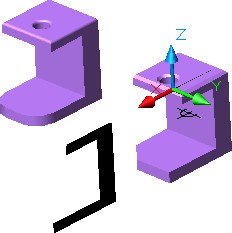
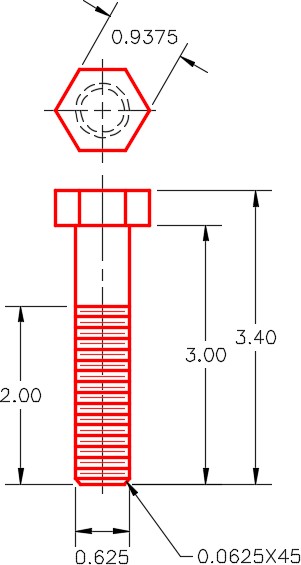
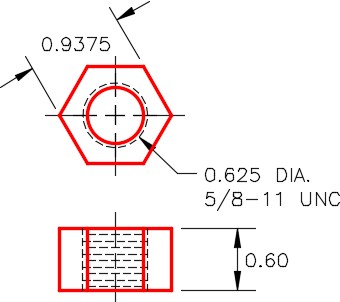
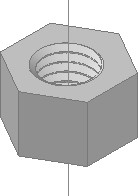
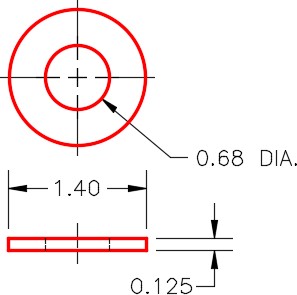
Draw a wireframe of the object shown in the figure. (Figure Step 1)
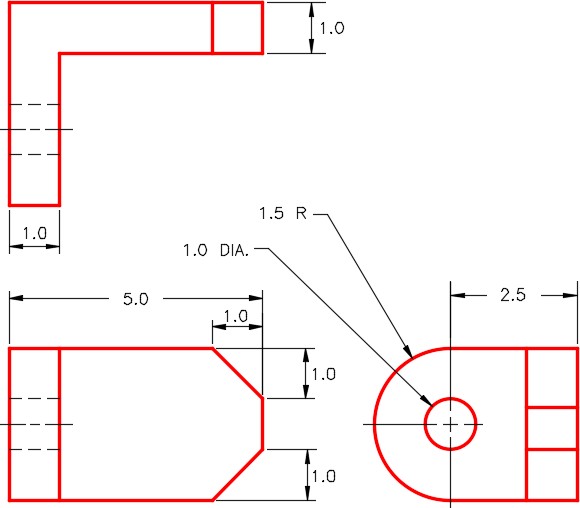
Figure Step 1
Dimensioned Multiview Drawing
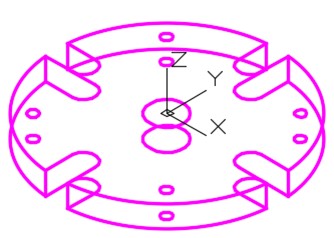
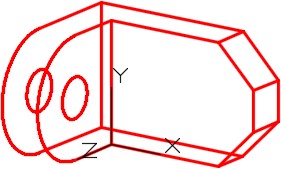
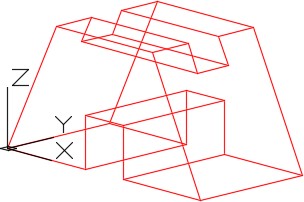
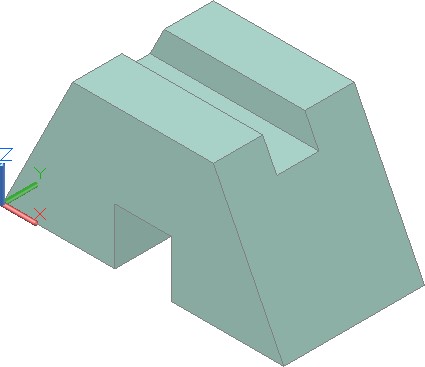
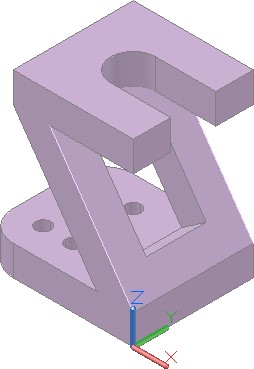
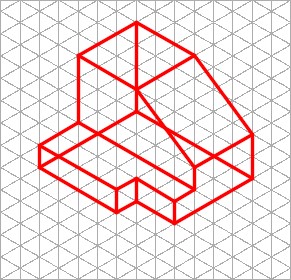
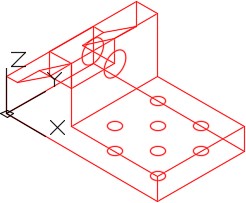
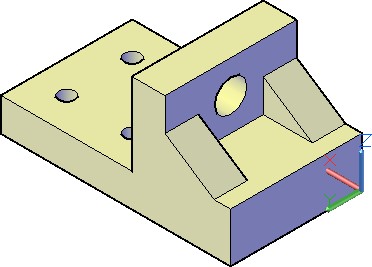
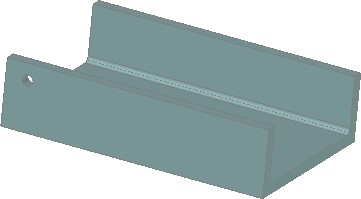
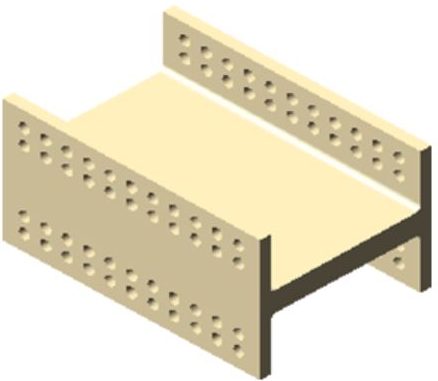
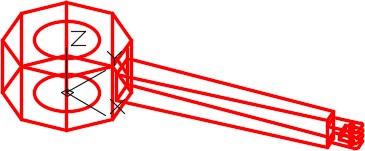
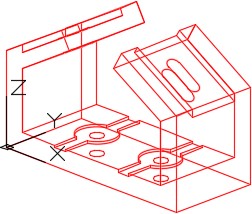
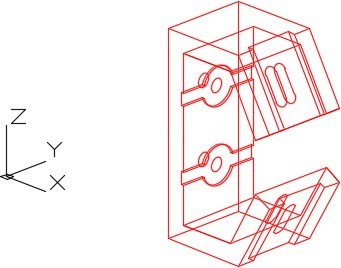
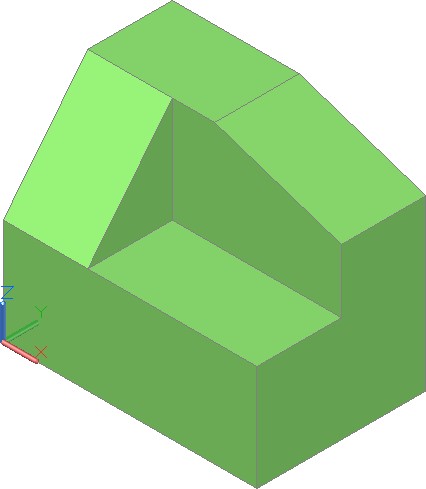
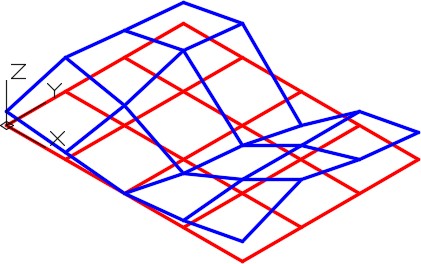
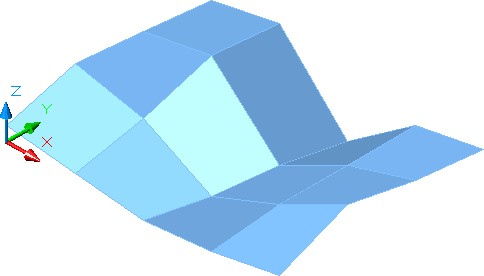
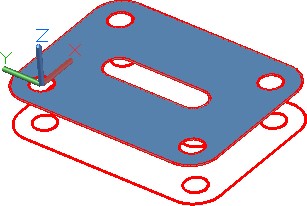
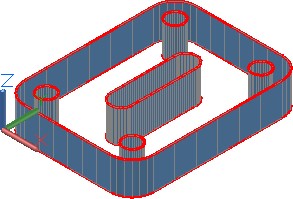
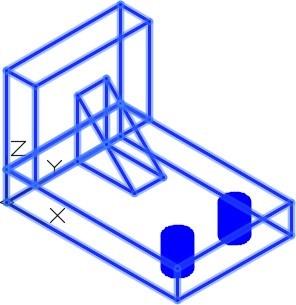
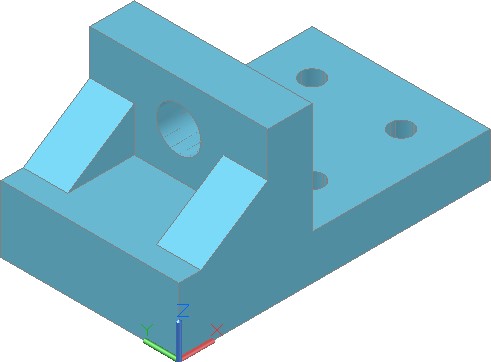
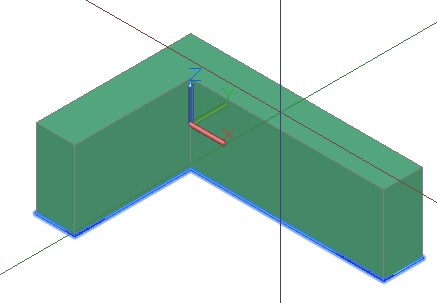
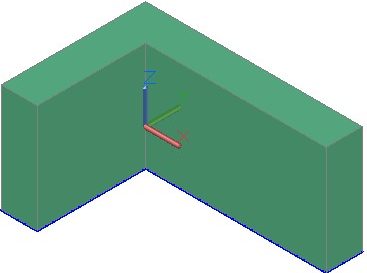
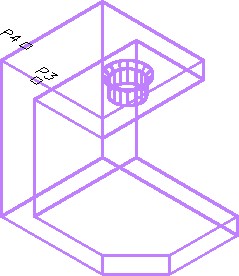
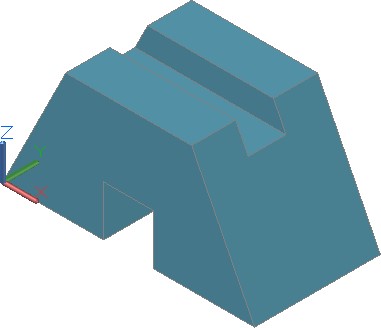
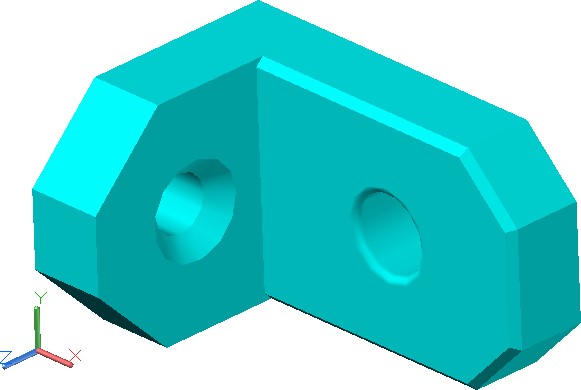
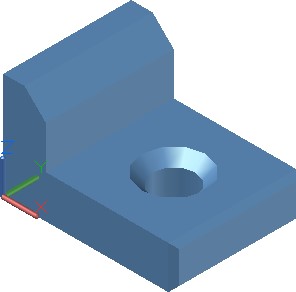
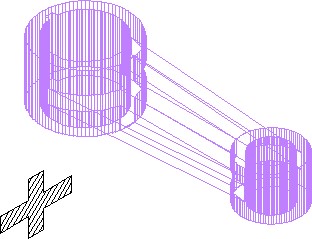
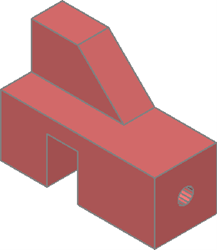
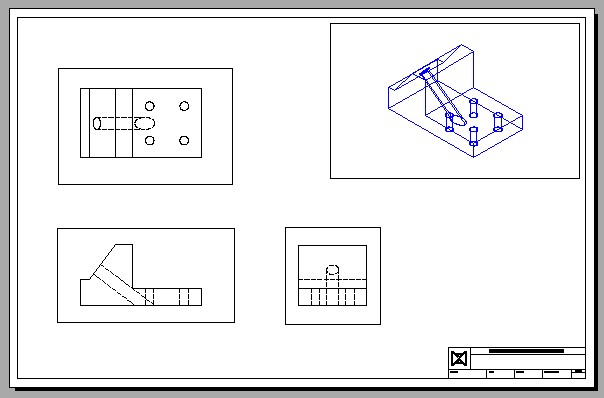
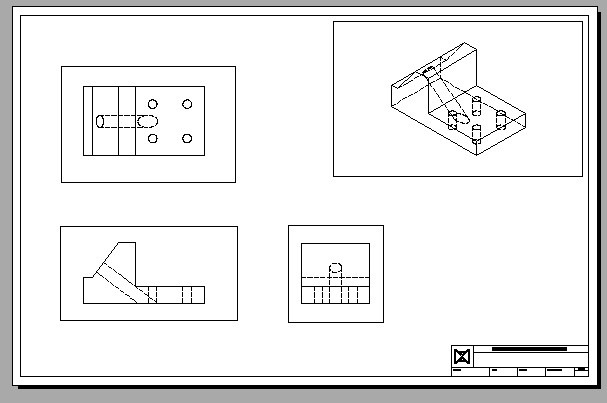
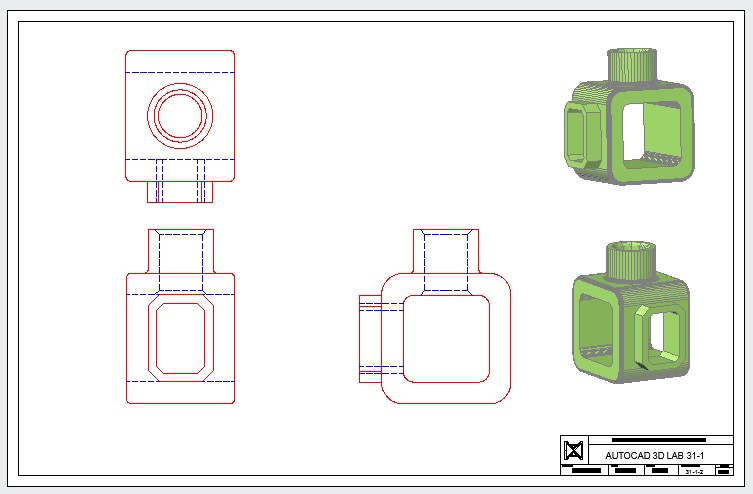
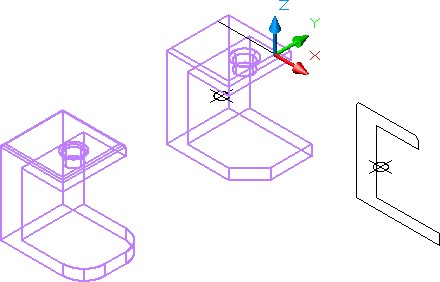
Step 2
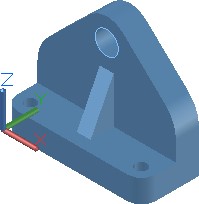
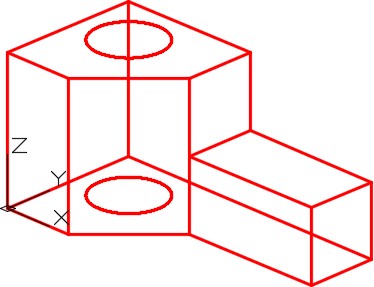
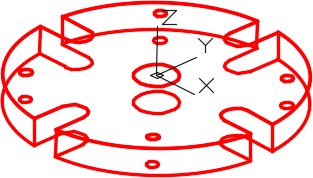
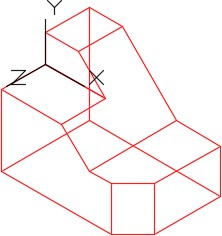
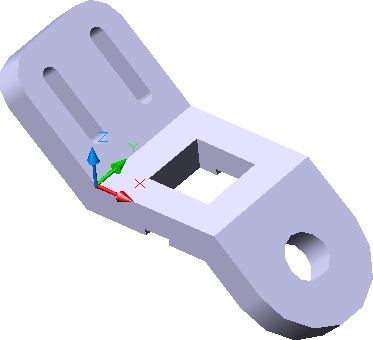
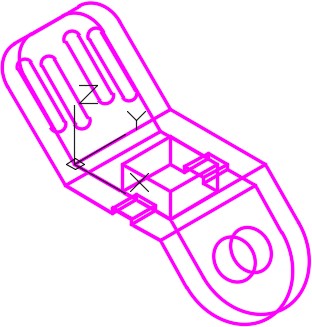
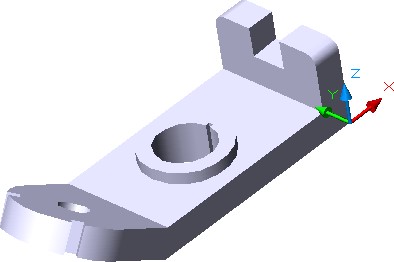
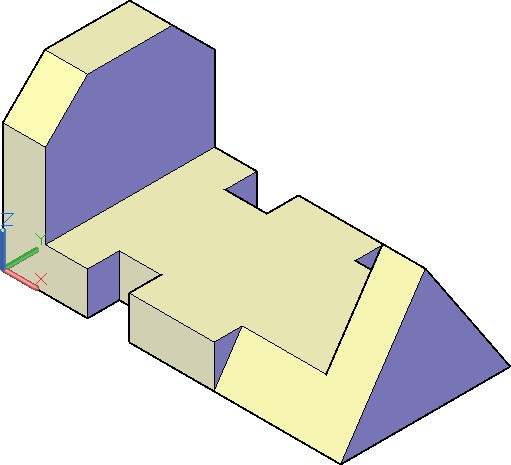
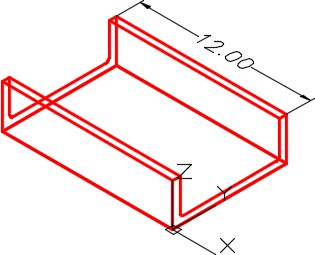
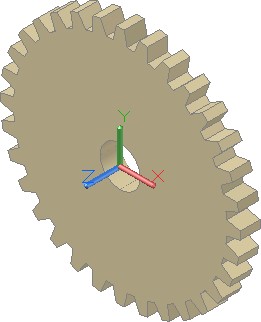
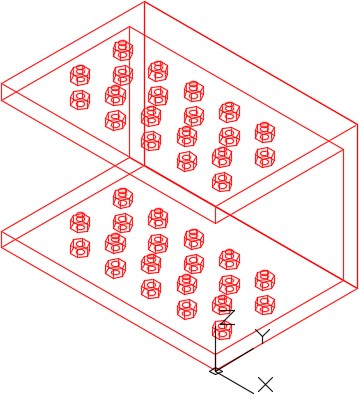
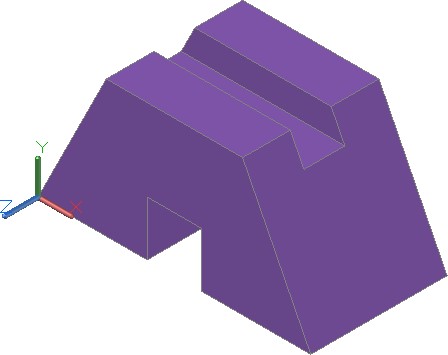
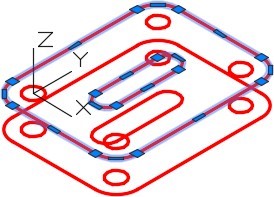
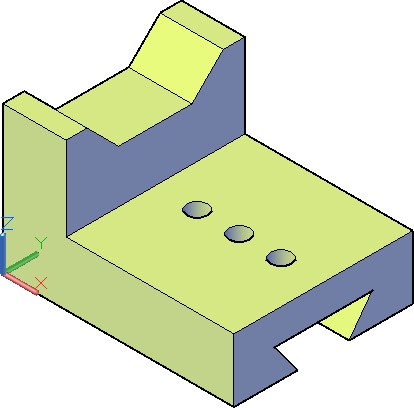
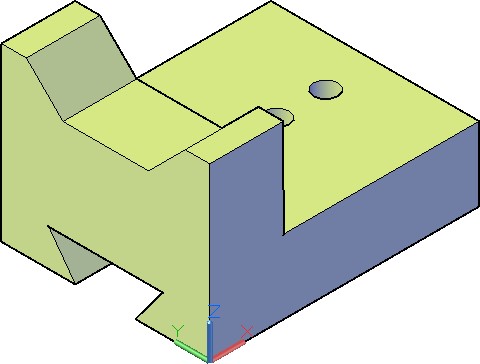
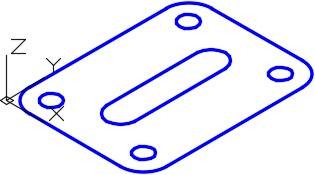
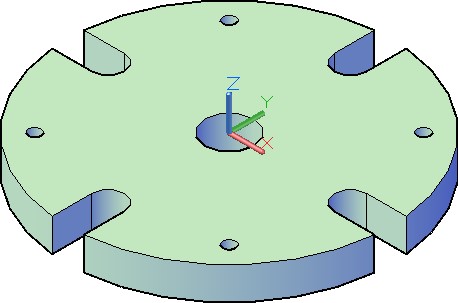
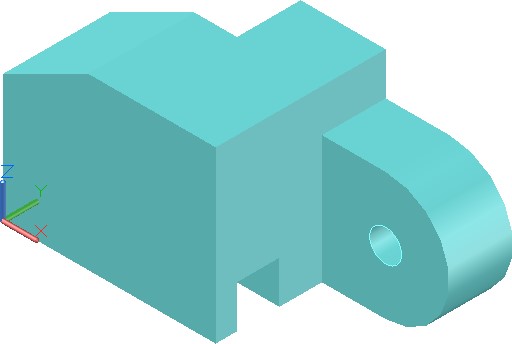
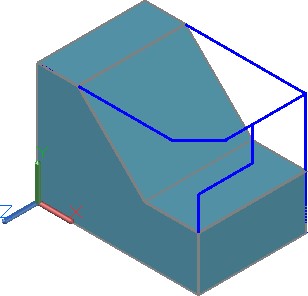
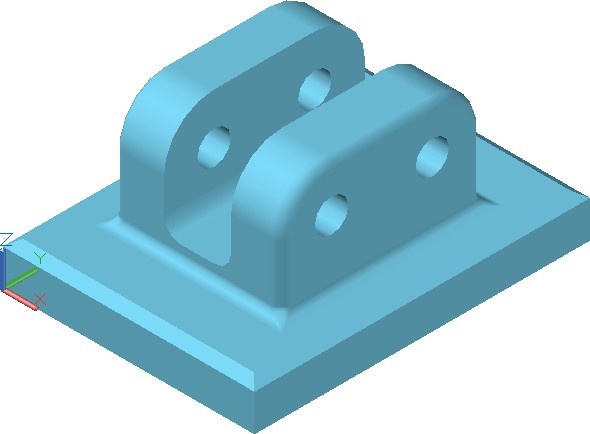
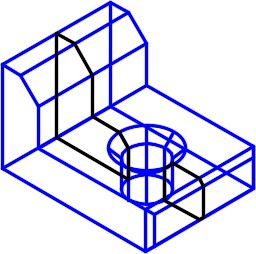
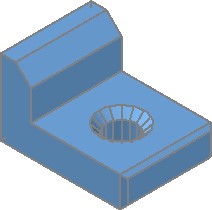
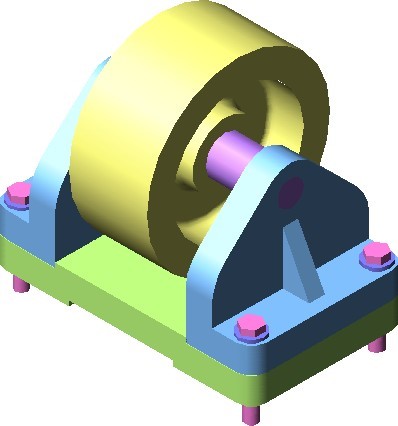
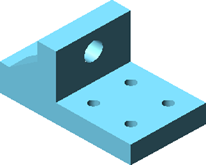
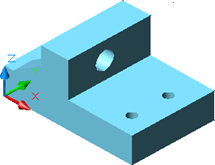
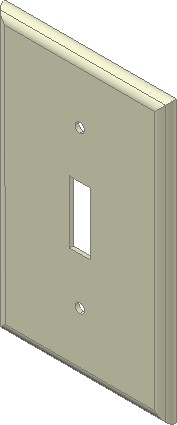
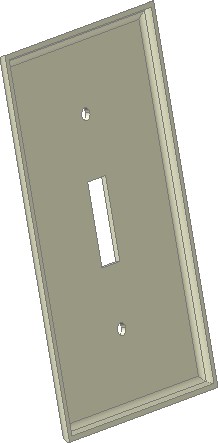
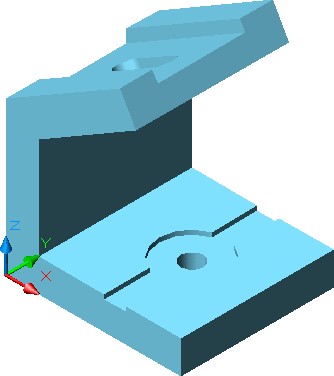
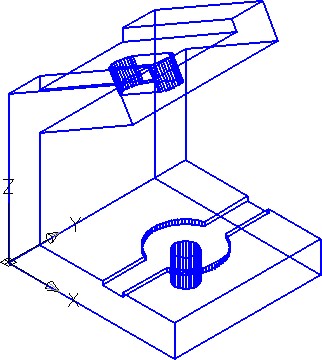
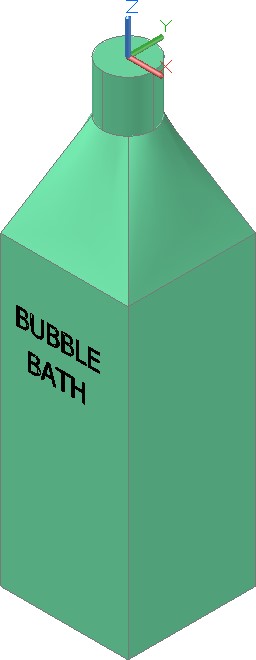
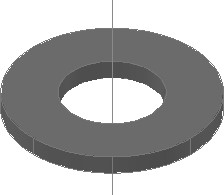
Pick appropriate mesh densities and on layer: Surface 2, create surface meshes on all surfaces including back and bottom. (Figure Step 2)
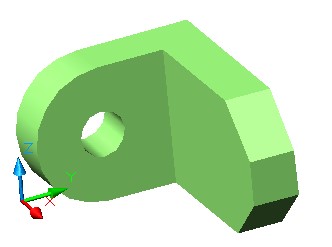
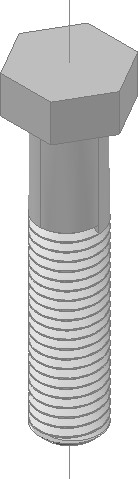
Figure Step 2
Completed Model SE Isometric View
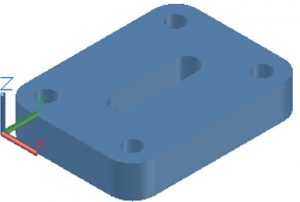
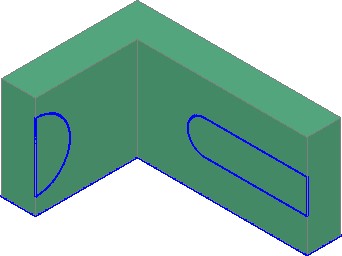
Step 3
Freeze layers: Construction and Model.
Step 4
Set the current visual style to Realistic. Use the 3DORBIT command to check that the model is surfaced on all sides.
Step 5
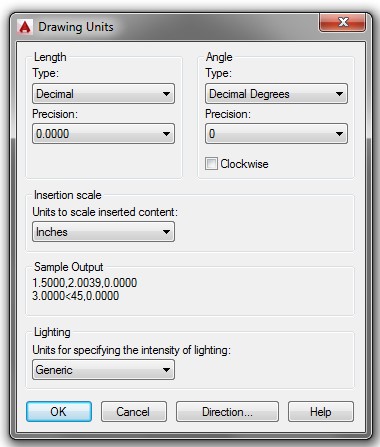
Set the Insertion Units, change the current UCS to World and check the model with the key.
Step 6
Save and close the drawing.
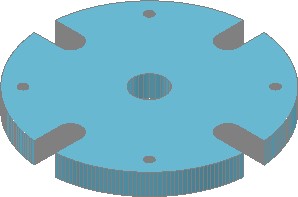
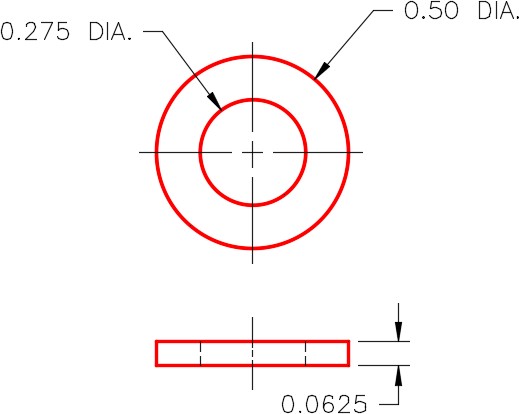
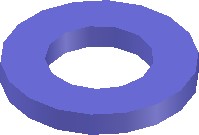
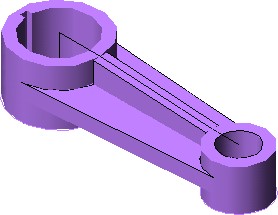
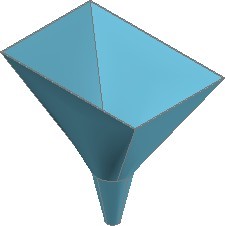
Lab Exercise 13-2
Time allowed: 45 minutes.
| Drawing Name | Template | Units |
|---|
| AutoCAD 3D Lab 13-2 | N/A | Inches |
Step 1
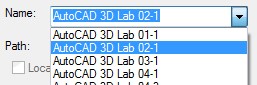
Open the drawing: AutoCAD 3D Lab 04-1.
Step 2
Save the drawing with the name: AutoCAD 3D Lab 13-2.
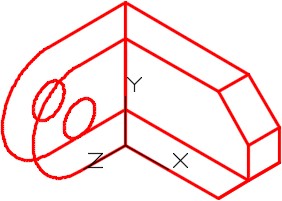
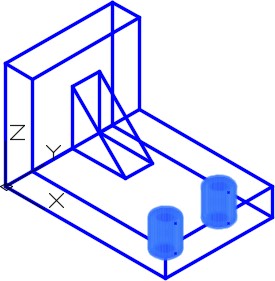
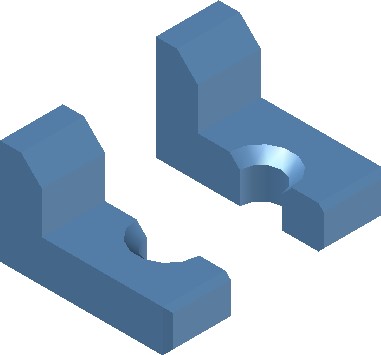
Step 3
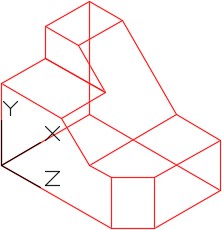
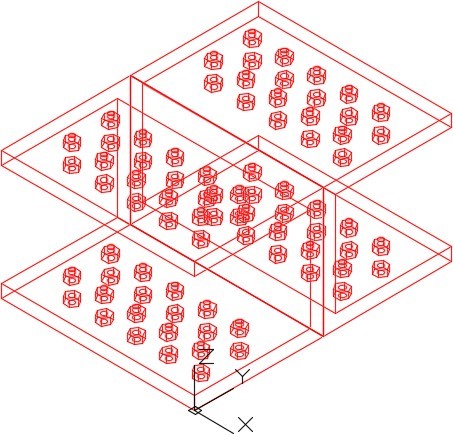
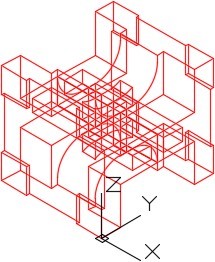
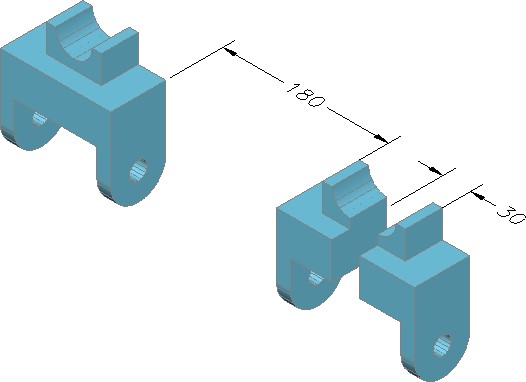
On layer: Surface 5, create surface meshes on all surfaces including back and bottom. (Figure Step 3)
Step 4
Freeze layers: Construction and Model.
Step 5
Set the current visual style to Realistic. Use the 3DFORBIT command to check that the model is surfaced on all sides.

Figure Step 3 Completed Model SE Isometric View
Step 6
Save and close the drawing.
AUTHOR’S COMMENTS: Do not be concerned if your shaded model does not match the figures in the module exactly. There are many visual style settings that can be set to change the look of the shaded model. For now, all you should be concerned about is being able to surface the model.The advanced features of customizing visual styles are taught in the AutoCAD 3D Advanced book.
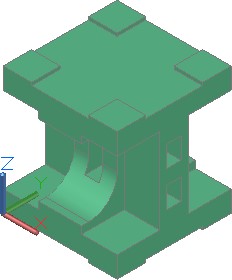
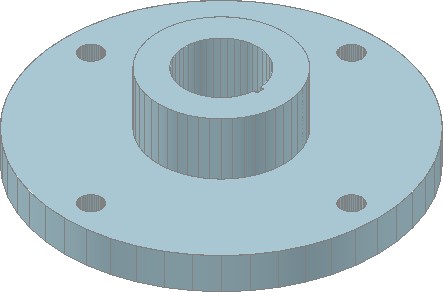
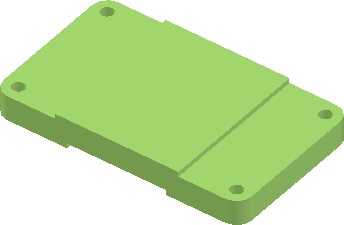
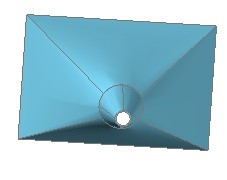
Lab Exercise 13-3
Time allowed: 45 minutes.
| Drawing Name | Template | Units |
|---|
| AutoCAD 3D Lab 13-3 | N/A | Inches |
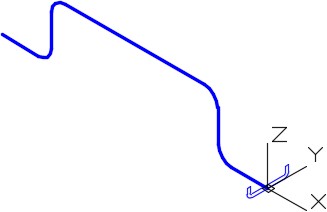
Step 1
Open the drawing: AutoCAD 3D Lab 08-1.
Step 2
Save the drawing with the name: AutoCAD 3D Lab 13-3.
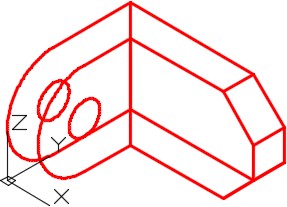
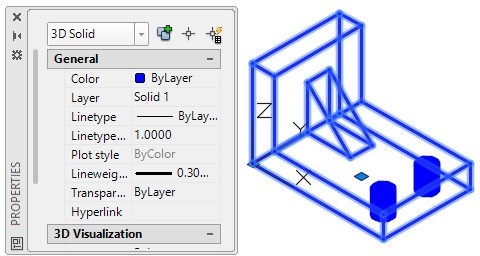
Step 3
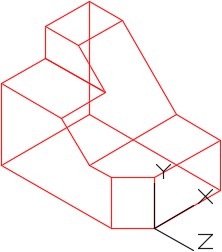
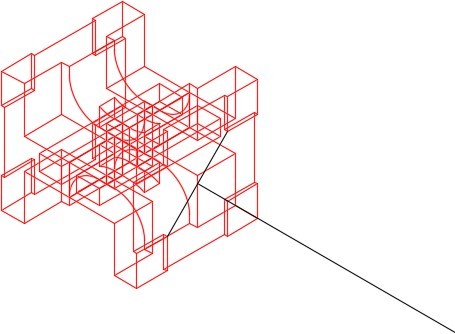
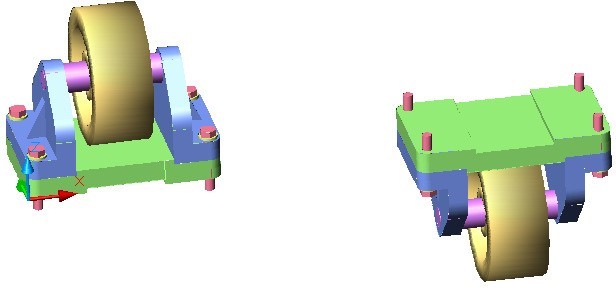
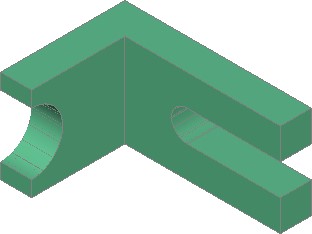
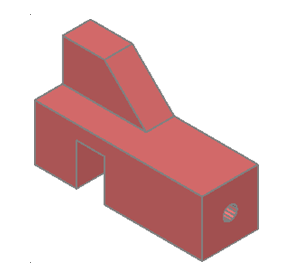
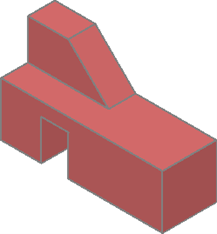
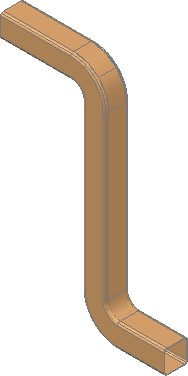
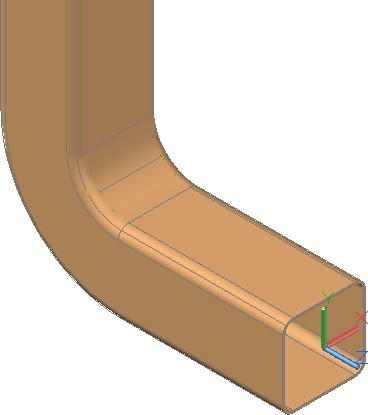
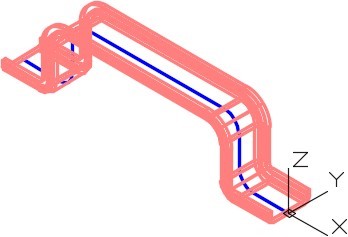
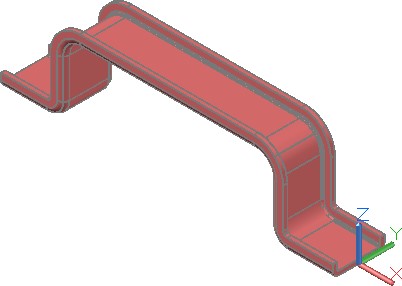
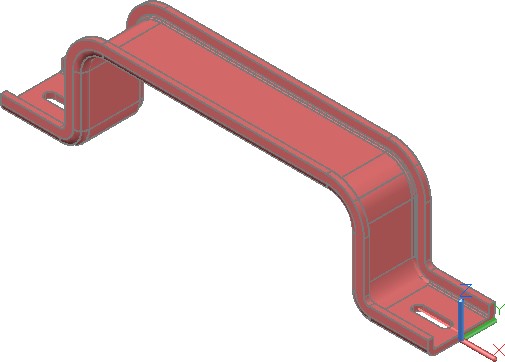
On layer: Surface 1, create surfaces on each side including back and bottom. (Figure Step 3)
Step 4
Freeze layers: Construction and Model.
Step 5
Set the current visual style to Realistic. Use the 3DFORBIT command to check that the model is surfaced on all sides.
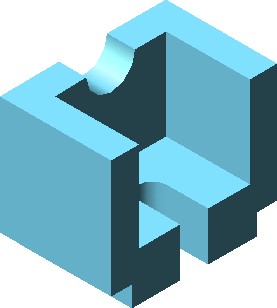
Figure Step 3 Completed Model SE Isometric View
Step 6
Save and close the drawing.
AUTHOR’S COMMENTS: Do not be concerned if your shaded model does not match the figures in the module exactly. There are many visual style settings that can be set to change the look of the shaded model. For now, all you should be concerned about is being able to surface the model.The advanced features of customizing visual styles are taught in the AutoCAD 3D Advanced book.
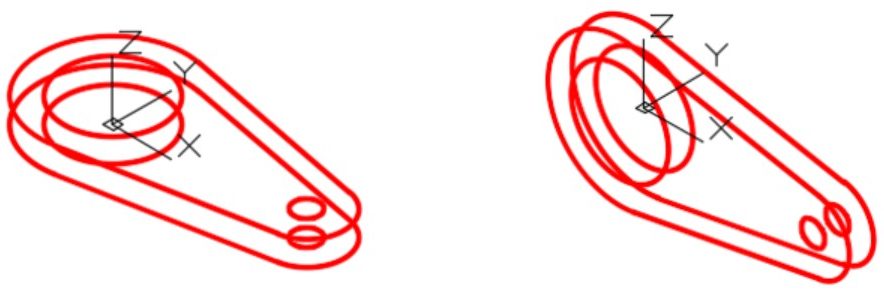
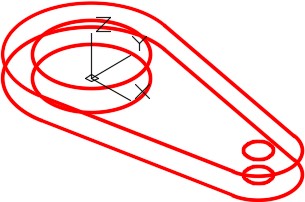
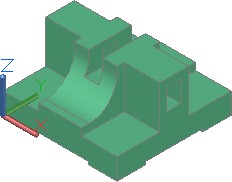
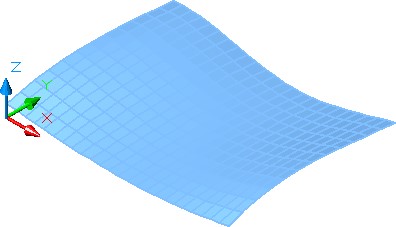
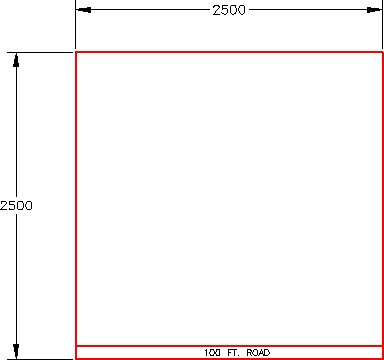
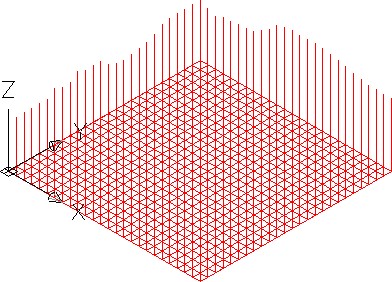
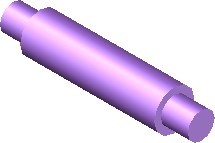
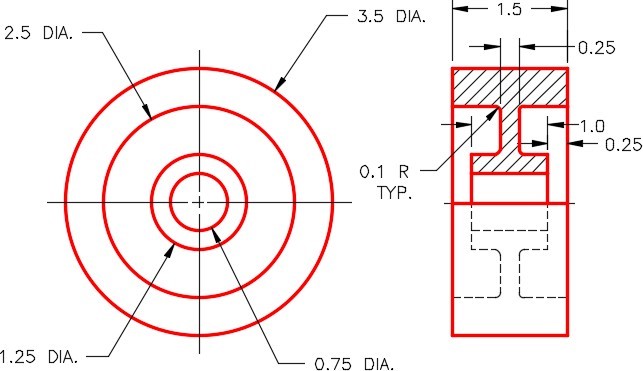
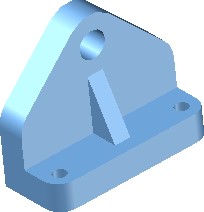
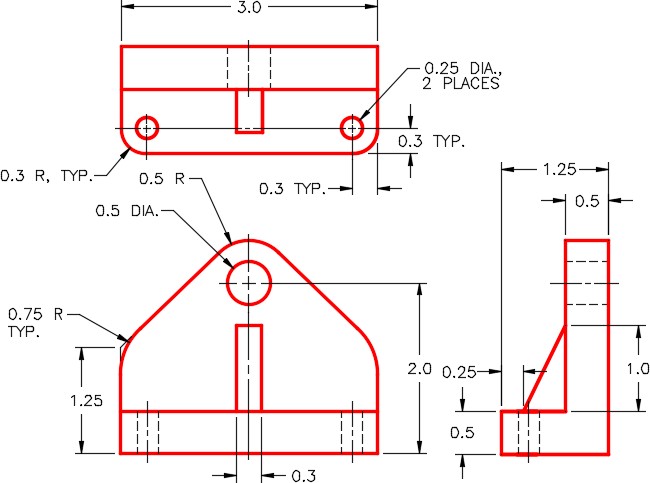
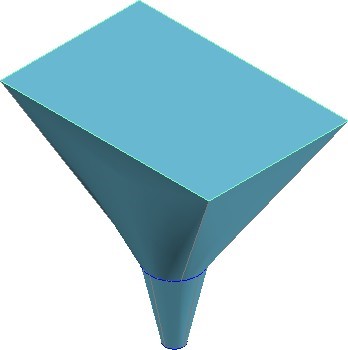
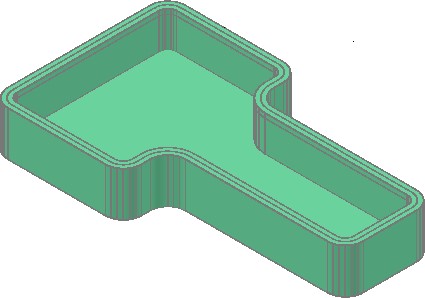
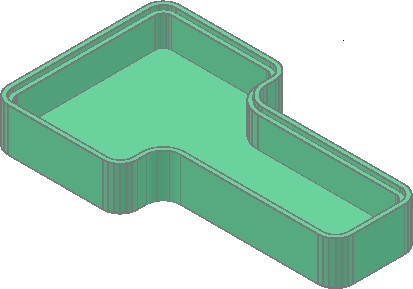
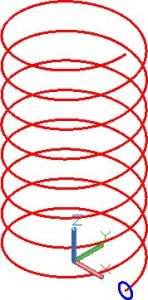
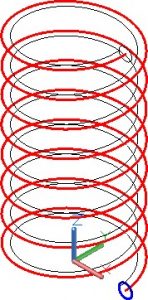
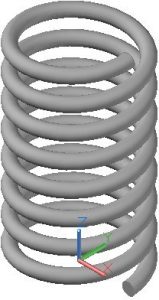
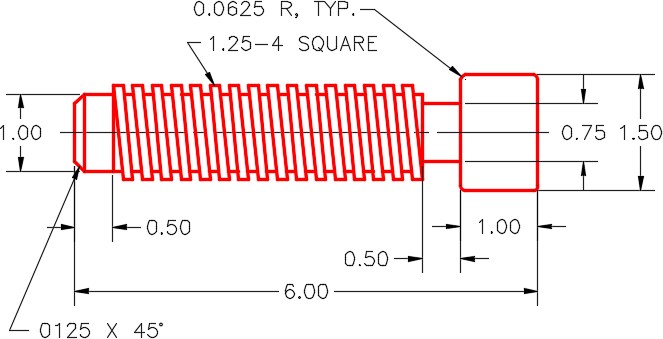
Lab Exercise 13-4
Time allowed: 45 minutes.
| Drawing Name | Template | Units |
|---|
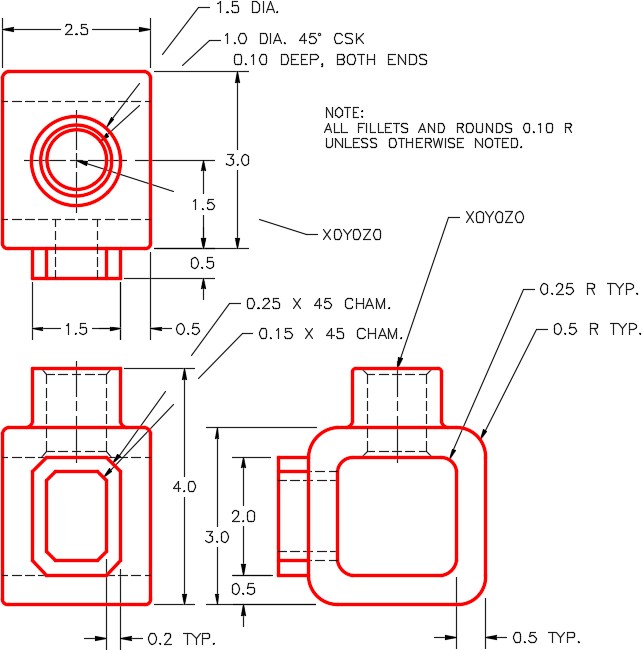
| AutoCAD 3D Lab 13-4 | 3D Layout Metric | Millimeters |
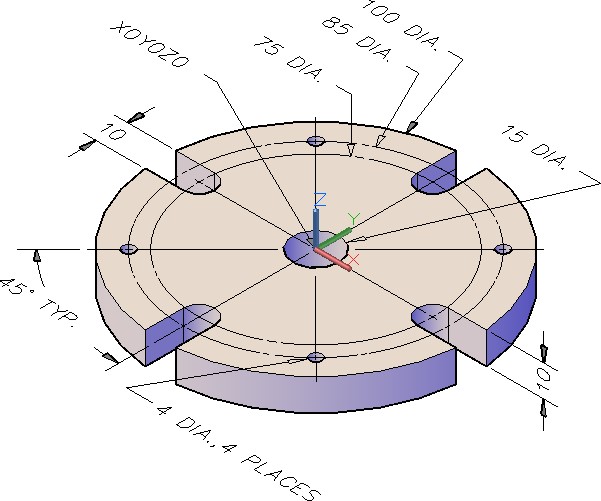
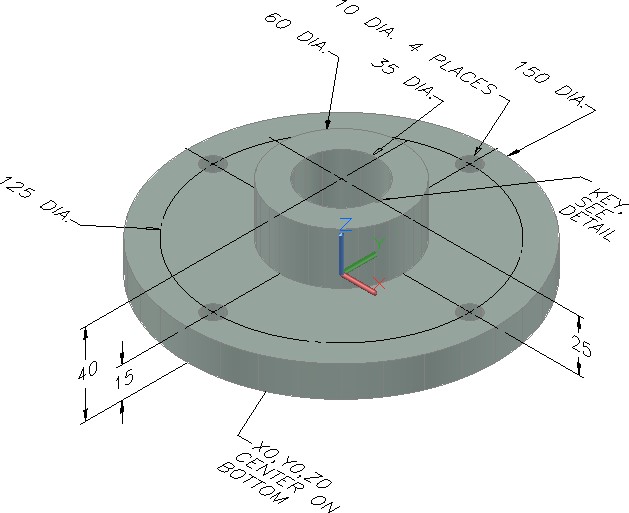
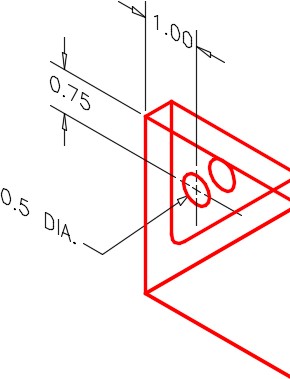
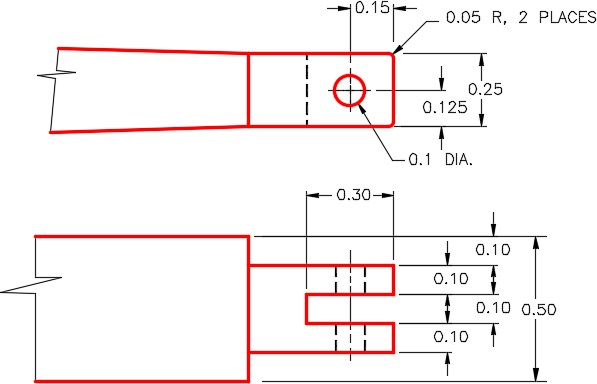
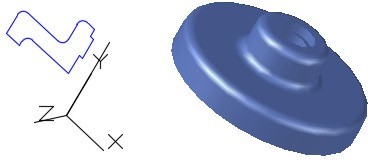
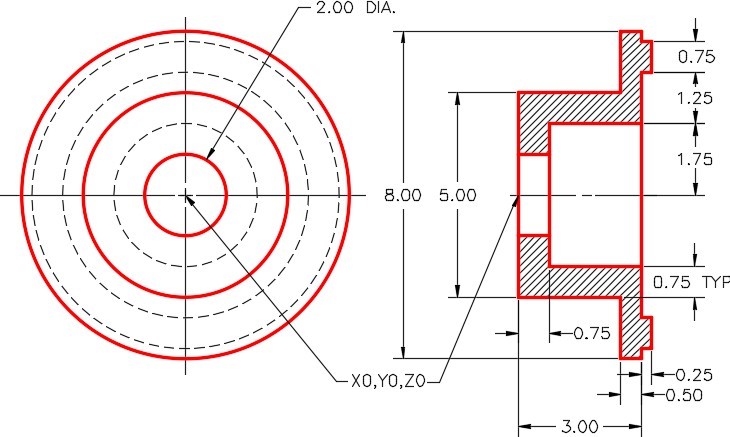
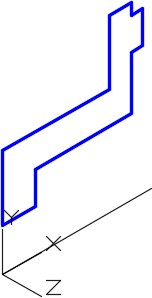
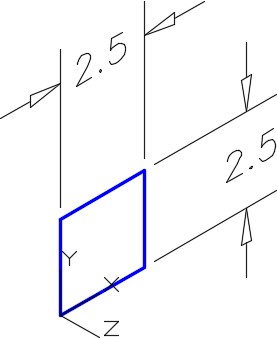
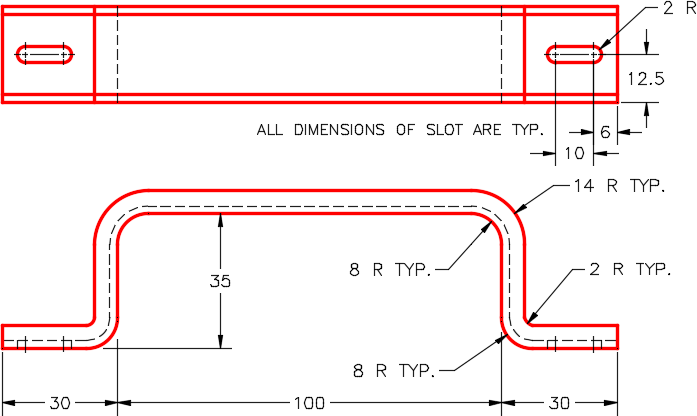
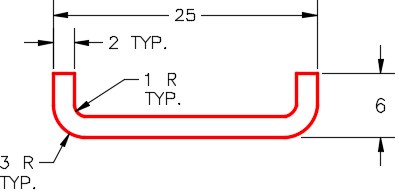
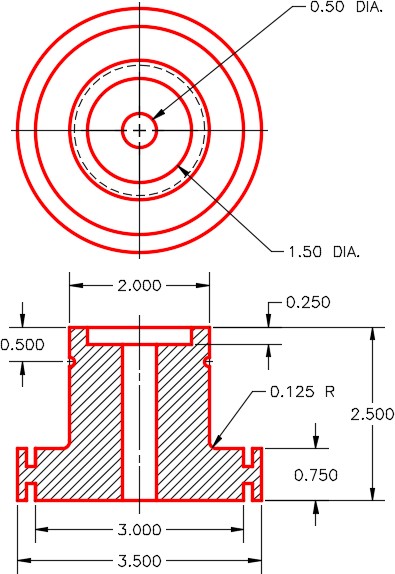
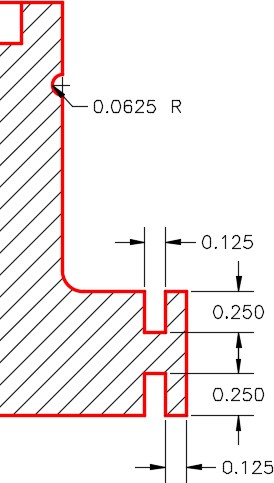
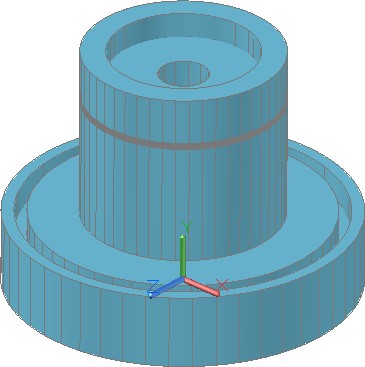
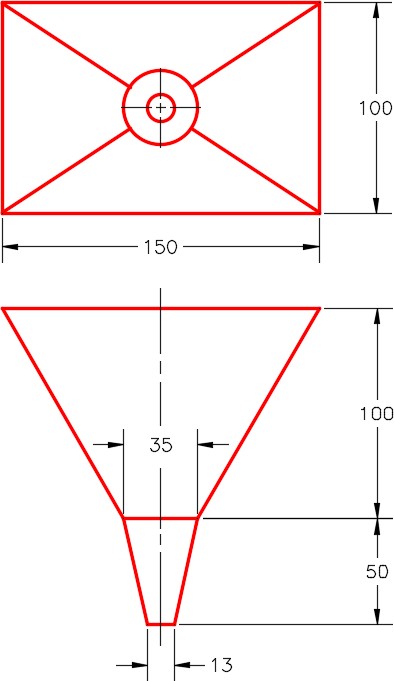
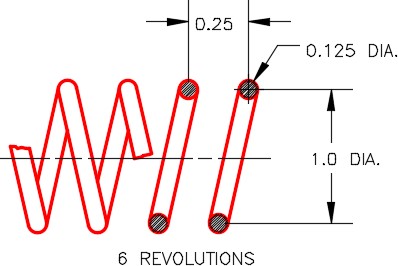
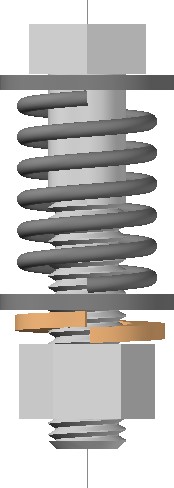
Step 1
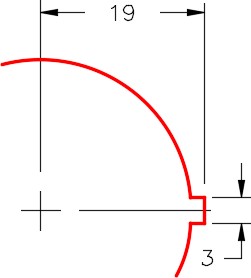
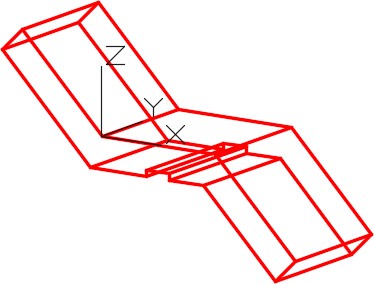
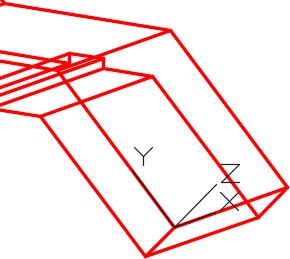
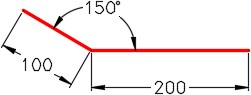
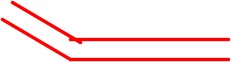
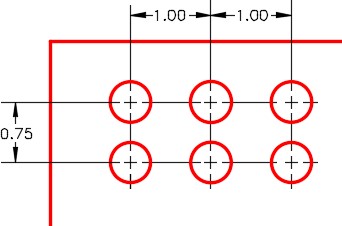
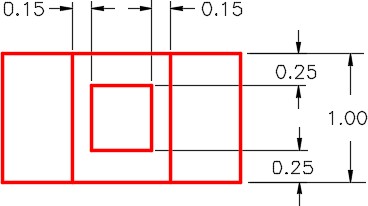
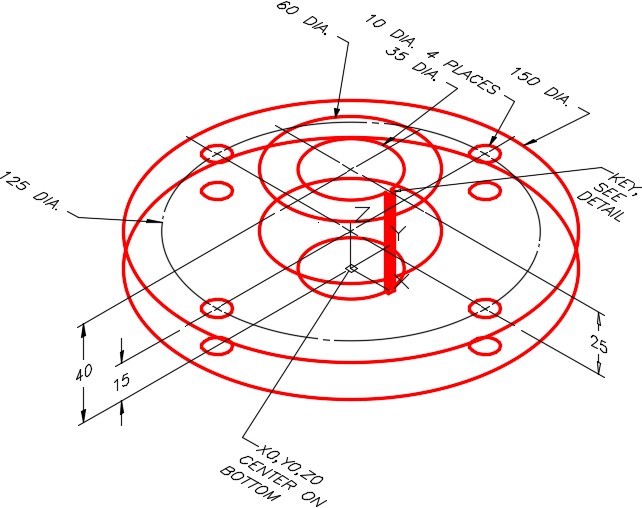
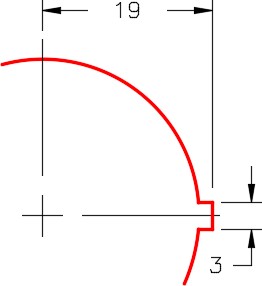
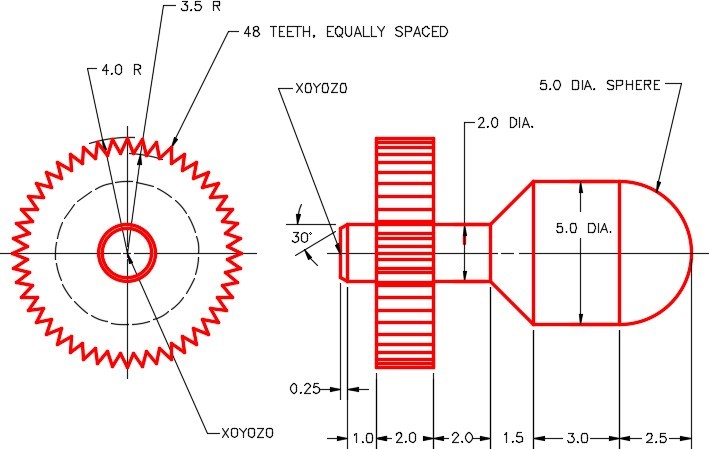
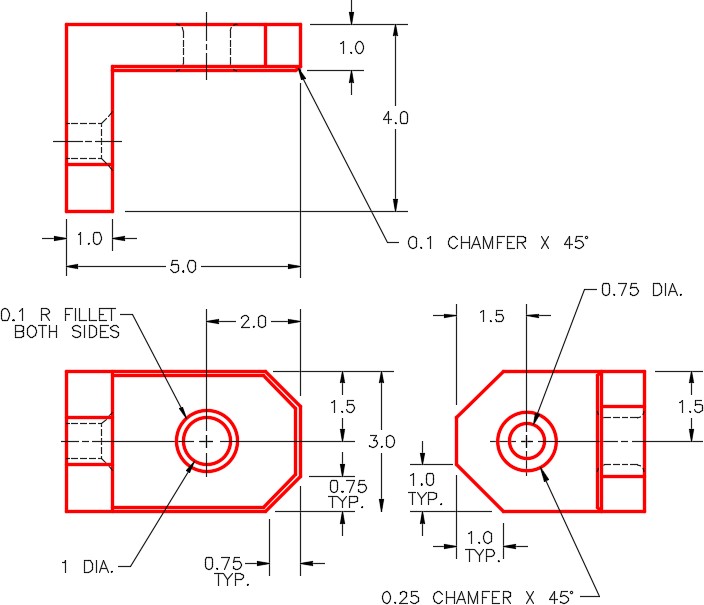
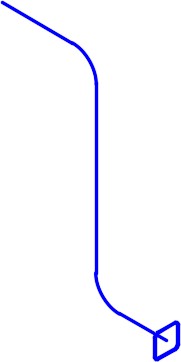
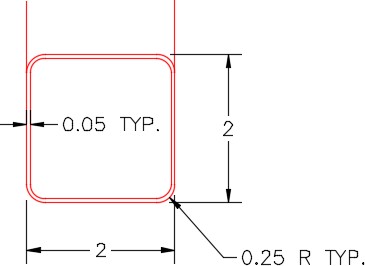
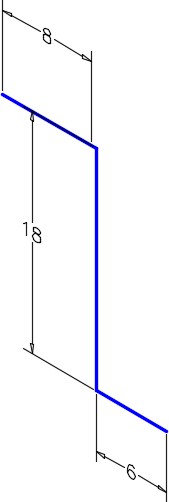
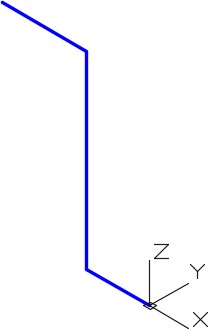
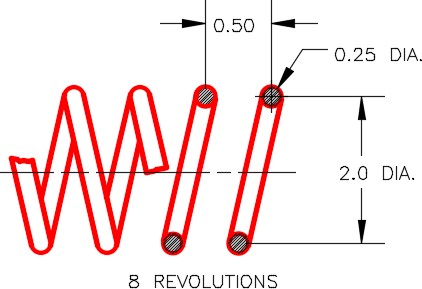
On layer: Pline, draw the cross section of the top half of the model on the right side UCS. (Figure Step 1A and 1B)
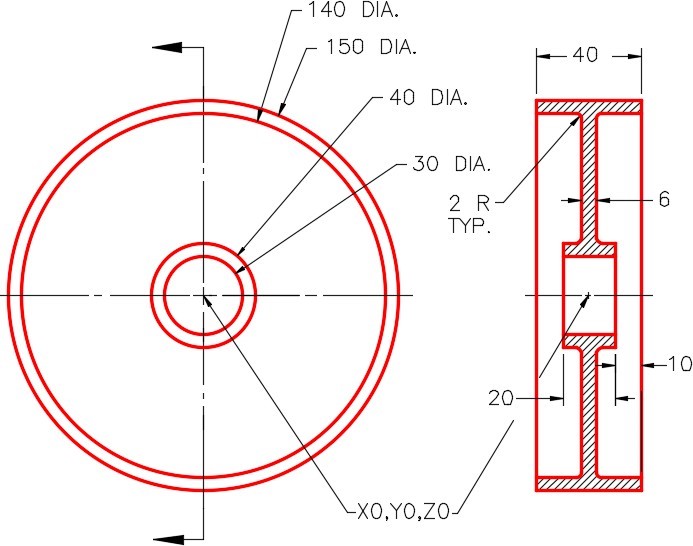
Figure Step 1A
Dimensioned Multiview Drawing
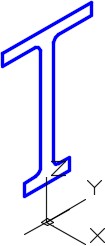
Figure Step 1B View Of a Cross Section to Revolve
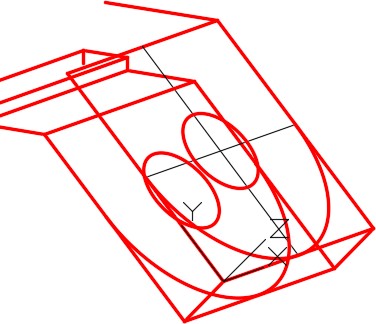
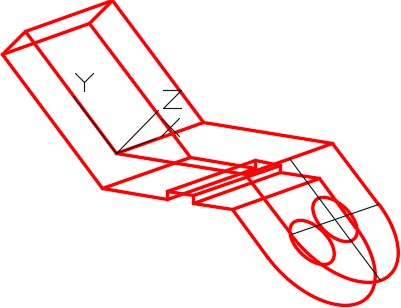
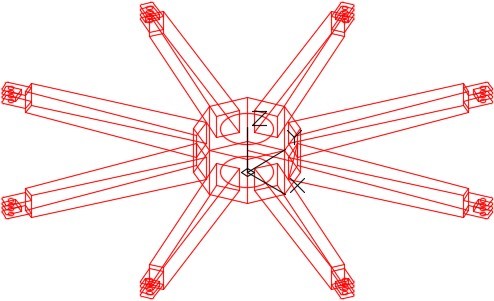
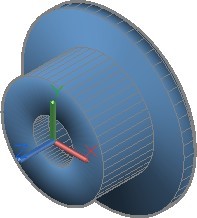
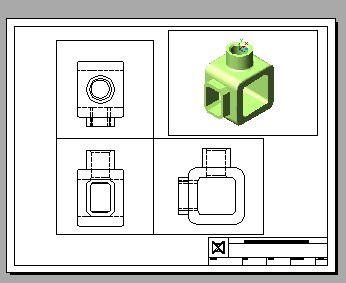
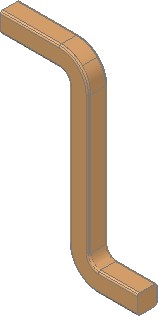
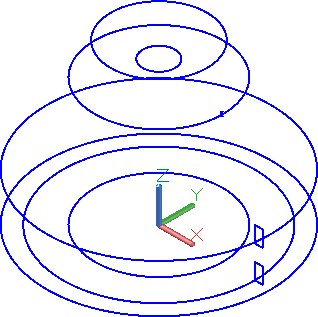
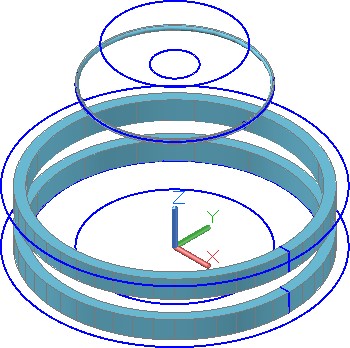
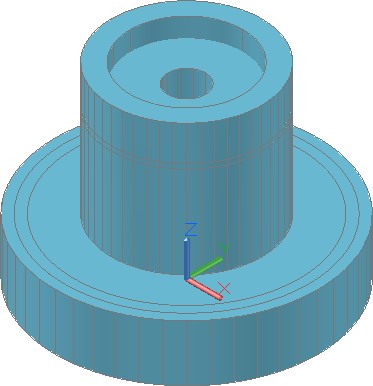
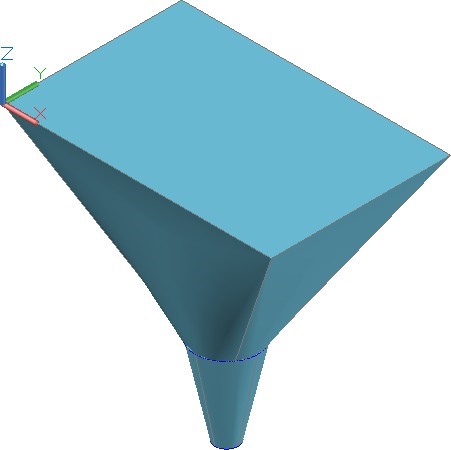
Step 2
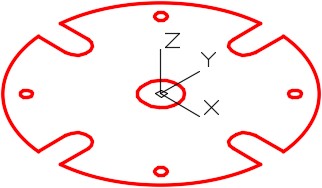
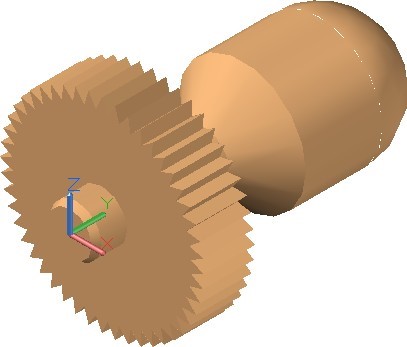
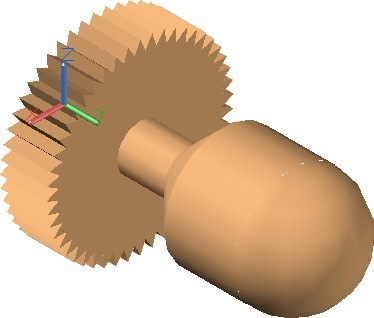
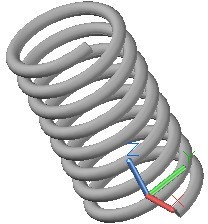
Create a surface revolution on layer: Surface 1. (Figure Step 2)
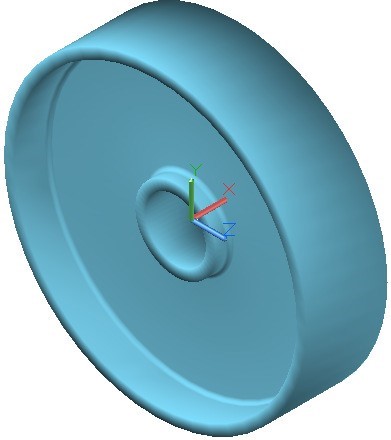
Figure Step 2 Complete Model SE Isometric View
Step 3
Freeze layers: Pline and Construction.
Step 4
Set the current visual style to Realistic. Use the 3DORBIT command to check that the model is surfaced on all sides.
Step 5
Set the Insertion Units, change the current UCS to World and check the model with the key.
Step 6
Save and close the drawing.
AUTHOR’S COMMENTS: Do not be concerned if your shaded model does not match the figures in the module exactly. There are many visual style settings that can be set to change the look of the shaded model. For now, all you should be concerned about is being able to surface the model. The advanced features of customizing visual styles are taught in the AutoCAD 3D Advanced book.